Processing, painting branches and cuts of a tree
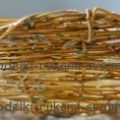
Back in ancient times, wood was not used.not only as a material for construction, but also as a material for handicrafts, from which not only various interesting household items were made, but also interior decor items. Since the tree is easily processed, crafts can be made with your own hands, without requiring any special skills. If you have a desire to learn how to make crafts from branches, but have not previously encountered such an occupation, do not be afraid to improvise. To choose the right tree for crafts, you should be aware of the fact that it should be smooth, without knots. The wood is flat, without flaws, you will find on the sawmill or at any woodworking enterprise or in the store. It is necessary that the wood was of high quality, as it affects the quality of handicrafts. Crafts can be done not only from the branches, but from sections of the tree or from any scraps. If you make crafts from branches, it is better to choose straight lines and without resin, although branches of a non-standard form are also ideal. Proceeding from this, the branches of spruce or pine are not very suitable for the manufacture of products for interior decoration, since there is a large amount of resin on them, therefore it is very difficult to clean the resin from working with the branches of pine or eating knife and hands. Branches whose fibers are located in one direction are ideal for handicrafts. The content of the article:
How to handle branches before use
If you want to make crafts from solid branchestree species (oak, maple), you need to know that they need to be processed immediately after they are cut. In order to make a small figure, the birch branches will fit perfectly. Because they are very easy to cut, and it will not take you much time to make crafts. And here, for example, black birch wood is harder. If the birch wood is a little dry, it will become even more docile. How to handle branches before using at home?
If the wood is dry, then you just need to moisten them with water before starting to work, since it is more difficult to work with dried wood.
How and what can be painted branches
In order that the branches were white, they canpaint it with plain white emulsion paint, and we get such a wonderful base for decoration. It is also possible to paint the branches with white gouache with a brush and without water (pure paint), and not with watercolor, as the gouache texture allows the paint to dry on the branches. Also, it is applied evenly, clearly and has a white color (compared to watercolor). After you cover the branches with one coat of paint, let it dry for about 15 minutes, turn them over and paint the other side. You can repeat the process until all parts of the branches are completely covered with paint. Also for painting branches, you can use acrylic paint or paint in a can (spray). Spray paint in the can has some advantage:
- Very easy to operate. No need to spend money on solvents or quality brushes.
- If you use brushes, then you will not achieve such a smooth painting, as from an aerosol.
- Spray paint in cans is a simplified compressor paint method. If skillfully used, then you can achieve professional painting of any surface.
- Reliability and color matching.
The advantages of acrylic paint:
- Virtually no toxicity - you can work indoors, there is no unpleasant smell.
- High quality coating material that makes it possible to apply smaller layers of paint.
- Dries very quickly. The drying time of acrylic paint on wood depends on the surface structure, layer thickness, indoor microclimate
- Good durability.
- Easy application (both manually and with a spray).
- After drying it is very elastic. The film, which is formed after the evaporation of water, can change its linear dimensions, therefore, cracks appear on the painted surface less frequently.
- Extensive color palette and a variety of textures.
Disadvantages of acrylic paint:
- High price.
- It is stratified if stored for a long time.
- Cheap varieties quickly discolor, fading under ultraviolet light.
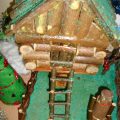
The painted branches of the tree are perfect as an interior decoration.
How to make a tree old
The use of wood in the interior is alwaysgreat option. This is the most environmentally friendly material. The tree always favorably affects the person, possesses bactericidal properties. Why artificially grow old wood? We distinguish three main answer options:
- Pure personal preference. Processed material allows you to create one of the fashionable styles: vintage, shebbi-chic, retro, Provence, country style.
- Make an appearance of antiques (especially when it comes to furniture).
How to make a tree old
There are several ways. The most interesting and most used of them is the texturing method, or brushing. The name of the brooch comes from the English word brush, which means “brush”. This method consists in removing soft fibers from the top layer of wood. As a result of processing the surface becomes relief. If this happened during natural aging, then it would take a very long time. Brushing is considered the most realistic method of imitation of antiquity, and it is not at all difficult to do this at home. What wood species are suitable for brushing? In order to age a tree, you need to use these tree species: pine, oak, larch, ash, walnut. And maple, beech, cherry, pear, teak and some exotic trees are completely resistant to mechanical aging. The main tool for brushing is a rigid metal brush. Since it is not possible to quickly age a tree, the process can be accelerated with a drill or a grinder with a special wire brush. If you do it yourself, then you will need hard sandpaper. We clean the surface with it, and then apply ammonia solution (ammonia), which gives the effect the darkening of the wood. As a result, the structure of the tree will be able to appear brightly, and darkening will give the product an antique look. Then you can simply varnish the product in 2-3 layers. Then rub it with a soft cloth to give extra shine. Thanks to varnishing, the product is given a finished look.
How to handle wood cuts
Products from end cuts or wood cutsjust fascinate with their drawing and deserve special attention. An even cross-section of a tree with a thickness of 8 to 20 cm and a diameter of 15 to 80 cm or more is called a saw cut. This is simply unique, since tree rings are visible on the “plate”, their contours are never repeated. Spily with bark and without it are used in the decoration of the interior: on the walls, ceiling, on the floor, in the lining of furniture, in the subject design and decor.
In order to protect your crafts from harmfulfactors and give them an aesthetic look, they need to be painted (by choosing the paint you like), or varnished. Before painting can be primed with primer on wood. On the primed surface the paint lies evenly.