Quilling postcards for the day of jam with your own hands - a turn-based workshop
Who does not love the birthday party? We will not hide that each of us most appreciates the birthday for the fact that you can get the opportunity of attention and love from other people. Most often it is expressed in a special attitude and, of course, gifts. And although a good person always deserves special treatment, this holiday should stand out among others. Children should understand this from the earliest years, and adults should take this fact into account in the future. But, what gift can be considered one of the best? Of course, this is a present that was made by themselves. To form such a gift is extremely simple. It will require a small amount of work materials, as well as the opportunity to sit still. Quilling is a special sphere of work, where each of us can show his abilities and show what he is good at. Of course, if you are ready to show new skills of your child, or are not averse to practicing new knowledge, this lesson will be extremely useful.  In the workshop you will be told about the method of working withpostcard for a gift for the day of jam. A beautiful greeting card will be made using ordinary cardboard, quilling paper and decor items. Of the main resources of the work - the desire to learn something new and spend your own time. Materials for the postcard Certain materials will be required that will help the true master to form and recreate a unique art sample. We are sure that you will enjoy the work and, of course, you will be able to appreciate modern features and unique features of the new quilling technique:
- Take the usual cardboard on both sides with one color (color type)
- Also, prepare the colored paper
- We take quilling paper in a width of 5 millimeters, the length of paper is 54 centimeters
- It will take a pencil, also take a ruler
- Prepare for work special scissors
- It will take PVA glue, it will also require a piece of wallpaper for work
- Take a toothpick for paper processing
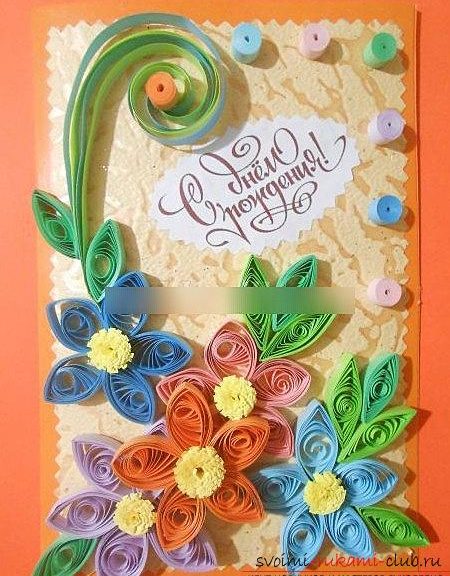
Basis for the picture  First, take the cardboard in orange andform a rectangle to a width of 18 centimeters, a length of 24 centimeters. It needs to be bent twice. After using a piece of wallpaper and curly scissors, we form a rectangle, the width and length of which is 17 and 23 centimeters, respectively. After using glue, we put a piece on the cardboard. In order to decorate the inside of the postcard, we need to take the scissors and using yellow paper, cut out the quadrangle, then glue the workpiece. After that, we form flowers. Forming flowers Take quilling paper in blue, blue, orange and pink. It is necessary to wind the paper on the toothpick. Then, you need to remove our disk and use a ruler, on the stencil ruler to dissolve the disc roll up to 19 millimeters per diameter. Then, glue in the ends. We thus form 5 petals. Then, you need to squeeze the ends and shape the eyes. Using PVA glue, collect the flower.
 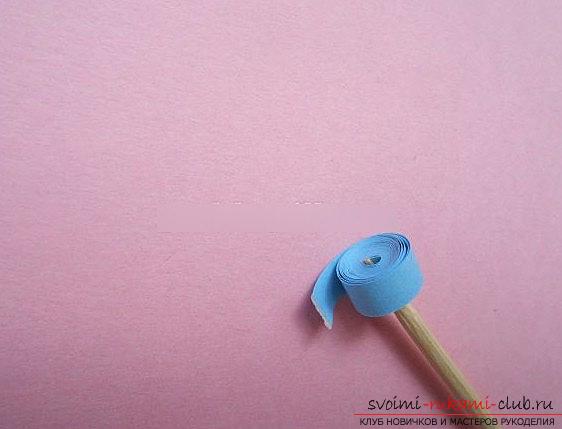 To form a core, it is necessarycut a little fringe and twist, glue. The fringe will be yellow. The sheets are made with the help of light green and dark green stripes. It is necessary to twist them on a toothpick in a strip and dissolve the rolls to a diameter of 19 millimeters. Form the shape of the eye and glue our elements. We form openwork curls. For this, it is necessary to glue the stripes of green, blue, yellow, and apply glue to the ends of the strips. Using a toothpick, twist the strips. Then, hold the workpiece elements and push the strip shape over the top to get a large curl. Next, paste the ends of the strips, the figure will be ready.
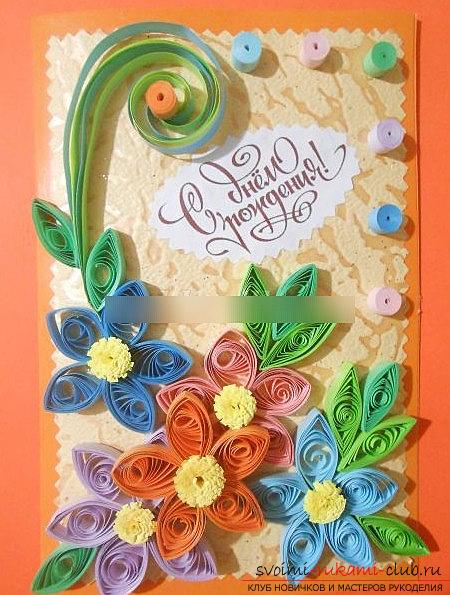
  Decoration of a postcard The design looks like this.
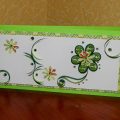
  It is necessary to glue our yellow flowerscore. Then, add leaflets and openwork curls. Using tight rolls, glue them on the upper corners. Using a color printer, print out the inscription, then it must be cut and pasted to the postcard. That's all! Our work is completely ready!
Comments
Related posts:
 This master class will teach you how to make your own beautiful quilling cards.
 This master class is designed for those who want to learn how to make beautiful quilling greeting cards and flowers with their own hands.
 This master class will teach how to make postcards with your own hands in quilling technique.
 What to donate to my father, a gift for my dad myself - a step-by-step master class on creating an unusual postcard, a postcard template.
 Scrapbooking a New Year's card-envelope with your own hands - a step-by-step master class