Raspberry from beads in the training master class (photo)
Content
- Master class on weaving raspberries from beads
- Video: Parallel weaving of bead leaves
- Video: How to weave strawberries from beads
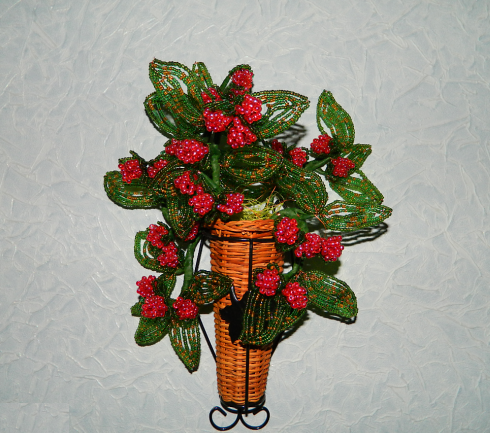
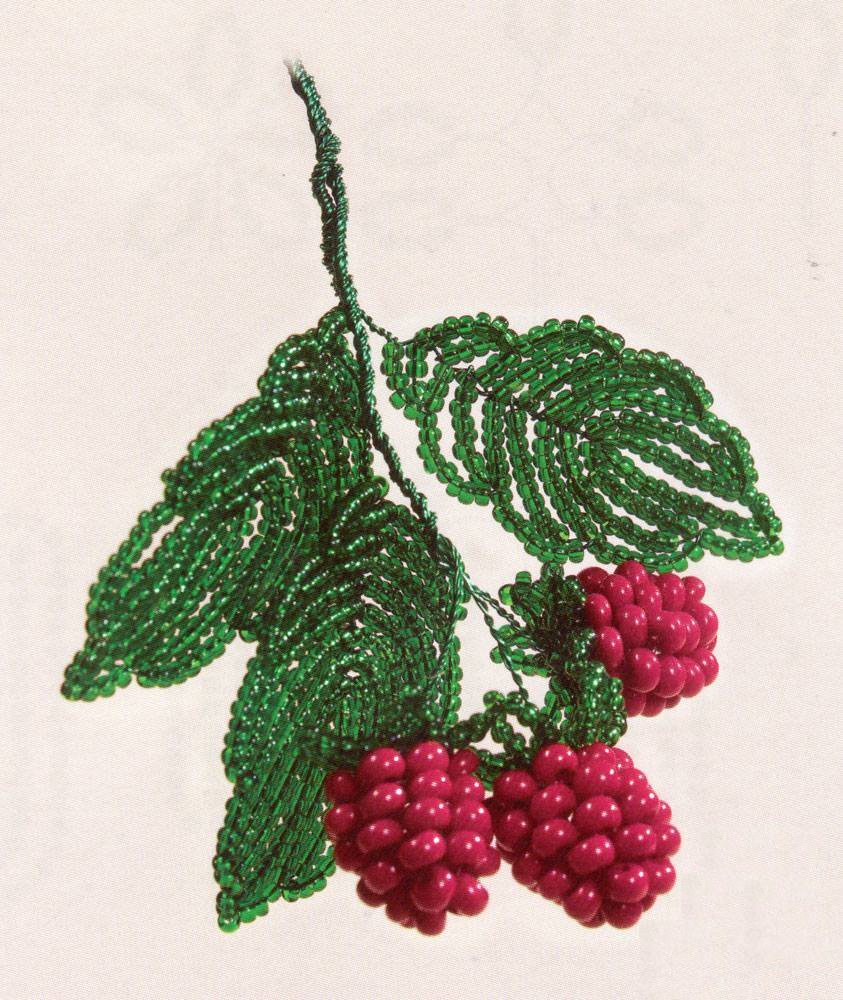
Raspberry is a symbol of warmth and summer aroma. We offer an uncomplicated master-class on making sprigs with voluminous berries. Raspberry bead is easy to beat. This raspberry, made from green beads and crimson beads, can decorate not only some element of clothing or the interior of the room, it can be given to an expensive person.

Master class on weaving raspberries from beads
The product will need:
- green beads;
- Crimson beads;
- wire;
- Threads of green color;
- wire;
- scissors.
Manufacturing process:
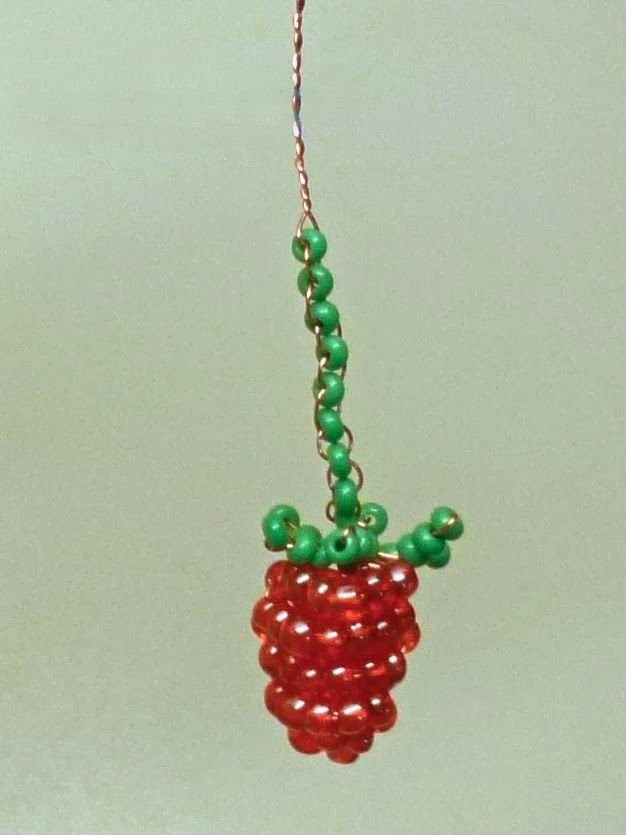
On the first stage of beadwork we willTo make a malinka berry. It is not difficult to create such a product by oneself. It's enough just to follow the instructions. This decoration is tied with tiers. Each layer consists of two halves. That is, it is required to string and fix beads for one circle twice.
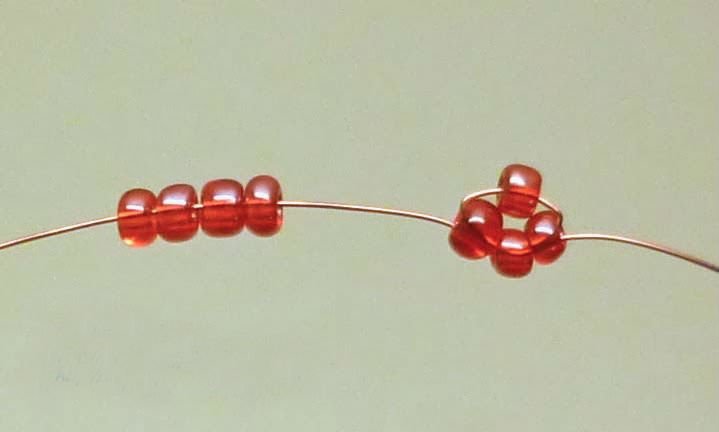
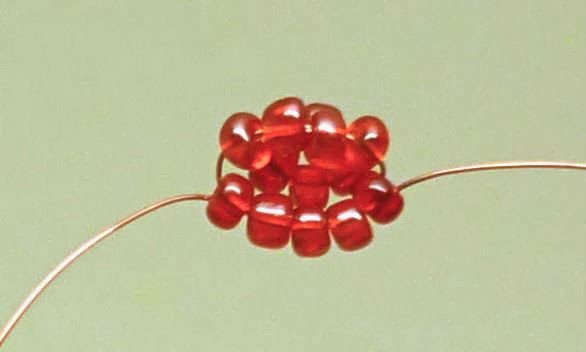
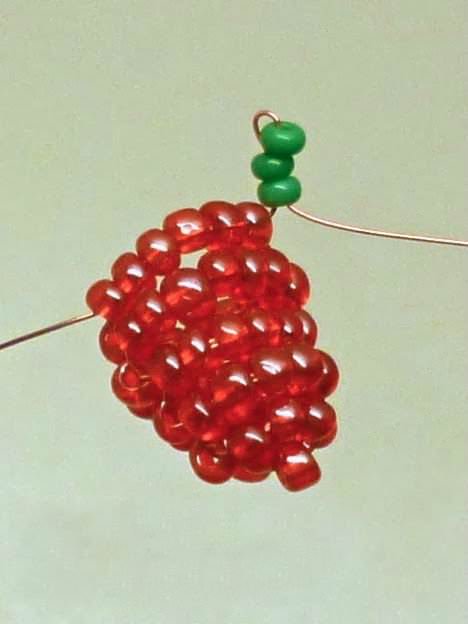
Before we begin to weave it is necessary to cut a pieceWire about 50 centimeters. On it we put on four raspberry beads, we shift them to the center. Then follow the end of the thread through three elements, in the opposite direction. We fix the series well. There will be two tiers with beads. In one there will be three elements, in the other - one. It turned out the top of the berry. Weaving schemes confirm each stage of the work.


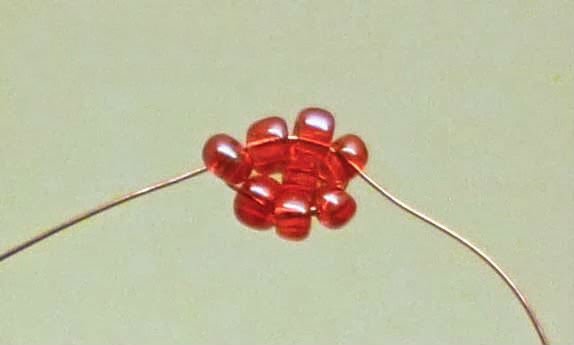
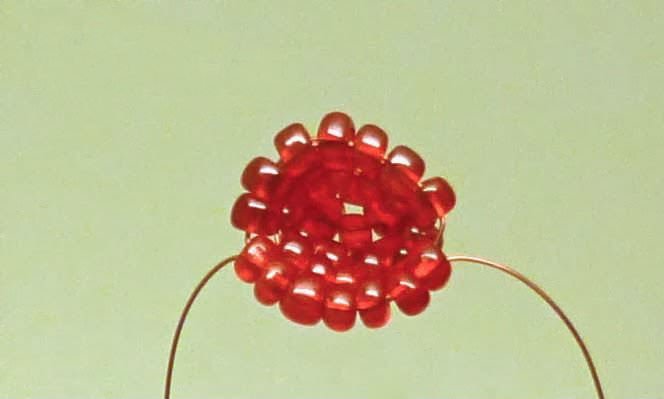
Next, we again string 4 beads and haveSo that they are over the first bead. The diagram shows how this should look. The other end of the metal thread is threaded through the whole row of crimson beads. Do not forget to tighten the wire each time. Then we string five elements, move them to the center and position them so that they are on the other side of the row. The third stage of the berry appeared. For the fourth ball, you need to dial twice for six beads. The fifth cycle consists of two semicircles with seven elements. For the sixth layer, you need to string both beads six times. It turned out a small raspberry berry.

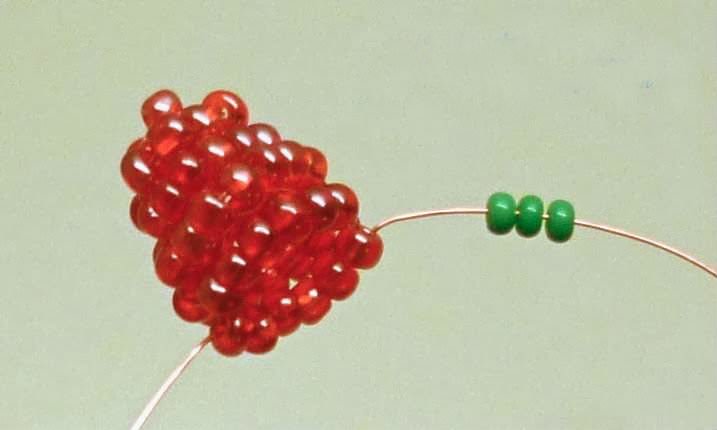
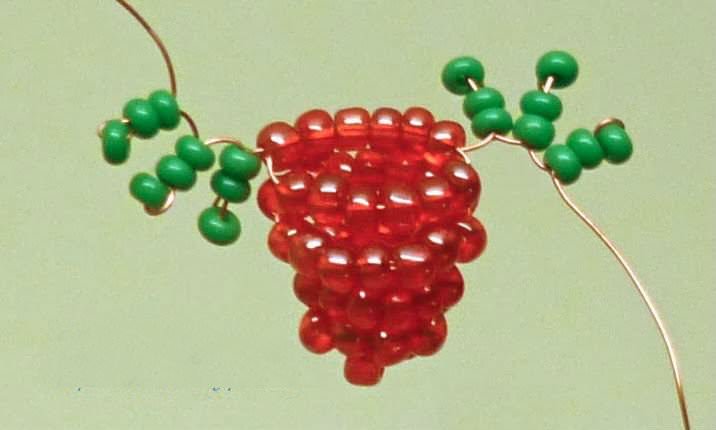
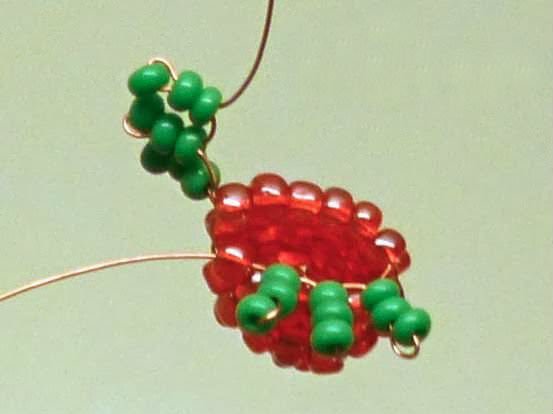
Sepals and petiole In the next stepNecessary do petiole. At this stage, the master class of raspberries from beads will need the use of green beads. On the free end of the metal thread, left from the berry, we put on three beads. The photo shows how to do it right. The first element is skipped, and after two others, we poke the same part of the wire in the opposite direction. It turned out a small leaf. Proscrew is well tightened.
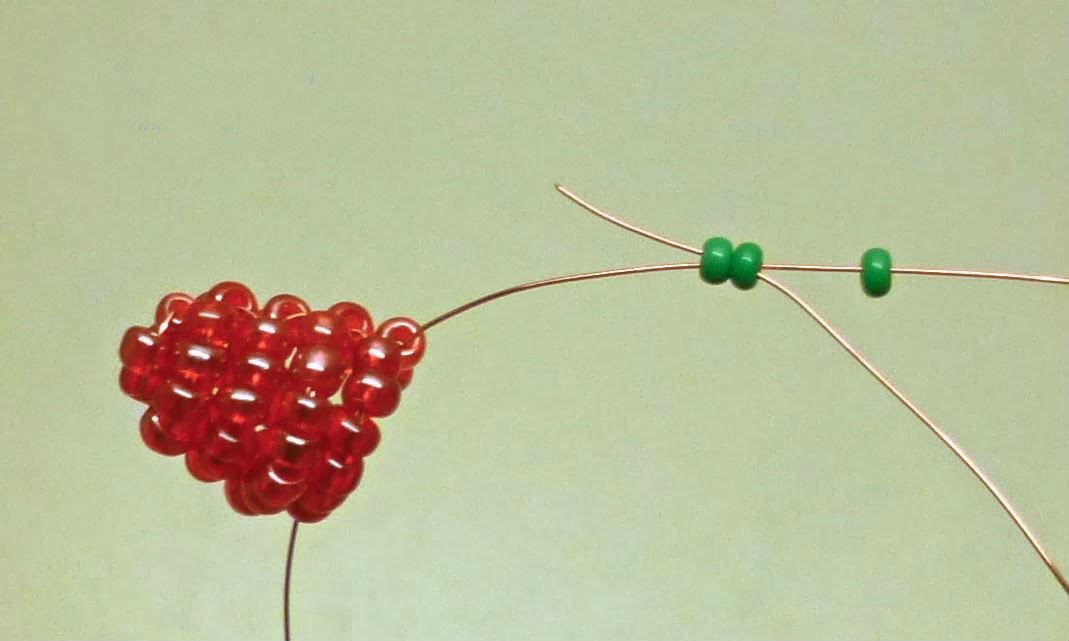
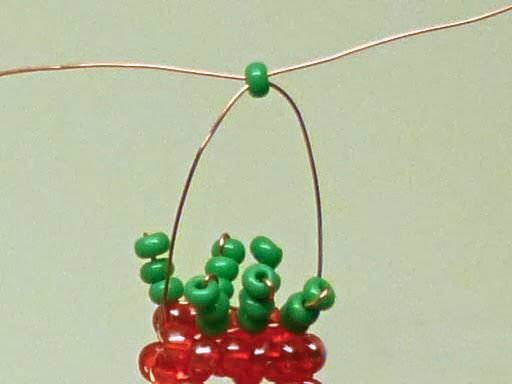
We retreat 1, 5 millimeters and again we repeatSuch manipulations. At each end of the metal thread, three similar leaves should appear. Then we fix our sepals on the berry. To do this, the end of the wire should be passed through the crimson bead of the last row. Next, on one part of the material, put on one green element and push the other end, in the opposite direction. The scheme of this work is quite simple, and the photos show the whole process of weaving.
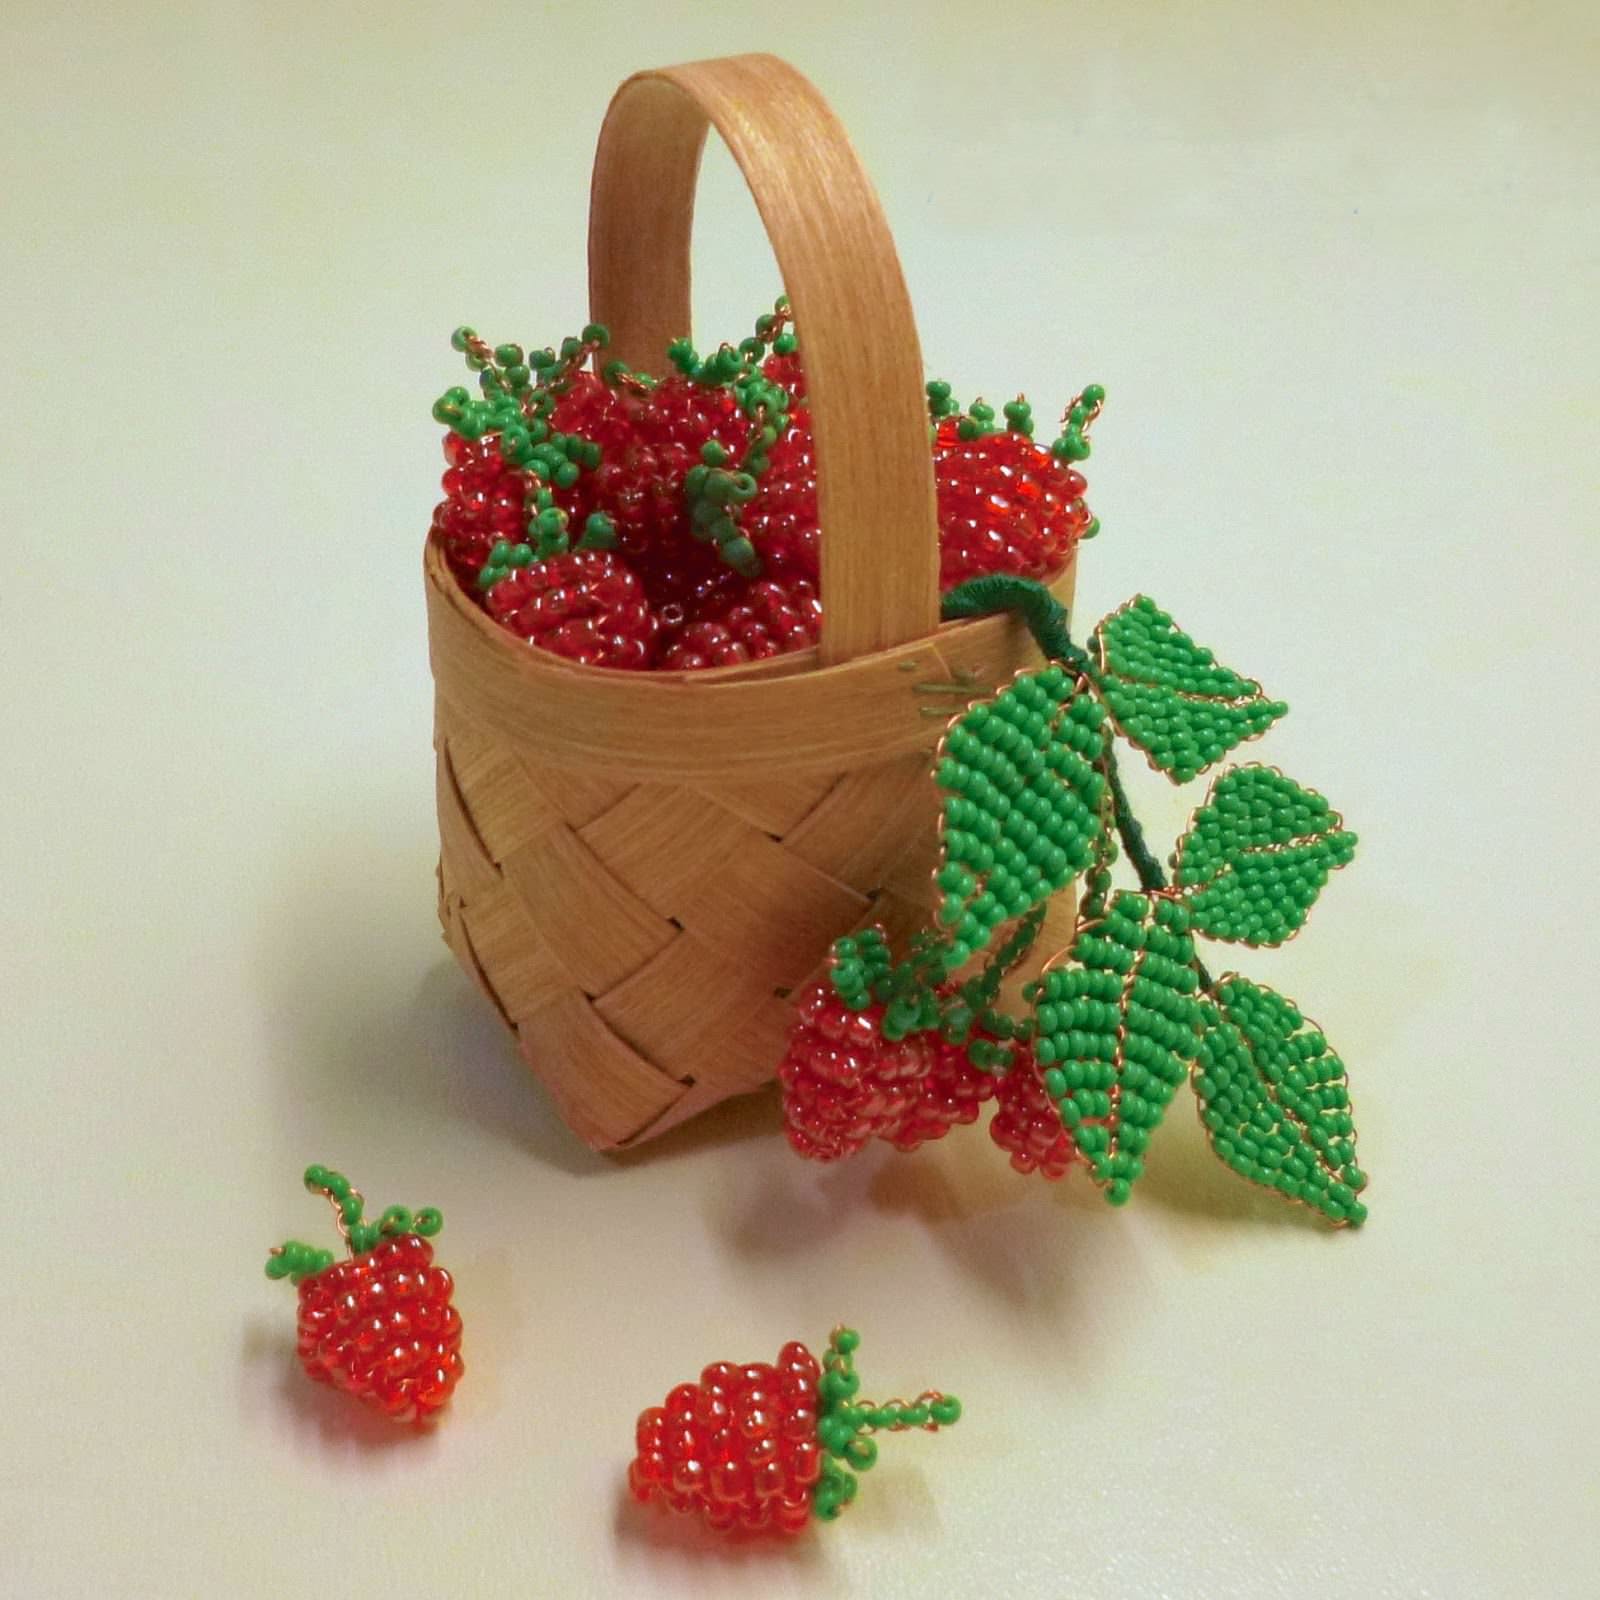
After, string an arbitrary amountGreen beads at their discretion, passing the ends of the wires towards each other through each of the strung beads, as in parallel weaving. If you want to make a small product to decorate something, it will be enough and five parts. To make a large craft, for example, a crimson bush, it is better to collect more than ten pieces. Yagoda with sepal is ready!
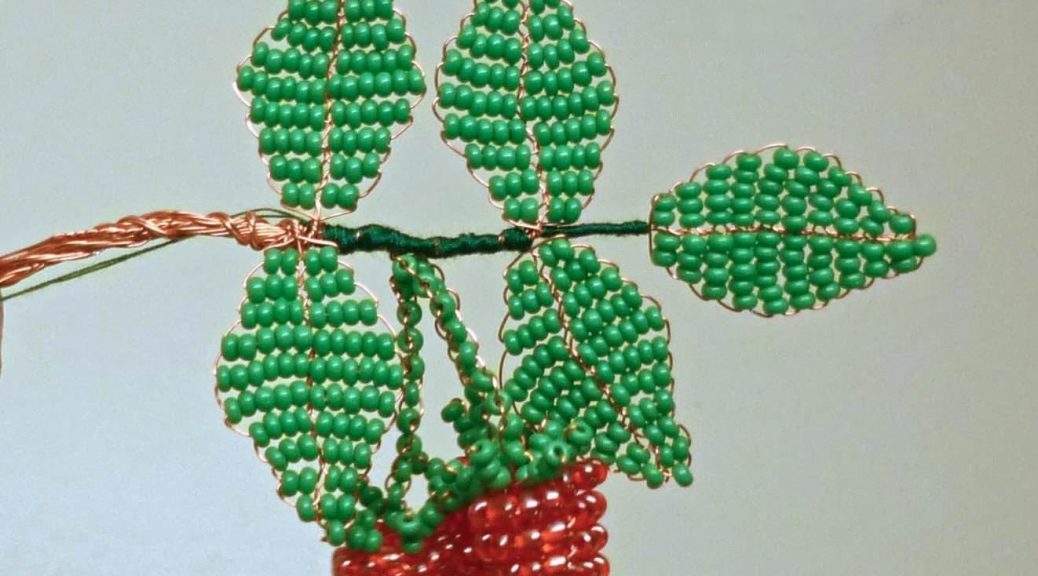
Leaf The technique of parallel weaving is used to create leaves. In more detail, the process of this process is shown in the video tutorial.
This beadwork will consist of twoHalves. From the beginning it is necessary to cut off the wire length of thirty centimeters. We string three green elements. We skip one bead, and through the other two we put the end of the metal thread in the opposite direction. It turned out two rows of leaves.
In the third tier of weaving we again type twoBeads and poke the other end of the wire in the opposite direction. In the fourth row, three elements must be used. In the fifth-4 beads of the Sixth - five beads. Seventh -6. Eighth -5. The ninth -4. The tenth -4. The eleventh is two green beads. It was the first half of a crimson leaf.

Beading of the second part is done similarlyMethod, but at the same time it is weaved to the first workpiece. The other half must also cut off a piece of wire and thread a bead. Secure by the method of counter weaving. One end of the metal thread must be pulled into the very first bead of the second row of the first half of the leaf.
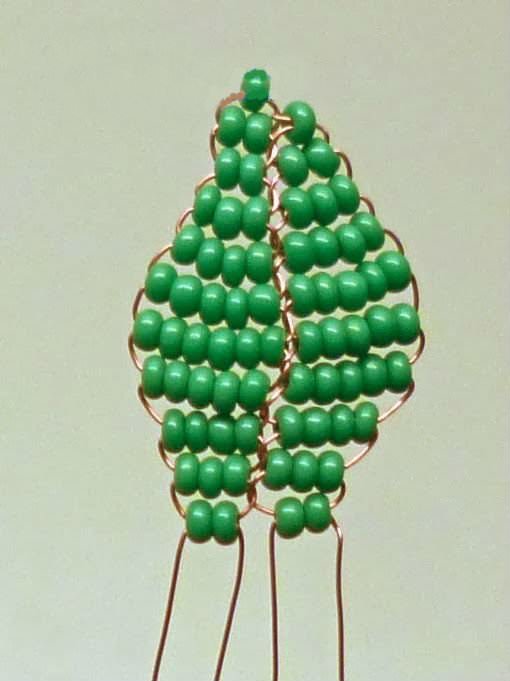
All the following tiers should be made similarMethod, increasing each row by one element. In the sixth and seventh balls we put on five beads. The eighth layer will need four beads. The ninth - three. The tenth is two elements. Each cycle must be weaved to the first part of the leaf, as the diagram shows. At the end of the wire of both halves, the blanks must be twisted together. To make a raspberry branch, five such leaves are needed.

Video: Parallel weaving of bead leaves
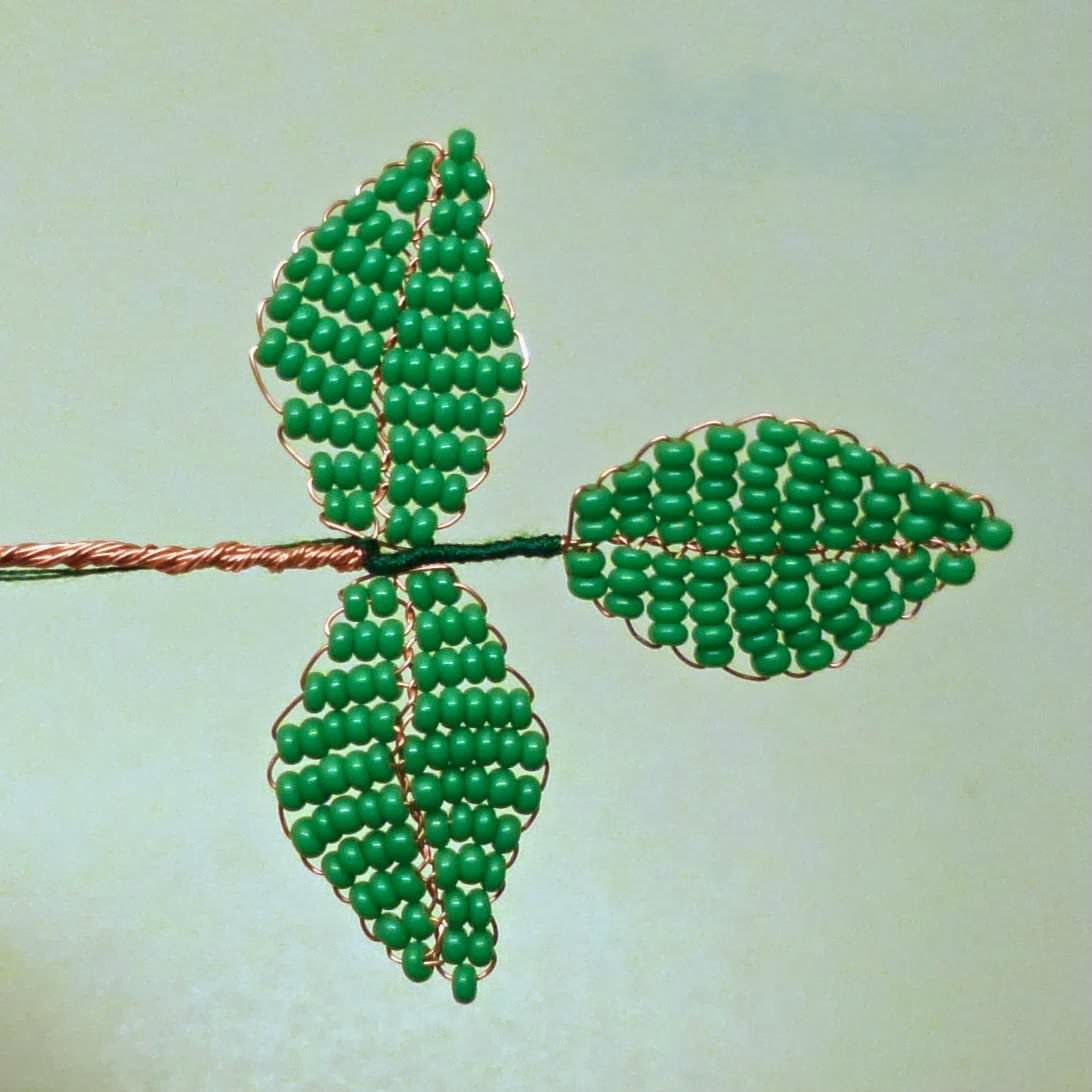
Assembly The master class is almost passed. It remains only to collect hand-made articles.
First you need to fold the leaves correctly. They must be twisted in such a way that one workpiece is at the top and two on each side. Strip the resulting twig tightly with a green thread. Between the leaves attach a berry. Place the fixation with a thread. Raspberry made from beads is ready!

Such an article will be an excellent decoration in the house. All year it will remind of warm summer days and berry aroma.
A good instruction for beginners will also be a video with a detailed master class on creating berries and strawberry flowers from beads.
Video: How to weave strawberries from beads