Embossed columns crocheted and pico, crochet for beginners
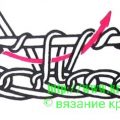
We continue the series of articles on the main elements. All of them can be found in the section. If you have your comments on the technique of the article described, leave them at the end of the article. Embossed crocheted crochet This type of crochet is used if you want to make relief patterns or dense products, and if you want to knit different chains and woven patterns of columns. The column is convex. A relief column with a crochet or two capes is made as follows: the hook is inserted from the right to the left side, wrapping the column of the previous row in front, and knitting the corresponding column.  Embossed Column Crochet Concave Patterns,made by such columns, resemble patterns, knitted with spokes with lifting and groove (front and purl series). To tie the groove, the hook is inserted from the rear from the right to the left side, wrapping a column of the previous row, and knit a column with one or more capes.
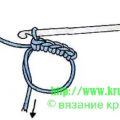
 These patterns tie the outer edges of the product. It is formed by three or more, connected in a ring polustolbikom or a column with a crochet. Tie three air loops, or any other required number of loops. Insert the hook into the main loop, as shown.
 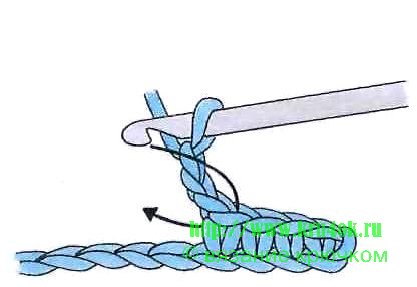 Fit the thread on the hook and drag it through all the loops on the hook to close the "pico".
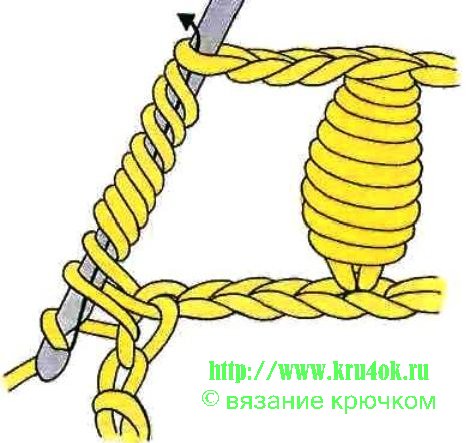
 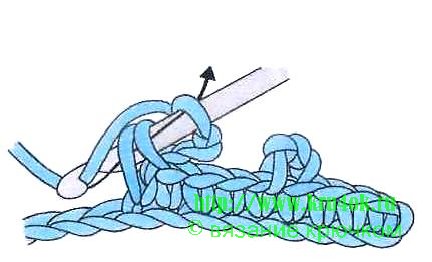 Cropped column To form a stitched columnThe thread is several times wound around the hook rod (usually 7-10 times), i. e. make numerous outfits. Then the thread is again thrown onto the hook and dragged through all the loops on the hook. Turn the thread (not too tight) around the hook several times. Insert the hook into the loop of the previous row and pull out the new loop. Once again, thread the thread on the hook and pull it through all the loops on the hook. Loosen each loop before tie it. Instead of extending the thread through all the hinges at the same time, we recommend that each loop be tied separately.
Comments
Related posts:
 Crochet for beginners - polustolbik, a column without a crochet, a column with a crochet.
 Crochet for beginners - posts with two or more outfits
 How to knit an air loop crochet. Knitting for beginners.
 Crochet crochet for girls. Diagram with photo and description for beginners
 Crochet on a circle, part two - crochet for beginners on kru4ok.ru