You can draw correctly on paper chamomile, using the technique of step-by-step drawing
How to draw a daisy in a phased techniqueDrawing? Very simple. At the same time the flower turns out to be the right shape, preserves its natural freshness and beauty. By simple actions to depict a daisy on a sheet of paper, or to draw a whole beautiful bouquet, even a beginner painter will be able to. Flowers are children of nature, known from prehistoric times. And there was always a special attitude towards them. They admired and admired, they were given to their beloved women, they decorated houses and dresses. To date, many kinds of flowers are known, both field and garden. Each of them is beautiful and unique in its own way. Each has its own flavor, its color and conceals something special and incomprehensible in itself. Naturally, many famous painters depicted in these pictures these wonderful plants. Yes, and each of us, despite the presence or lack of ability to paint, at least once in my life I had to draw this or that flower. Unfortunately, we did not always get what we wanted to see. Let's try to figure out how to draw a beautiful flower - a field or garden chamomile. Everyone tried to depict it on paper. someone got better, someone worse, but, as a rule, they do not turn out the way we want. The reason is simple. We start our drawing incorrectly - first we draw petals. To make it work, it's necessary to start from the bud (draw its contour and the contour of the stem) and only then proceed to the petals themselves. Today you will learn how to draw a daisy in the technique of stage-by-stage drawing. 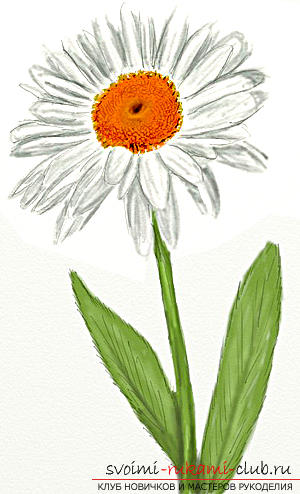 First we need to draw a simplepencil on paper a small circle - this will be our future bud. Then from the circle we draw a line, which later becomes a plant stem. This will help us in the future to draw the petals correctly, in a circle.
 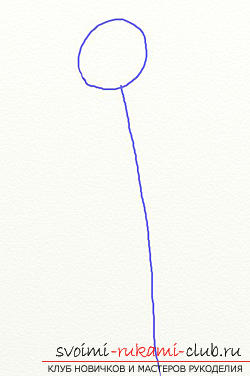 Now draw another circle aroundprevious (as in the photo). It will be somewhat larger than the first and will be a kind of boundary when drawing petals. Thus, the petals of color will have the same length and width, thereby approximating the drawn flower to the original.
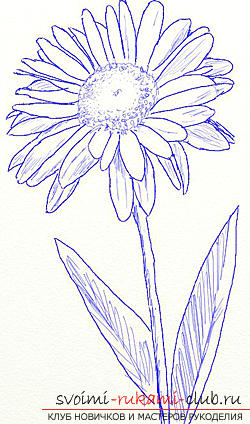
 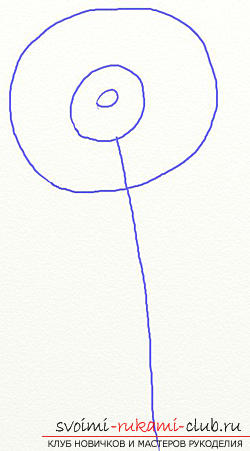 It is the petals of the flower itself that require specialattention during work. There is one rule that must be adhered to. They should be the same width. Everything else you do arbitrarily, based on the boundaries drawn earlier. Thus, you can easily represent the flower itself with a sufficient number of petals.
 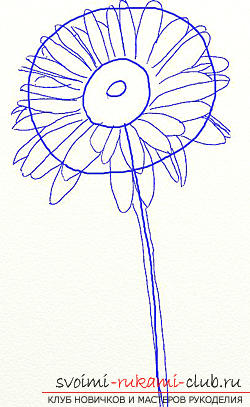 Only after the work done earlier canembark on the drawing of the stem and leaves. On the contour outlined earlier, we form a stalk and draw the necessary number of sharp leaves. To make the flower more realistic, it is necessary to draw small streaks on the leaves. Our chamomile is ready. It remains only to decorate it. You can use both pencils and paints. It all depends on what you prefer to work with. For decoration, you only need to take two colors - yellow for the bud and green for the stem and leaves. In the same way, you can draw a whole bunch of chamomiles on paper or leave a flower in a single copy, after finishing the necessary background for it.
Comments
Related posts:
 Schemes of gradual drawing of a New Year tree for kids 4-8 years, complication of drawings depending on the child's age
 Find out how to draw a nose on a person's face, you can from the materials posted in the article
 How to decorate a Christmas tree ball, using the technique of decoupage, the original black and white idea
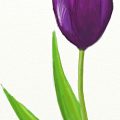 Draw a beautiful flower yourself you will help step by step drawing the tulip in pencil
 Embroidery on paper options for creativity with their own hands