
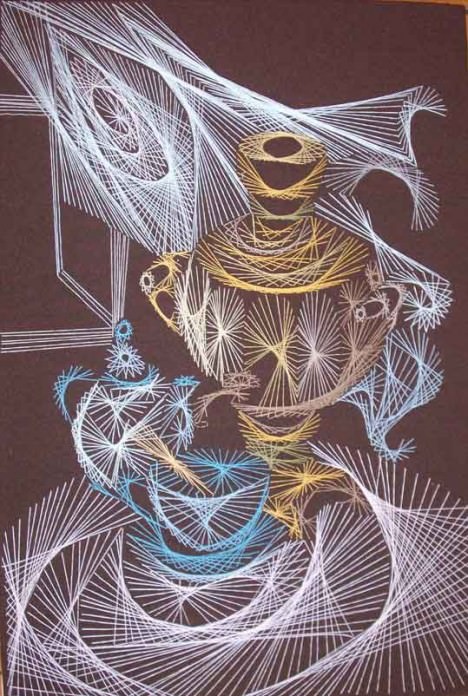
Schemes to isolate: lessons for beginners (photo)
Content
- Materials for embroidery in technology
- The basic tricks of embroidery isonite
- Kitten
- Spring dandelions
- Tone thread graphics
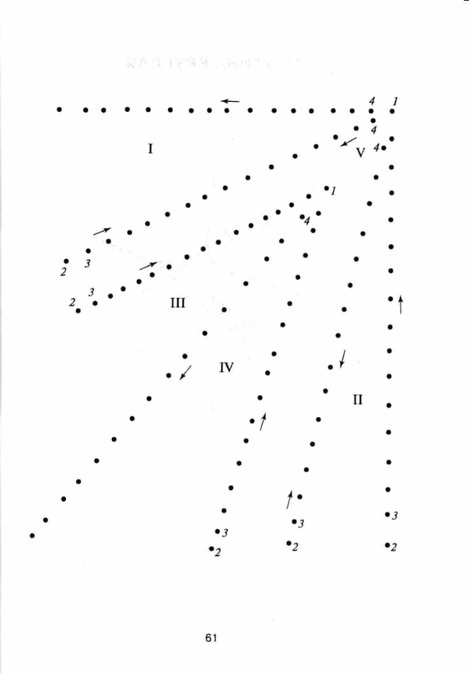
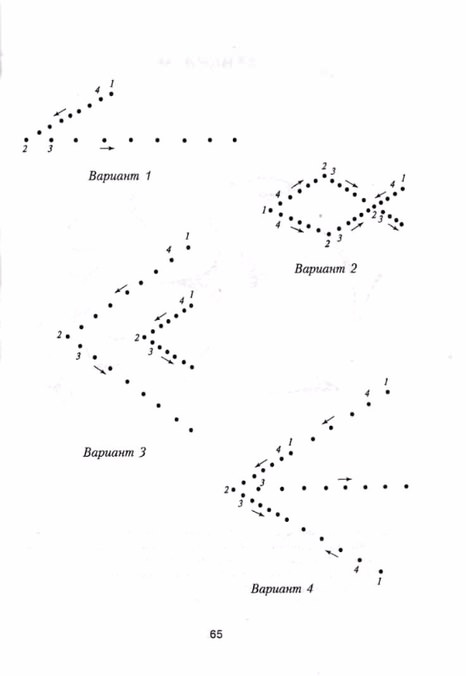
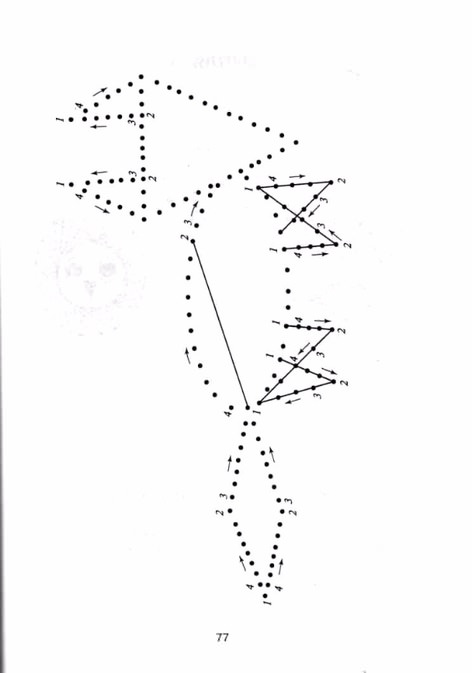
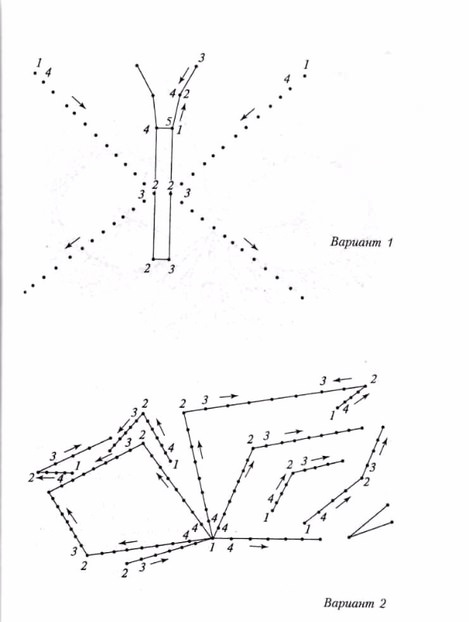
- Schemes for beginners
Pictures in
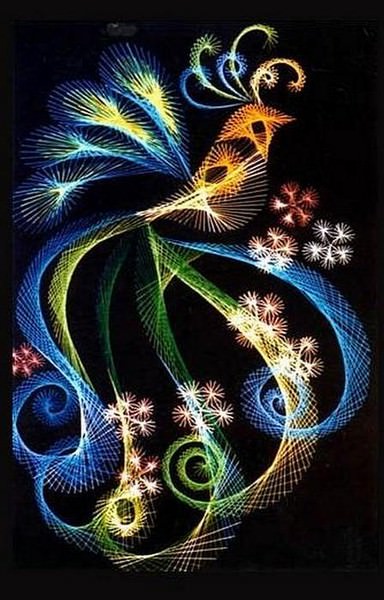
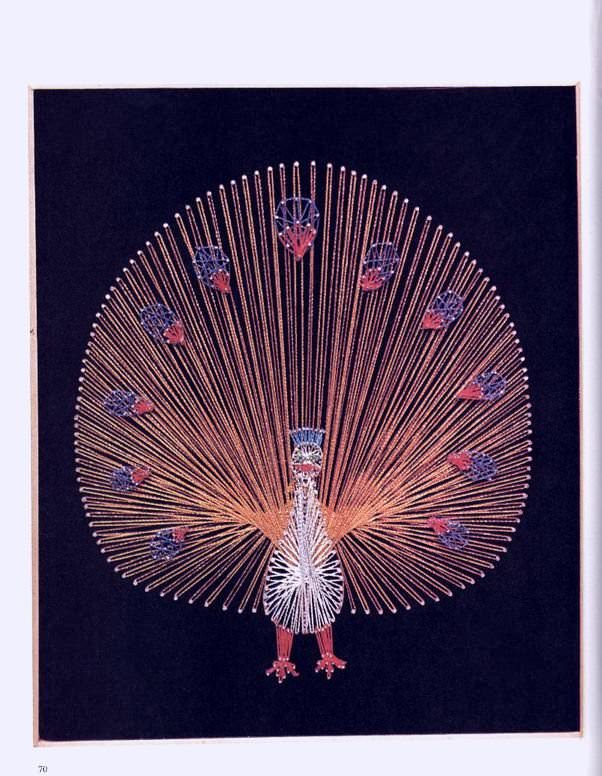
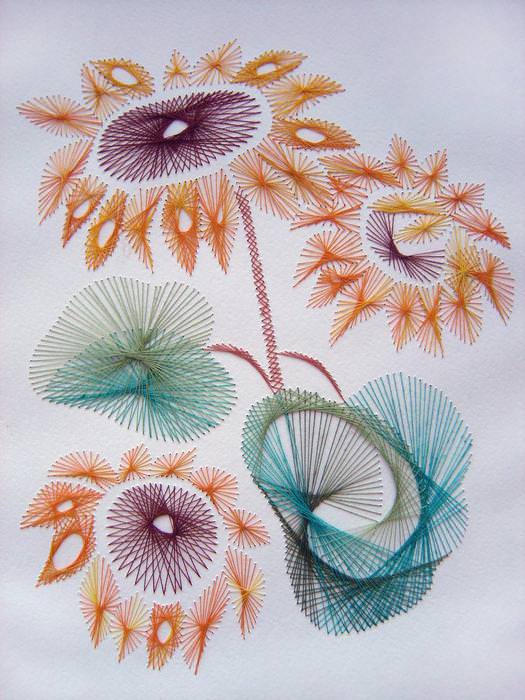
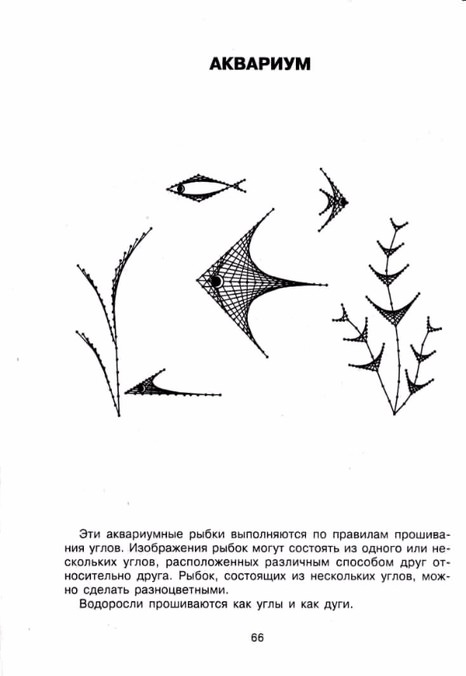
, Are extremely beautiful and elegant. At first glance, it might seem that thick paper is a very complex material. It is clear that each needlework requires skills. To create at once a complicated intricate drawing on a photo is unlikely to succeed. But it is only necessary to learn two basic methods: filling a corner and a circle, as needlework will immediately become easy and understandable. Those who already have experience in this craft, easily create the most intricate patterns and compositions.
It is quite easy to isolate schemes. Such an embroidery can create almost any picture. It is enough to draw a contour and make holes on it. Next, we will take a closer look at the master class, how to do this work.

Materials for embroidery in technology
Materials and tools for thread graphics are in every house. Therefore, even for beginners, it's easy to find everything you need.
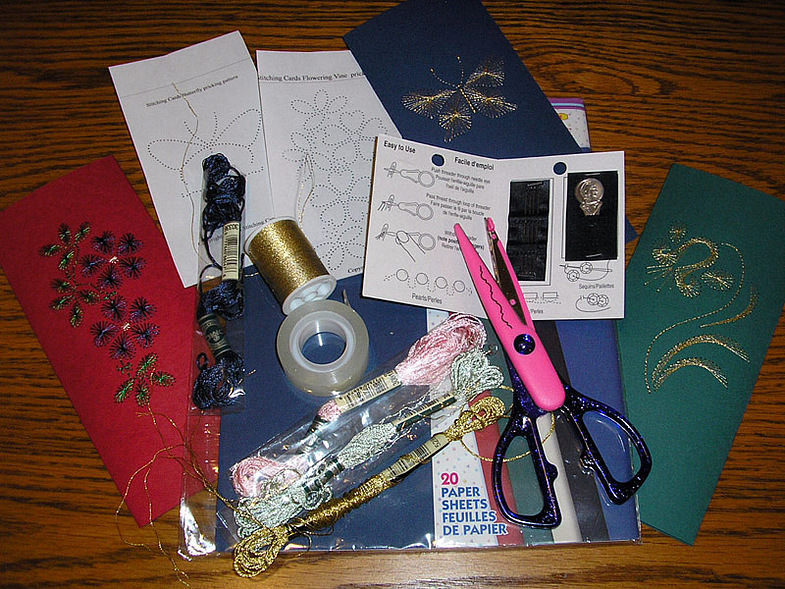
Compass. Such a tool is required if the circuit needs to draw a circle;
The basic tricks of embroidery isonite
Any thread graphics schemes have similar methods of filling elements. Let's consider the basic ways.
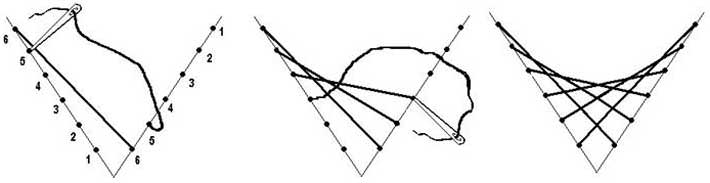
Filling the corner On a piece of heavy paperIt is necessary to draw an angle. The magnitude and severity of the difference is not. Each side of the drawing has to be divided into equal parts. To do this, use a ruler to measure gaps of 5 millimeters. We start the work from the top of the corner. Each distance is marked by a dot and a digit. In these places, using a substrate and an awl, it is necessary to make holes. The angle is sewn up, as shown in the diagram. Embroidery begins from the wrong side.
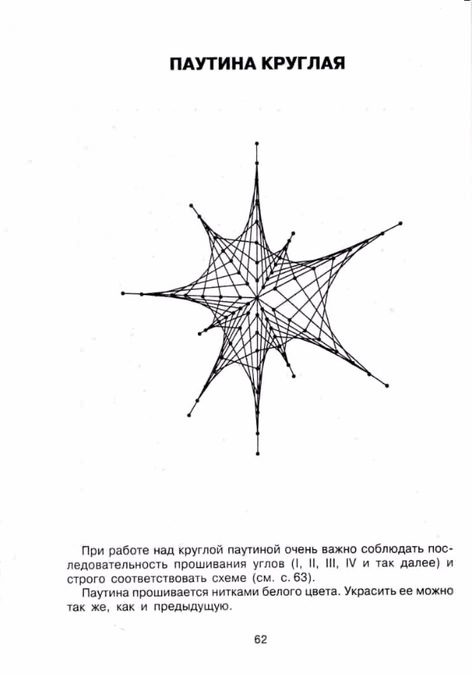
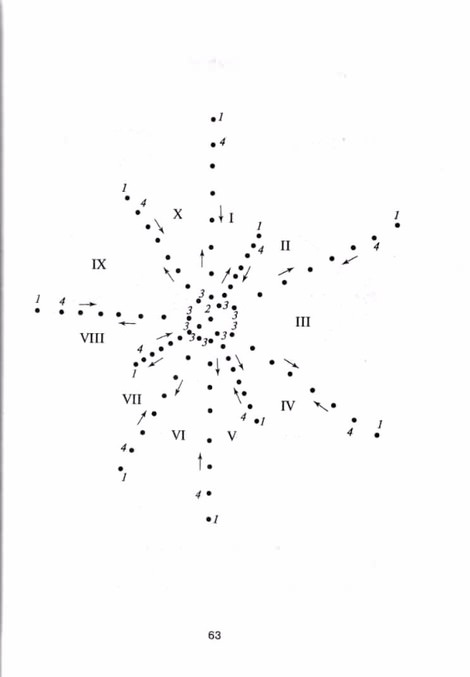
Filling a circle On thick paper withA circle is drawn through the help of the circular. It must be divided into twelve identical segments. Also, we mark the dots with numbers and make punctures in these places. A feature of filling a circle is that the smaller the distance between punctures, the more beautiful the image will be. The main thing is that there should be an even number of holes.
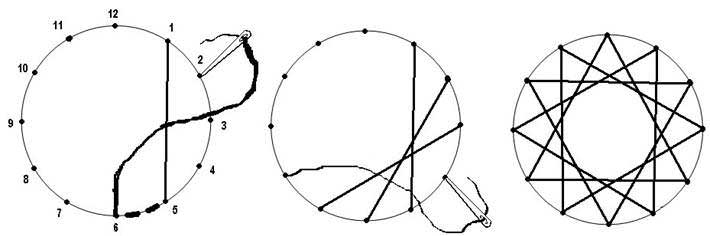
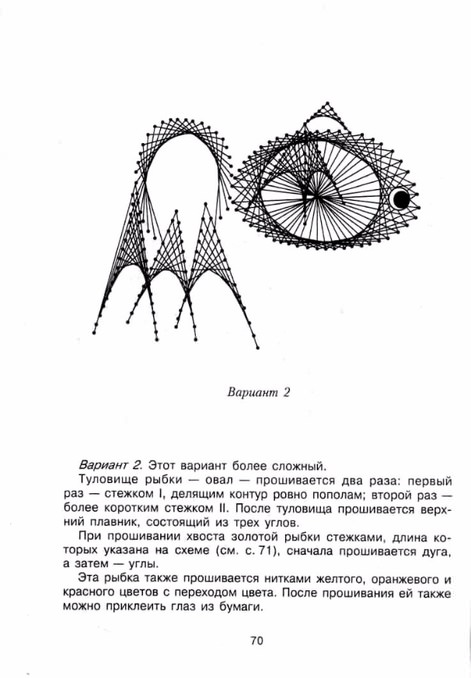
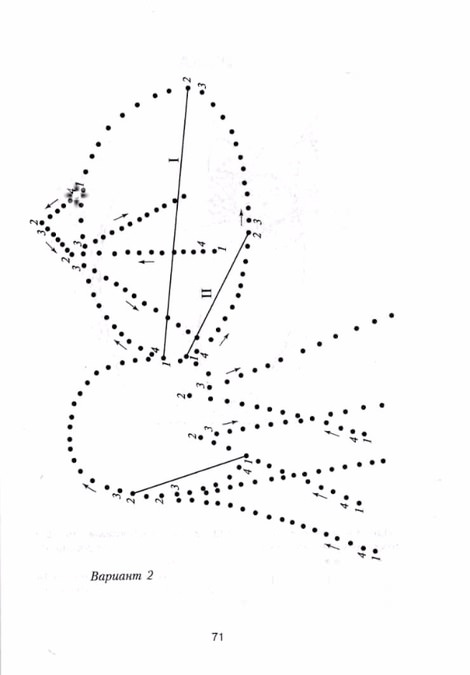
As for the length of the isonite stitches, the longThe stitches fill the element more than small stitches. And accordingly, the central hole will also be smaller. The circumference is embroidered according to the scheme.
Arcs and spirals Embroidery of these elementsIs carried out by the same method as for the circle. But the length of the stitches should be small. The size of one piercing must be less than half the arc. The width of the embroidery directly depends on the size of the stitch. The smaller it is, the thinner the arc will be.


As for the features of embroidery spiralFigures, it is produced all the time in only one direction. The stitch length of this iso-nity can only be from 3 to 5 punctures. Once you understand the main methods of embroidery in the technique of thread graphics, you can proceed directly to the product. We offer a small master class for children's schemes.
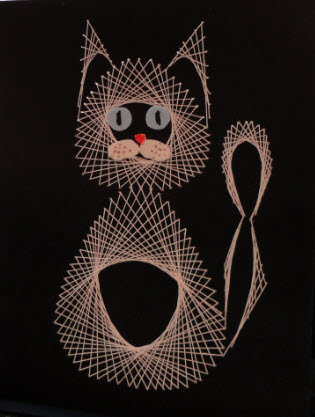
Kitten
This one is easy. A master class of such work is quite suitable for the first creation of children.
For embroidery you will need:
- Black heavy paper;
- White threads of a floss;
- Thin white paper;
- pencil;
- pin;
- Clamp;
- glue;
- needle.
Manufacturing process On white paper with a sharp pencil you need to make a contour of the cat. The photo shows how this scheme looks.
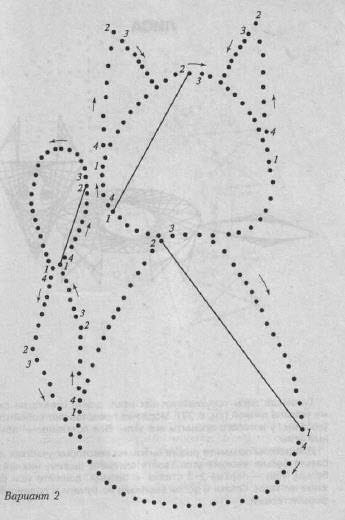
We apply the sheet to the dark cardboard and fix itClamps. If you use a paper clip, there will be dents on the finished product that will not disappear. Therefore, it is better to take special paper clips.
On the image contour at regular intervalsIt is necessary to put the dots with numbers. In these places, piercing holes pin. Before you start making holes, place a thick, thick material under the workpiece. It will not damage the work surface. Thread in the needle, but do not do the nodule. The embroidery of isonite should be started from the wrong side. After making a couple of stitches, the end of the thread should be fixed on the inside with glue.
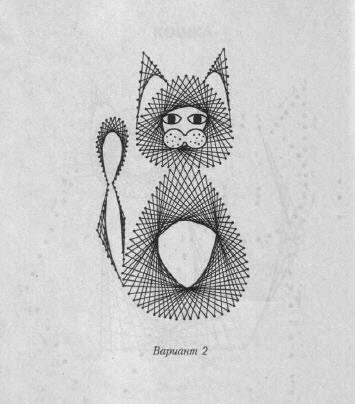
Ears and a part of the tail are embroideredFilling the angle. All other elements are the way to fill the circle. Separately, we cut out from the multi-colored materials eyes, a nose, antennae and glue them to the cat. Embroidery is ready!
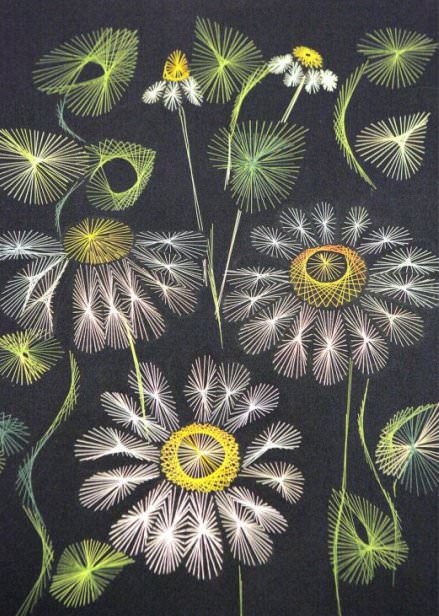
Also it is possible to spend with children a master class on embroidery in technology to isolate dandelions. It's not difficult, any child can cope with it.
Spring dandelions
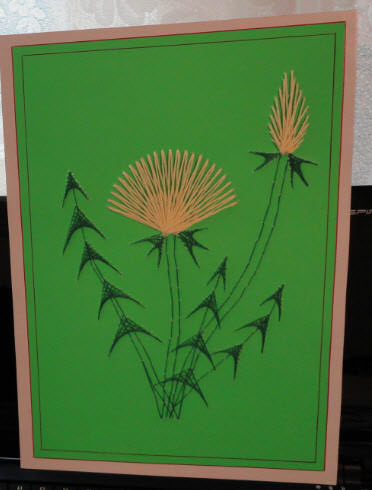
This master class does not require special skills. Such an image is an excellent option to mute the circuit for beginner masters. The picture is created by means of the most simple stitches.
For embroidery you will need:
- cardboard;
- Green paper;
- glue;
- needle;
- pencil;
- awl;
- Yellow and green thread.
Manufacturing processPaste green paper. It draws a scheme of colors. Through equal distances with a pencil, you should mark the points with numbers. With the help of an awl on the contour of the picture holes are made. Embroider begin with the wrong side, fixing the tail of the thread with the help of glue.
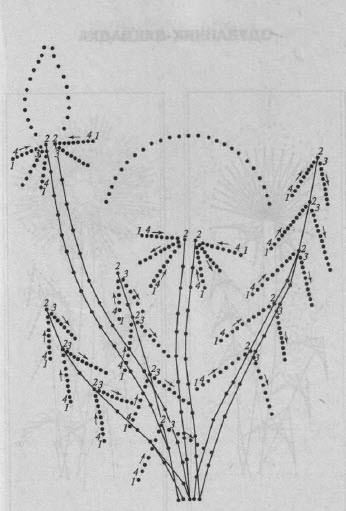
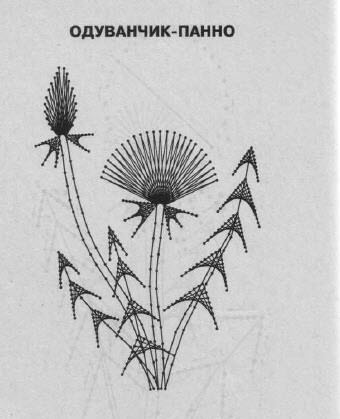
Flower and bud of dandelion, which are shown onPhoto, embroidered with yellow thread, method of filling the arc with triangles. The stalk is created by stitches of green thread. The leaves are made by the method of filling the corner with green threads. Ready-made embroidery can be framed or decorated with baguette.
Tone thread graphics
The creation of tone iso is considered to be the highestDegree of skill. But it is also easy to do. The main thing in such art is to choose the right materials and beautifully harmoniously place all the elements.
In nature, all shades are divided into two groups: Warm and cold. Visually warm are perceived as protruding forward, cold - retreating back. Using such tricks, and creating a unique volumetric embroidery.

In addition, shades are divided into light and heavy. To heavy - carry dark, sated, to light - cold, light. If the composition is embroidered correctly, the upper part of the image will be "lighter" than the bottom one. It is also necessary to monitor the harmony of the connection between the color shades and the canvas. In the photo, such paintings have a unique art and originality.
Tone embroidery is very beautiful. It is very refined and picturesque. The master class of such works is based on the correct correlation of color schemes.
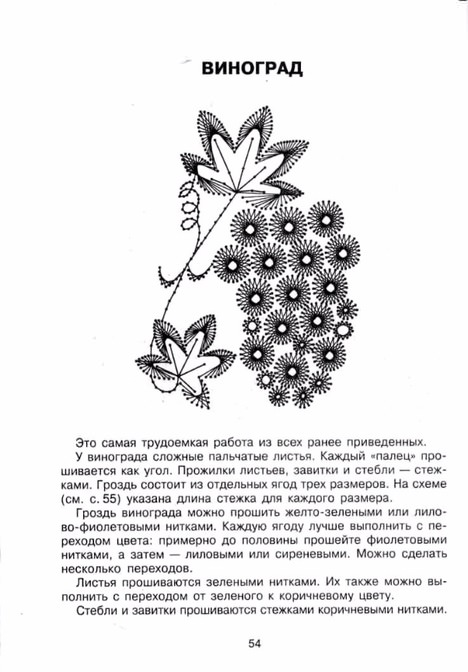
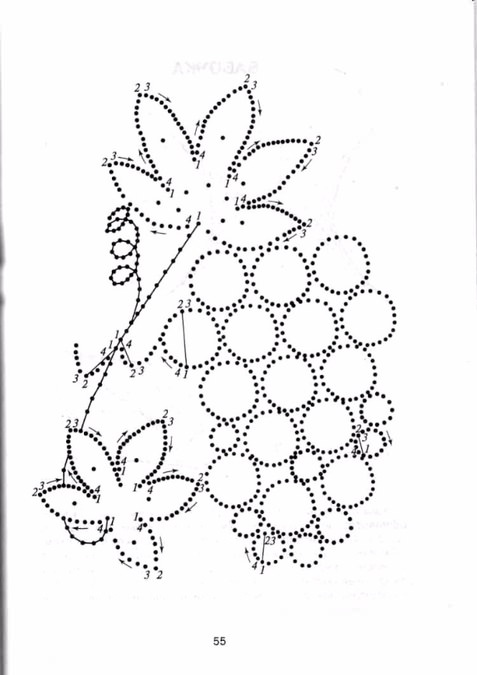
Technique is an ideal business for childrenAny age. It is simple to perform, but very exciting. The first classes allow creating attractive and artistic works, which is very popular with young needlewomen. In addition, this method of embroidery develops in the child attention, thoroughness, fine motor skills. Isolate for beginners, the best way to join such needlework as embroidery.
Schemes for beginners


Comments
Related posts:
 Isolate for beginners a scheme with the numbers heart for the holiday
 How to create handicrafts in technology, detailed instructions, diagrams with figures and photos of work, lessons on the creation of postcards for the New Year in technology to be eliminated
 Isolate for beginners a scheme with numbers of flowers step by step
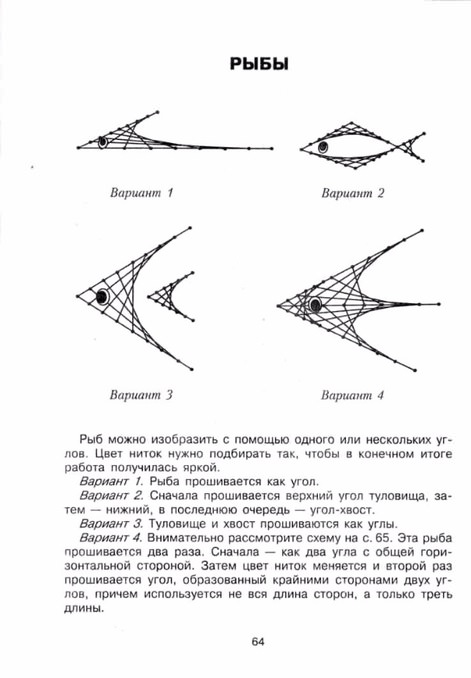
 Izon for beginners scheme with numbers butterfly (pictures)