Schemes amigurumi, toys - mouse, turtle, bee, piglet / Toys with their own hands, patterns, video, MK
The art of making small toys amigurumiCrochet or spokes originated in Japan. At first, they were usually portrayed as heroes of Japanese cartoons. Now knitted babies, having won the whole hand-made world, can be in the form of animals, pupae, household items and even fruit-vegetables. Amigurumi can be performed not only by experienced professionals, but also by beginners. It is only necessary to choose the right amigurumi for beginners and the scheme that is easy for them. 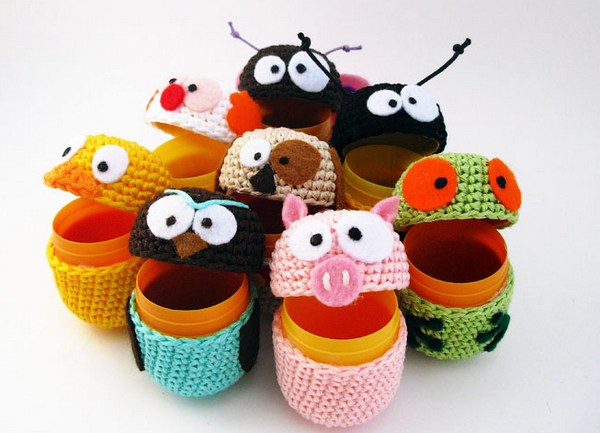
Tips for Beginners
Technics of knitting amigurumi
Knitting of such a toy begins with an amigurumi ring. The ring can be made according to the Japanese scheme, winding the thread on the finger, and then tie the RLS, or pull the loop with the hook and also process the RLS. All amigurumi toys consist, mainly ofround or oval details. Therefore, the circular schemes for their execution are typical. The circle is divided into several segments, each of which adds and decreases depending on the shape of the element.
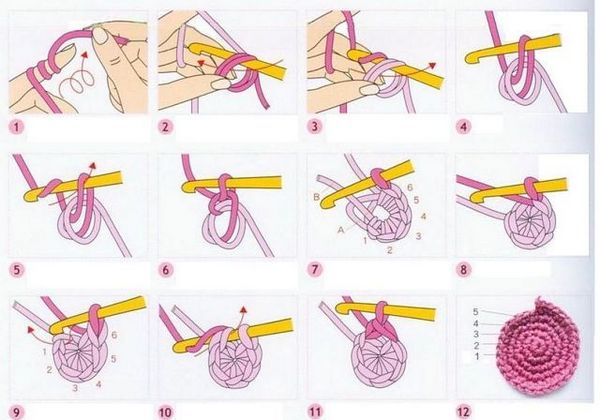
Amigurumi schemes


We knit the guinea pig with amigurumi
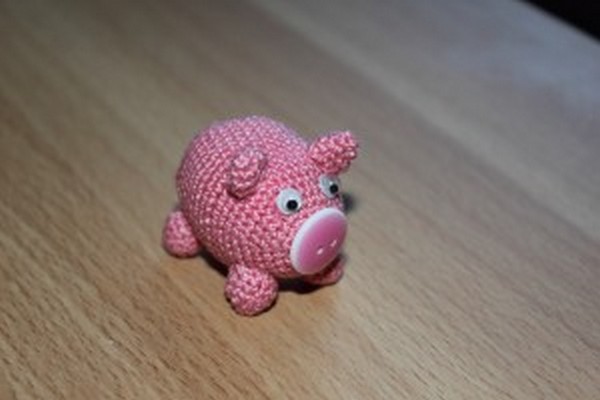 Sweet pig Amigurumi - one of the simplest toys for beginner needlewomen, which will not be difficult to connect. The main and only pattern for creating this crumb is the RLS.
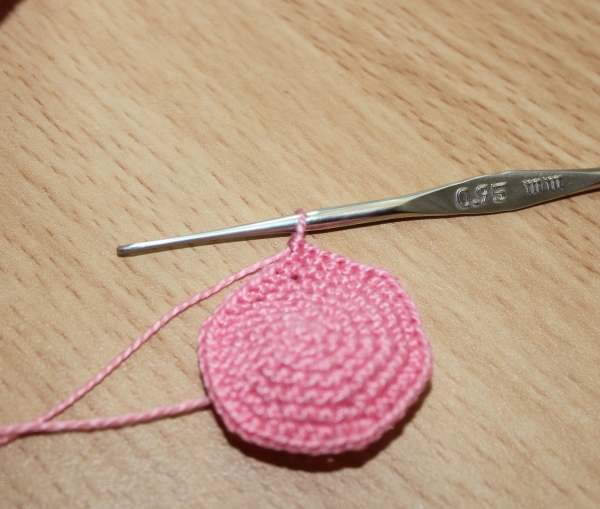
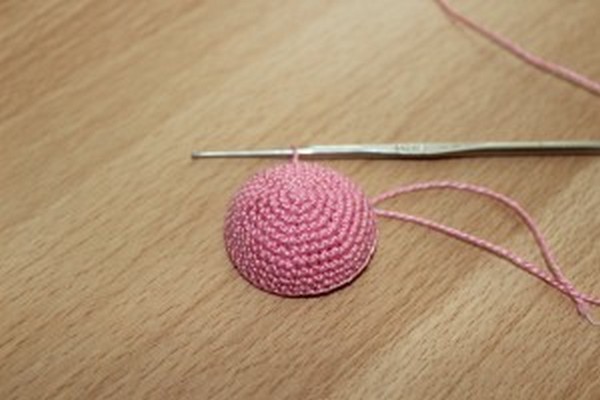 Using the hook and pink thread we typeJapanese amigurumi ring from 6 RLS for the trunk and knit in a circle, according to one of the above schemes, evenly adding loops in each row. We thus execute approximately 7 rows of RLS with additions, and then from 8 to 20 series, without adding. Then from the 21st to the 25th we make a symmetrical reduction, not forgetting to fill it with a sintepon as the detail shrinks, and in the 26th row we pull the remaining 6 loops into one, cut and stretch the thread.
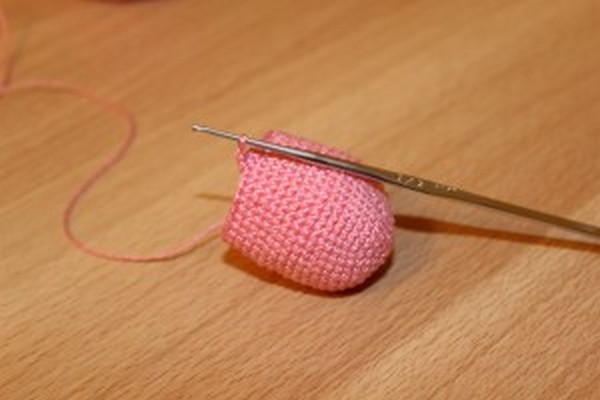
 Ears begin to knit just like the body of a piglet. In the 2nd row from the amigurumi ring we make an increase from 3 loops and we perform 2 more rows without addition. Ears fold in half and sew to the body.
 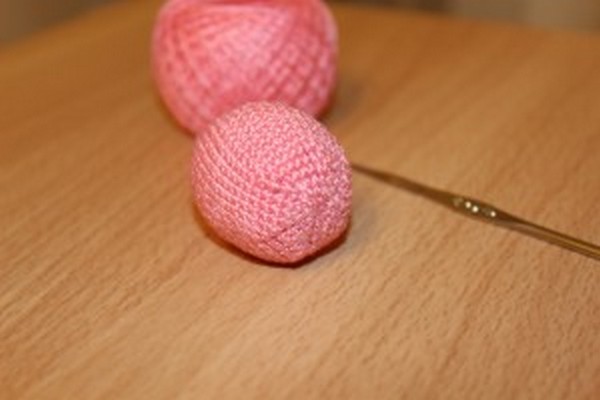 The legs need to be connected according to the same scheme, but to untiein the 2nd row from each loop 2 RLS. It is necessary to link 4 more rows without additions, then stuff the legs with a sintepon and sew them to the calf. Stretch the remaining threads with a needle through the trunk and bring the tail back into place. Thread the wires with a pigtail, grease with the glue "Moment", twist the spiral and leave to dry. Glue eyes and a button instead of a patch to the muzzle of the pig.
 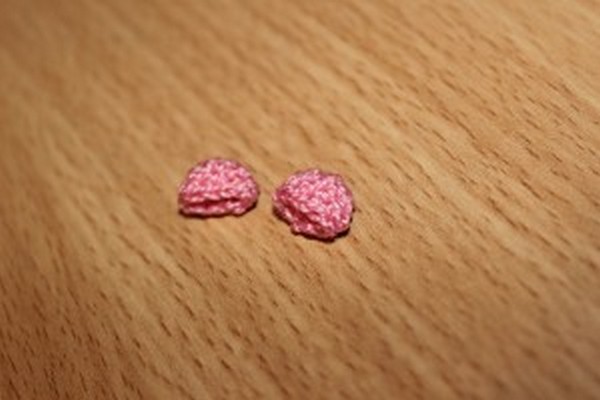 Funny pig is ready!
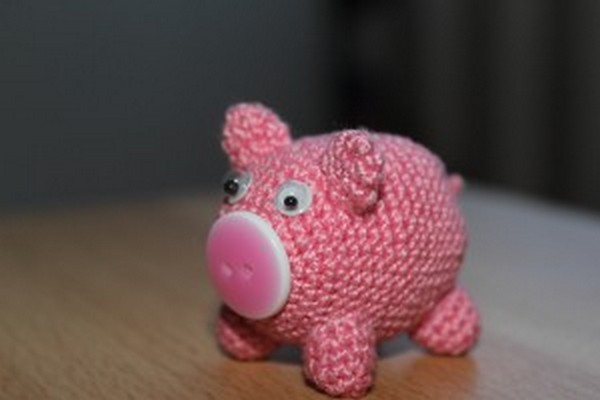
Amigurumi mouse
The first toy for very inexperienced craftsmenmaybe this pretty mouse, made from one detail of the trunk, two ears and a tail, can also turn out to be. Tie the body according to one of the above schemes, reduce for the muzzle, execute through the row. In this case, the mouse's muzzle will get a little pointed. The ears should also be tied in an amigurumi ring, in the 2nd row added 2 scs in each loop, in the 3rd row evenly 4 more loops around the circle. Sew the ears to the trunk, glue the eyes and the spear, tie the tail in a circle. 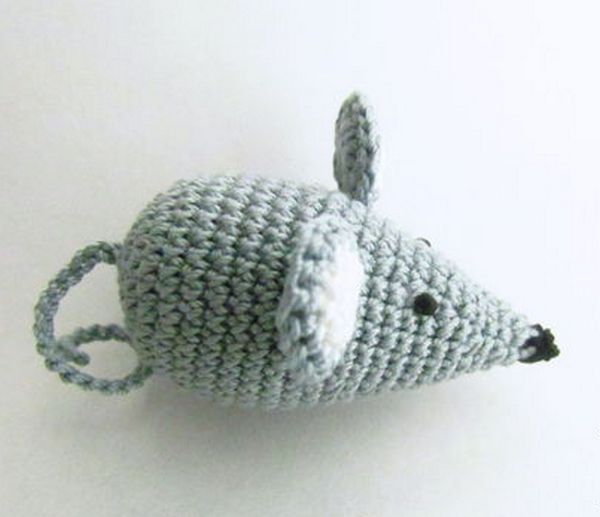
Amigurumi Bee
The original bee can be done withhooks and boxes from under the "Kinder Surprise." According to the size of the box, the head of the bee is pulled out with black threads, with black and yellow threads - the trunk. Eyes are cut from cotton wool discs and stick to the head of the bee. Pupils can be made from beads or embroidered with black thread. Antennae make of laces, in the middle of which insert wires, sew them to the head. Two ready-made elements of the bee on the box. 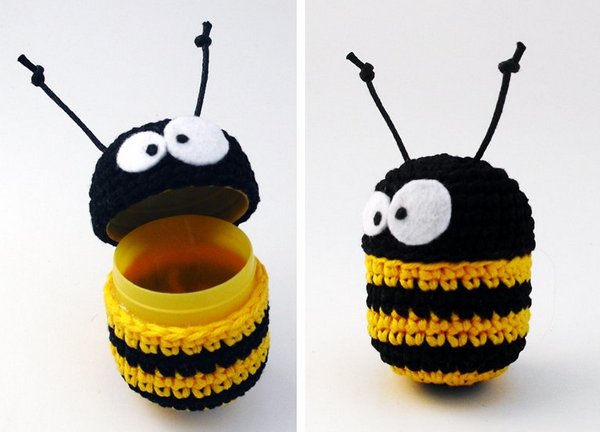
Turtle
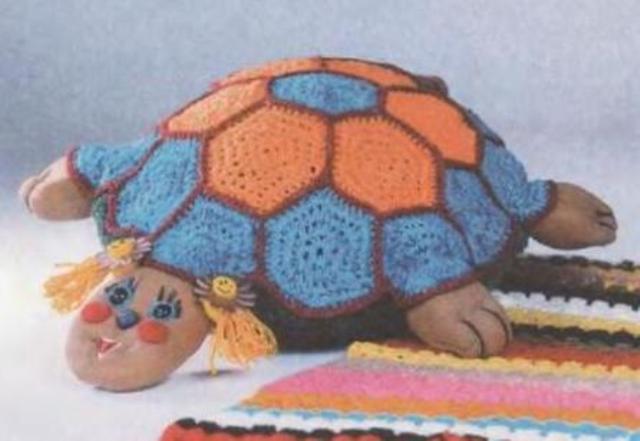 Turtle in amigurumi style is made of twocircles: flat and convex, which are connected with the RLS between them and stuffed with sintepon. The head is made in the form of a ball, paws and a tail - in the form of flat semicircles. All the details are sewn to the trunk, and the bead-eyes are to the head.
Spider
The spider in the technique of amigurumi knits quite easily,but requires a little patience and perseverance. The body of the spider consists of two oval parts connected by the RLS scheme and connected to each other, and the legs and tendrils of the spider are from the rows unloosed without the addition of the Japanese amigurumi ring. Such a spider can be used not only as a toy, but also as an original decoration for any interior. 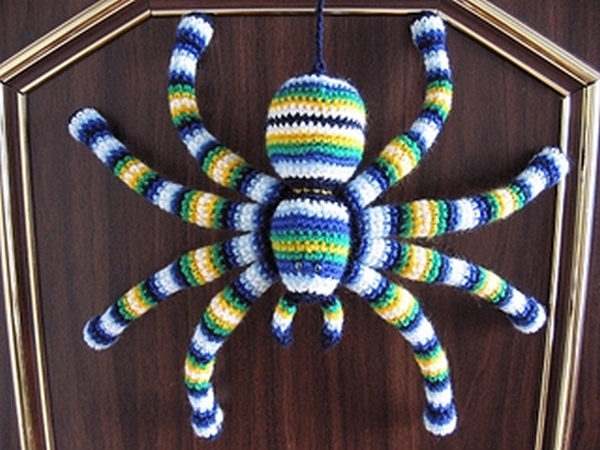
Fruit
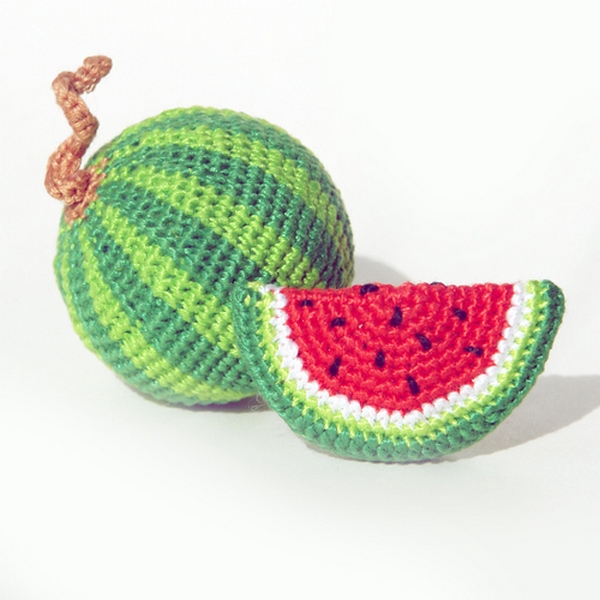
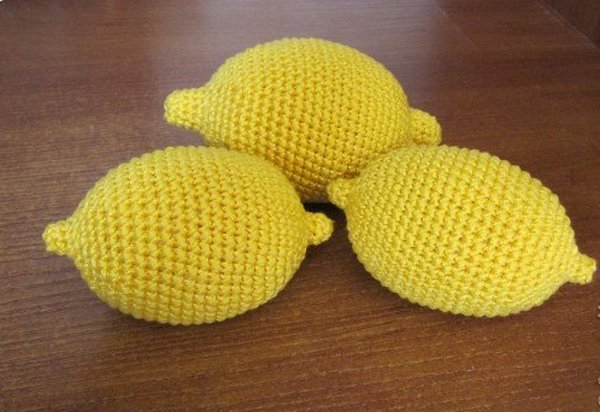 Crochet fruit toys crochet in the techniqueAmigurumi are performed according to the general scheme, but with the difference that for each of them additions or subtractions are made depending on the desired form. Bottom of fruits such as an apple, plum or pear, pull the thread up, and then remove the twig and leaf.
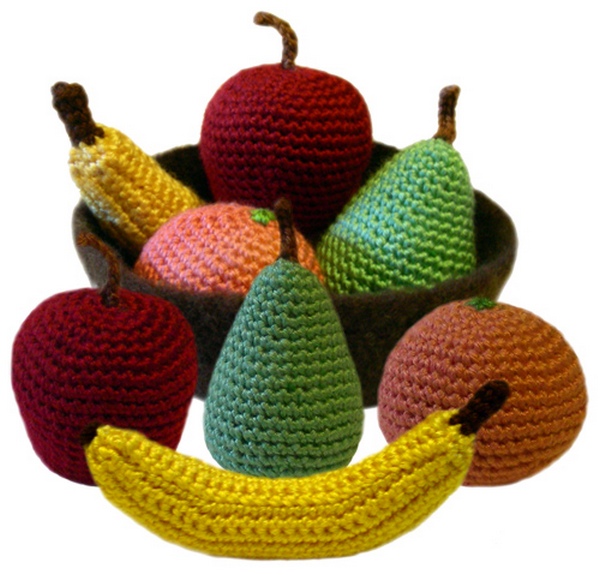
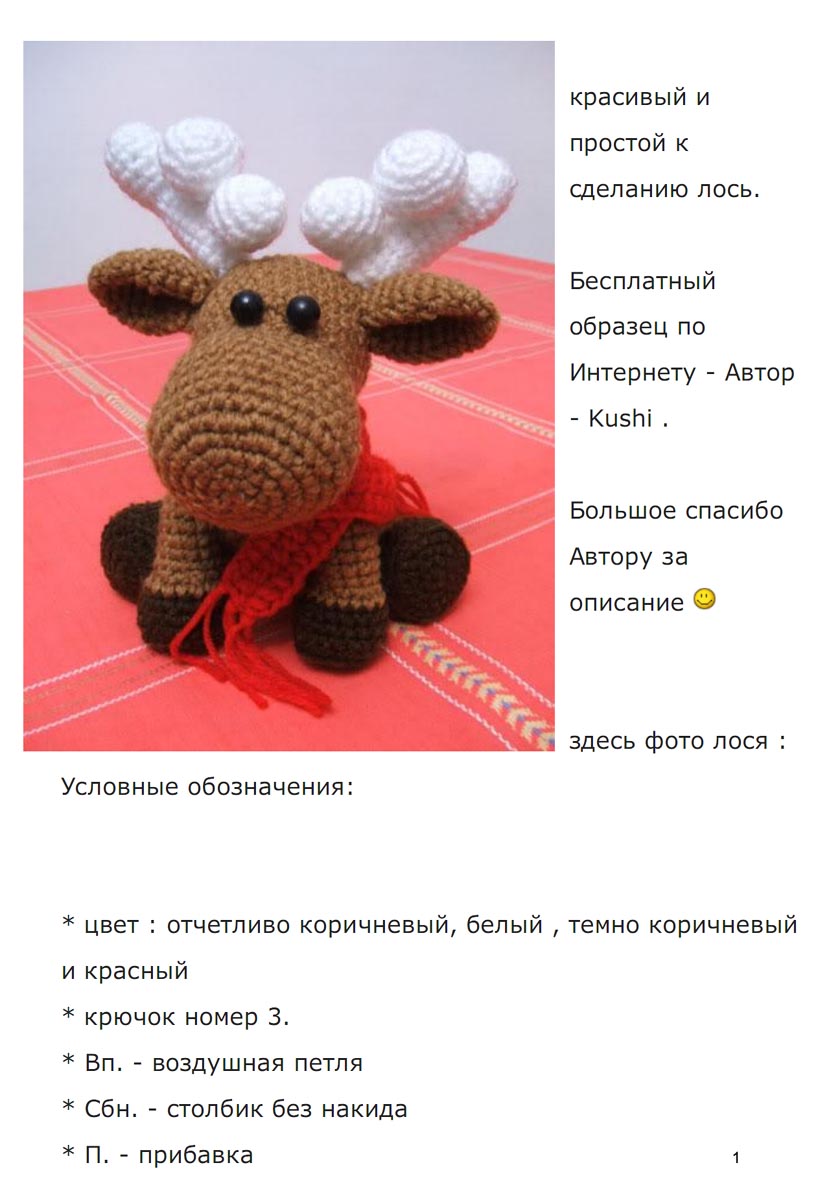
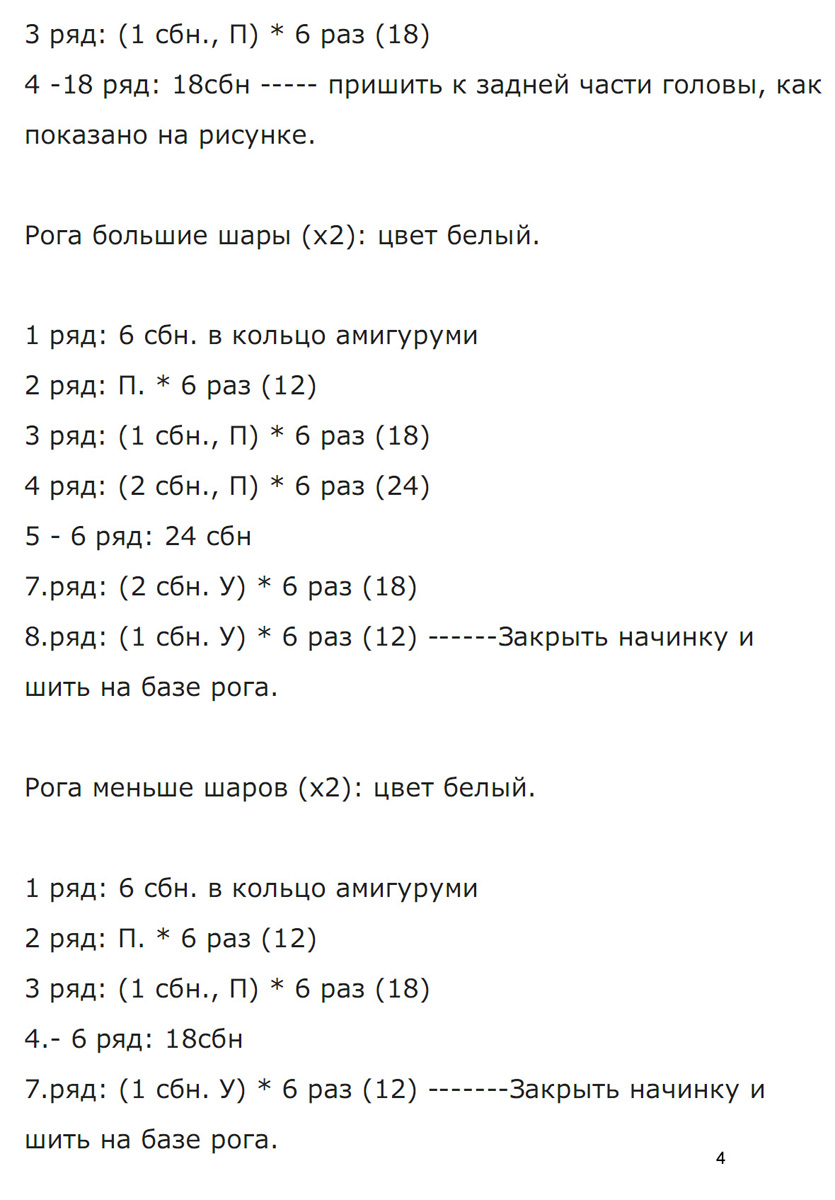
A turn-based lesson - Los


Comments
Related posts:
 Amigurumi toys from elastic bands, video lessons / Toys by own hands, patterns, video, MK
 How to weave an amigurumi frog crochet. Master Class. Video / Toys with own hands, patterns, video, MK
 Knit crochet elephant in the style of amigurumi. Master Class. Video / Toys with own hands, patterns, video, MK
 Amigurumi crochet hooks with their own hands, schemes, knitting technique / Toys with their own hands, patterns, video, MK
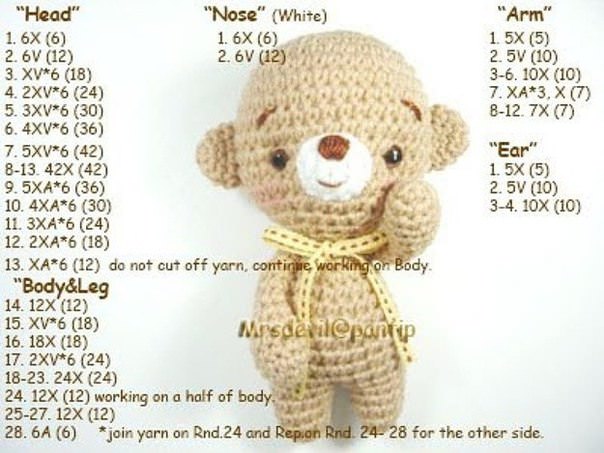
 How to crochet a monkey amigurumi, charts, description / Toys with own hands, patterns, video, MK