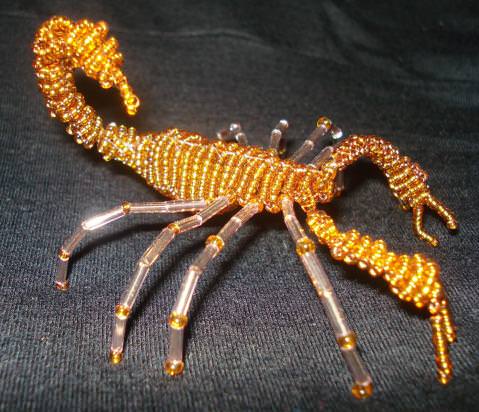
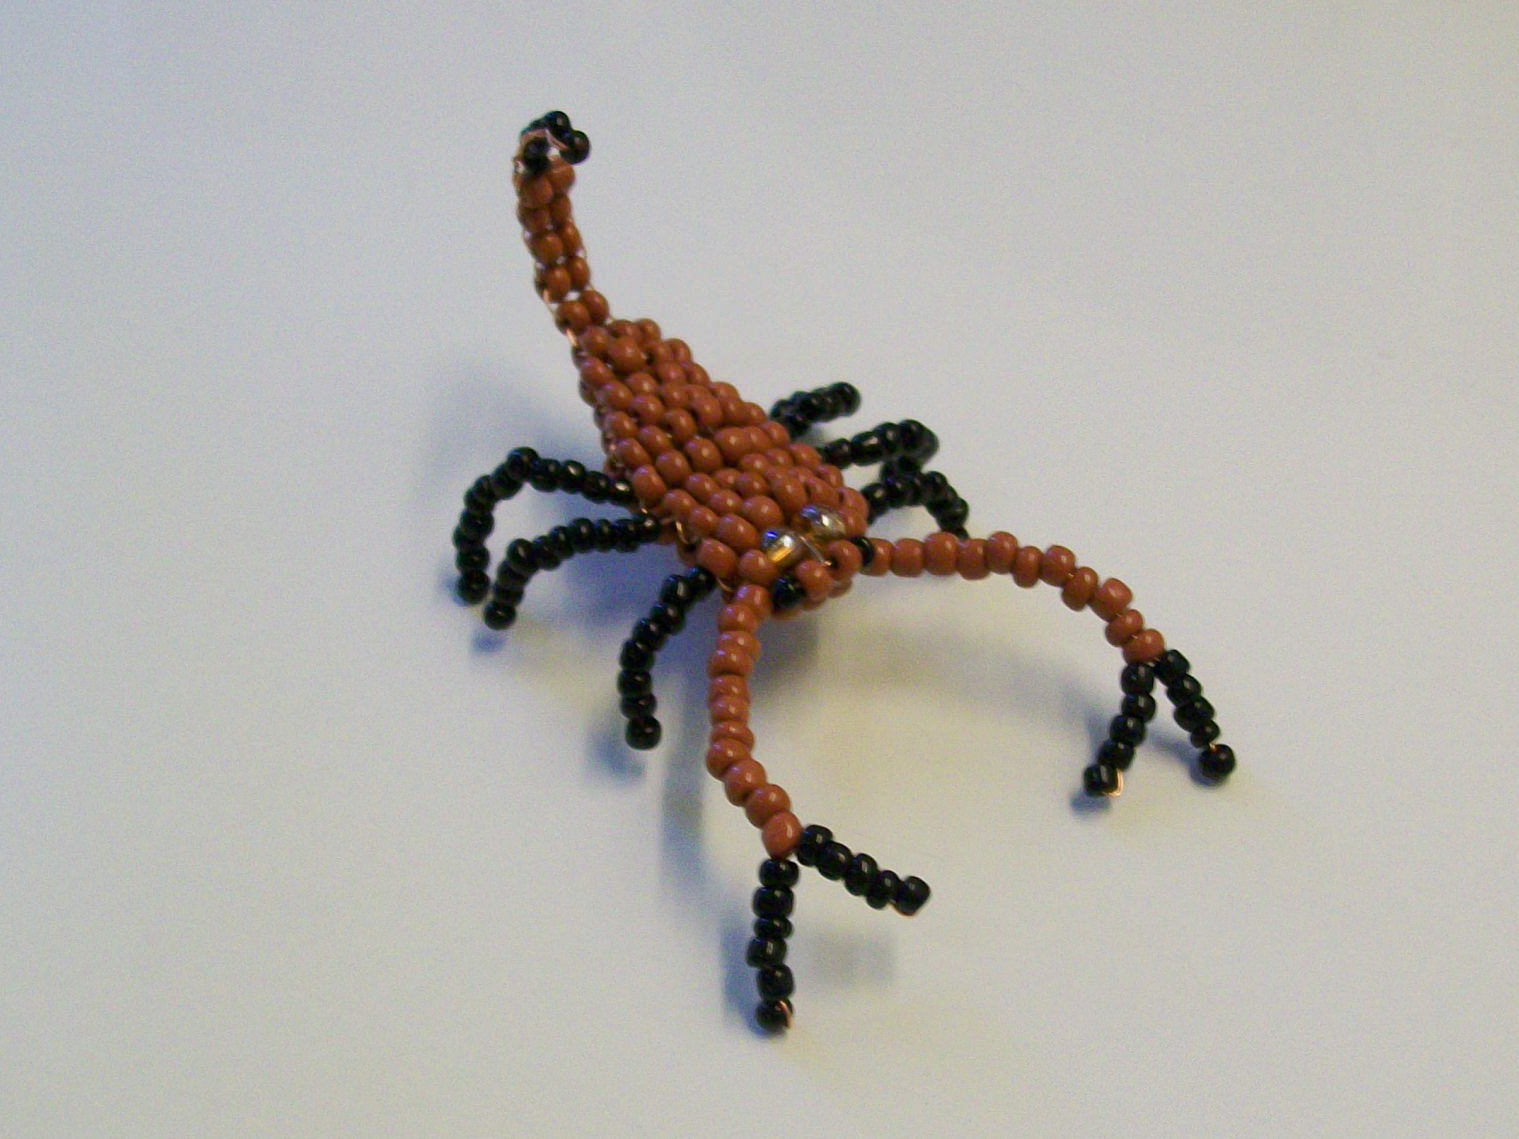
Scorpion from beads in a step-by-step master class (photo)
Content
Beading is an interesting activity. There are a lot of options for making figures with your own hands. Scorpion from beads is one of them. Below is a diagram and video lesson, which will prompt you how to make this figure. The work is quite simple, and its result is impressive.


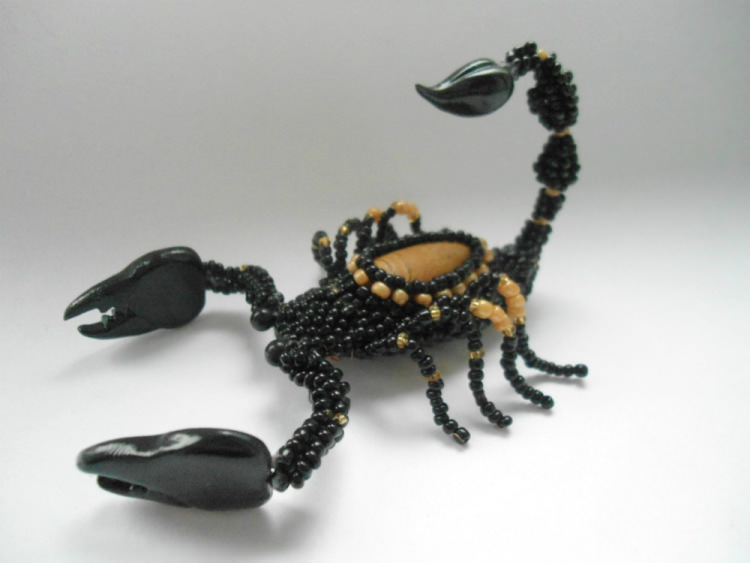
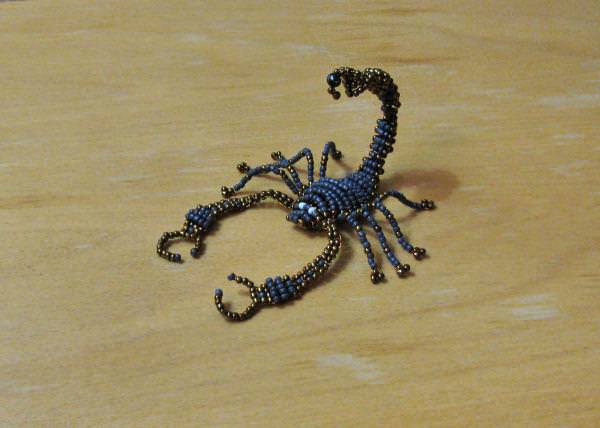
Master class of weaving a scorpion from beads
In order to start a master class for beginners, it is worthwhile to prepare the materials:
- Beads of brown hues (brown);
- Black beads;
- Beads of yellow color for eyes;
- Thin fishing line for firmware;
- Wire that has a diameter of 0.2 mm.
Scorpion made from beadsIs quite simple in execution. The length of the wire that will be used in the process of work, should be 150 centimeters. Scorpio from beads in the master class will be made in the technique of weaving, which is called volumetric. Tiers of beads that will be on top - this is the back of the scorpion. Accordingly, the lower tier of this material will form an alternating layer.
The process of making a figurine in video and photo format will greatly facilitate your task.
So, a scorpion from beads, a master class on weaving which we begin with the head.
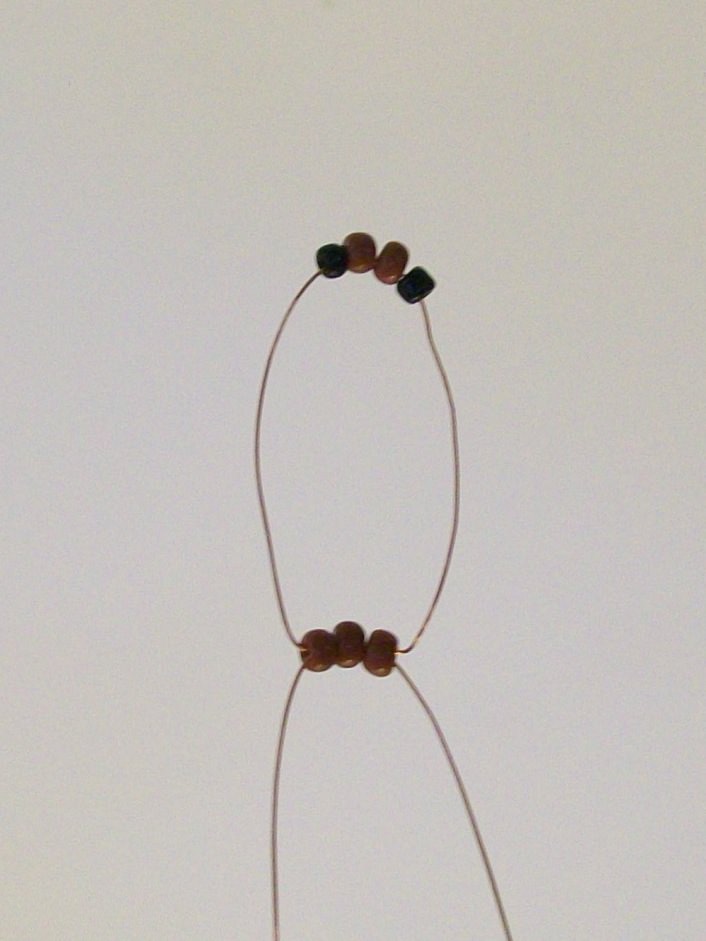
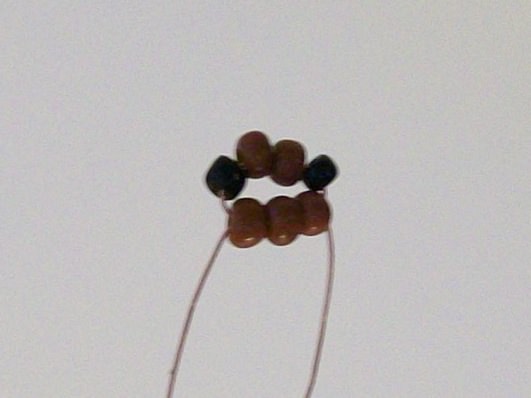
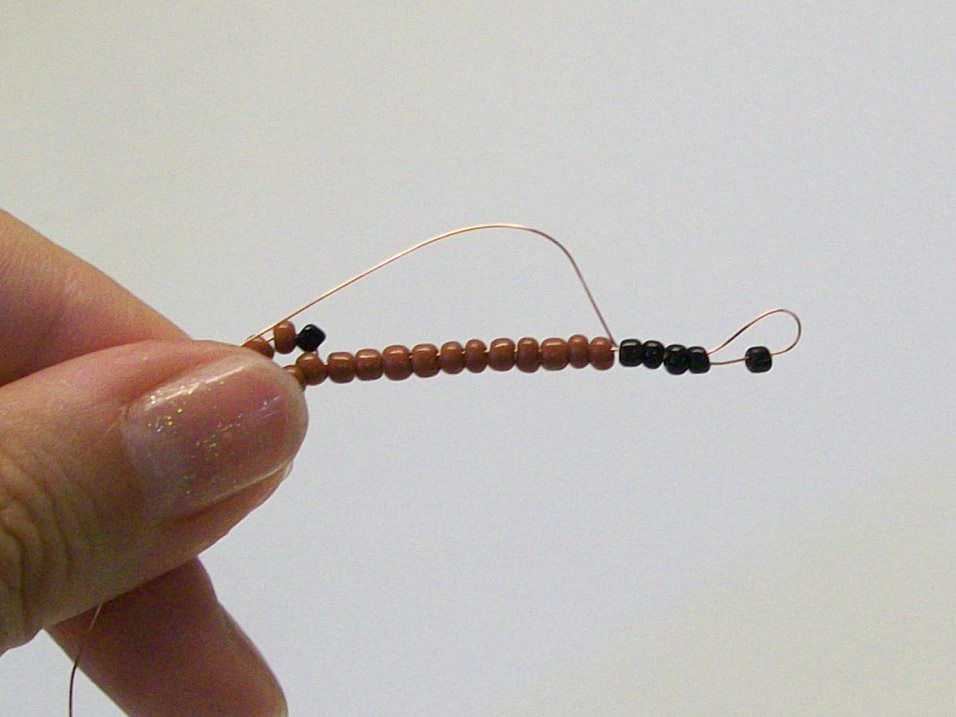
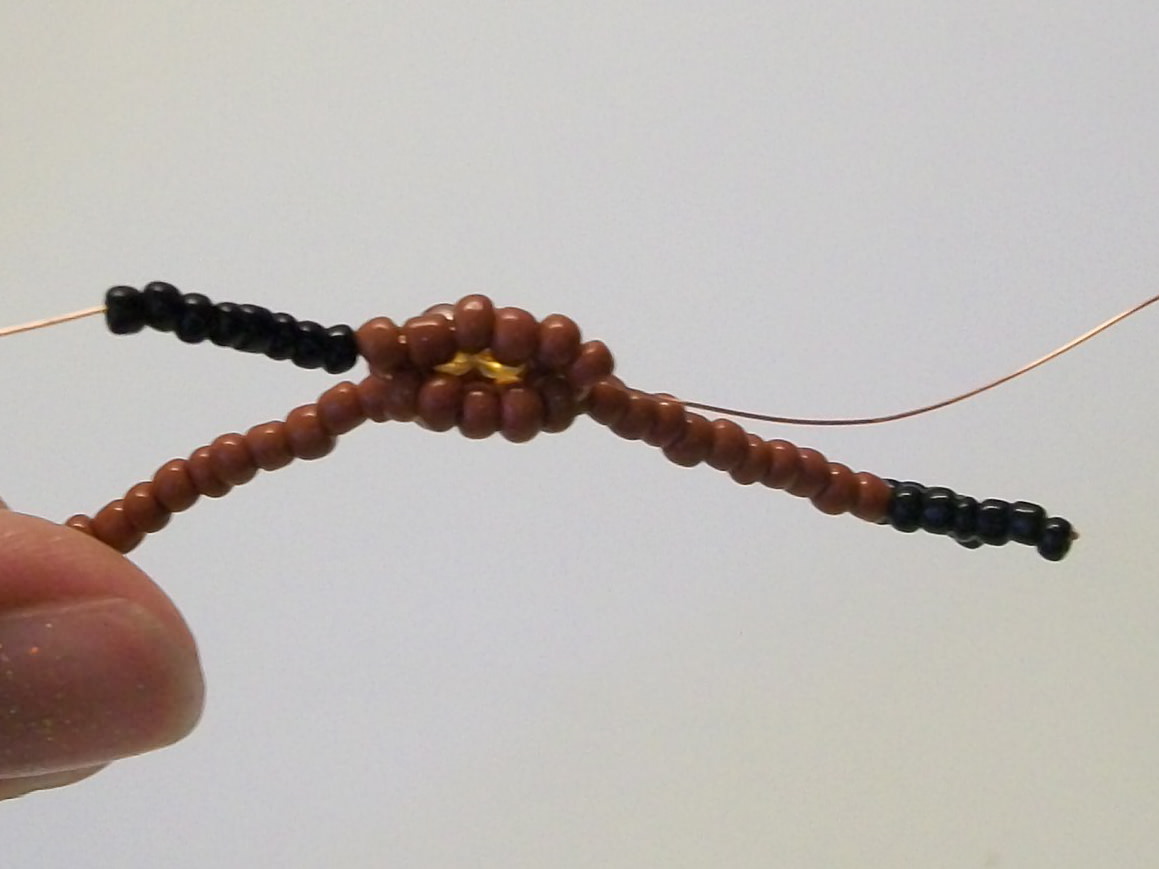
First row
- Dial the wire beads in aSequences: 1 black, 2 brown, 1 black. They are followed by 3 pieces of brown hue. They form a tier, which will be at the very bottom. The whole set of beads placed on the center of the thread;
- The end of the wire through which the black bead was typed, pass through 3 beads of another shade on the other side of the base;
- The wire must be tightened. The upper and lower balls of the first line were obtained;
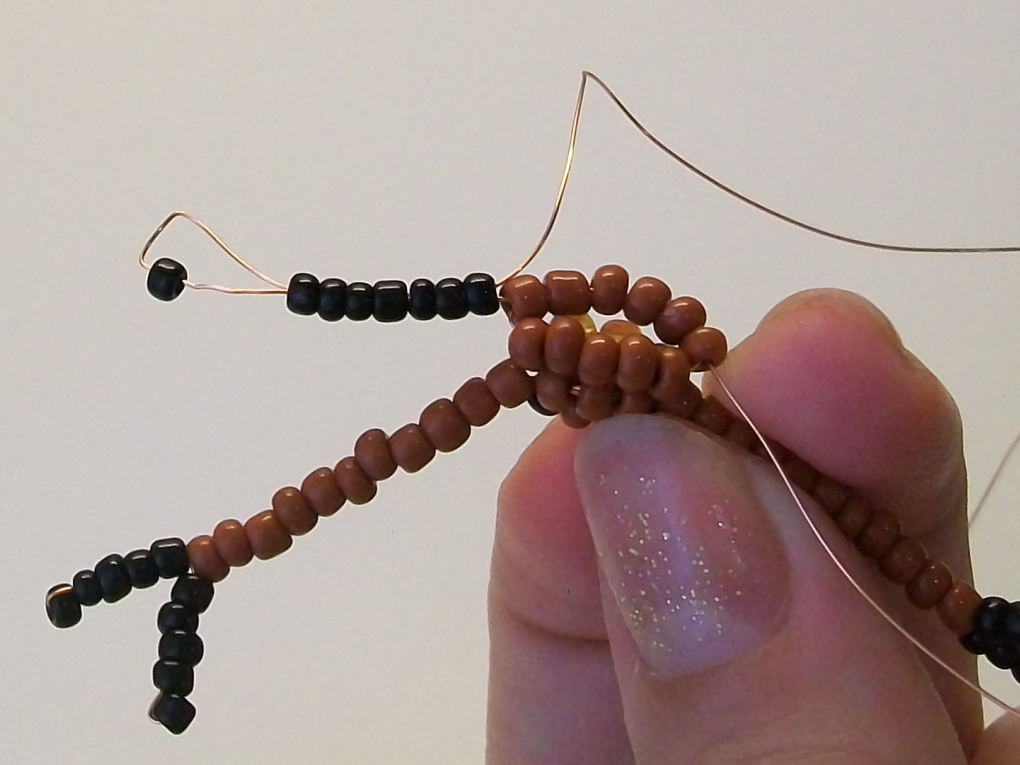
- Next will be work on claws. Put on the thread 5 black beads and 11 other shades;
- Skip this end of the thread through 4 black beads in the opposite direction. During this process, the last bead must be held;
- Tighten the wire;
- At the very end of the wire, dial 5 beads of the same color;
- It is necessary to hold the last bead put on and to pass the wire in the opposite direction through 4 beads. Next, pass the thread through 11 beads of a different color;
- Tighten the thread. Beading of one claw can be considered complete;
- Just such a master class should be used to make the second claw.


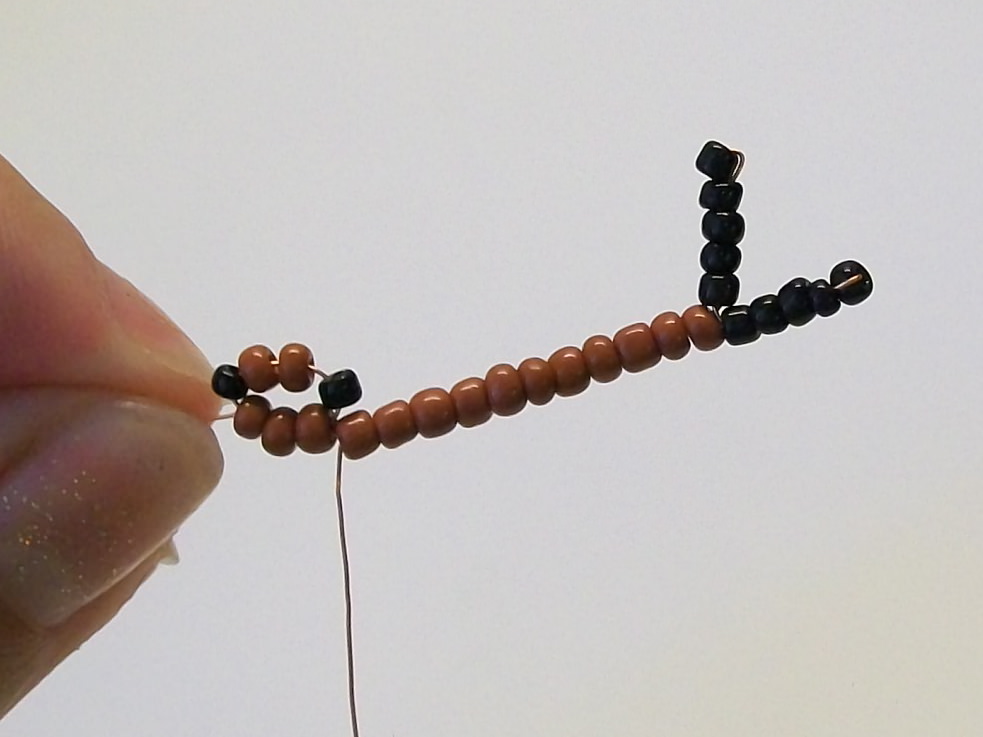
Second row
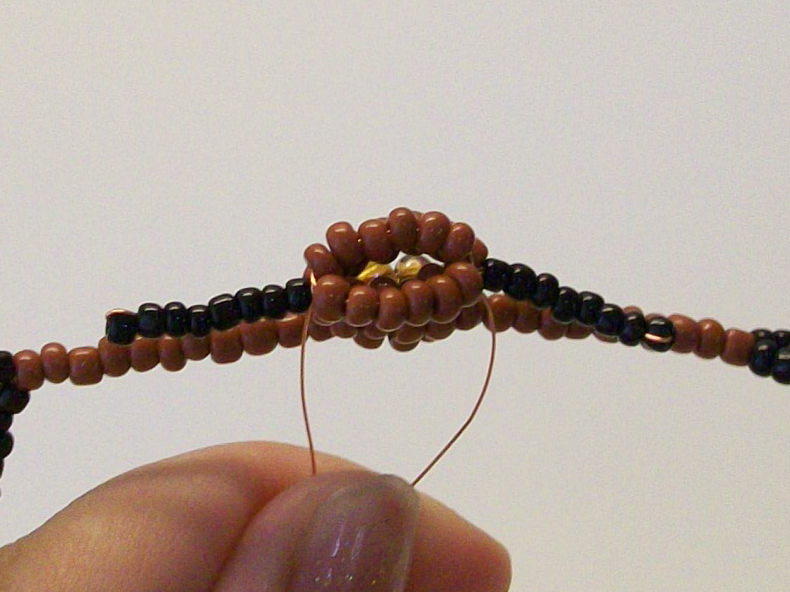
- First you need to make the first level. Put beads on the wire in the following order: 1 brown, 2 yellow, 1 brown. Next, skip it through all the newly recruited beads. Wire bend in such a way that the beads are located parallel to the upper ball of the previous line;
- For the lower level, use 5 brown beads. Thread the bend so that the beads lie opposite the upper tier.

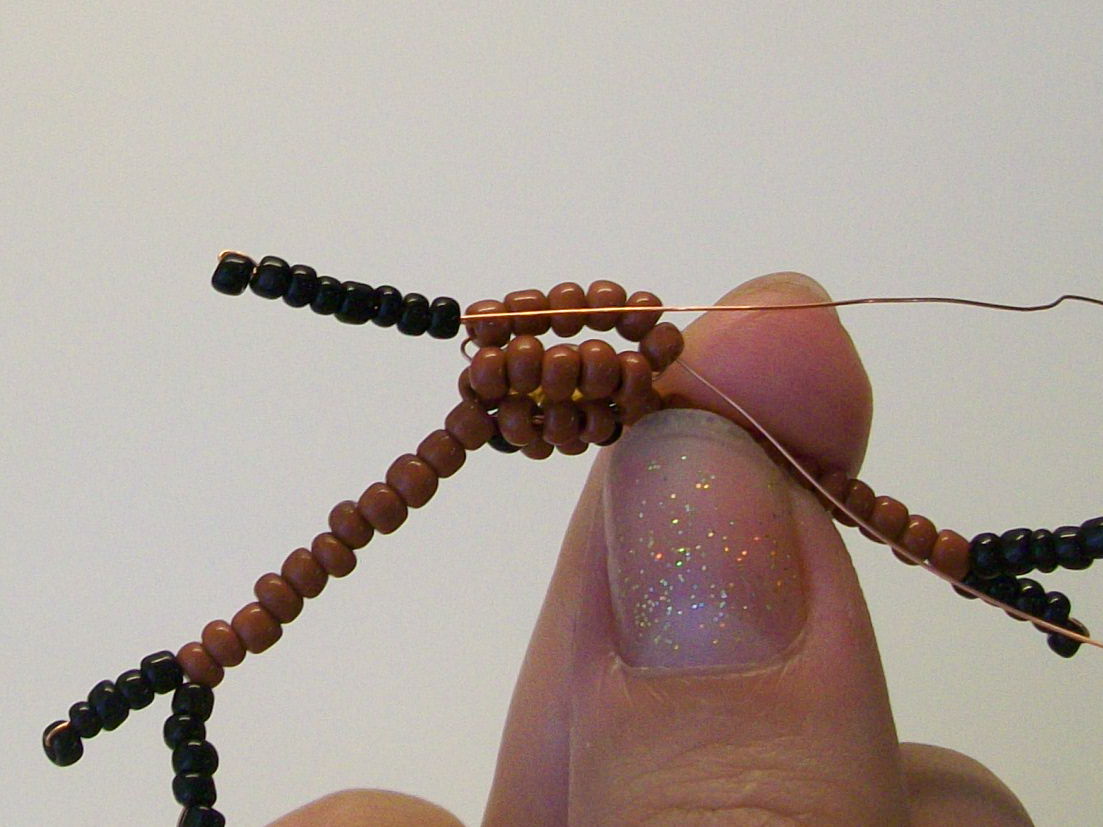
Third row
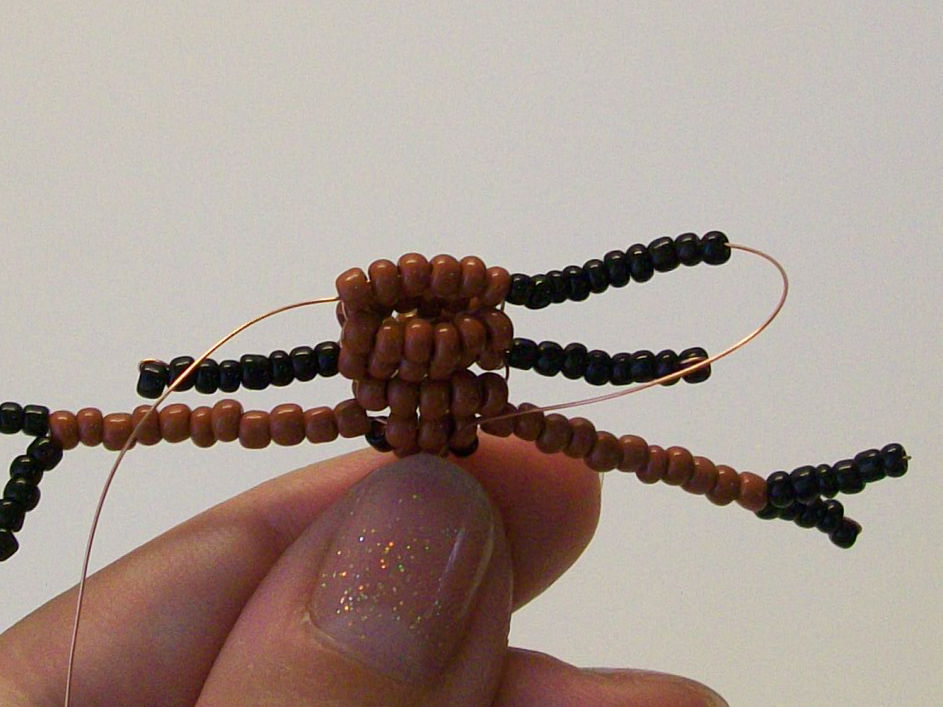
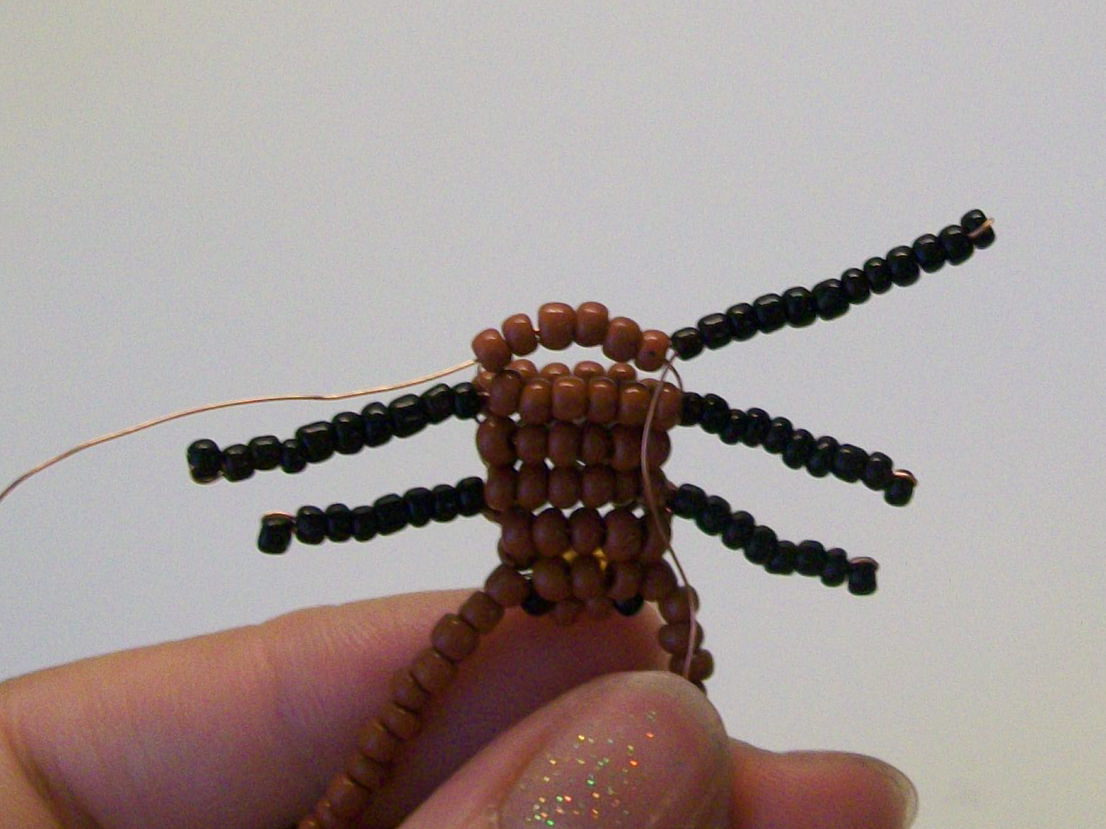
- To braid the upper ball, one should take a brown bead in the amount of 6 pieces;
- The next step is to work on the paws. It is necessary to dial 8 beads of another shade on one end of the wire;
- The most recent should be kept. At the same time, pass the same end of the base through 7 black beads in the opposite direction;
- To fasten the wire. It was the foot;
- Using the other side of the wire, weave exactly such a foot;
- For the formation of a line from the bottom on the 3rd line, you should use 6 brown beads.


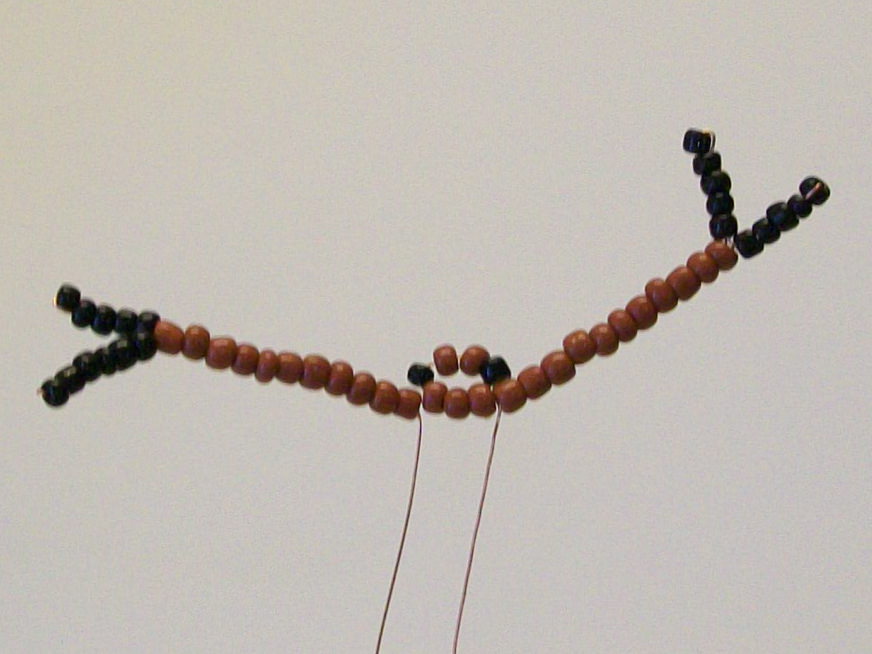
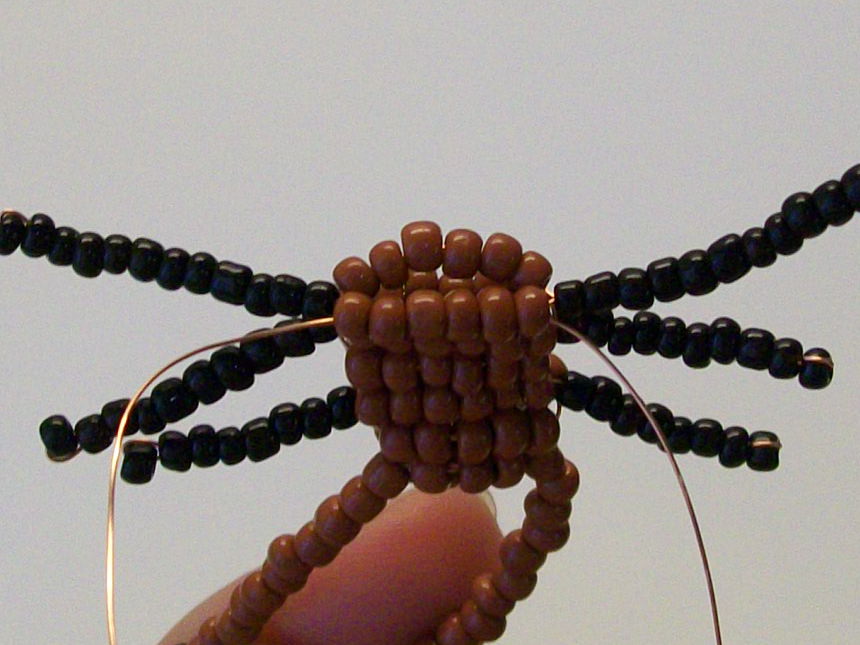
Fourth row Weave 6 brown beads for the upper ball and the same for the level that will be placed below.
Fifth row It is very similar to the 3rd.
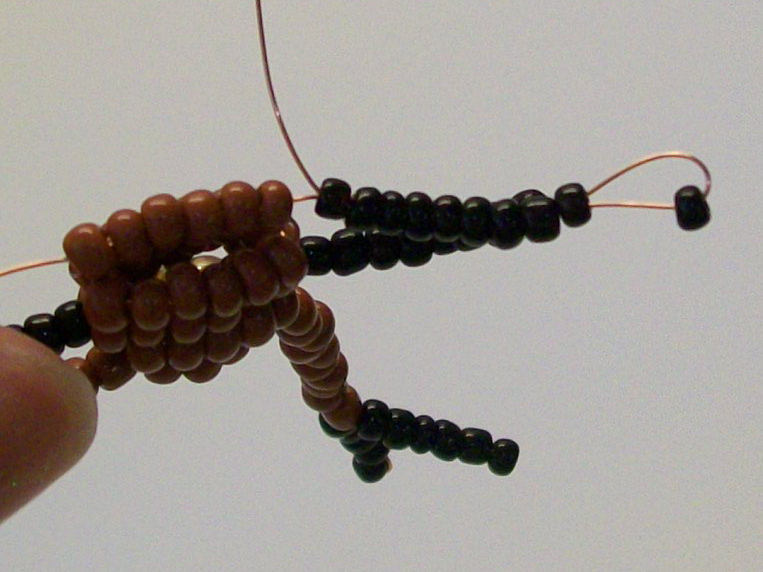
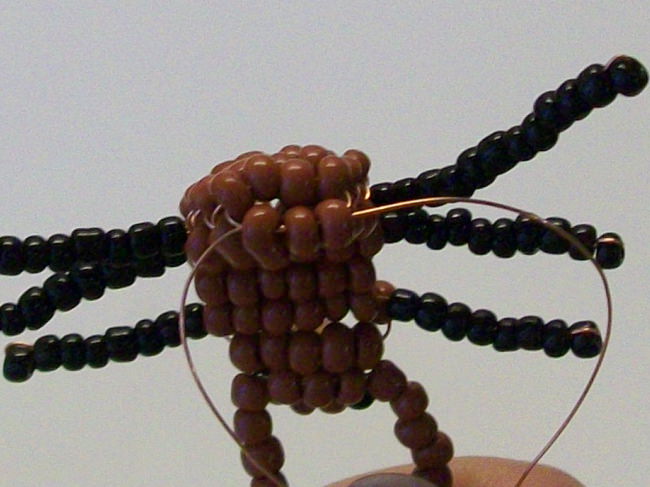
- You need to make a tier, which will be on top, of a brown bead in the amount of 6 pieces. Next, weave the legs of 10 black beads for each;
- The bottom line weave from 6 brown beads.

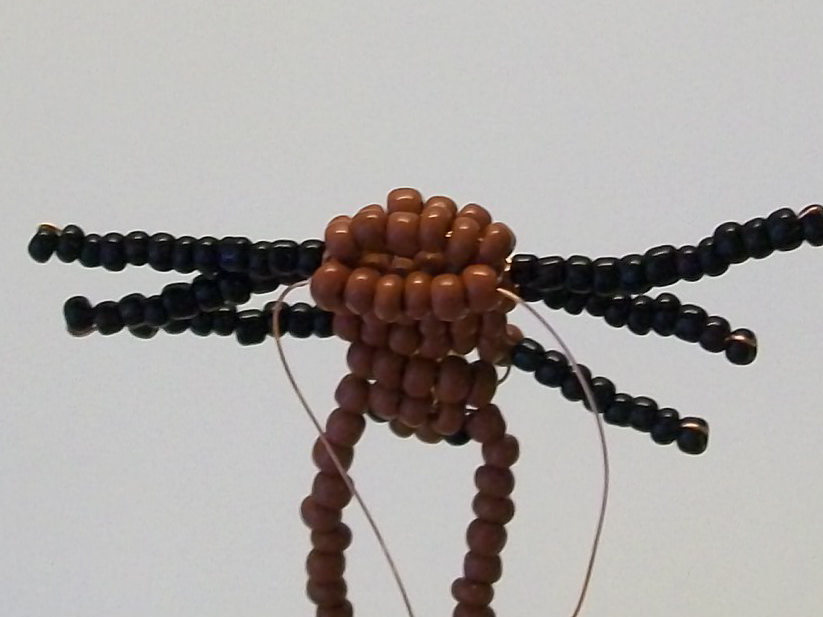
The sixth series of the scheme for creating this line is almost the same.
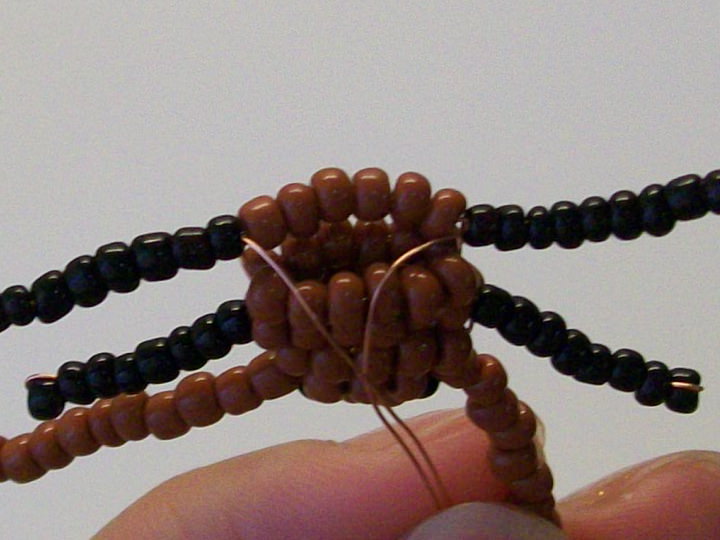
- Weave the top of 6 beads of brown hue;
- Further, make paws. To make each foot, you need 12 black beads;
- Make a ball of material from below. He needs 6 beads of a different color.

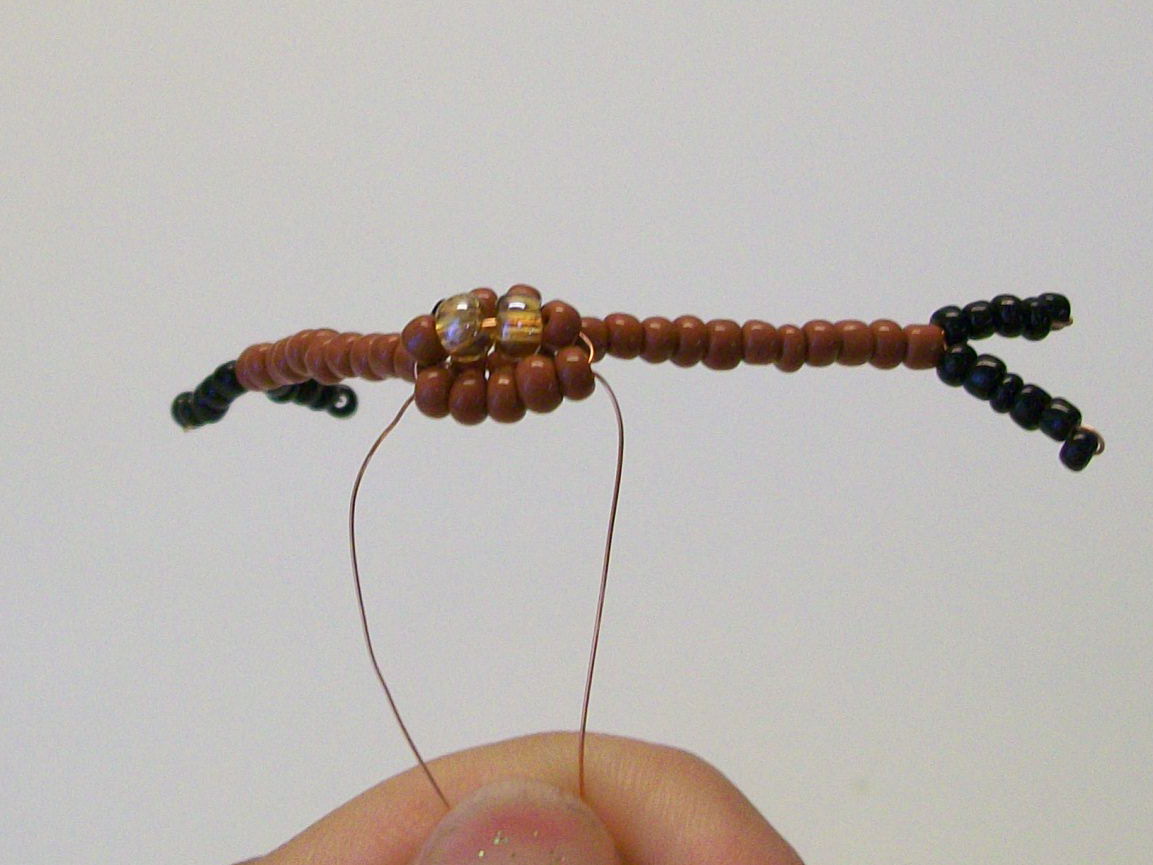
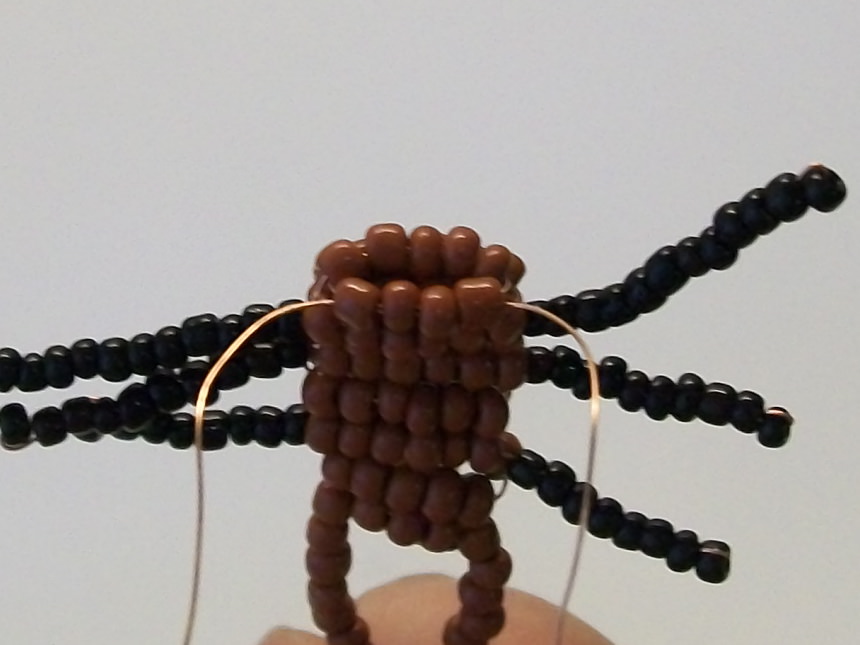
Seventh row
- Line that will be placed on top - 6 brown pieces;
- For the lower tier you also need 6 beads of the same color.
Eighth row Need 5 brown beads for the top and 4 exactly such beads for weaving the lower level.
Ninth row
- It is necessary to use 4 pieces of brown beads for weaving the upper ball;
- For the lower tier you need to use 3 pieces of the same color.
Tenth row
- The scheme is the same. To create the top line, use 3 pieces of brown beads;
- The bottom ball also needs 3 precisely such beads.

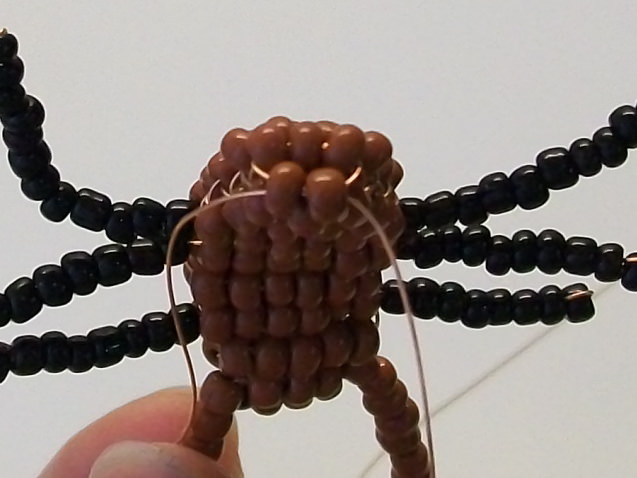
Single row
- The upper tier weave from 3 brown beads;
- 2 units of beads of the same color are needed for weaving the lower level.
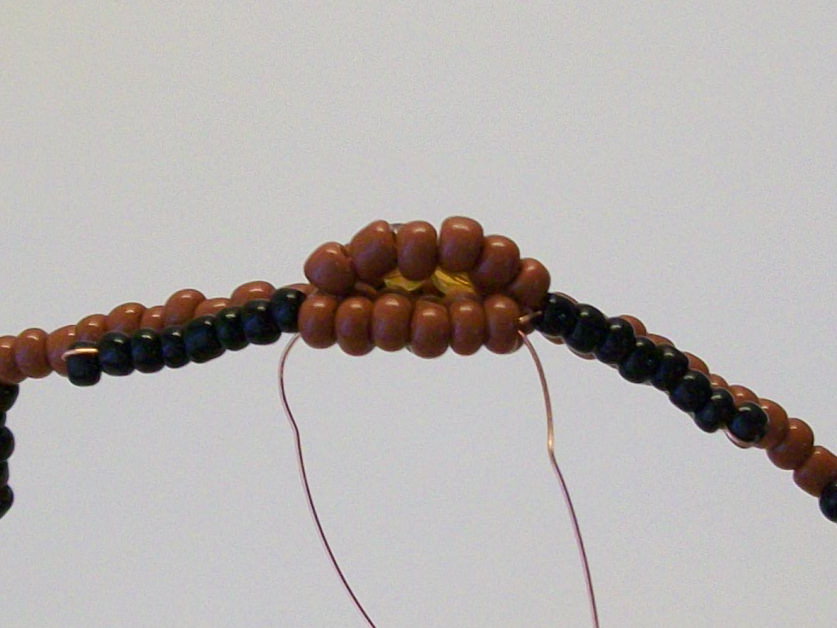
This action completes the voluminous weaving.
Scorpion tail design
- In the process of manufacturing this part of the body, you need to use the technique of conventional parallel weaving. The lines must be arranged one after the other;
- Weave 5 lines of 2 beads. Next, 5 lines of 1 black;
- Thread secure in this way: pass it through the previous line, twist together the two ends of the base and cut them off.

The last thing to do is to sew a scorpion with a fishing line. The figure must keep its shape. You need to use the usual firmware.
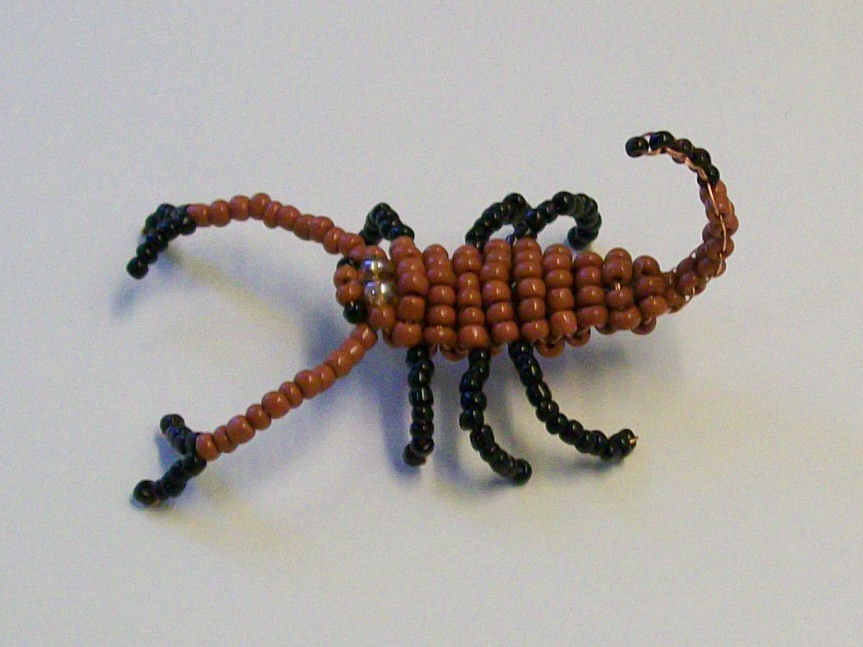
Master class on making a scorpion from beads with your own hands is ready. We got the original result. The main thing is that a scorpion from beads requires little time and effort.