A blind seam by hand and types of machine stitches in video lessons
Content
- Classification of machine stitches and their purpose
- Video: sequence of execution of stitches
- Video: double stitch
- Video: edge machine seams
- Countersunk by hand
- Video: how to perform a manual secret seam
- Finishing seams
- Video: the main types of hand welds
Handicrafts touch many of us. We adore zaek, bears, dolls sewn by hand, and handmade interior items cost a lot of money in the store. The thing is that in addition to his work and talent, the creator puts in these trinkets something more - his own soul and warmth. It is not surprising that needlework today is very popular not only among women of retirement age, who spend long evenings at a favorite job, but also among young girls. This type of activity is especially common among young mothers. Still would! Who does not want to make something unique, warm, soft, interesting for his baby. Give him all your love.
But even if you are not a fan of creationToys, clothes, household utensils with their own hands, you, for sure, will have to sew something up, sew, repair. In order to perform the work accurately and accurately, you will need to understand the types of seams, which are several dozen species. Initially, all the seams can be divided into two types: manual and machine.


Classification of machine stitches and their purpose
Work on a sewing machine, having mastered someWisdom, it will not be difficult even for a beginner. And with new technologies, such work can bring real pleasure. New machines do not confuse or tear the threads, unlike their older relatives. Fabric is advanced on them automatically, and the program includes all the main types of seams.
Usually machine stitches are used for sewingClothes, bed linen, curtains and other items of interior. In a word, they are relevant everywhere, where you need to sew a lot and a long time. The classification includes several types of machine stitches, and each of them is applied for a specific purpose.
Before you start, make sure that the sewing machine's foot is securely attached, otherwise you risk ruining the product.
StitchingConnection of the basic details of clothes. To make a stitch, you need to fold the stitched parts face down. Then pound them with pins along the line of the future seam. After that, we sweep the parts, taking out the pins as we go along. Now you can proceed directly to the execution of the stitch. At the edges of the work, it is necessary to make bows. To do this, you need to make several stitches with a back seam. Remember that the smaller the stitches, the stronger will be the seam itself. The machine foot should pass on average 0.5 - 1.5 cm from the edge of the fabric.
After the stitch has been made, it is necessary to iron it. You can do this in several ways:
- Stitch seam "vzoyutjuku" - the edges of both parts are bent in one direction, ironed and smeared together with the help of an overlock;
- The stitching of the seam is "rotten" - the edges of the parts are bent in different directions and are ironed. We sweep each edge separately;
- The stitching "on the edge" - the edges of the parts and they themselves are located in the same plane. We sweep both edges with the help of an overlock.

The stitching seam "Vzautjuzhku" 
The stitching seam "In vain" 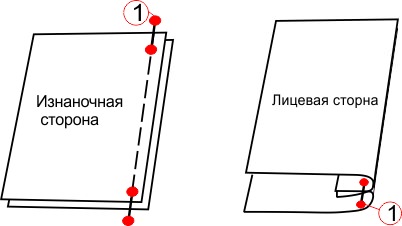
Stitching seam "On the edge"
Video: sequence of execution of stitches
Double seam When we plan to work with a fabric whose edges are crumbling, the double seam or "French" is appropriate. It is done in several stages:
Double seam We put the parts of the product inside out;
Thus, the first line was inside the second. In this case, an additional cutting of the slices is not required.
Video: double stitch
Overhead seam 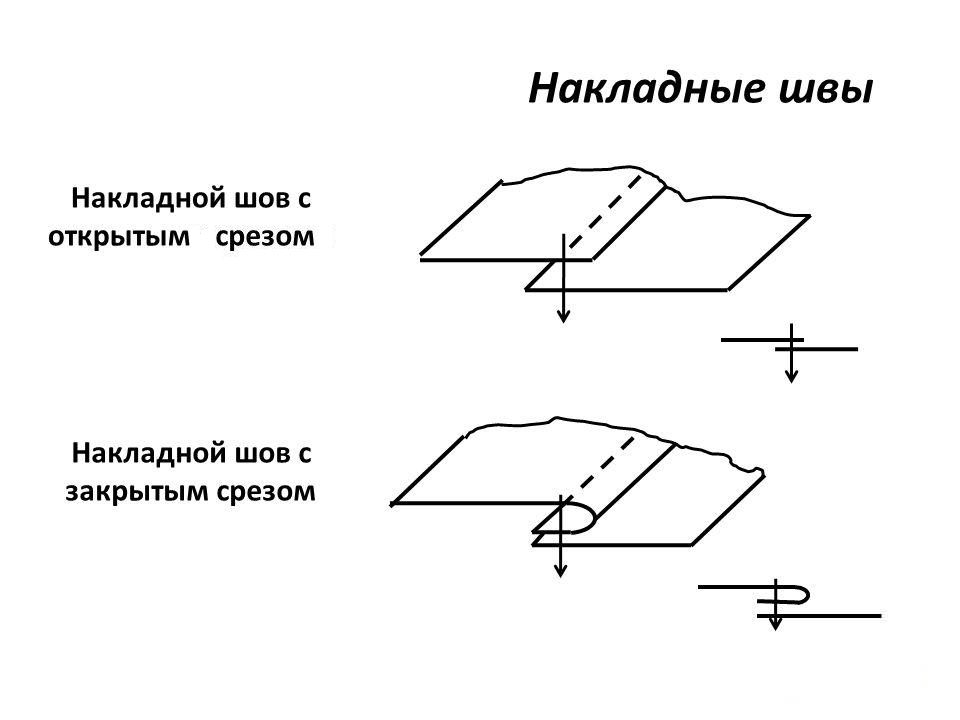
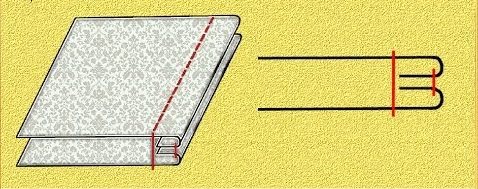
The overlap seam has two variations, each ofWhich is suitable for a certain type of work with cloth. To join the details of the lining, sewing of gaskets and other "internal works" use an overlaid seam with an open edge. For its execution, the details of the article are superimposed on each other with a spacing of 1 - 1.5 cm. After this, a straight or zigzag line is made.
To make an overlaid seam with a closed cut,The edge of the sewn part is turned inside out by about 1 - 1.5 cm. After bending, iron is ironed. Next, we take the part to the other. When making machine seam, the foot should pass 0, 1 - 1.5 cm from the edge. It is often used for sewing pockets, ruches, flounces and other things. By the same principle, you can make and tuning the seam. The seam is still open and closed.
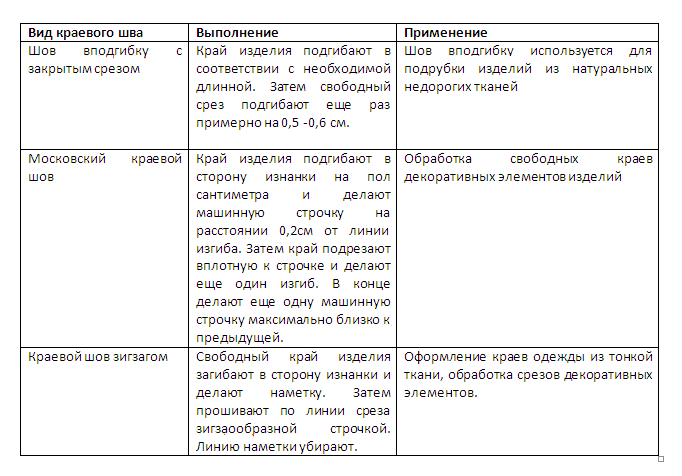
Edge seams All of the above seams are wornConnective function. In spite of which one you are performing, the free edges of the fabric require additional processing. Often, the edges are processed using an overlock. But there are cases when it is inappropriate. In such situations, edge seams are used. The following table can tell about them in detail:
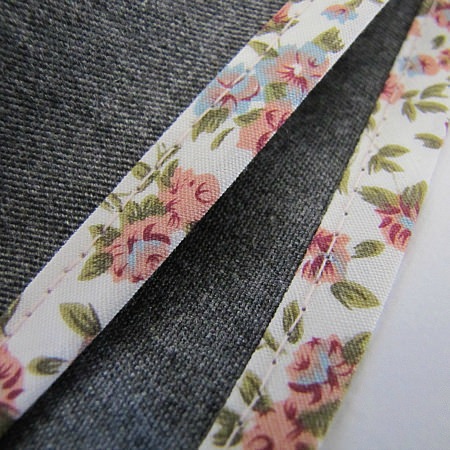
By the principle of marginal sutures, the stitch is also performed, serving for filing trousers, skirts, bed linen. The anterior suture can be with an open and closed cut.
Sewing on the machine is a quick andpleasant. But if you do not have a sewing machine in your house, do not despair. Most of the seams can be done manually. It takes, of course, more time, but the result will not be worse. In this article, we will consider in detail how to make a hidden seam by hand, as well as the main types of finishing seams.
Video: edge machine seams
Countersunk by hand

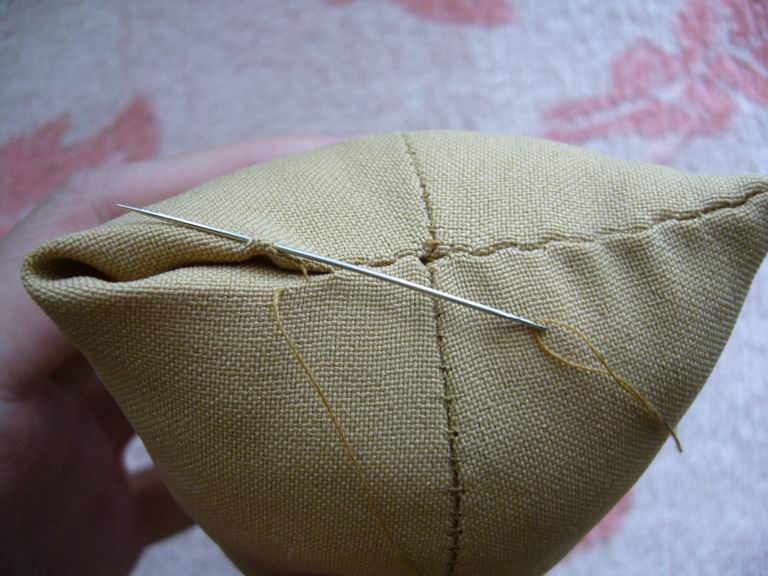
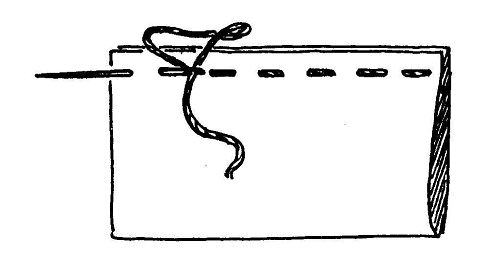
Secret SeamOn toys, pillows and other things that need to be filled with something, and then silently sewed. It is important that the seam is reliable, and after a few weeks the product does not fall apart, and the filler does not get out. Remember! The reliability of a hidden seam is very important in the product.
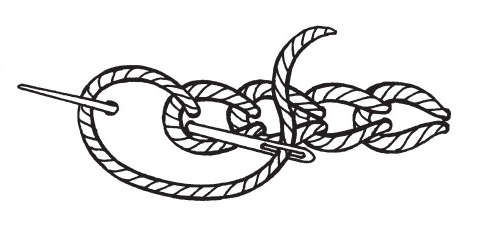
To make a secret seam it is necessaryPre-iron the allowances on the fabric. Then you will see well the line of the future seam. If your seam will carry a physical load, it is better to make it a thread folded in half. If it's a torso or a toy animal's foot, then one thread is enough. So, enter the needle from the wrong side exactly into the bend line. Next, insert the needle into the opposite part. Puncture must be exactly opposite to the previous one. We make a small stitch 0.2 - 0.3 cm. Then continue the same way to the end. When the secret stitch is made, you need to make a bite. To do this, insert the needle under the last stitch, wrap the thread around the needle, pull it out and tighten the knot of the secret seam.
It should be remembered that the smaller your stitches, the more accurate and firmer your seam will be.
Video: how to perform a manual secret seam
Finishing seams
When working with a cloth, whether machine or manualSewing, you will definitely come across a decor. This is often done with finishing seams. They can be performed by machine or manually. There is a great variety of decorative and finishing stitches, which can be done manually. It is not possible to consider them in detail in one article in detail. Therefore, we describe the simplest seams, which easily master even the novice. Having worked them, in the future you will be able to learn to perform more complex seams, which are described on the Internet, literature and periodicals. It's good, if the schemes chosen by you will be supplemented by step-by-step photos.
Basic finishing joints include:
- "Forward the needle";
- "Back needle";
- Stitch suture;
- .
With their help, you can handle the edges of products, embroider patterns and patterns.
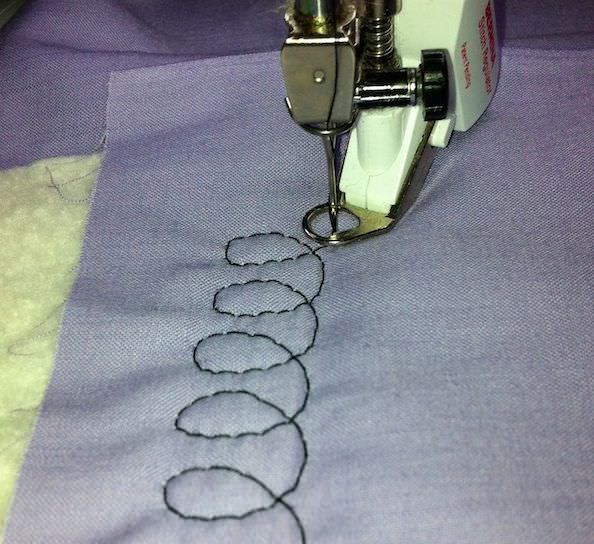
Seam "forward needle" "Forward the needle" manyNeedlewomen use for basting. But he also looks good in finishing. This seam has several varieties. It can be rounded, parallel, alternating. In his stitches, you can also skip the thread. Everything depends on the goals.
To perform this seam, you need to withdraw the needle from theThread from the back to the front, make a stitch, pulling the thread to the wrong side and repeat it in the same way. The most important thing is to keep track of the length of the stitches. It is important that it is the same throughout the seam.

Seam "back needle" "Back needle" allowsCreate smooth or wavy lines, embroider contours and patterns. Before proceeding to its implementation, it is better to draw a line on the fabric through which the seam will pass. Bring the needle to the front. Make one stitch back and put the thread on the wrong side. Pull the thread and pull it to the front side so. That the needle is at a distance from the first stitch. Repeat the procedure until the end. In this case it is important to monitor the size of the stitches. To make the embroidery beautiful, the stitches must be the same.
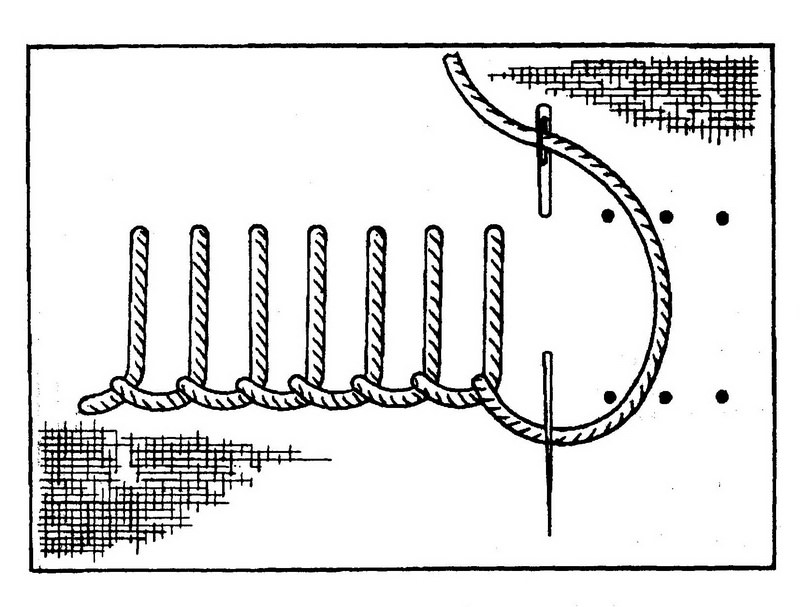
The stitching seam is most often used to process the edge of the product, in the event that it is not possible to make a stitch or edge seam. In machine sewing for such fir trees use an overlock.
Often used to create toys from felt or fleece.
To perform
, First you need to fix the thread so that it does notJumped out during work. To do this, output the thread from the wrong side, then transfer it over the edge to the front side. Then bring it back inside out, and then transfer it to the front. The needle is inserted into the same hole. When the thread is fixed, you can start sewing. We deduce a thread on the front side in half a centimeter from the previous stitch. Further, we extend the working thread through the loop over the edge of the product and again introduce it to the wrong side. So repeat to the end.
Another popular seamstress is considered to be a seamChain stitch. It is used for decorating clothes, toys, pillows and other things. Smooth chains look impressive and original. In the old days it was used for embroidery of clothes.
Tambour seam This seam is very simple. We deduce a thread from the wrong side to the front. We lay out the thread in the form of a loop and again output to the wrong side through the same hole. The thread is not tightened to the end, so that there is a small loop on the front side. Again, draw the thread on the front side, so that the needle comes out above our eyelet. Again, we form a loop from the thread, and draw the needle inside out through the same hole. So continue on.
If the chain should not pass smoothly, it is better to draw a sketch of the drawing beforehand with the pencil.
These are the most common types of decorative hand-stitches. The rest are described in detail in materials on cut and sewing.
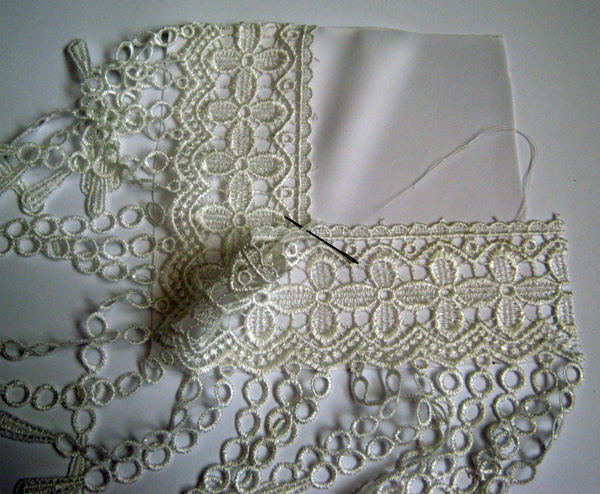
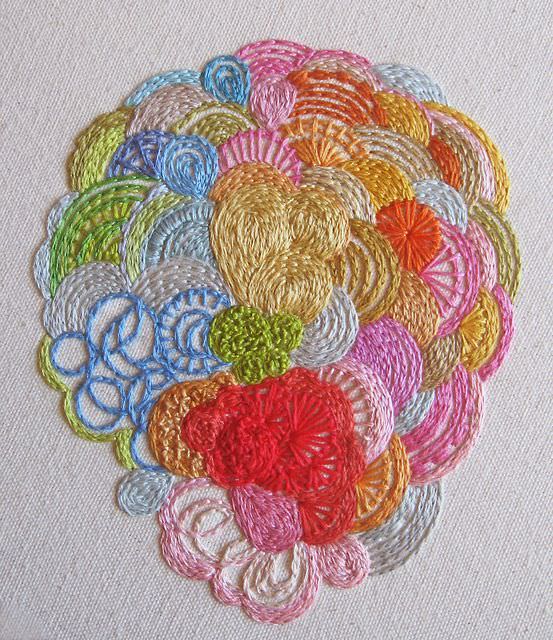
In the decorative finishing of clothing and interior items, lace machine embroidery is widely used.
Whether you are a beginner or a professional, do it with pleasure - and your products will please loved ones and friends.
Video: the main types of hand welds
Comments
Related posts:
 Openwork embroidery on a napkin and types of applied seams (photo)
 The loop stitch seam back needle and kinds of hand joints (pictures)
 Embroidery Rococo basic techniques of performing seams (photo and video)
Embroidery crochet for beginners in photo and video lessons
Embroidery Rococo basic techniques of performing seams (photo and video)
Embroidery crochet for beginners in photo and video lessons