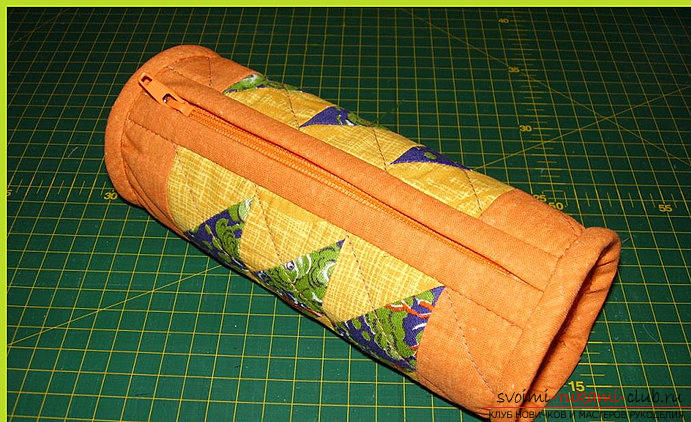
Self-catering pencil case with the use of Japanese patchwork technique is available to all
Sewing a pencil case using Japanese techniquepatchwork is not complicated. To sew on such a necessary thing yourself, it is only necessary to carefully study the schemes, and show maximum patience. The master class, placed in this article, will make it possible to easily cope with the work of even needlewomen who have no experience in sewing in scrappy technique. Naturally, patchwork is very interesting for those who are friends with a needle and thread. However, for those who only discover the world of applied art, there are many items available in complexity that will please both the master and his entourage. As art, patchwork in Japan was not popular, but it was quilting that became the hallmark of Japanese patchwork. As an example, you can consider the jackets of Japanese Buddhist monks. They were made from squares symbolizing rice fields - the pride of the Land of the Rising Sun. These squares were joined by means of stitches with a needle forward lap. The resulting patterns of geometric shapes have become a feature of the Japanese patchwork technique. So, sewing a pencil case using the technique of Japanese patchwork begins with the preparation of fabric and shreds, as well as the necessary tools for work. Those who have children of school age in the family, will please the kids with an original surprise, namely, a pencil case made with their own hands.  First of all, you should carefully consider the proposed pattern.
 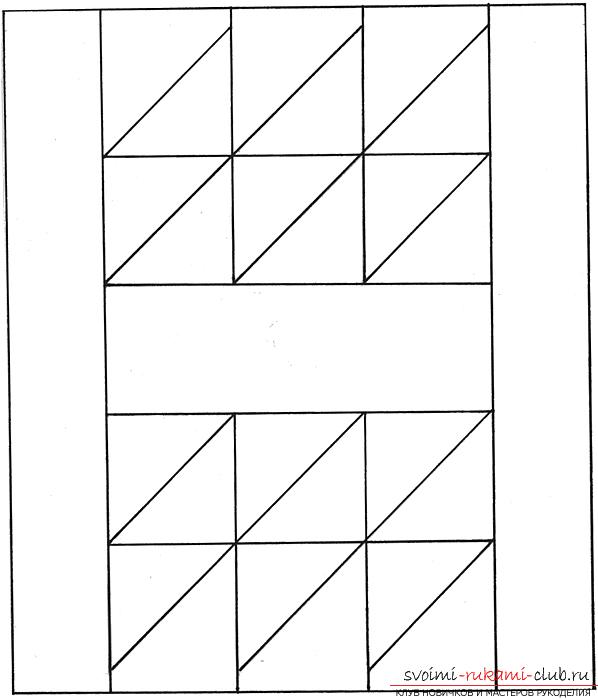 Below is a photo of the pattern in color. However, you can vary the color gamut by personal preference.
 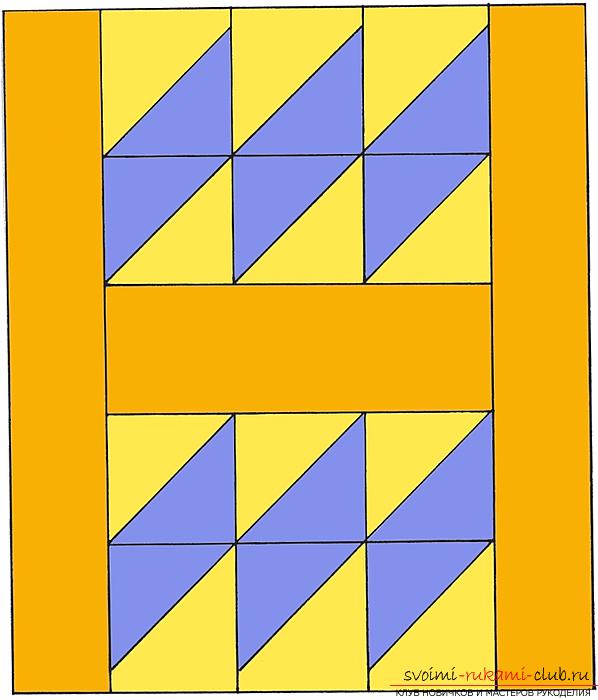 The next stage will be the cutting out of the details of the future pencil case.
 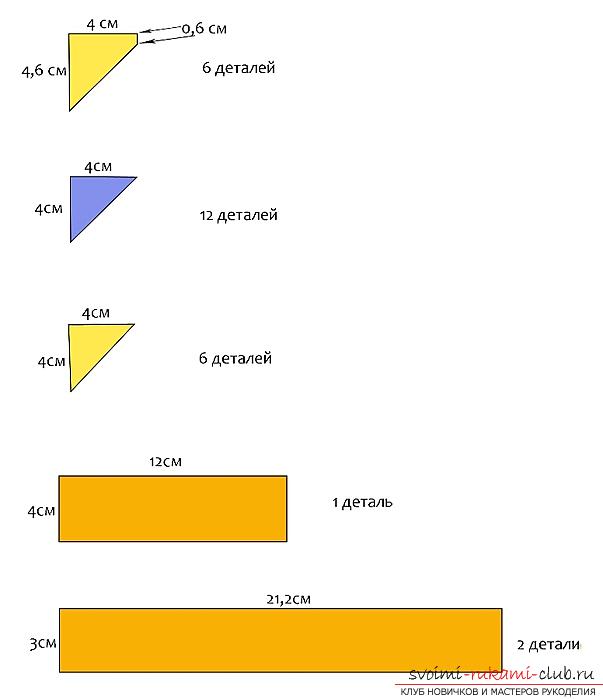 It is necessary to pay attention to the fact that the parts need to be cut out with allowances on the seams from all sides.
 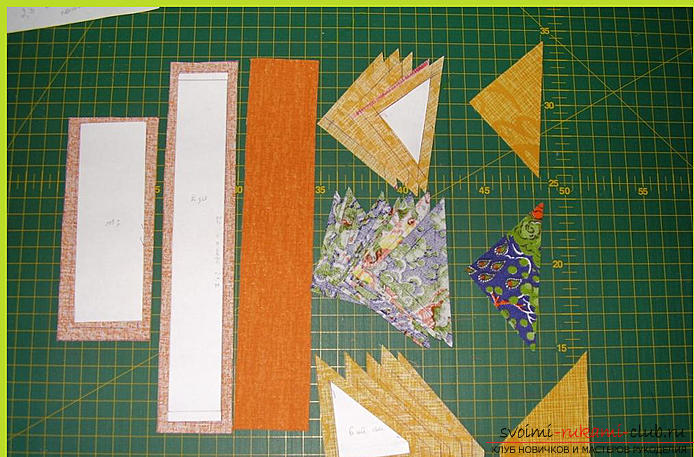 First of all, you need to sew triangles of light tones with dark ones.
 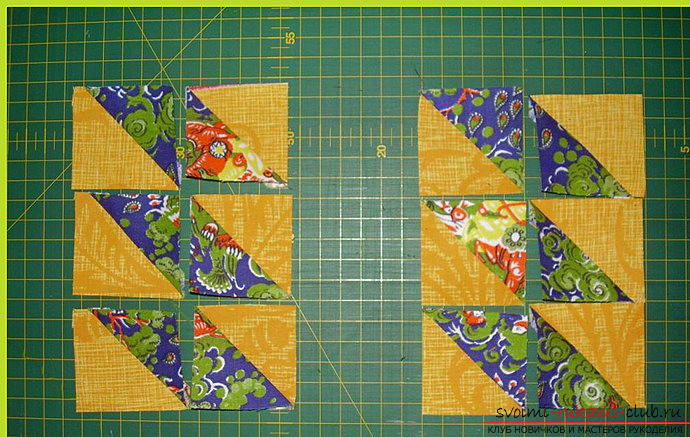 After that, you get two-colored squares. Further, these square blanks are stitched together. In this case, it is desirable to immediately open the seams.
 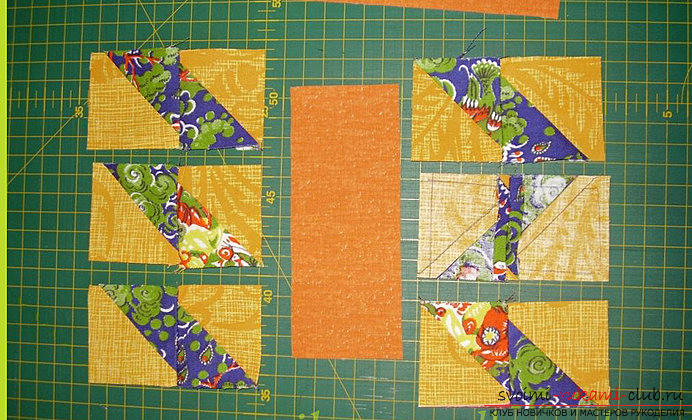 After two squares are sewn, rectangular blocks are obtained. They also need to be connected
 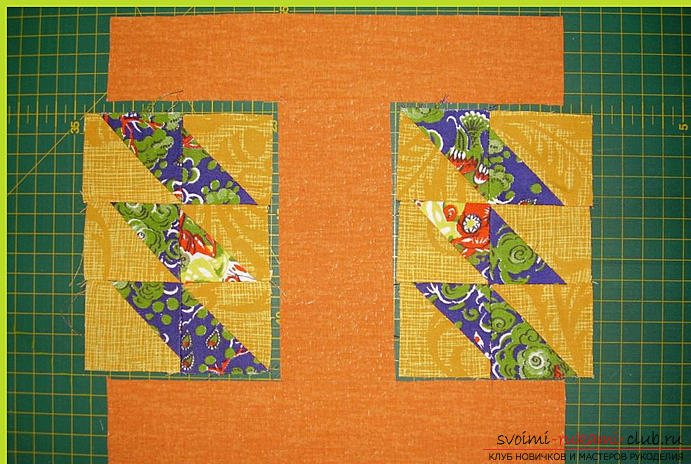 The next task is to sew patchwork parts with a rectangle measuring 12x4 centimeters, not counting the allowances for seams.
 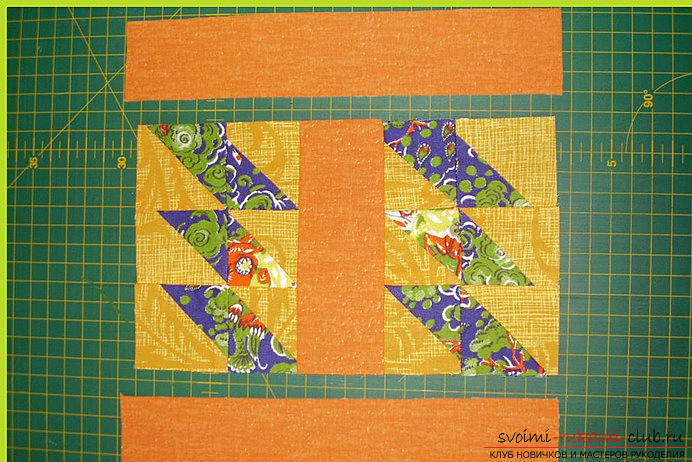 Then follow along the long edges of our rectangle to sew the strips, which have a size of 21x3 centimeters with the addition of allowances for the seams.
 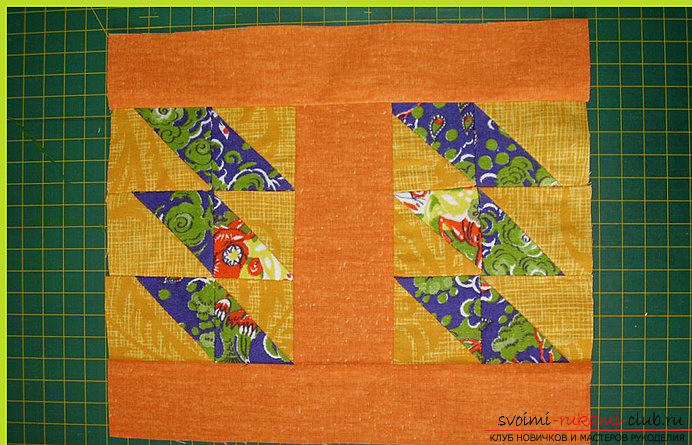 Now there will be several layers, namely three. The top of the product is a patchwork pattern, then a synthon gasket and a backing layer. Now you need to quilt these layers.
 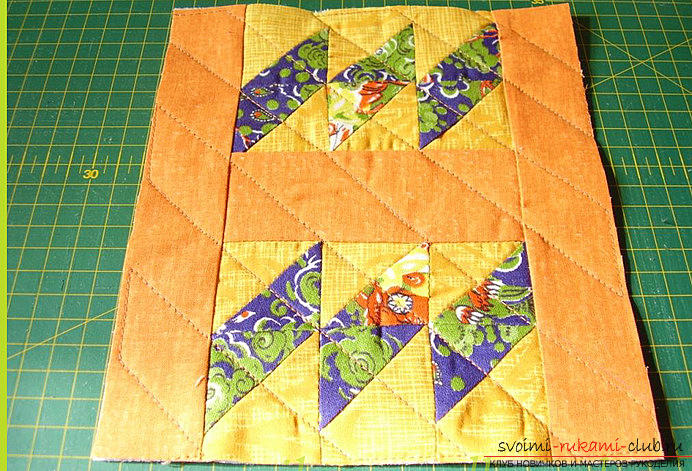 Each short slice needs to be processed using a skew-beam.
 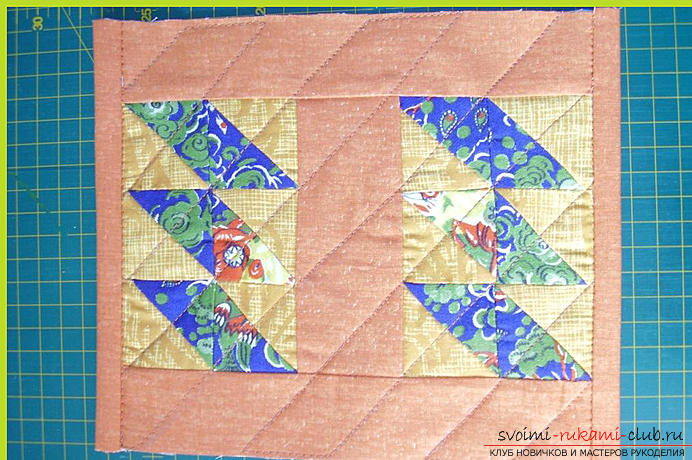 Now lightning is sewn. A pair of square blanks 4x4 centimeters are cut out, bent twice and stitched. Next on the turn is a clasp. Scatter two more squares of their fabric 4x4 cm, fold in half and sewn.
 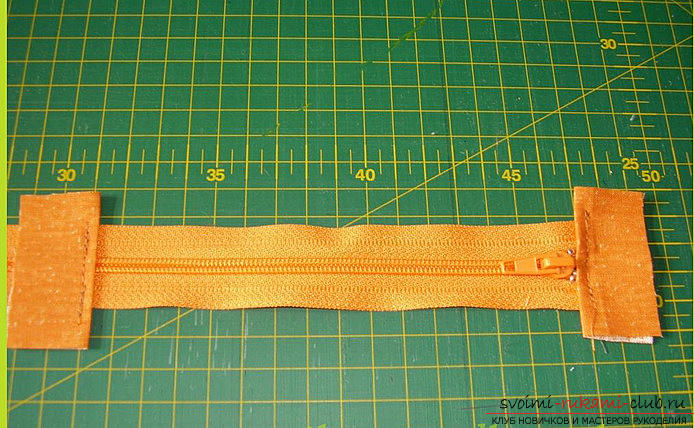 Lightning is sewn to one short side with a sewing machine, and to the other with hands.
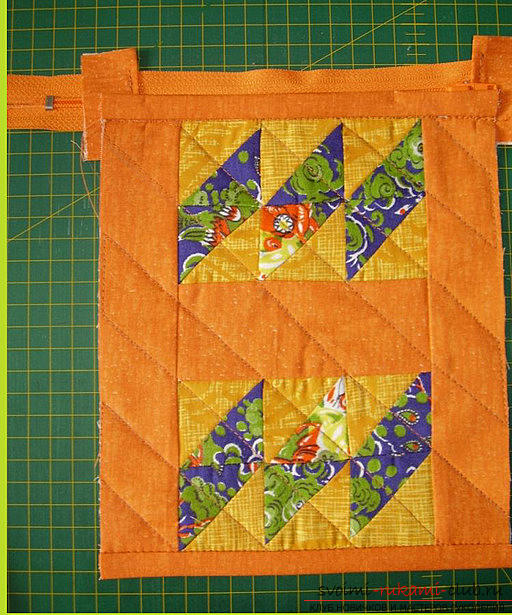
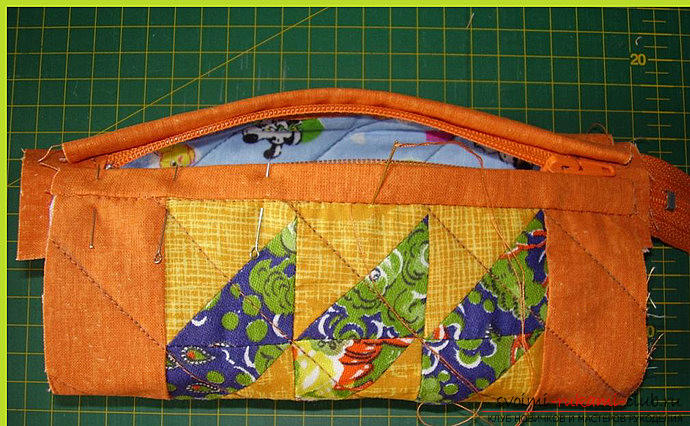 After the work done, this is an incomplete product.
 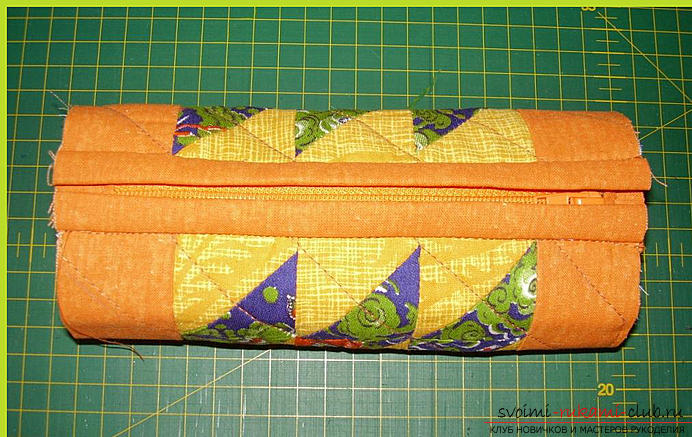 Now we need to work on the side elementspencil case. To do this, you need to cut three rectangular blanks. The size of these should be such that, after the stitching on a rectangular "sandwich", circles are placed, in an amount of 2 pieces, having a radius of 4 centimeters.
 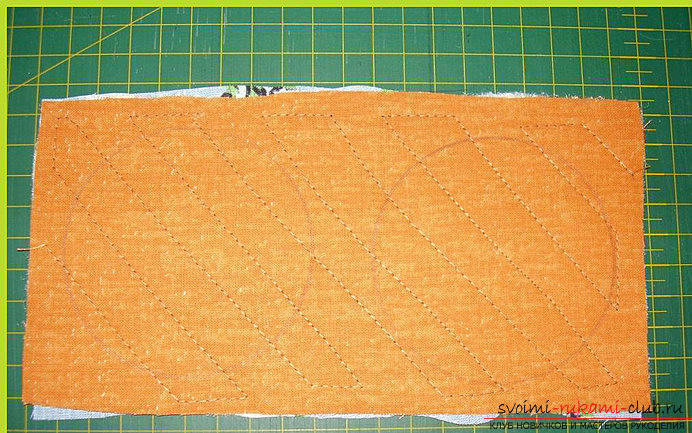 As a result, we have two round details having a diameter of 8 centimeters.
 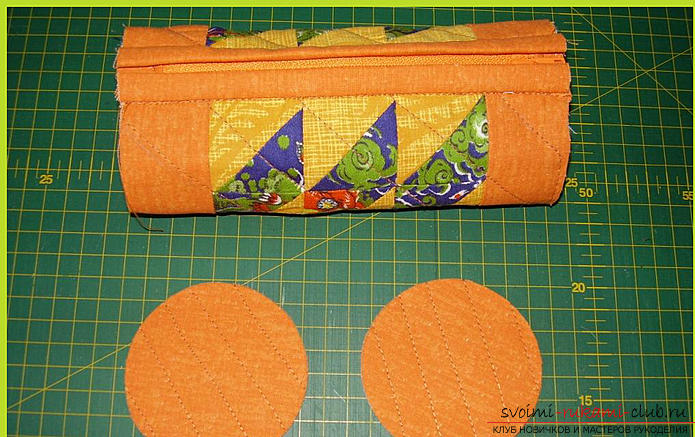 On each side of the pencil pins are pricked with the help of tailoring pins and hand-grinded.
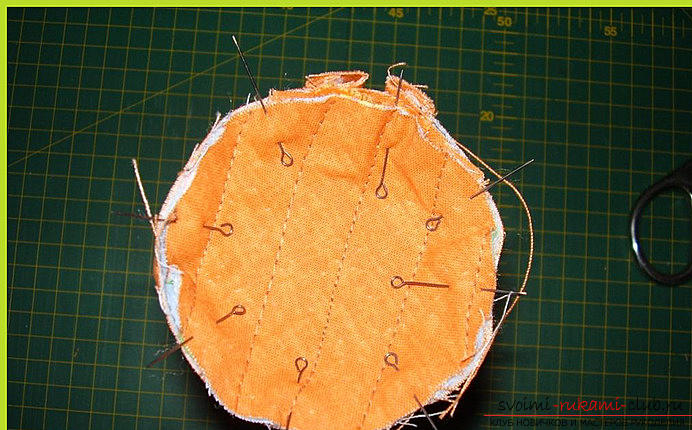
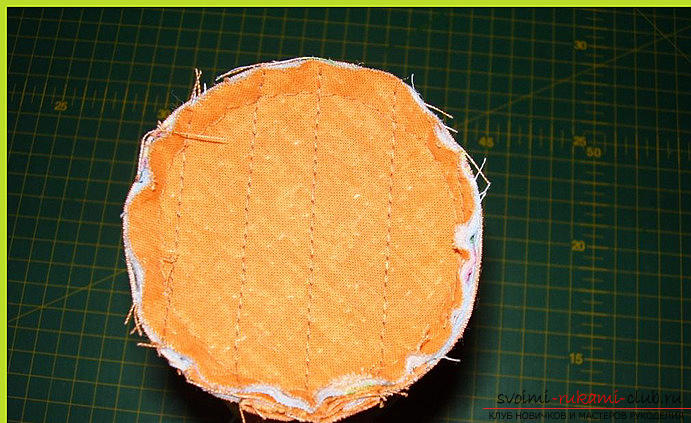 With the aid of an oblique bake, an open cut is processed on each side.
 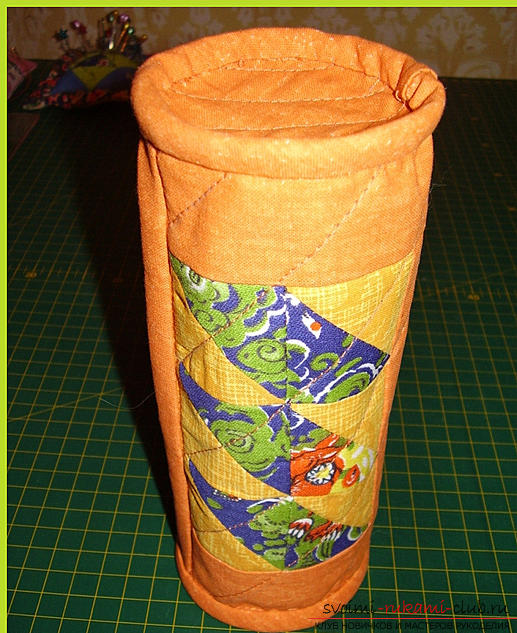 Now we can confidently say that the first exam for the ownership of the Japanese patchwork technique was handed over. It remains only to please their students!
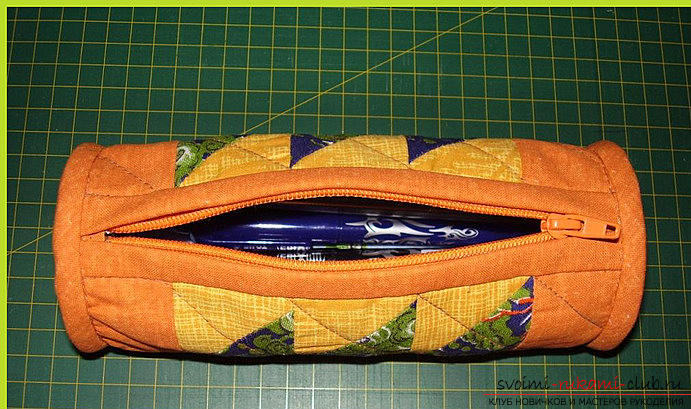
Comments
Related posts:
 Easy making of a Japanese bag of Omega in the style of Japanese patchwork is possible with a master class
 Self-made sewing of decorative pillowcases in patchwork style is a fascinating process
Self-made sewing of decorative pillowcases in patchwork style is a fascinating process
Self-made sewing of decorative pillowcases in patchwork style is a fascinating process
 Self-tailoring jeans shorts will not cause difficulties if you follow the instructions
 The pattern and sewing of growth dolls are within the power of all needlewomen, regardless of their experience in this direction