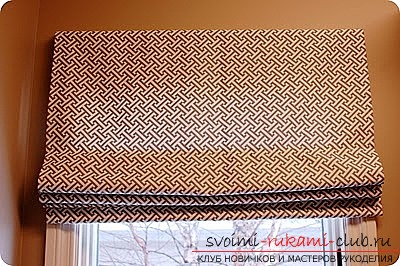
We sew simple but beautiful Roman curtains for the kitchen. Completely free of charge we make an excellent decoration by our own hands
Kitchen - the place where we spend just a lot of time. The process of cooking often takes us too much strength. Therefore it is very important that everything in this process is very conveniently balanced, nothing hindered, especially if your kitchen is located on the sunny side of the house. After all, too bright light not only interferes with the work and creating another culinary masterpiece, but it is also very harmful to health. Therefore, a reliable curtain, protecting from sunlight, an integral element of any kitchen. But what type of curtains is best for this task? The answer is obvious. Simple Roman curtains for the kitchen not only perfectly protect the room from scorching sun rays, but also perfectly fit into the interior. Simplicity of design and convenience in tailoring contribute to making such a curtain very easy with your own hands. Especially using the absolutely free advice of our site.
For tailoring Roman curtains you will need:
Step 1 To begin with, we measure the window and determinethe size of the supposed curtains. In width, add 10 cm to the length of 21.5 cm. Next, we cut the fabric for the lining and the base fabric. Then we straighten the main fabric face down and bend it to a width of 5 cm on the sides and below. We iron them and turn them around again. Then wrap the coals and also iron them. Again wrap the bottom and side edges, as shown in the photo below. As a result, you get a corner with a bevel of 45 degrees. 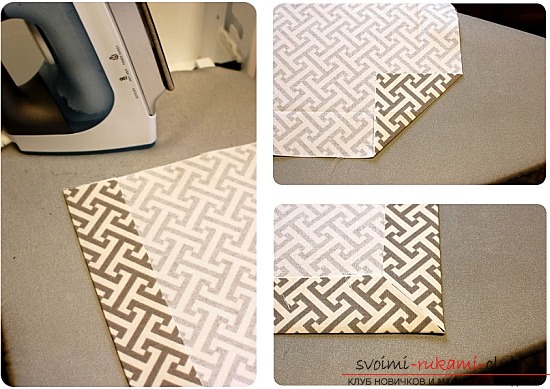 The same must be repeated from the cloth forlining. But the bends need to be made to a width of 6.25 cm. Step 2 Lay the fabric for the base face down on a flat surface. From above, now with the front side to the top we put the lining, having previously moved it upwards by 5 cm. We fasten both cloths using pins. Then sew on the bottom and side seams.
 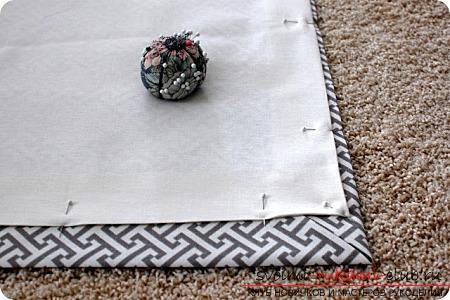 Step 3 The next step is to determinehow many folds will your curtains have and how far apart they will be placed. In order for your folds to look beautiful even in the assembled state, they should be located at a distance of about 20-30 cm. Next, determine where the lower stick-rod will be located. To do this, you need to determine how to fold relative to each other. The resulting number must be divided by 2 and added to it 1. So for example, if the distance between the folds is 20 cm. 20/2 + 1 = 11. Thus, the bottom stick-rod must be placed 11 cm from the bottom edge of the fabric. The top is very desirable to arrange with an indent about 25 cm from the top edge of the fabric. When you finish all calculations, make notes on the fabric where the rod sticks are to be installed.
 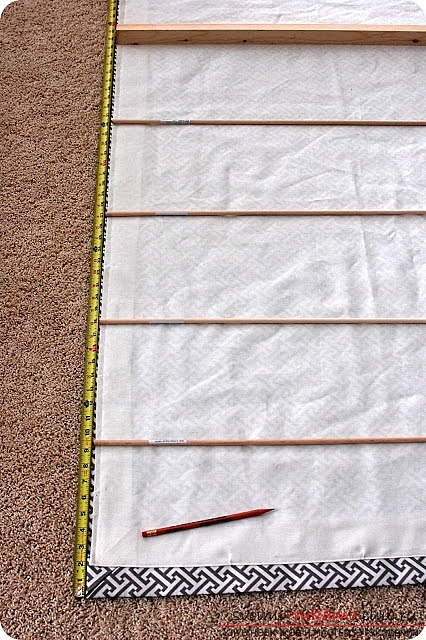 Step 4 The next step is to make the pocketsfor our terminals. To do this, cut a ribbon under each pocket of cotton fabric. The width should be 7.5 cm, the length should be the same with the length of the lining. We are smoothing in half and smoothing the crease. After bending the lapel 1.7 cm and also smooth. In places with marks we have our ribbons on the lining fabric. The lapel in 1.7 cm should be adjacent to the lining. Then we pin our ribbons with pins and sew the fabrics, at the same time we need to make a seam along the bottom edge.
 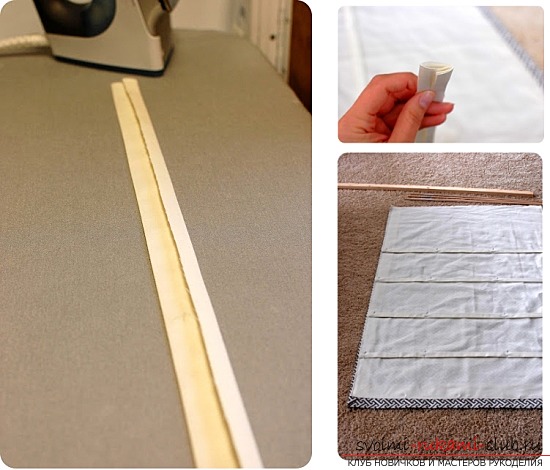 Step 5 Next, we file to the required lengthOur lower wooden trestle and stick-rods. Then we put it all in the pockets. The rail must be inserted into the pocket which is located in the lower edge of the curtain. Then sew three plastic rings to each rod. Two of them should be at the edges (about 5 cm from the edge), one should be located in the middle.
 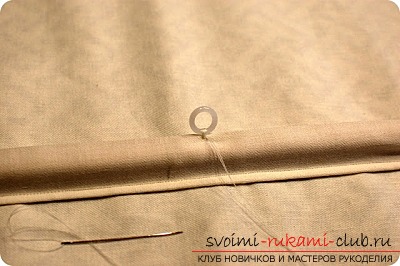 Cut the nylon cord into three equal pieces. The first end of the lace is tied to the lower left ring, then stretch the lace to the top of the curtains, alternately passing it through all the rings. The remaining two cords must be tied, respectively, to the center and right lower rings, and in the same way to extend through all the rings.
 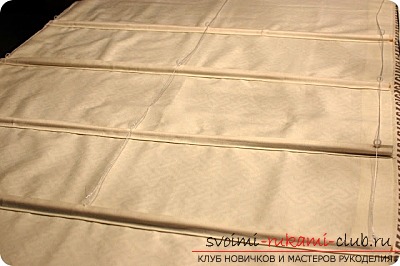 Step 6 The length of the finished curtain should beapproximately 1.5 cm more than the length of the top rail. The remains of the lining and main laths are wrapped in the top rail and fixed using a furniture stapler. On the rail we lay the finished curtain and pencil at the level of the plastic rings to make marks.
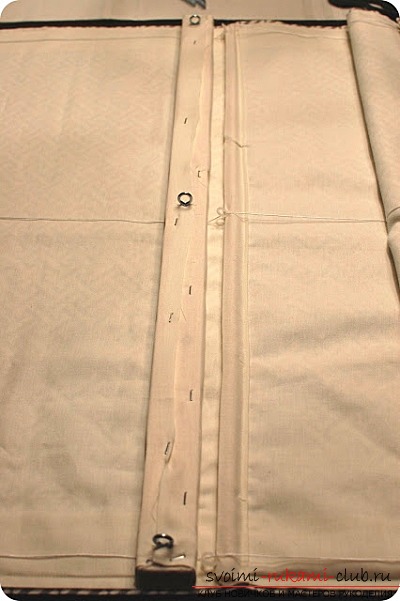
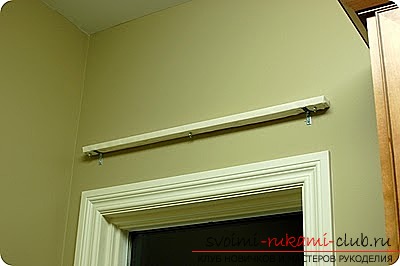 Then we screw in the marked places threehook with a ring and using metal corners we fix our rail above the window. Then attach a curtain to the rail and see if it suits you its length. If something does not fit - just shorten it. Do not forget to sew the upper edge. When you are satisfied with the dimensions, fasten the blind to the rail using a stapler.
 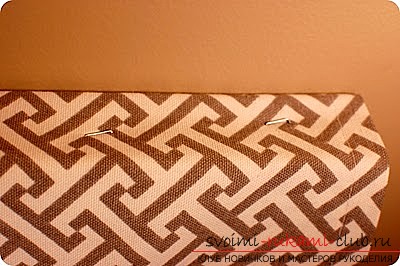 Step 7 We pass through the rings of hooks, which are screwed into the top rail, lace. The first cord will need to pass through all three rings, the next two, the last through one.
 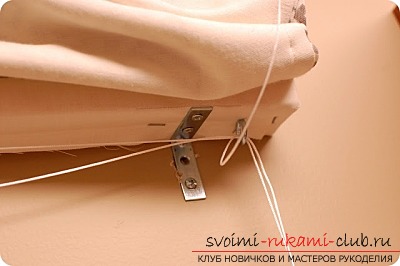 The last step is to screw a small fixing hook to the window frame. On it you in the further operation will fix the coiled cord to keep the blind in the assembled position. That's all a simple Roman curtain for the kitchen is ready! Thus, very quickly and easily using the materials and tools available to any hostess, you created a simple, but at the same time, a beautiful curtain for the kitchen. This new outfit of your interior will not only perfectly protect the room from sunlight and unwanted looks (you can even forget about the additional use of blinds), but it will perfectly fit into any design from the classics to the newfangled trends of 2014. Therefore, do not waste time in vain, use our advice and create a simple and original Roman curtain for the kitchen now. The result should be sure to share with other masters in the comments below. And let your kitchen become the most comfortable room for you for many years with the help of a new beautiful accessory!
Comments
Related posts:
 Roman blinds with their own hands on the strings
 We sew roll blinds with our own hands, detailed steps to create a roller shutter with a photo.
 We sew with our own hands a toy for flowers Ladybug of felt simple technique, original decoration of wildlife
 Completely free of charge and without difficulty we make the original Christmas tree with our own hands. A simple instruction with a lot of photos
 Simple and beautiful hairstyles on medium hair with their own hands with a description and a photo.