We sew with our own hands a comfortable, knitted children's hat for a pattern, taking into account the features of the fabric
Children's hats from stretching fabrics, as a rule,have the same size. Since they are made of knitwear, they stretch, while perfectly fitting the baby's head and protect from the cool wind. Therefore, when making a cap with the necessary dimensions, it should be remembered that it is necessary to make a hat shape smaller than the actual dimensions of the baby's head. Since the hat is stretched, then, the seam on the side will fit the child's head in a beautiful way. 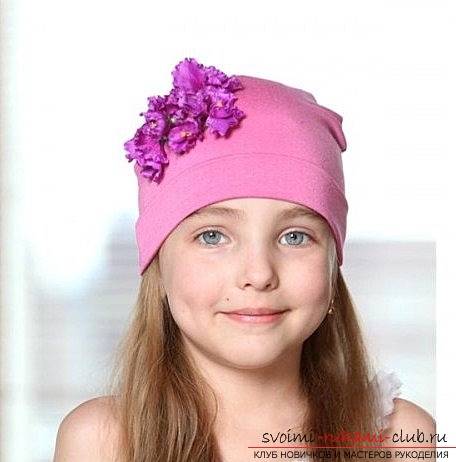 Initially, it is necessary that the fabric from whichwill be sewn baby cap, was washed, so that, in case of shrinkage, the hat does not become unexpectedly small to the child. Today we will talk about how to sew an original hat for a girl. So, let's get started! Cap for a girl
  For the template can serve as a used baby cap. It is necessary to fold the fabric in half and circumnavigate the cap. After that, lower about 6 mm from different sides.
  After this, you need to cut out the contour of the nurseryhats with allowances for seams. After that, a rectangle with a height of about thirteen centimeters and a width of thirty-six centimeters is cut out, using the same fabric as for the cap. It is necessary to pay attention to the fact that the fabric could stretch in different directions, that is, horizontally, and not vertically.
 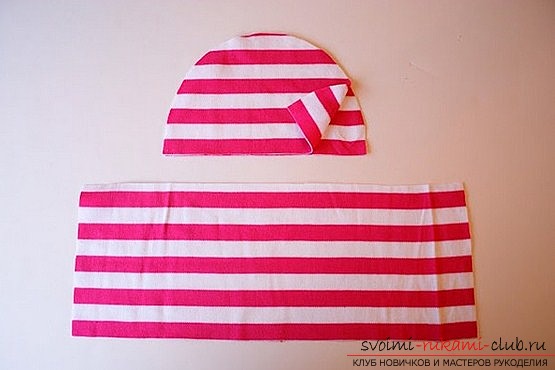 After that, both parts of the head are foldedinward by the front side and stitched on the typewriter along the arc line. In doing so, use an overlock. In the same way, a rectangle is formed and stitched on one side.
 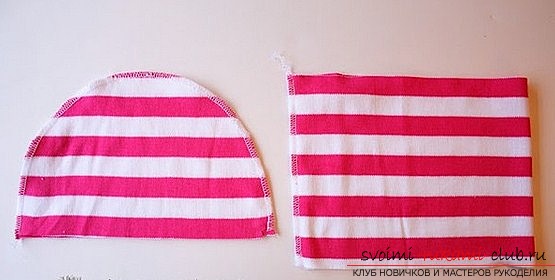 The rectangle is turned to the front andfolds in half. After that, the same rectangle is inserted into the main part of the header. The edges of the rectangle and the edges of the children's cap are compared, then fixed with pins. It is necessary to pay attention to the fact that the cap has been turned inside out.
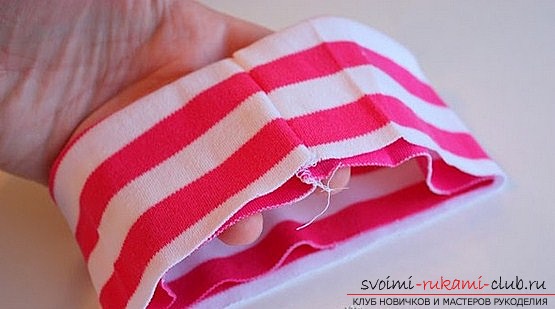
 Then, the both parts of the cap are sewn together. The cap is turned to the front side, while the seam should be inside. The seams of the beads are pressed together. The edges of the cap are fixed, in order to get a lapel.
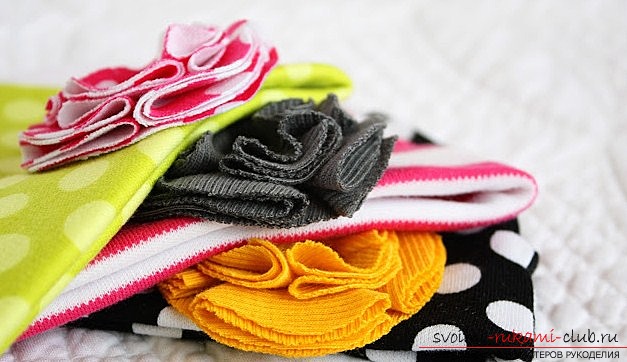
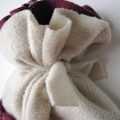
  Now you can start decorating the cap,to give its originality. To this end, cut out five circles with a large size and four with a smaller size. Large mugs are initially used. They fold in half, then in half. The same principle is used for the other three circles. After all four mugs are ready, they are sewn to the fifth mug, which is the base.

 In the same way they do the restfour circles of smaller size. They are sewn in such a way that the folds of the first row with the circles are closed. Thus, the flower appears in the completed form. Such a glamorous flower is sewn to the children's cap.
 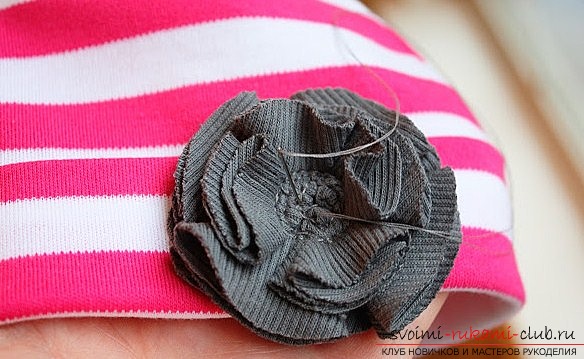 That's all! Our cute knitted hat is ready for the girl!
Comments
Related posts:
 How to sew a cute baby hat from fleece for a pattern. Step-by-step description of the necessary actions
 How to sew a cute baby bag in the form of a lion. An original bag made of cloth will certainly please a small fashionista. Sew it is not difficult with your own hands
 How to carve a children's cap from fleece, you can learn by reading the materials of this article
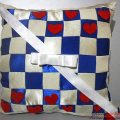 We sew a pillow from the patches with our own hands for Valentine's Day with our own hands in patchwork technique
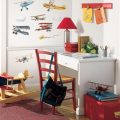 How to decorate a nursery with your own hands.