Embroider your own hands with pictures of beads will help you with affordable schemes of future products
How to embroider with your own hands pictures of beads -an urgent issue for today. Among the many types of needlework, popular and not very, this technique of creating decor elements occupies a significant enough niche. Despite the laboriousness of the work process, the result is worth it. So the person is arranged, that it attracts all the most beautiful and attractive. This applies to the exterior, and the surrounding world, and to the house in which he lives. The best way to create coziness and comfort is to learn to create unique things yourself, regardless of their destination. One of these skills is the embroidery, namely the beadwork of pictures. Embroidery was given a special place in society since ancient times. It was decorated with household items, clothing items and, even, shoes, it was indispensable for creating an interior in living quarters. Today we will talk about a very interesting and time-consuming process - beadwork painting by our own hands. What we need to work. To get started, we need:
- canvas (the canvas on which our picture will be created) - maybe with a pattern printed or not;
- threads for securing beads;
- scissors;
- Beads of different color shades, but the same in size and shape;
- containers for beads (you can take plastic or cardboard).
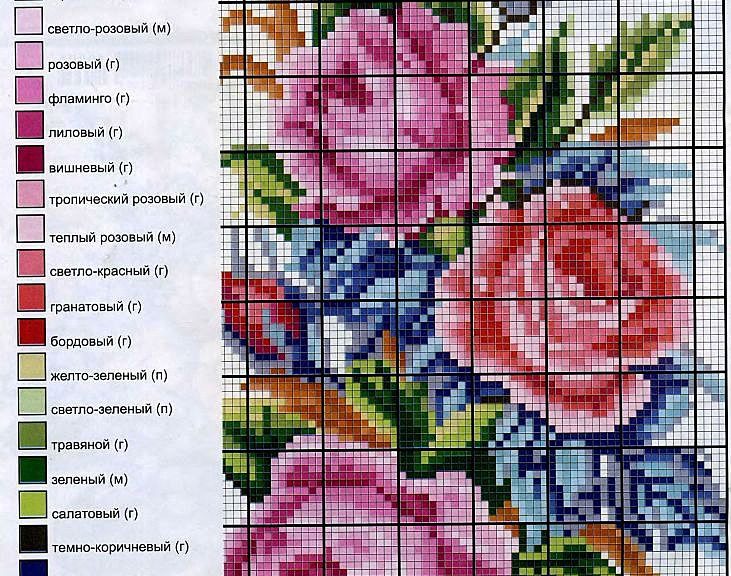
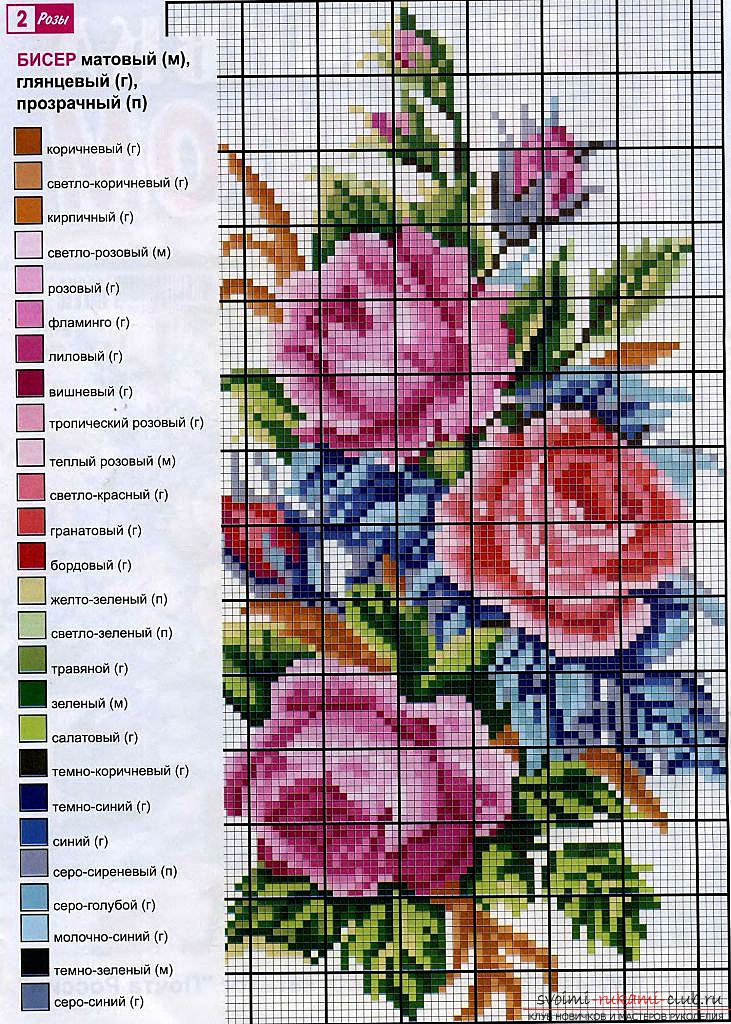
Important. Beginner craftsmen should pay attention to simpler schemes, small in size, using a minimum number of shades of beads. So it will be easier to get a hand and work with more complex products in the future will not cause any difficulties. Below in the photo are presented several such simple schemes. 
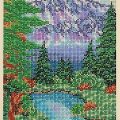
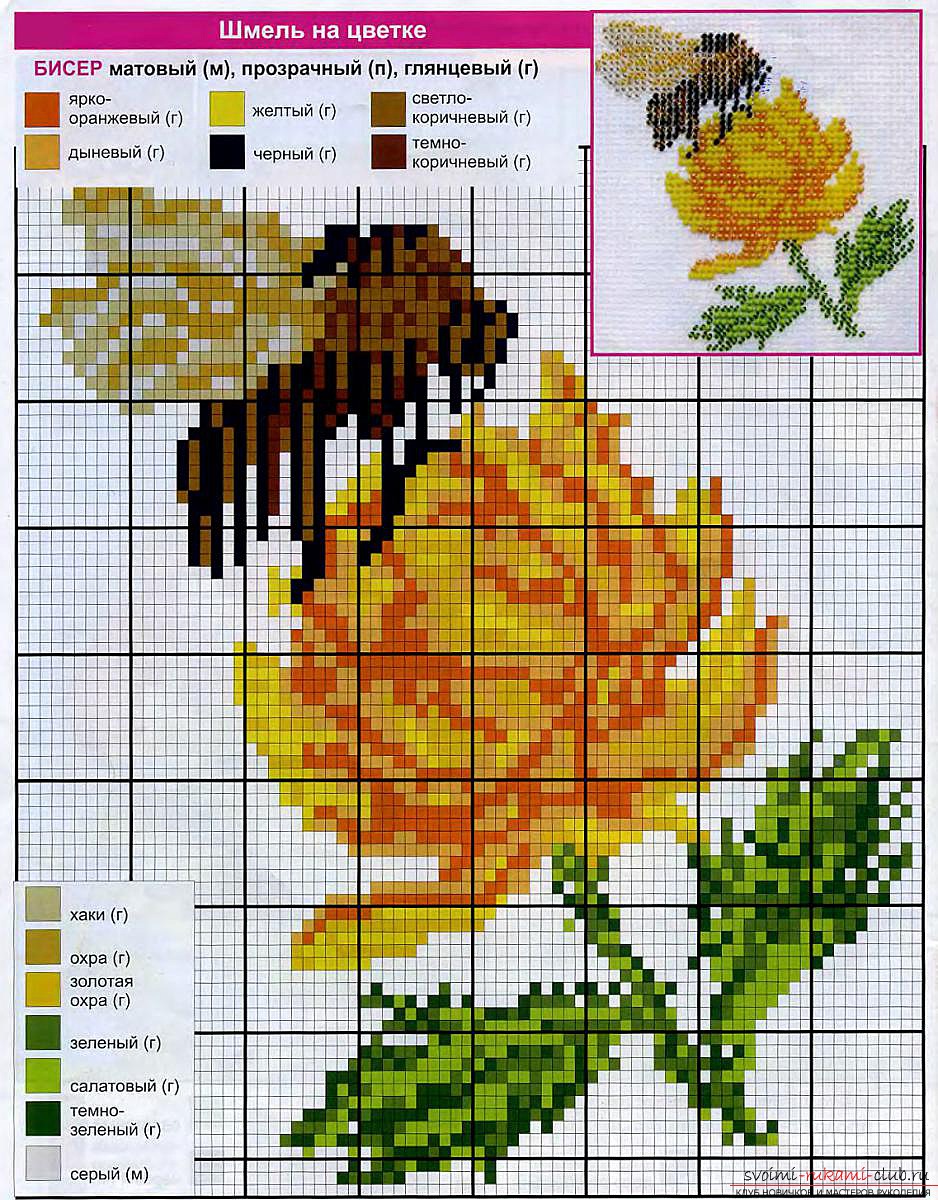 Let's start embroidery with beads. In order toembroider your own picture, you need to learn to read the picture from the proposed scheme. One square on it means one bead. For convenience, you can divide the working cloth into squares - 10 cells x by 10 cells. It should also be remembered that some individual beads may not meet the requirements (have any defect). So you have to stock up a lot of them, just in case. If it is difficult at first to count the cells, get the canvas already with the drawing on it. This will greatly facilitate your workflow. Embroider horizontal or vertical rows, alternately sewing each individual bead. To ensure that the working thread is securely fastened, an ordinary knot must be tied at its end. You can face such a phenomenon as too large cells of the canvas. In this case, tie two nodules. Now you can safely proceed to further action. As a rule, we start with the upper left cell of the selected figure. In the first cage securely fasten the thread with a few small stitches and here we sew the first bead. Gradually, under your needle a beautiful image will appear. In the case when the working thread ends (it remains, approximately, centimeters 10), it is necessary to fix it from the wrong side under the formed stitches and tie a small knot at the end. A little more effort and you will be able to enjoy the amazing result. Ideas for embroidering paintings by yourself you can see below in the photo.
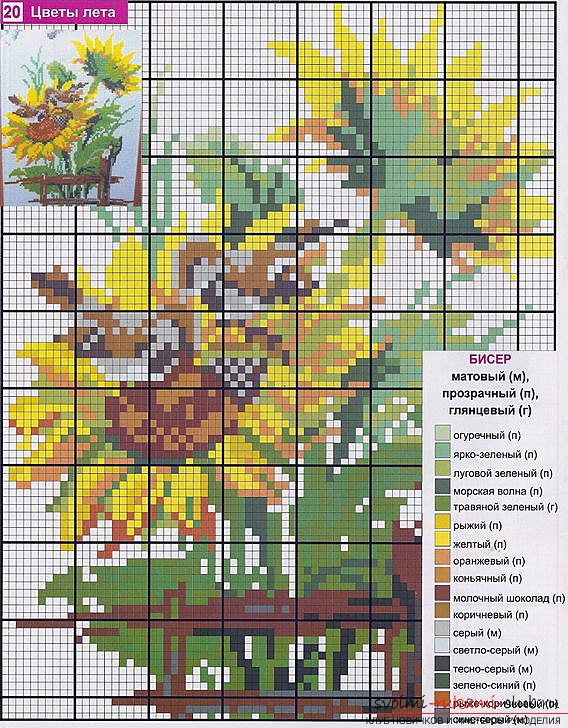
Comments
Related posts:
 Embroider a beautiful butterfly smoothly on one of the elements of clothing or as a pattern help scheme
 A lesson in the history of making a picture of beads. Materials and available advice is free.
 How to make a tree of beads with your own hands? Schemes and a master class for work
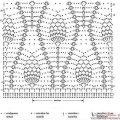 Diagrams and description of knitting by hand with various products by hook pattern "Pineapple"
 Owl made of beads by own hands (photos and diagrams)