A simple and affordable scheme and description of the "Shashechki" block will help in the work in the patchwork technique
Scheme and description of the block "Checkers" likeExperienced needlewomen, and skilled beginners, those who have just started to master the technique of patchwork (patchwork). There are both simple and complex versions of this block, but their principle remains the same. this kind of blocks is actual practically at tailoring of all products without exception and is one of the most popular. Patchwork is an amazing kind of sewing skill that has been used since ancient times. For centuries, craftsmen have created real masterpieces, beautiful objects of interior and exterior, clothes, household items from ordinary rags, remnants of matter or old things. There are many different schemes for manufacturing individual blocks, of which then one or another product is sewn. One of the most simple and well-known is the "Shashechki" block. That's what we'll talk about in our today's article. The scheme and description of the block "Shashechki" is quite simple. There are several types of these blocks. In this article, we will only talk about some of them. This patchwork block has several names. Among the most common: "Chess", "2 x 2 squares," "4 squares," and many others. In the article we will consider two block diagrams - "Checkers", as well as "Double checkers". How to assemble a block of tissue squares "Checkers" The components of this block are four identical in size square cloth flaps. They can have two, three, four different colors. The choice of the color range of the flaps depends entirely on the personal preferences of the master.  How to cut the material To make it more convenientto cut elements of blocks, it is best to make a template. Although it is possible to carve out squares in random order. We need to find two pairs of absolutely identical in shape and size flaps (squares). Then we cut them out and add them to the block.
 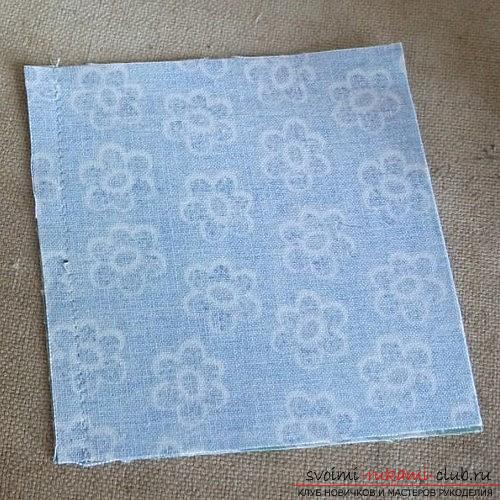 Assembling from individual parts of the unit Initiallyyou need to put together the two elements of the upper part, the square. Face their sides should be directed inwards. The edges of them are combined. We spend one side. The allowance should be six millimeters. Using an iron, iron the seam well towards the square with a darker color. By the same principle, we also sew the two lower pieces of a square shape. Both details, upper and lower, are folded with faces so that the seams are well aligned and chipped, fixing them together. We spend on the machine, leaving an allowance of six millimeters.
 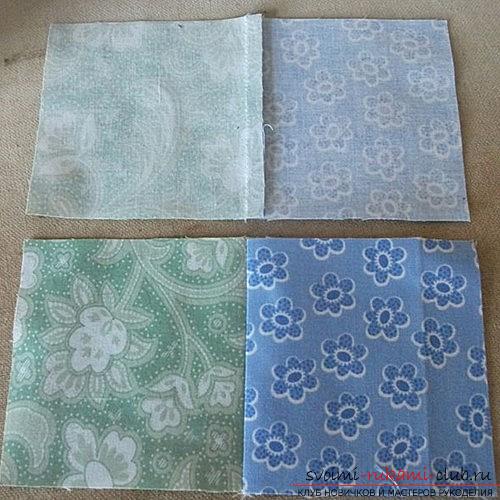 All the seams are well ironed. How to assemble the block "Double checkers"
  This block make up four squares enoughlarge sizes. Two of them are integral, and two consist of four small squares. Large monochromatic squares are located in the block along the diagonal, similar to the arrangement and squares consisting of small squares. We need to find two identical square shreds, the size of which is A + 12 millimeters, where 12 mm is the allowance for seams (six millimeters) around the perimeter, and also eight small squares. Each of them is the fourth part of the square. To compose each of the large squares, you can apply several color solutions (more than two). The more color shades, the more saturated, brighter will be the large square itself.
 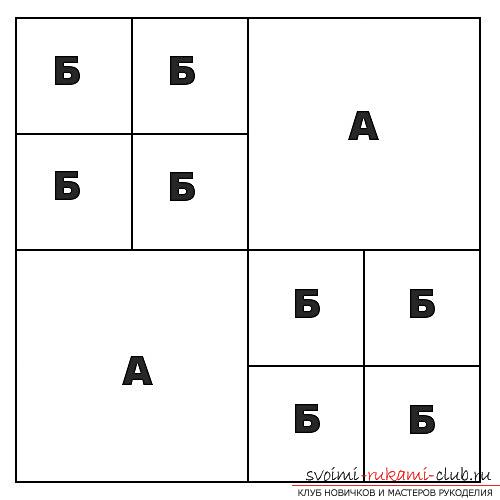 After all the elements of the block areprepared, they need to be put together in an appropriate form. Initially, small squares form large ones. We do this, according to the scheme "Shashechki", about which we spoke earlier.
 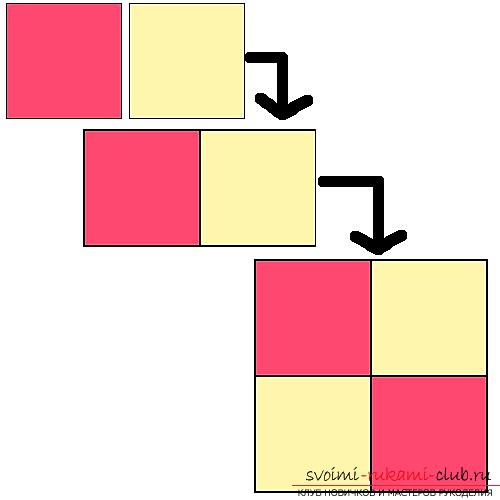 When these squares are ready, let's makethe layout of all the details on the pattern. First we take two squares for the top part of the block, the whole and composed of small squares, and we put them inside the faces. Compatible edges of parts and fix them with each other with the help of sewing pins. We spend, leaving the allowance for the seam six millimeters. We will press the seams in the direction of the large square.
 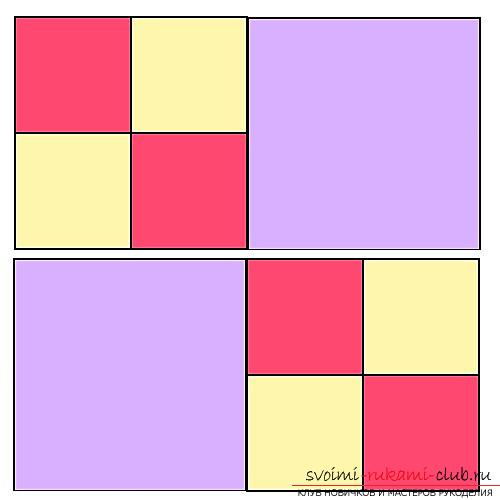 In the same sequence we carry out andassembling two squares of the bottom of the block. After that, the two parts, the lower and the upper, we combine with each other and shear, connecting them together. We attach two parts to the machine, leaving a seam allowance of six millimeters. The seam, as in the previous cases, is carefully ironed.
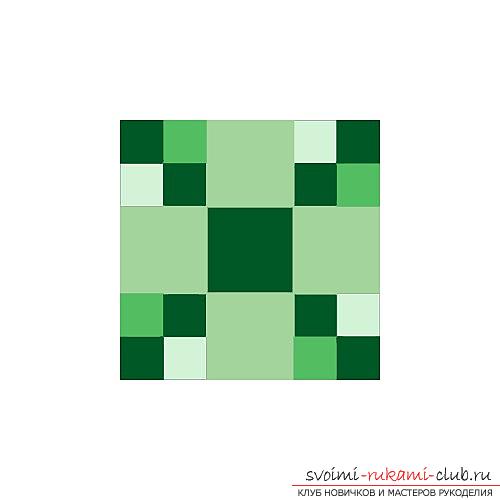
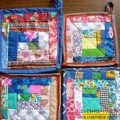
 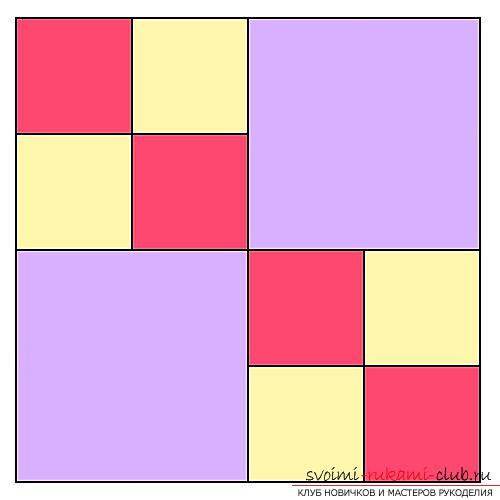 Important. Carefully ensure that the squares are located according to the pattern of the block being created. Block "Shashechki" is also called "2 x 2 squares" and is one of the first patchwork patterns invented by needlewomen. Block "Double checkers" is a complicated version of the previous pattern and consists of two solid squares of large sizes and two similar sized squares consisting of four small ones. In the photo below, we see another version of the block "Shashechki" called "Thrift". It consists, as in other cases, of different squares, larger integral and composite. Only in this case the squares are somewhat larger - not four, but nine pieces. The scheme and description of the block "Shashechki" will help each needlewoman to easily sew a beautiful product with an interesting pattern.
Comments
Related posts:
 Easy sewing stitches in the patchwork technique for beginners, help to get skills
 Bedspread in the technique of patchwork, patchwork and patchwork for beginners
 Rug in patchwork technique, patchwork and patchwork for beginners
 The process of knitting on the needle patterns of dog rose. A simple scheme for beginners to knit on knitting needles will help to tie beautiful things with a dog rose pattern
 Decorative and applied art, the technique of patchwork sewing is simple and accessible to everyone