A simple lesson drawing 3d images for beginners will help you master this technique
The lesson of drawing a 3d image for beginners givesthe opportunity to obtain general information about this technique, to familiarize yourself with the principles and rules. You can find out which pencil should be used and on which paper it is best to draw. And, of course, you can learn how to draw the simplest geometric figure, making it three-dimensional. It's no secret that anyone can draw absolutely anyone, even if he does not have any special abilities for this kind of creativity. Moreover, you can learn to work in any technique. Today we will talk about the technique of 3d drawings, which have recently become very popular in all countries of the world. They attract attention, evoke admiration from observers. Such drawings can be found practically in any places - on asphalt, houses, on paper and so on. To learn how to depict various objects and objects in this technique, you need to know certain rules and principles of work. Today's our lesson of drawing a 3d image for beginners is devoted to the image of three-dimensional drawings on paper. Thanks to him, you can try to depict something in this technique on your own, and in the future, perhaps, draw a real picture.  The basic rules of working on 3d drawing. To draw a drawing in this technique, first of all, you need to create a sketch. The sketch implies an exact plan with the designation of objects on it, each of which has a clearly assigned place, and each of them is given its own form. After this, it is necessary to determine the light source relative to all the objects that will be displayed, if this is a plural or one object in case the drawing will consist of a specific object. This approach is necessary in order to ensure the correct construction of the shadow of objects.
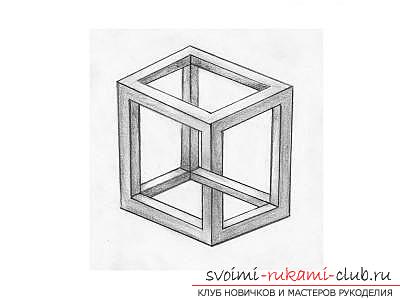
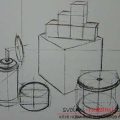
  It should be remembered that those items thatare drawn closer to the light source, should be lighter. The farther from the light source the object is drawn, the darker it should be. The next step in the work are the shadows, their drawing. Many painters working in the technique of 3d drawing noticed the fact that the shadows in the drawings should be drawn in several stages (layers). Initially, it is necessary to make inexpressive sketches, and only then add a darkening, the intensity of which depends solely on the creator's vision. It is very important when drawing in this technique to choose the right tool and material for work. As a tool, in this case, we use a pencil. Ideally, you need to use a soft pencil. The softer it is, the easier it is to work with shadows. The transition from dark tones to light tones will be unobtrusive and more realistic. To achieve this effect, it is only necessary to change the intensity of the pressure of the pencil itself on the paper. To make the drawing as close to reality as possible, we must make the shadow fuzzy, a little vague, without clearly visible induced lines. To get a secondary light, use a regular eraser. Equally important is the quality of the paper on which we will depict our objects. More experienced artists recommend for work to take a glossy white paper with good density. Naturally, the first time you do not get a professional 3d drawing. This requires a lot of time, patience and training to get all the necessary skills. We recommend starting with the simplest - a three-dimensional image of a simple simple geometric body. Even if you can not do it right away, do not be discouraged. Just practice and you will succeed. Be sure to pay attention to the object that you are going to draw, namely its lighting, shape and, of course, volume. This image is a three-dimensional illusion, achieved due to the volume of the object, which is explained precisely by the presence of properly located and traced shadows. So that you can practice and independently try to draw a three-dimensional geometric figure, we suggest you draw an interesting cube with an illusion. Below in the pictures you can see a detailed outline of his drawing. First, we draw a cube (three-dimensional). Inside each of the three sides that we see, we need to draw faces.
 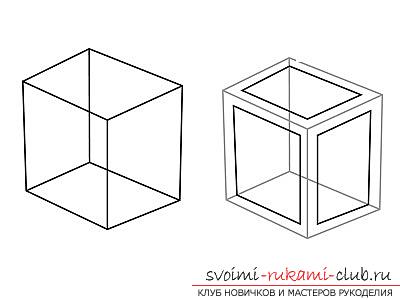 In the second drawing we will draw the faces that are inside the figure.
  Red color, which you see on the followingfigure, the lines that we need to delete are marked. Now we'll draw all the remaining lines with a pencil, making them more saturated. It remains to add shadows to our object and the 3d image can be considered complete. We hope our lesson helped you in your work.
Comments
Related posts:
 Master-class on embroidery of a small picture with beads will help to master this technique of needlework
 The basic lesson of step-by-step drawing will allow you to master a simple technique of drawing with a pencil
 Uncomplicated step-by-step drawing of the sea depths with the help of gouache will help master this technique of painting
Uncomplicated step-by-step drawing of the sea depths and their inhabitants with the help of gouache will help to master this technique of painting
Uncomplicated step-by-step drawing of the sea depths with the help of gouache will help master this technique of painting
Uncomplicated step-by-step drawing of the sea depths and their inhabitants with the help of gouache will help to master this technique of painting
 A detailed lesson of drawing a sea wave will help you learn how to draw constantly moving objects