Easy sewing stitches in the patchwork technique for beginners, help to get skills
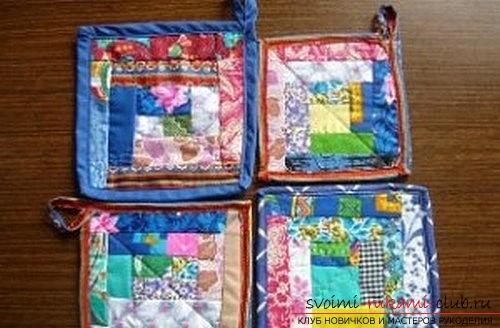
Sewing potholders in the technique of patchwork for beginners -it's an excellent option to make by yourself the beautiful, necessary in every home, thing without much effort and learn how to work with different materials. For tailoring products suitable pieces of different materials, which you can find in your home without difficulty. Ideally, old, unnecessary things will do. It takes a long time to complete the work, only your desire. Among a huge number of ways to do something with your own hands, sewing deserves special attention. Thanks to this kind of needlework, you can create excellent details of interior and decor, unique items of everyday use, completely renew your wardrobe and wardrobe of your loved ones. The result will not only be a new beautiful thing, but also exclusive and economical. A separate sewing technique, which can not but interest the needlewomen, is patchwork or the technique of patchwork sewing. Each housewife in the arsenal must find the remains of cloth or old unnecessary things that may become in the future an excellent product, including an element of clothing. Beginning seamstresses will be difficult to immediately work with a large complex thing. Therefore, we offer you in today's article sewing stitches in the technique of patchwork for beginners. Such a stitch will become a real decoration of the kitchen and a practical subject for the hostess. Before we get to work, we need to take the scheme of the product. In the picture we see that the potholder consists of different sizes of rectangles. They symbolize tissue shreds. We need pieces of fabric of exactly this size and in the same quantity as in the diagram. We also need materials from which we will sew stitches.
- Scraps of different cloth.
- The segment of non-woven squares is square, the size of the square is 20 x 20 centimeters.
- Ninety centimeters of ribbon.
- A piece of drape similar to a piece of non-woven fleece.
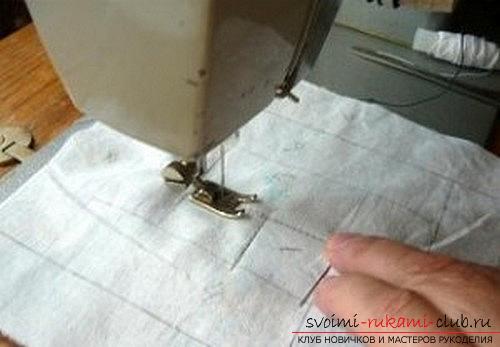
To begin with, we need to transfer the scheme tonon-woven fabric (from the wrong side of it). To correctly transfer the sketch, you need to start from the edge of the fabric. In order to make it easier to work afterwards, you must necessarily number the rectangles on the fabric exactly as it was done on the circuit itself. Now proceed to sewing. Unlike drawing a sketch, we will start sewing from the very center of the square. We put the liking shred in the center, the place where, according to the scheme, we drew the central element (square). Take the sewing pins and fix it on the canvas. From the wrong side, it will look like this picture.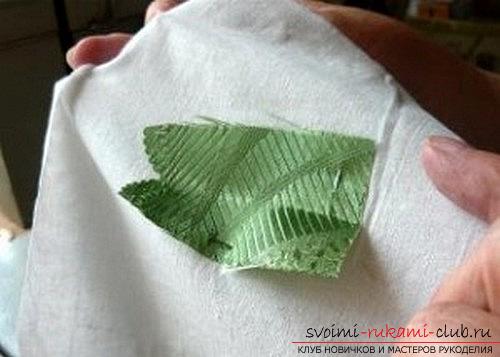 Now take the next piece of fabric, preferably the color to choose in contrast to the previous one. And already attached and the second patch is applied to each other facings.
 Straighten both rectangles on the adjacent side.
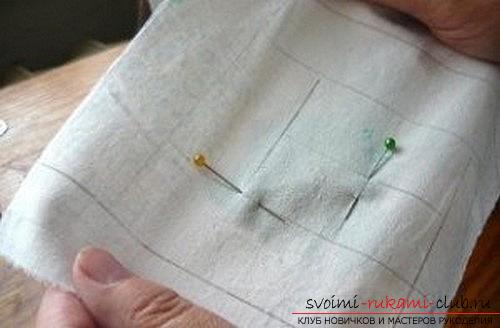
 Turn the product over to the front side, bend the second rectangle and smooth the seam with an iron or we use it, for example, with scissors.
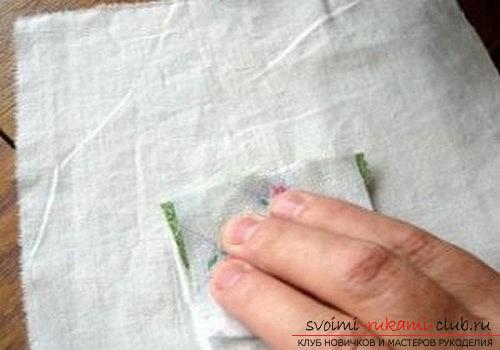 We take one more scrap of cloth and put it on the front side to the next rectangle. We prick it with sewing pins and we add it. Smooth as in the previous case.
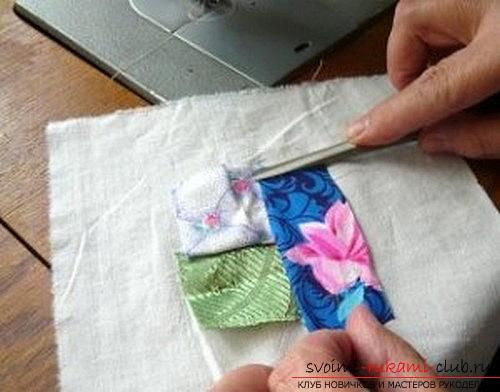 All the same we do in turn and with the remaining pieces until all the details have been sewn.
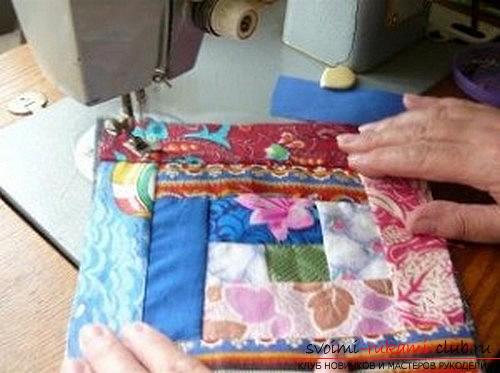 The first part of the work we successfully accomplished. We will proceed to the second half. We apply the detail with the decor already to the previously prepared square of the drape. We need to attach the front side of the product (square with colored scraps) to the drape. Doing this we will be a figured seam, which one decide for yourself. Ideally, you need to stitch it diagonally twice.
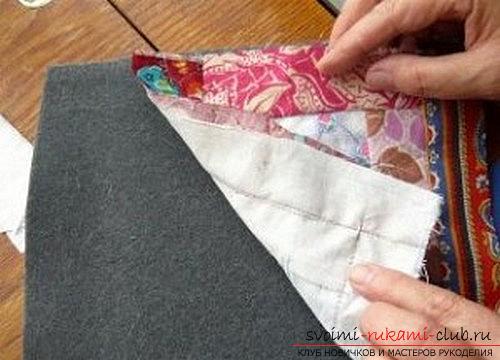 The tack is almost ready. It remains for us to make a fringing. As a fringing we have a braid or ribbon made of any material.
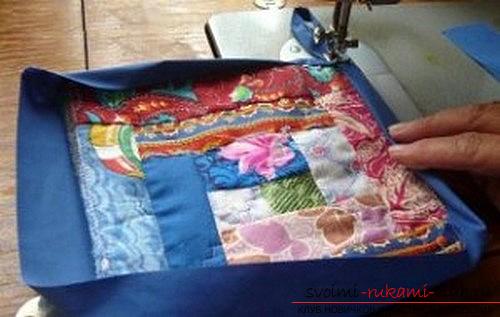 To begin with, we sew it from the back. Then, let's sew from the front part. A small stroke - do not forget to make an eyelet for potholders. Sewing potholders in patchwork technique for beginnershas come to its end. We offered you one of the easiest ways of sewing this necessary thing in the household. We hope that our lesson will help you in your work.
Comments
Related posts:
 Bedspread in the technique of patchwork, patchwork and patchwork for beginners
 Rug in patchwork technique, patchwork and patchwork for beginners
 How to sew pillows. Sewing for beginners
 Uncomplicated sewing of a pillow-owl with your own hands will please both an experienced craftsman and a beginner
 Uncomplicated step-by-step drawing of the sea depths and their inhabitants with the help of gouache will help to master this technique of painting