Small pencil case (crochet)
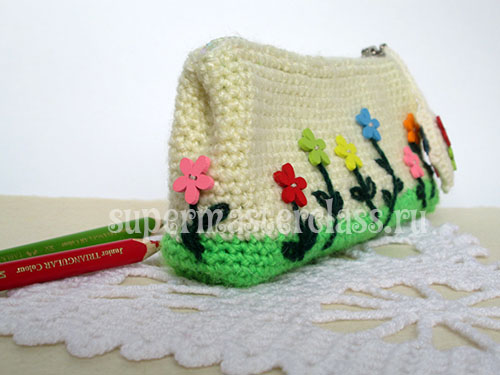
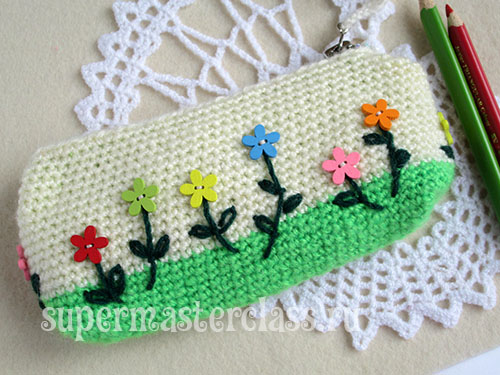
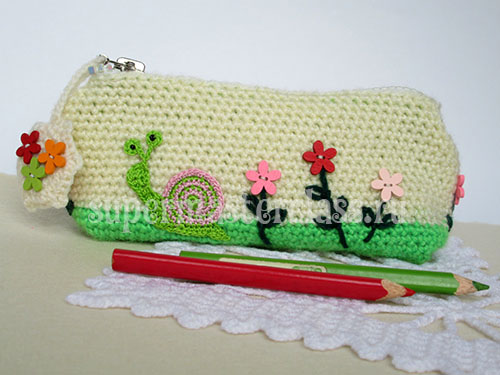
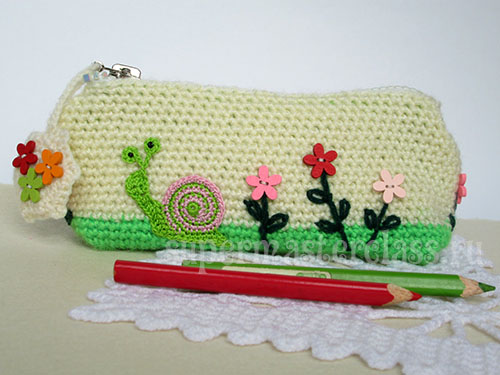 Once we have already told you, "Cat" ortoday and in fact playing the role of a school pencil case. But for colored pencils I wanted to make a special case that encourages a child to be creative. And, of course, a bit like simple children's drawings. So this small pencil case, crocheted, and then decorated with buttons-flowers and appliqué-snail was born.
To link such a pencil case, you will need:
yarn of the same quality in two different colors -green and white or cream (we have acrylic 400 m per 100 g); suitable size hook; wooden or plastic buttons in the form of flowers of different colors; dark green yarn for embroidery; yarn and crochet hook (if you decide to make a pencil case with it); short one-piece zipper for fastener; sewing thread to match the light yarn; embroidery needle (if necessary); light knitwear for lining; scissors; ruler; tailor pins.
Small crochet pencil case: job description
Knitting a pencil case From green yarn we knit a chain fromair loops equal to the length of the finished canister plus the desired width of the end. We have short pencils in a set, so the length of the pencil case is 15 cm, and the width of the end is 2 cm. In total, we first knit a chain 15 + 2 = 17 cm long. 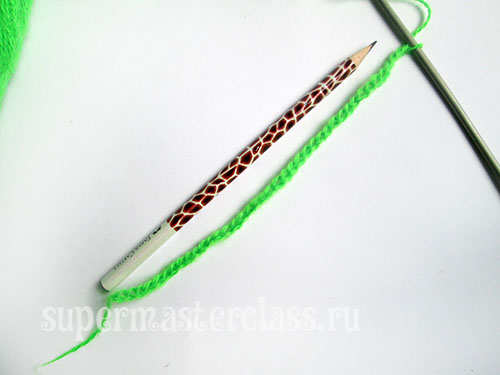 We knit a series of single crochets along the chain, capturing only one half of each air loop.
 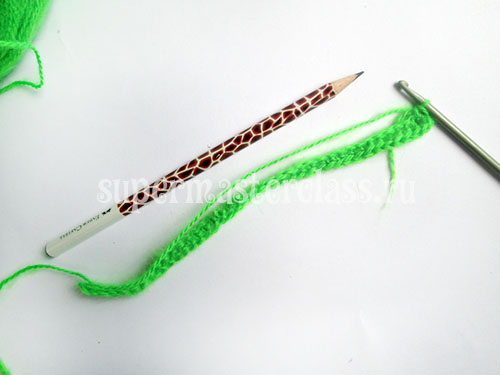 In the last air loop do 3 tbsp. without nakida
  After that we continue knitting on the second part of the chain of air loops, thus closing the first circular row.
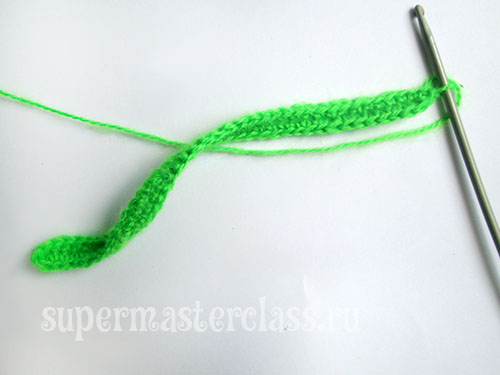
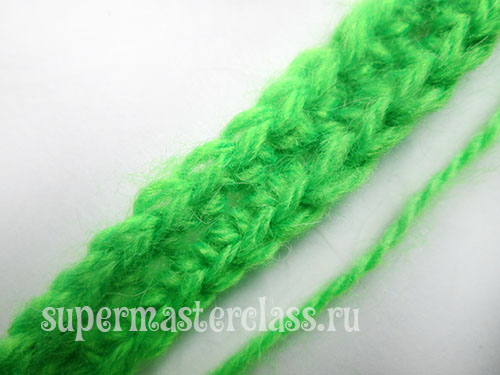 We continue to knit green yarn columns without nakid in a circle without increments and decreases. I got 7 rows, but you can make a green part of a crocheted pencil case for pencils and higher.
 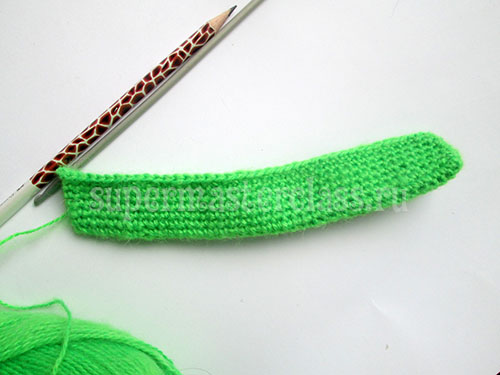 Then we change the green yarn to beige or white and continue to knit up to the desired size of the case.
 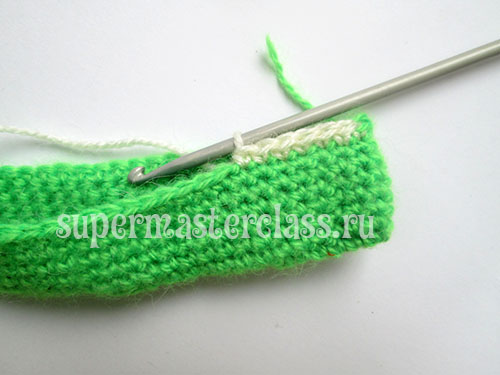 The height of the knitted part (both green and white)we calculate by the formula: the desired height of the canister plus half the width of the bottom (or end). If, as in our case, you have an end width of 2 cm, then we add 1 cm to the desired height of the finished canister.
 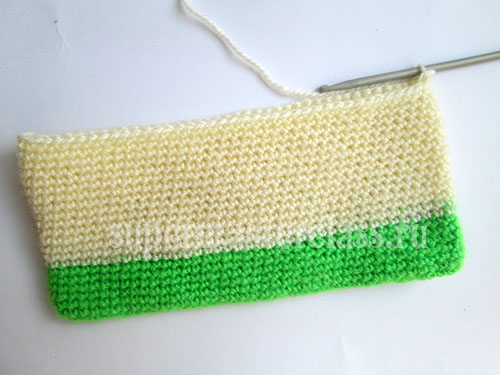 The last row is closed deaf loop threadfasten and trim, and tip the tip on the wrong side. Decorating the front part of a crocheted pencil case for pencils. We embroider stems and leaves of flowers in dark green yarn. Let them be different lengths and located at different angles - so interesting. Then sew flowers-buttons, covering the upper part of the stem.
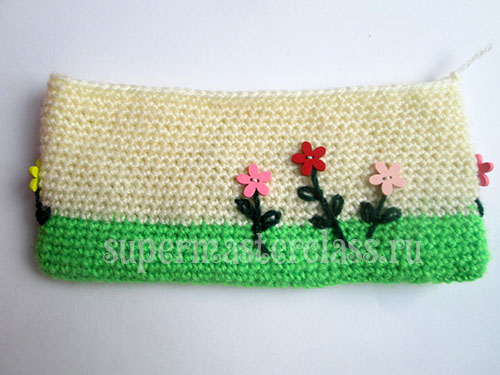
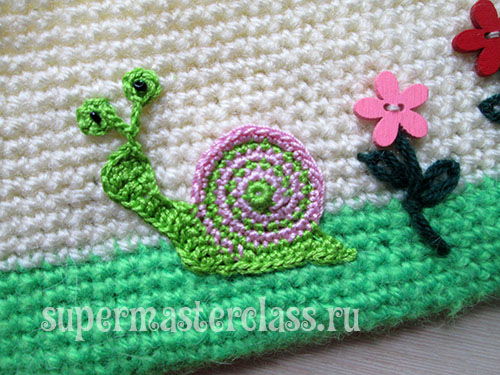
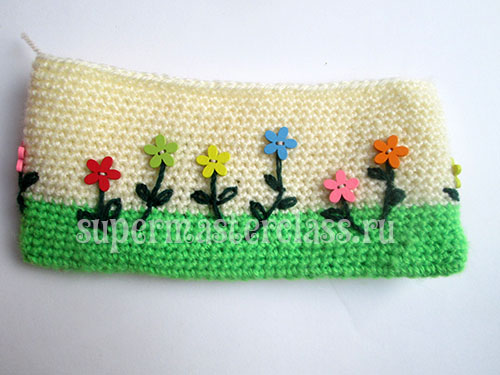 As you can see in the photo, we left part of the case withoutflowers - knitted appliqué will be sewn there. We tied the snail out of my head and did not guess the chart. However, there are a million variants of knitted appliqué schemes, and you can easily find the one that suits you. For some, it will be a bunny, someone is nicer than a butterfly, and in our case a knitted snail settled on the pencil case.
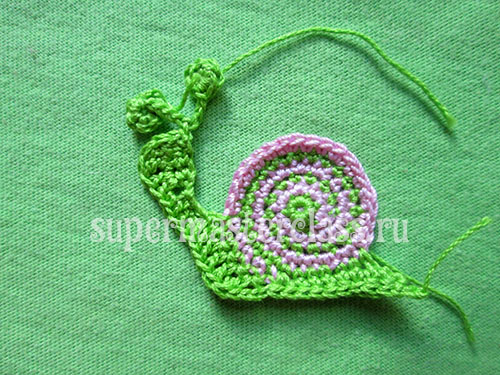
 Lining and zippercase: height and width. From a soft knit fabric (or any other) we cut out a rectangle whose height is twice the height of the knitted part of the canister, and its width is equal to the width of the canister. Along the perimeter of the rectangle add seam allowances.
 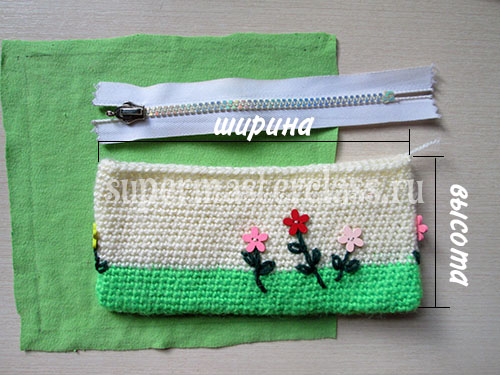 We fold the rectangle in half and cut it so that the fabric does not separate.
 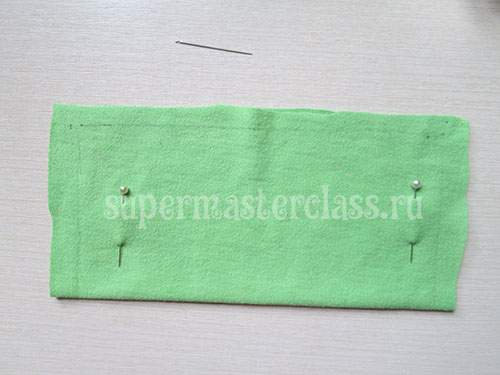 Manually or on the machine sew the side seams.
 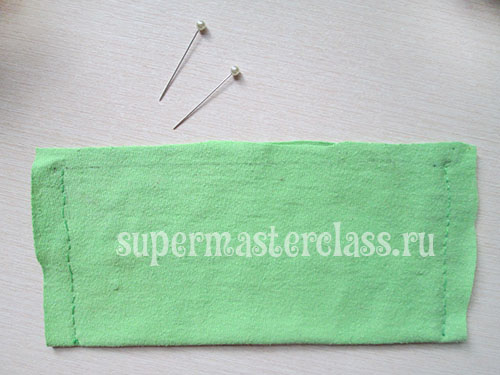 The lining is turned out so that the seams areinside. We twist the knitted part also so that the inside is turned outside. We stretch the lining on the knitted pencil case. It will be cramped, but it's not scary. The main thing is to combine the corners of both parts of the pencil well. We fold the corners, as shown in the photo below, and sew both parts of the pencil case, well tightening the thread. The seam can be pre-marked with a pencil or a remnant; the length of the seam is equal to the desired width of the end of the canister (in our case, as we remember, it is 2 cm).
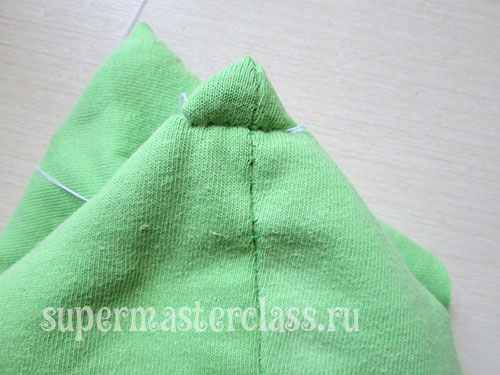
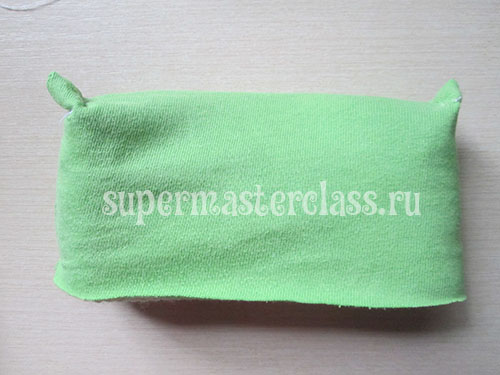 So, the volume of the pencil case we gave. Here's what the corner will look like outside.
 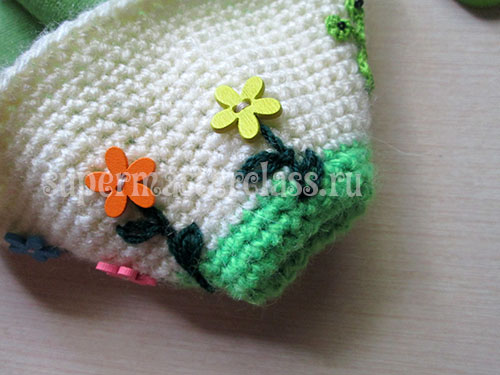 I sewed the zipper twice, laying a cloththe part between the knitted and knitted parts of the pencil case and sewed on top of the lining. Each method has its advantages and disadvantages. In the end, she stopped at a simple sewing, when the lining is already decorated. So, we lay a cut of the lining inward and we seize it using a contrasting thread (later it will be removed).
  The upper corners of the case are laid inside, as shown in the photo below.
 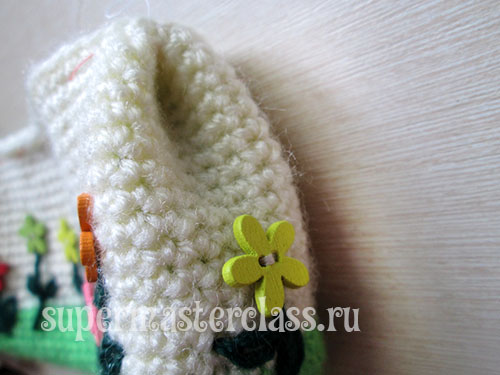 We catch a lightning, and if everything is in order (pencil casenot skewed, and the zipper is well unbuttoned and fastened, the fabric does not fit into the teeth), then we sew the whole sandwich with a neat “back needle” seam manually, thread to match the light yarn, which we used to knit the case.
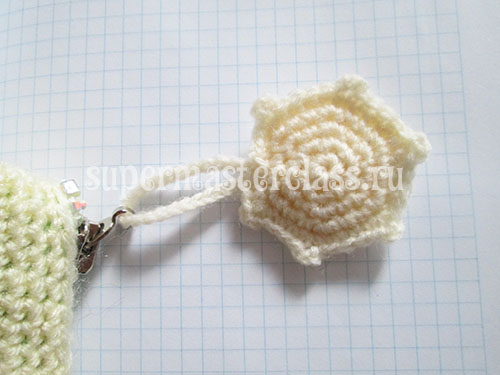
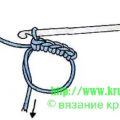
 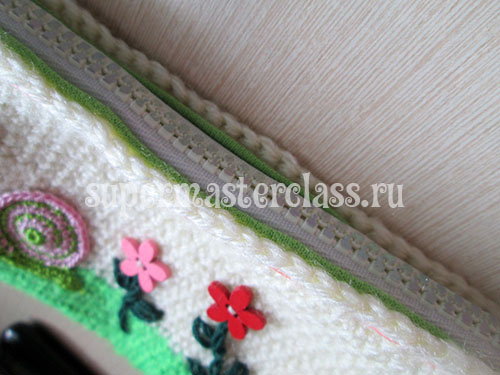 Coin tag on the lock If you have a fulllightning, then this work on the canister can be considered complete. I also had a zipper without a "dog", so I contacted a label for which it was convenient to pull to unfasten or fasten a pencil case. So, knit. 1 row. 6 tbsp. without nakida around amigurumi ring. Tighten the ring.
 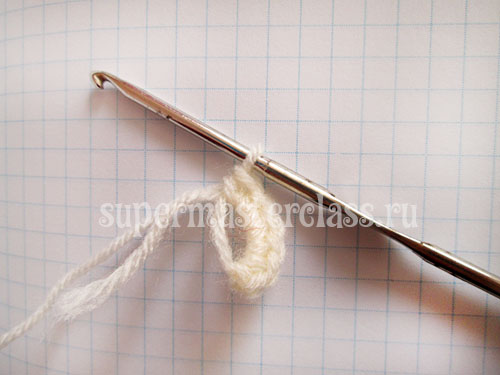 2 row. 2 tbsp. without nakida in each column of the previous row. Total - 12 loops.
 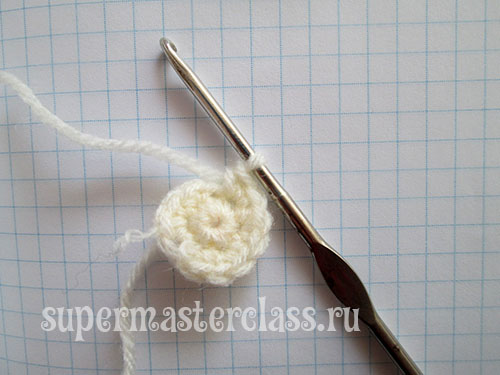 3 row. We double every second loop - 12 + 6 = 18 loops.
 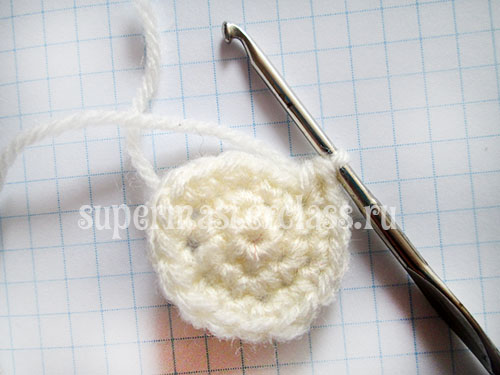 4 row. Double every third loop - 18 + 6 = 24 loops. Close the row of deaf loop, trim the thread.
 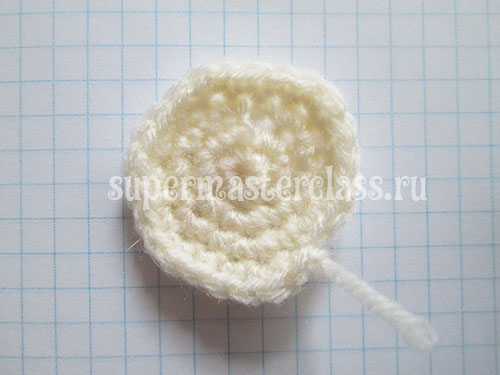 We knit the second coin, but do not cut the thread.
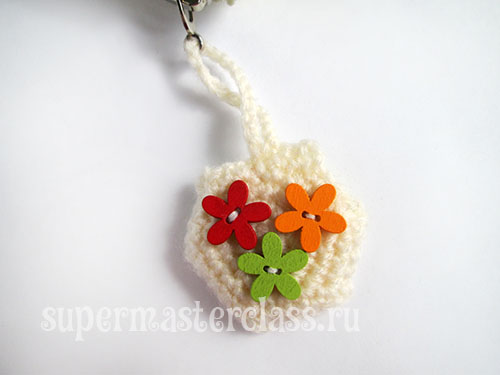
 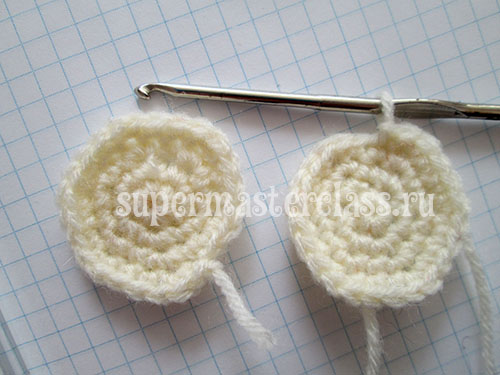 We combine the coins with the seamy side to each other, connect them with a single crochet. At this stage it is convenient to decorate the coins with flowers. I did it later.
 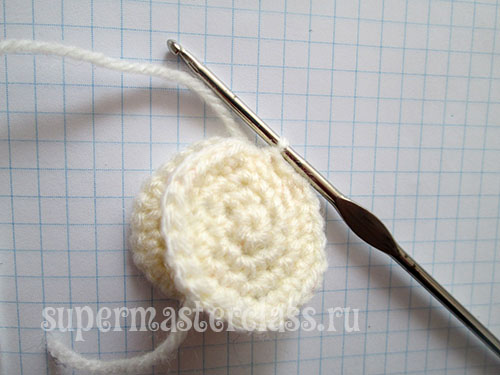 20 air loops.
  We continue tying two coins around the perimeter with single crochets; because we initially had hexagons, in “corners” for expressiveness added 3 cf each, without closing them in picot.
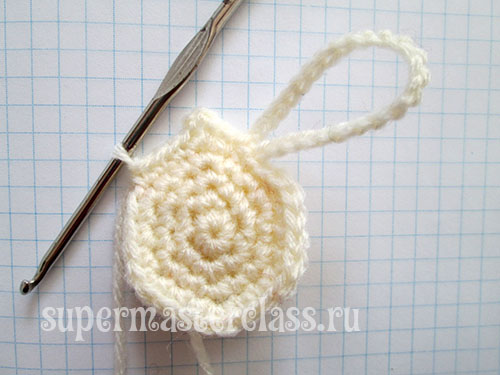
 We decorate the label with flowers on both sides.
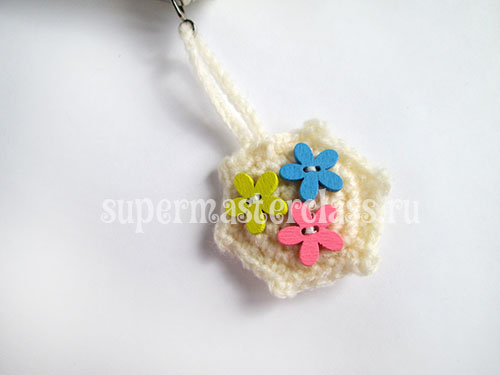
 Crochet pencil case ready.
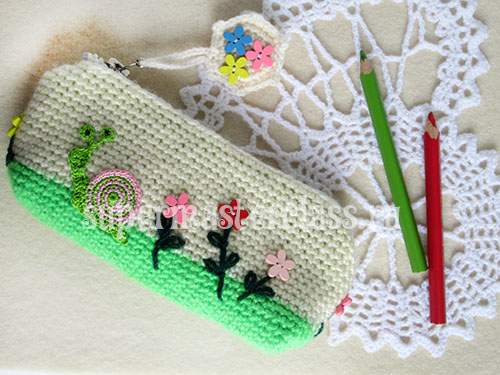
 Eva Casio specifically for the site Workshops on needlework Previous article: Next article:
Comments
Related posts:
 A pencil case for pencils, pens or markers from plastic bottles, we make an original pencil case for schoolchildren
 Pencil - a roll for pencils own hands
 Knitted Pencil Organizer - crochet for beginners chart video tutorials
 Crochet on a circle, part two - crochet for beginners on kru4ok.ru
 Crocheted pencil case minion: master class