Soft goat toy with their own hands, master class / Toys with their own hands, patterns, video, MK
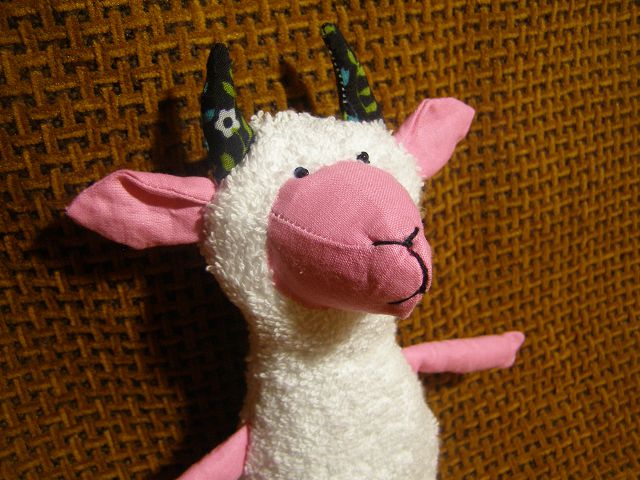
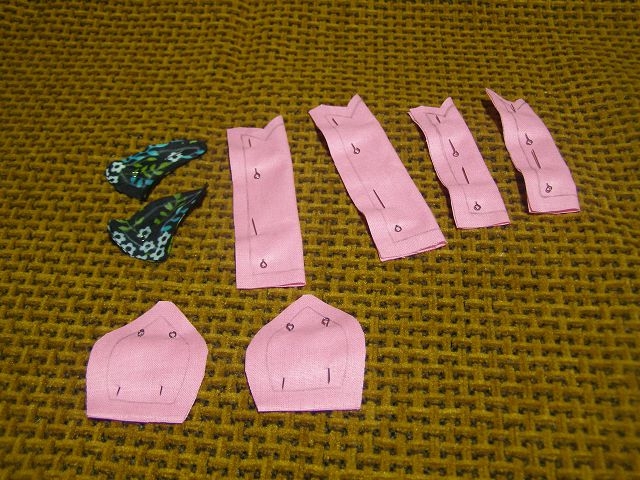
To sew a soft toy with your own hands, do notmust have special knowledge and skills. You can choose a simple pattern of goat and available materials. The remnants of a color or monochromatic material are suitable, preferably a cotton one. For the body it is better to take the cloth more tightly: jeans, corduroy or even a terry toe. For the legs, muzzle, ears and horns - flannel, flax, coarse calico. We make the horns of the goat in contrast to the body, from coarse calico with small vegetal ornamentation. This will give the toy a special decorative effect. The fins, the muzzle and ears are made of pink coarse calico, and the head with the trunk is cut from a white terry towel. To make out the face, you need a pair of beads and sequins and black threads.  Preparing the Parts
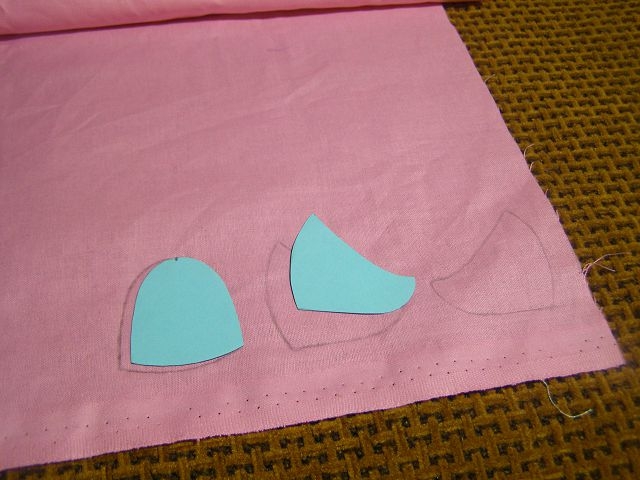
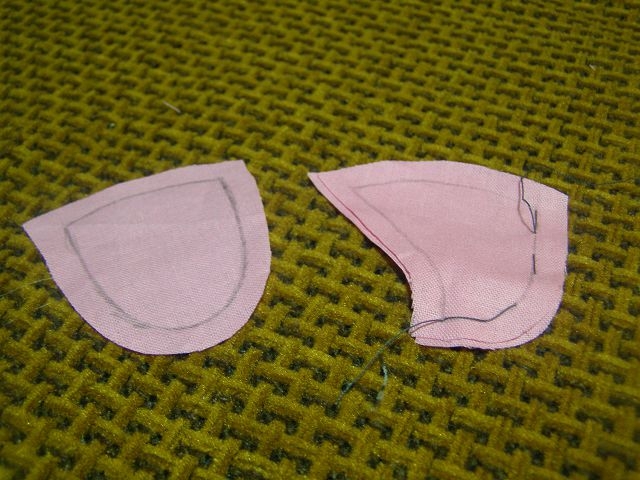
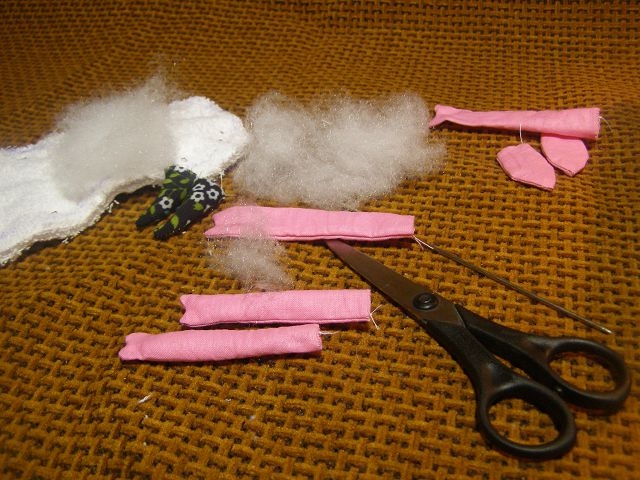
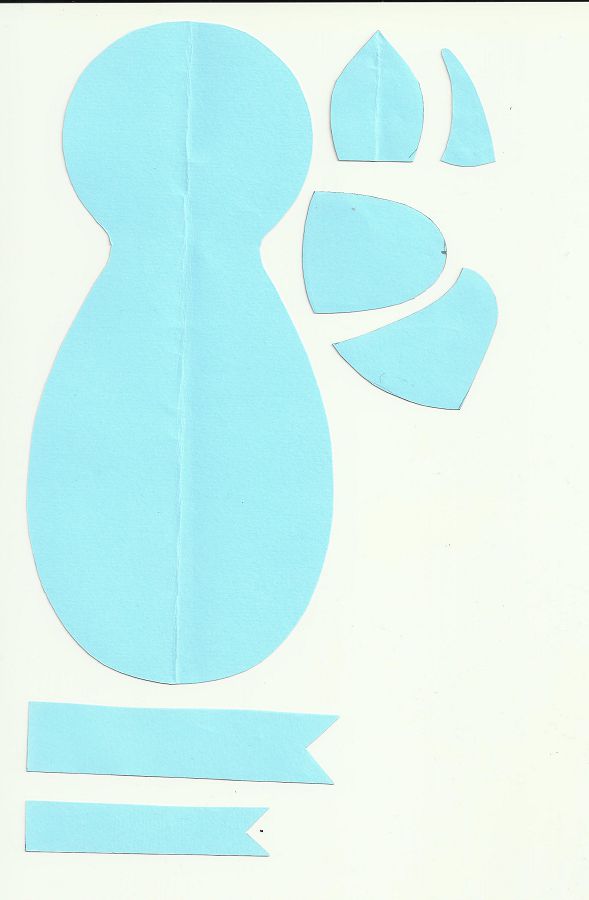 To sew a goat, first we'll carry it ourselveson the fabric of all small parts. 3 details of the muzzle will be cut out separately, the rest of the elements are transferred to a folded fabric. Moreover, on each leg of the goat there will be only one longitudinal seam. Immediately after transferring the outline of the legs, ears and horns to the folded fabric, we chip it inside the contour with sewing pins so that when cutting out the details are not displaced, and when sewing, these paired details do not have to be swept away. , deviating from the pencil line of 3 mm, and we spend on the machine with a stitch pitch of 2 mm. A small step is necessary, so that the contours of the hooves are clear and the rough fabric does not fall. Holes for eversion are left in places where the parts will be attached to the trunk and head of the toy. We turn out the details with the help of scissors, the corners of hoofs, ears and horns - with the help of a sewing needle. Two symmetrical lower details of the face are swept and stitched on the typewriter. With the top will have to tinker. Apply the center of the upper part to the seam between the bottom elements, hence we begin the marking in both directions. We do this carefully, carefully following the pencil lines, do not deviate from them, do not pull together the details, otherwise the muzzle will be skewed or with unnecessary folds. The quality of the assembly of these three parts largely determines the expression of the muzzle of our goat. Therefore, if somewhere there is a marriage, a mismatch, it is better to return, dissolve a couple of stitches and remake. We also make the machine stitch very neatly.
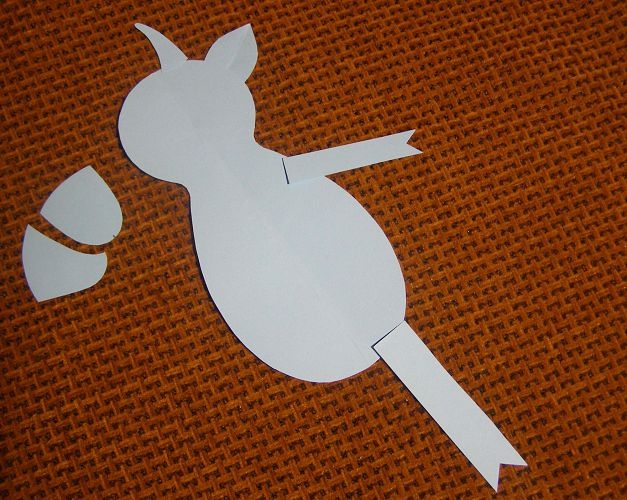


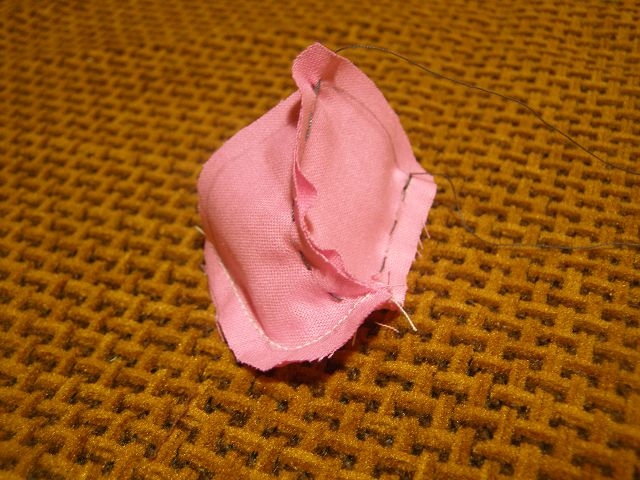

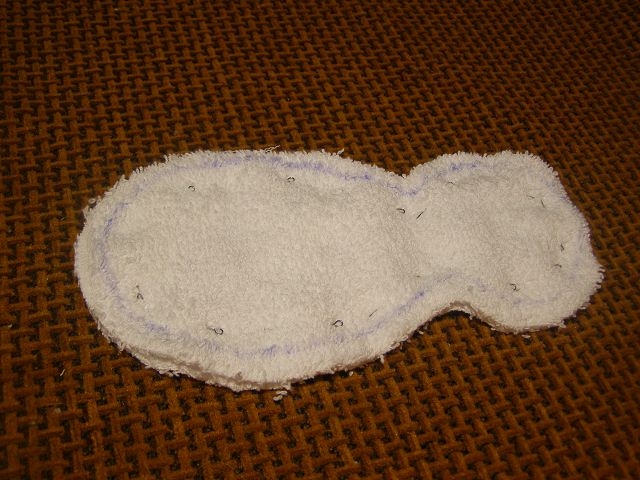

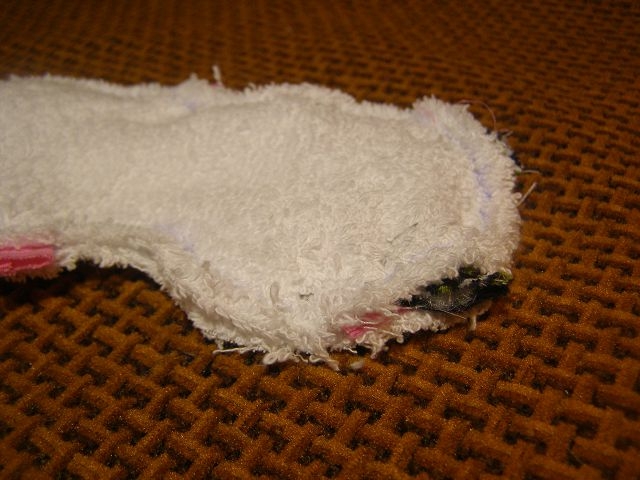

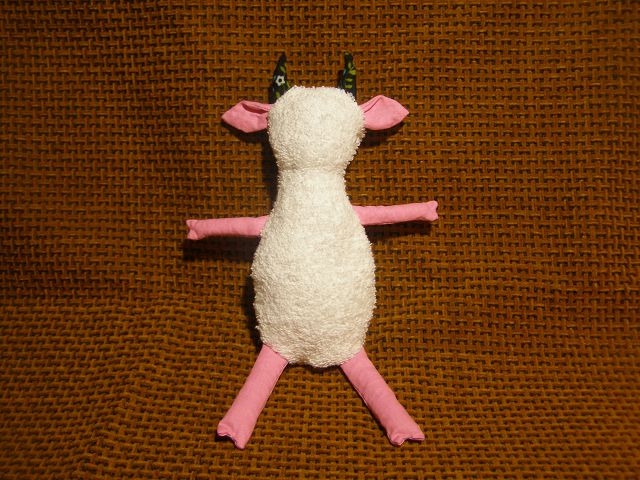
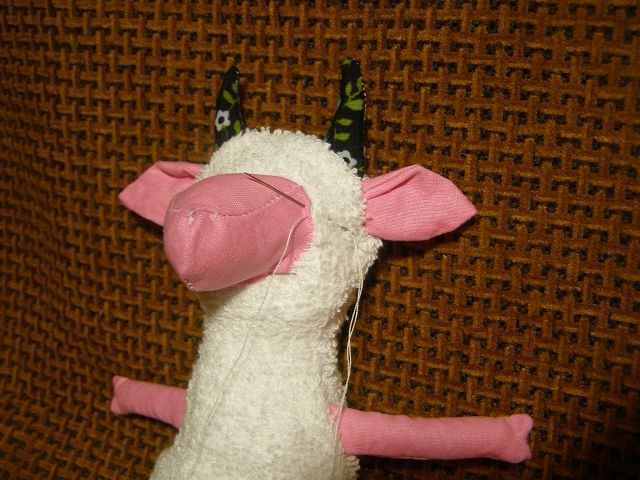
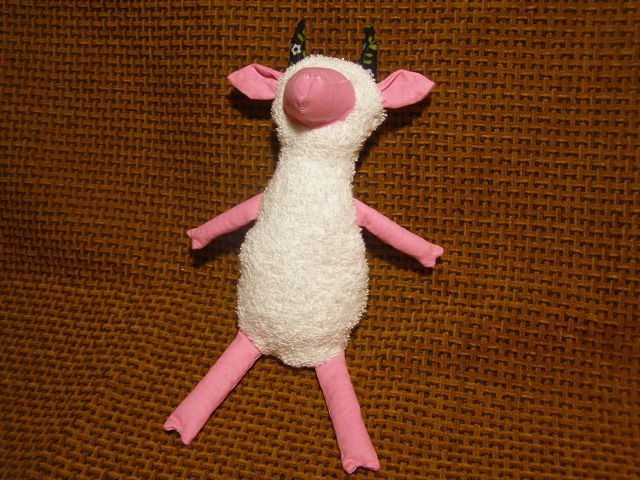

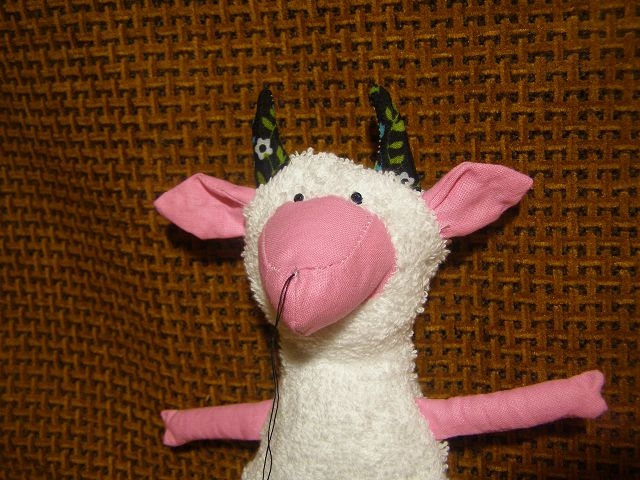 The trunk and head of the goat are a single detail. On a terry cloth it is difficult to draw a contour, for this purpose we take a special marker or a ballpoint pen. The material should be folded in half. After holding the line, the parts are chipped and cut. Terry cotton fabric is very loose, so we increase the distance from the contour to 5 mm, and cut it, trying not to damage the warp threads too much, cut off the "mahrushka" shakes. For the stuffing of toy-goats, you can use sintepon, holofayber or fluffy cotton. With the padding we will be helped by the same scissors and a knitting needle. We stuff the horns of the goat tightly, before giving it a round shape, and the legs slightly, they should be soft and flexible. You do not need to stuff your ears. In the muzzle we put so much sintepon that it does not stick out and does not interfere with its sewing to the head. Billets for a textile goat are made by their own hands, you can start assembling it. Assembly All the elements of the toy, except for the muzzle, will be sewn into the circular seam that connects the two terry details of the body: the back and front parts. First, we will try, how they will be fastened: in what places, at what angle. To do this, we will prick your feet, ears and horns directly to the wrong side, move as much as you like. On the ears we pawn a characteristic wrinkle. Then we will transfer them all one by one inside, between terry details. A school sewing pins or we sweep. When we spend the backside and in front of the goat with the enclosed elements, we leave a hole for eversion and stuffing on one of the sides, between the upper and lower claw. It should be a large slit, so that thick terry cloth is easily wrenched. Sew it, too, not just because of the thickness, but the coarseness and inaccuracy of the seam are not as visible as on a smooth fabric. In extreme cases, you can sew terry details with your own hands with a needle and thread, without a typewriter. If the threads get strong, we sweep both parts together in a wide zigzag. We fill the toy not tightly, but resiliently, sewhole in the side of the goat with a hidden seam. Muzzle pins pin first top and bottom, while bending inside the edge of pink fabric, then on the sides. We sew the muzzle in a circle with our own hands with a small suture over the edge. Eyes can be embroidered or sewed beads at the distance you like. The nose and mouth consist of several stitches of black thread. The goat, sewn by hand, is ready.It can be decorated with beads, a bow, a snowflake, dyeing hoofs in black, and horns in gold. You can make her earrings, give her a tissue heart, sew elegant lace apron or sarafan. You can make a whole thematic costume for her, surround with suitable objects. Depending on your imagination and goals, the goat can become a game doll with your wardrobe or interior, static, with fragile complementary details. An exotic goat toy, you can change its size, experiment with fabrics, design of face, ornaments and fillers. There are no boundaries for perfection.
Comments
Related posts:
 Soft toy octopus with your hands, patterns, master class / Toys with your hands, patterns, video, MK
 Kit is a soft toy. Master Class. Video / Toys with own hands, patterns, video, MK
 Panda toy with own hands, patterns, photo, master class / Toys with own hands, patterns, video, MK
 A toy clown with his own hands made of cloth. Master Class. Video / Toys with own hands, patterns, video, MK
 Knitted toy hedgehog with knitting needles. Master Class. Video / Toys with own hands, patterns, video, MK