How to make an original shelf for a house with your own hands? Step-by-step description of the stages of work, diagrams and photographs
Making a semi-circular shelf is not as difficult as it seems. Attentiveness, accuracy, some knowledge of geometry and you have to get it.
Necessary tools and materials
- multilayer plywood or flat boards;
- ruler, pencil, gon, compasses;
- electric jigsaw;
- surface grinding machine;
- sheet of paper or paperboard (such as packaging from the refrigerator);
- grinding skins of different granularity;
- putty;
- glue and primer;
- aerosol paint.
The best material for the shelf will be multilayer plywood. For large shelves, thicker - 18 - 20 mm, for small (up to 50 cm in diameter) thinner - 10 - 12 mm.
Stages of work
For example, consider the manufacture of a small semicircular shelf. 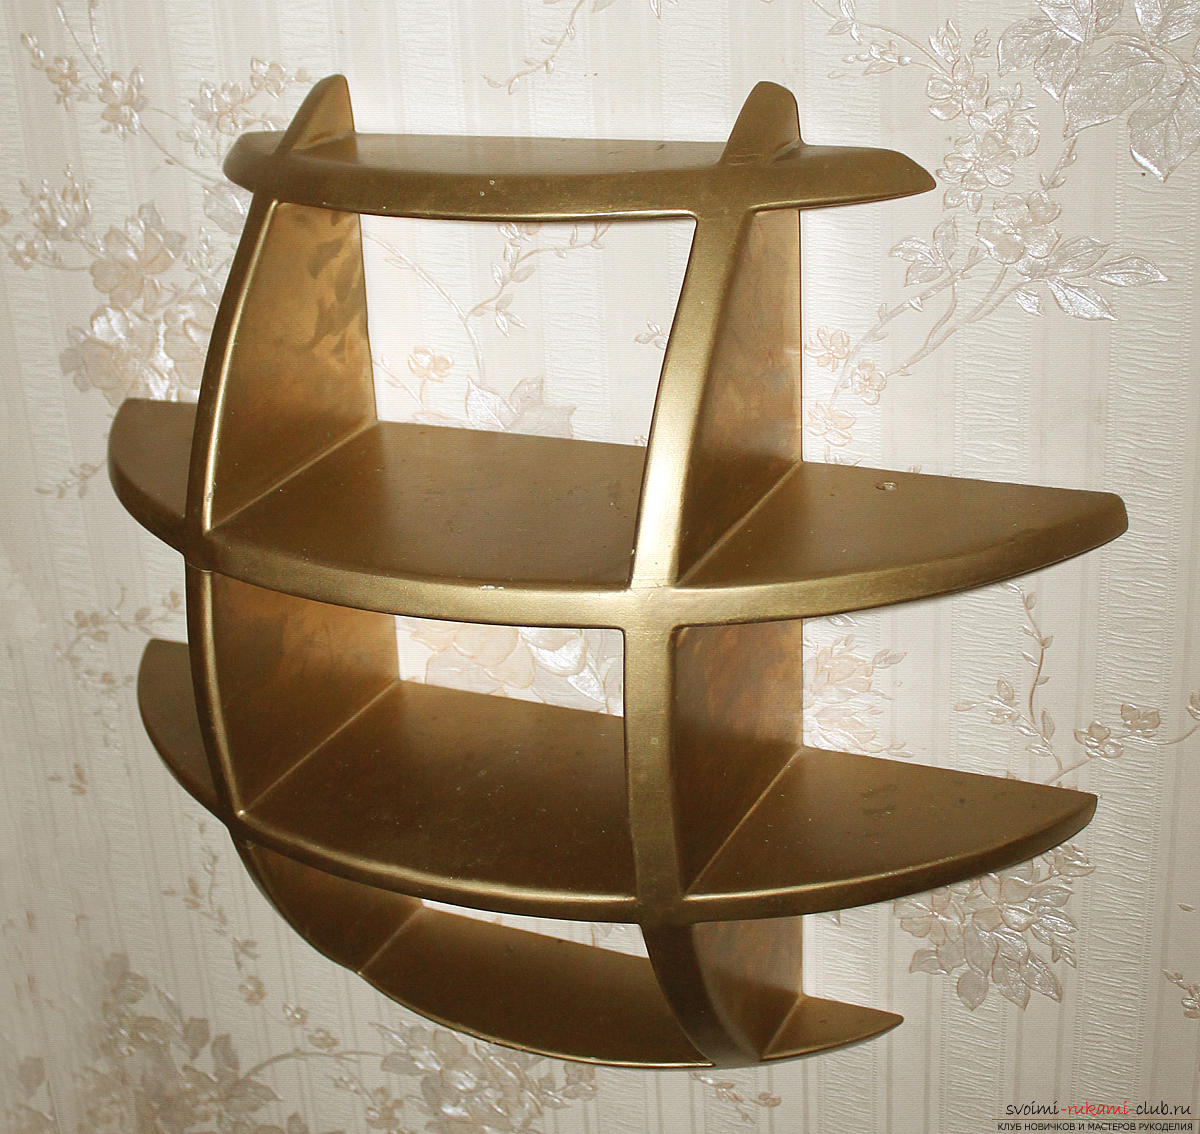 As you can see, the shelf consists of vertical andhorizontal elements. Vertical call racks, and horizontal - shelves. In plan, the shelf fits into the circle. We call this circle the base of the shelf. Draw the bottom (preferably in full size), mark the location of racks and shelves on it, taking into account the thickness of the material.
 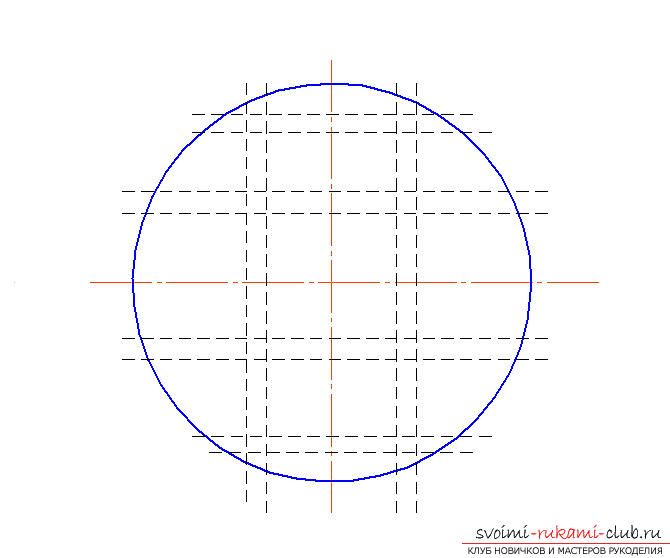 Choose the size of the width of shelves and racks. Draw the pattern.
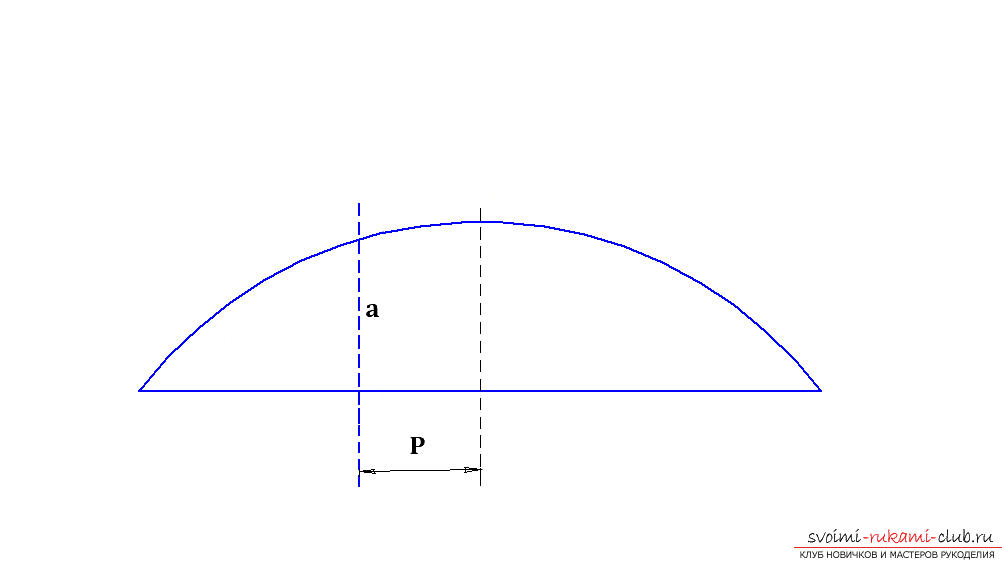
 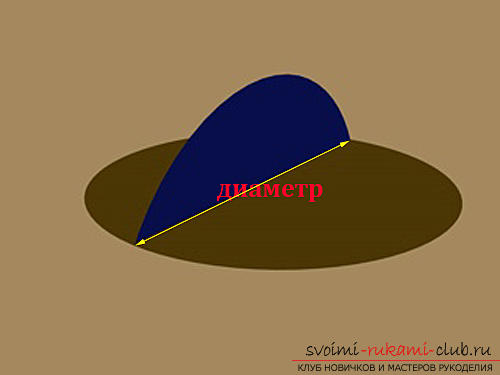 Its base is equal to the diameter of the circle -on the bottom of the shelf, from the middle of the base we put up slightly more (approximately 5-10%, depending on the size of the shelf) of the chosen width of the shelves. This will be the height of the arc. We draw the arc by the formula where a is the arc height and, respectively, the width of the racks and shelves, b is the length of the element's base, R is the radius of the circle that satisfies the requirements of a and b. The template is made in full size. On the basis of the template, we mark the middle. Each element has two sides; the side closest to the center of the circumference of the base will be called the inner, the far outer.
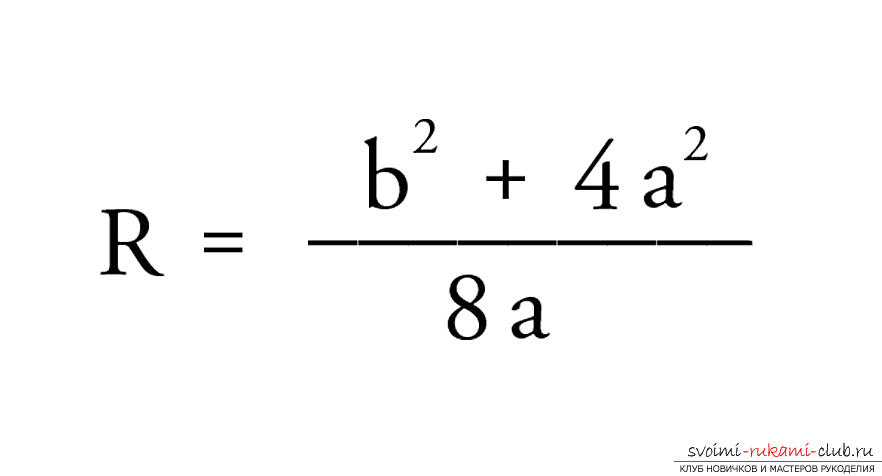 From the middle of the base of the template,to the inside of the post (or shelf) (P), at this point we draw a perpendicular from the base to the arc, the perpendicular dimension is the height of the arch of the post (or shelf) (a).
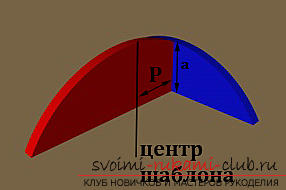
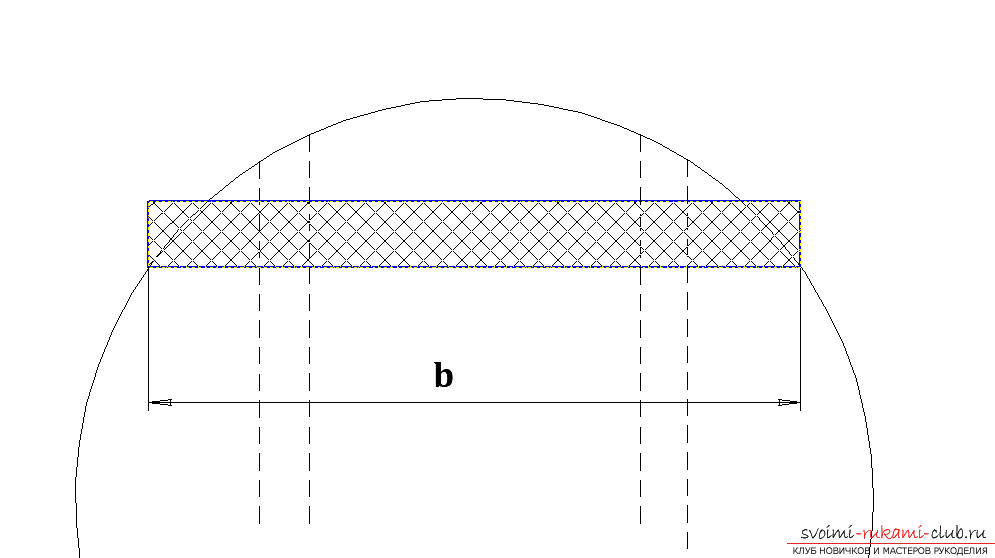
 The length of the base of the post (b) is determined by the layout of the elements (therefore it should be done in full size).
 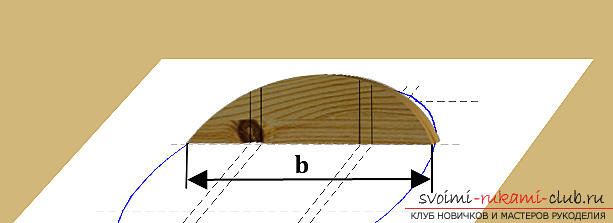 And the size is measured on the inside. Having all the necessary dimensions - a and b - calculate the radius R and draw the marking on the workpiece.
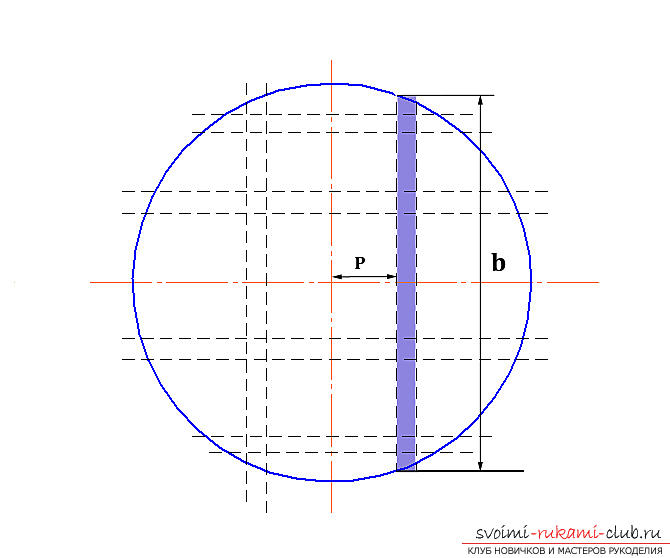
 To facilitate markup, you can usethe simplest device: a flat board, along the long side in the middle we draw a line, perpendicular to the line we fix the stop, on the stop we make a mark of the middle line. On the workpiece mark the length of the base, the middle of the base, we put the workpiece on the device, we rest against the stop, we combine the middle marks. We mark the value of R on the middle line from the ends of the base. At this point we put the needle of the compass and draw an arc on the workpiece.
 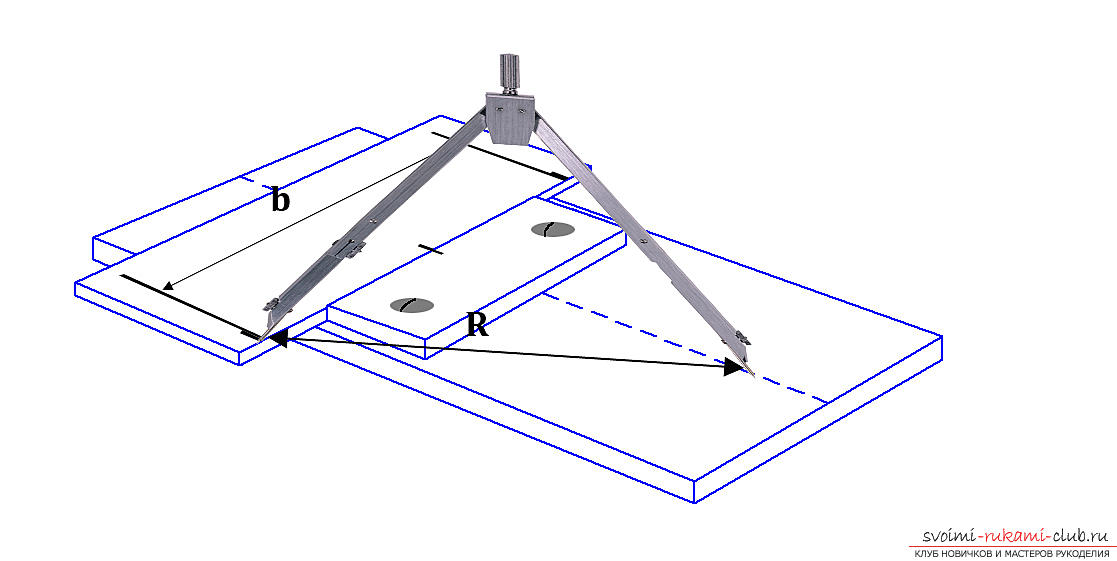 If the value of R is large and there is no suitable compass, then it is possible to make a temporary compass from a flat strip (the design is shown in the figure).
 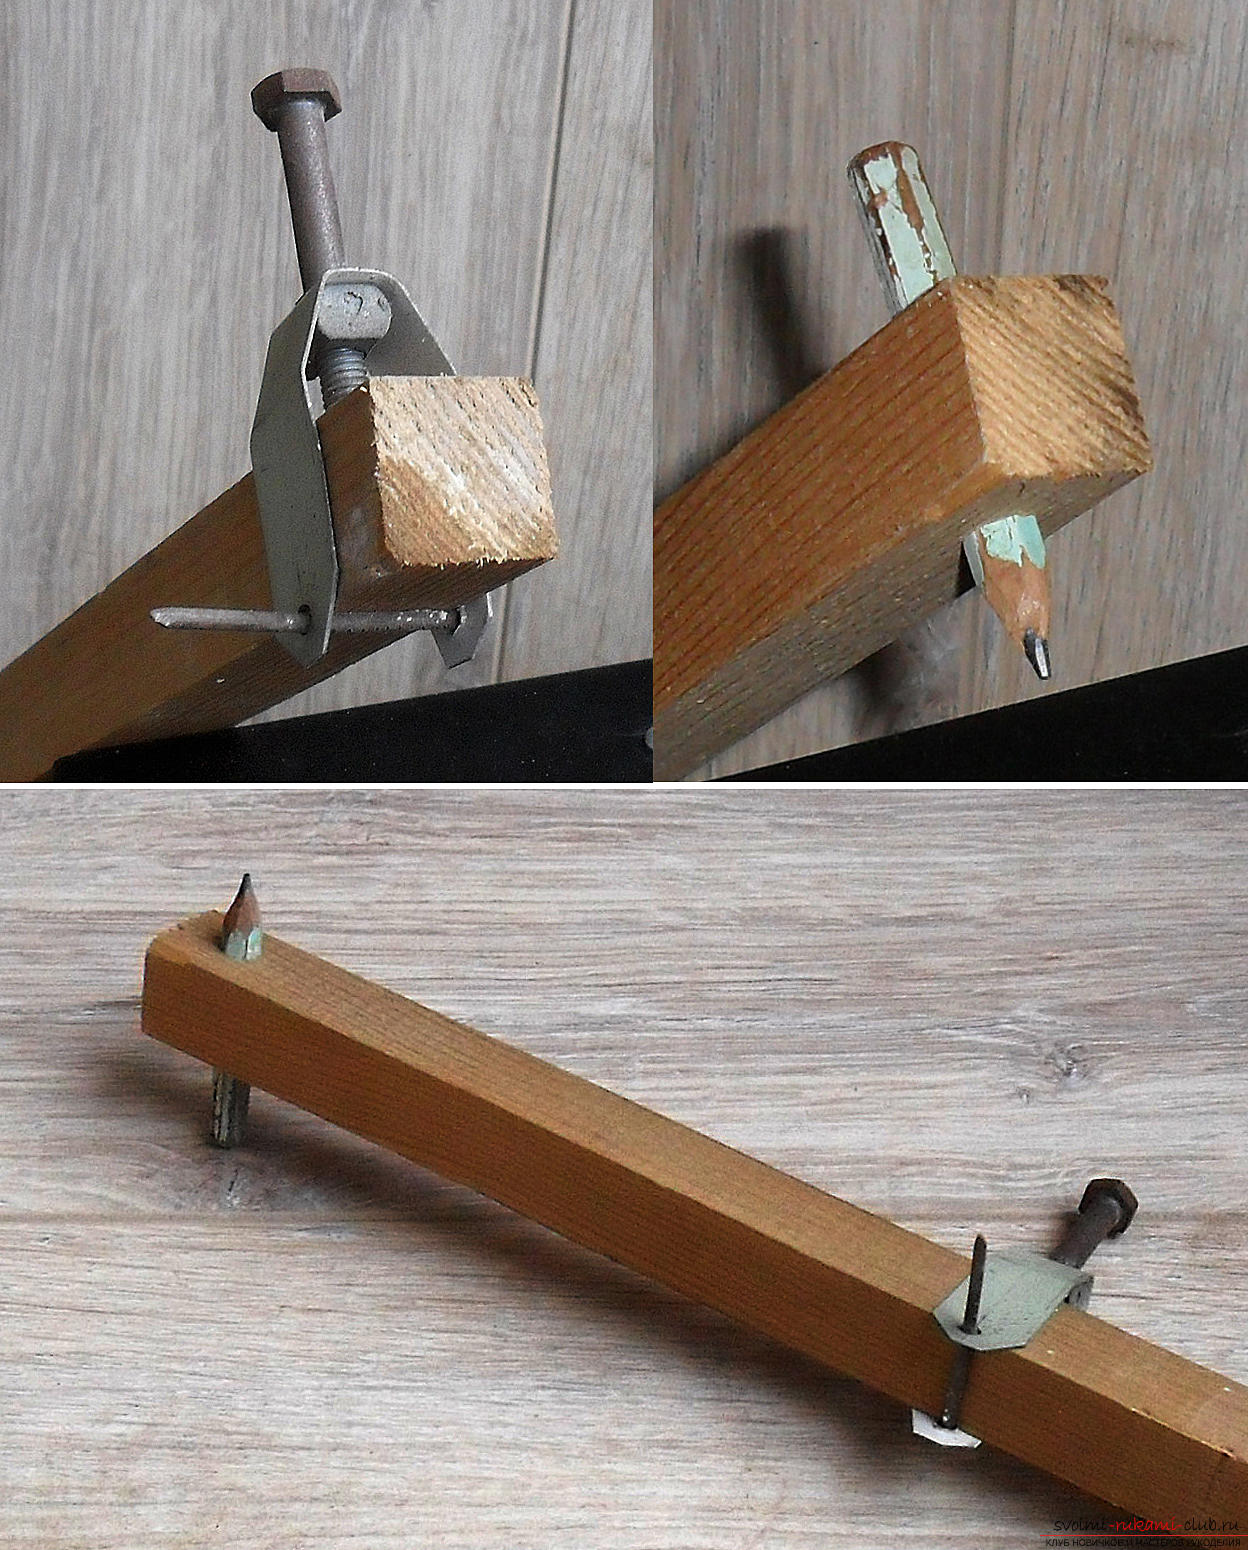 In the same way, we mark out all other elements. After marking, cut out the elements with an electric jigsaw. On the racks and shelves, we mark the intersections according to the marking on the bottom of the shelf. We make selections for joining elements in the middle. On the racks on the side of the arc, on the shelves - from the bottom.
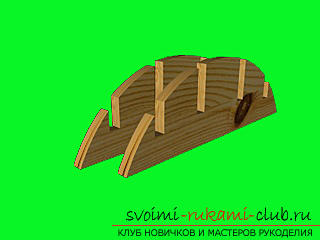
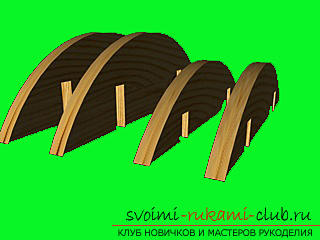 Connecting. If all the elements are in their "own" places, we collect the construction for glue. We draw attention to the elements being perpendicular. After assembly, the structure is as shown in the figure.
  We proceed to finish. The outer edge of the elements with a grinder or manually mow down so that they have a spherical appearance.
 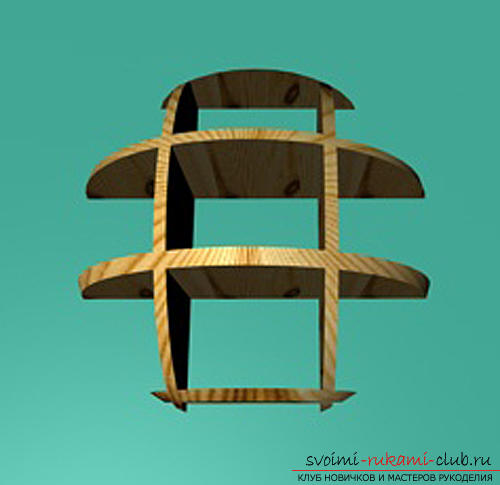 Sharp edges are evenly smoothed by grindingsandpaper. We shall ground. Shpaklyuem. We clean. If necessary, repeat the process until smooth smooth surfaces are obtained. Next, primed for painting and painted with aerosol paint. Important note. If no other type of fastening is provided, then at the fitting and assembly stage it is necessary to drill two holes in the second on top of the shelf under the hooks - dowels. The place for the holes is selected unobtrusive, closer to the posts. We deviate from the rear edge and the rack by 1 - 1.5 cm.
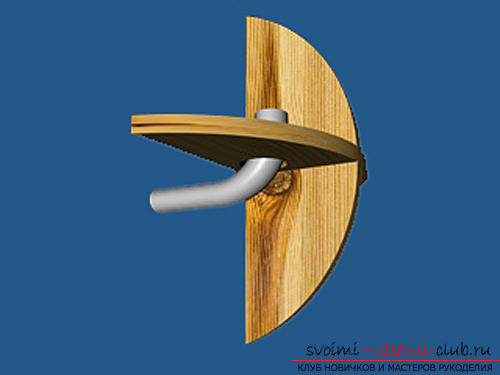
 Hooks are screwed into the wall and we hang a shelf on them. Bonus. For sanding it is very convenient to use a homemade device.
Comments
Related posts:
 How to make an original package of gifts in the form of a cake yourself, a diagram and step-by-step photos of the main stages of work.
 Gift wrapping with your own hands, how to make a gift wrapping, its scheme and step-by-step description of the work.
 How to weave a small turtle from multicolored rubber bands? Step-by-step description of the stages of work and photos
 How to make a decoration on the Christmas tree "Gingerbread House" of felt with your own hands? Detailed description of the stages of work with photos
 To make your own hands a simple vase made of multi-colored origami paper will help you to describe the work