Spring, butterflies, flowers: spring crafts using quilling technique
Spring has come and so I want to please loved ones andfamiliar with an unusual gift, unique and unique at the same time. Yes, you can really buy a gift, but it’s much more pleasant than a unique thing created by yourself! Paper twisting technique - quilling will come to the rescue. The technique itself has been known to mankind for a very long time. In the XVI century it was the lot of masters, in the XVIII-XIX centuries, a female passion. The industrial revolution of the twentieth century transferred quilling to the status of a forgotten art, and only now this unique technique of handling colored paper is once again experiencing its new birth. Distinguish between eastern and European quilling schools. Our craft relates specifically to the European style where the number of details is concise and minimal.  Spring Quilling - Paper Crafts Photo Contents
What you need to work
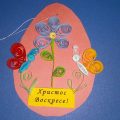
Actually for work in quilling styleneed a minimum of tools. These are large and small scissors for cutting paper and cardboard, small preferably wooden toothpicks, a sharp breadboard knife, colored paper, cardboard or corrugated cardboard, various plastic details for the decor of the product.  Quilling Easter eggs decor photo
Quilling spring: storage box
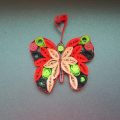
In order to create such a small miraclefirst, glue the box over with colored paper, normal wallpapers are good for this purpose. The central place in the composition is occupied by the butterfly, and we will begin with it. 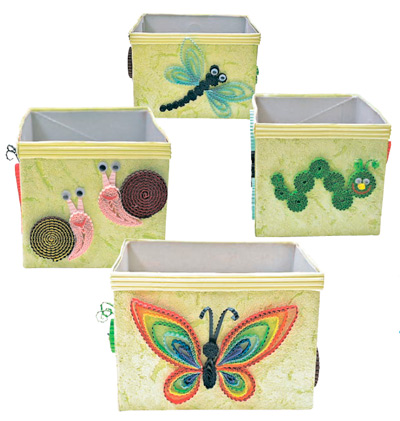 Spring craft using quilling style
Spring butterfly quilling
To create this character of our composition, you need to take 7 colorful strips of 15x0.5 centimeters. Now let's try to glue a “panicle” out of them, simply by gluing the ends of all the ribbons together. 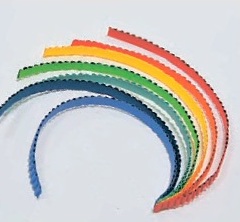 "Whisk" basis for butterfly wings in stylequilling We turn a nice blank into a “ladder”. To do this, we shorten the uppermost ribbon to 6 centimeters, and cut each subsequent ribbon by adding 1.5 centimeters to the base (7.5; 9; 10.5; 12; 13.5) the last seventh ribbon remains 15 centimeters long.
  We bend the ribbons in turn and get the wingbutterflies We take a toothpick and put a drop of glue on the free tip of the ribbon in the “ladder” and attach this edge to the place where all the ribbons meet. As you can see, it turns out part of the butterfly wing. There are four such parts.
 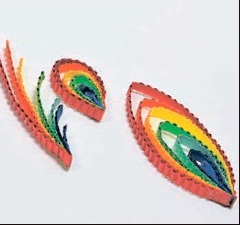 The first of four wings. The body and head of a butterfly.we make black corrugated cardboard, rolling flat disks. The length of the strip is 10x0.5 centimeters, only the blank for the body of the butterfly should be slightly pressed in the longitudinal direction, and the head of the butterfly should be left round.
 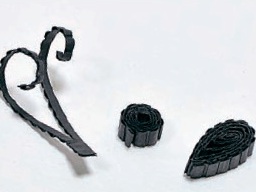 The antennae, head and torso of the butterfly makeblack corrugated cardboard For antennae, take a piece of black paper 5x0.5, cut it lengthwise, but not completely, twisting the paper with a toothpick or scissors, and we have a beautiful antennae at the exit. Now just collect the butterfly.
Quilling paper dragonfly
For wings, take blue or green paper and act with it, just like with a butterfly wing, only strips should be taken not seven, but three. 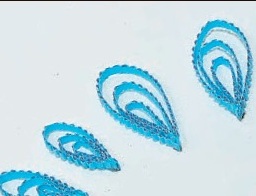 Quilling dragonfly wings For bodydragonflies will require 11 black strips of different lengths: 5 pieces 6x0.5, 5 pieces 10x0.5 and one 15x0.5 cm. Having rolled up the disks, we get body parts and the head of a dragonfly. Do not forget to stick the tip of the ribbon, otherwise the body will lose its “harmony”. We collect a dragonfly.
 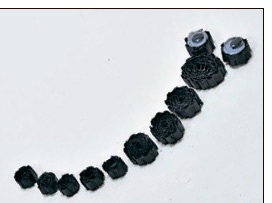 Black corrugated quilted dragonfly body
Corrugated Quilling Caterpillar
To create this character you will need a long green ribbon of 40x0.5 centimeters. We turn half of this tape into a disk. Now is the time to stick here a red ribbon of 5x0.5 centimeters. 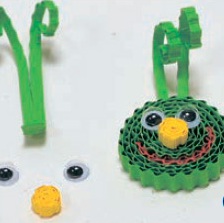 Corrugated cardboard track head Here we have a headwith a smiling mouth! And now a yellow ribbon spout of the same size. The body of the caterpillar will be made of green ribbons. Five 20x0.5 and two 10x0.5 centimeters. Having rolled up the disks, we get fragments of the body. It remains only to put everything together. That gift is ready. Agree, to buy this is simply not possible!
Tips for spring quilling
In order to do crafts quickly,it is recommended to cut corrugated cardboard in advance into ribbons of different lengths with a width of 0.5 centimeters. Having intercepted such a bunch with an elastic band, and putting it into any container, we get a good original decoration for the interior. And a few more ideas for spring in the style of quilling and paper crafts:  Lilac quilling
  Flowers in a vase quilling
 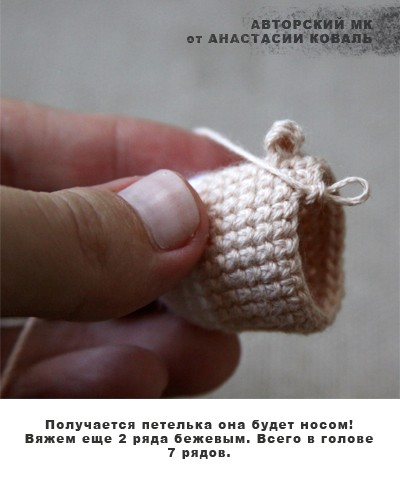 Spring flowers made of paper
  Spring crafts quilling
  Flowers and ladybug made of paper and beads
  Bouquet of snowdrops from paper
  Quilling flowers
  Snowdrops quilling
  Spring quilling
  Flower and Butterfly Quilling
  The beginning of spring with flowers and butterflies
  Quilling tulips
  Spring fairy made of paper
  Beautiful Tulip Quilling
  Spring paper pattern
  Lilies of the valley in a vase of toothpicks We also recommend you to view:
Do you like the article? Share on social networks!
Comments
Related posts:
 Quilling technique, various flowers in technologyquilling with your own hands, creating compositions using colors, quilling techniques, tips, recommendations and instructions for creating them with phased photos.
 Quilling butterflies - loop quilling and master class with their own hands
 Spring is children's crafts. Spring crafts by March 8, at Easter.
 Easter cards in quilling technique on Spring 2016, quilling postcards
 Easter egg in the technique of quilling at the Spring 2016 Competition, simple postcards with own hands