
Step-by-step description of the process of felting scarf without holes with a photo
Light stylish scarf can be goodthe addition of any wardrobe, giving its owner an extra charm and grace. In this article we will tell you how you can create an elegant scarf with your own hands using felting technology. 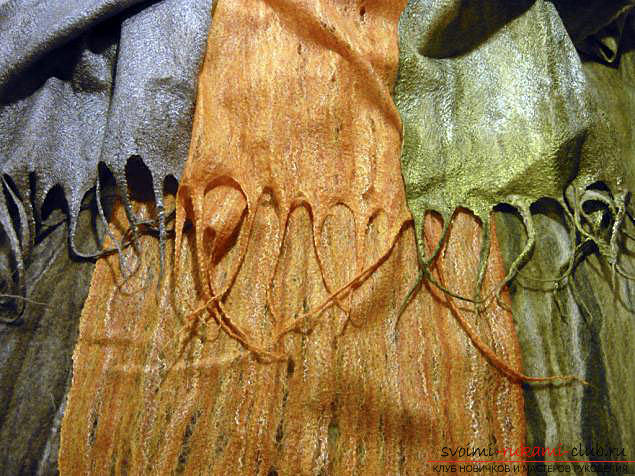 To create such a product, you will need: blended wool merino (sixty - seventy grams); viscose (thirty grams); towels for cleaning surplus moisture; rolling pin or stick; a substrate for a laminate; packages for garbage; Sander; soap solution; spray; bright marker; towel. 1. Using a marker, draw a rectangle on the laminate substrate, which will become a guide for creating the shape of the future scarf. Our model measures thirty-three by two hundred centimeters, that is, the width of the product does not sit down, but changes its dimensions only in length. The substrate needs to be laid out on the table, with the figure lowered to prevent contamination of the future scarf. We draw the layout. Stretch the pass. To do this, it is necessary to take the edge of the river and proceed to straightening. It is necessary to pay attention to those places in which the fibers were folded into the tow, and diligently to straighten them.
 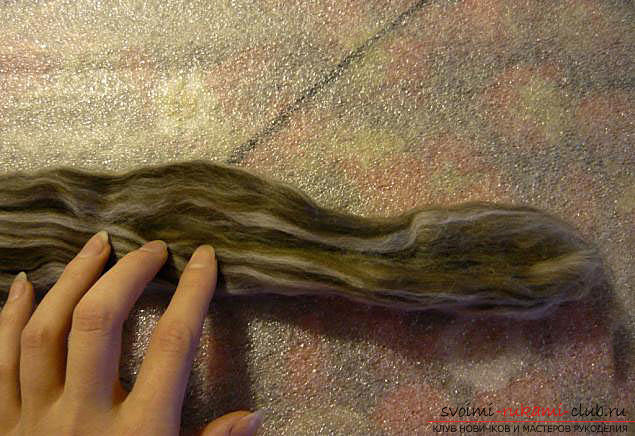 Be careful: do not stretch the scarf for the edges themselves. It is better to press the edge of the palm of one hand, and the tips spread out with the fingers of the other hand.
  Pay attention also to the fact that the wool of different colors does not intersect in the figure, but goes in parallel.
  During the stretching of the morning, take care not toholes were formed. 2. When all the paper is stretched, lay it flat and go to the stage of "patching holes". To do this, from the rest of the yarn you need to pull out thin strands and with their help fill all the holes in the main canvas.
 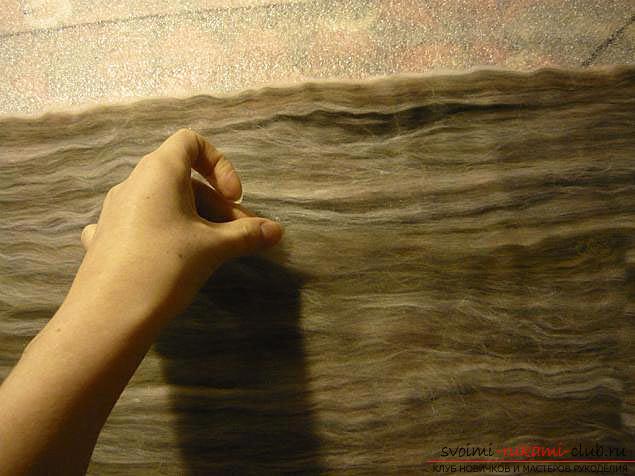 3. Once all the holes are filled, you can go to work with viscose. You should choose several shades, which are suitable for the basic color scheme. After you firmly check the absence of holes, you can start viscose. Separate a quarter from each pamochki. And then we put them together and get the blend created by ourselves. When working, pay attention to the fact that the necessary colors do not end. 4. Viscose should be laid out in fairly thin layers throughout the product, without having to protrude beyond its edge. In length, each strand can overlap another approximately 50%.
 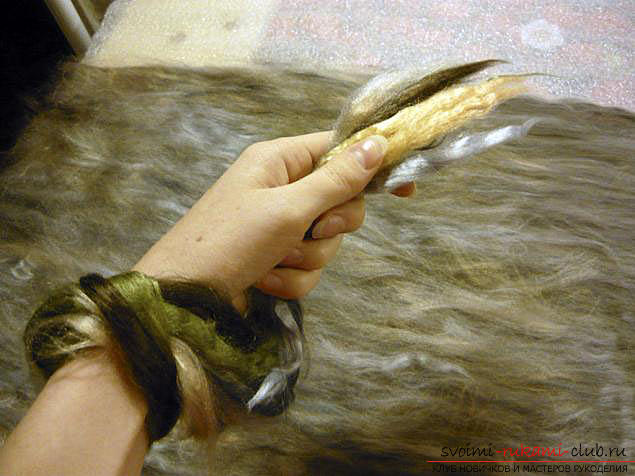 When you completely complete the layout of the scarf,damp it from the sprayer with a soapy water solution. Press the layout with your hands so that the viscose itself lies smoothly. Next, you need to sprinkle the product from the edge to the middle, so that it's easier to collect the fibers that are knocked out. Do not force the sprayer too hard to wet the surface of the scarf evenly. Dry to leave only the tips (ten centimeters), in the future we will make them tail. You need to lightly press your hands on the wool to determine if it is saturated with moisture. Then the scarf is covered with a film taken from a trash bag, and pressed by hands on the perimeter of the entire surface. Then, with the help of a grinder we go through the entire surface of the product. You do not need to exert much effort. This will help make the scarf uniform, without seals and unevenness.
 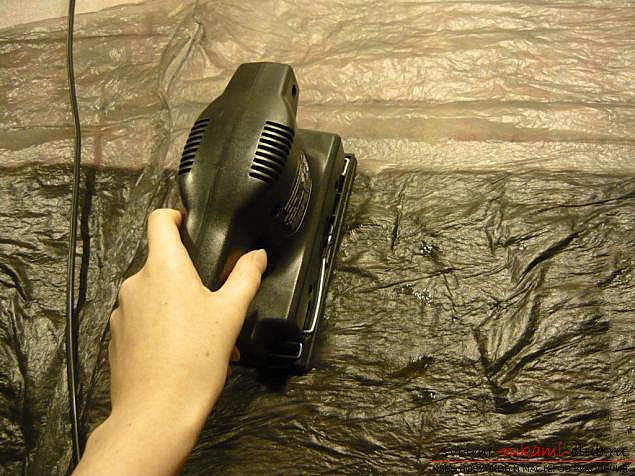 Then it is necessary to remove a film and already processmachine itself surface. 5. Create tails. It is necessary to divide the ends of the scarf into strands. We twist all the strands. We process them with water. Again, twist it. We process with a machine. We roll the strands along the substrate.
 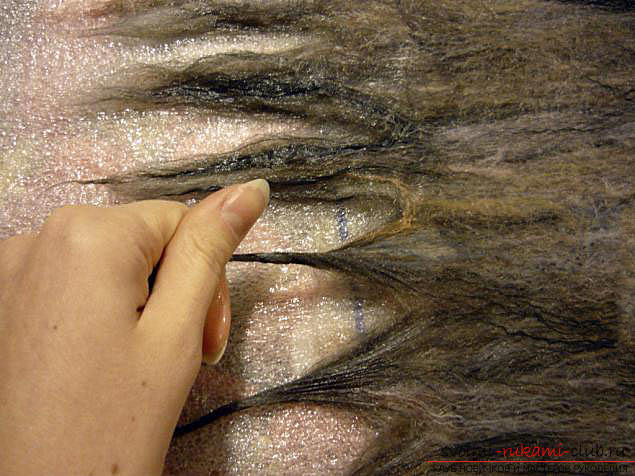 6. We roll a scarf in a roll. It is necessary to wind the scarf on the rolling pin very evenly, without seals and folds. In the process of winding, excess water will appear. They need to be soaked with a cloth or a towel. Then we roll the roll with a little pressure on it (one hundred-one hundred and fifty times). Next, unfold the roll, wind it on the other side of the scarf and again roll the same number of times.
 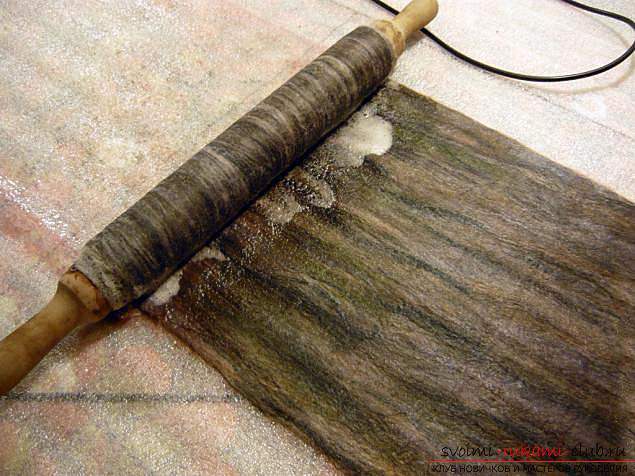 Next, you need to unfold the scarf hair to the top andcarefully see if there are any fibers that have shifted to other color rows. If such fibers were found, then they must be torn off and gently laid back in their place. 7. Decoration of the ends of the scarf. Three scarf about a laminate substrate, perpendicular to the edges. After that you need to roll the scarf again. Next, you need to put the tips into the flagella. To achieve this, it is sufficient to rub the edges on the laminate substrate or on the wash board. 8. We rinse and dry the scarf. At the final stage, it is necessary to thoroughly rinse the product in a warm water, for more softness we can add a conditioner for tissues or balm for the hair. Then we rinse in cold water, and we survive without twisting the scarf. Finally wrap the scarf in a towel toit is finally dry. Then it needs to be processed with an iron so that its surface is perfectly smooth. That's all! Your elegant, delicate scarf, created by felting, is ready! Wear it with pleasure!
Comments
Related posts:
 How to mold a snowman from polymer clay to decorate a Christmas tree? Step-by-step description of the process of modeling with photos
 How to sew a pretty sarafan for a girl on a pattern with her own hands. Step-by-step description of the sewing process
 How to tie a warm original scarf - manto with knitting needles. Step-by-step description of the process of knitting a beautiful scarf
 How to make a children's swing by yourself. Step-by-step description of the process of making children's swings
 How to make a unique three-dimensional picture of cardboard and paper with your own hands. Step-by-step description of the process of making an unusual picture