Step-by-step instruction on how to make a pattern and sew the trousers of a riding breeches
From this article you will learn how to make a patternWomen's trousers-riding breeches for those who lead an active lifestyle. We will learn how to collect these trousers and make the workpieces according to previously measured standards.  For work we will need: the size of the waist, buttocks, ankles, calf muscles, the size under the knee, and the length of the foot along the outer surface, inside, the height to the middle of the knee and the height of the seat. To measure the size of the leg on the side, you need to attach a centimeter tape to the waist level and put it to the floor. Then you need to determine the width of the back and front halves. Since the chosen model of trousers is designed for riding a horse, it is important to choose the most elastic fabric for it. The height of the saddle is somewhat lower, and this must be taken into account when determining the size of the future pattern. To increase the stepping line, draw a line for the front fold during the drawing.
  We offer a trousers pattern trousers 42-44 size:
 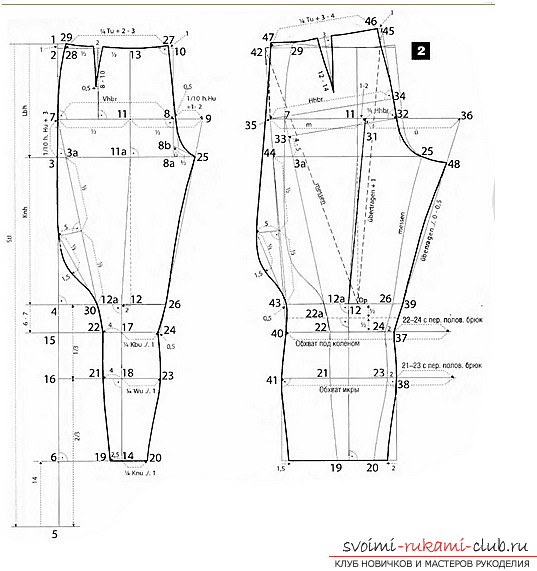 We make our own pattern
 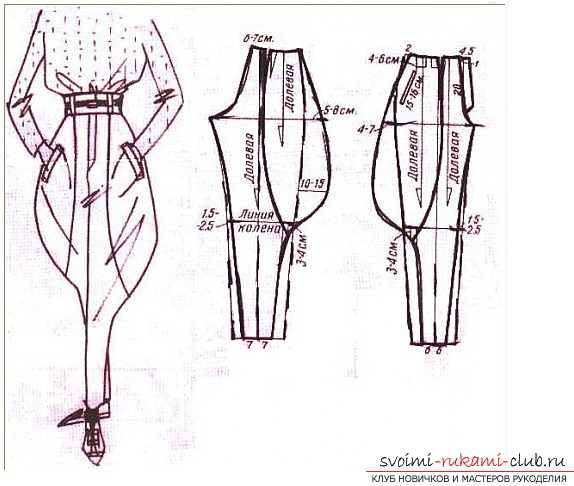 To do this, we will need to measure the halfcircumference of the waist and hips, as well as the overall length of the pants. To build the front half, we need to draw an angle of 90 degrees and designate its vertex with the letter T. Further down from T we draw the length of the future trousers. Denote the new point by the letter H. The size of half the circumference of the hips will be divided by 2 and add 8 centimeters. Calculations are drawn down from the point T, and the resulting point is denoted by the letter S. From W and H, it is now necessary to draw horizontal lines. We will get the depth-of-seating markings. Next, find the width for the front. Again, split half of the circumference of the thighs by 2 and add 7 centimeters. We put the resulting dimension to the right of the point W and denote the new point by the letter W1. From this point, draw a perpendicular to the intersection with the horizontal line and call the resulting point the letter T1. Now let's construct the width of the step. Make a horizontal segment W1W2, 4 centimeters in size on the right side of W1. We construct an analogous segment of W1W3 from W1 upward. Should get a corner. We find the bisector of the corner (that is, its half) and measure on it 2 centimeters. We denote the resulting point by W4. This point must be joined by rounded lines with points W3 and W2. Next, let's postpone from T1 centimeter segment T1T2 down. Let's find the width of the bottom. We will measure the segment Wl1 and subtract from it 2 centimeters. The resulting value will be plotted to the right of the point H. We obtain the segment HH1. The segment Ш2Н1 is extended by 2 centimeters and we put the point H2. We connect it with N.
  To draw the back half, you need to findwidth of the seat. Half the girth of the thighs first divide by 4, and then take away 2 centimeters. From W2 postpone the resulting size to the right side. We put W5, from which we draw down the point W6 downward by 1 centimeter. We connect W2 and W6 by a smooth arc. Then from T1 draw to the left a segment T1T3 with a size of 4 centimeters. This results in an increase in the seating line. Next, extend the waist line on the back half of the pattern. We put the mark T5 on the extended horizontal line on which T lies. We will postpone from it 3 centimeters. We draw the segment T4T5. We make the extension of the bottom. From the H mark to the left, draw a section of HH3 measuring 3 centimeters. We connect the points H3 and T5. We construct from H a length of 3 centimeters HH4. We draw the segment H4N6. This method is also true for the patterns of male and children's trousers. So, the pattern is ready! Now it remains to transfer it to the fabric, cut and gently sew our trousers to the neck. Congratulations on upgrading your wardrobe!
Comments
Related posts:
 Unusual elements of decor, how to make a hanging wigwam with your hands, step by step instruction.
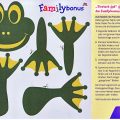 How to make a frog from paper - step by step instruction.
 How to make steamship from paper - step by step instruction
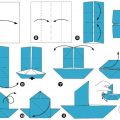 How to make a paper boat - step by step instruction
 How to make a plane from paper - step by step instruction.