Embroidery makosh scheme of the amulet and symbols in the master class (photo)
Content
- Master class on embroidery of the amulet of the goddess Makosh
- Several rules of the embroidery embroidery
- The choice of thread
- Video: patroness of needlewomen-goddess Makosh
, Like any other, has many specific conventions and rules. When performing, you must take into account not only the quality and texture of the threads, but also the operating time.
The ancient Slavs paid much attention to colorEmbroidery. The guardian for the younger generation has always been red, for women - red or black, for men - green or blue. In the old days, embroidery was made with high-quality wool and raw silk, painted in red, almost scarlet. In the opinion of our distant ancestors, threads made of cotton, perfectly protected from damage and evil eye, silk helped to keep clear thinking and solve complex issues, and wool protected people who collided with evil.
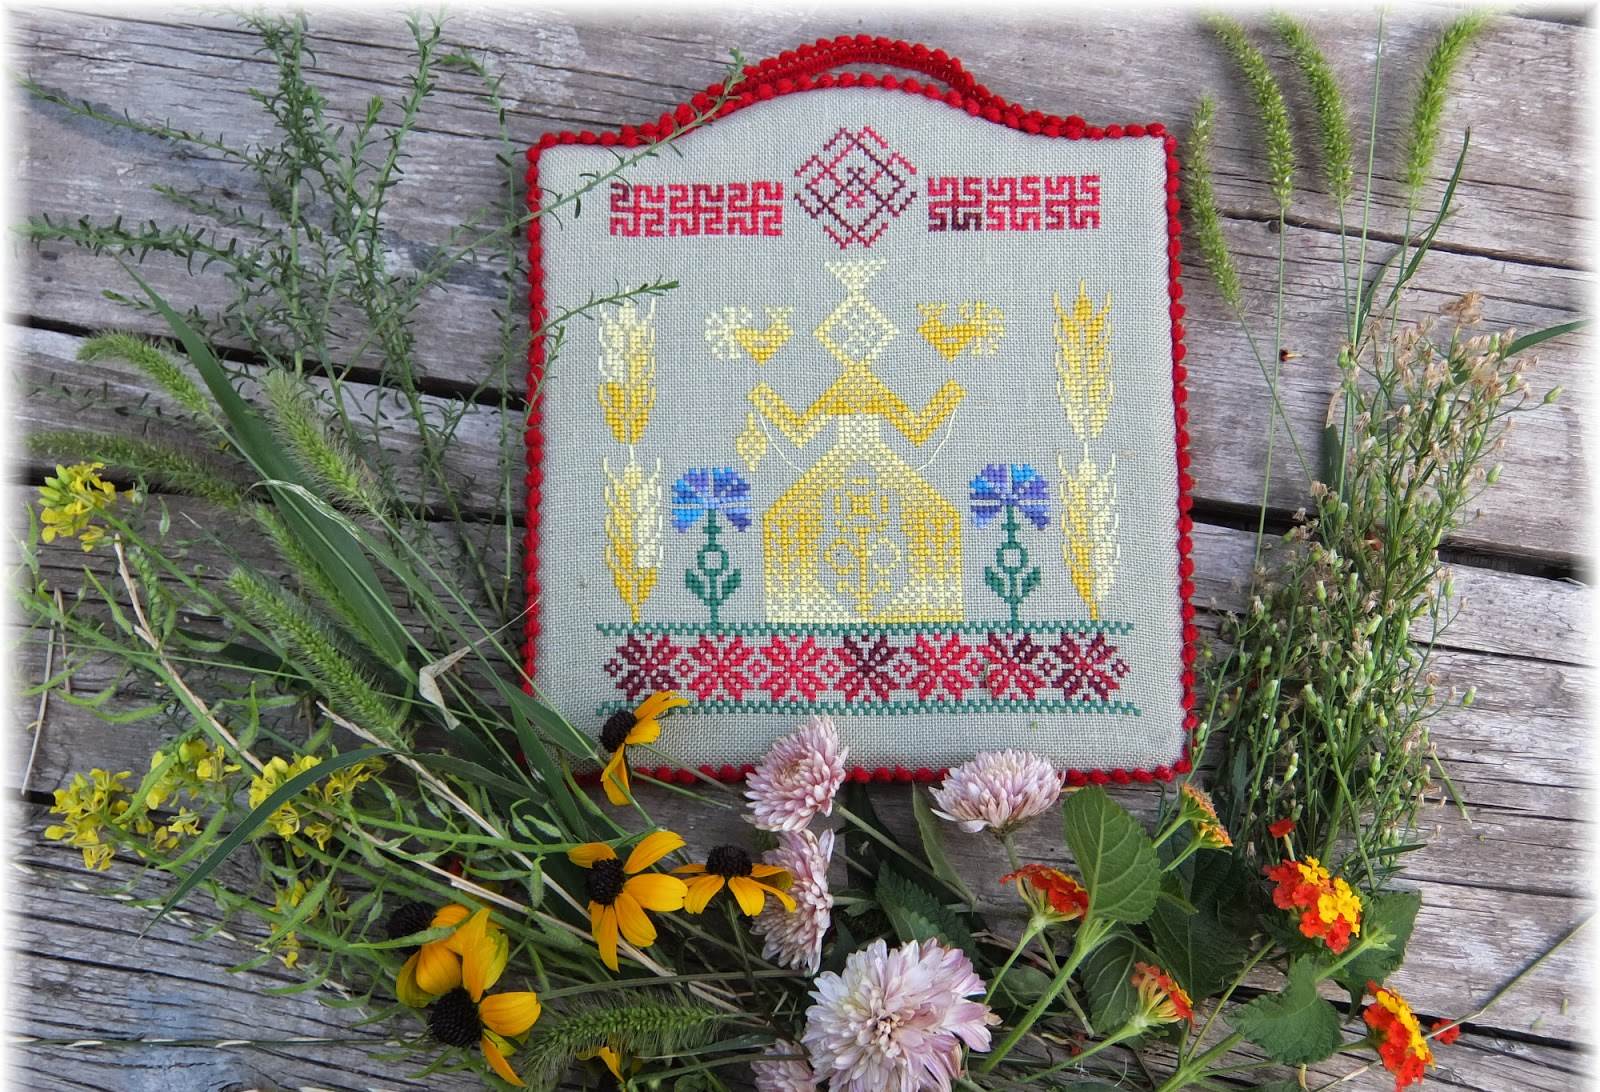
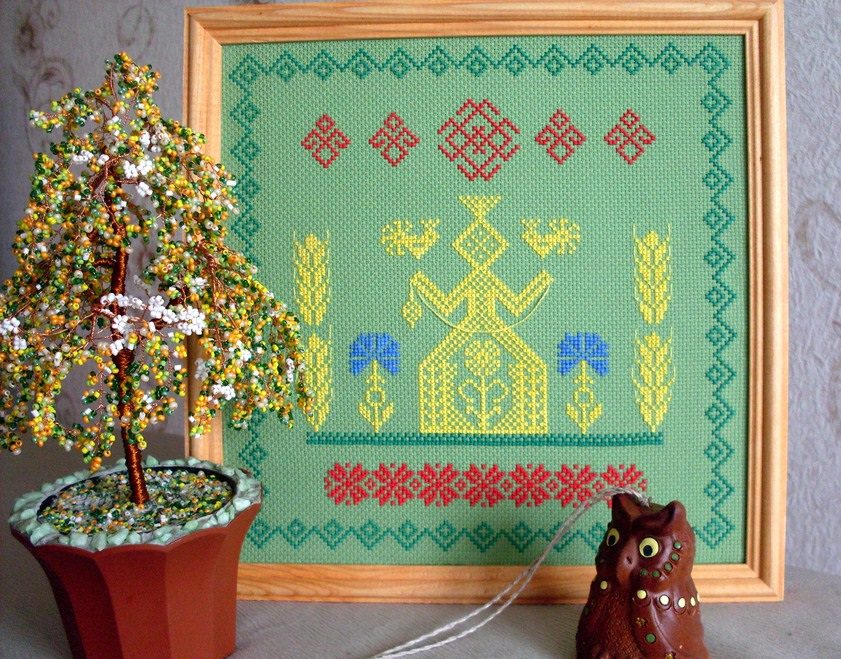
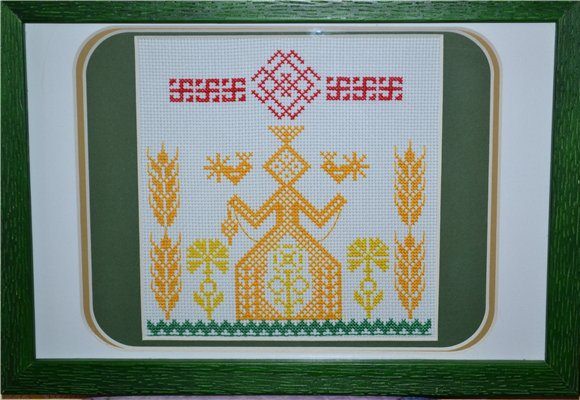
The goddess Makosh was considered the patroness of ancient timesHousekeeping and needlework. The charm with the embroidered mistress of the home gave his owner the ability to soon solve economic problems and revealed both culinary skills and talent for needlework. Probably, that's why this amulet is so popular with modern masters.

Master class on embroidery of the amulet of the goddess Makosh
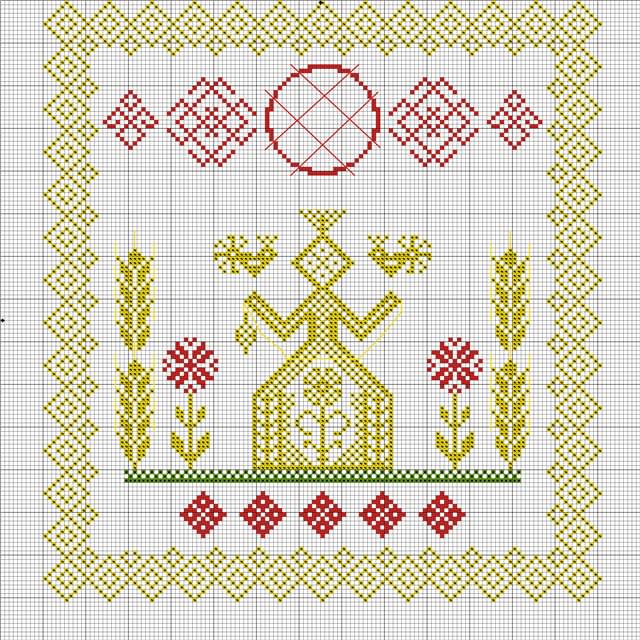
In the manufacture of this embroidery there are no strictRules. Embroidered Makosh on a green background. If this shade is not particularly appealing to you, try to add at least a green pattern or a green frame. In extreme cases, embroidery can be decorated with green crosses in the background.
Preparatory stage
Embroidery makosh today does not require specific preparations. That is, it is not necessary to wait for tenth or fourteenth lunar days.
It is necessary to prepare the following "ingredients":
- The outline of a green hue;
- Threads of a yellow shade.
Getting Started
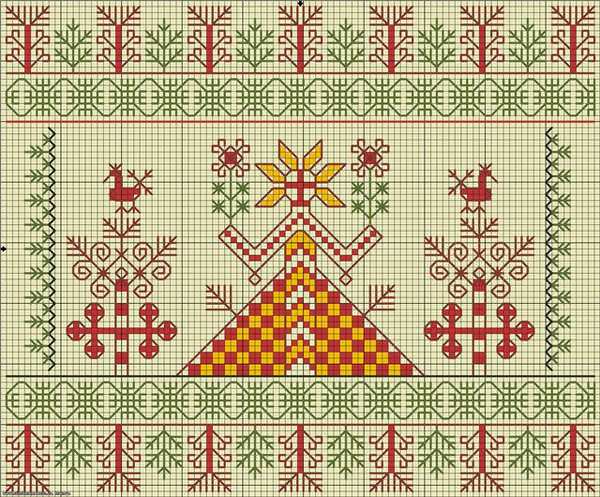
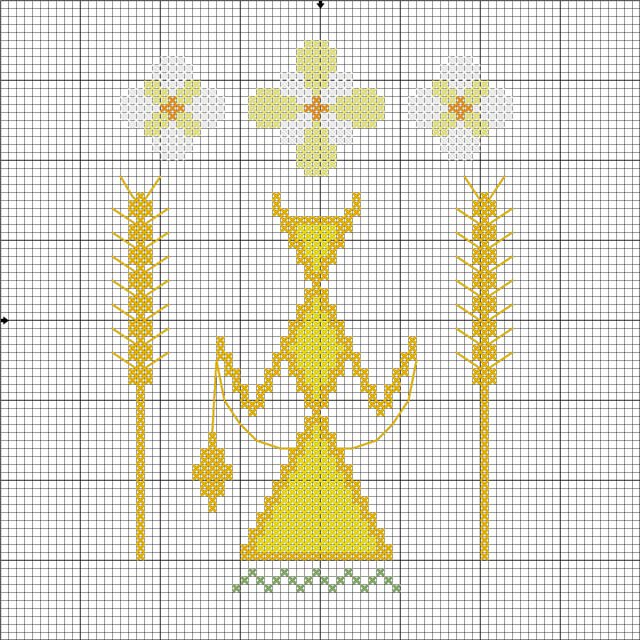
The embroidery scheme is quite simple and is freely available. The scheme is chosen depending on the taste preferences and abilities of the master.
The next stage is the marking of the canvas. To do this, you will need a marker or a snap. Mark the boxes in size 10 to 10. This is necessary for convenience: you will not be mistaken with the number of crosses needed and get the opportunity to work from any place.
Important point: If you are a beginner embroiderer, the ideal scheme for you is the goddess Makosh in the middle of the picture. Around it you can add the elements that come to you by heart - spikelets, flowers or birds. Thus, you will get not only the right, but also a very beautiful amulet.
In order to embroider a charm, it is important to remember the following:
- The needle should not be thick. If there is a choice, stop on numbers 24 and 26;
- Embroidery will be perfect if you work with an even number of threads - with two or four;
- Canvas with holes - an ideal material for cross stitching. If you take a material with a uniform weave of threads, then it is not even an hour to get confused;
- Despite the fact that the most popular scheme is Makosh standing on the waves, it is best to embroider the amulet with the sown field or the goddess standing on the ground.
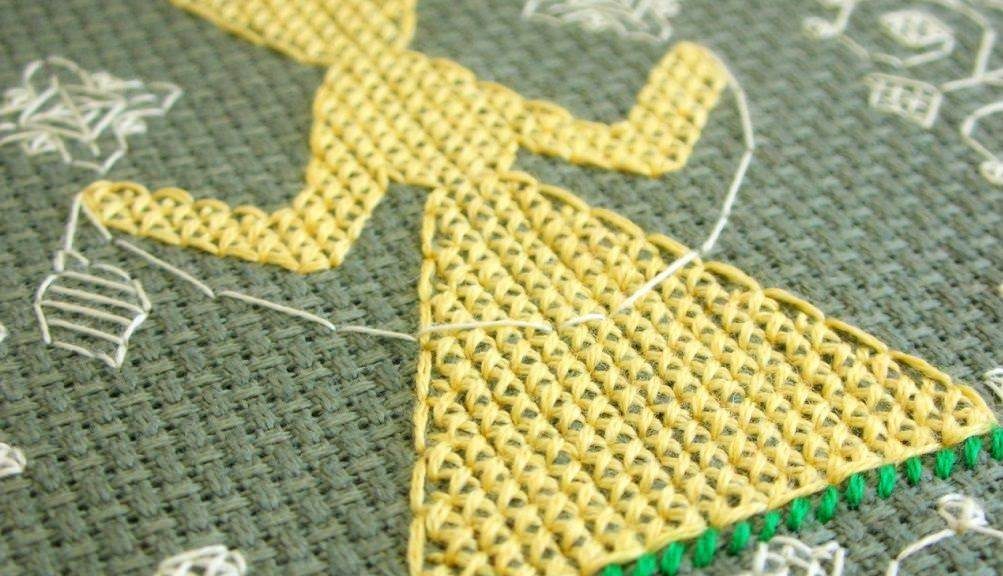
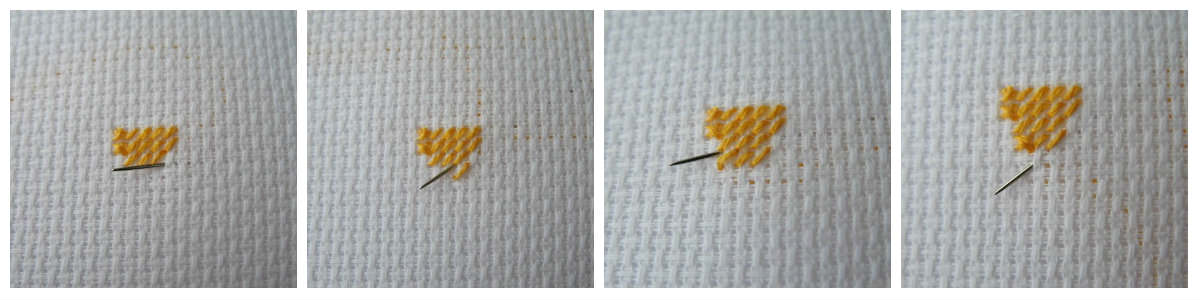
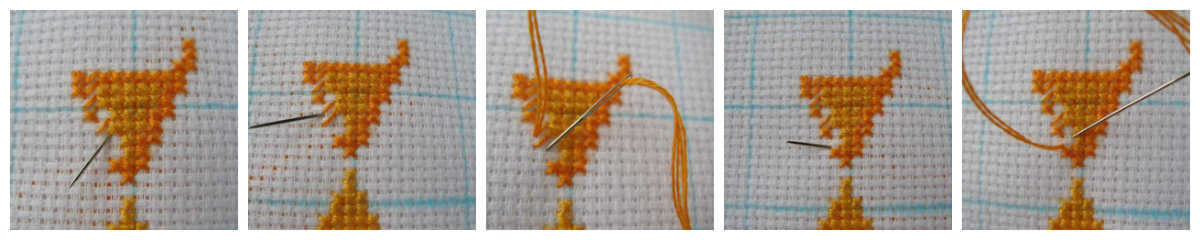
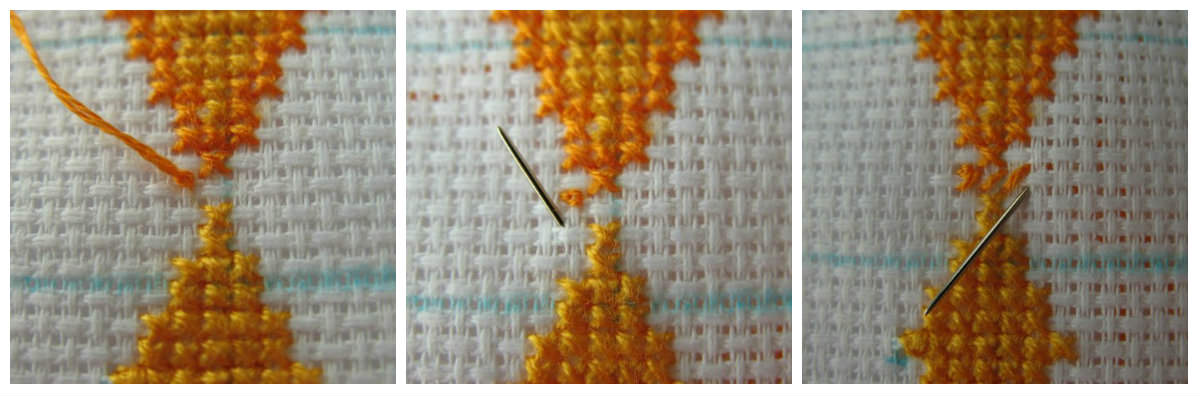
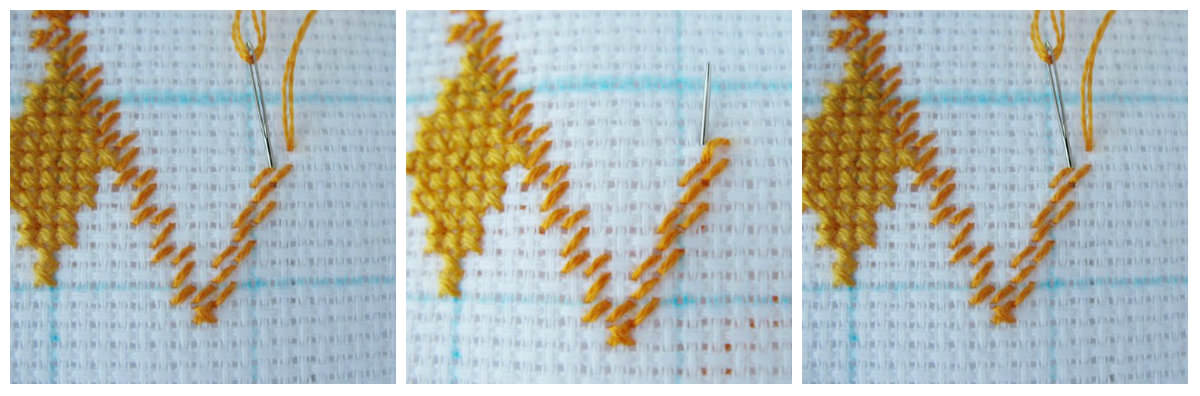
Head The principle of embroidering the goddess MakoshEmbroidering crosses one by one. The scheme is first filled with semi-crosses, and after the master sews in the opposite direction, closing them. The scheme with the goddess, depicted between the two ears, will be the optimal solution. It is recommended to start work from the inner, the lighter part. Cross stitch embroidery includes the following steps:
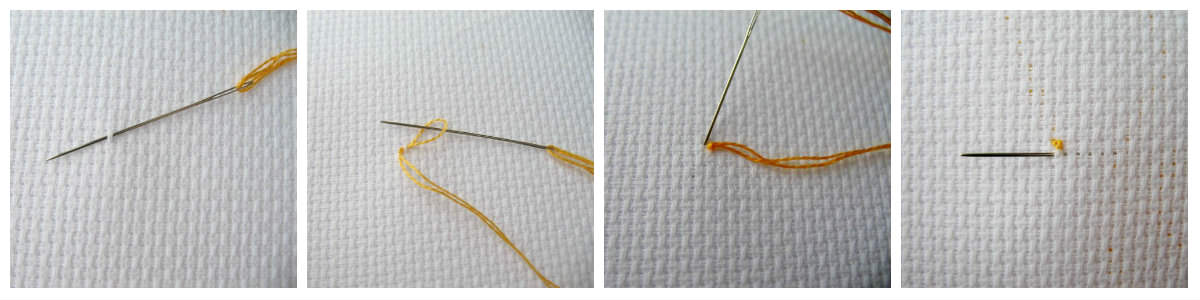
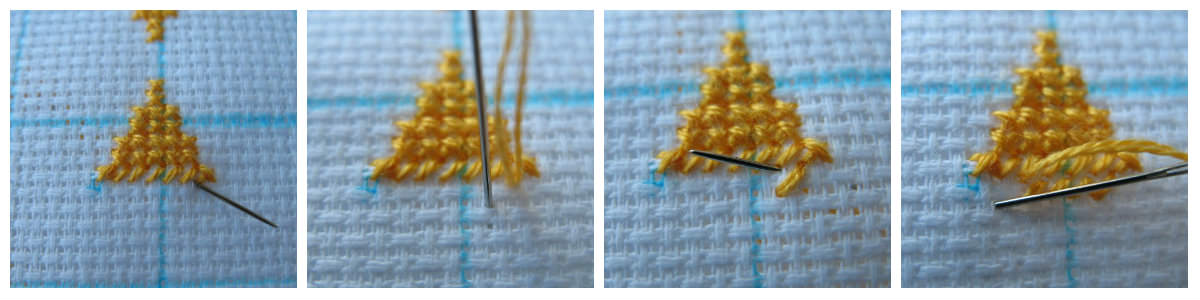
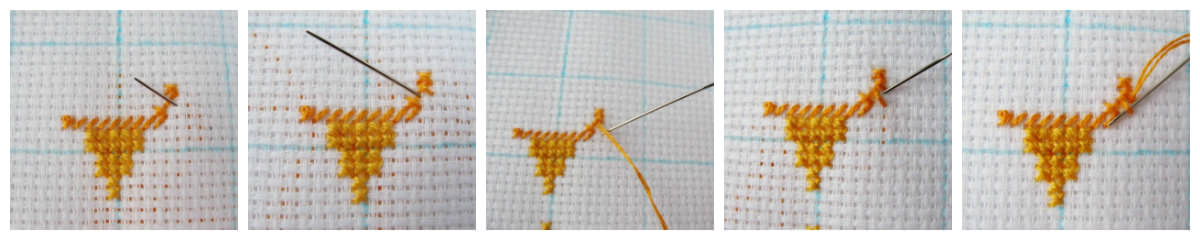
The head of the goddess Makosh is embroidered. If you decided to embroider in four strands, then take two pieces and fold them in half. On the one hand you will get a neat loop, on the other - two nice "tail". Both "tail" must be threaded into the needle. Next, thread it on the "face" of your work under the threads of the central cross;

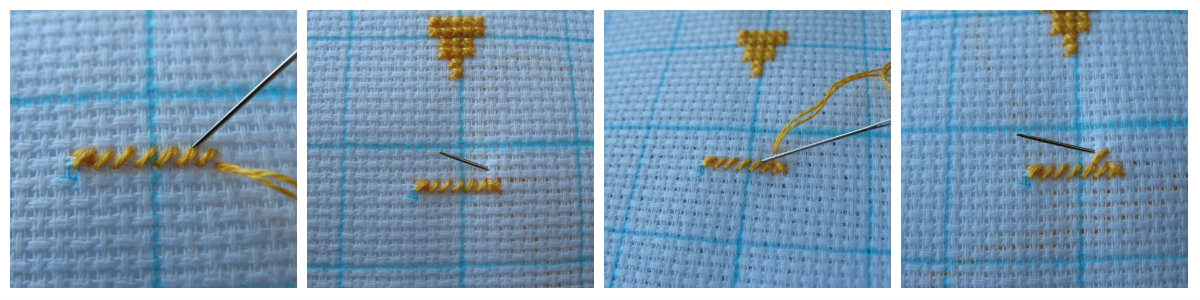
Given that the guard is embroidered from the top down, the needle must be inserted into the upper hole and removed to the wrong side;
The next step is again to work with the wrong side. To do this, you need to insert the needle into the lower hole and sew five neat semi-crosses;
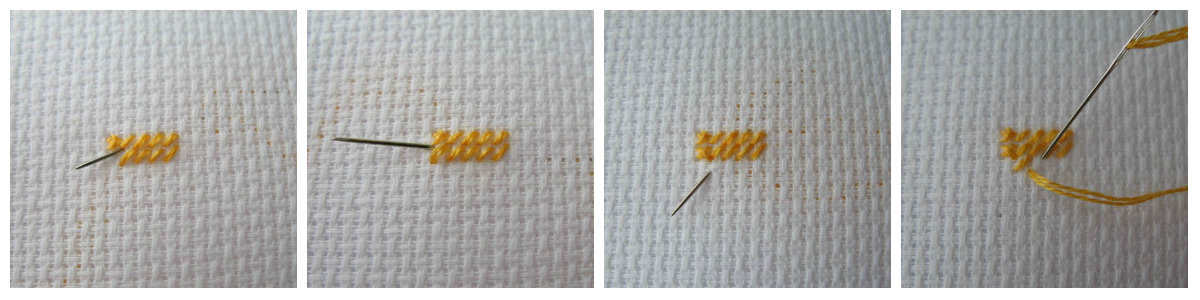
After that, bring the needle to the "face" of the work, to the same hole that is above the place of the previous puncture. You will get a vertical stitch;

After the last element is completed, bring the needle to the "face" of the work strictly under the last puncture;

Then you will need to make two half-crosses;

Closing all the crosses, pull the needle to the front and stretch the thread under 3-4 elements;
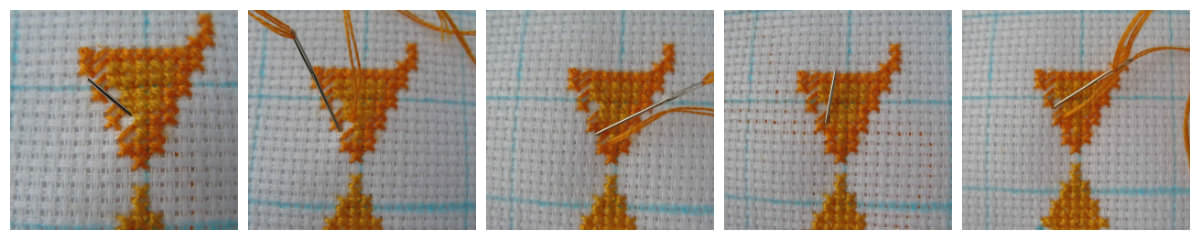
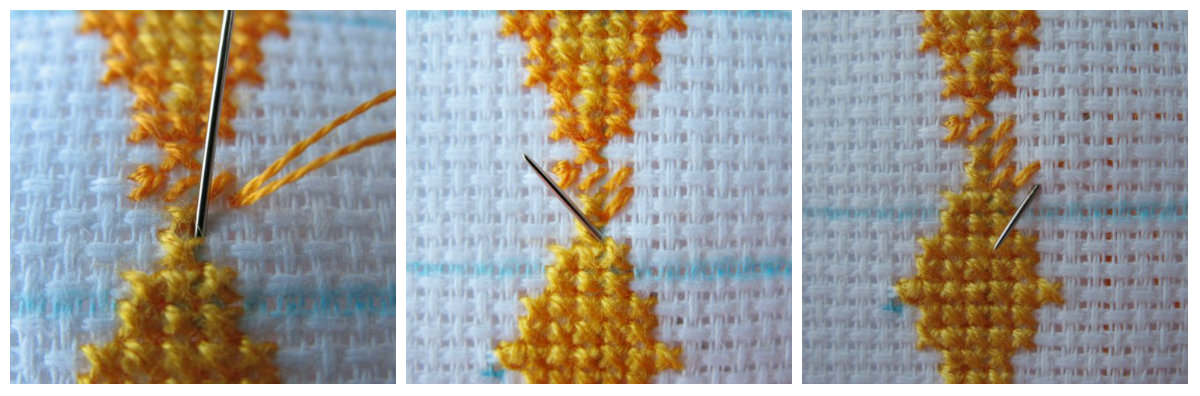
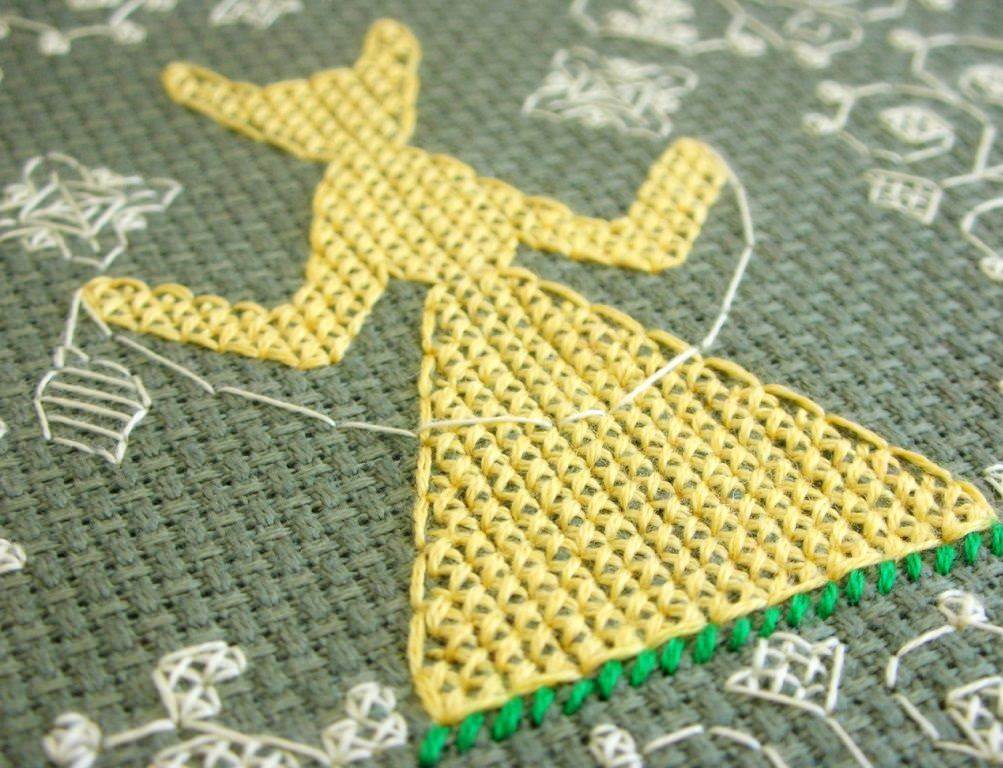
Surely you noticed that the head of the goddess Makosh resembles a triangle in shape. By the same principle, subsequent elements of the drawing are executed, except that each successive series is doubled.
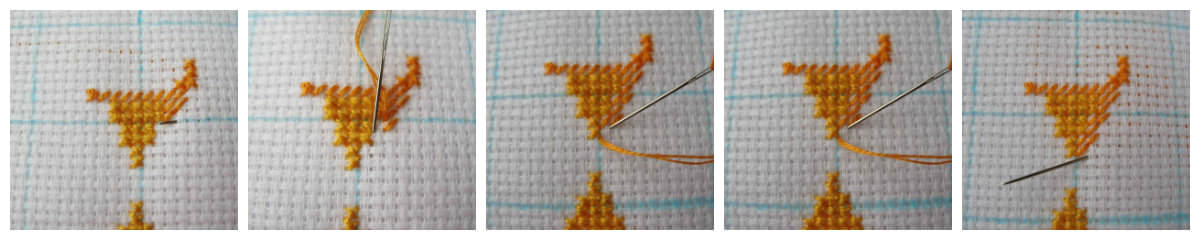
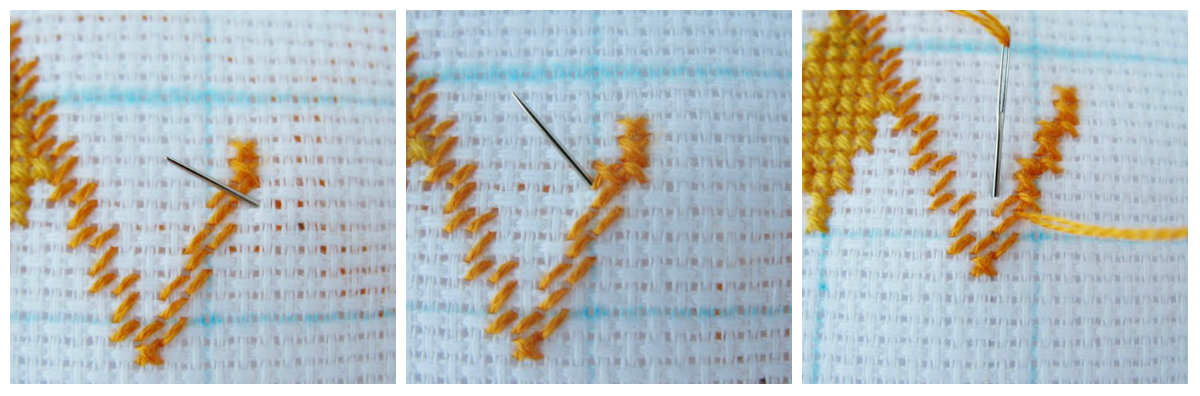
Body The next stage is the creation of the body of the goddess Makosh. The shape of the trunk is a rhombus.
Starting to create this element, it is important to remember that you need to embroider from the longest row. Then proceed as follows:
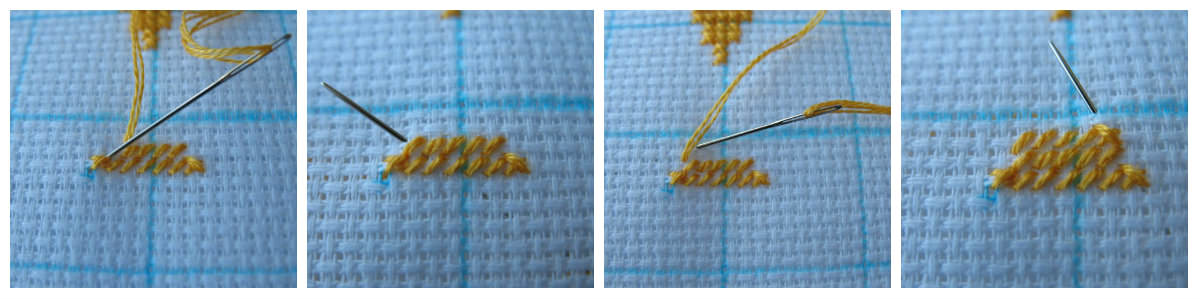

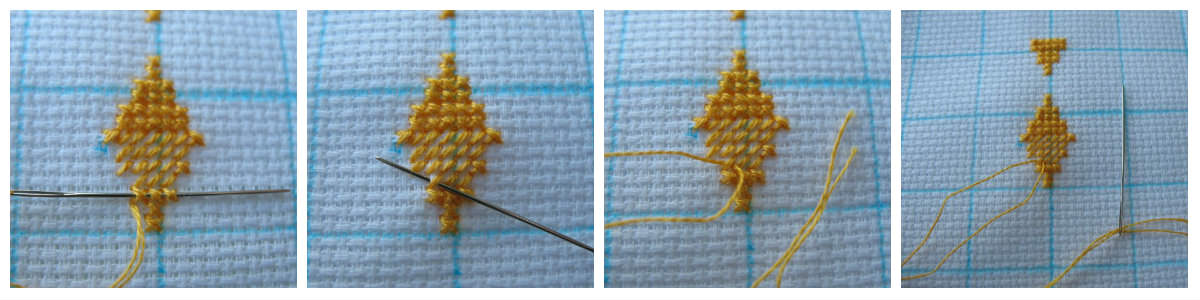


Do not forget to turn over the work and admire the wrong side. It was perfect!
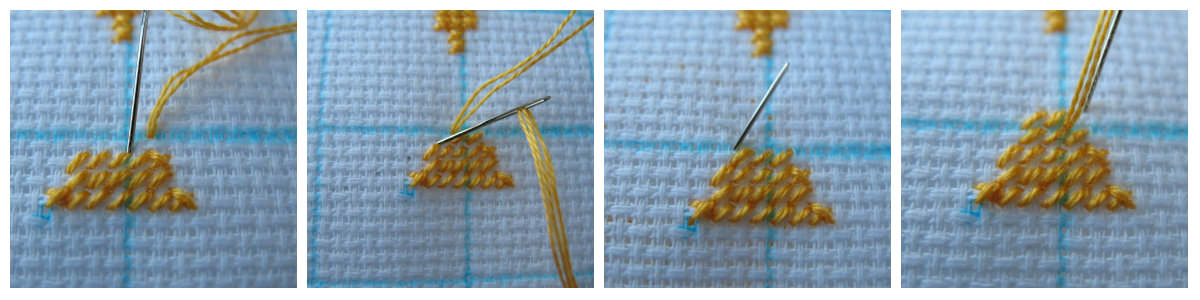
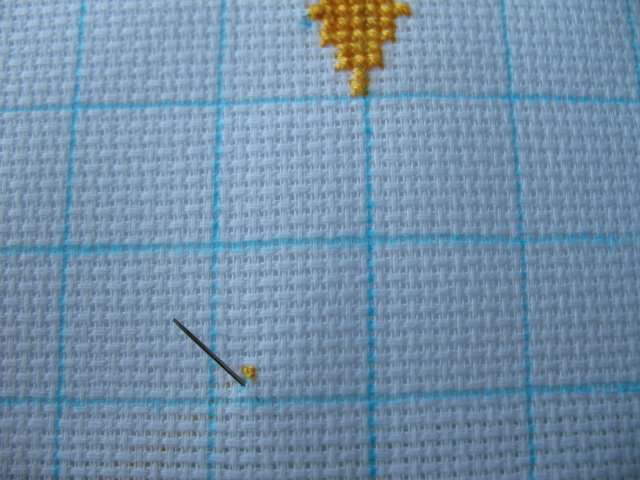
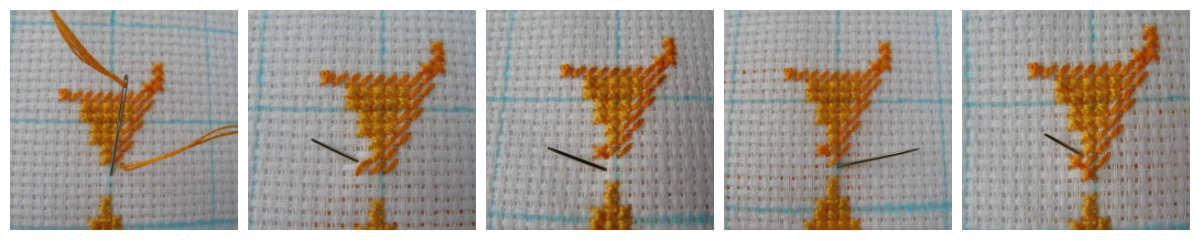
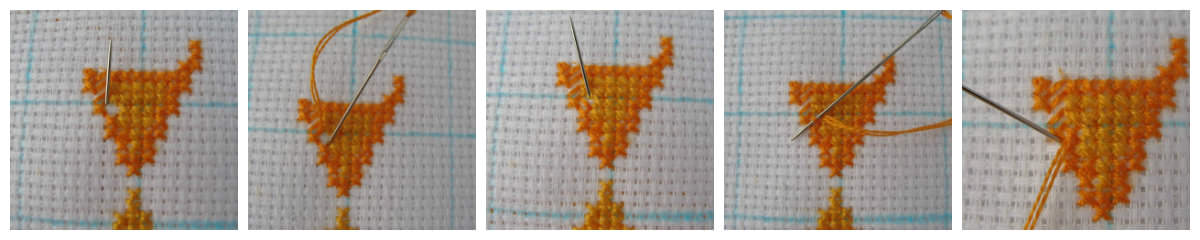
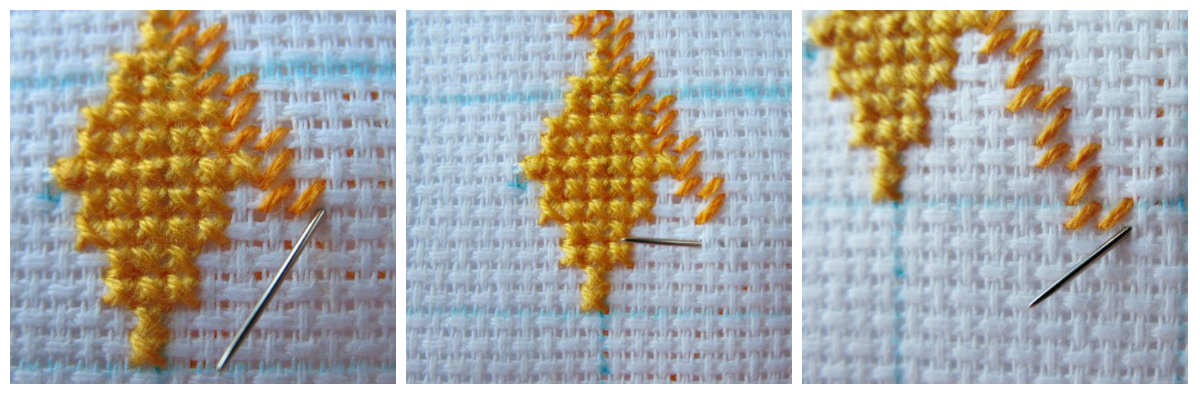
Skirt An important step is the embroidering of the skirt of the goddess Makosh. Even if you already have a good idea of the whole "wisdom" of embroidering triangles, do not fail to use some tips:


Head shaving In order to protect the charmComplete and beautiful, you need to properly trim it. To work with the plating of the head of the goddess, you will need a thread of a different shade, a little darker. So, let's get down to work:

Fasten the thread;
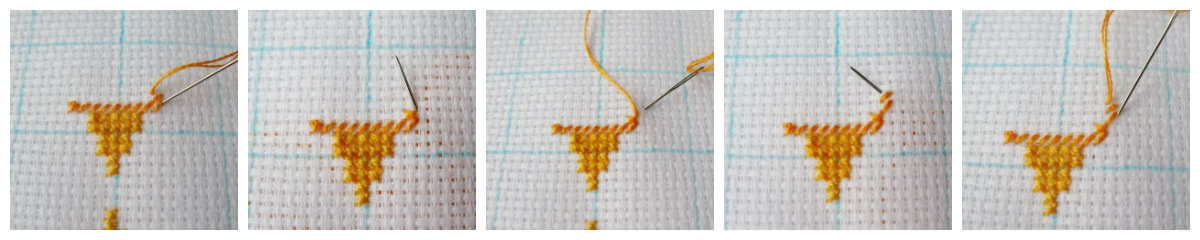
Return to the unfinished cross. It is important to follow the "ideal" of the wrong side, so first you need to perform the upper stitch and bring the needle upright to the "face" of the work. Pass the needle under this stitch and complete the work on the cross;
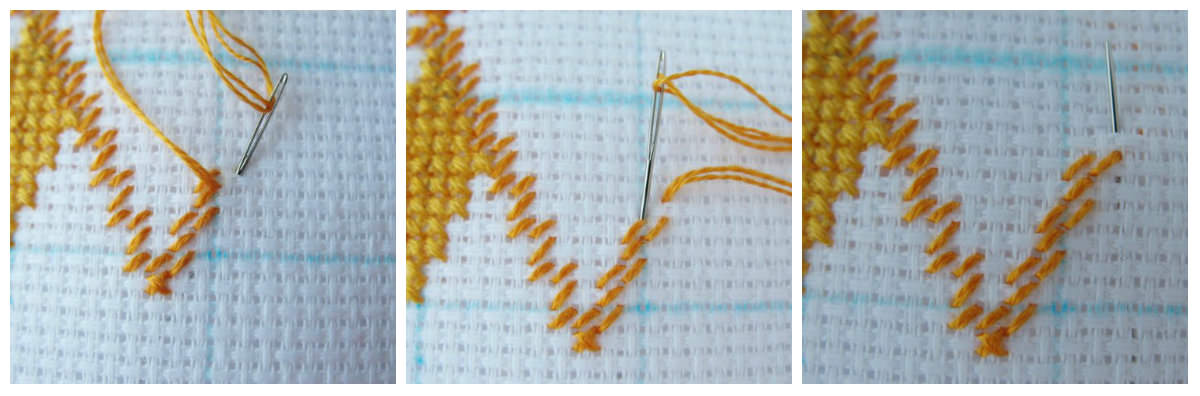
Wear the triangle to the end and execute three more half-crosses, the last of which must be closed;

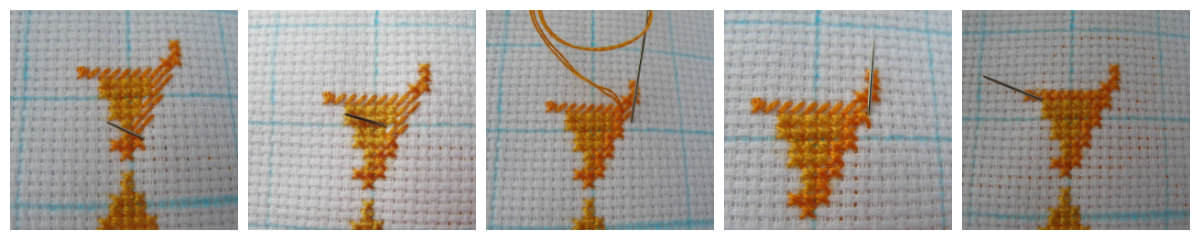


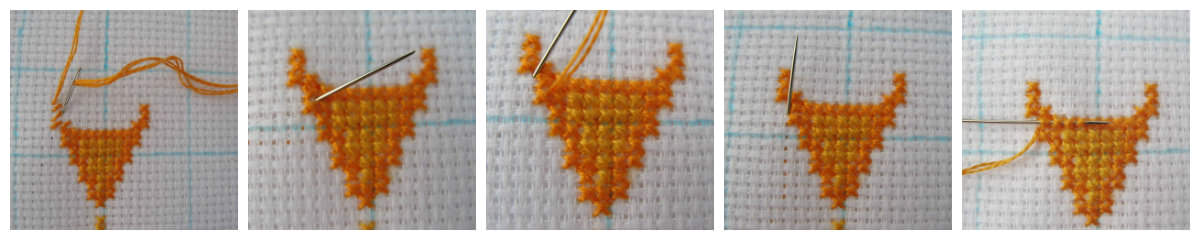
Hand The color of the thread should be the same as that used when working on the edging of the head.
After exactly the same way you work the second hand, your amulet will be completely ready.


Several rules of the embroidery embroidery

Work on magical objects was forAncient Slavs a real sacred action. Taking advantage of the invaluable experience of our distant ancestors, you can make a beautiful and effective amulet. In order to make the embroidery perfect, you will need to adhere to a number of rules:
- The choice of the scheme should be approached carefully. First of all, you must analyze what exactly embroidery is being made for. The ancient Slavs sincerely believed that the amulet can not only protect the home of the needlewoman from evil, but also attract health, love and prosperity;
- Despite the "love" of the goddess Makosh to greenTint, choose what you prefer. If you want to strictly follow the Slavic traditions, then you need to choose the shades of green, blue and red.
- Like any other needlework, the embroidery of the goddess Makosh must be performed with desire.
- It is important to remember the order during embroidery, as well as the careful attitude to work. The Slavs kept the ready-made amulet in a clean and bright place.
The choice of thread
According to the ancient Slavic craftsmen, the type of working thread had a great influence on the amulet. So:
- A thread made of flax, perfectly suitable for work on solar symbols, had a calming effect on needlewomen;
- Thread of wool defended the master and her relatives from the "evil eye";
- A thread made of cotton gave a stable protection against unkind people;
- Thread of silk contributed to attracting good luck.
Embroidery with wool was performed on garments inArea of the solar plexus, heart and neck. With the help of flax handymen embroidered symbolic patterns. Optimum option is a cotton floss. The main condition - all materials must be "live", otherwise embroidery will not work. For example, it is better not to pay attention to "dead" synthetics at all.
The basis of embroidery is not only reliable, but alsoNeat thread fastening. Remember that after the first wash the loosely attached ends will make themselves felt. In order to avoid this, you should avoid knots and "hiding" dark ends under light stitches.
Video: patroness of needlewomen-goddess Makosh
Comments
Related posts:
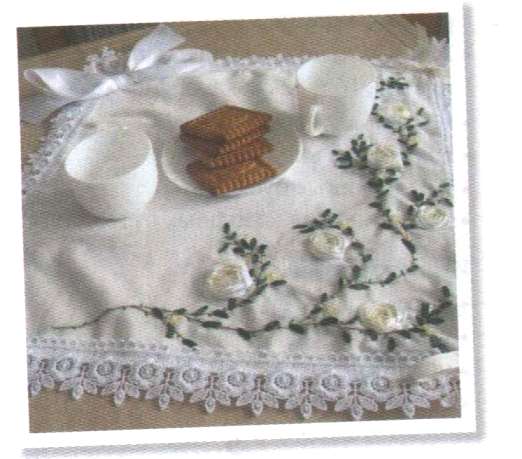 Tablecloths embroidered ribbons in a master class (photo)
 Buti elegant embroidery volume in the master class (photo and video)
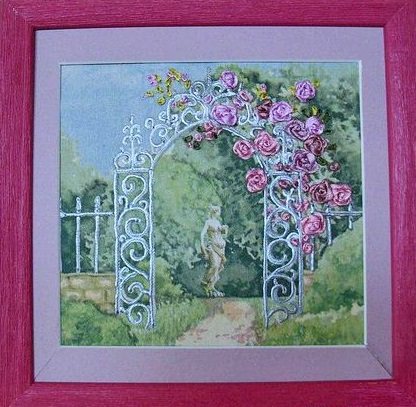 Embroidery ribbon paintings in the photo and video master class
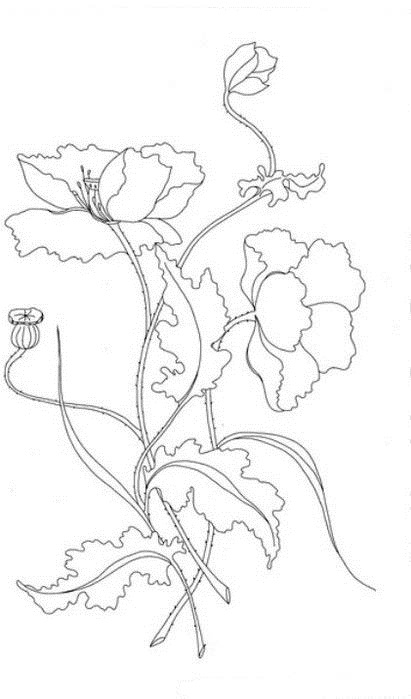 Flowers embroidery smooth schemes and a master class