Embroidery lilac ribbons tutorials (video)
Content
- Lilac French knots
- Video: Step by step tutorial embroidery lilac ribbons
- The second method of embroidery lilac satin ribbons
- Video: We embroider lilac ribbons
In this tutorial, we'll show you howfashion embroidered lilac using satin ribbons. For this purpose, you can use various methods of embroidery, and the circuit operation in each case its own. We consider two methods by resorting to which can be embroidered lilac. For each of them hold a master class with the video. For lesson accompanied by appropriate theme photo, which you should definitely see.


Lilac French knots
And now it's time to start the first master class on embroidery of flowers of lilac satin ribbons. It is necessary to purchase the following materials and tools:
Getting Started on lilac satin ribbon embroidery.
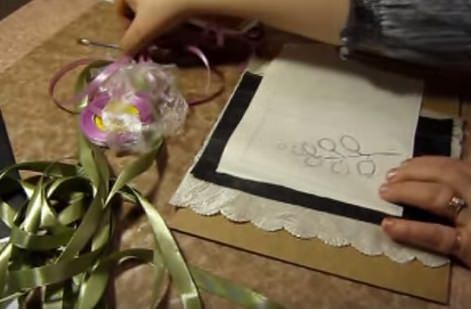
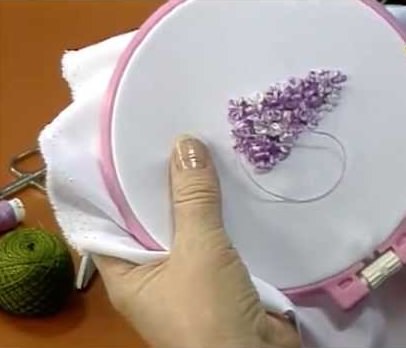
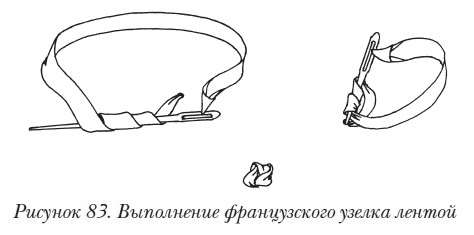
We start our work on embroidery with lilac ribbonsthe transfer pattern on the fabric. Our pattern, or in other words, embroidery scheme, should be transferred to fabric for the convenience of work on embroidery. Puts on the cloth carbon paper, and put it on our scheme. Contours pencil drawing diagrams, and then remove all and proceed to embroidery. To do this, take a lilac ribbon width of 5 mm, and learn how to do a French knot, because that's what we'll embroider seam and lilac.
Vdevaem our tape in the needle, stick the needle into the fabricinside out and display it on the front side with tape, leaving the free end of a length of 1.5 cm. To embroider French knot, put a ribbon on the index finger and wound around the needle once, and then derive the needle on the underside of the work. And now, using the drawing, make the second the same bundle. The needle is injected into the tissue from the inside near the first node, is displayed on the front side, and then a second French knot. Embroidering regular nodules, pay attention to the wrong side of the work.
It is necessary to watch closely so as not toget the needle in the previously embroidered ribbons. For better absorption of the material, you should refer to the video tutorials that we make. Any lilac consists of both this attempted colors, and from buds that had not yet opened. Therefore, we need to learn to embroider these buds of lilac. The scheme of work remains the same, and the buds have to fit into it. To perform the bud lilac derive needle on the face of the work, put tape on the base fabric, stepping back a bit, again introducing a needle directly into the tape. The needle is displayed on the wrong side, and formed a small bud on the face. The smaller the piece of tape on which you turn away, the less will be your bud. Follow a few of these buds next to each other.
The smallest bud can be embroidered withoutsticking a needle in a tape. To do this, simply display the tape on the face of the work, and, stepping back one millimeter, again go to the wrong side. We get a very small unopened bud of lilac. Working on the embroidery, observe the wrong side of the work, on which everything should be smooth and orderly. Embroidering a sprig of lilac, can be arbitrarily varied flowers and unopened buds, and perform French nodules of different sizes. This is achieved by varying strength tightening knots. If you will delay it more, then get a small flower. If it does not do very much, it will flower big. So what happens in nature. On a branch of lilac flowers are available in different sizes and unopened buds.
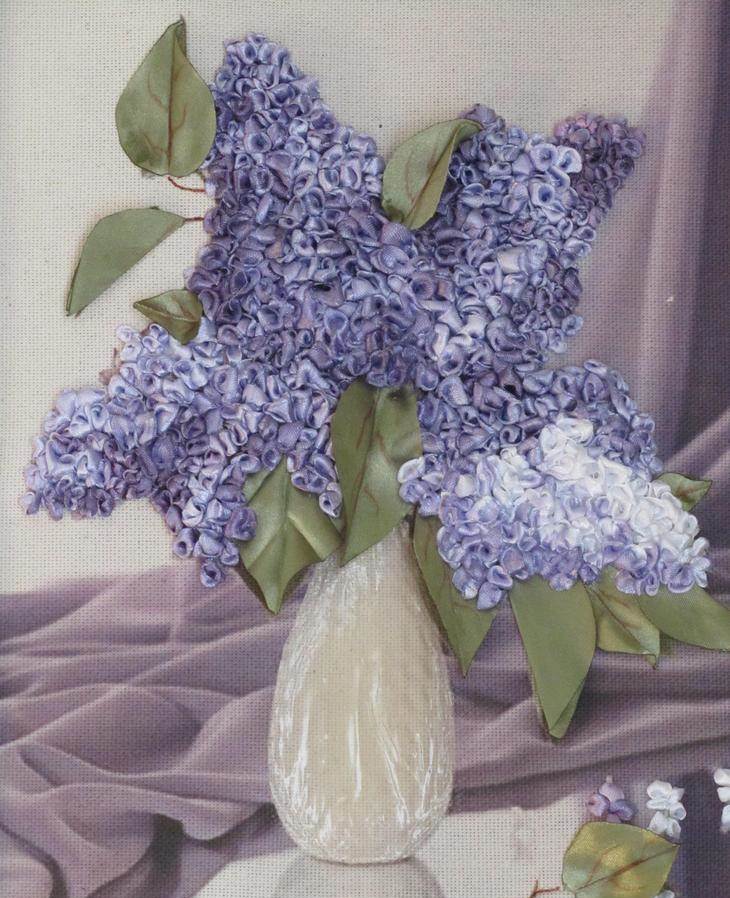
Using all these techniques of embroidery, we will continueWe are working on a lilac, keeping our image and not go beyond the boundaries of the scheme. But when the lilac ribbons embroidery is finished, we will embroider a few green leaves. To do this, we will need a green satin ribbon, 10 mm wide. Cut off a piece of a length of 5 cm and fold it loop by placing one end to another, fixing them with the green thread floss. We need the three leaves of one branch of lilac. To place they need to be in a place where there are embroidered thread grooves. That's where we have to sew our leaves. Sew on leaves, hiding their base for the flowers, and the top thread fixing.
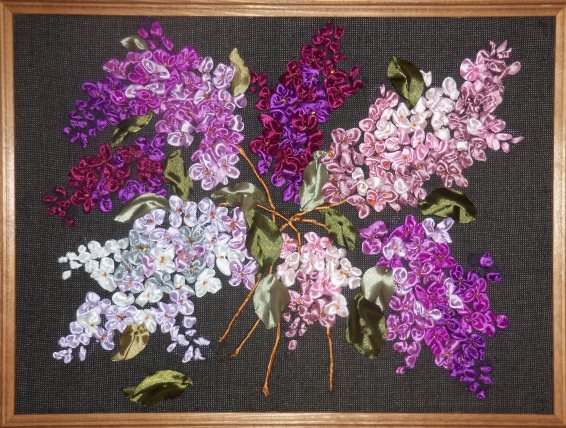
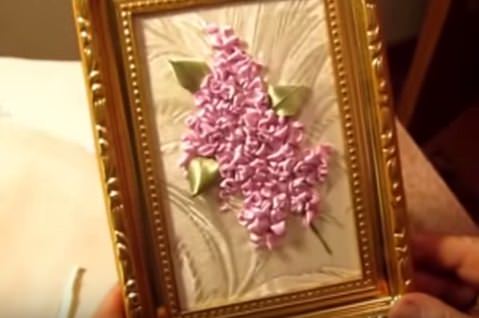
To use green stalk embroidery threadsewing and embroidering it simple embroidery. To stem was more thick, grab a thread in a few additions. The more you make additions, so nice to get your stalk. This branch of lilac embroidered very well placed in a special beautiful frame. Embroidered gabardine fabric, this will be a very lilac look good in a frame on the wall of your room.
Video: Step by step tutorial embroidery lilac ribbons
The second method of embroidery lilac satin ribbons
This lesson contains another master class on embroidery lilac satin ribbons. Prepare the following materials and tools:
The second method of embroidery lilac ribbons radicallyIt differs from the first one, but the circuit or sketch on the fabric needed here. The difference is that some lilac flowers are produced separately and then sewn to the twig and some embroider on the canvas. So it is possible to achieve the maximum similarity with real lilac flowers.
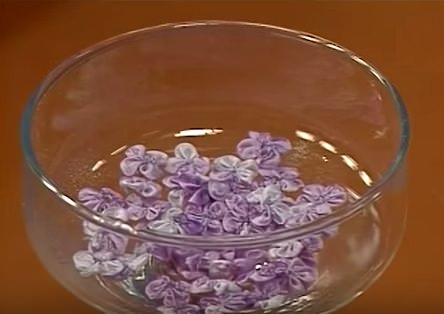
For one branch, we need to perform somehundred individual flowers, each of which will require a length of tape 7 cm in length. Each segment is required to process the flame from the lighter, or lilac will look sloppy and disheveled. To make a flower lilac, basting seam need to collect a piece of tape and pull his string. Begin basting on the vertical edge of the scorched and continue turning the seam 90 degrees. Prior to bend basting tape in three places, as if dividing it into four parts. First, follow the fold by bending the segment in half, then half again. You will receive a three-fold, which will divide the segment into four parts.

Continuing, basting one edge to the linesfold. Reaching each fold line, climb up it and descend down. When tightening the threads of the transverse seals form the individual petals. End the basting on the second vertical edge of the flame singed. After this thread to tighten, with the result that you will see the flower of lilac, which is absolutely repeats flower in nature. Threads sure to fasten, and sew the two free edges together. Our flower is ready. As we have noted, these flowers need about a hundred pieces.
Now draw a sketch on the canvas, which we have alreadyWe secured in the hoop and start embroidering. The first to perform upper unopened buds with a very small French knot. Tape wrapped around the needle once, and enter into the fabric of two millimeters away from the puncture site, and we get a bud on a stem. The distance between the pinholes and forms a leg bud. Embroider a few buds of branches at the top, and in the process begin embroidering iris green twigs, which are attached buds and flowers.
Continuing, we descend down the twig,and begin to embroider half the opened flowers using conventional tape stitches. The embroidery is done in parallel with green iris, ribbon embroidery flowers, purple thread to sew the individual colors. All these filaments and tapes are on the underside of the embroidery throughout. Finished flowers sew yellow thread in the center, forming the middle of a flower. Ready-made colors can be sewn when the work is carried out at 3-4 cm from the top branches. To ensure that your branch has been as much as possible similar to the present, you need to keep before the eyes of the photo lilac. This will facilitate your work and refresh your memory.
Remember that the flowers should be ready to sewin the center, leaving a loose petals that create the effect of reliability lilac. But the gaps are formed between the flowers, fill with conventional tape stitches. To make the visual volume of our branch of lilac, vary the color of the finished color from pale lilac to darker. Take an extra second tier of colors in some places, it will also add volume to your work.
When the work is finished embroidery colors, you need toadd to them a twig, which can embroider as a thread of wool, and of green satin ribbon. On both sides of the green threads embroider two leaf with the green satin ribbon. The tape should be wide enough, about 3 centimeters. Leaves perform normal tape stitch. Our work has come to an end and the embroidery scheme followed. Now you can arrange embroidered lilacs as you tell the imagination and fantasy.