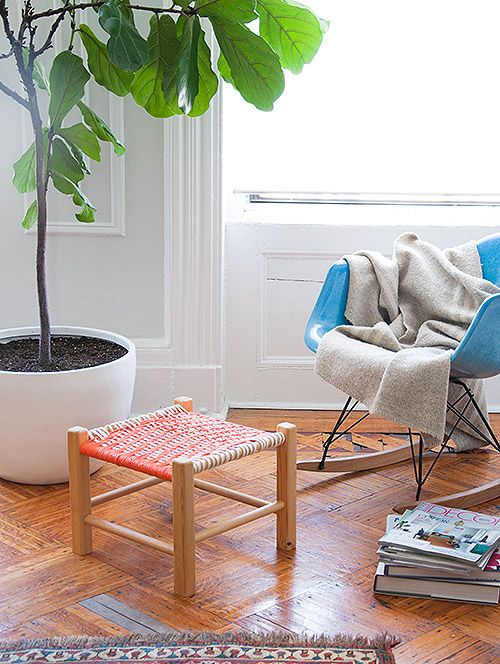
Stool with wicker seat with own hands
The original stool with a wicker seat will beIt is actual in almost any interior. If you use natural hemp rope, then this stool will look great in the interior of the eco, Scandinavian style or loft, and bright synthetic ropes and an abstract geometric pattern will help to write a stool into a modern style with kitsch accents. We suggest that you learn about three master classes how to update an old stool and make an interesting wicker seat with your own hands. Content:
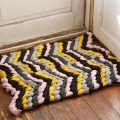
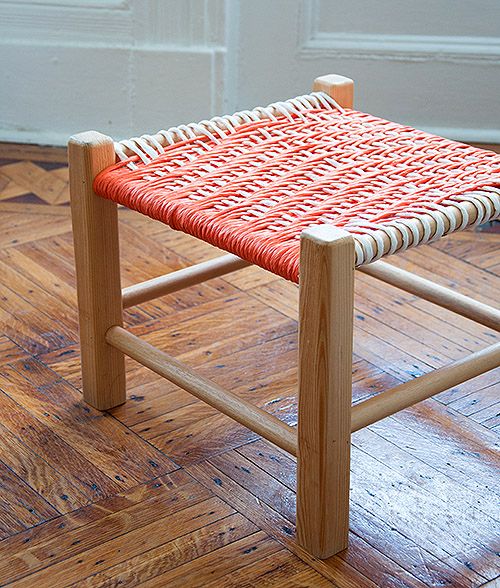
Stool with wicker seat - chevron pattern
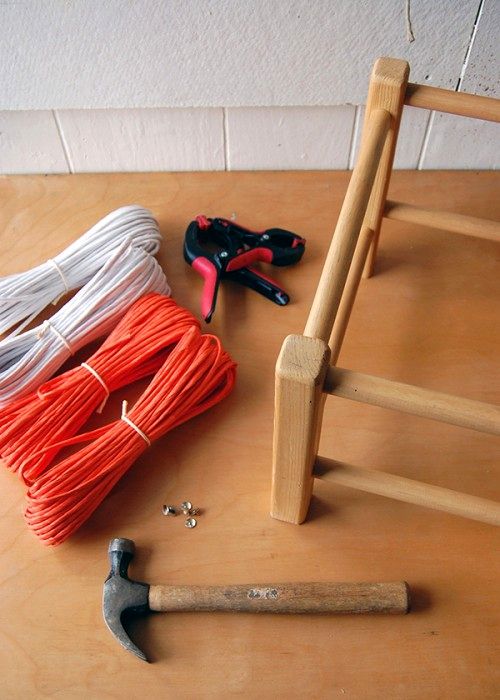
 Necessary materials and tools:
- Stool base (frame with legs);
- Rope or cord of two colors;
- Furniture nails (furniture stapler);
- Scissor clamp;
- a hammer;
- scissors;
- awl;
- Optional - varnish or paint to paint the base of the stool.
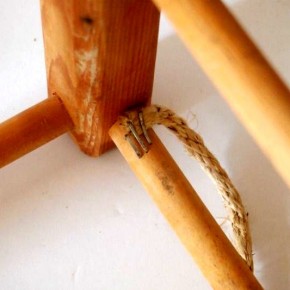
 In this project, you can use any cordOr rope: linen, paper, jute or from synthetic materials. The required length of the rope depends on the size of the frame of the stool. In this example, the frame dimensions were 35 cm by 30 cm, it took about 17 m of the cord for the main weave and about 8 m for the braid. ⇒ Step 1. Prepare the stool base. It could be an old stool without sitting. If necessary, treat the legs with stain, paint or varnish. Decide on the direction of the weaving. To make the rope easier to tighten, fix its end to the frame on the reverse side with furniture nails or a furniture stapler.
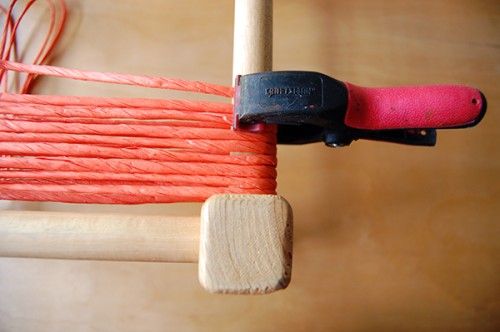
 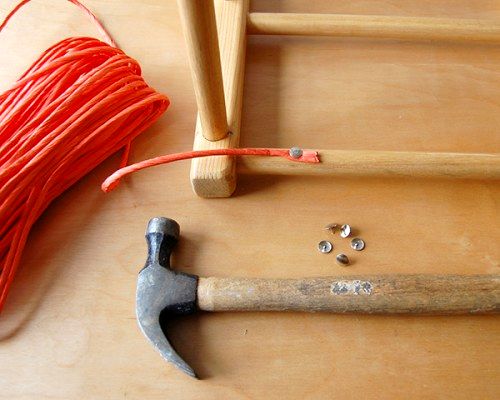 ⇒ Step 2. Begin to wind the rope on the opposite rails of the frame. The coils should be as close as possible to each other. When winding, pull the rope tight. After 5-6 turns, grasp the clip and press the rope firmly on the frame. If desired, to further fix the tension, you can use glue, pre-applying it to the frame. Or in several places, fix the rope with a furniture stapler on the back of the frame. The end of the main rope is also securely secured with a stapler or furniture nails.
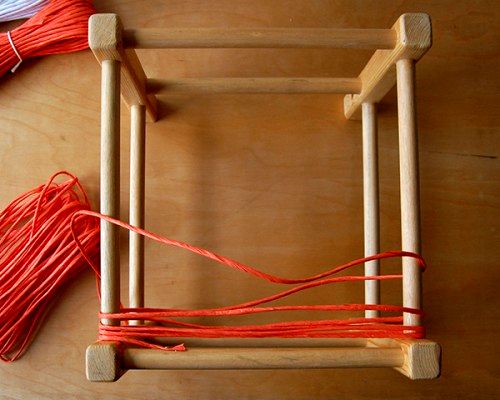
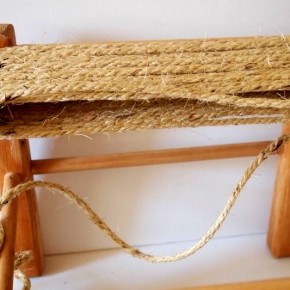
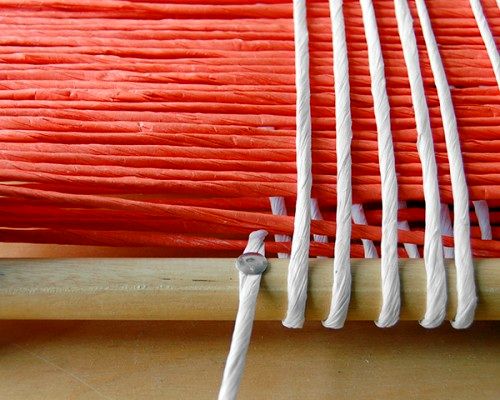
 ⇒ Step 3. Now you can weave an extra cord into the main weave. We will weave perpendicularly to the main rope, alternating rows. In this example, we used circuit 3 of the rope from above, 3 ropes from below. But you can experiment and make 2 to 2, 4 to 4, 2 to 3, etc. Fasten the second rope on the frame, removing the hank under the free rack.
  ⇒ Step 4. Pull the rope through the main netting according to the chosen scheme, wrap it on the opposite rack of the frame and tighten it. If necessary, move the cord left and right. Then start to weave the second row, but set the rope forward one rope. In this way we get a diagonal pattern. Each next row, move one rope. If weave it will be difficult, help shilom. After certain intervals, the braid cord can be fastened to the frame with a furniture nail or a stapler, fixing the tension.
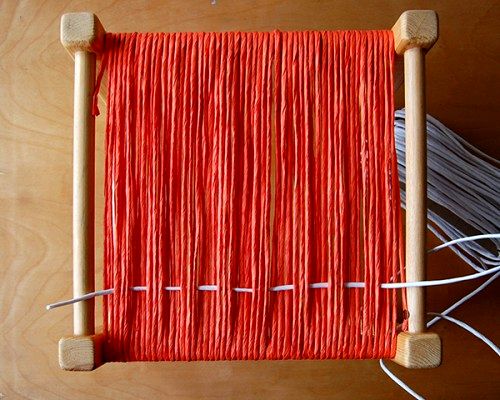
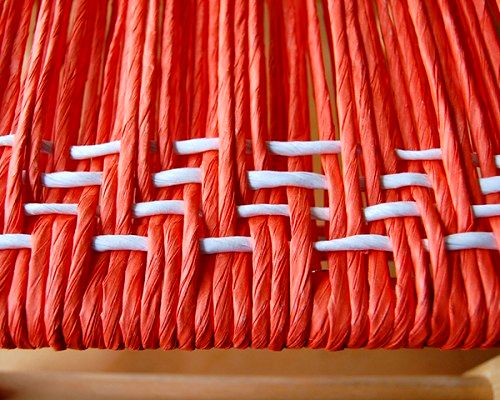
 To change the direction of the diagonal lines and make a pattern in the form of a chevron, in the middle of the braid, move the weave to one rope back.
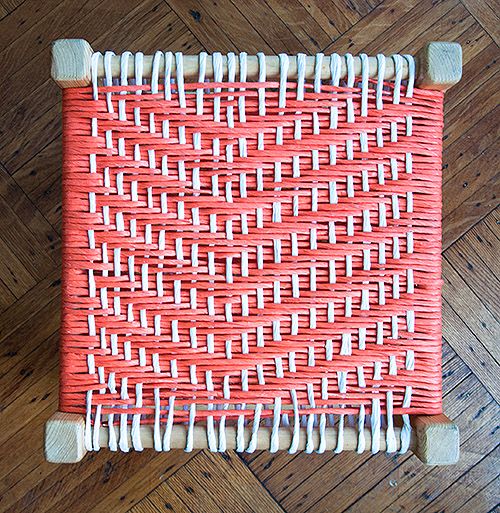
Stool with wicker seat - pattern "diagonal weaving"
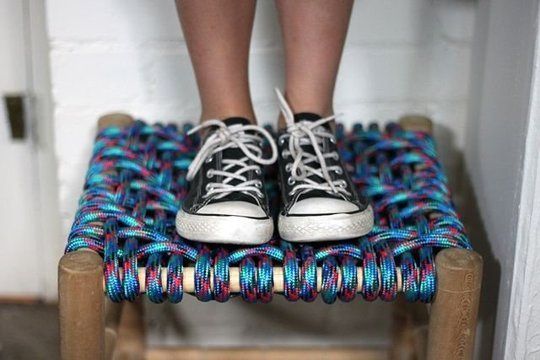
Since in the previous master class we have described in detail each step of the process, then we will consider the main aspects of weaving.  In this case, a rather thickA synthetic rope used in mountaineering and tourism. As a fixation of the rope to the frame, it is better to use ordinary nails of the appropriate size. The technique of weaving is similar to the previous version, only one rope is used here, the weaving scheme of the 2 ropes from the top is 2 ropes from the bottom with a shift to one rope forward. There is no reverse motion, so the pattern is obtained not in the form of a chevron, but in the usual diagonals.
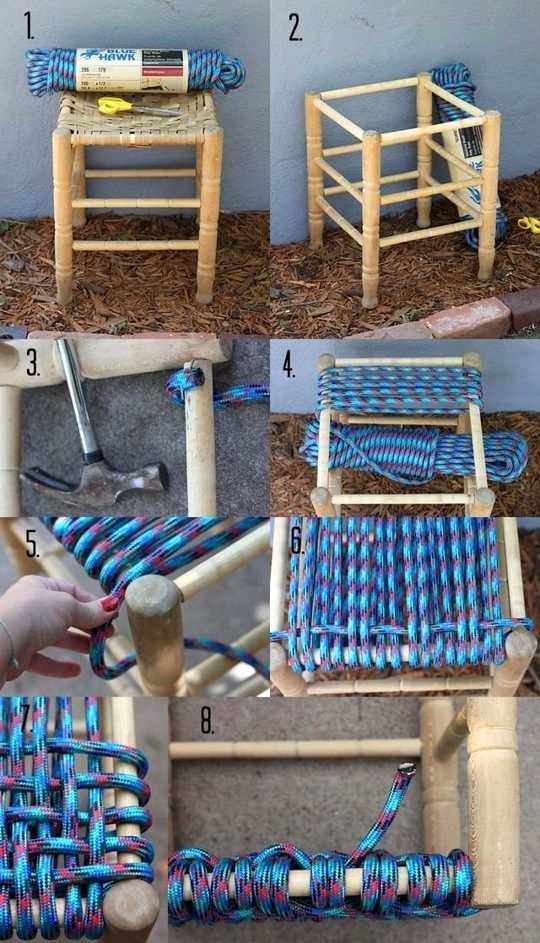
Leg stool with decorative weave
If in the previous two options the tensionWas created as the main, and an additional rope, in this case the main load falls on the main thread, in the braid serves as a decorative ornament. Thus, the stool is more suitable for use as a footrest or as a chair for small children with low weight. 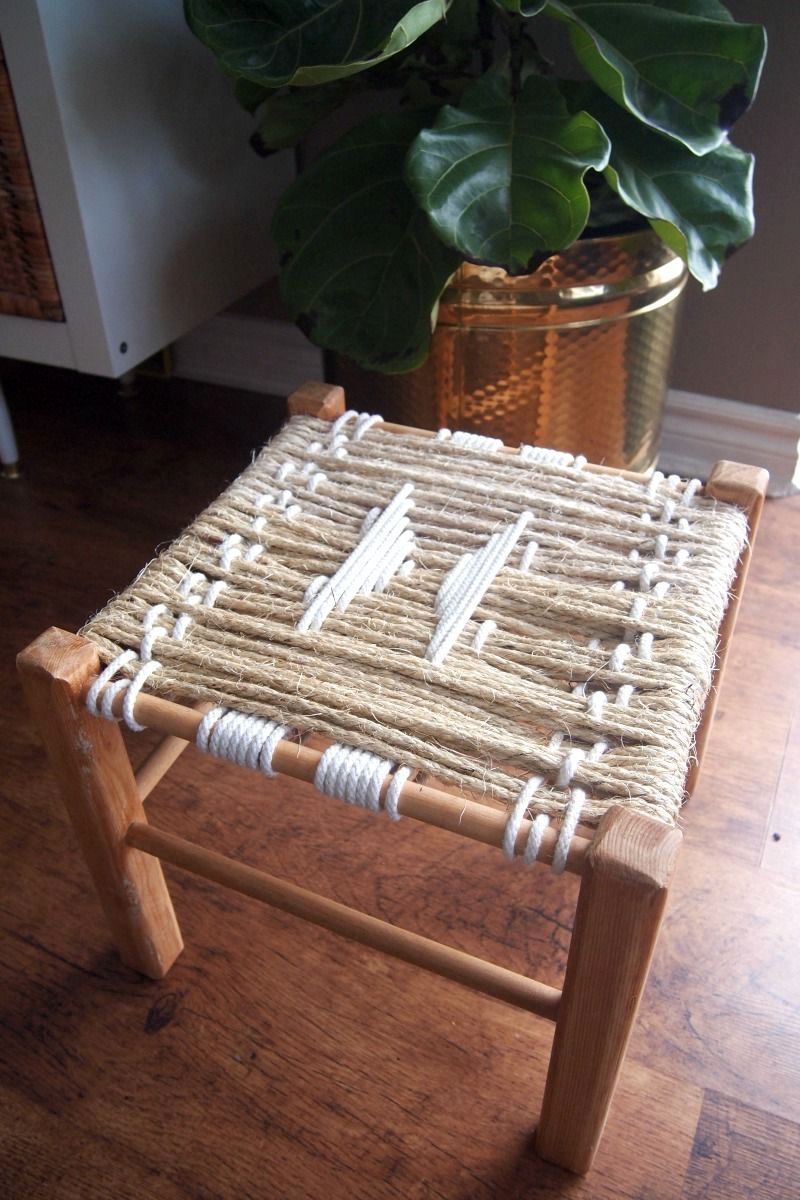 All stages of work are similar to the previous methods. It is recommended to tighten the main rope especially well and fix it with a stapler or furniture nails. With an additional rope you can make any pattern.