Stylish quilling of snowflakes: handmade cards, master class
Quilling snowflakes for the new year with their own handsMany of us like to receive gifts. And craftsmen like to make them, and then to give. Undoubtedly, for the New Year holidays and Christmas, I want to please my family and friends with a good presentation. Make it simple enough. It is only necessary to have the necessary tools, a scheme and an operating procedure. We offer you a full-fledged master-class, in which we will talk about the construction of beautiful forms of snow stars. With the help of special tools, as well as knowledge of all forms, it will be extremely easy to do the work. The idea is suitable for the realization of a good and atmospheric postcard in honor of New Year's holidays. In addition, with the help of such an object you can decorate your apartment. 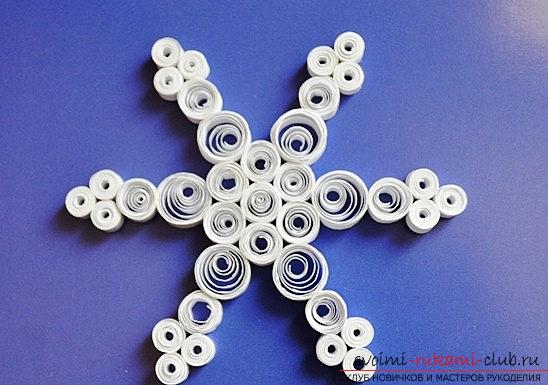
For work we can come in handy:
- Tweezers
- Awl
- Pencil
- Ruler
- Figured Scissors
- Conventional Scissors
- Compass
- Knife Stationery
- Ruler and diameters
- Cardboard blue
- White cardboard
- Quilling paper 3 mm white
- Quilling paper 3 mm in blue
- PVA-adhesive
- Paints with gloss (stained glass)
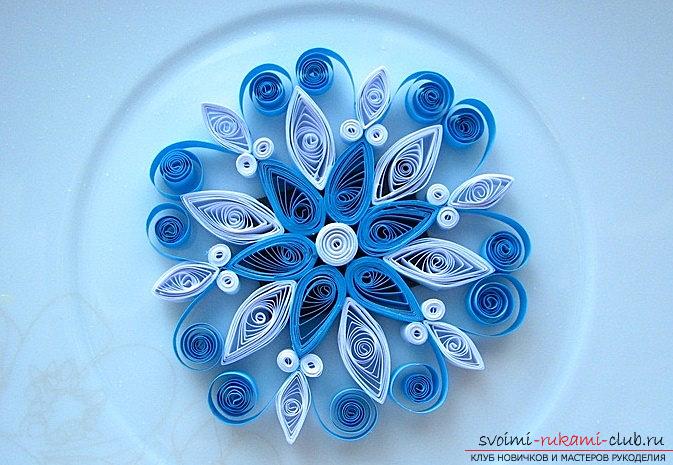
This postcard is a composition (consists of three snowflakes, and snowflakes are made up of modules).
Modules of the eye
 We will begin work with the central snowflake, whichwill be the largest in our application. We take a strip of blue, as well as white. It is required to fold the strips together, and then, to make the roll of our object. After that, the roll is laid out in a ruler with a diameter and after, is processed around the required size. Each element of our circle must be identical to the other. Next, we take the roll from our diameter of the ruler and after, we make the gluing of the sides. Using tweezers or fingers, create an eye shape for our module. Next, we work on the following elements for exactly the same structure. There must be six in all.
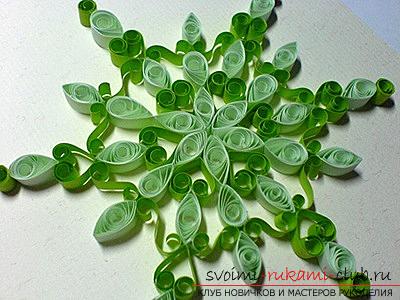
Curls
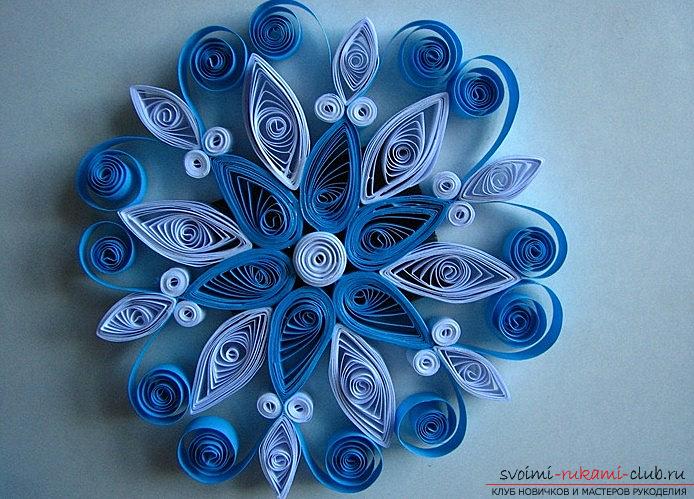 Further, we make special curls with the help ofpaper blue, white. Use the glue to attach the curls to the space that lies between the petals. First we fasten the blue curls, and then - the white curls. After that, we complement the snowflake with the form of "heart". To do this simply - you need to twist a third of the strip from two ends to each other, and then bend the strip in half.
Mounting
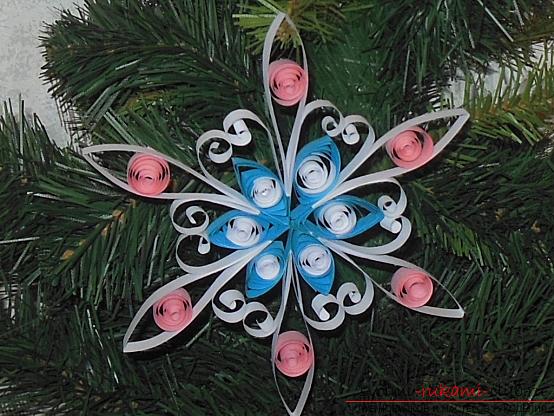 After this operation is completed, toA snowflake is attached to the heart. Further, the snowflake is treated with stained-glass paint and sequins. The snowflake should dry up, and then we start working on the base for our picture.
Postcard background
In this case, it should work outtwo-colored species. It is necessary to take two sheets of blue and white cardboard, which must first be processed. Trim the edges of each of them using curly scissors. Afterwards, using the front side of our product, we will glue a rectangle of blue color. Next, prepare a circular for the location of the circles, where our snowflake will be. We glue them. Remember that the central snowflake is more extreme. Therefore, the circles should be in diameter of different sizes. Next, with the help of glue we install our snowflake modules. To make small snowflakes, it is enough to twist the curls in two stripes of papers of different color ranges. A total of 6 elements per snowflake should be obtained.
Done!
Quilling snowflakes for the new year with their own handsready. You can also add a text application and decorate the background image with colors, or small peephole modules and other elements. The work is ready, you can hand it over!
Comments
Related posts:
 Quilling is a master class. Pictures and postcards by own hands
 Quilling postcards for the day of jam with your own hands - a turn-based workshop
 This master class will teach you how to make your own beautiful quilling cards.
 This master class will teach how to make postcards with your own hands in quilling technique.
 This master class is designed for those who want to learn how to make beautiful quilling greeting cards and flowers with their own hands.