
Stylish tie for the girl ha on 1 September. Step-by-step instruction for making a tie with your own hands
The first school day is a holiday for allschoolchildren. Girls are dressed in white blouses and black skirts, but this form may seem boring and monotonous. This master class tells in detail how to create with your own hands an amazing school tie for the holiday of September 1. 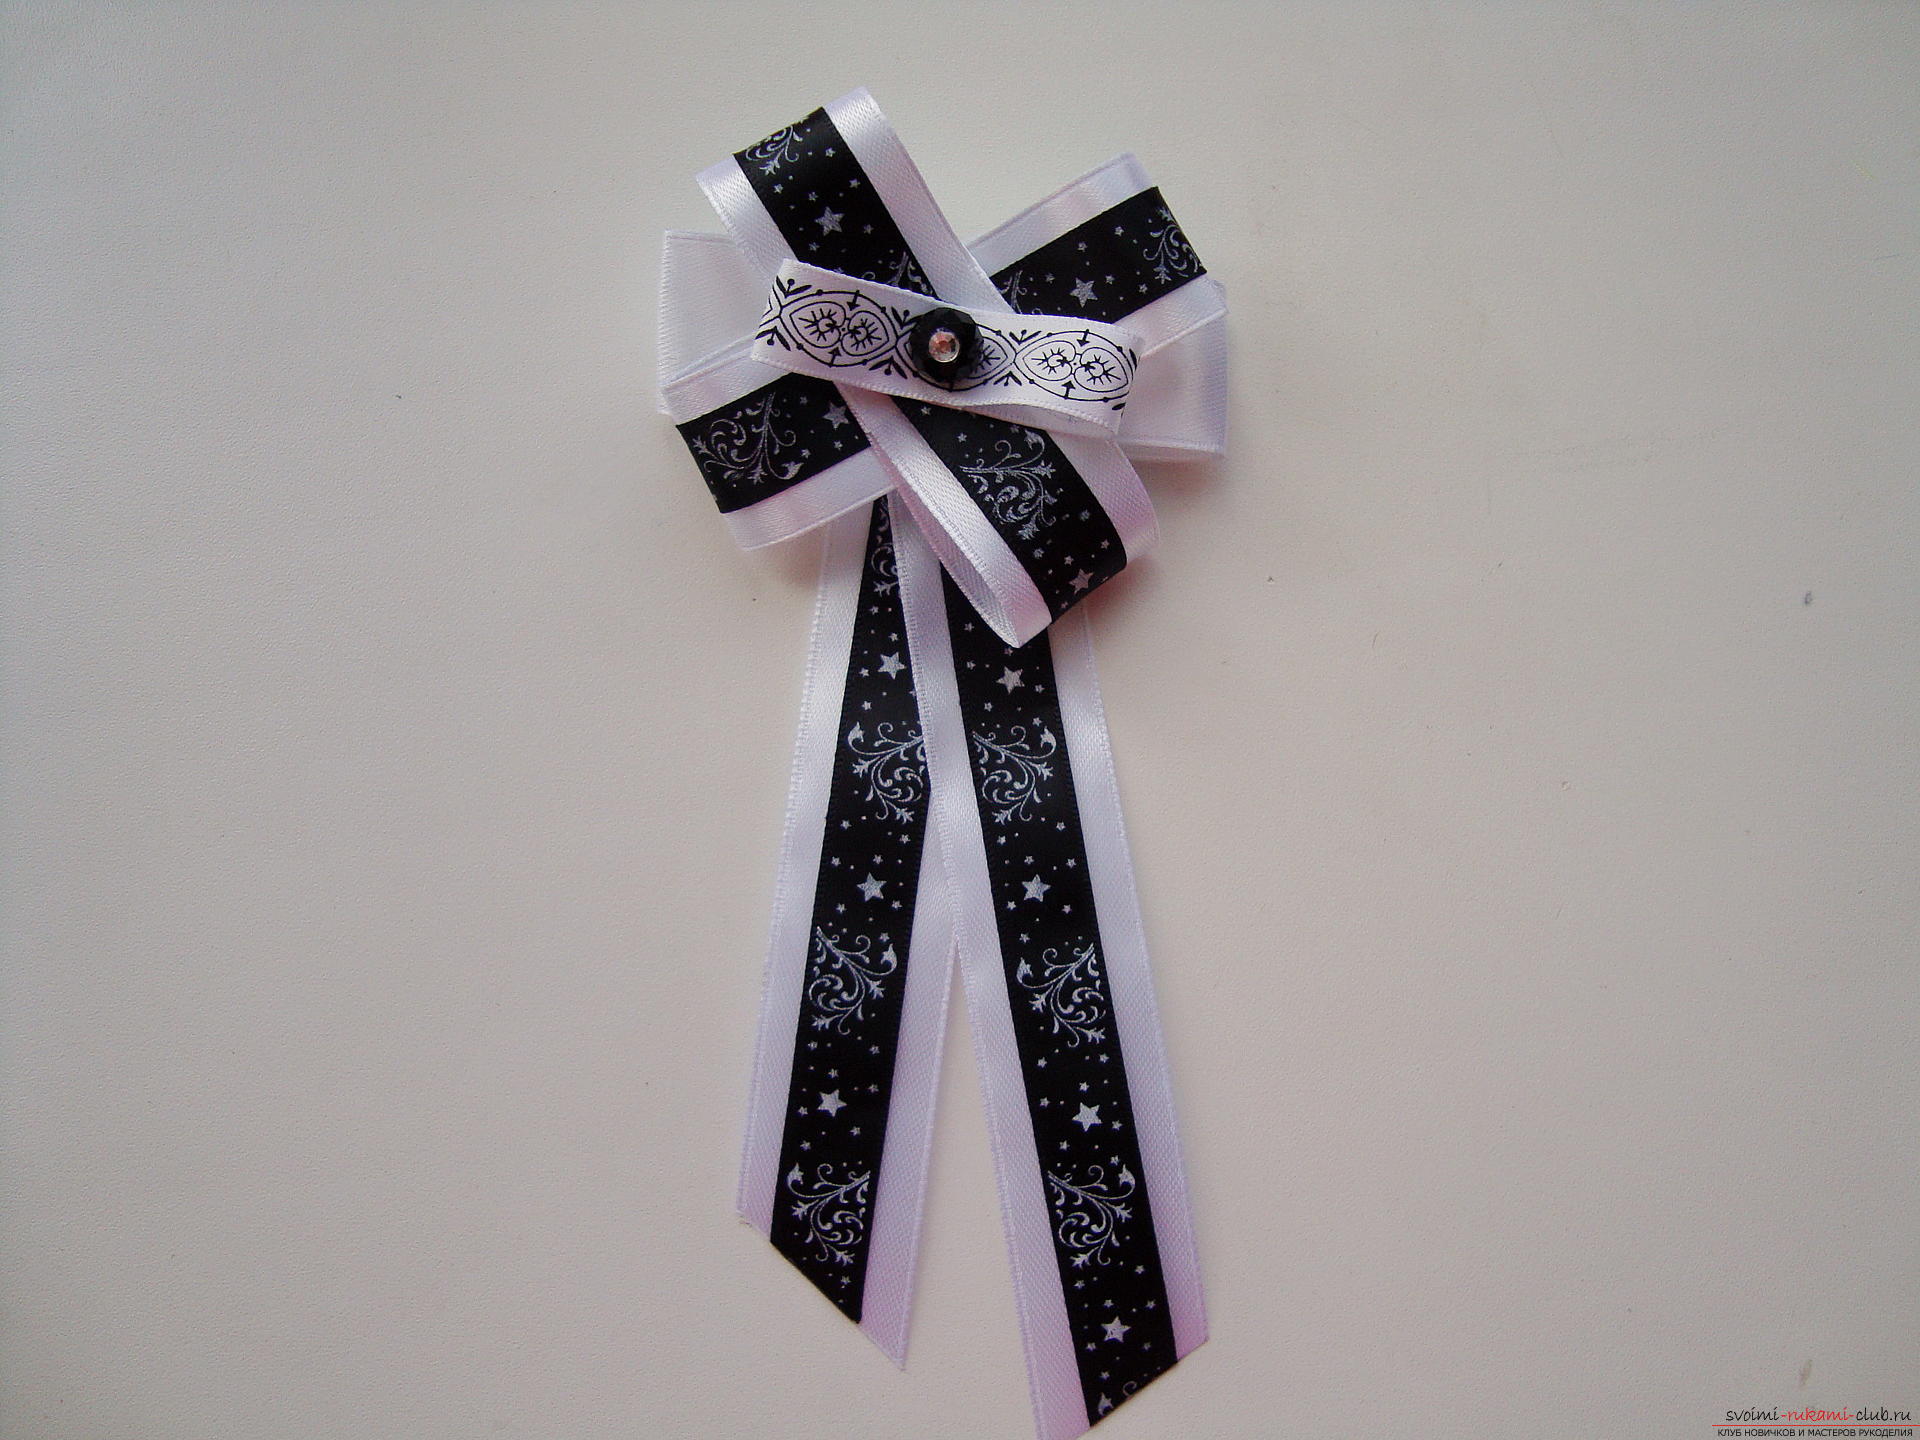 To create the product, prepare:
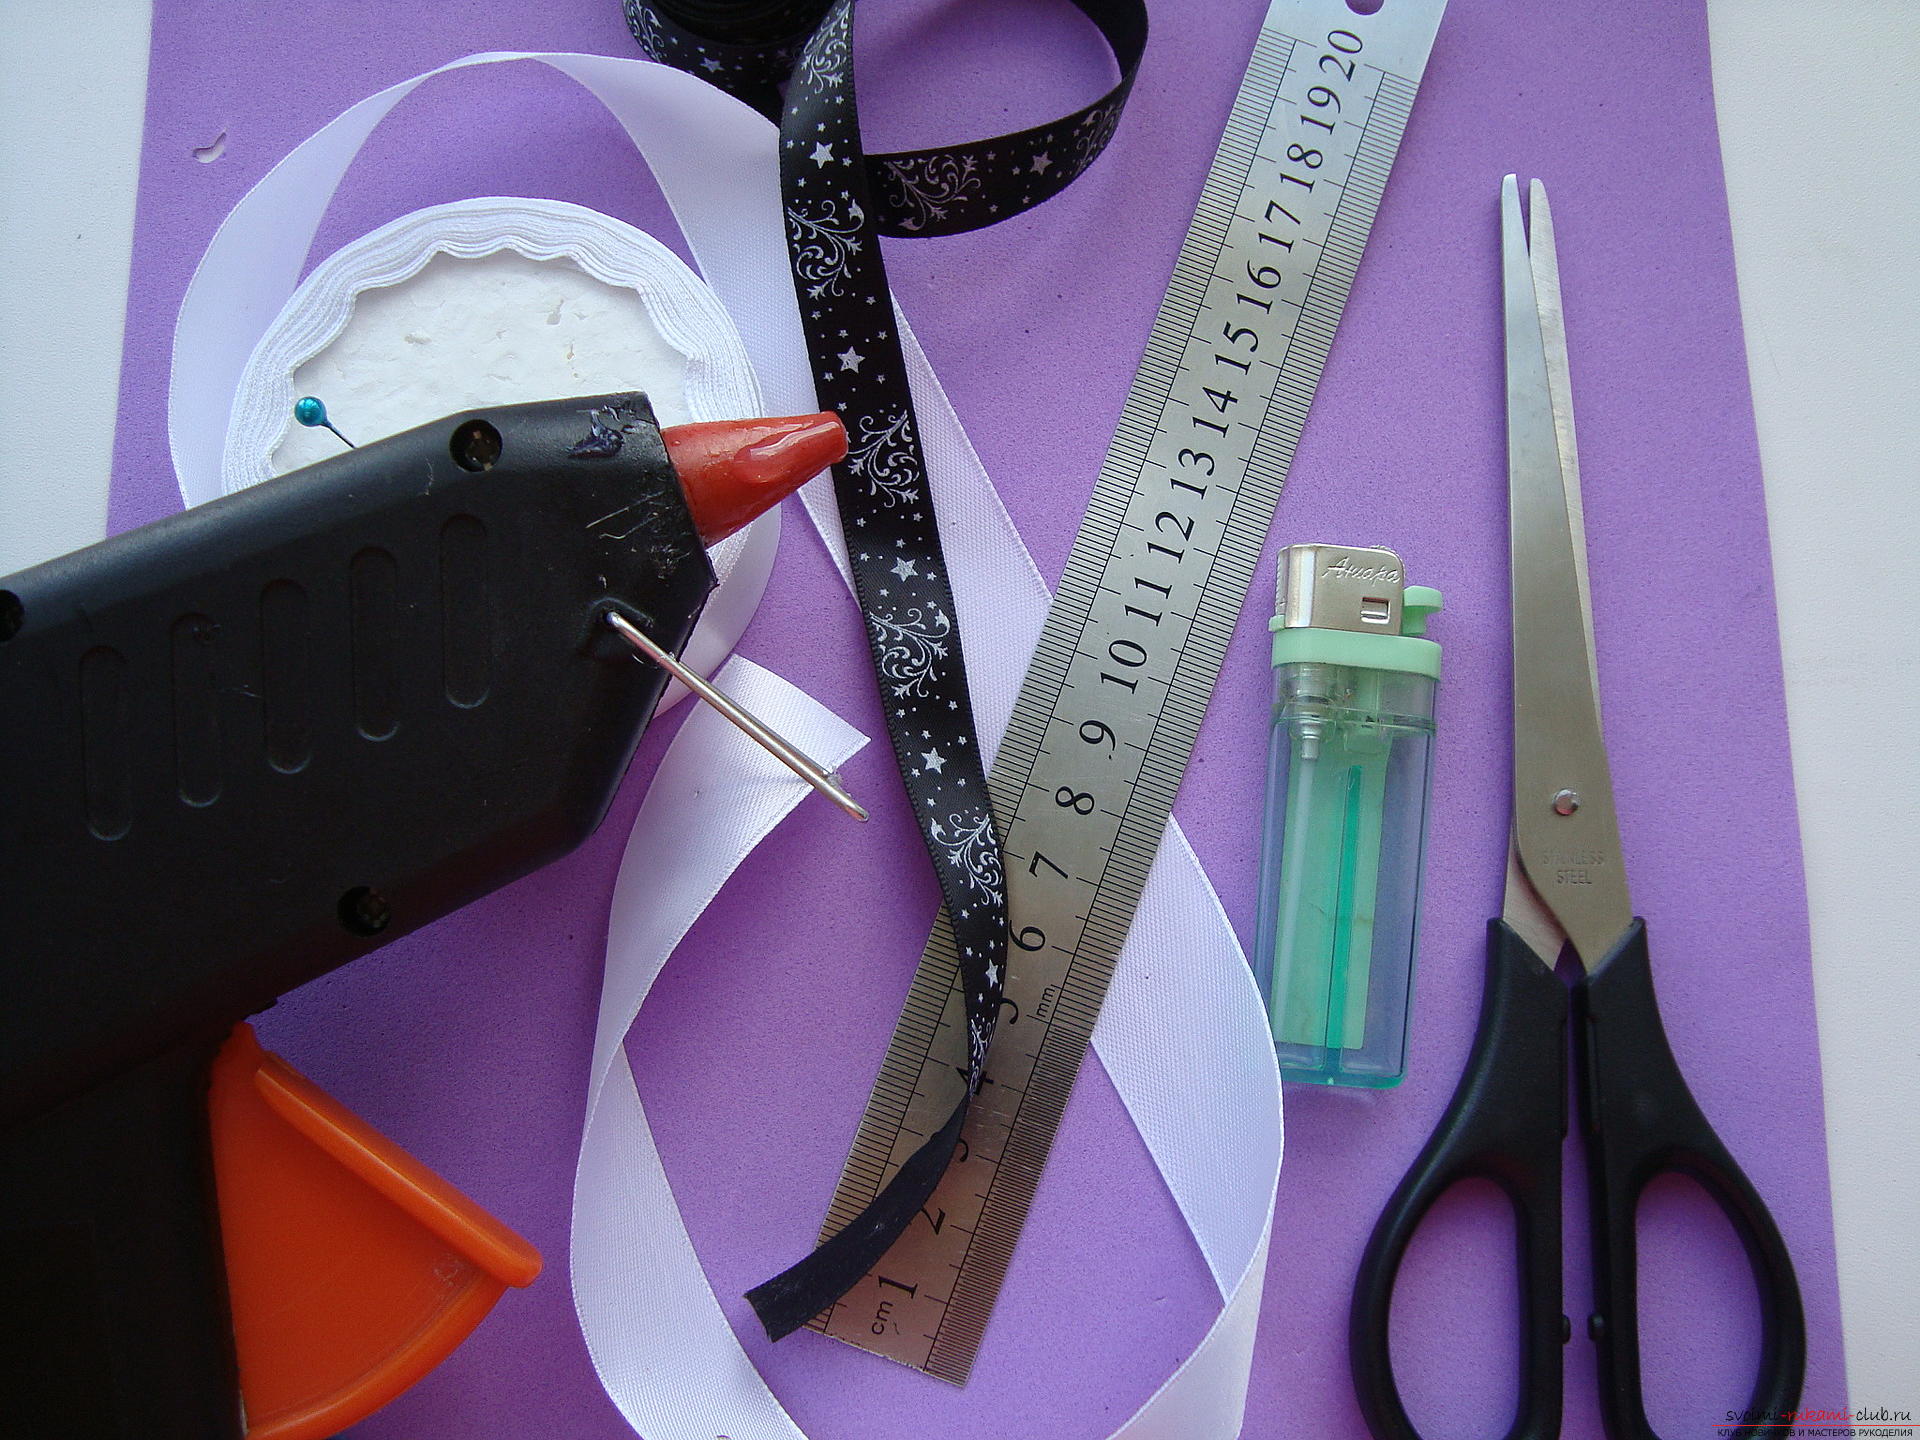
 Forming a tie by creating two parts,this is the upper multi-layered ribbon and the lower bands of ribbons, which hang beautifully on the school blouse. We begin to form a festive tie from the bottom. To do this, measure from the white braid two long cuts, approximately 14 and 16 cm. The length of the hanging part can be changed at your will in a larger or smaller direction.
  On top of the white ribbon is a black borderlight pattern, it is important to place it in the middle of the bottom base. Border is fixed with a few drops of melting glue, which are applied with a thin stick, and immediately the upper band is pressed down to the bottom.
  The lower edge of the bands is cut at an angle, with oneThe side slope is directed to the right, and from the other towards the first - to the left. The upper parts of the long cuts are glued together at an acute minimal angle, that is, in the hanging state they should not be far apart from each other.
 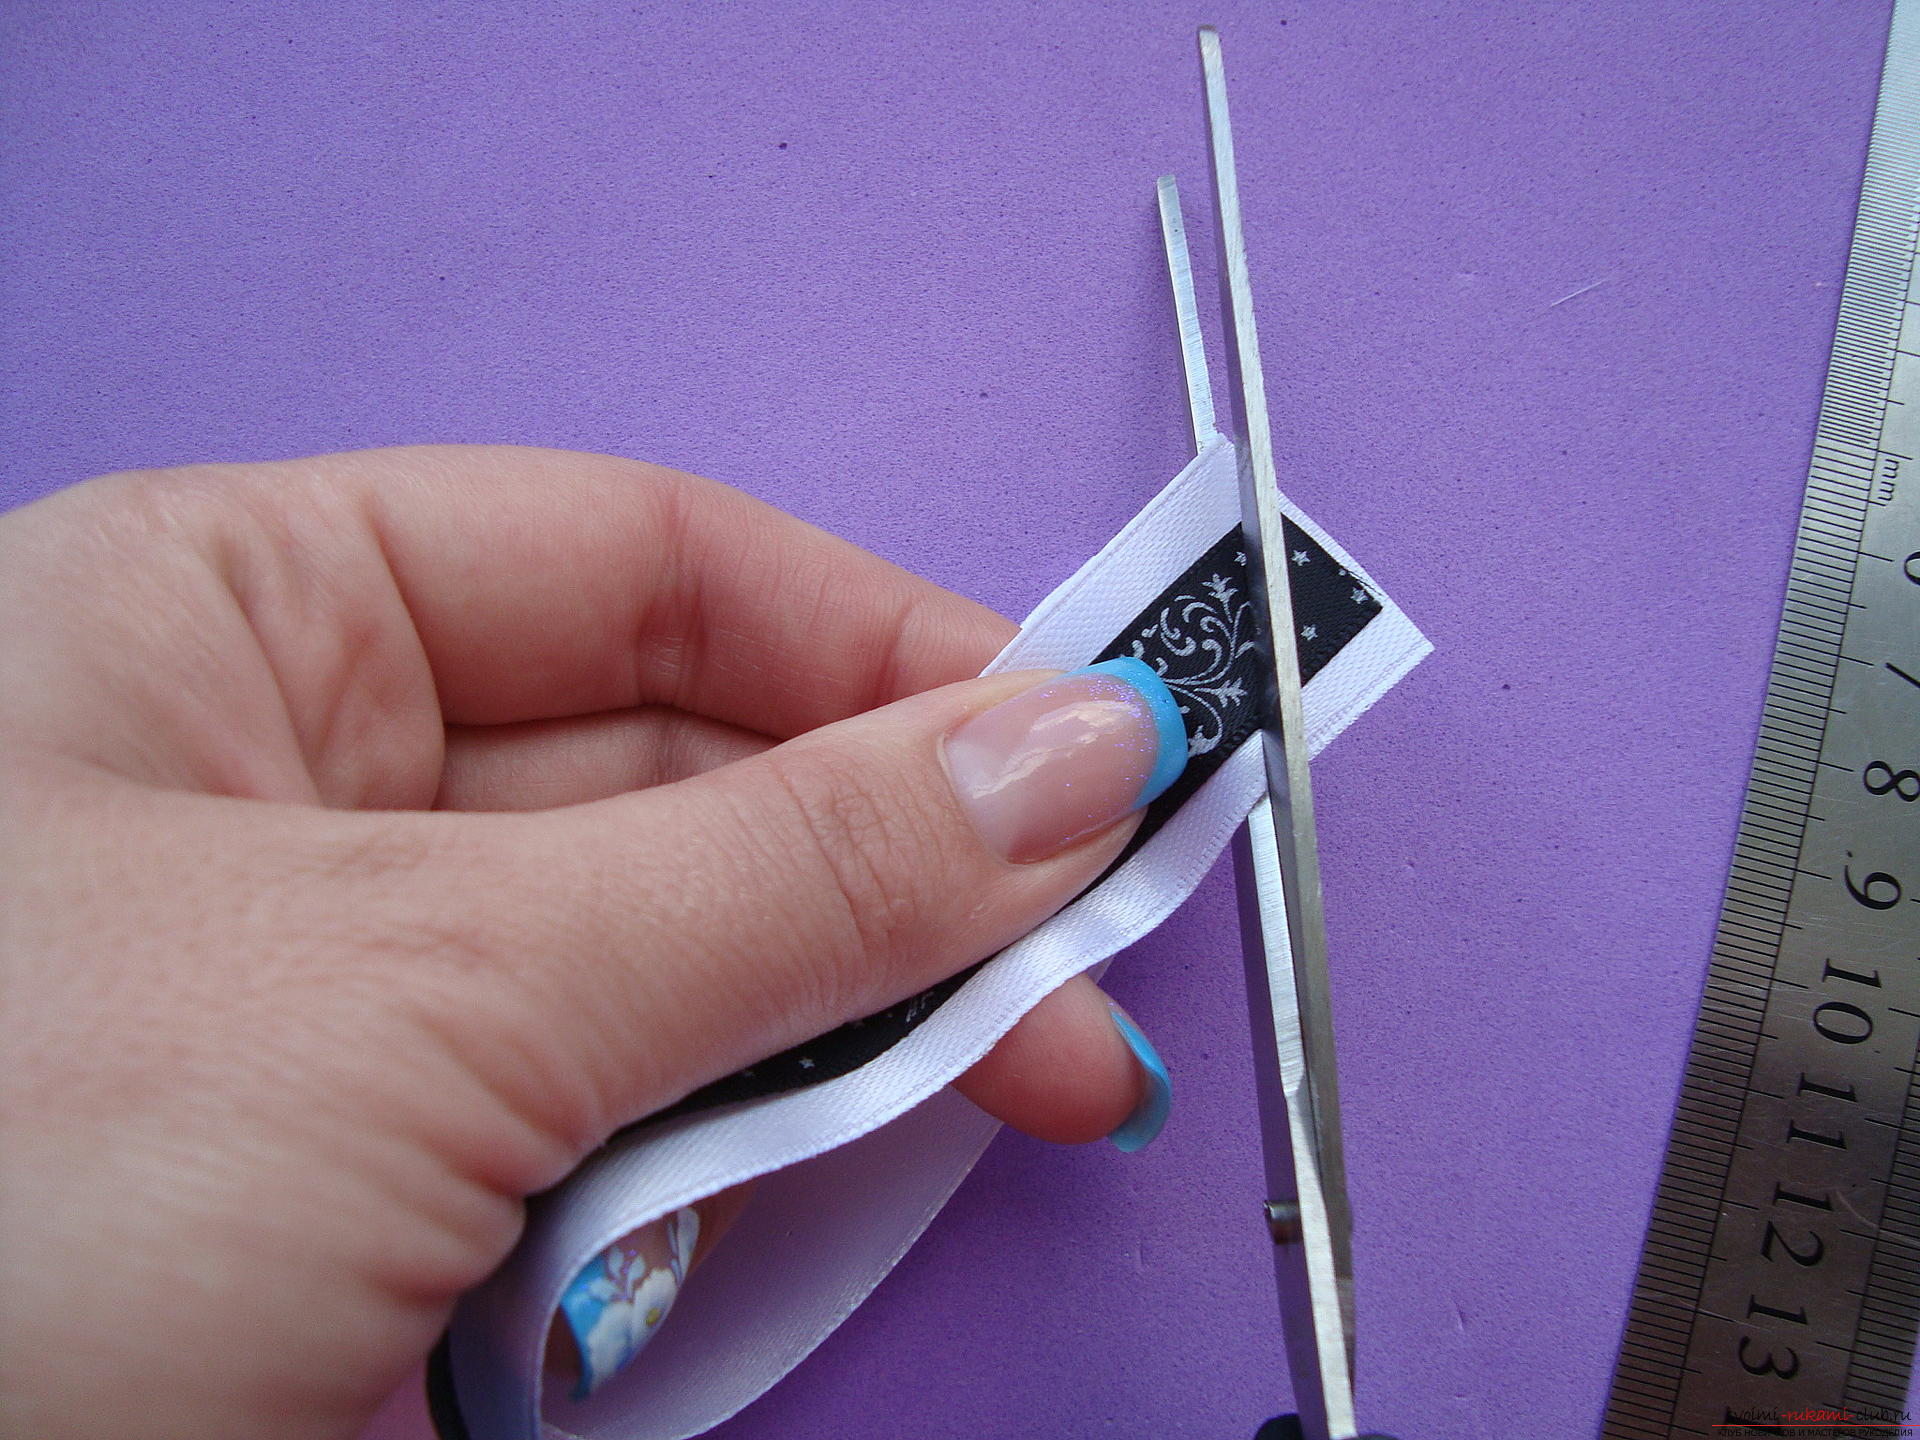 Glue both parts at a slight angle to make a beautiful, neat base.
 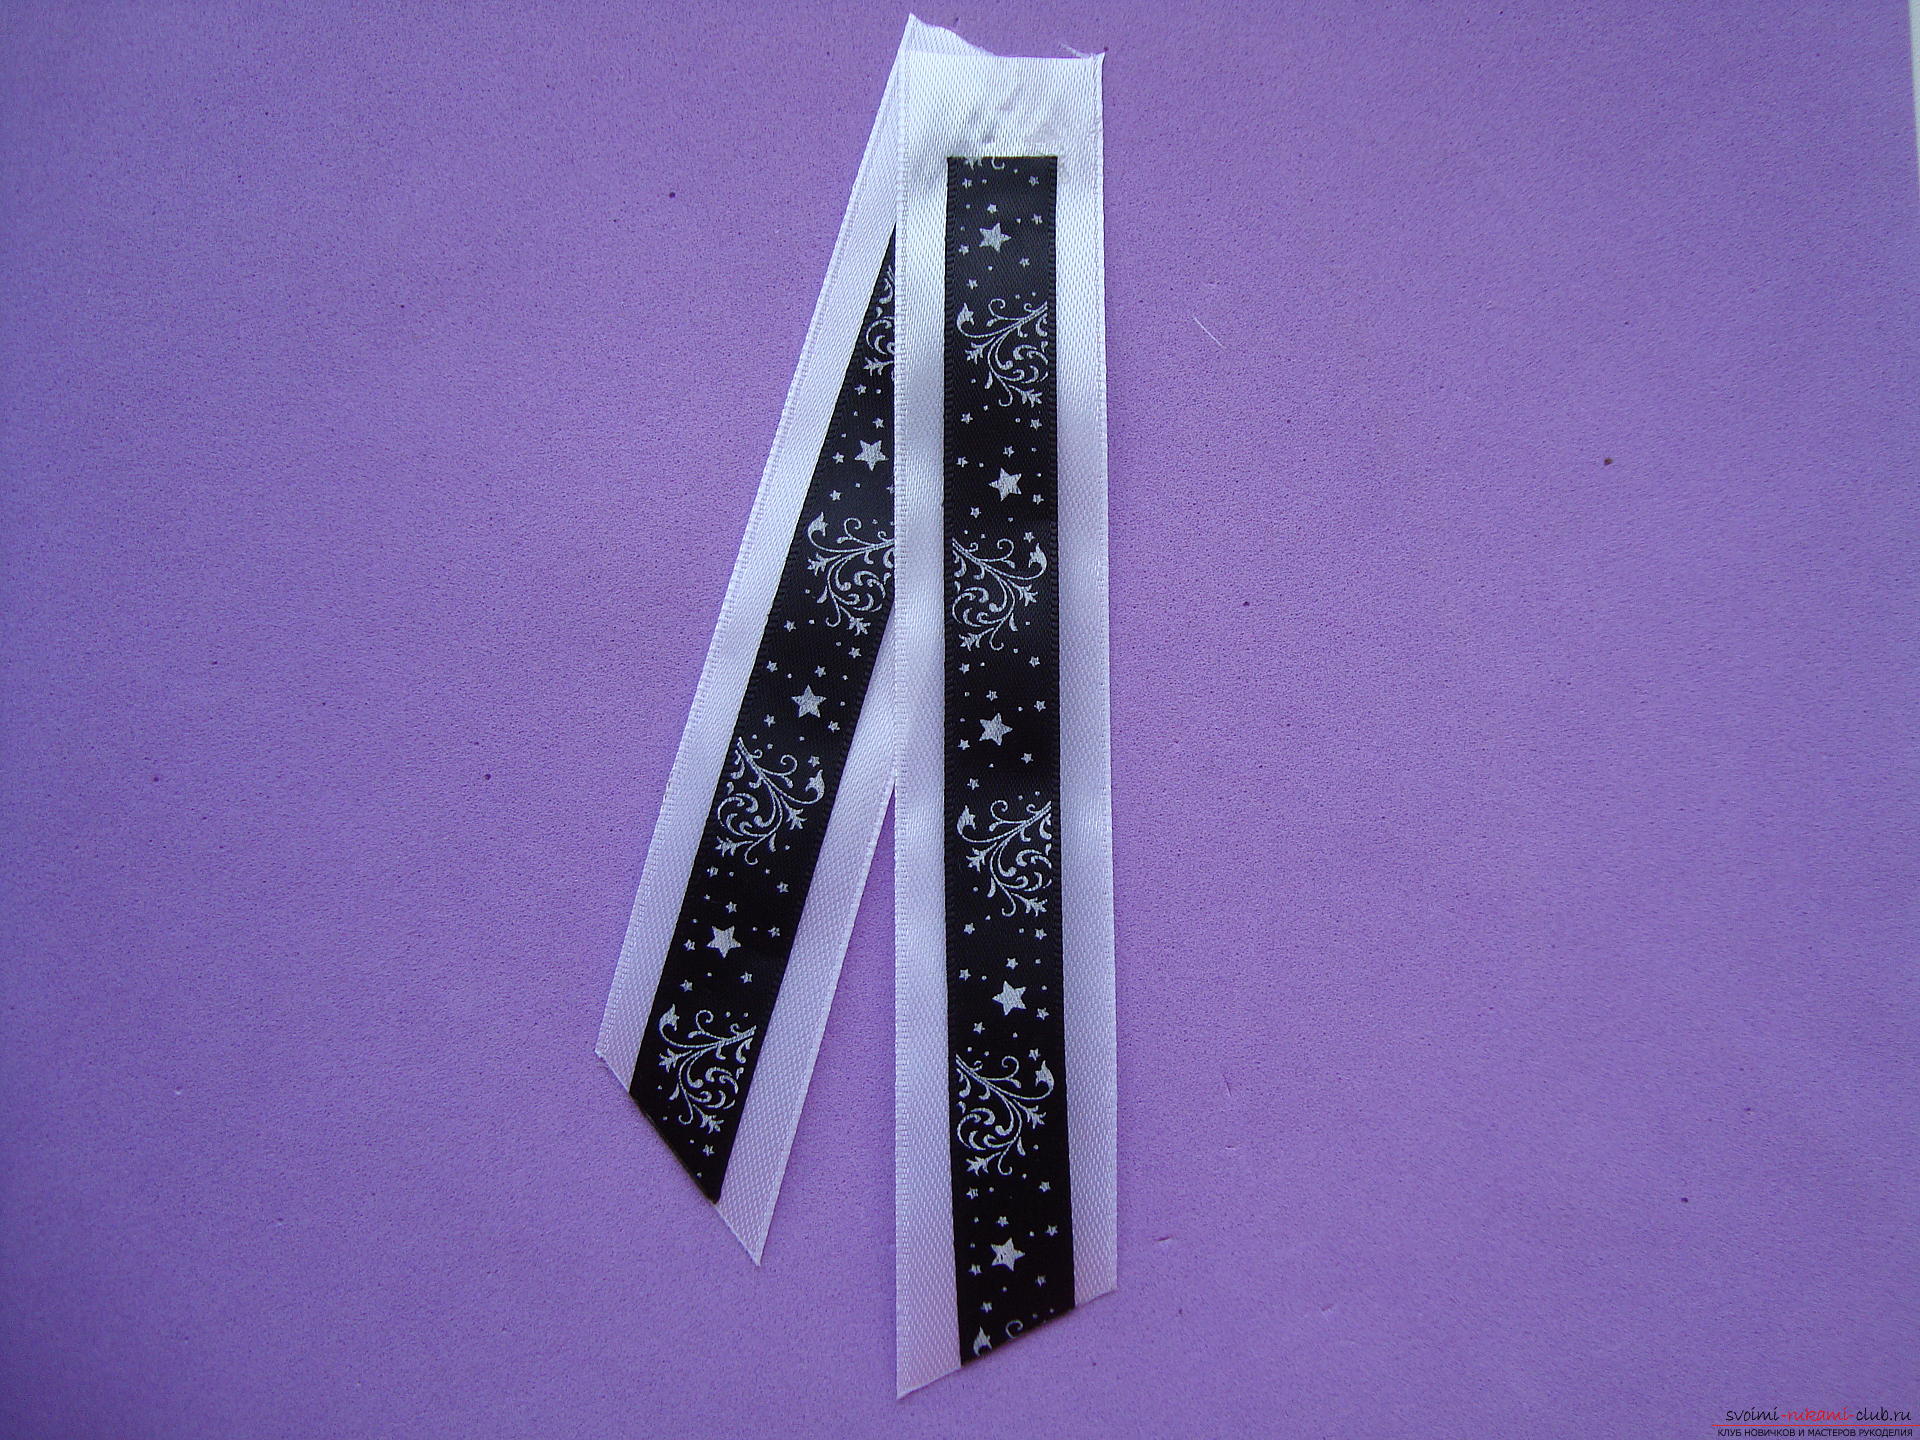 When the lower ends of the tie are created,go to the top and a lush bow. In the product, only white and black bands are combined, so from a single-colored snow-white border cut a flap length of 22 cm, it will be needed for the bottom base of the decoration by September 1. For the middle level of the bow, double tapes will again be needed - the basis is white and the top is black with a pattern. The length of the cuts is 17 cm. Each cut is welded at the edge so that the tapes are connected, and then glue them in the center.
 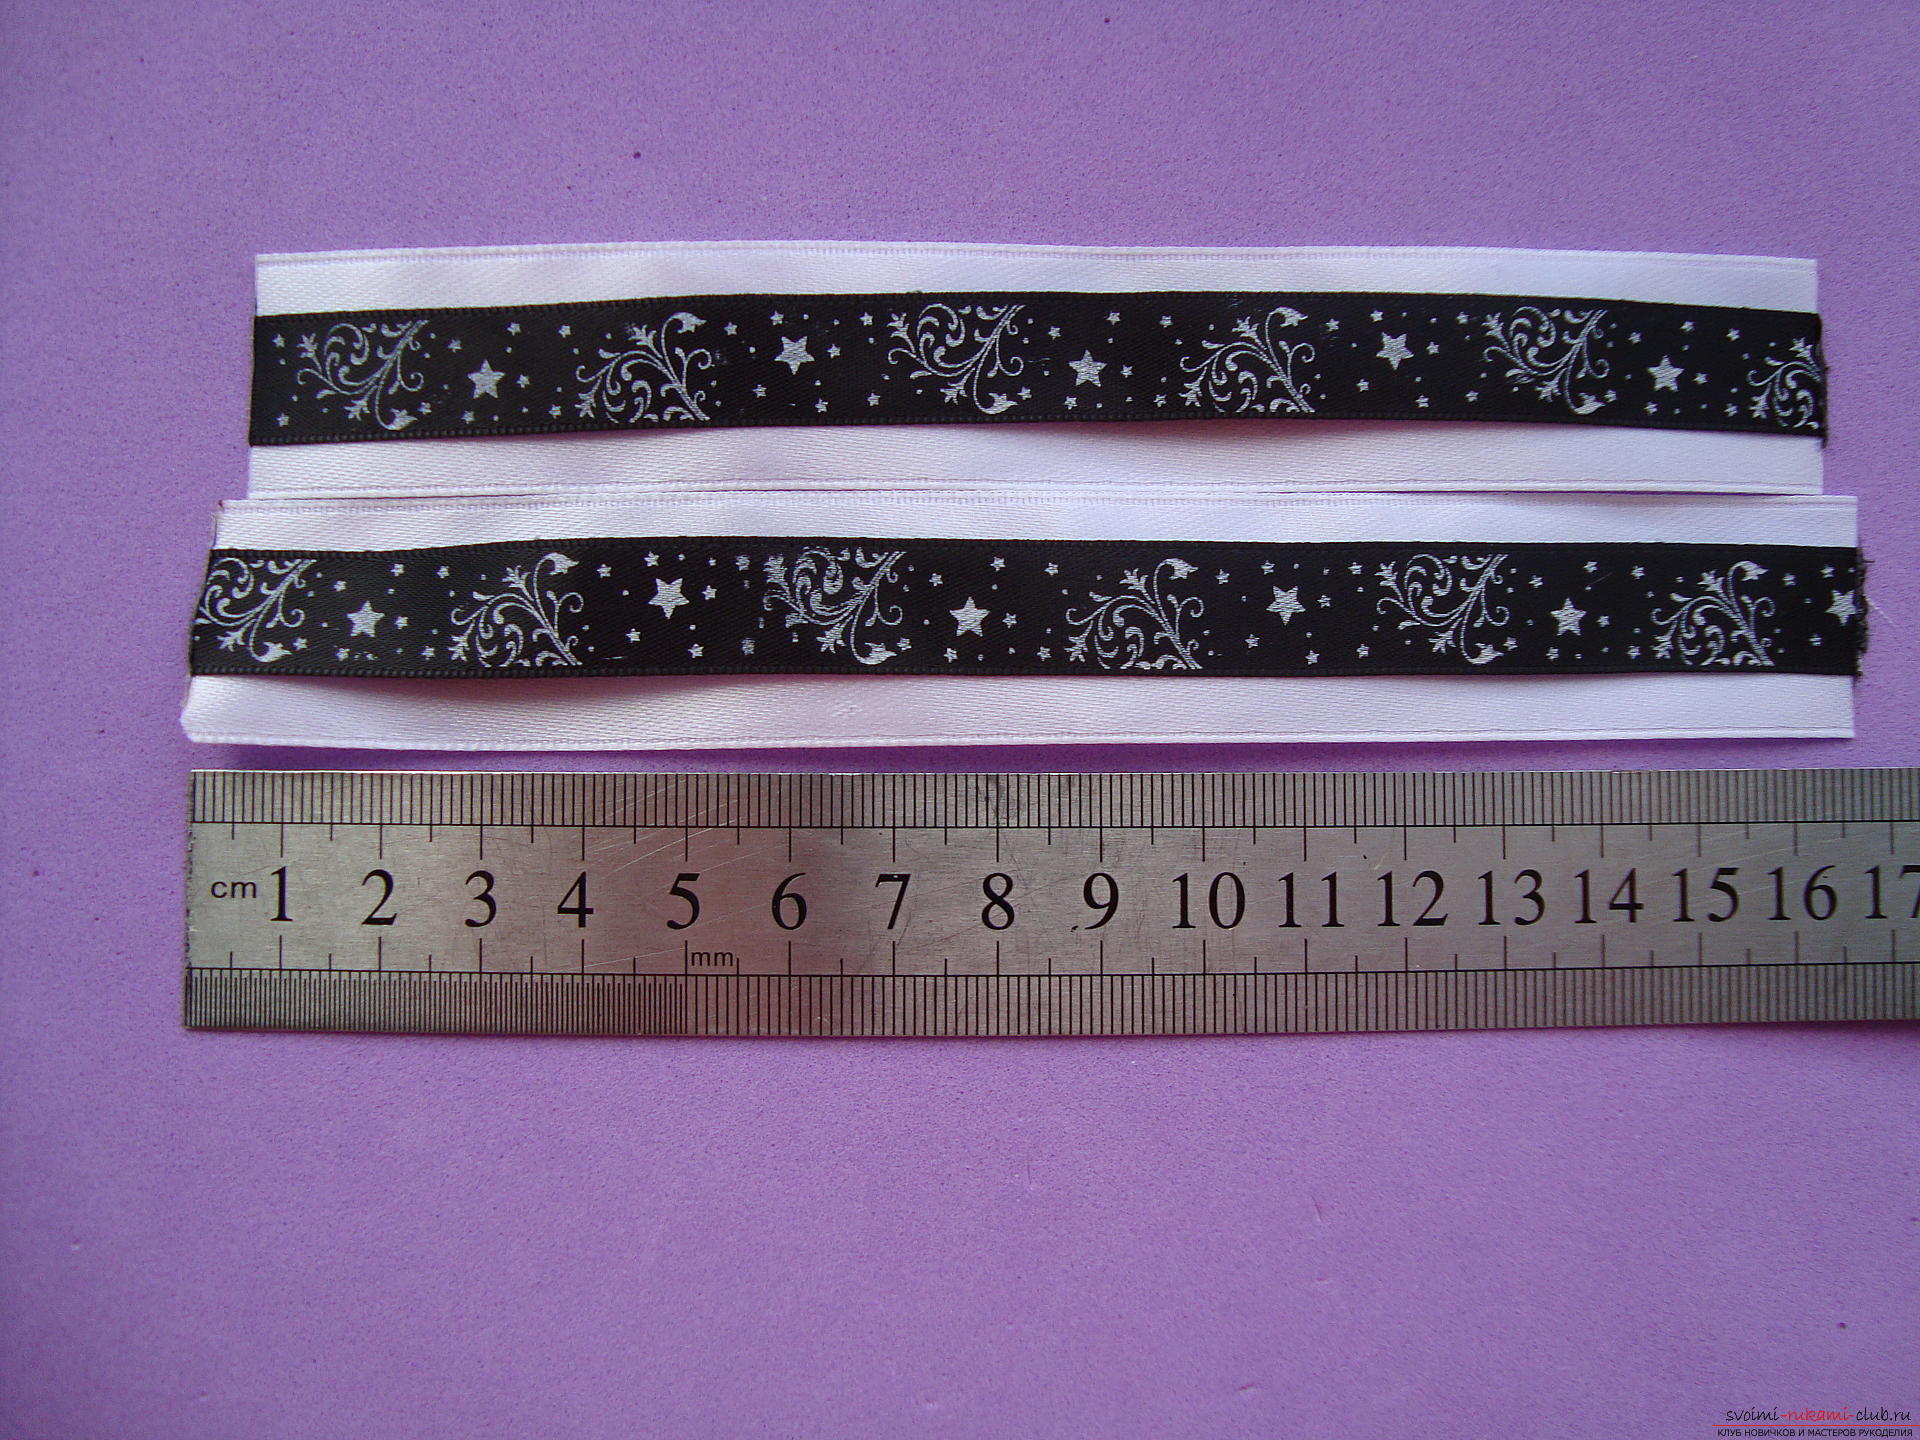 Each cut is glued together in a round shape. Try to connect the ends only by 1 mm, if you fasten to a greater distance, then the ribbon will turn out to be rough and sloppy.
 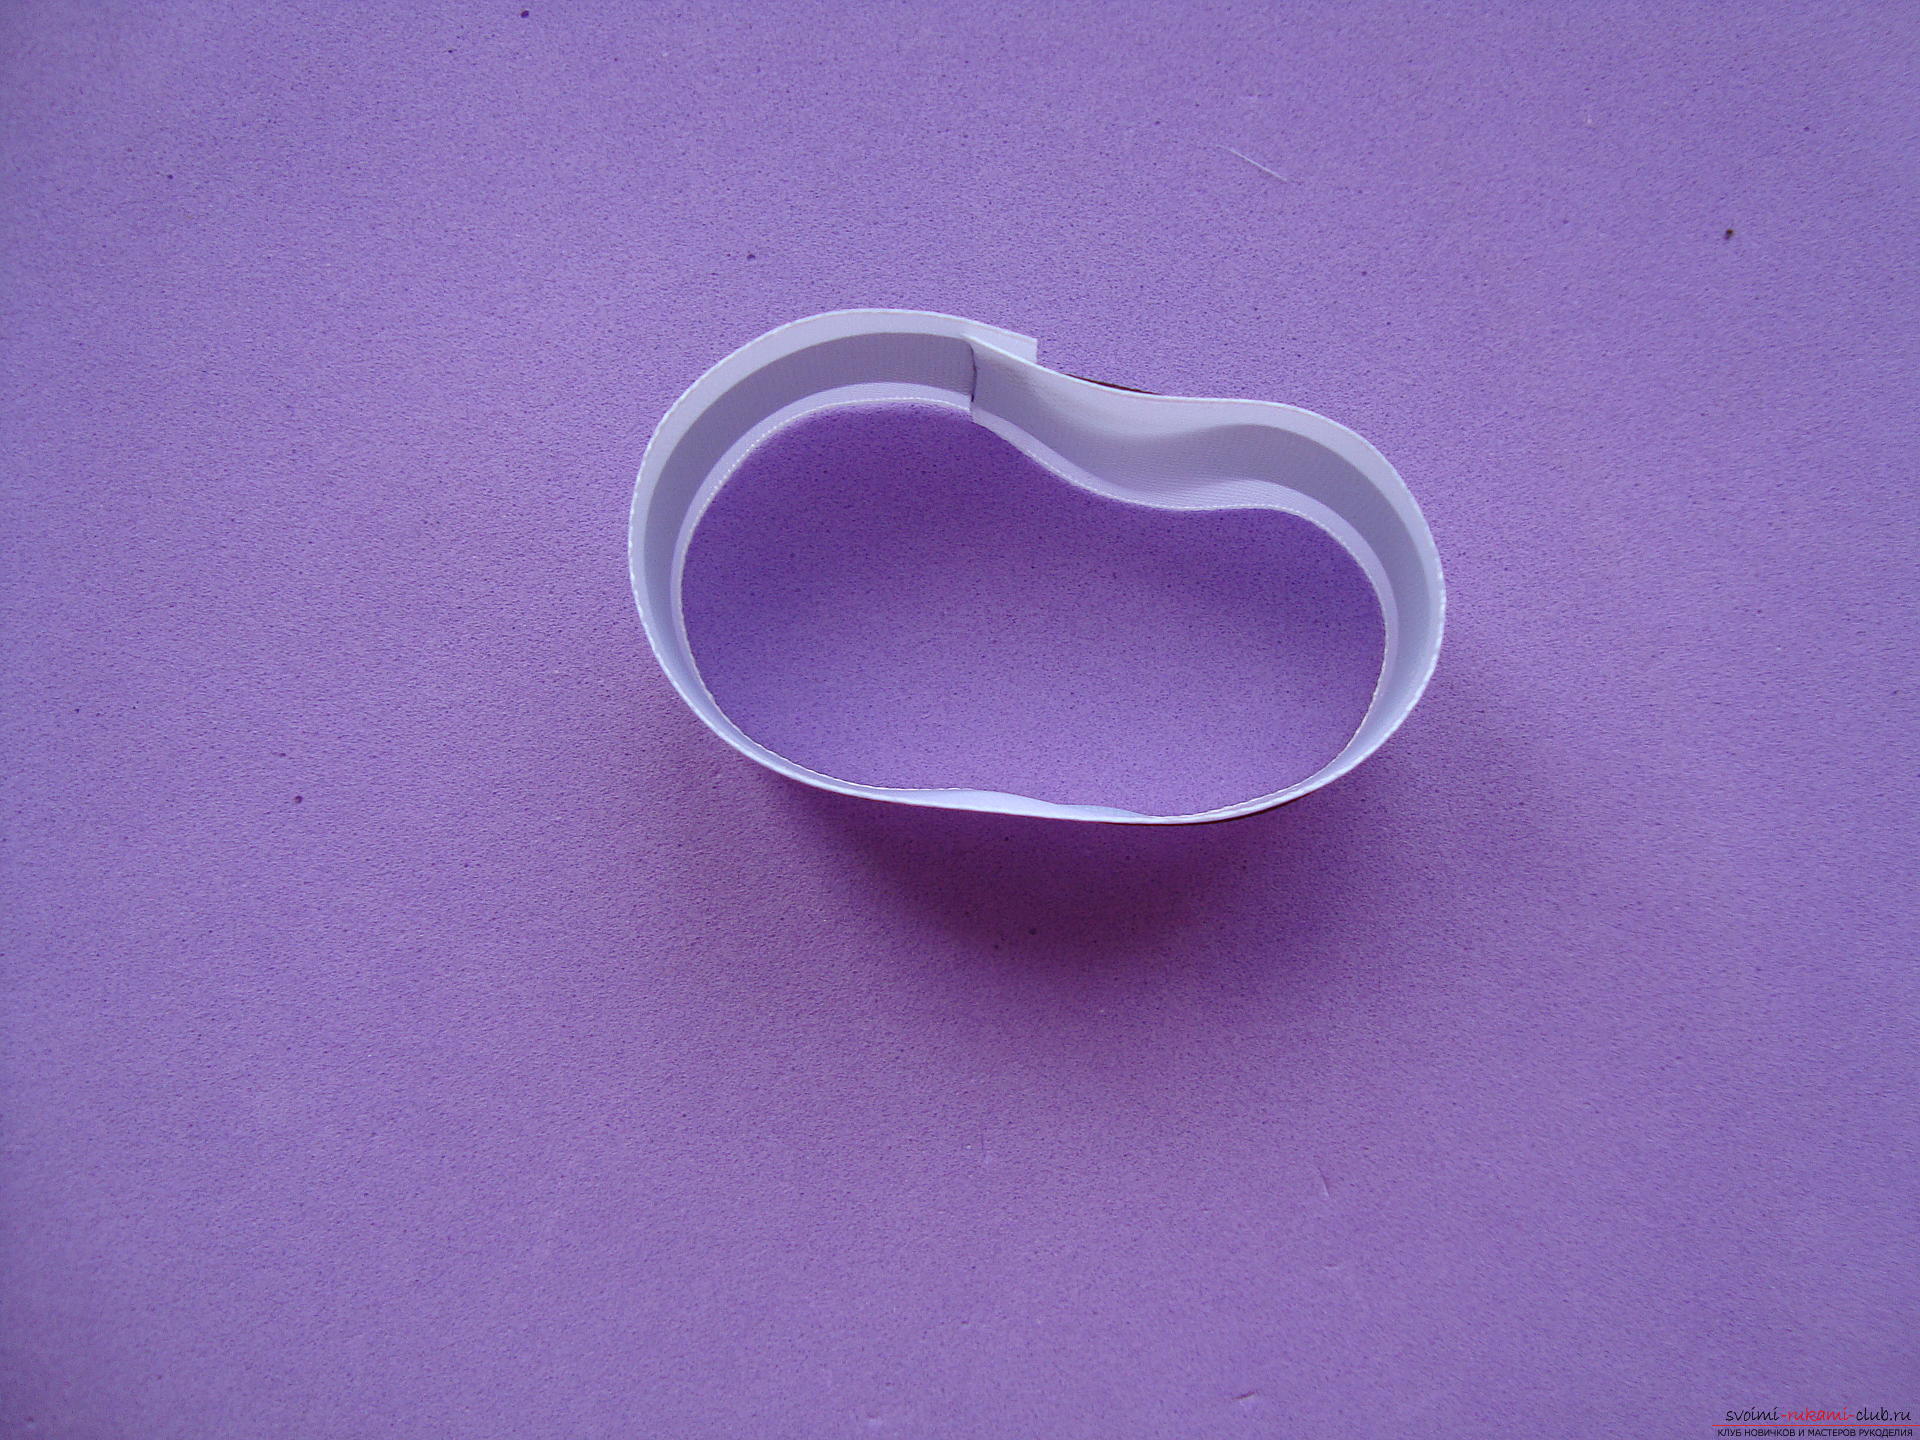 At the next stage, the ring is glued from the inside, while the seam line clings to the opposite side.
 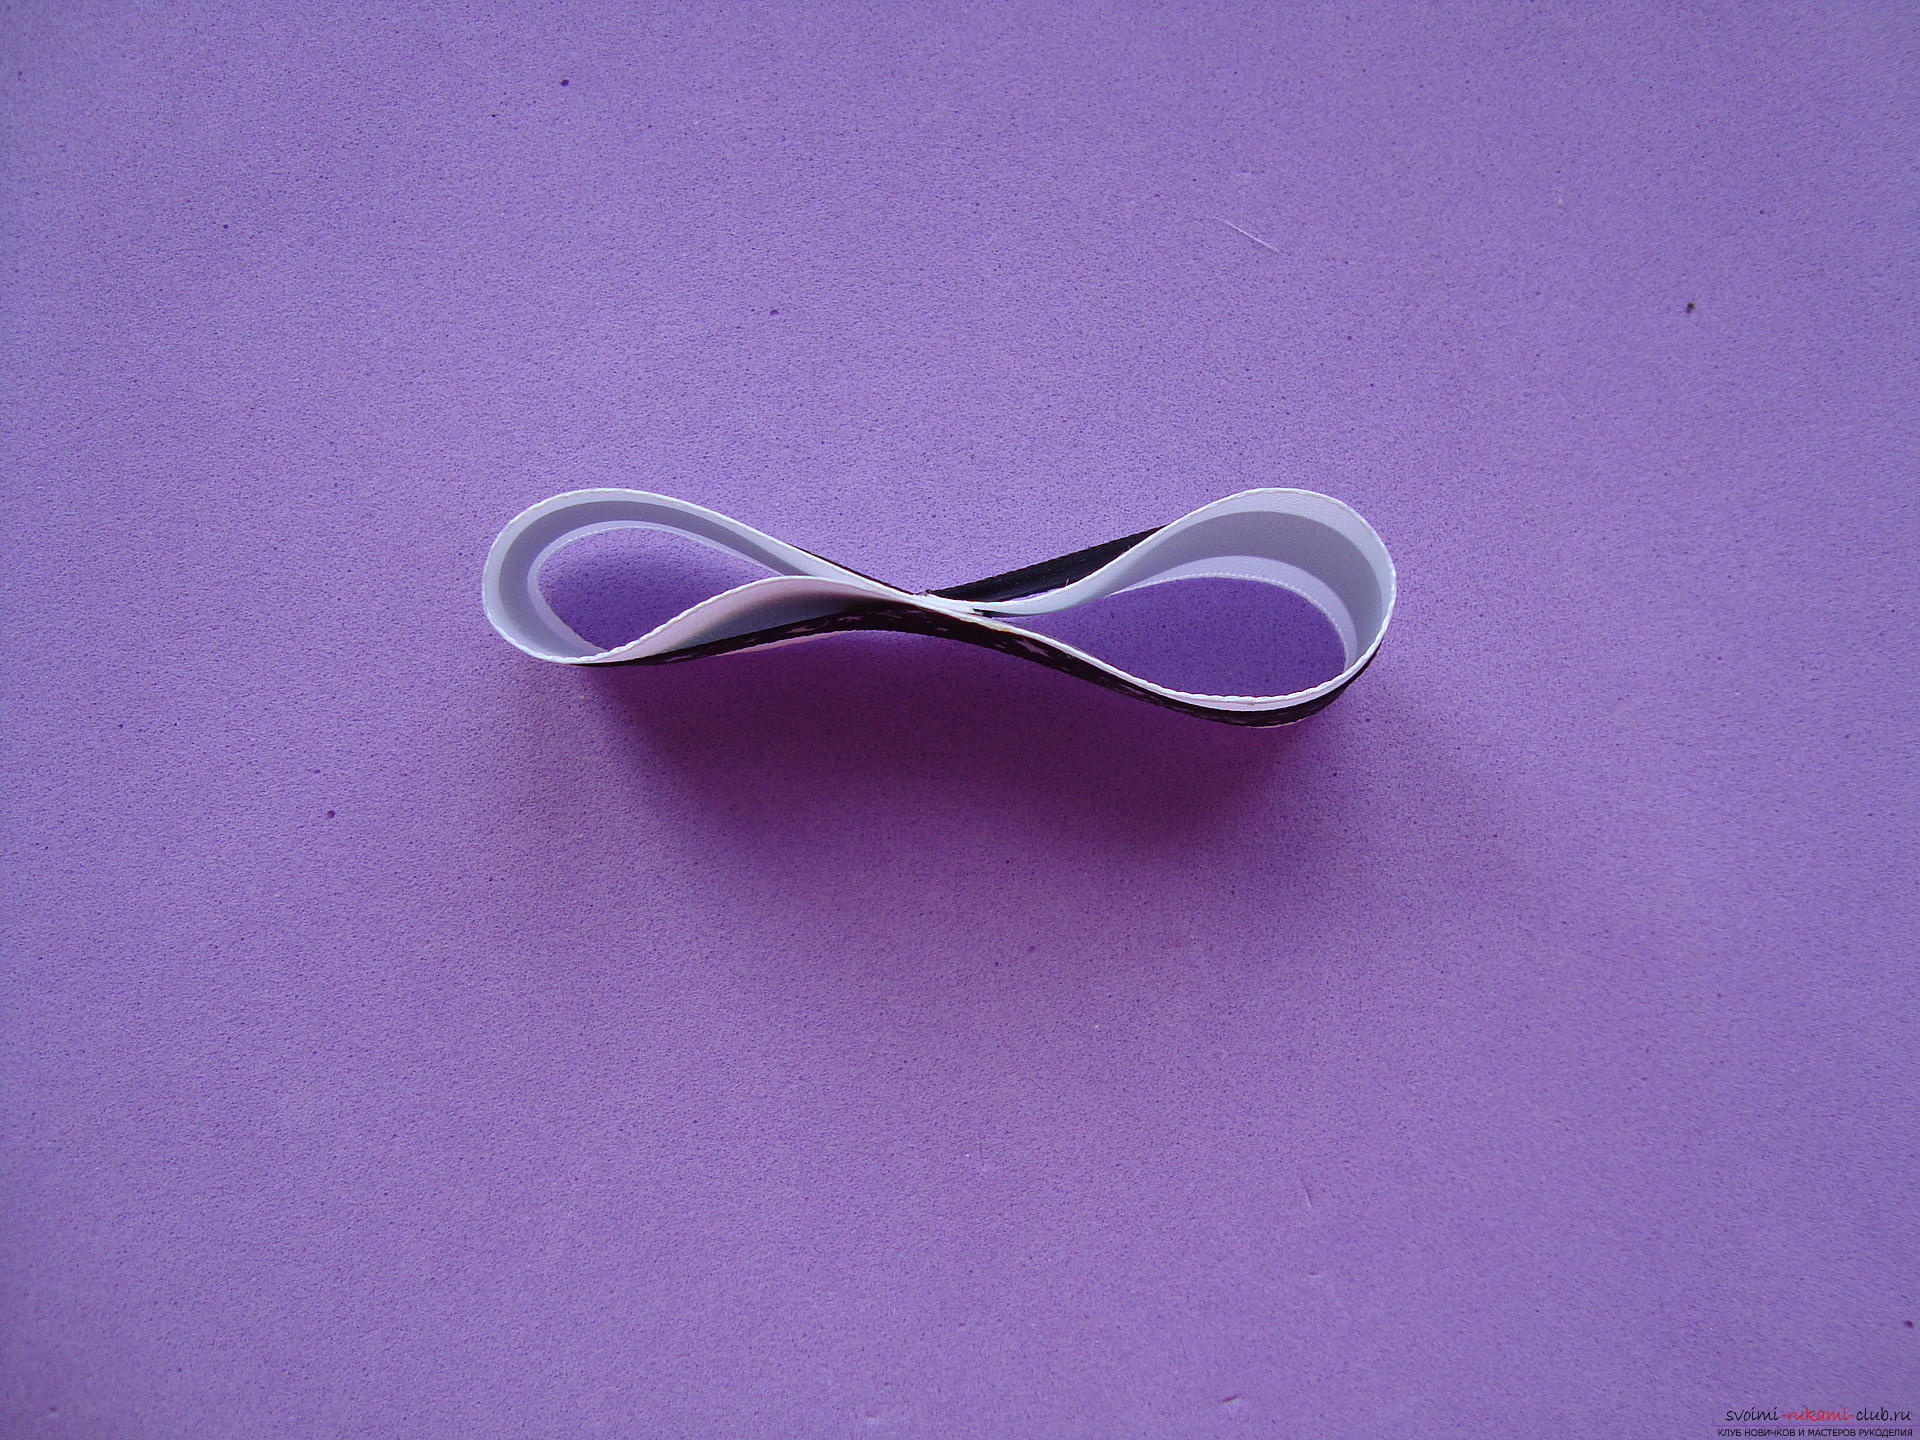 It is necessary to glue together two identical elements in the form of "eights" of equal size. These details are stitched together in seams at such an angle to make a pretty bow.
 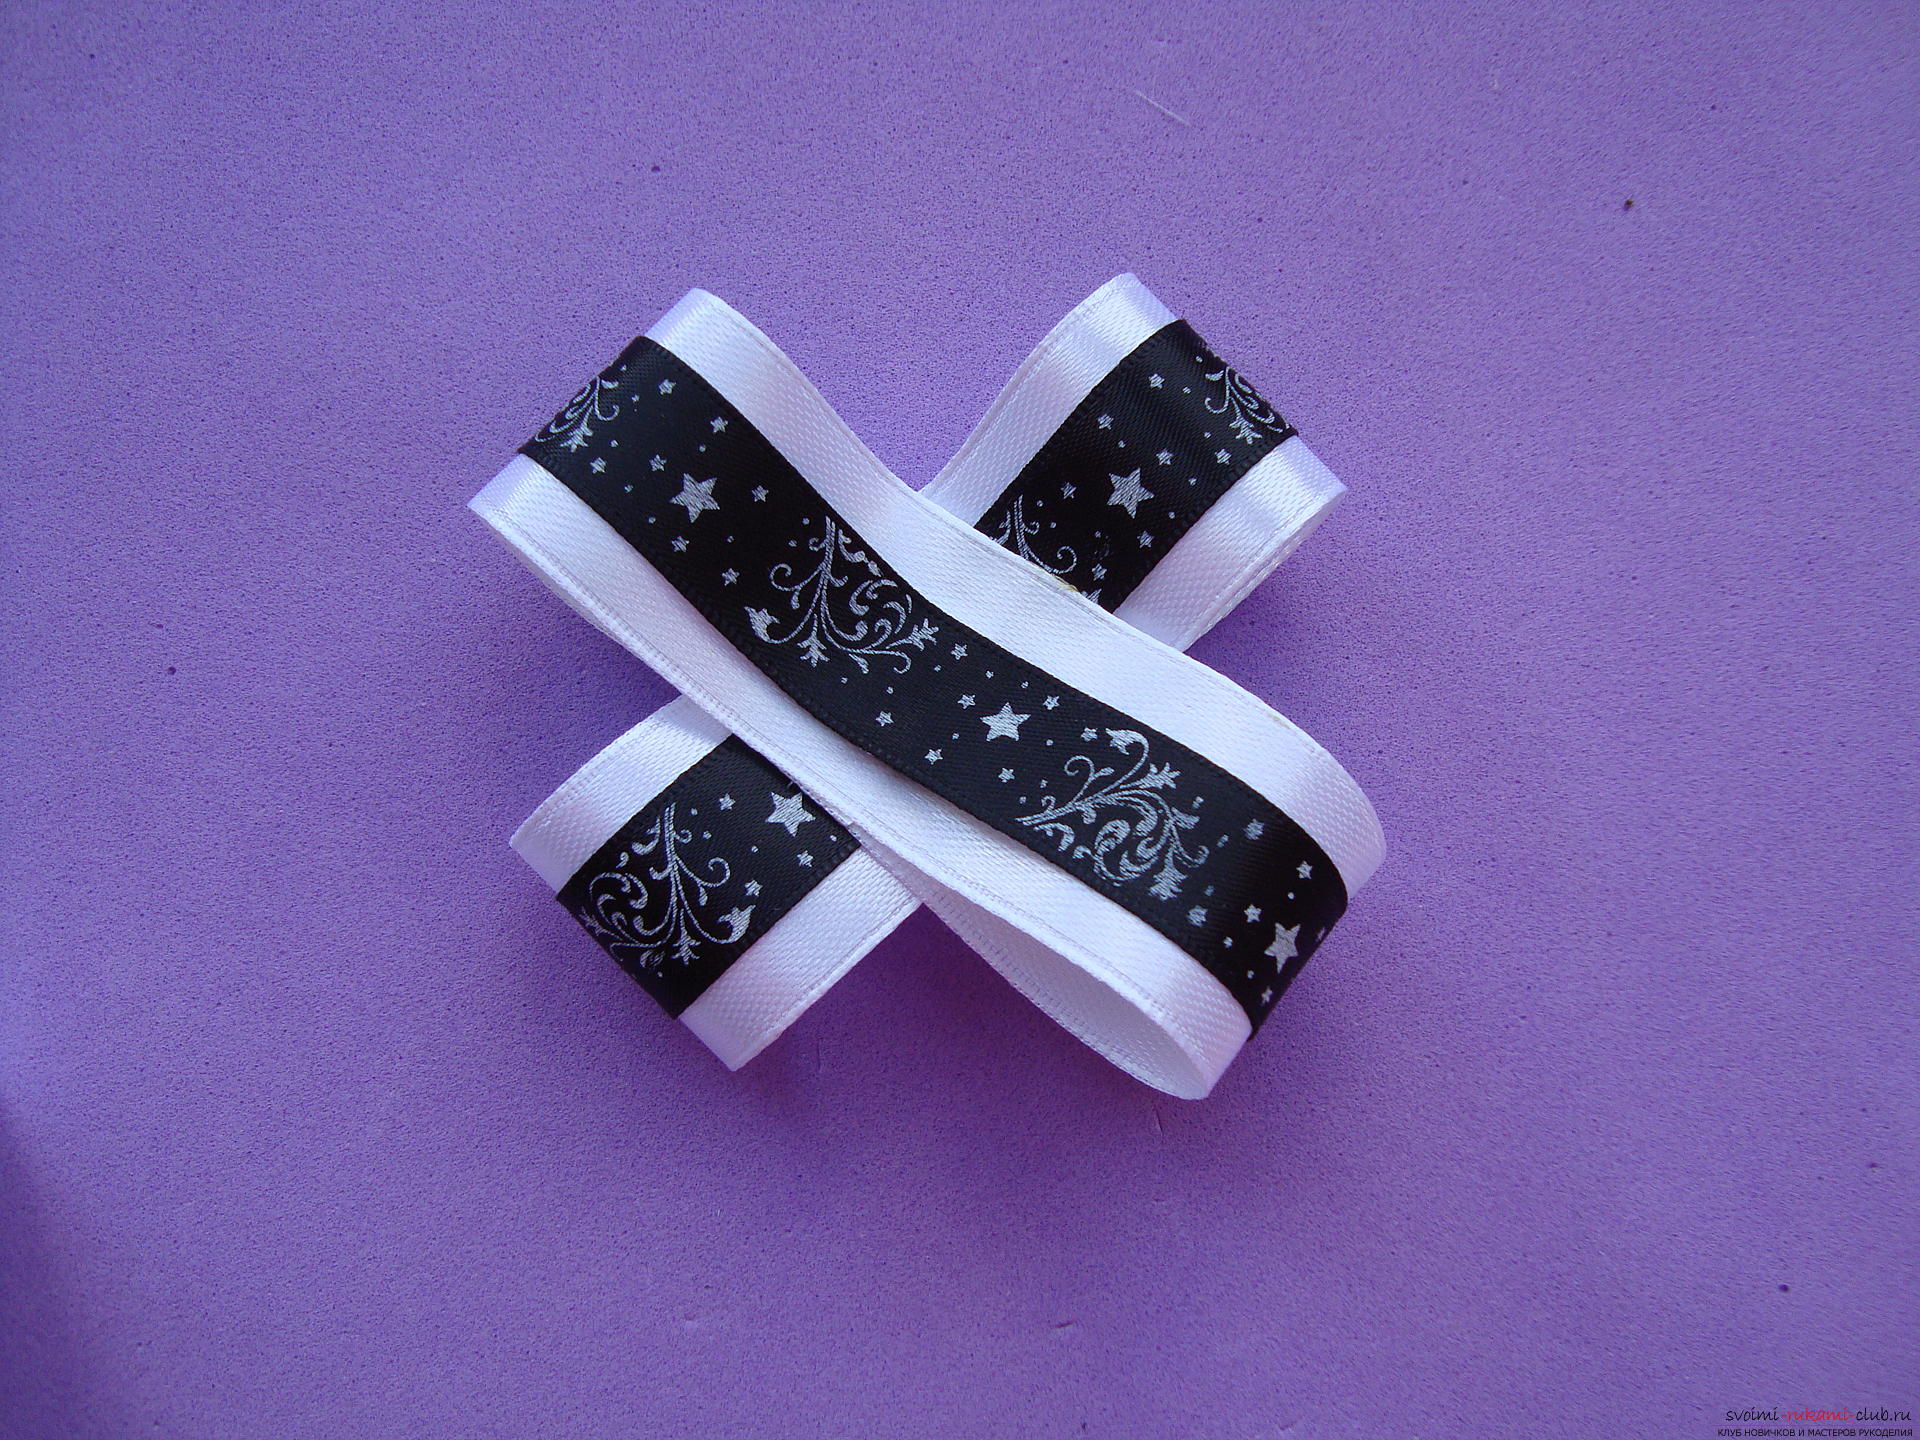 Similar manipulations with a white ribbon, this bow will form the basis of the product, and a double-ribbon bow will be glued on top.
  The middle will be decorated with an element of white tape with a thinblack pattern or you can pick up the braid with small peas. The cut size for this bow is about 12cm. Bonds it as well as the previous elements. The middle of the last bow is decorated with a large half-bead or a cut stone. It is desirable to use black and white jewelry.
 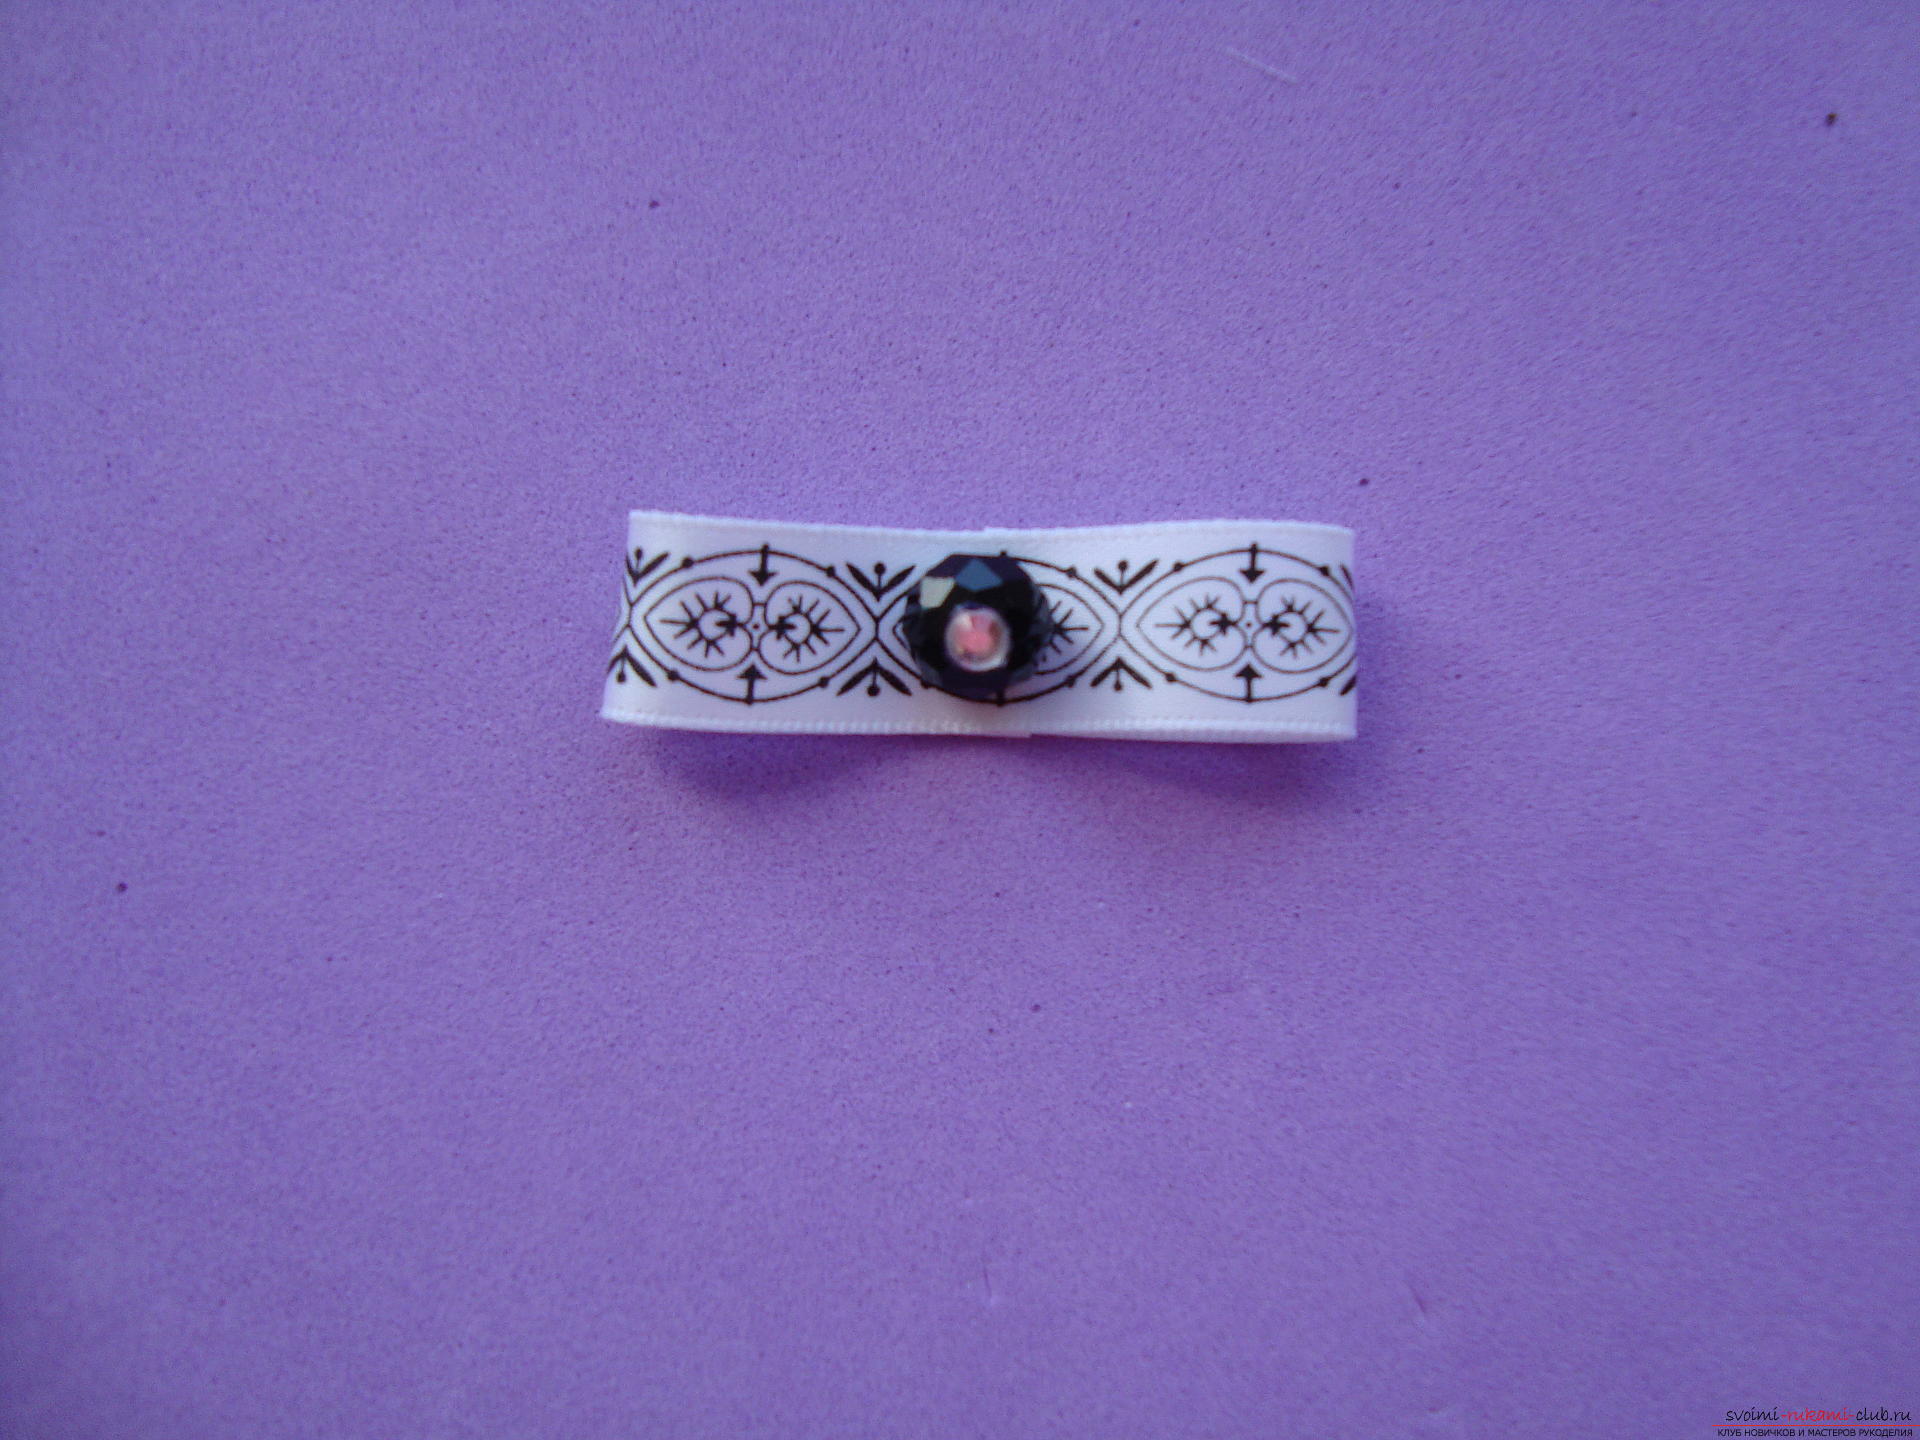 Glue the bow in the center of the second layer, placing it on a horizontal line.
 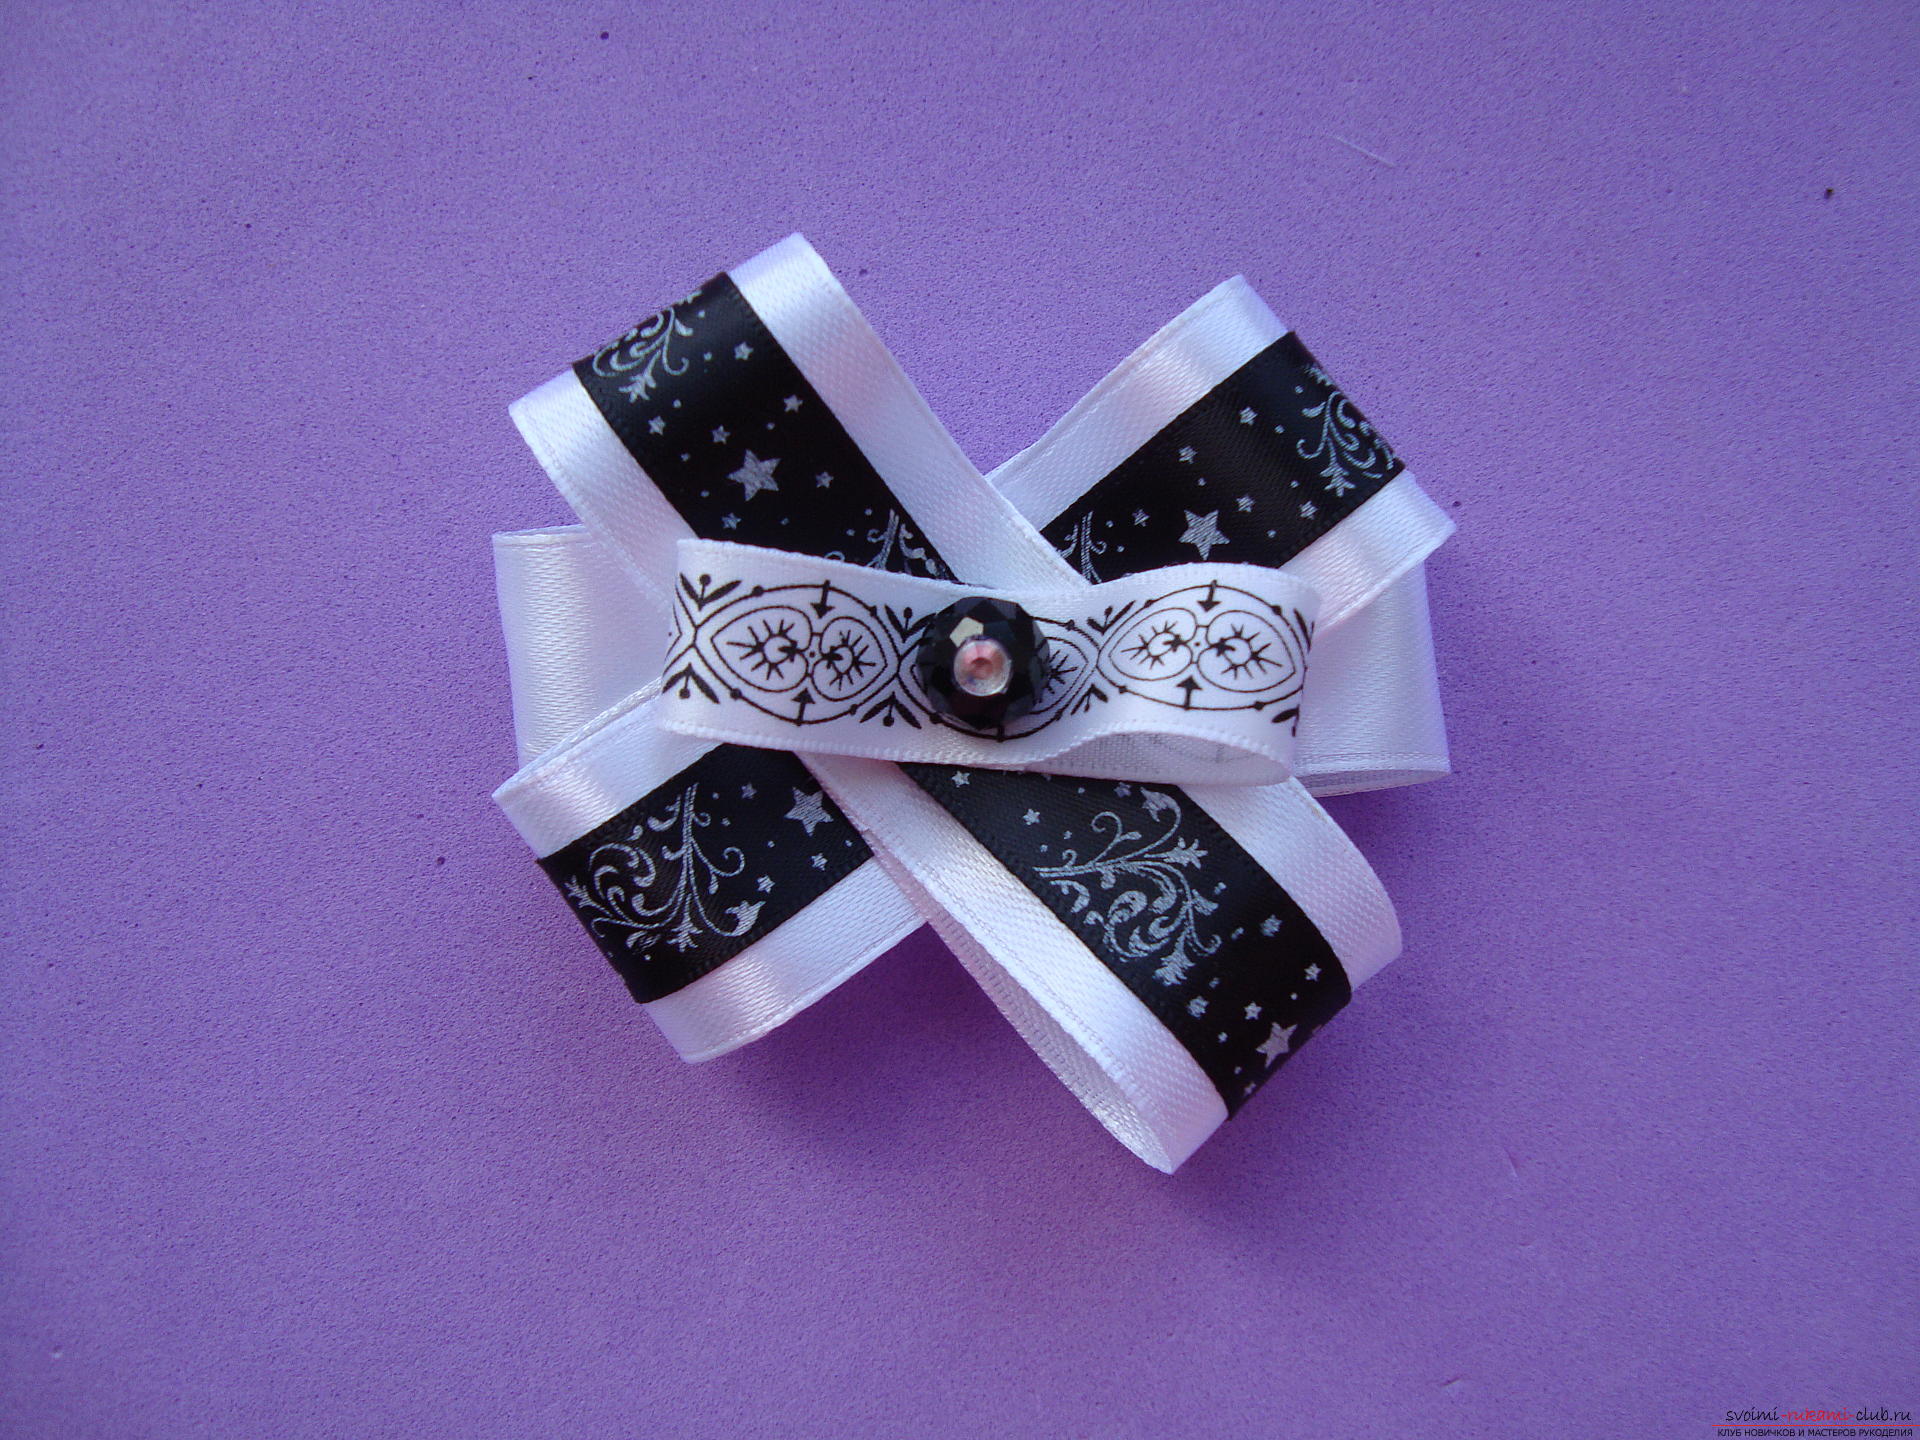 The assembled bow is glued to the top of the ribbons and tightly pressed until the thermo-glue seizes (it takes about 1 minute).
  On the back of the product is a pinor a base for a brooch. It is important to place the stitch strictly horizontally, with its wrong arrangement, the product will attach to the blouse under a slope and will look uneven.
 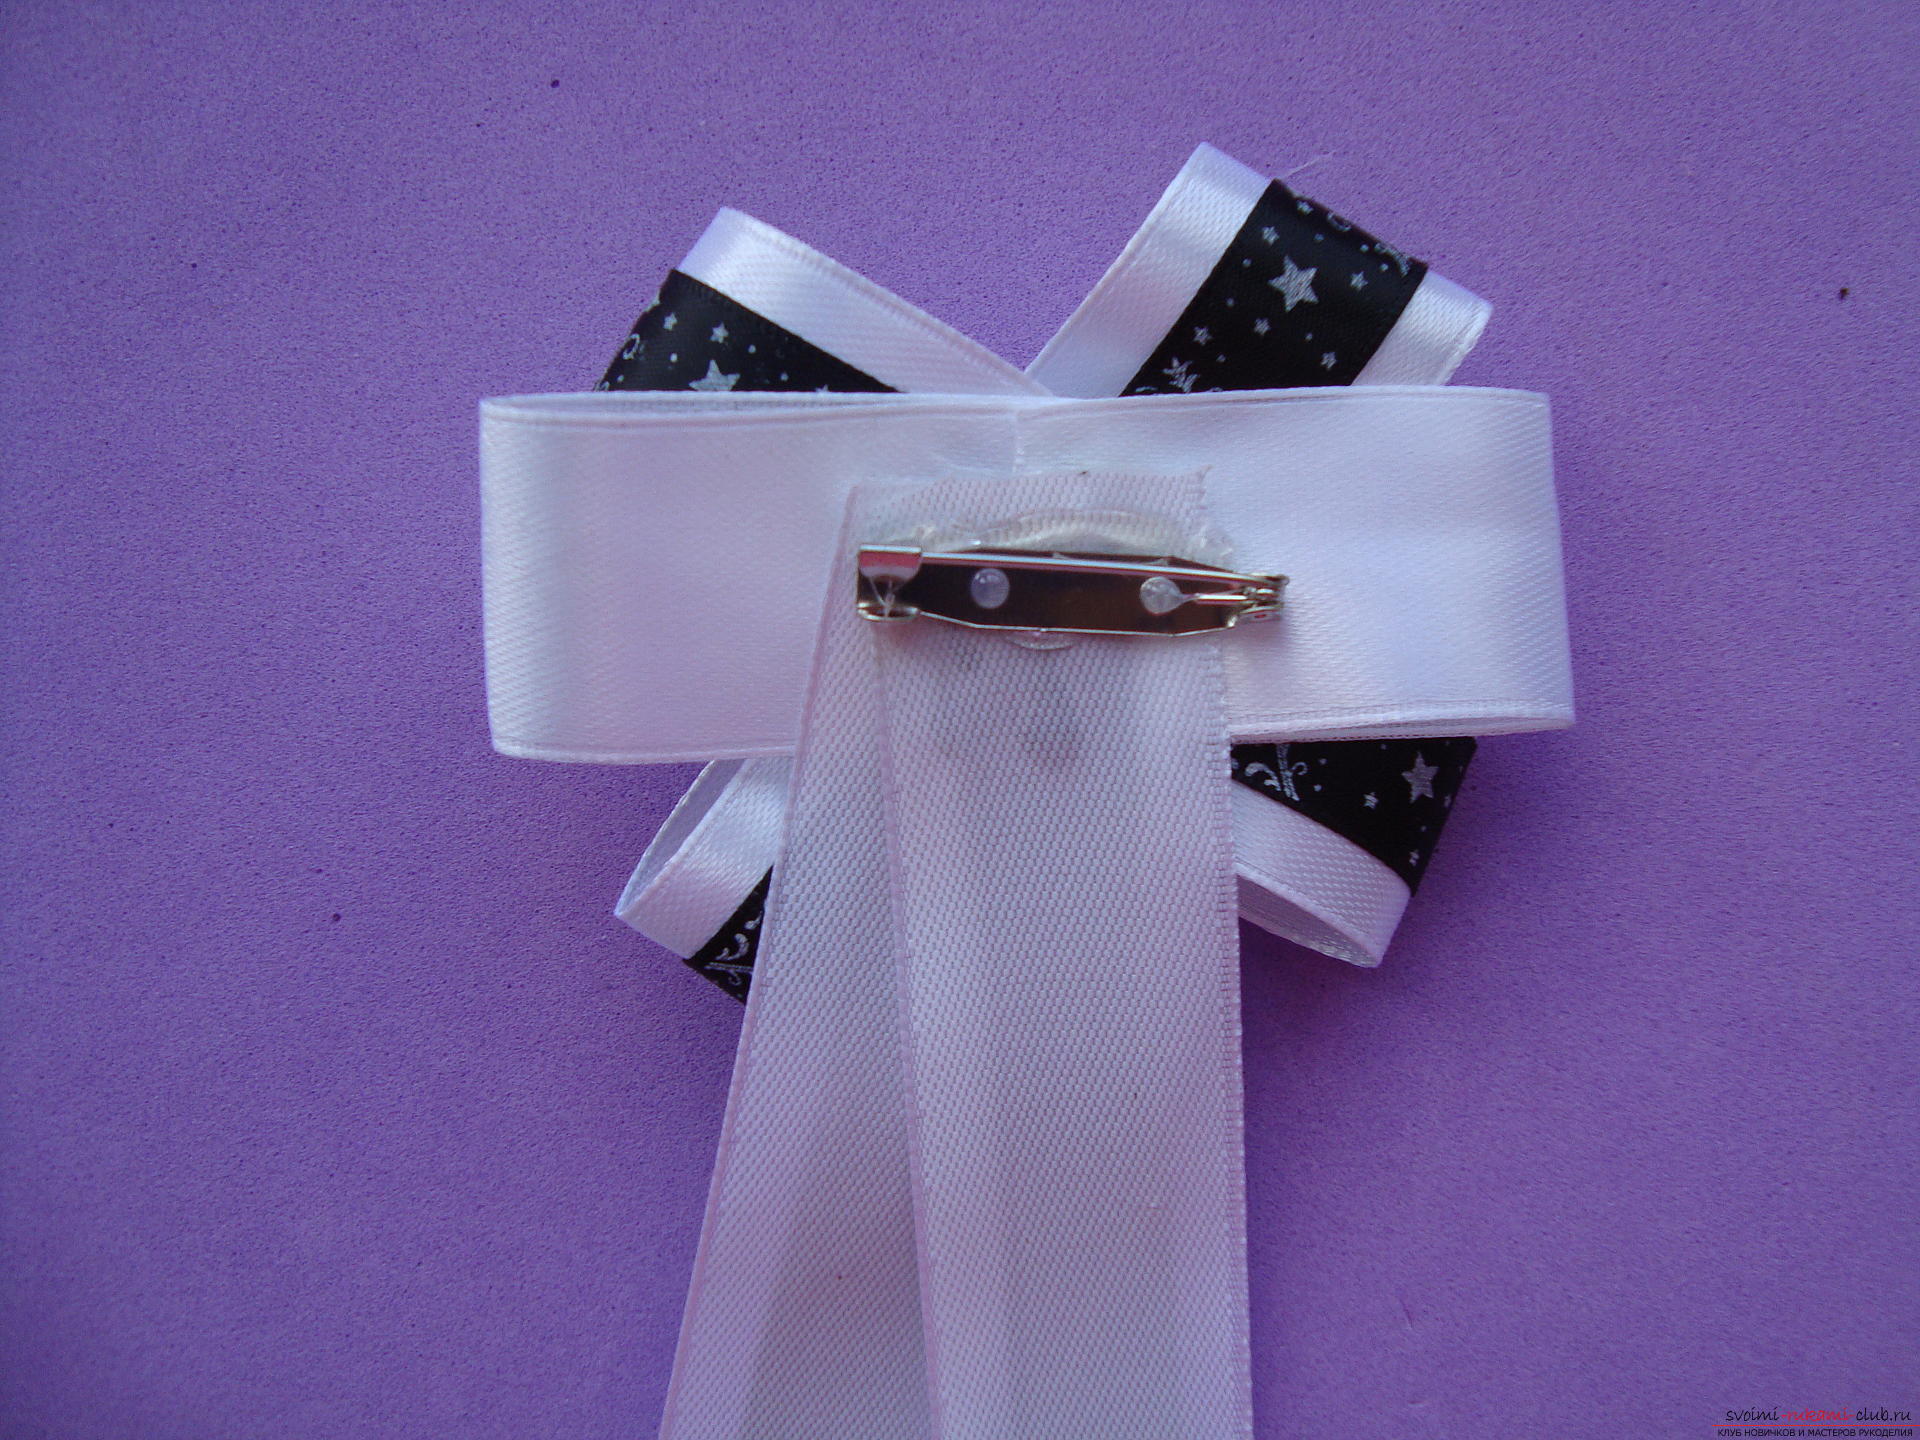 A charming tie on September 1 for the most fashionable schoolgirl is ready. It takes about an hour to create it yourself.
 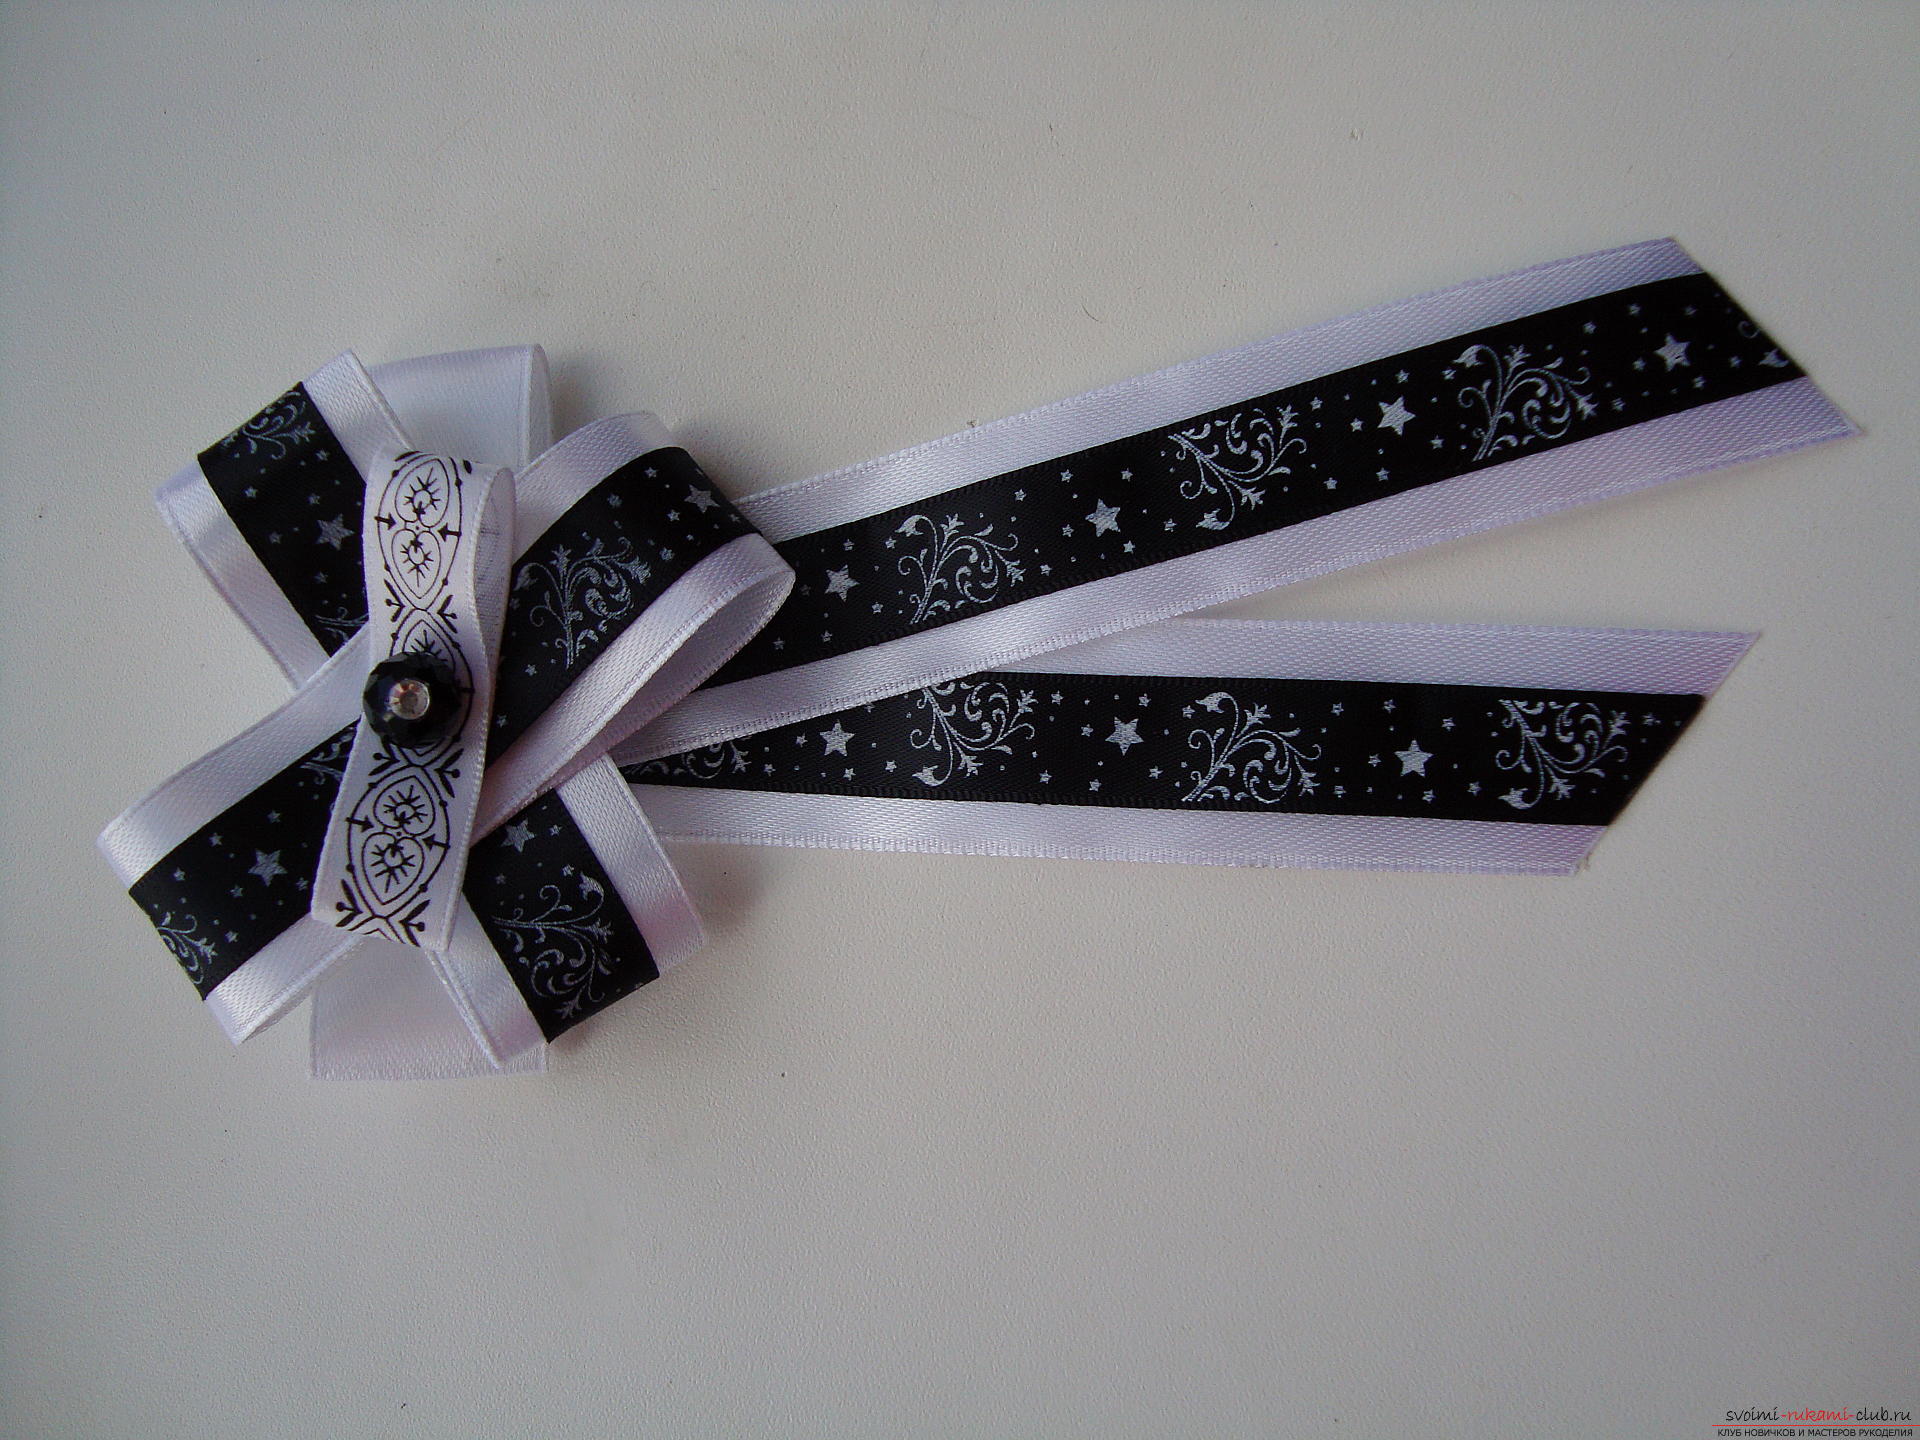 Wear this tie in the center, fixing it to the first button of the blouse. He also looks great on the jacket, then his location shifts to the chest in one direction.
Comments
Related posts:
 Bantams on September 1 of the white ribbons with their own hands for girls. Step-by-step instruction with description and photo
 Step-by-step instruction on making holiday bows for girls with their own hands
 Handmade of ribbons: a butterfly with your own hands, step by step instruction on how to make with photo and description of steps
 Decorative wreath in the form of cobwebs and a spider for her own hands, step by step instruction for manufacturing.
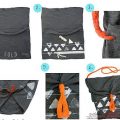 Summer bags, summer bag with their own hands, step-by-step instruction for making bags from pillowcases.