Crochet hook
Catch hook Crochet hook will beuseful and very beautiful addition for your kitchen. It depends on you whether it is decorative or functional, your tack crochet. Pothaking, which we consider today, we differ in its suitability for use and can also serve as an ornamental decoration of the kitchen. Many may wonder, what are these gloves, which are not suitable for use! And the answer to practice, I hope you will never feel and immediately you will make good, beautiful and comfortable crochet gloves. ? Bad tack I call one that is made in one layer. Why! No matter how dense the knitted fabric is (of course, I do not take into account the tacks made by semi-columns without nakida), it can always stretch out and when removing a hot pan or pulling the oven foot, the hand can get through hot through the holes. I had such a small tack that I don’t even remember where it came from, sometimes I forgot in a hurry and grabbed it. Naturally, then jumped from the pain and rather ran to handle the burn. Now she is sent "to retire" and very successfully serves as a bookmark in a large cookbook. Well, I hope everyone has already dissuaded from thin tacks! ? And now, let's start knitting! We will need: - three hanks of contrasting yarn, but combined with each other; - hook under the selected yarn; - needle with a wide eye; - scissors. 1. We need to connect two squares of the same size. Standard pot size 15 cm  2. Square pink perform by
  3. And the second square is performed
  4. After completing both squares, we attach them to each other connecting the corners. Moreover, the prospective facial sides should be out
  5. Making the thread in a contrasting color.
  6. Remove the yellow loop from the hook. We hook the edge loops of two squares, again we put the yellow loop on the hook
 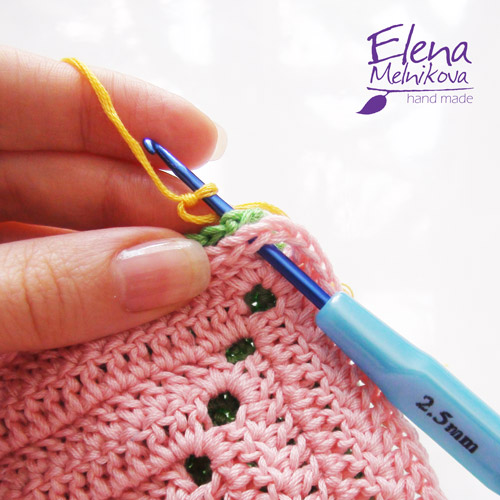 7. Pull the yellow loop through the squares, perform
 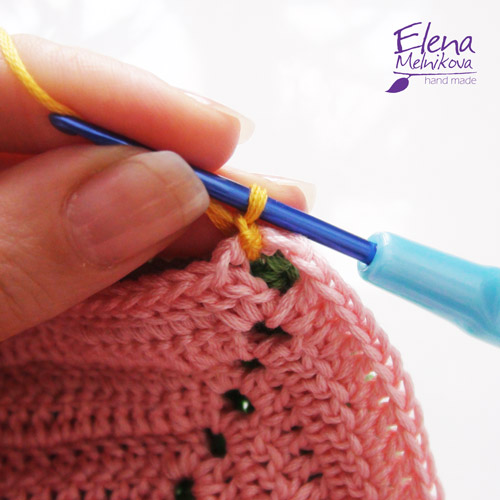 8. in the next loop. Tail from the yellow yarn need a little, so that she would not look through the holes of the pink square. Similarly, in advance, select the sides or thread the edges of the pink and green threads from the holes with a needle
  9. We knit the entire length of the sides of the squares with the help of single crochets. If the number of side loops does not match, adjust for a uniform distribution of loops by counting the number of non-conforming loops and distributing along the side length. And when cornering, we perform 5
  10. Tying around in a circle with the help of
  11. Air and we continue to tie with one more row from columns without nakida
  12. In the central points of the turn, we perform three columns without single crochet. If the corners will be bent, make an additional two columns in 1 and 5 loops turning the previous row
  13. Having finished the second row of the strapping, we close it with the help of the connecting post.
Do not forget to add a useful bookmark.using the buttons of bookmarks or social networks located below! Thank you for attention! See you at your new lessons! Do not forget to add a useful bookmark using the bookmarks buttons or social networks located below!  Your e-mail: * Your name: * Share in social. networks
  </a> Navigation by records
Tack crochet - Part 1: 3 comments
Add a comment Your e-mail will not be published. Required fields are marked * Comment Name * Email * Website