The technique of entlerq in knitting. Wicker patterns and the most unusual patterns of knitting of children's vests
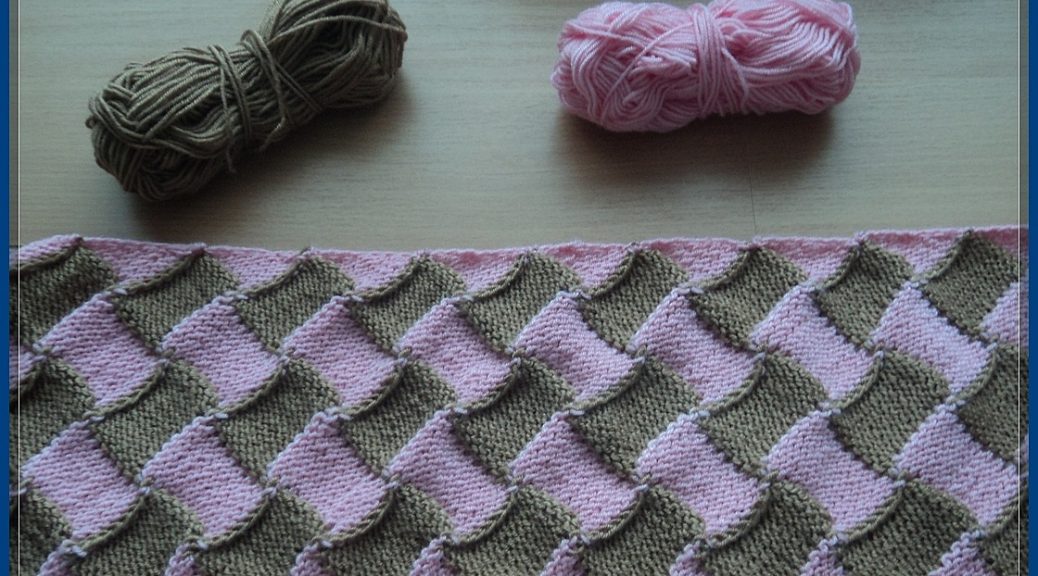
We learn how to knit a children's waistcoat with beautiful technical equipment. This technique resembles a patchwork sewing - a kind of woven pattern from a single thread. 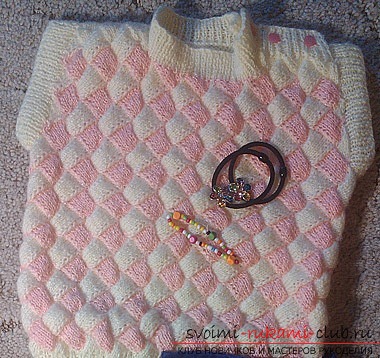 Amusing motley squares are perfect for naughty kids! Have enough patience, and get started!
 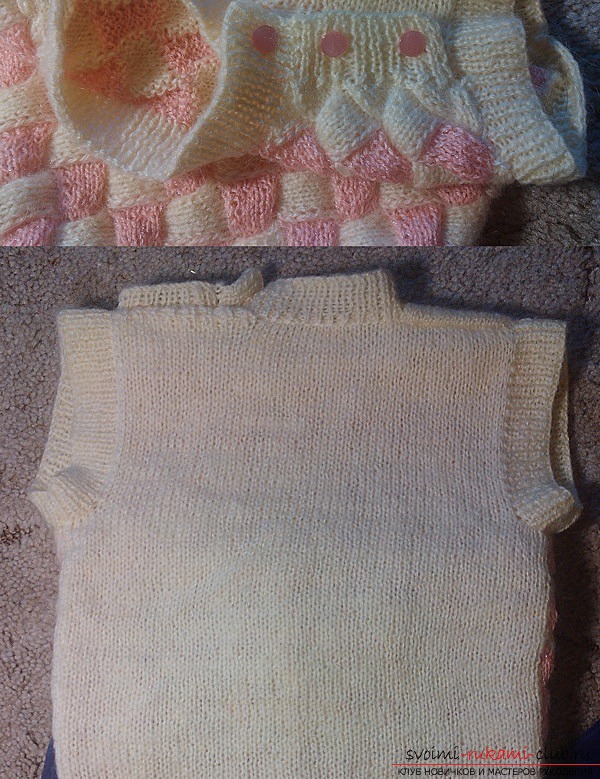 For work please: 30 g light pink and 50 g pure white yarn (acrylic + angorka), and spokes number 2.5; 3 buttons. Face surface of the waistcoat: face - facial loops; the wrong side - also purl. Elastic waistcoat (1x1): one loop face, and one loop knits the wrong side. The waistcoat: Dial 60 pcs and knit with an ordinary elastic band about 4 cm, then the work is knitted in the technique of the enterlac: We knit the base (base row) - make triangles 6 cm wide: 1st row (inverse): 2 out of the way, and work rolls over. 2nd row: 2 faces and turn the canvas. 3rd row: 3 out., Too, turn over. In each row of the underside of the canvas, add 1 pt until the needle is 6 p. And the loops of the first triangle are left on the right spoke and start again from the first row to execute the second triangle. So we knit 10 more triangles. A. Triangle of the marginal (it will be right). Knit a light pink thread. The right triangle will be the main one for all rows of rectangles. 1st row of face: 2 faces and flipped over. 2nd row: 2 out., And turn over the work. 3 rd row: re-tie the front and back walls of the hinge by the face behind the wall, subtract 1 st with the slope to the left (connect this triangle and the triangle on the left knitting needle), turn the work over. 4th row: knit by the wrong side, then turn the work. 5th row: you need to tie the face behind the front wall and back of the hinge, now loosen the hinges, and turn the work. Rows 4 and 5 are repeated until the loops of the lower triangle are tied. The product does not rotate before we finish the last 5th row. We knit the first rectangle. To do this, climb 6 loops from the barrel of the triangle 1st row (face): all typed loops tie with the face, turn the work. 2 nd row: tie the wrong side, turn the work. 3rd row: we knit the face to the very last loop, which we must tie together with the first loop on the basis of the next triangle, the work is turned over. Then, rows 2 and 3 are repeated until all six loops on this triangle are tied. Start from the first row to associate another such rectangle. And so we knit a whole series of rectangles. The boundary triangle (it is left). By the lateral triangle we finish knitting a row of rectangles. 1st row (front side): Dial 6 points from the bottom of the last triangle, turn the work. 2 nd row: all knit by the wrong side, we subtract one point at the end of the row, tying the two together with the wrong side, and turn the work. 3-row: knit face, work to deploy. Rows 2-3 repeat the same way, until 1 st stays. The thread is fixed, and after that it is cut off. B. Rectangle. Now we begin to knit a number of one rectangles on the wrong side of the working cloth. We take a white thread. 1st row (wrong side): from the base of the triangle we type six loops with a working thread, and move down along the side of our triangle, work to turn. 2-row: knit face, work to turn. 3-row: knit by the wrong side up to the last loop, which we are tying together with the next loop from the next rectangle. And the work to expand the 2nd and 3rd rows is repeated knitting similarly, until all the loops from the lower rectangle are sewn. When we finish the rectangle, the work does not turn, but we need to start knitting our next rectangle. Repeats until all the rectangles are ready. So, when the pink rows (A) and the white (B) rows alternate, you knit the shelf to the armhole - it's 12 rows, and the last row turns white. The rows of group (B) are knitted with pink color twice, and the rows of group (A) and white color 2 times.
 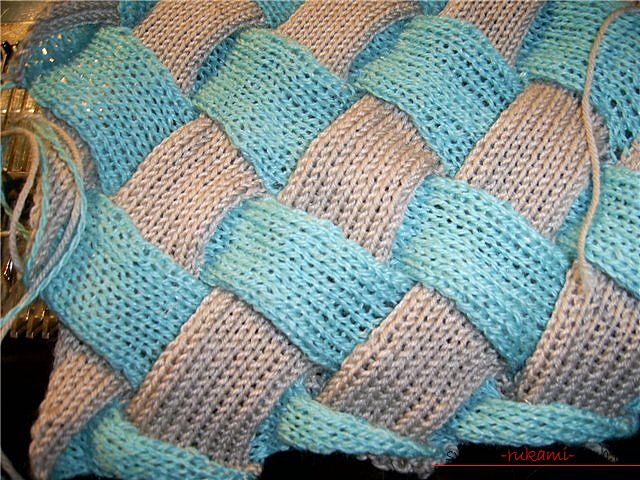 Next, gently knit the neck of the vest, forthis in the person knit pink three rectangles (B), then three triangles: enter the working thread into the base of the rectangle and lift the six loops, in the purl series, the last two stitches are tied together, in the front row the last loop is sewed together with the next loop of the rectangle.
 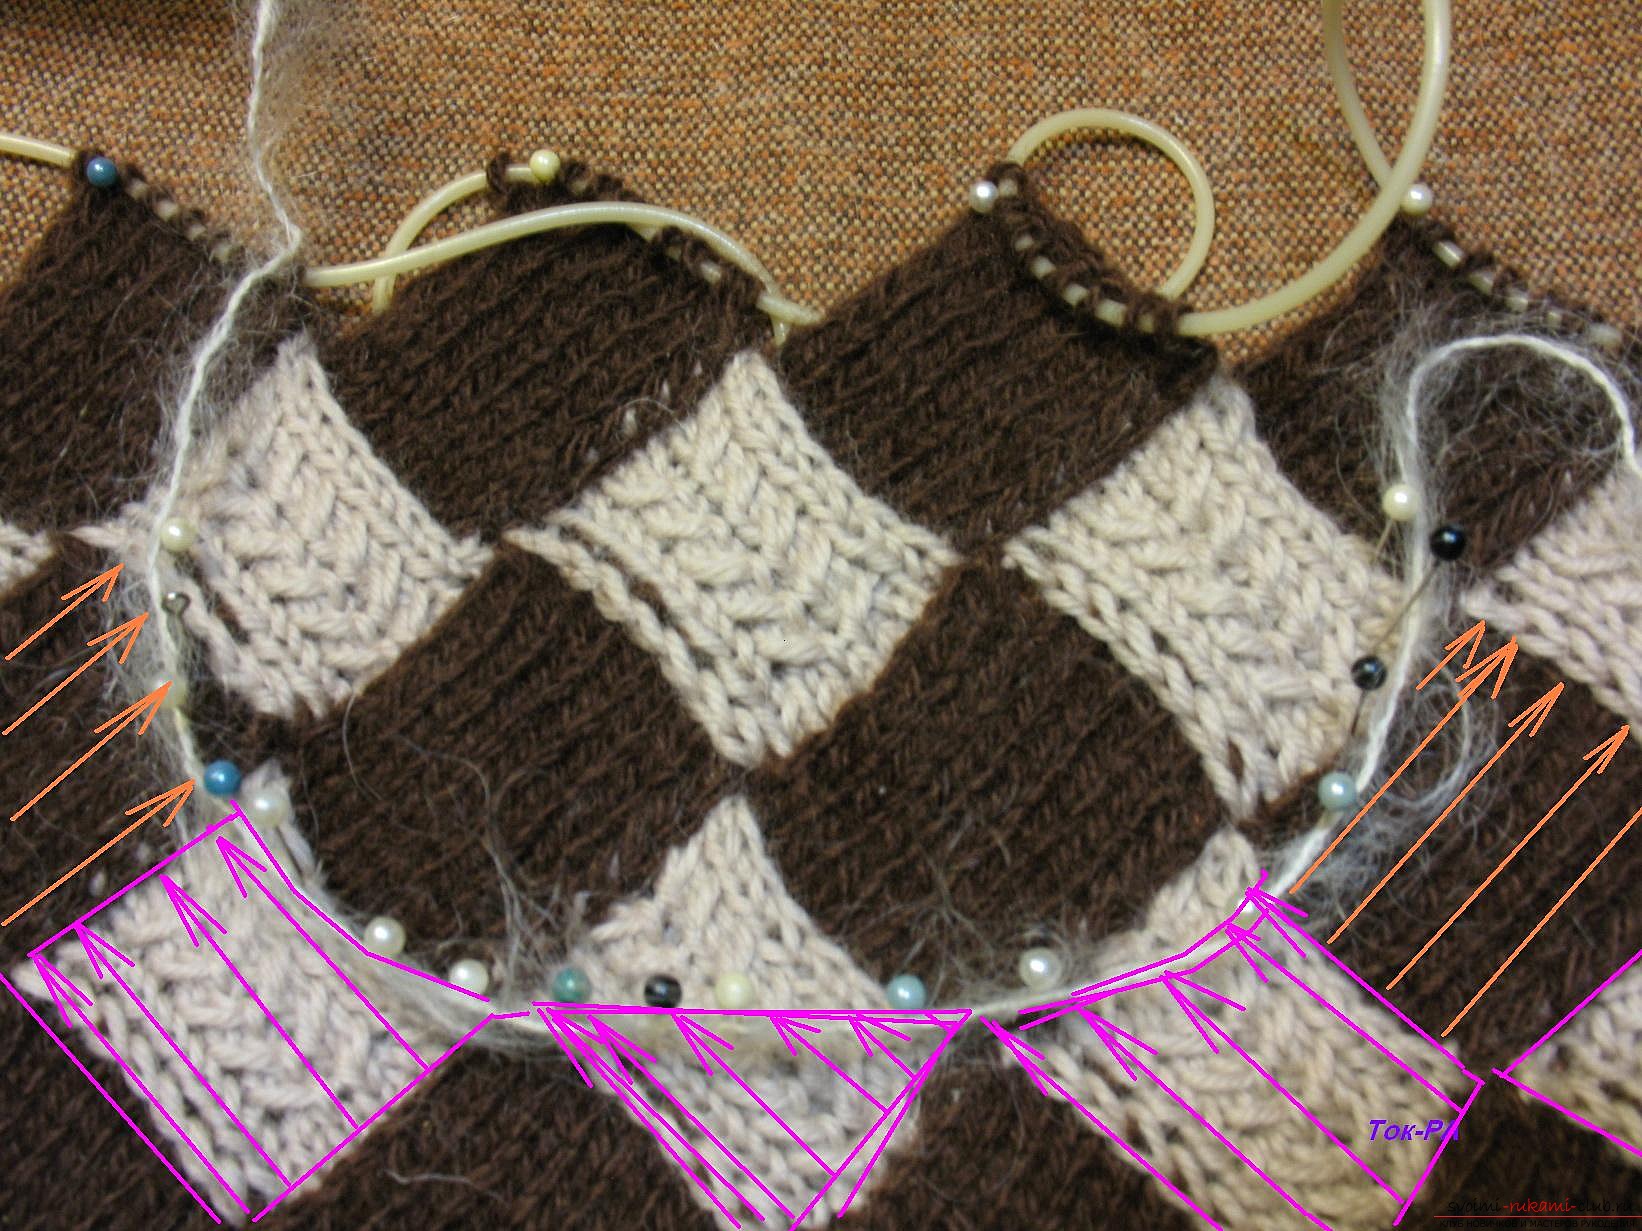 We repeat similarly along two rectangles,and those spaces that are formed between the rectangles, we fill with knitted triangles. Next, make three rectangles (B). Then we knit another row of the group (A) and end with triangles, but in the purl series there are not two knots together at the end of the row, you are tying in shortened rows.
 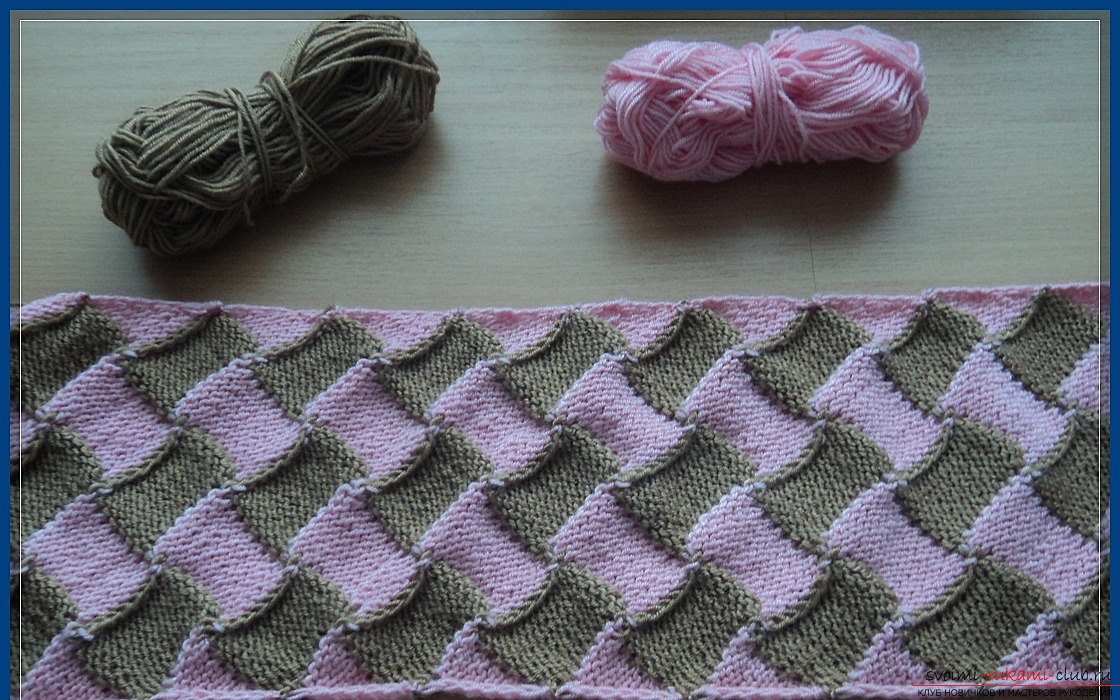 You can combine different colors of threads, and different shapes of squares. Do not be afraid to experiment in knitting, and you will succeed!
Comments
Related posts:
 How to bind the most simple knitting patterns in knitting. Description of the most popular and at the same time simple patterns and the process of their knitting
 All details about knitting enterlak in photo and video tutorial
 Knitting on knitting needles, knitting for knittingbeginners, knitting patterns on knitting needles, openwork patterns, how to knit openwork patterns, jacquard patterns, how to tie a lazy jacquard pattern with knitting needles, braids, master classes for knitting them.
 Cake loops or crochet-knitting techniques
 Patterns and patterns with a description for knitting socks with knitting needles