Quilling technique for beginners, the basics of quilling, rules and advice for beginners, a description of the basic schemes, tools required for work, tips, advice and photos.
Quilling, as well as origami, technique,implying paperwork (twisting). This kind of needlework, like many others, came from Europe. Quilling was known in the 14th century, at that time it was brought to the real art, which was practiced by monks, who created fine medallions from fragments of paper with a gilded edge. Of course, up to now these creations could not reach, because the papers for such a long period of time just decayed. The second birth of this kind of art survived in the 19 century, but at that time in this technique created by rich ladies, because such a paper was very expensive. After that, the quilling was forgotten again. At the end of the last century it was reborn for the third time, but already in the form of decorative needlework. Many craftsmen are engaged in quilling quite professionally, making products for exhibitions and sales. The basics of quilling As in all other fields of activity, in order to successfully implement all your creative ideas and ideas, you first need to get basic knowledge. Before you create beautiful compositions, it is very important to learn and practice to twist the basic elements. If you master the torsion of the basic forms, then making any of the most complicated compositions for you will not be a problem. Diagrams describing quilling for beginners always contain the outlines of the drawing and the elements that fill it. To fill the scheme you need, you need to use the basic forms and components, which are also made up of basic forms. 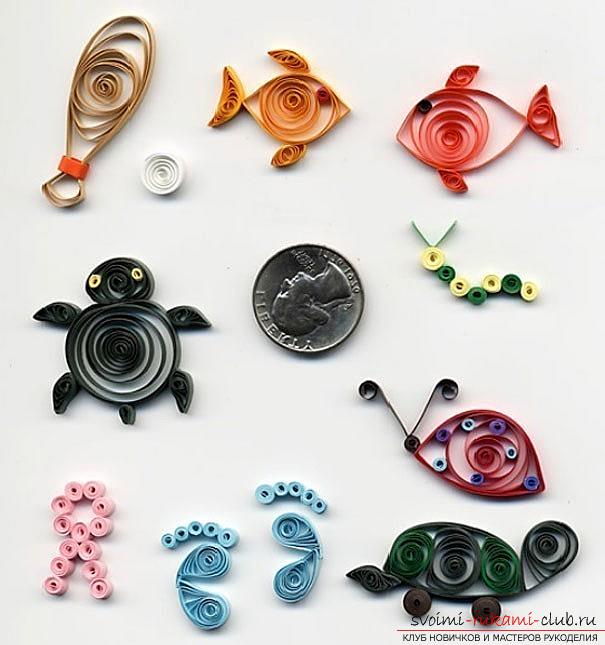 The most difficult task for all newcomers whoare engaged in composition formation, is to precisely place all forms within the drawing and not go beyond its contours. That is why it is initially recommended to practice on smaller and simpler compositions, in the creation of which the main goal will be to fill the hand. Schemes for beginners are more detailed, in addition to the main figure, the exact location of the basic forms is indicated here. This way of training is very convenient, even small children will be able to master this kind of needlework. After you master the basic provisions of the quilling technique, you can proceed to other schemes, where only contours are already indicated. In addition, after practicing, you can draw the drawing you need yourself and plan the location of the base rolls and shapes on it. Useful tips for beginners
Basic Tools To In Progressmanufacturing of products in the quilling craftsmanship was as easy as possible, invented a variety of tools. With their help, you can create details of various shapes and sizes. Moreover, the creative process itself is much faster. 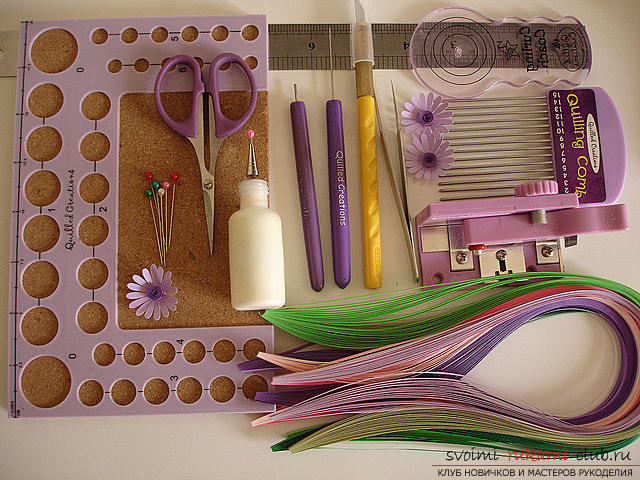 For this kind of creativity, first of all you will need:
- the main tool of any master who specializes in quilling technology is an awl with a forked tip. It can be replaced with an ordinary toothpick or a bamboo stick with a slot;
- colored paper. This can be a specially purchased paper in the store for creativity or homemade, which is simply cut into separate strips;
- stencil for quilling or ruler, on which there are slits in the form of geometric figures;
- tweezers, which are used to hold the rolled strips when glue is applied to it;
- scissors for cutting fringes or other small details;
- adhesive PVA (it can be replaced with other quick-drying glue);
- pencil;
- line;
- compass.
In addition, experienced craftsmen use a fringing machine, special cork boards, special scallops used to create some elements, etc. 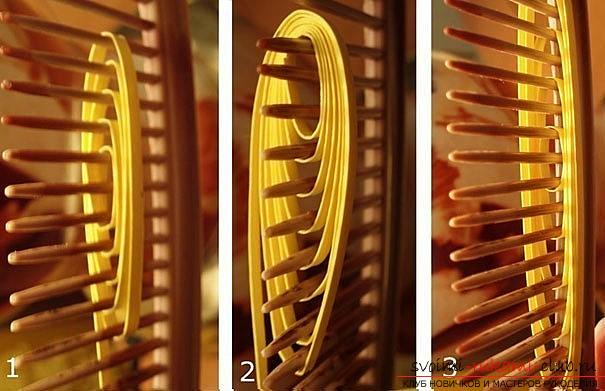 The basic technique of creating a roll
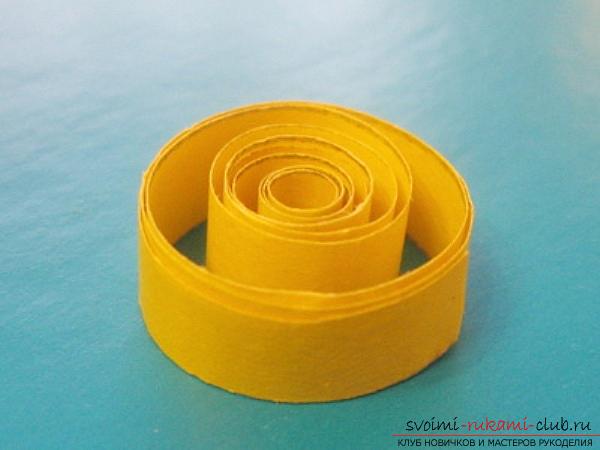
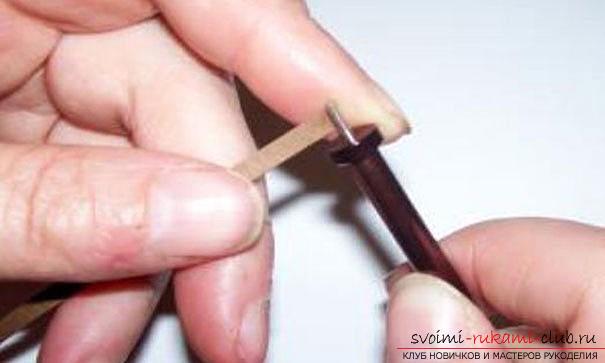 Making the simplest spiral
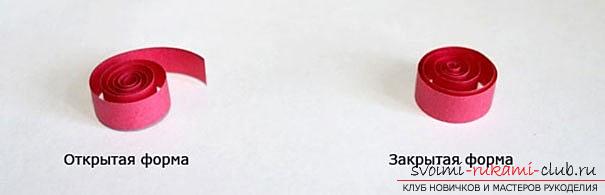
Below is illustrated the method of creating a "tulip" from a spiral. 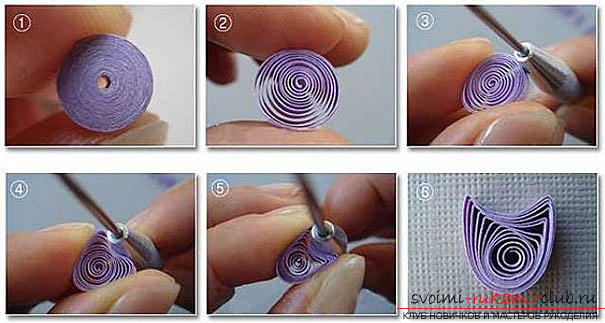 Basic forms used in quillingfuture to create bright and beautiful compositions, first of all, familiarize yourself with the basic forms of quilling that are used in any work. All the basic elements in terms of forms are divided into tight and free. Free rolls are obtained by twisting the paper tape onto the instrument, and at the end of the work the tension of the strip is weakened. Thanks to this method of twisting, the element can be given absolutely any shape that is necessary for work. At the end, fix it with glue.
 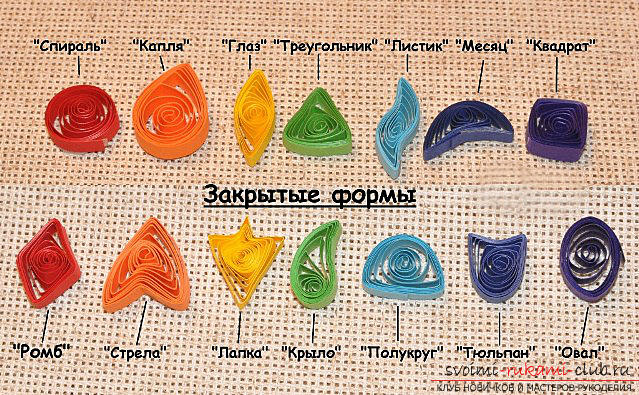 In the case of tight rolls, paper tapetwist as tightly as possible and also glue at the end. Most often tight rolls are placed in the center of the entire composition, they become a kind of the basis of the picture. They are also used to isolate individual parts of the image. Due to the tight winding of the paper strip, the color of the tight rolls becomes more intense.
 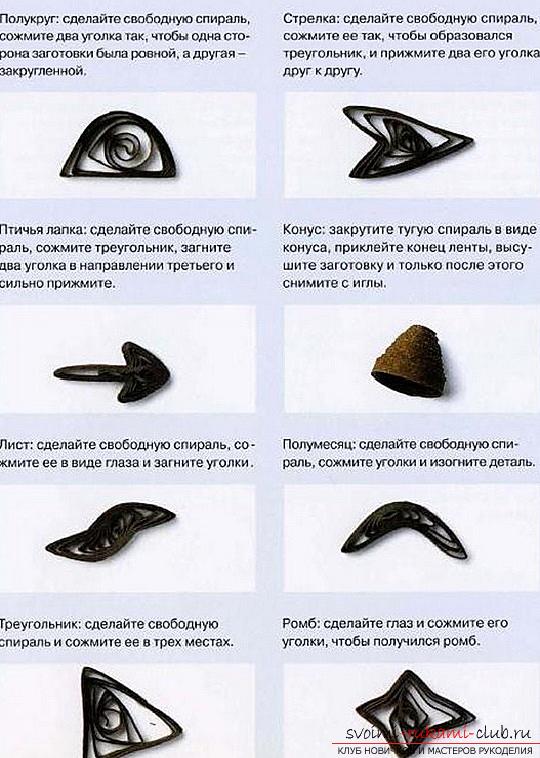 In quilling there is a lota variety of open and closed forms. From the illustration it can be understood that in the open form the end remains free. To make a closed-form roll, the end should be fixed with glue. To depict the basic form - a loop, you need to gently pinch the closed form on one side with your fingertips.
 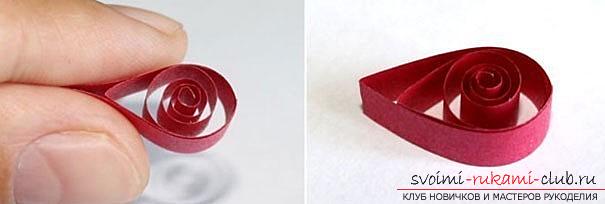 If a drop is also stuck on the other side, another base form will appear-the eye.
 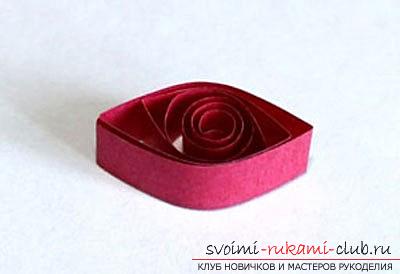 Below are illustrated many basicclosed forms that can be made using only one strip of colored paper. Triangle First, do a drop, then flatten the rounded side so that it becomes straight.
 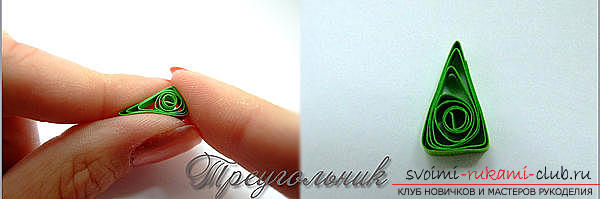 Arrow This figure is also easy to make. First make a triangle, then press the middle of the base inward.
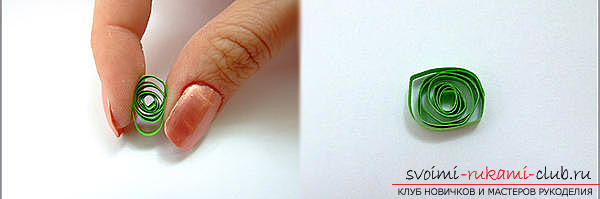
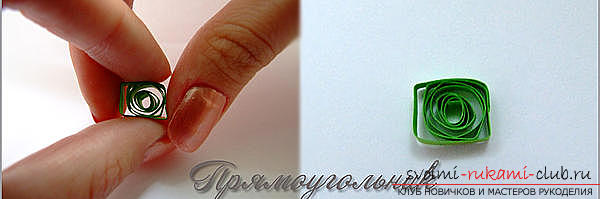
 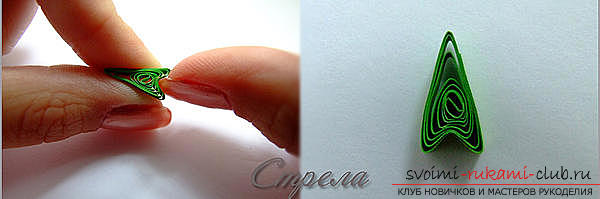 Creating a rectangle To begin, bend the spiral in the shape of the eye, as shown above. Then, in the same way, bend the other two sides. You have left to align all corners.
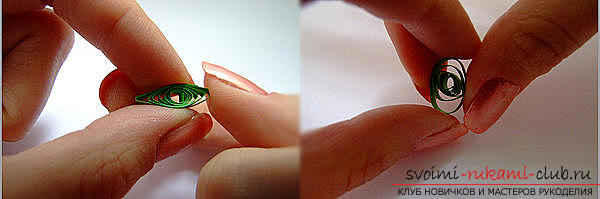
 Semicircle To create this part, secure the two tips of the free spiral. You left to straighten free space on one side between them.
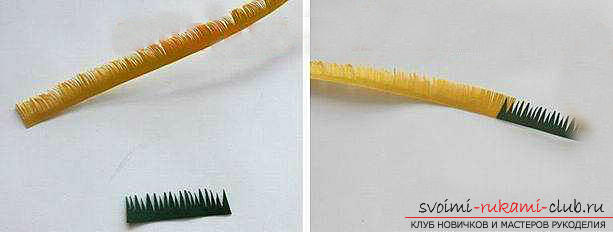
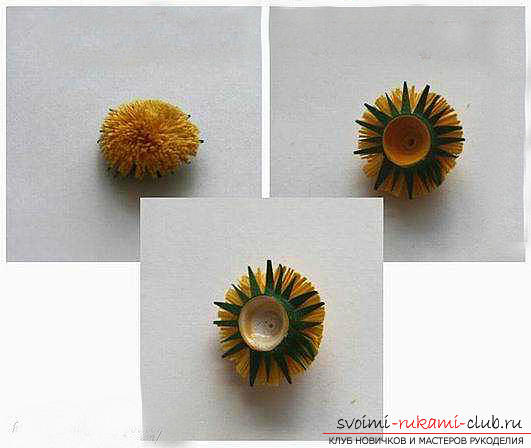
 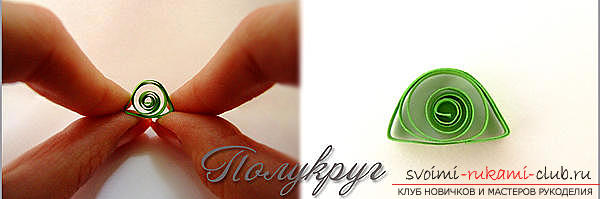 Create a crescent shape Make the shape a semicircle, and then squeeze the middle into the straight side. Making fringe The process of creating fringe is absolutely not complicated, but it takes more time.

 Also worth dwelling on and creating freefigures, for the manufacture of which you do not need a closed spiral. This group of figures is different in that the tip does not need to be fixed with glue, it turns out to be free. Variations of such forms can be invented by a large number. But here the main ones will be considered. Horns To make such a figure, fold the strip in half, each of the stripes must be twisted into the outer (opposite) sides. Curl Take a strip of quilling paper (do not bend it) and twist one piece in one direction and the other in the opposite direction.
 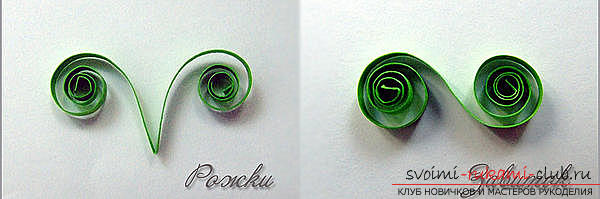 Sprigk To get the shape of the twig, foldstrip in an approximate ratio of 1: 2, then twist both parts in one direction. Heart In order to make the heart, bend the strip in half and twist both of its parts inside.
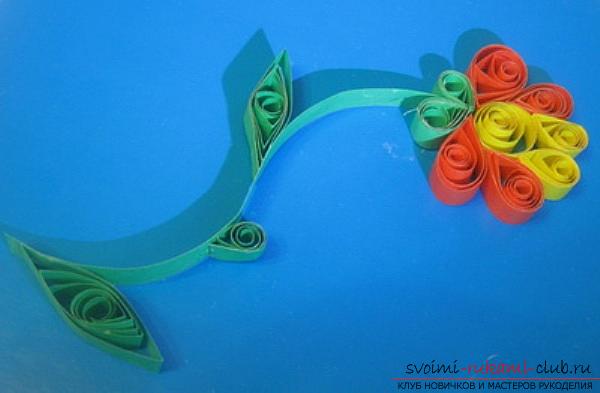
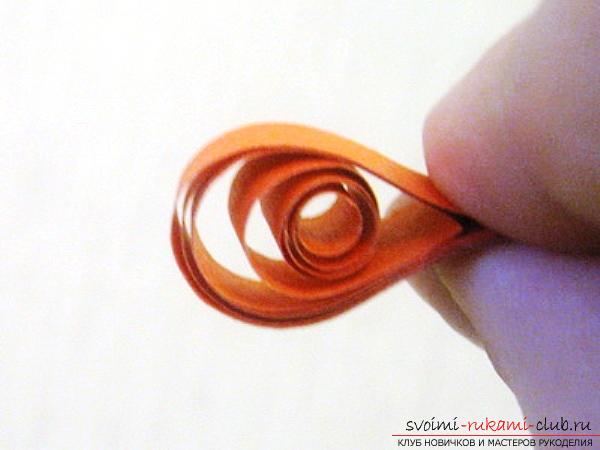
  Flower for beginners, made in technologyQuilling To make a simple composition, you need to prepare two-sided colored paper, several toothpicks, a thick cardboard that will be used as a background, as well as PVA glue. Take a strip of colored paper, the length of which will be about 25 cm, and the width - 0.5-0.7 cm. It needs to be twisted into an ordinary spiral, which is the main element in quilling.
 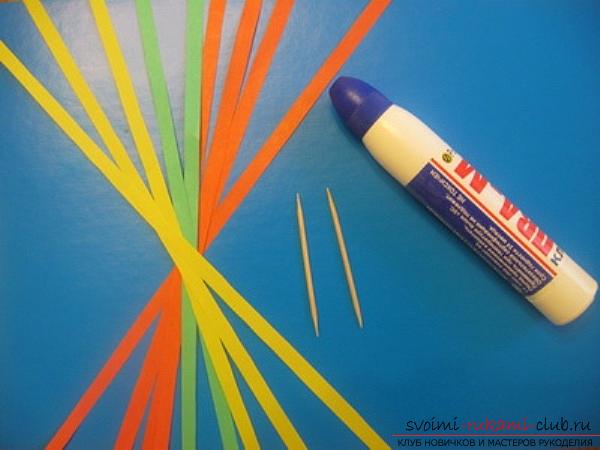 Make a drop out of it, which in use will be used as a petal and a leaf.
 Clamping the spiral from two sides, you can get a lot of details in the form of eyes, which are also perfect for making a composition of flowers.
 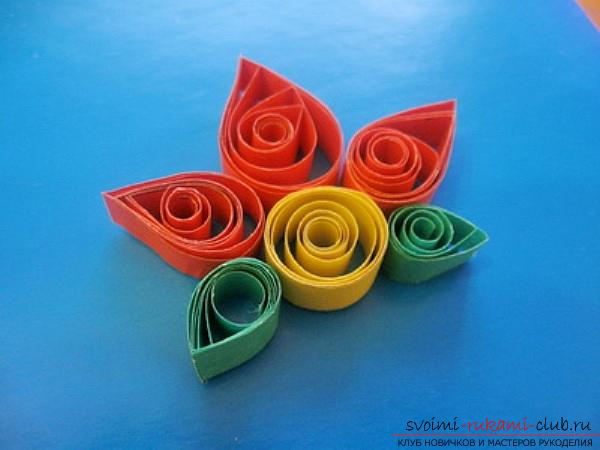 After all the elements are ready,Think about how they can be arranged on the basis to make the composition come out as brightly, harmoniously and beautifully as possible. After that, glue all the parts to the cardboard with glue, and the flower in the quilling technique is ready. If we talk about the schemes of specific products,those are very few. However, the Internet comes to the rescue, here you can find many examples and detailed master classes to perform paintings and other items in quilling techniques. Knowing the basic schemes of twisting elements from paper, you can easily repeat the most diverse compositions. Moreover, having mastered the quilling technique, use your imagination and creativity to create something new, nothing like that. I wish you success in your creative work and successful experiments!
Comments
Related posts:
 Quilling for beginners, schemes for quilling, instruments and materials for quilling, snowflakes in quilling technique, snowflake patterns, creating a picture in quilling technique, a scheme of the picture "berry".
 Quilling technique, various flowers in technologyquilling with your own hands, creating compositions using colors, quilling techniques, tips, recommendations and instructions for creating them with phased photos.
 Three-dimensional flowers from quilling, a quilling for beginners with a description
 Quilling for beginners. Master class for mastering basic skills using the example of a butterfly creation scheme
 This detailed master class contains a quilling lesson for beginners and will teach you how to make yourself a quilling ballerina.