This article will tell you where to start knitting a napkin. Knitting crochet crochet
It is best to start knitting a napkin of thicker yarn. This is necessary in order not to be confused in the thread. You can take an acrylic or wool blend thread. The next step is selecting the appropriate hook. Too thin it will not work, because the thread is thick. A too large hook will make holes on the product. The optimal option for beginners, who will make a dense wipes, will be a hook size 2 or 2.5, but still, I repeat, that you need to select it for the thickness of the thread. And choose the one that will have at hand time, it is necessary that it was convenient for them to work. But for knitting similar openwork, napkins, you need to take thin hooks of the smallest sizes (0.5 or 1) and thin threads. The sewing thread No. 10 is most suitable, from which light and air napkins are obtained, which will perfectly decorate your house. Let's start to make our wonderful product according to the proposed schematic drawing: A product for beginners 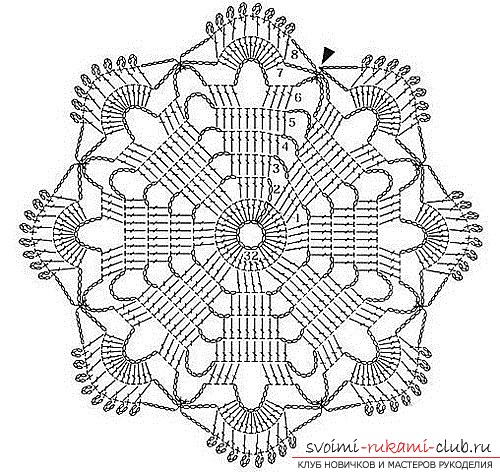 Knitting crochet crochet stages 1 stage. The knitting of a round napkin. To this stage, proceed with a set of chains and loops (the symbol is written like this: VP). In this diagram, the loops are represented as a small circle. For the proposed product, we need to link a chain that will consist of 12 loops and connect the first and last loop of which, we will get a circle. We take the napkin from the right to the left in a circle. 2 stage. To pick up a row, you should start tying with a set of a certain number of air loops. The quantity you need is always written in the description for the picture. In the presented example, we unfasten 3 air loops in the first row for lifting. The second for the VP means a column with 2 overlays (C2H).
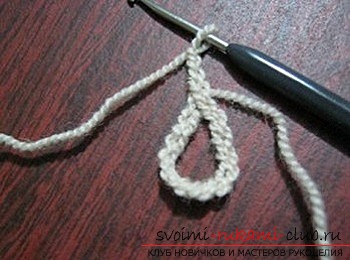
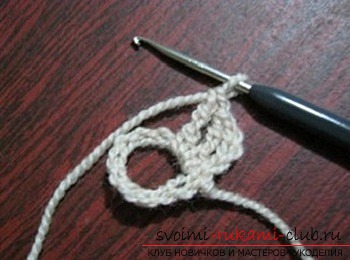
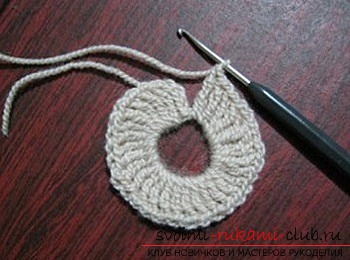
 Now we simply tie this ring 31column with two overlays. Enter our hook into the ring. The final column, which turned out to be connected to a chain which consists of 3 light loops, which were typed at the beginning of our row. Stage 3. All the following rows are knit with the help of our drawings. The next row should consist of 3 air loops and 4 columns with two capers in each column in the previous row.
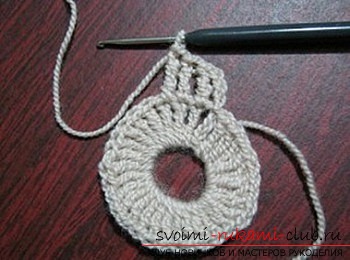
 Already in the 3rd row we alternately knit 4 airLoops and 6 columns with 2 nakidami. Look at the drawings very precisely. When we knit the middle 4 columns, the hook must be inserted into the base of the columns of the preceding row. But we untying the first and sixth columns, with the help of inserting a hook under the chain, which consists of light loops in the preceding row.
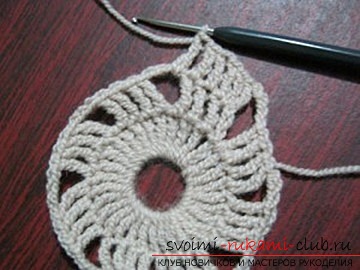
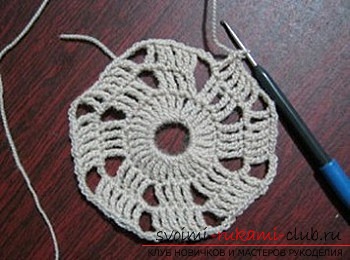

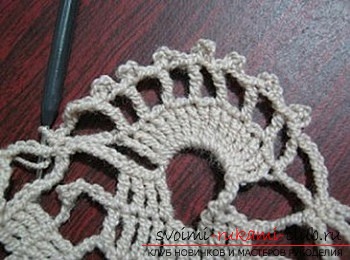
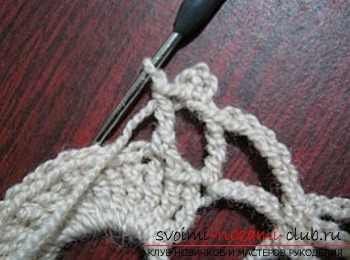
 In the fourth row we alternately make 5 airand 8 columns with 2 overlays. In the fifth row: 9 air loops with 10 columns and 2 nakidami. In the sixth row also alternately: 11 air loops, 4 columns with 2 nakidami, and we knit already 4, the basis of the remaining four columns of the row in the patterner, which is repeated. At the end of row 5, we connect the remainder with the other, which was tied at the beginning of the row, with a column without a crochet. In the seventh row we do:
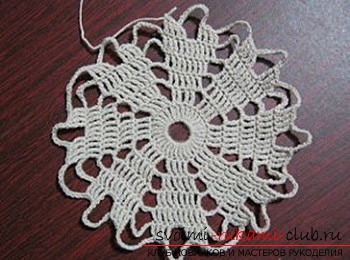


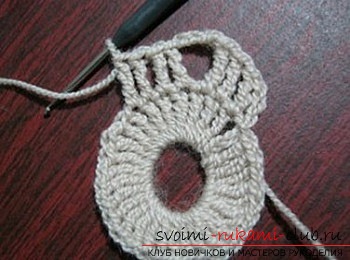
 5 VP, 15 columns with 2 overlays are started underan arch made of light loops in the previous row, 5 VP, column without a cap under the arch from the EP of the previous row, final 6 VPs and connect to the beginning of the row with a column without a crochet.
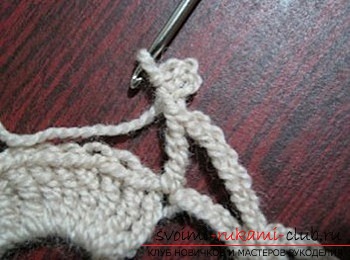
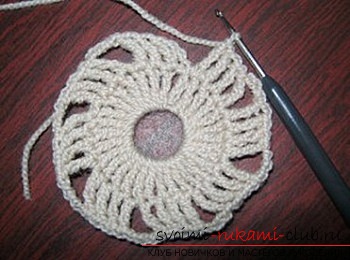
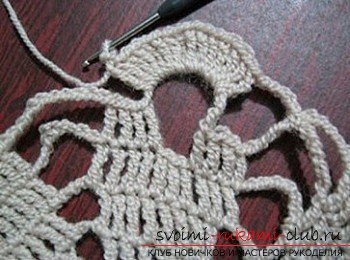
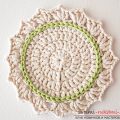
 4 th stage. Cut the thread and fix it with a small knot from the back of the napkin. That's ready, beautiful, openwork napkin. Everything is very simple.
Comments
Related posts:
 Detailed lessons of crochet wipes for beginners on detailed instructions with photos and diagrams
 A master class of crocheting a beautiful napkin with detailed descriptions and photos.
 This detailed workshop will tell you how to tie a dog crochet and how to knit an amigurumi.
 Embroidery tapes where to start and how to make inside out
 This article will give a lesson on how to crochet flowers of poinsettia, a master class with photos