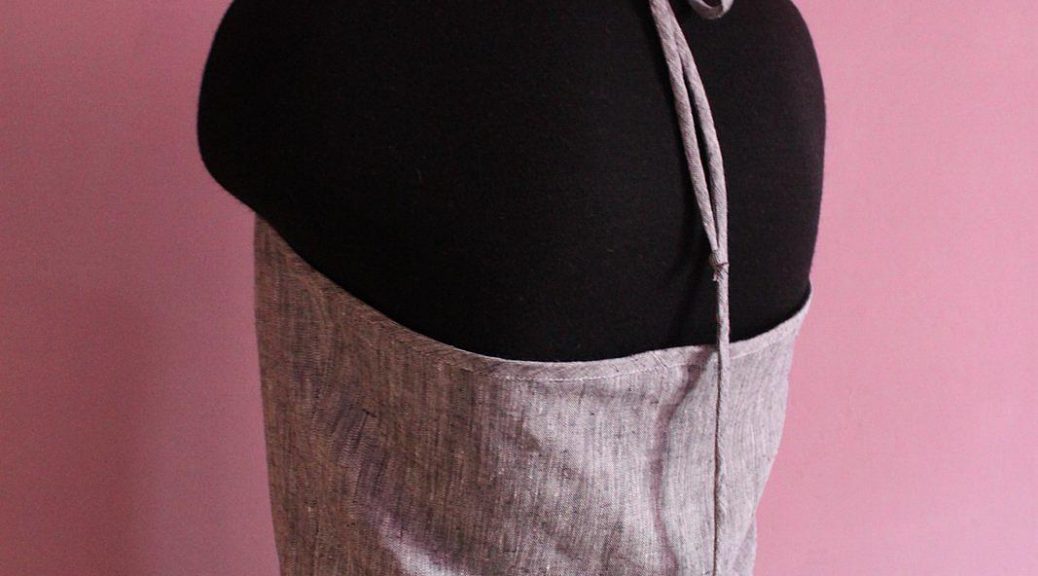
This detailed master class of sewing and sewing for beginners will teach sewing a summer sarafan.
 In the summer, you often want something simple,breathing and comfortable. For this, this summer sarafan is perfect, you can make it from linen or from cotton. We sew a summer sarafan easily, even a beginner will cope. Very useful will be the available text and high-quality photos of this master class cut-and-sew for beginners. We need: - the main fabric is 1.3 m; - Pattern (shown in the photo); - film and marker or paper and a pencil to build a pattern; - non-woven - 8 by 30 cm approximately; - cardboard 18 by 20 cm; - thread; - scissors; - pins for chipping cloth; - chalk or soap; - sewing machine; - overlock; - iron. If everything is there, then we can start the sewing process. The pattern is shown on a grid with squares of 10 by 10 cm for size 46.
 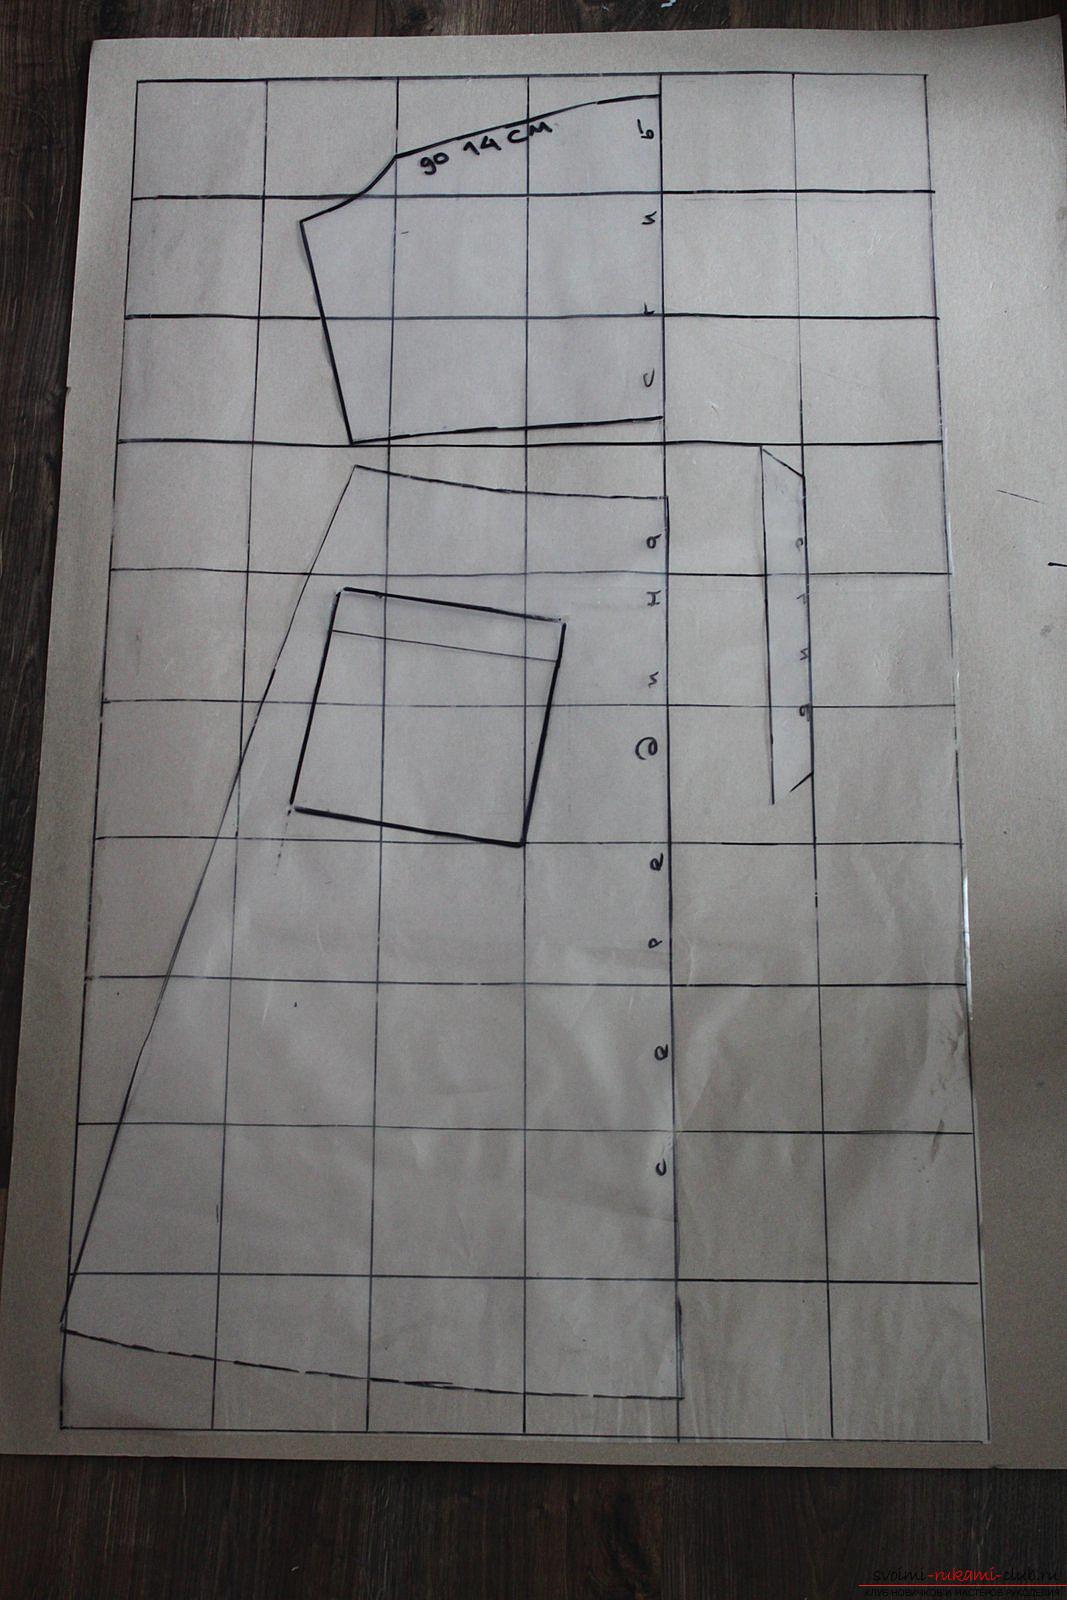 Build the same grid, and restorepattern details. The pattern consists of the following parts: - the upper part of the shelf - 1 piece with a fold; - lower part - 1 piece with fold and two parts without fold; - Throat necking - 1 piece with fold. If you decide to use flax, it should first be soaked in almost hot water, weighed, spread and dried. Then iron with steam. Because flax shrinks, you need to consider this when buying a fabric. Fold the fabric in half with the front side inward. Lay out the bottom part, pin it with pins and cut out two parts. This is the back lower part. For all allowances, add 1 cm and 1.5 on the bottom cut.
 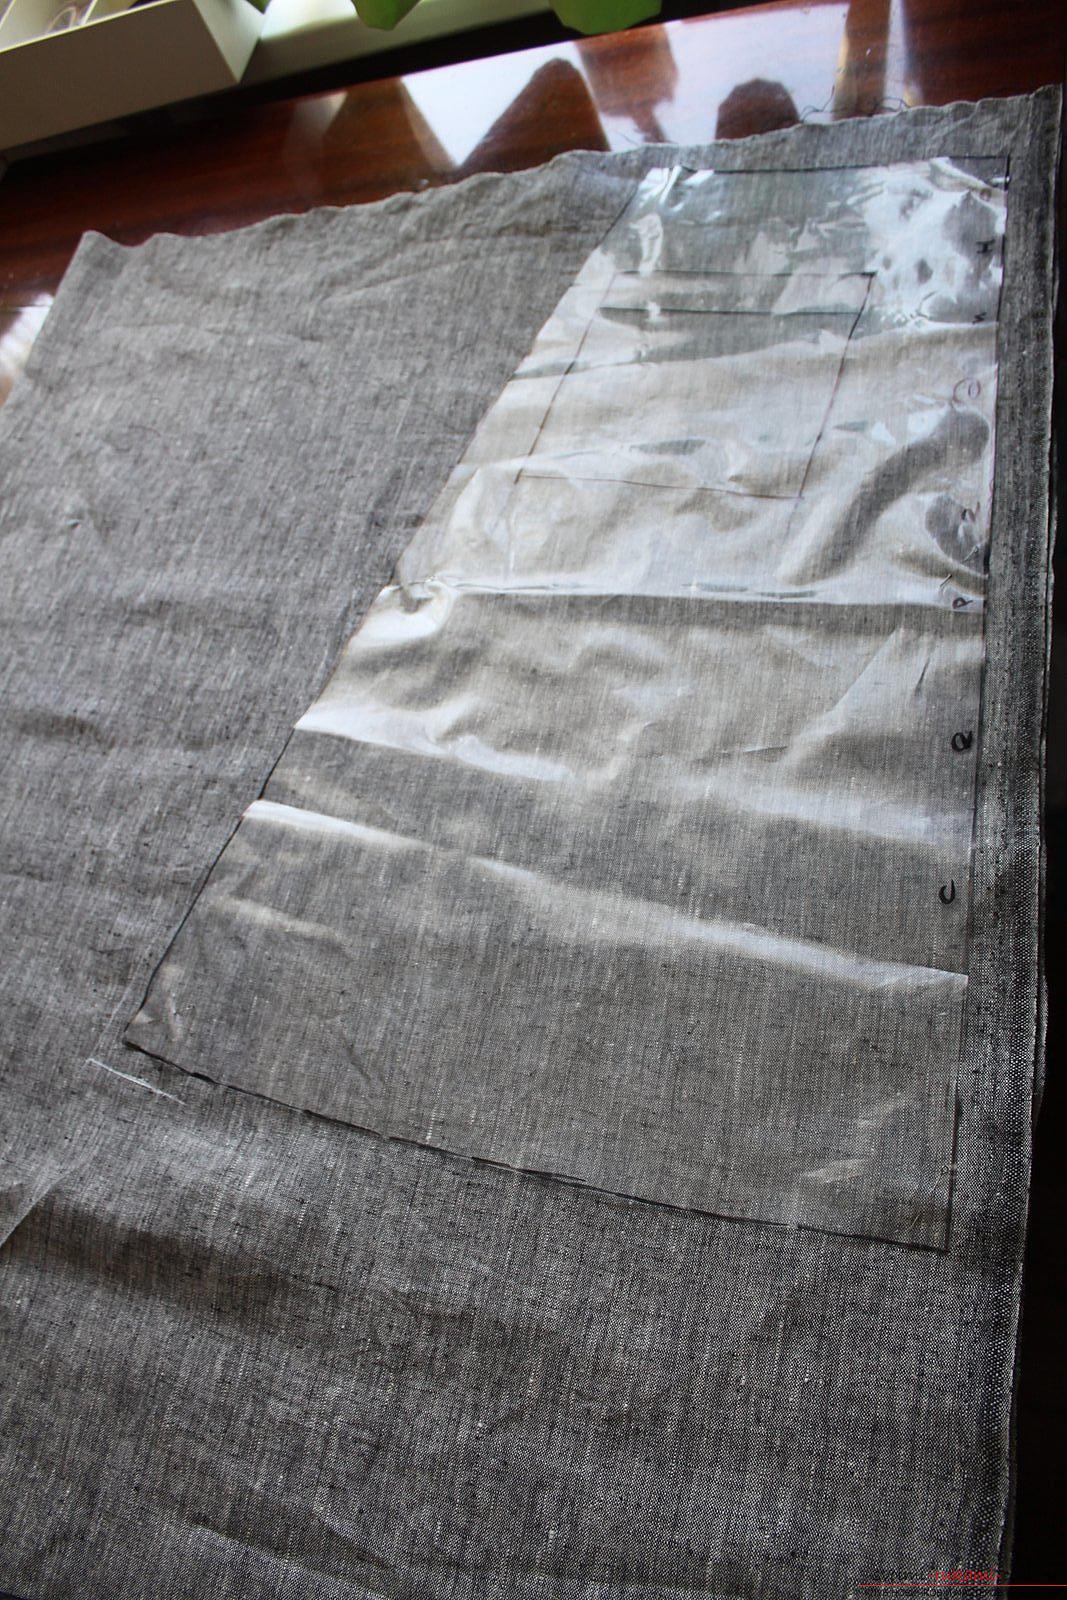 Now attach the bottom part to the bend, pin with pins and cut it, it will get the front lower part.
 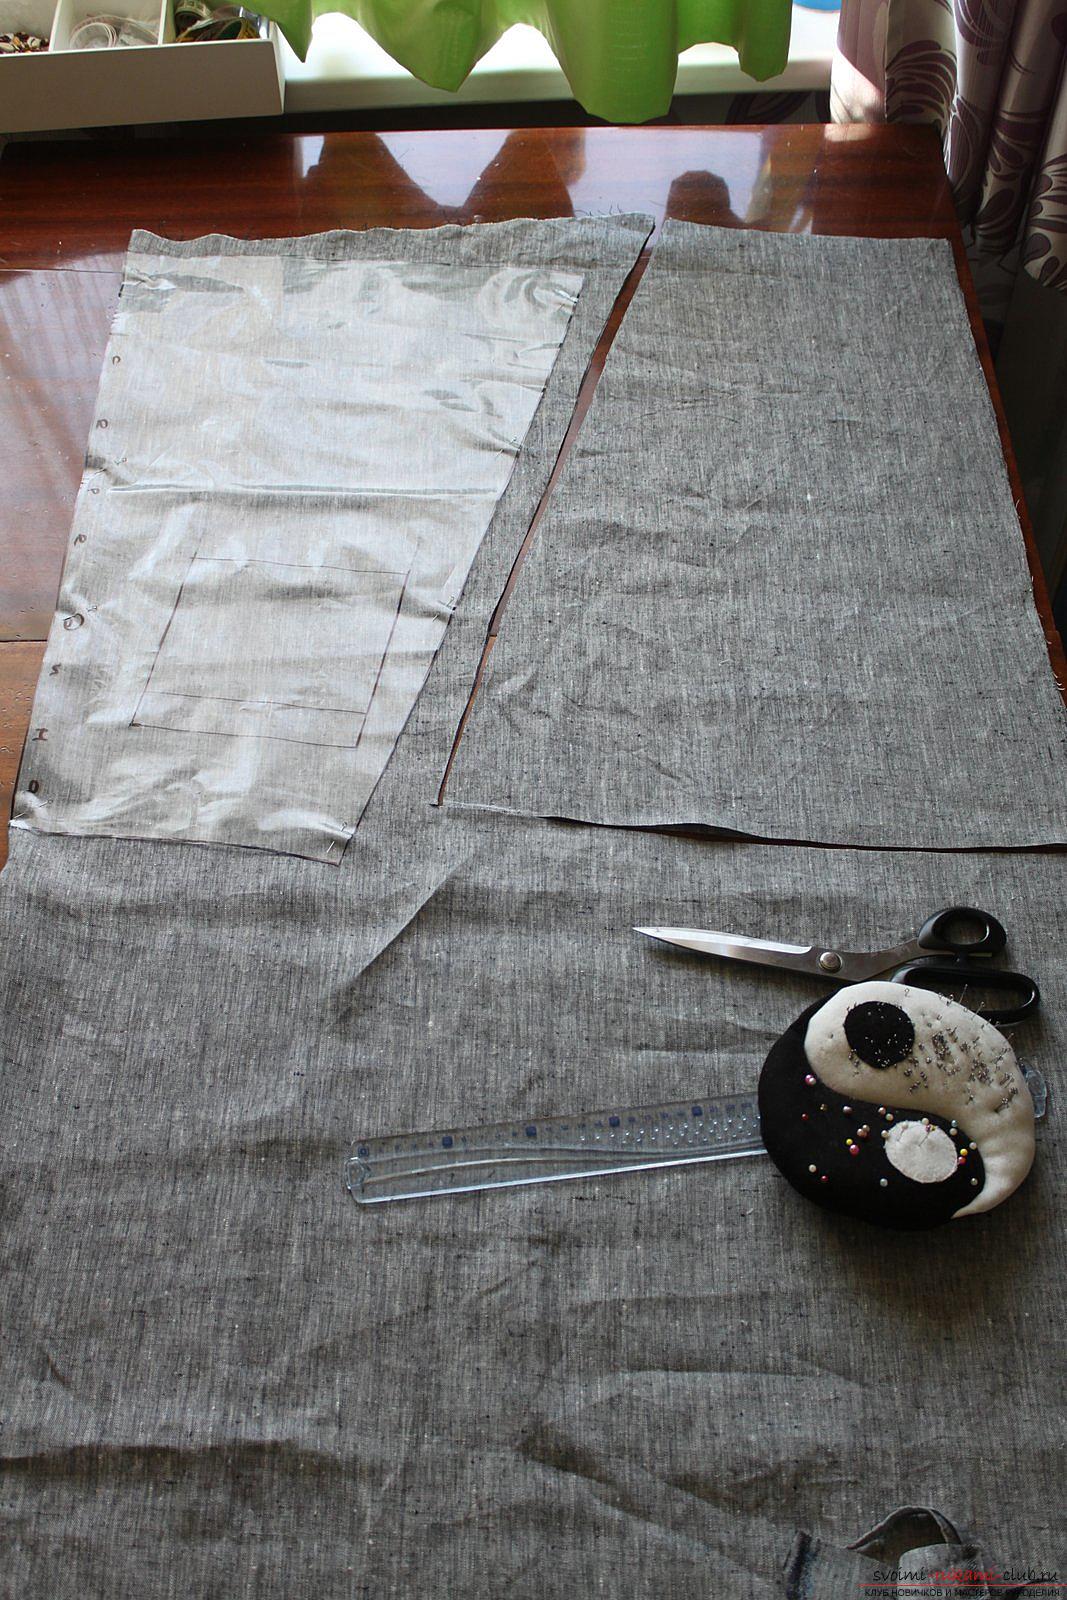 We cut out the remaining parts: the upper part of the transmission; pockets - 4 units (26 cm tall by 21 cm wide); perforation of the top - strips cut along the oblique (4.5 cm per 1 m - 2 parts); up perch.
  We glue the flask on the top with non-woven fleece and iron in half the part (longitudinally).
 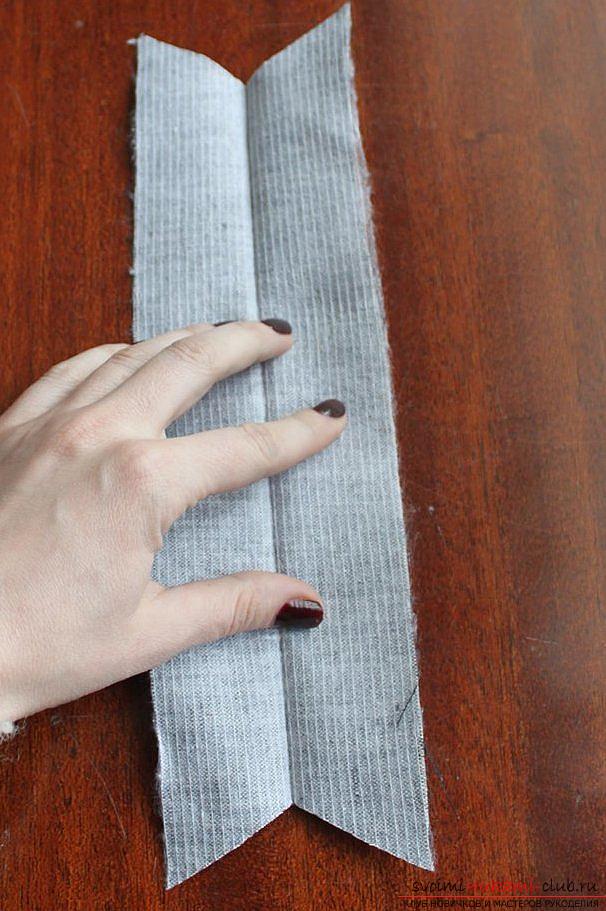 We take the cardboard, put it on the front side of the pocket.
 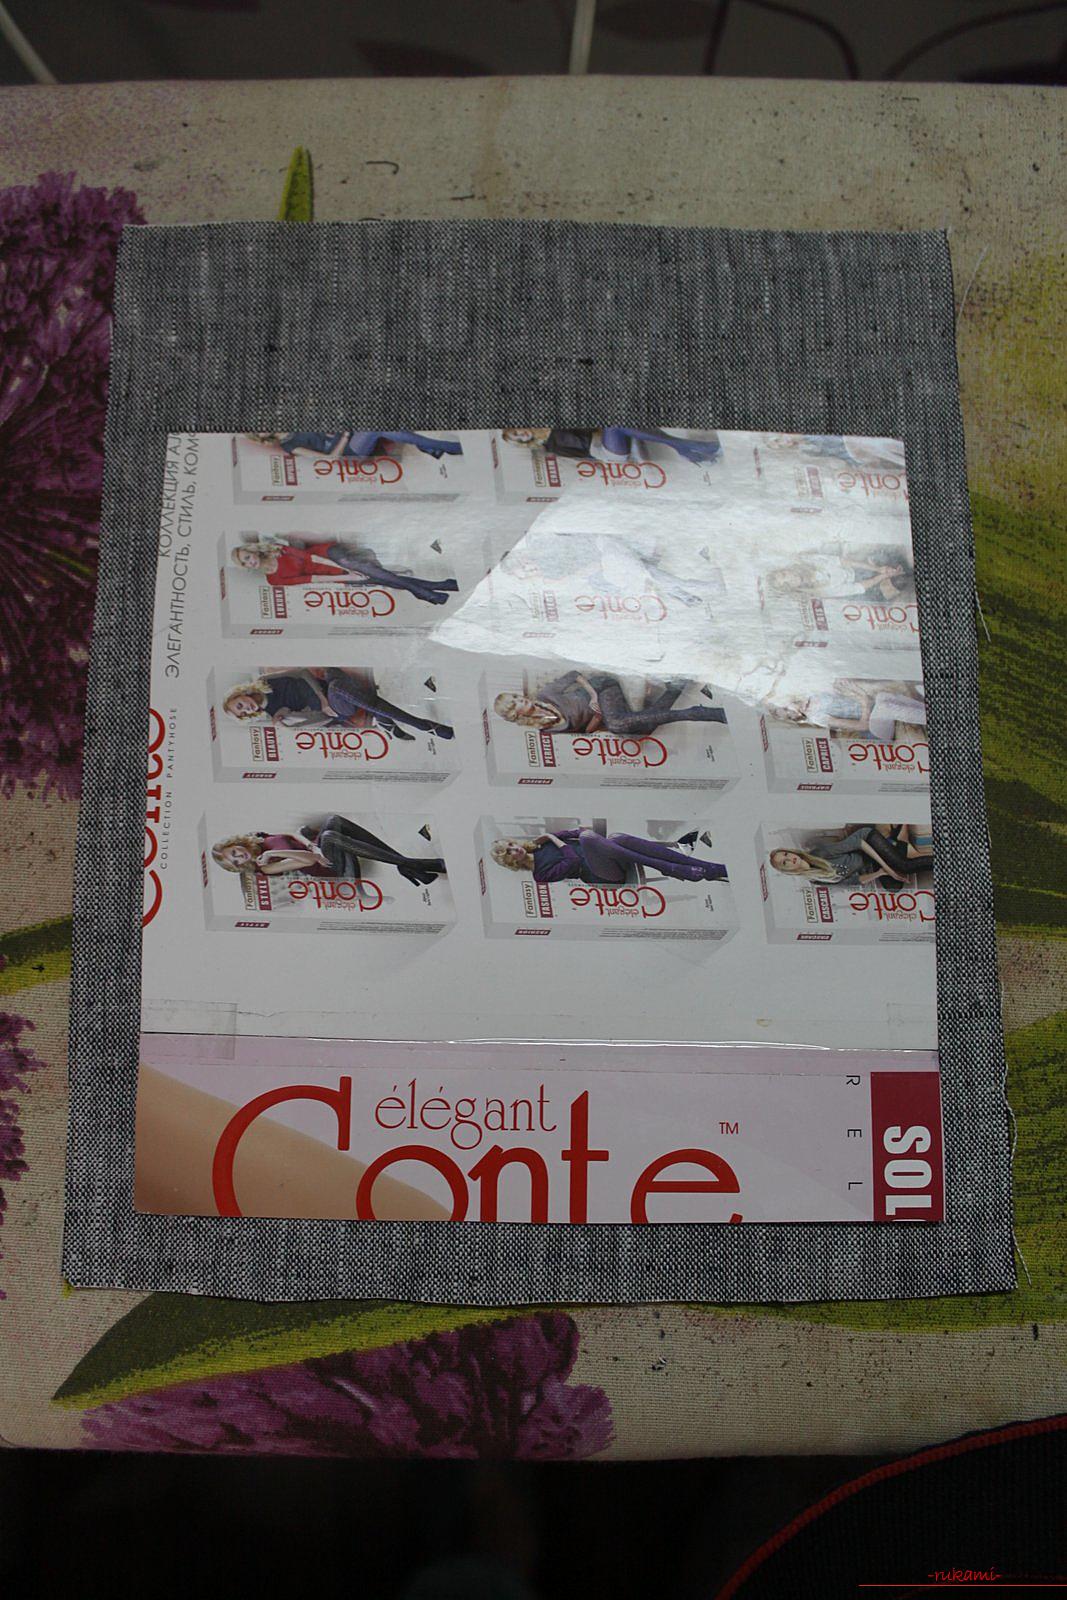 Press out on top by 5 cm.
  Then from zamyuzhennogo another 1 cm inside.
 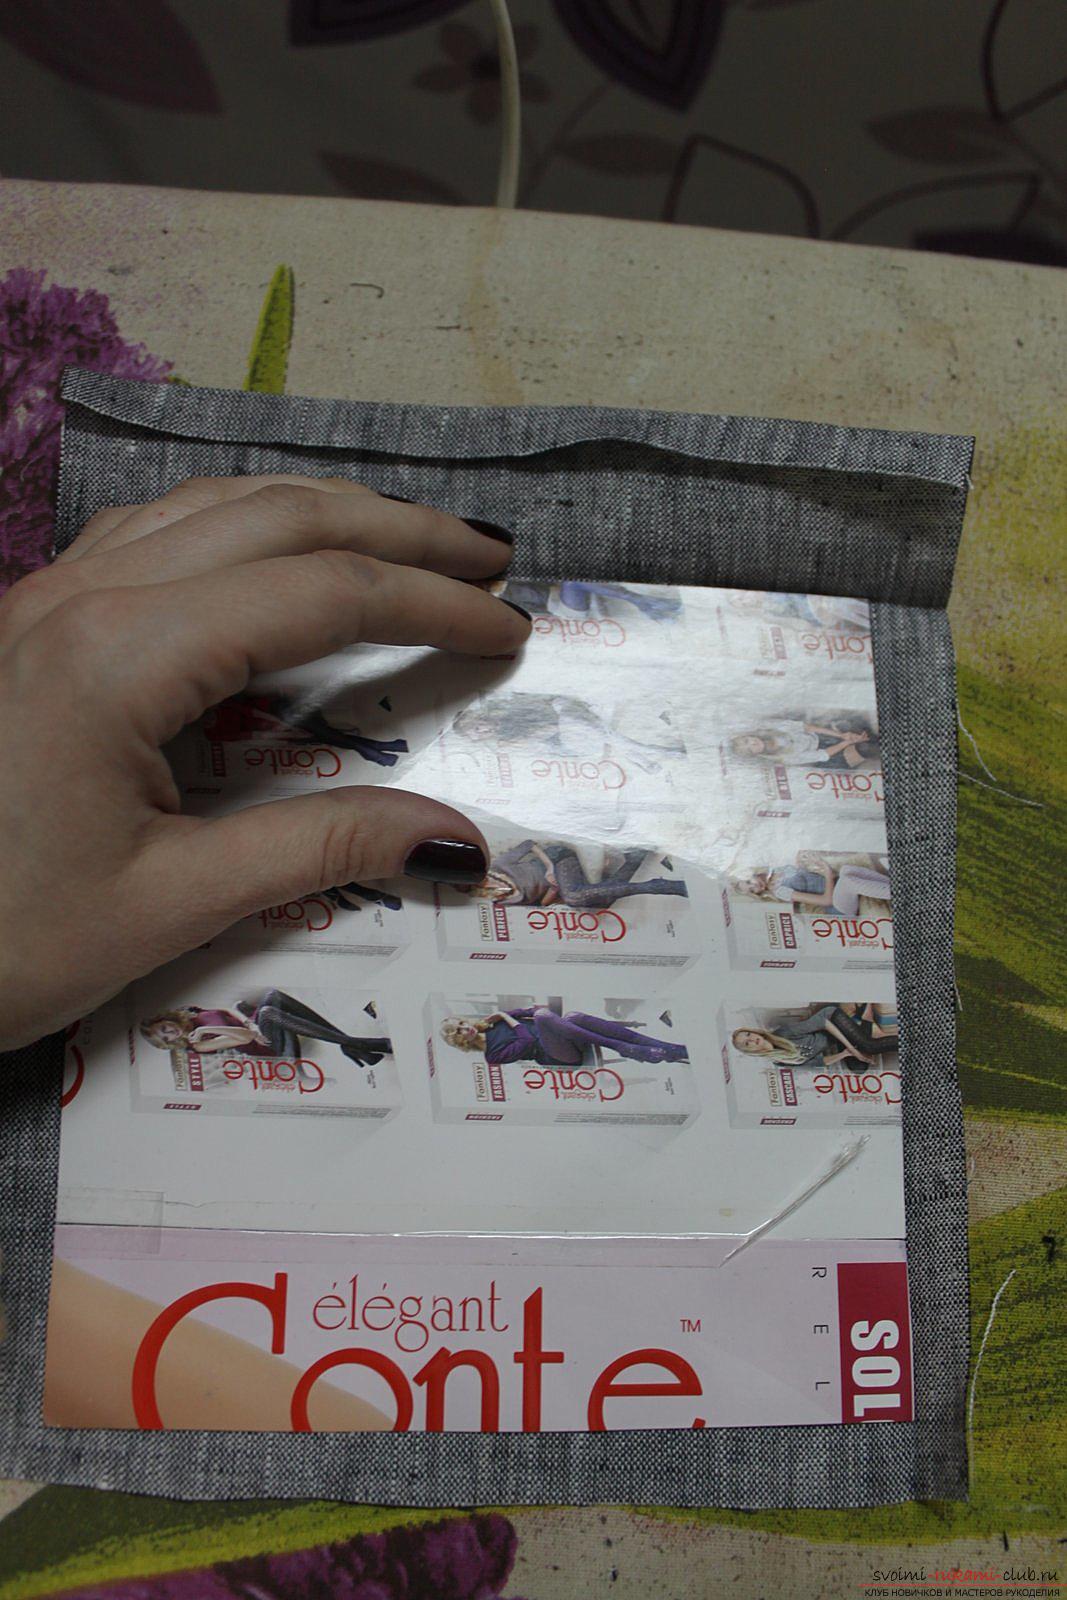 Leave this "cuff" on the front side, and put the cardboard on the wrong side. We align the upper sections of the cardboard and pocket. We press side and bottom allowances.
 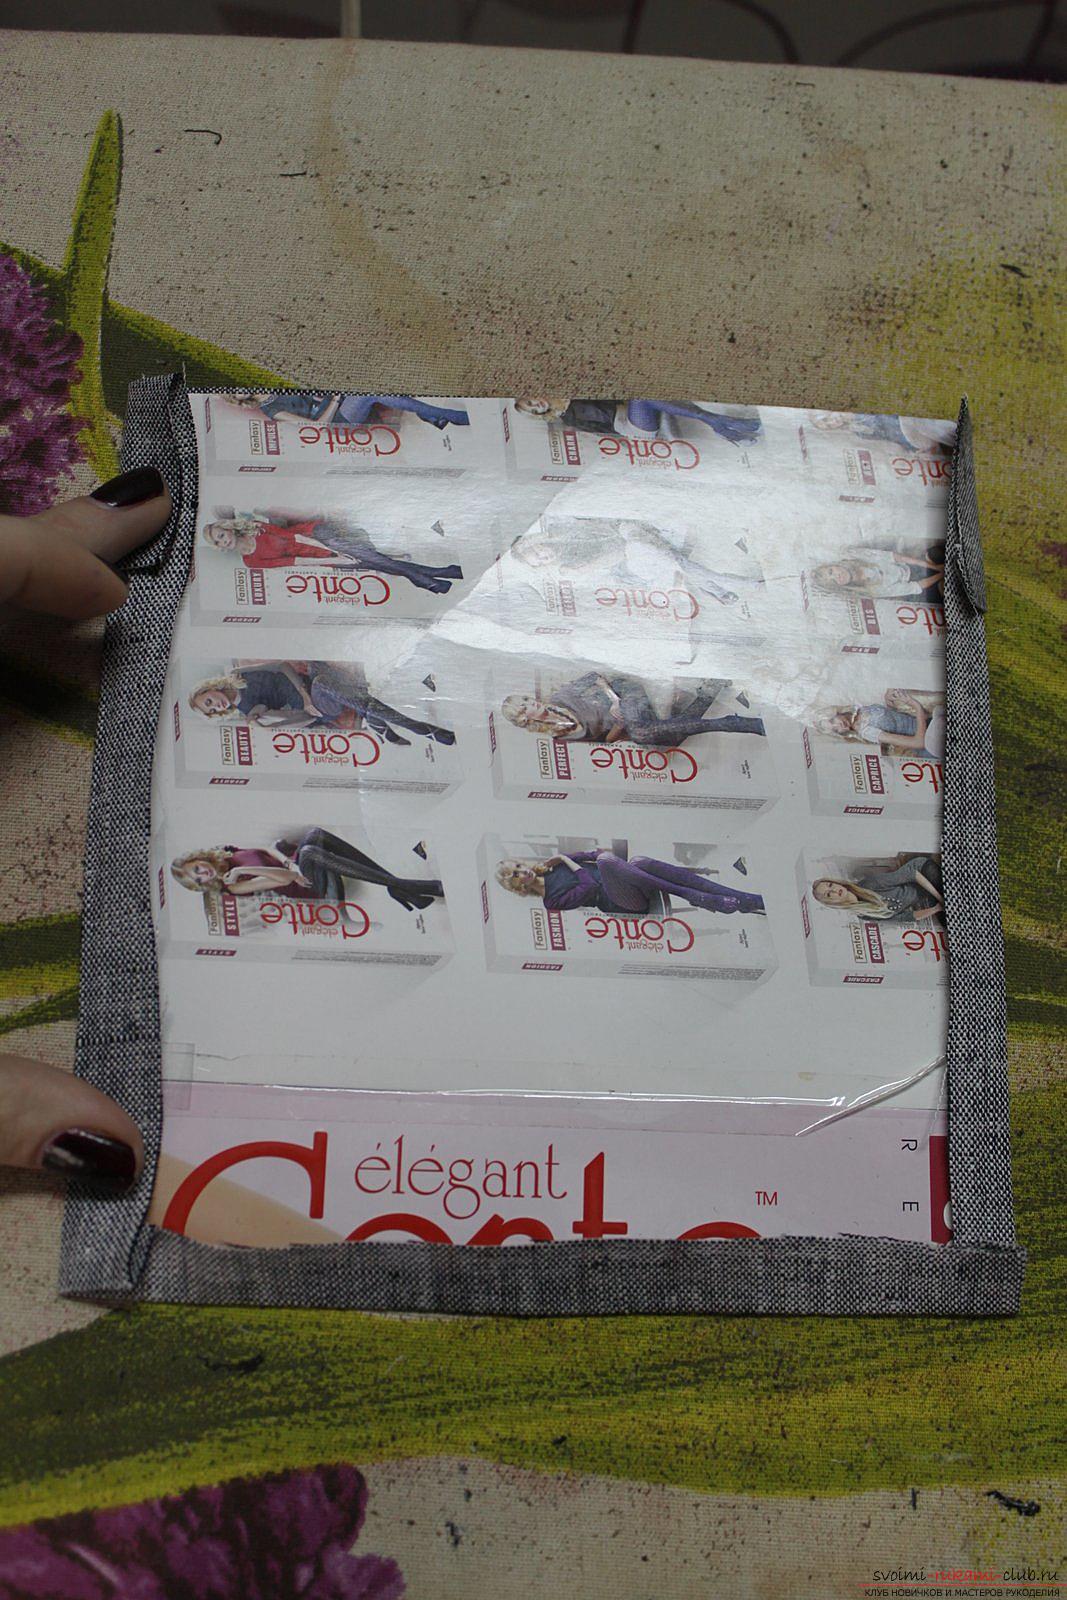 Thus, iron all 4 pockets.
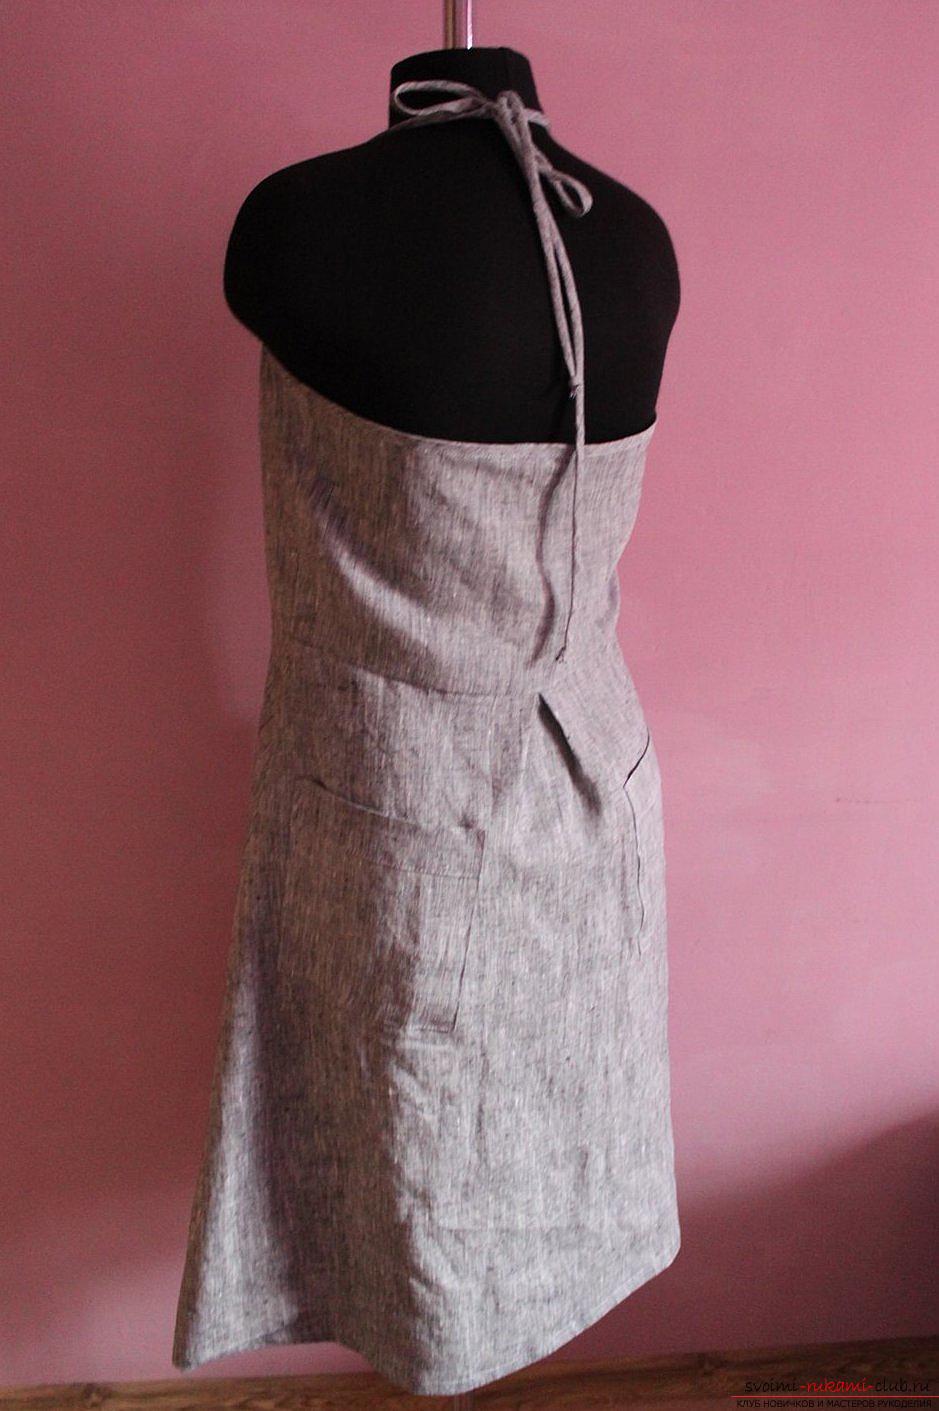
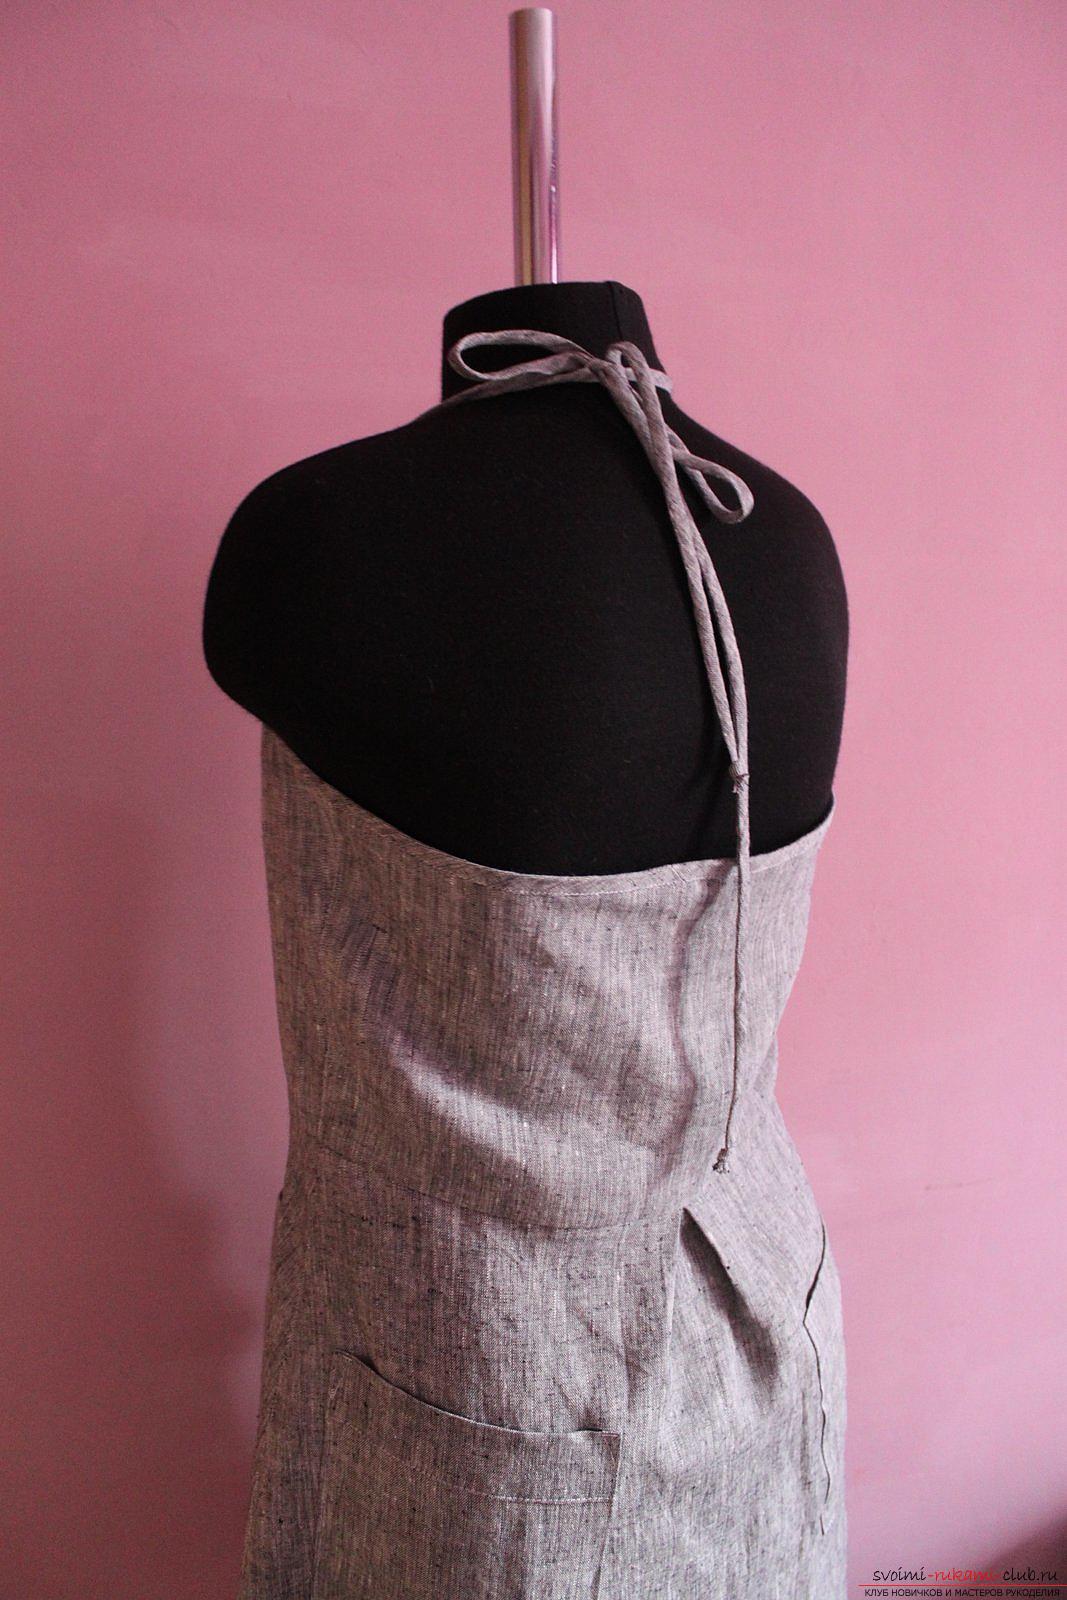
 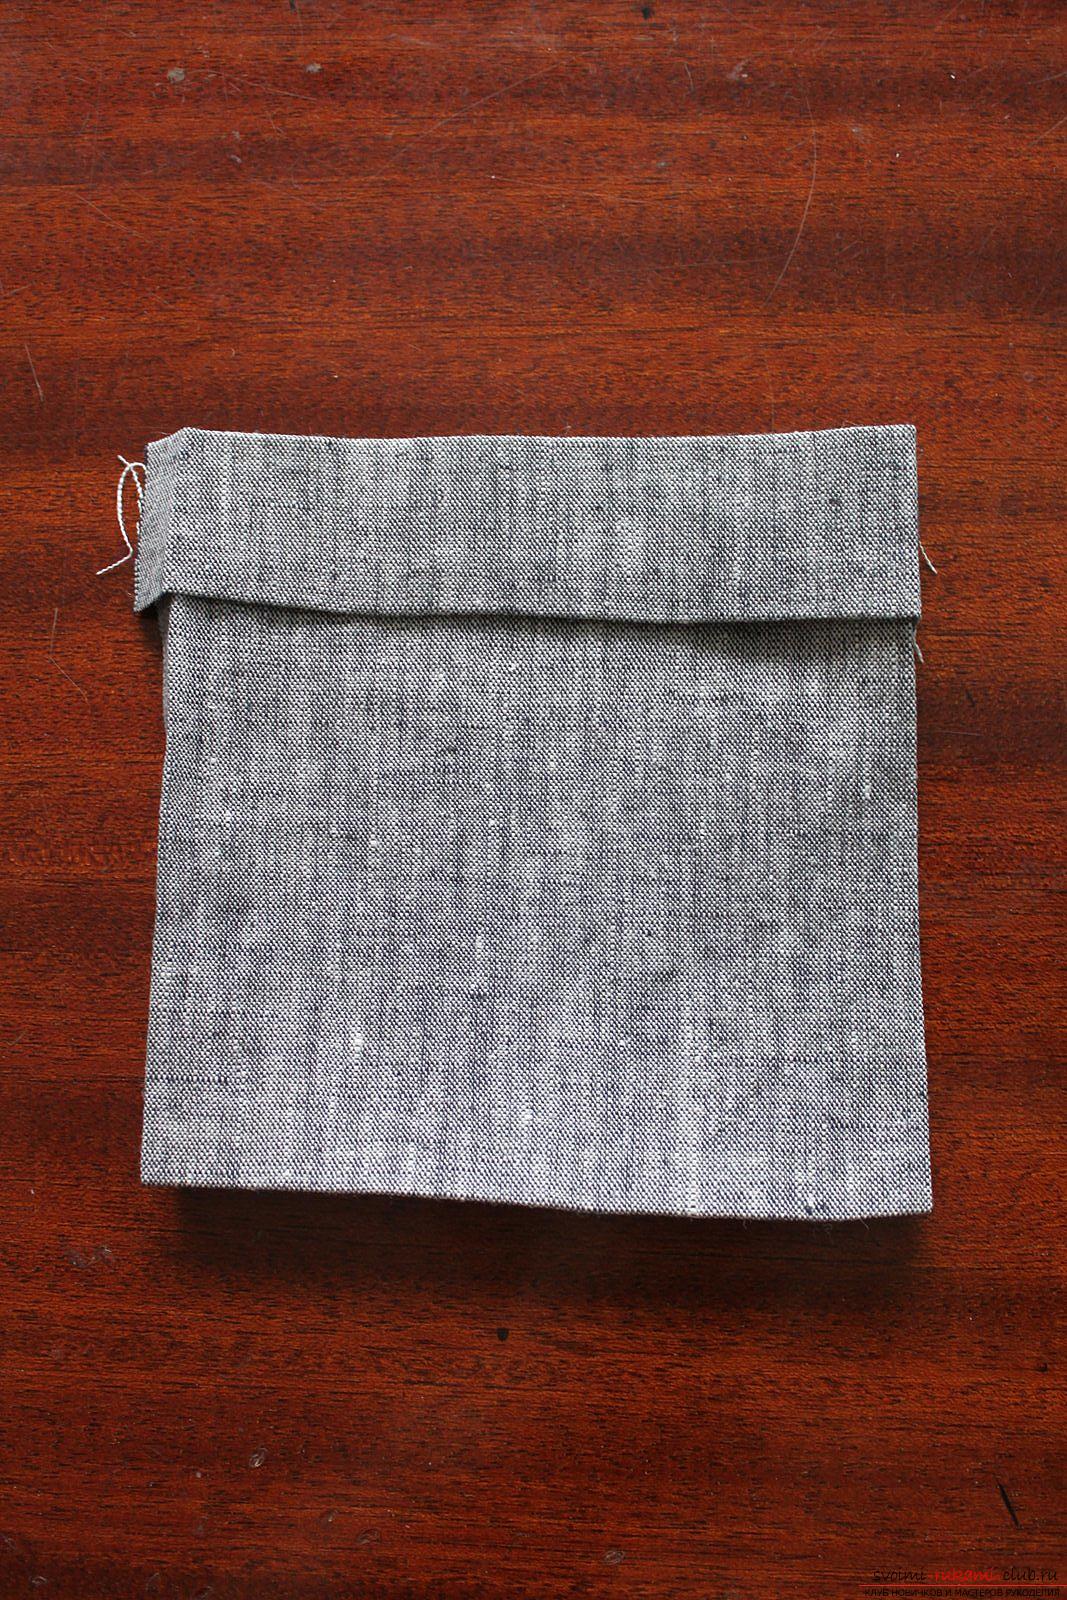 We grind the rear lower parts along the middle seam 1 cm from the slices.
  On all four pockets, we lay the finishing stitch along the bottom edge of the "cuff" by 2 mm from the edge.
 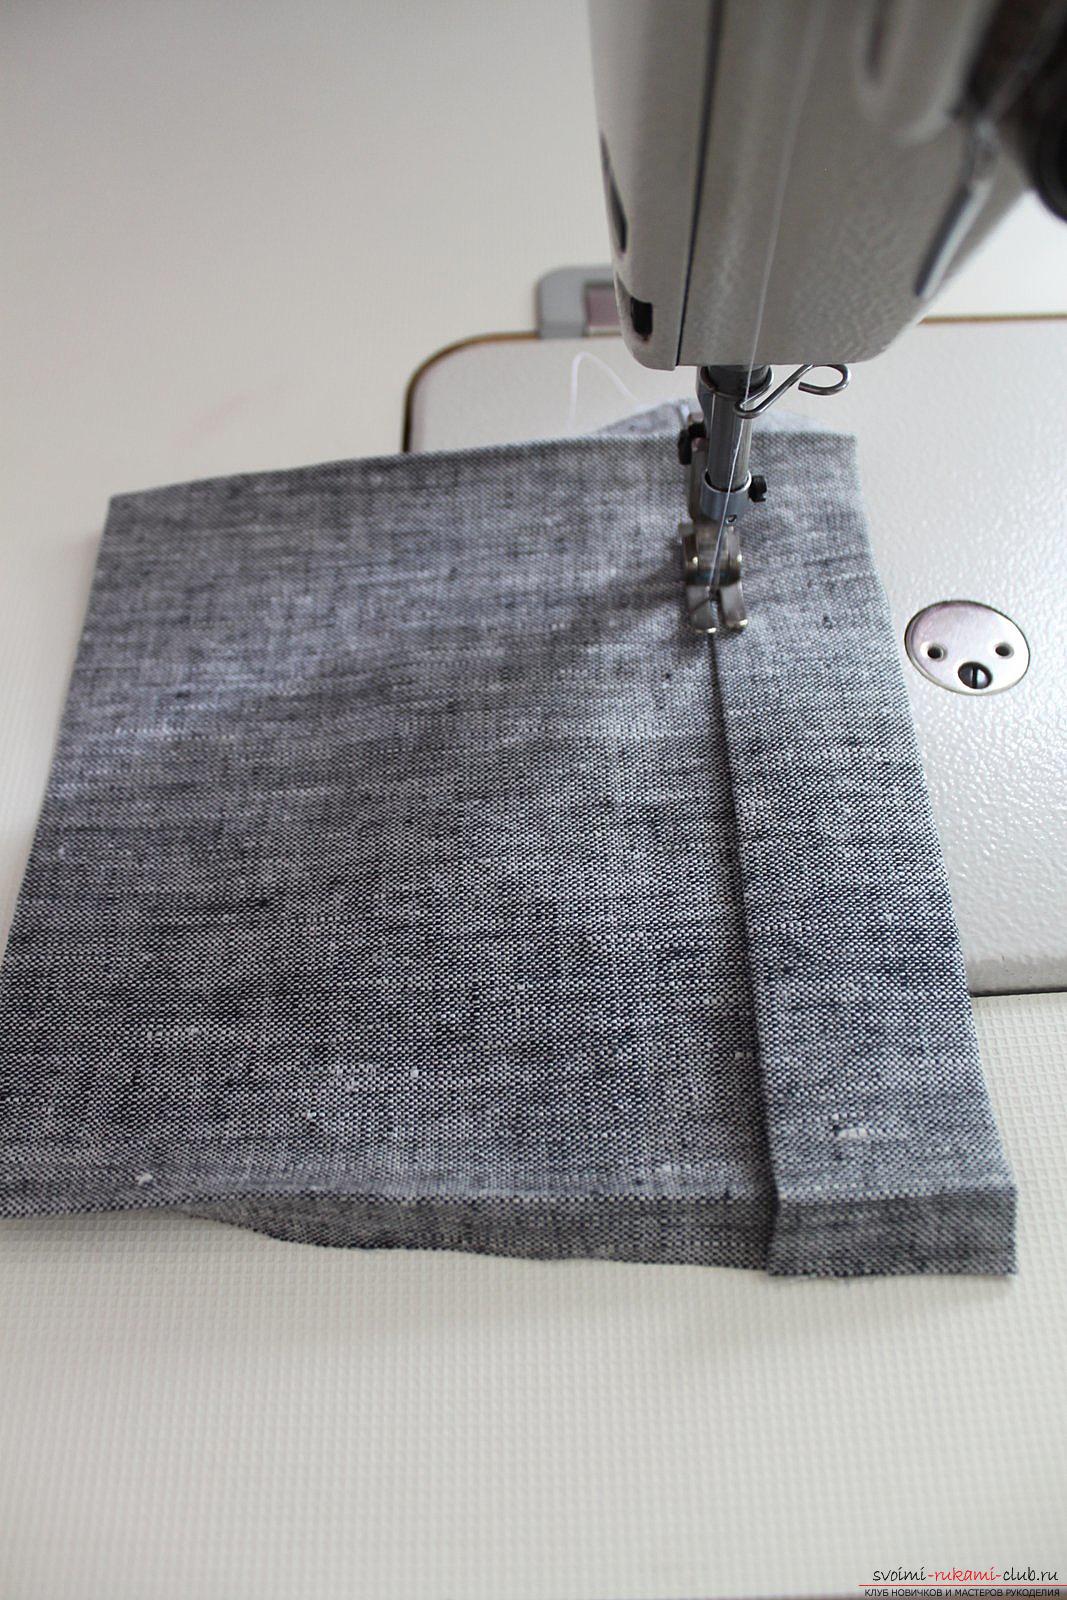 We sweep the middle allowance of the rear lower part.
 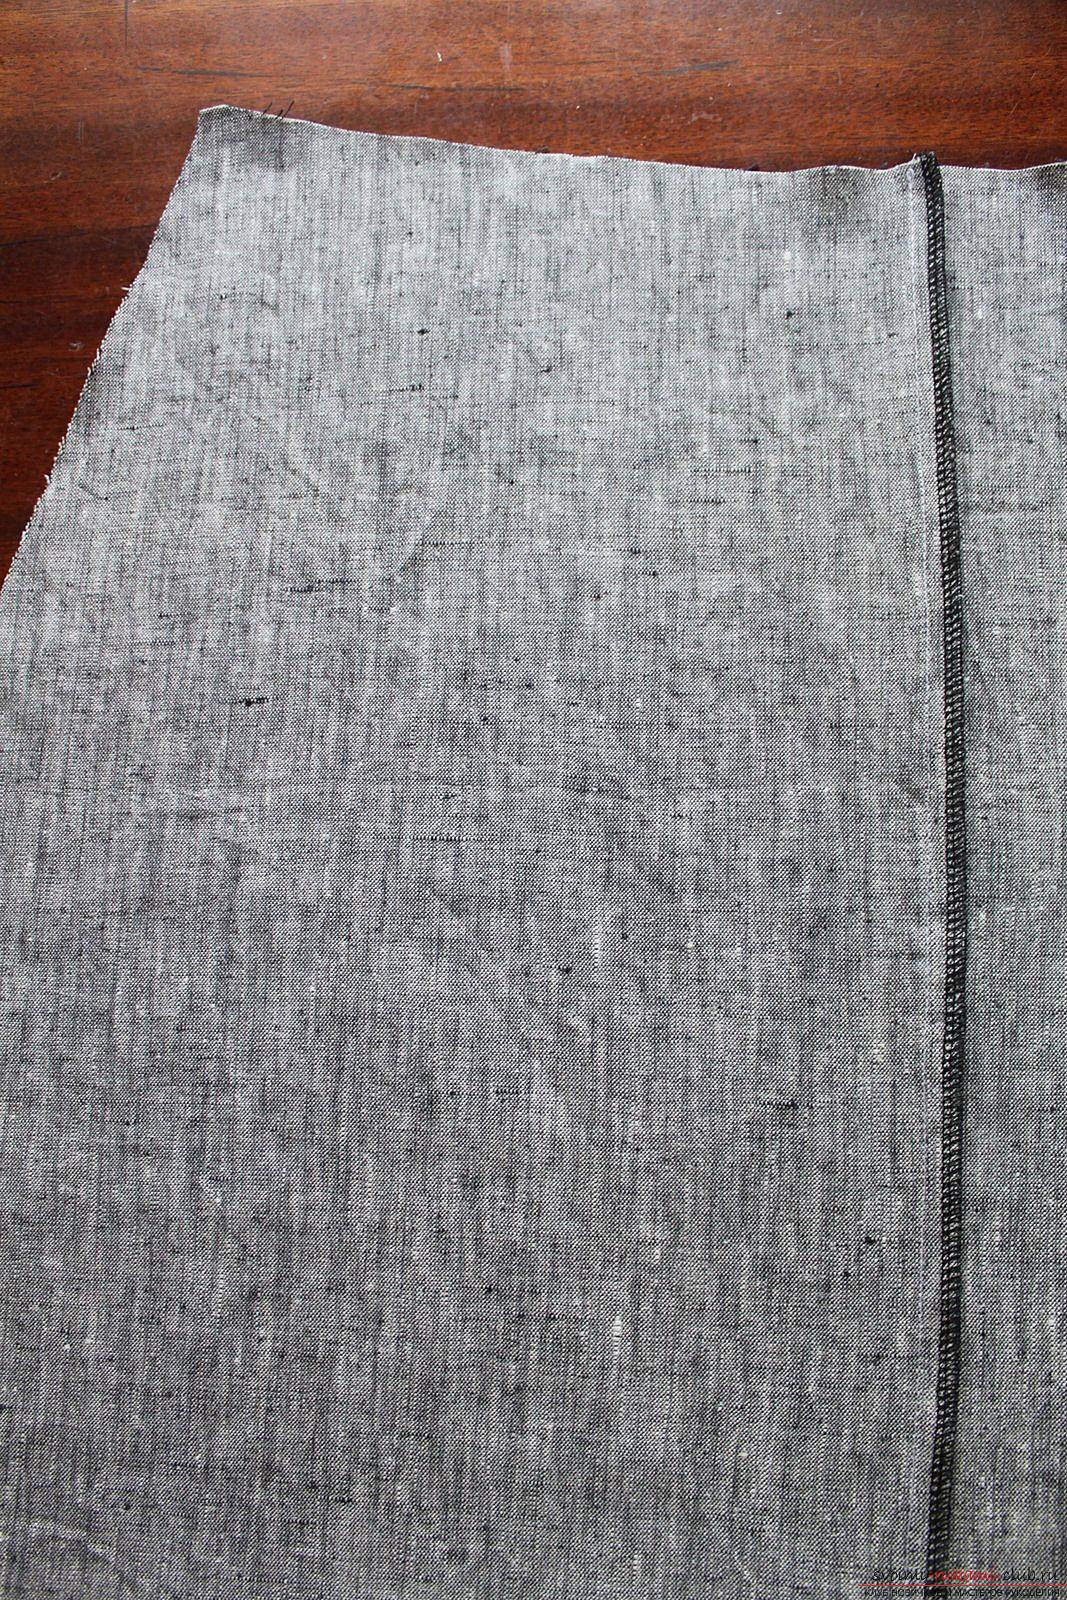 Also we sweep all four pockets.
  With the help of a cardboard we plan the location of the pockets.
 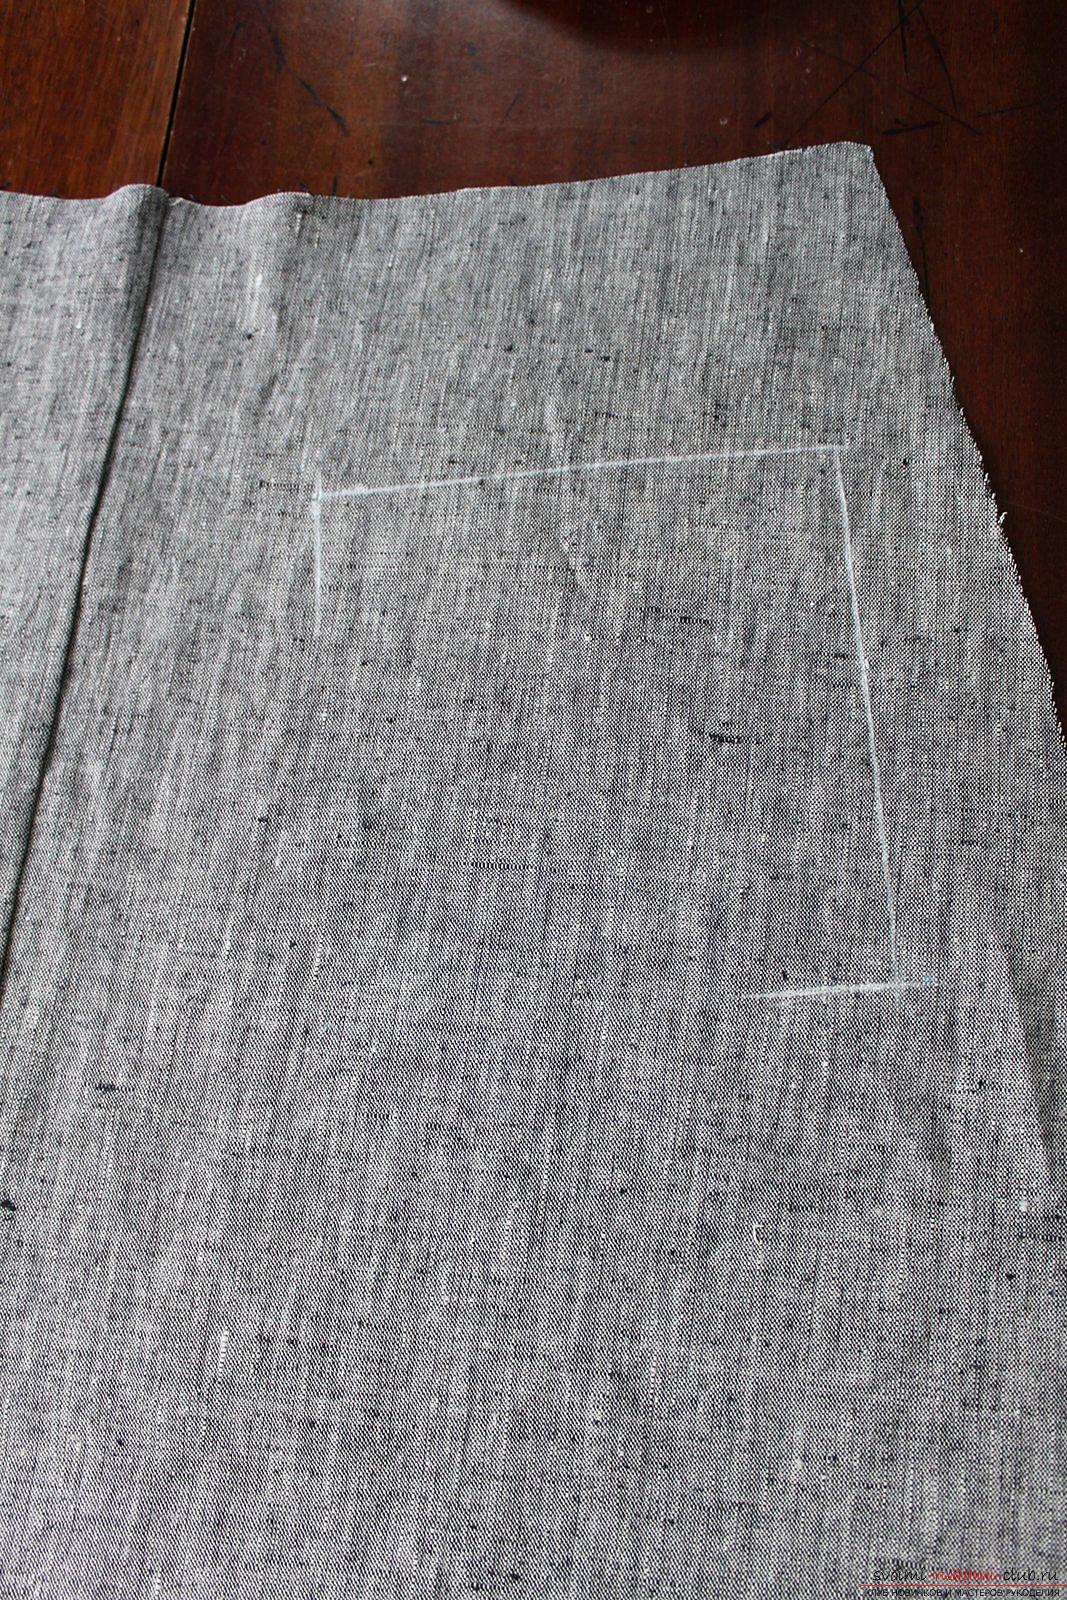 We pin pockets with pins. At the front and at the back.
 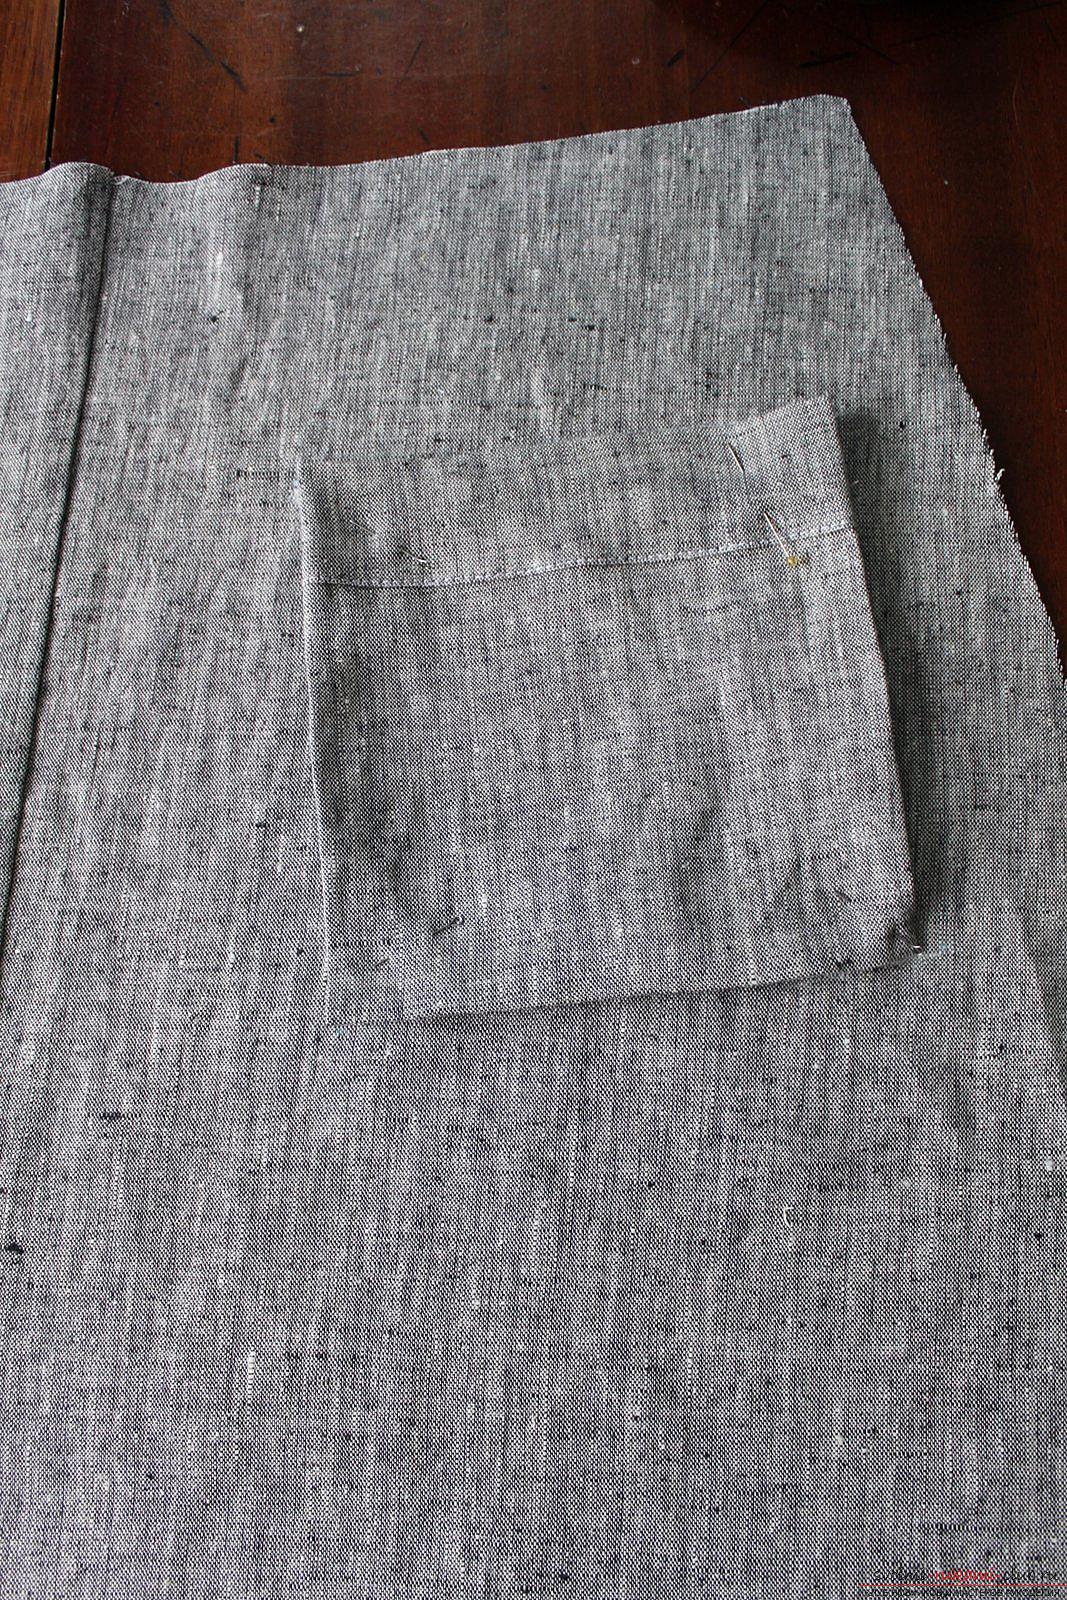 Pave on the pockets of a finishing line 2 mm from the edge of the pocket.
 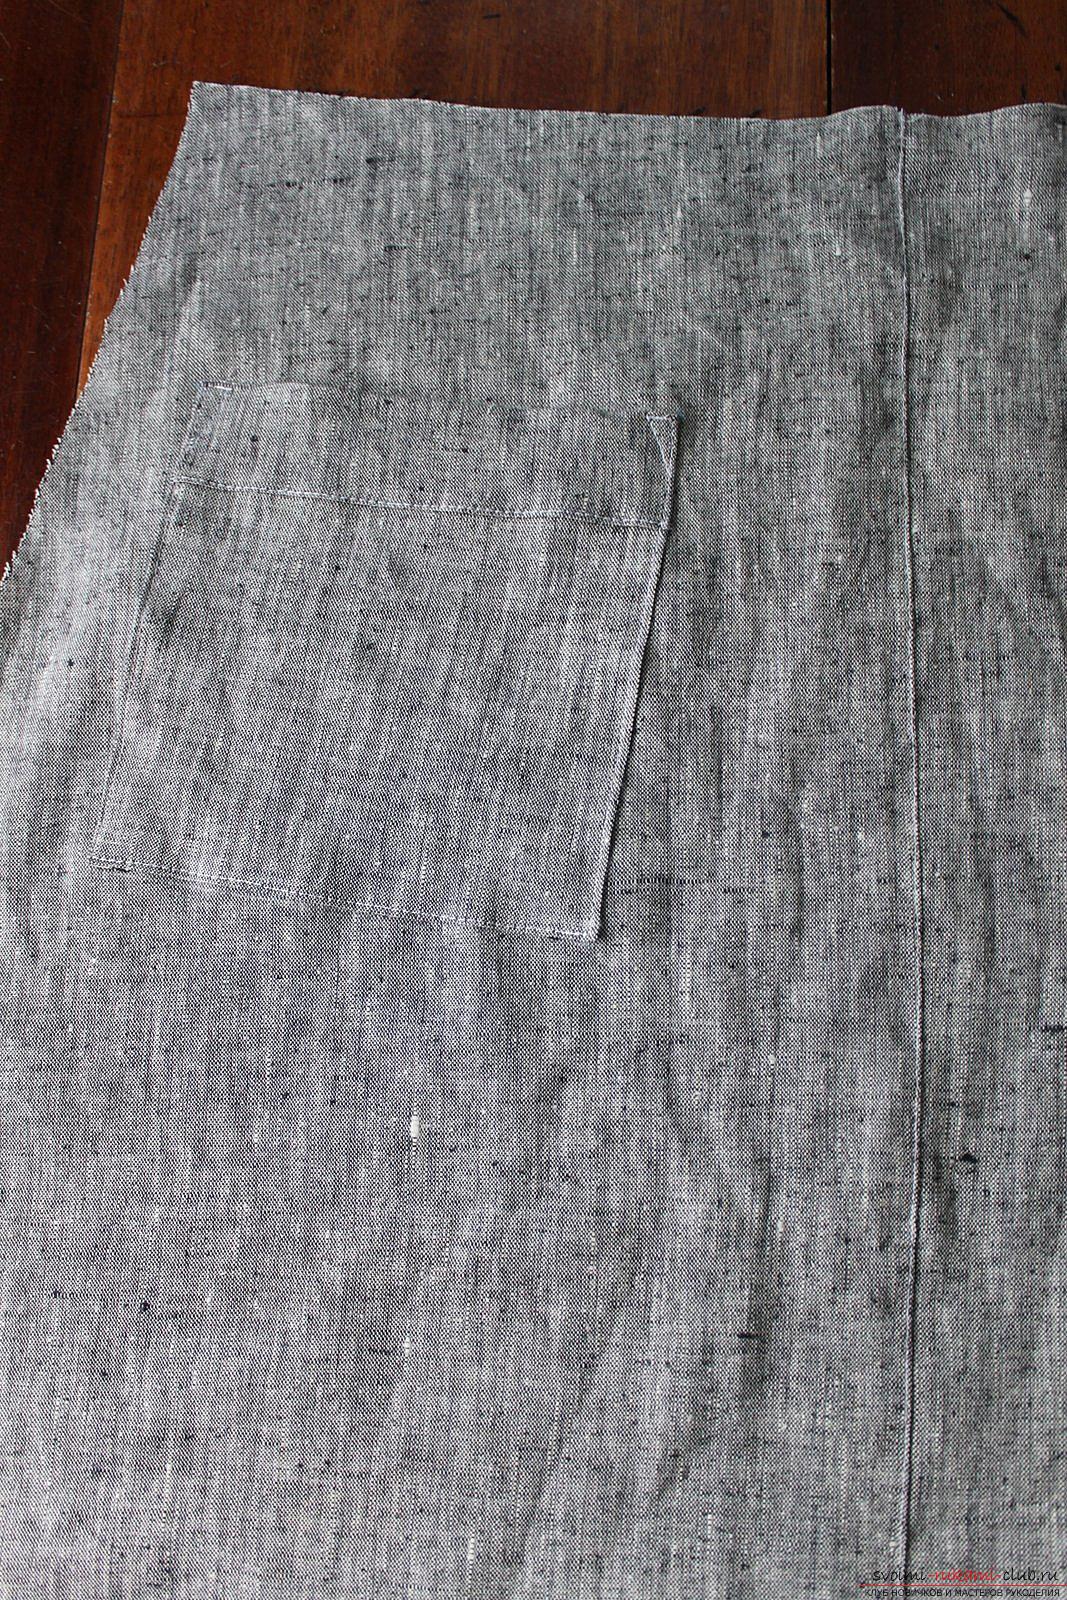 Pritachivaem pocket on three sides, except the top.
  We grind the side seams of the lower parts.
  We cut out the upper part of the back. We bend the fabric and directly on it we draw on the upper cut 22 cm, on the bottom 21 cm, height 20 cm.
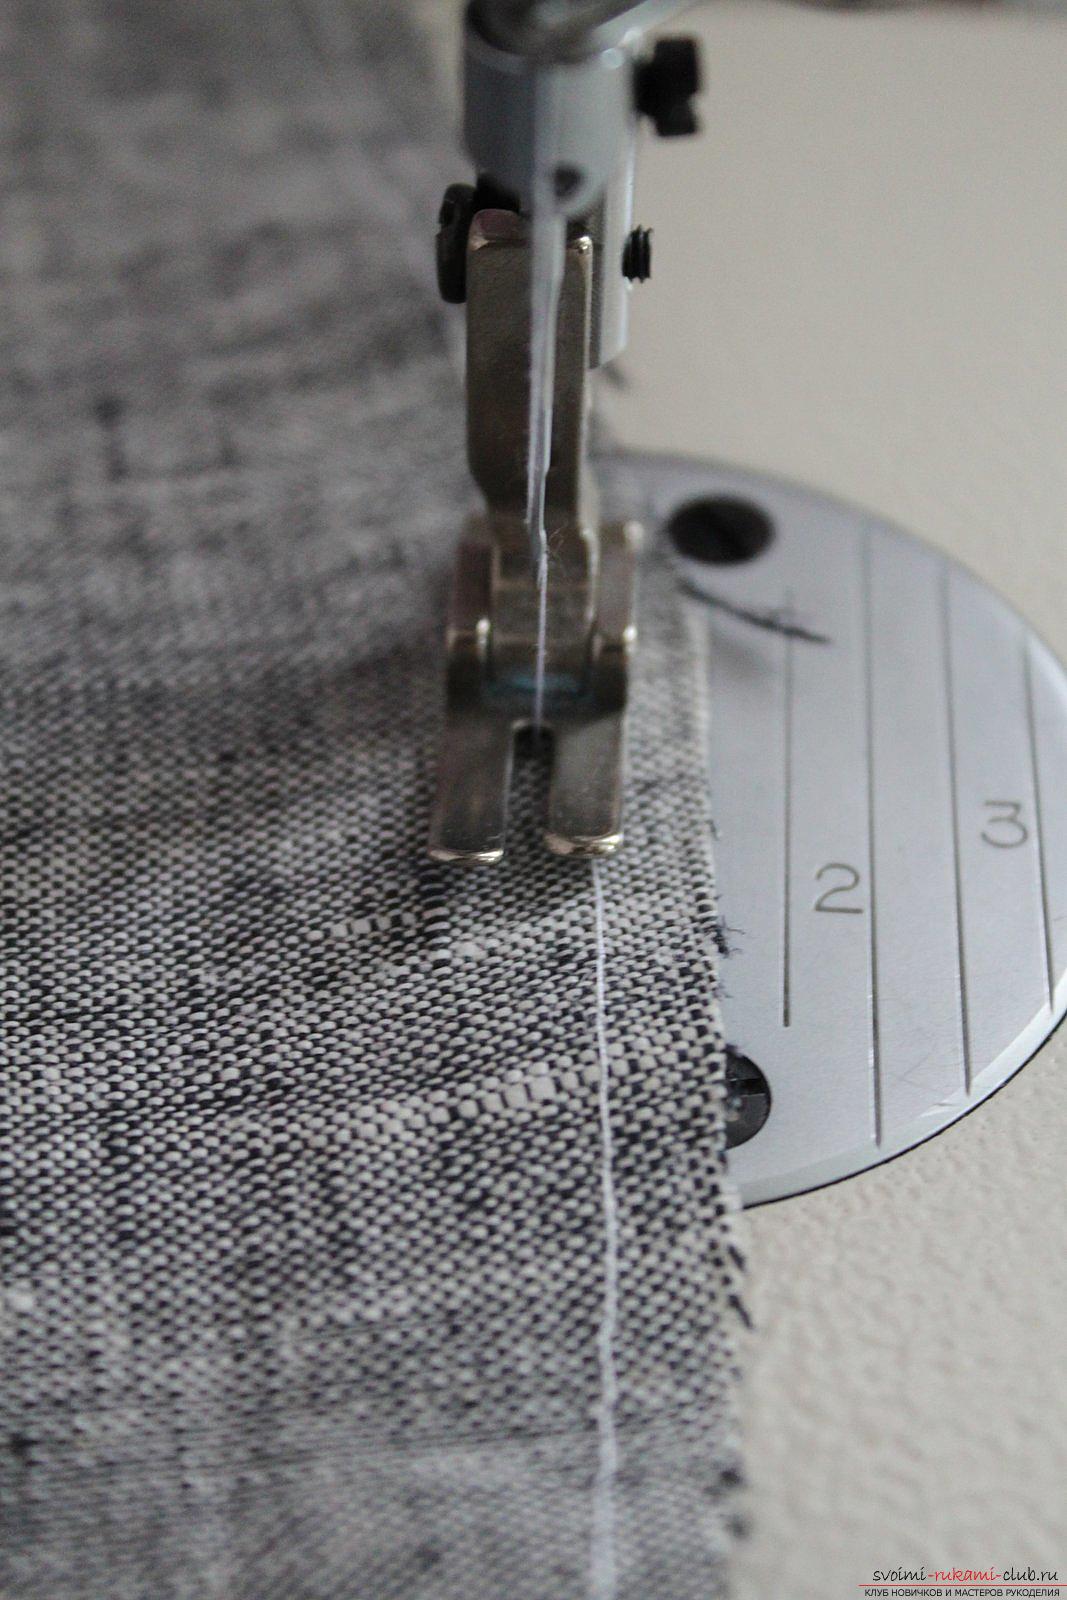
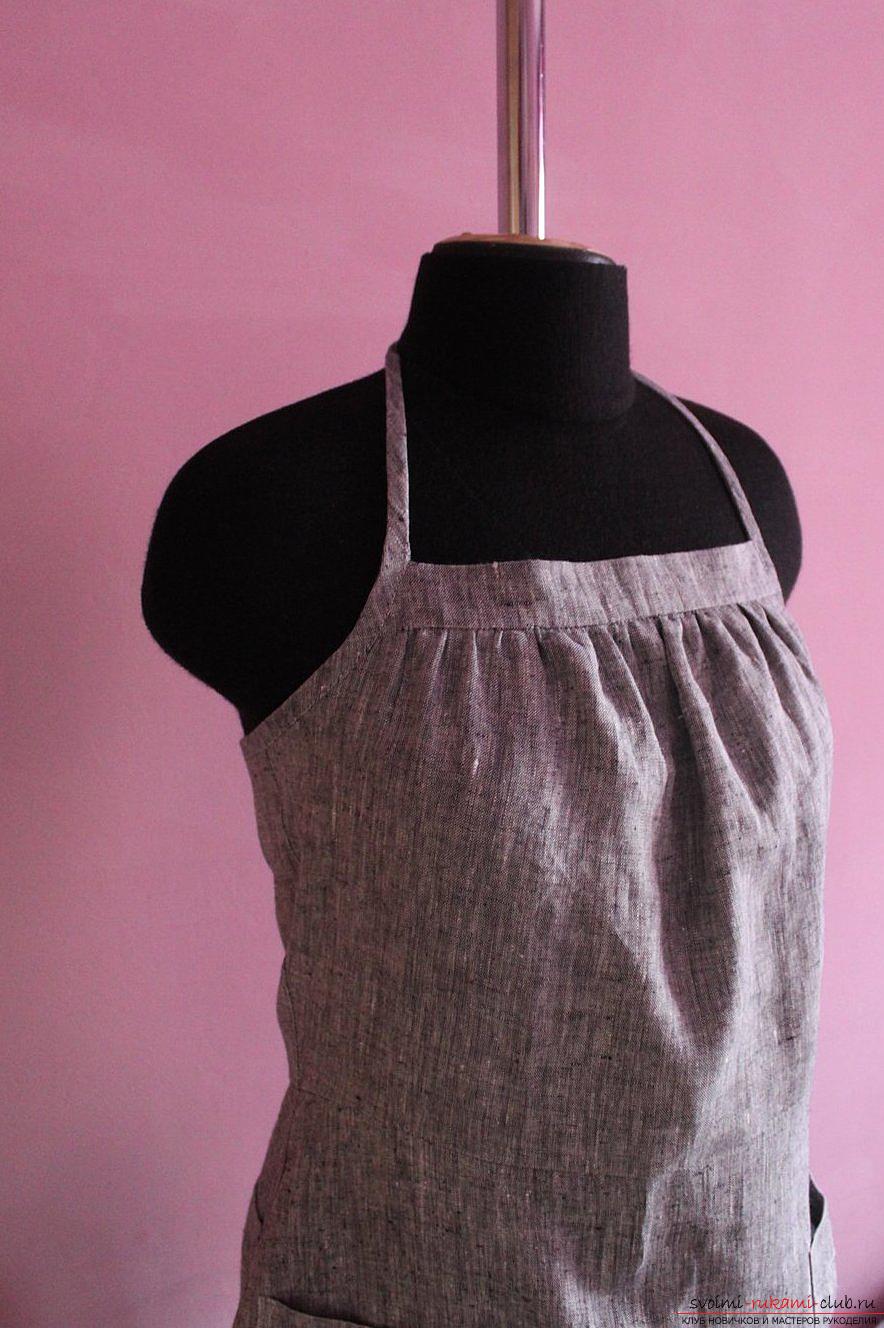
 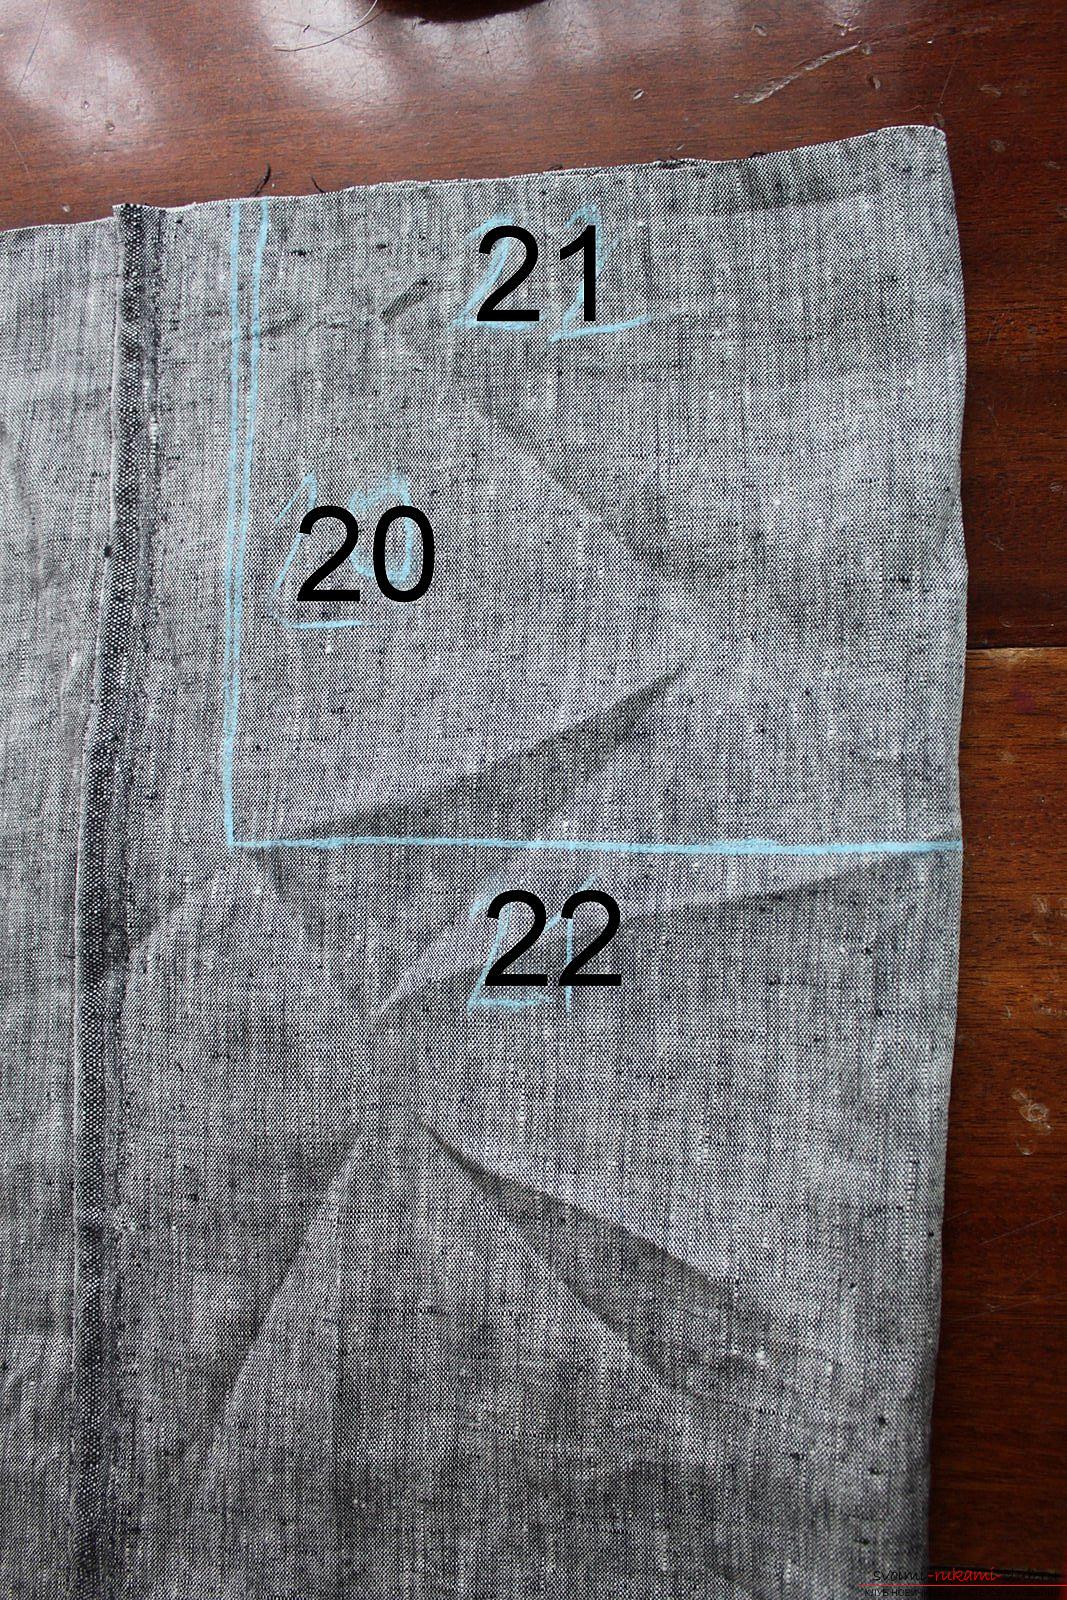 On the upper part of the shelf lay two parallel lines on a wide step. We start each line with a tie and end with the loose ends of the thread about 10 cm.
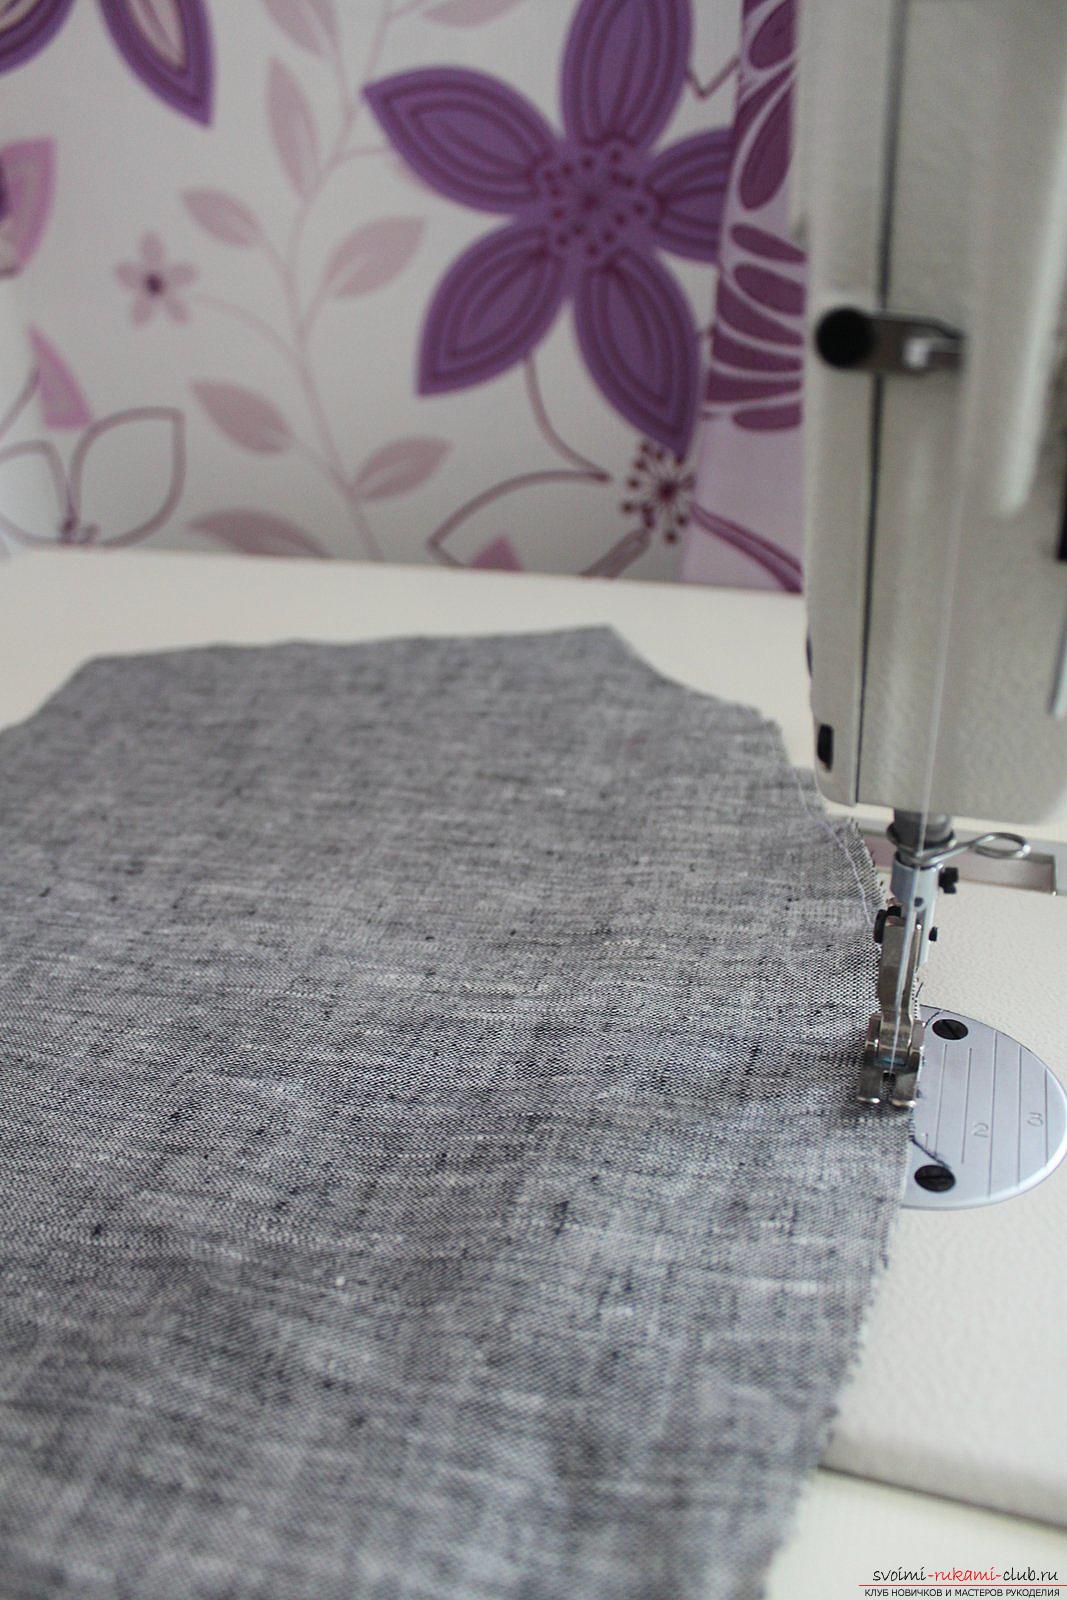
 We pull the bottom threads (pull at the same time) to 28 cm.
 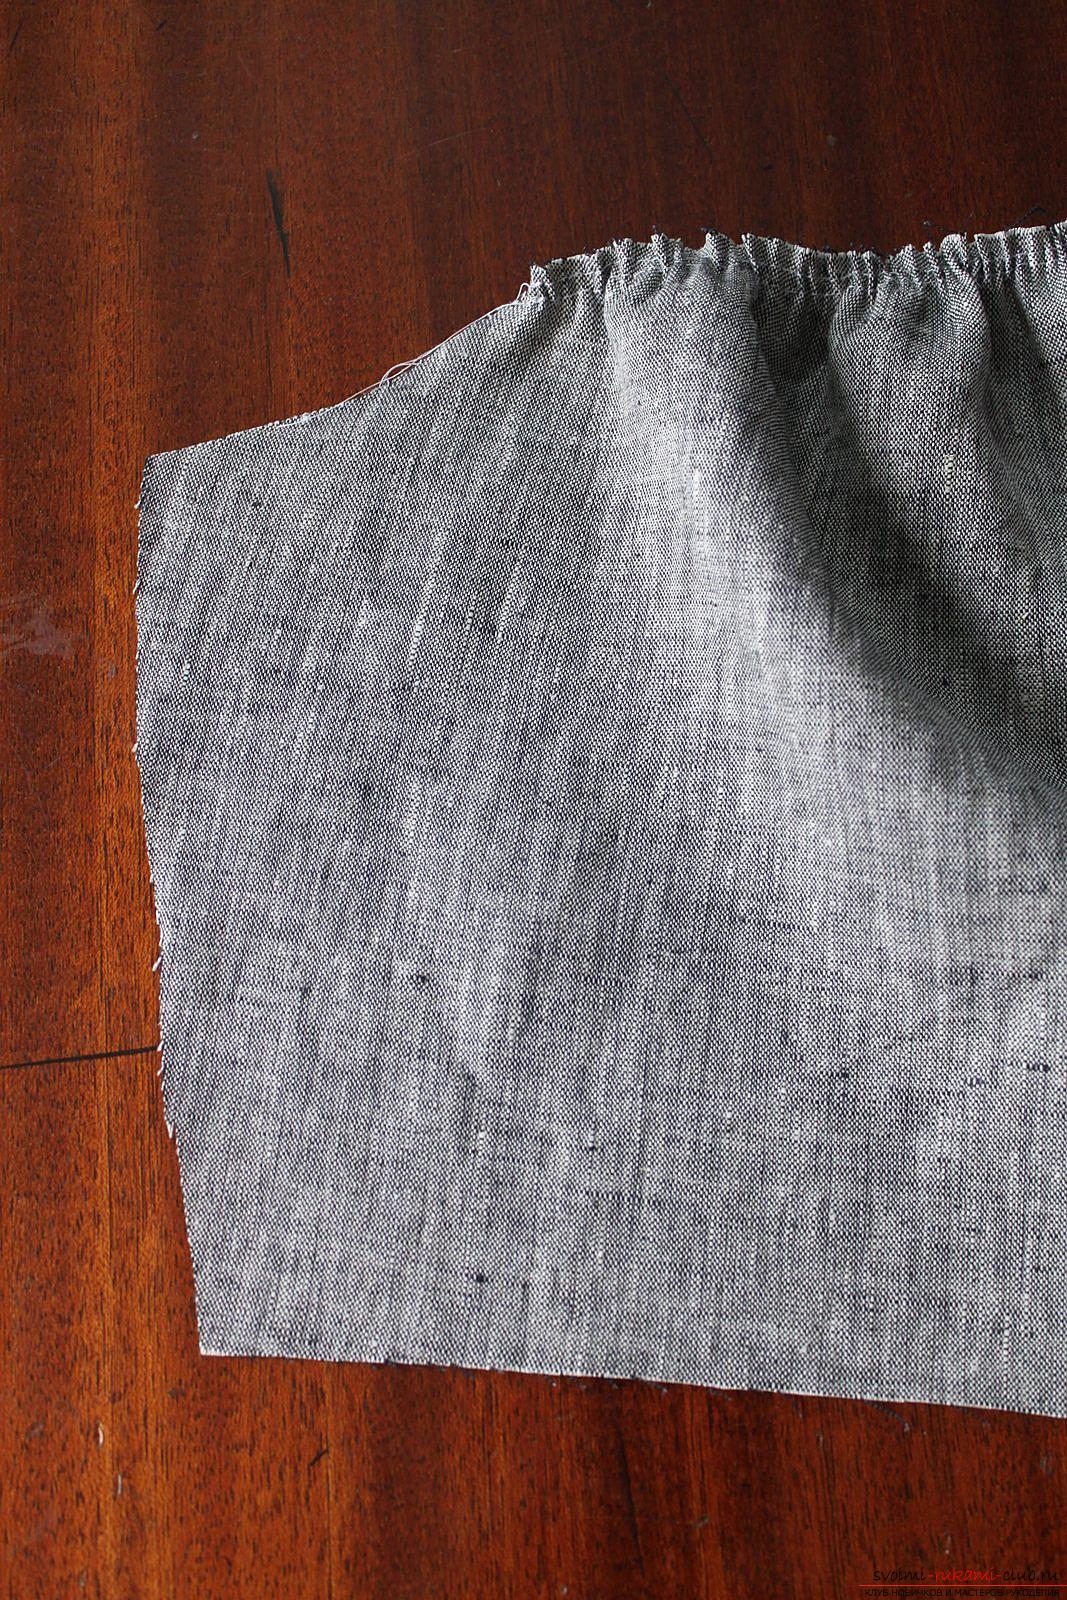 We put the expanded edge of the top of the shelf, put the top of the shelf on it (the assembly). Face sides inside. That is, face to face.
 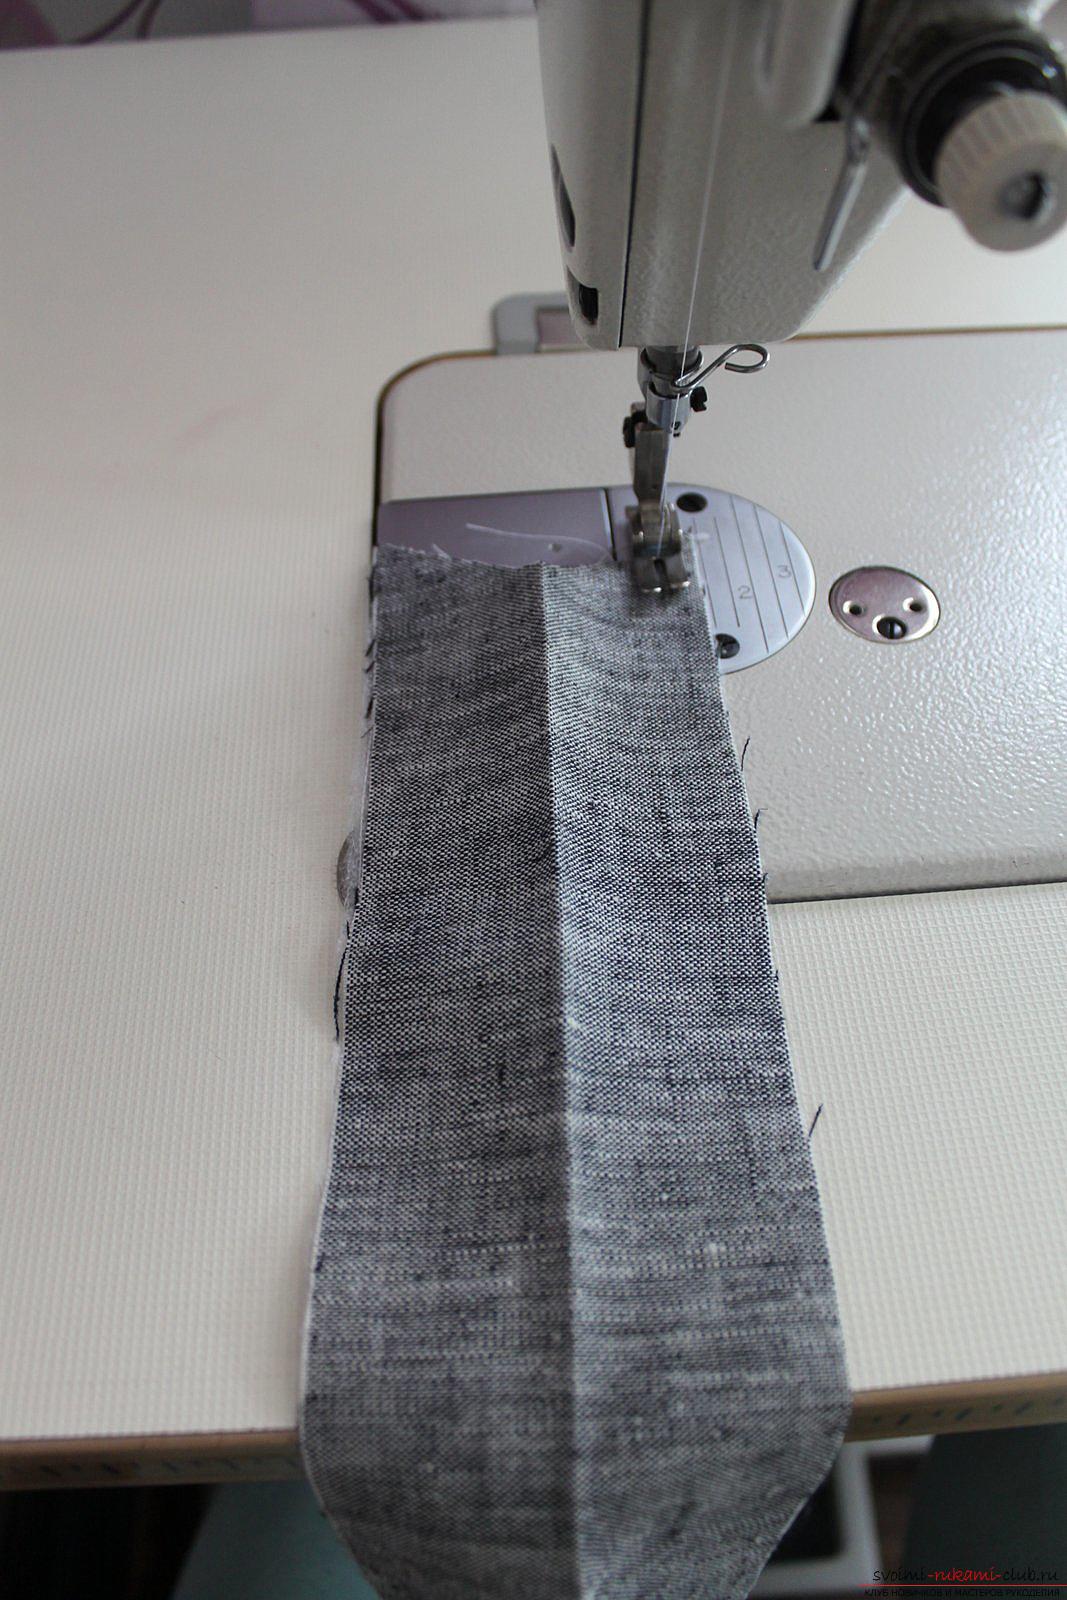 We grind these parts 1 cm from the slices.
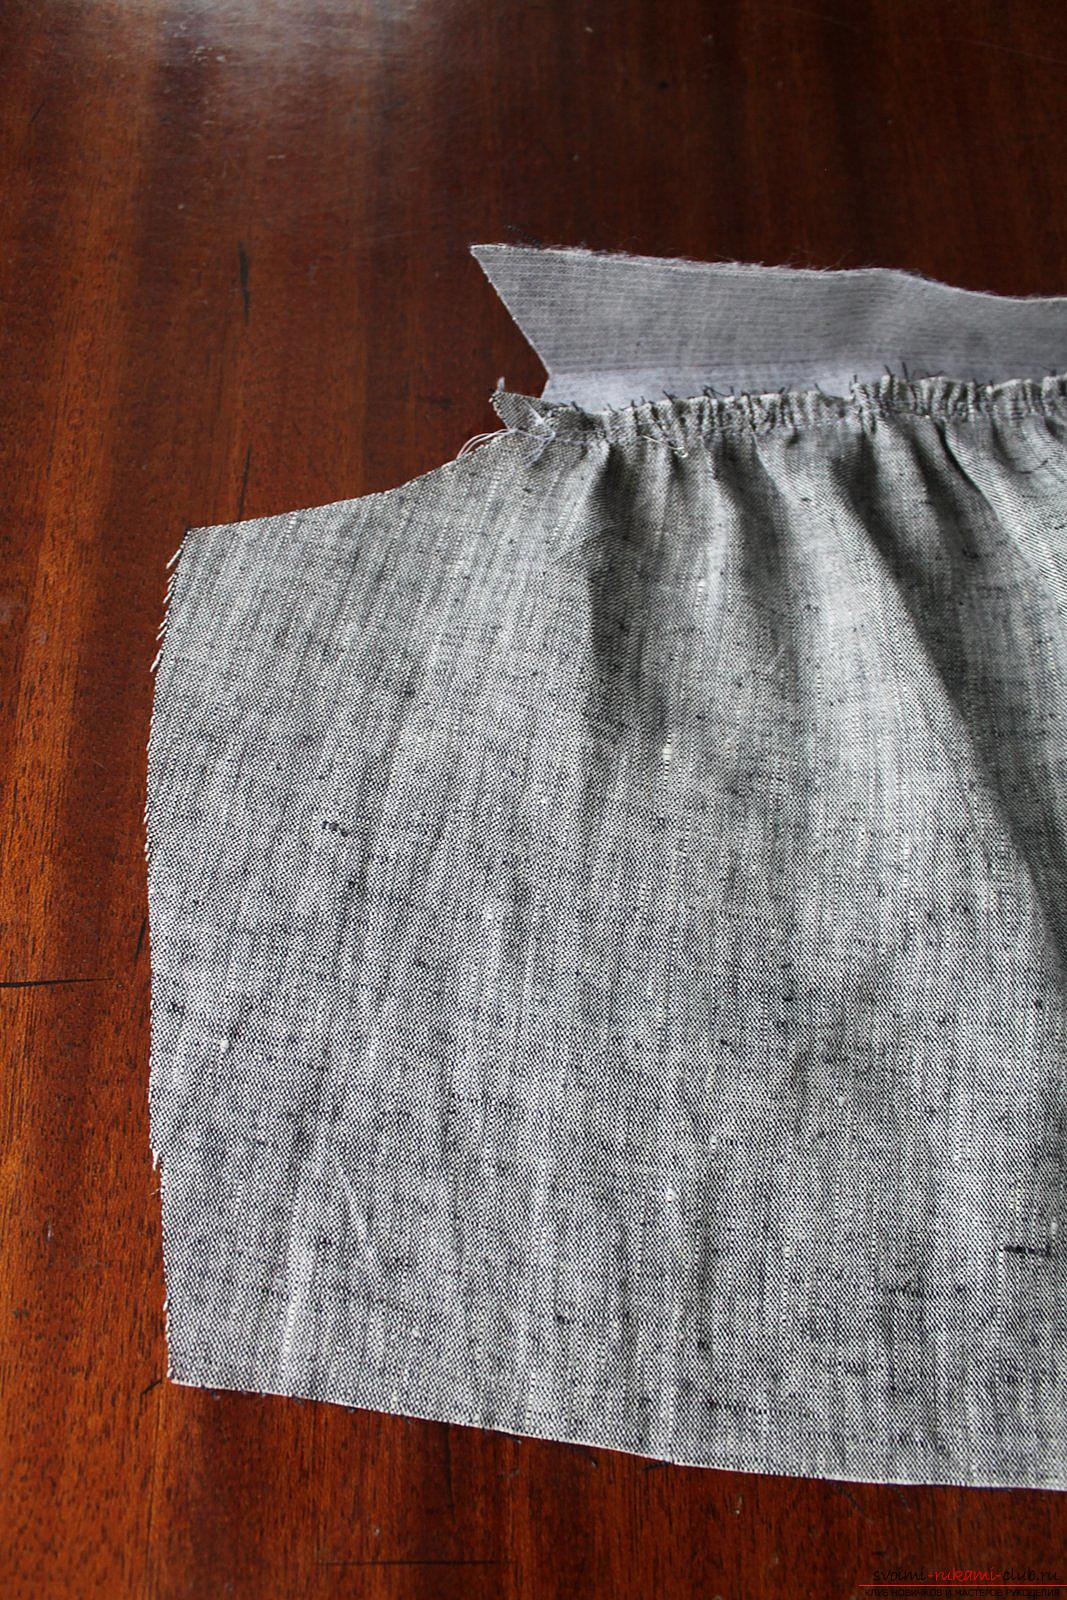
 We pin the internal flying part with pins.
 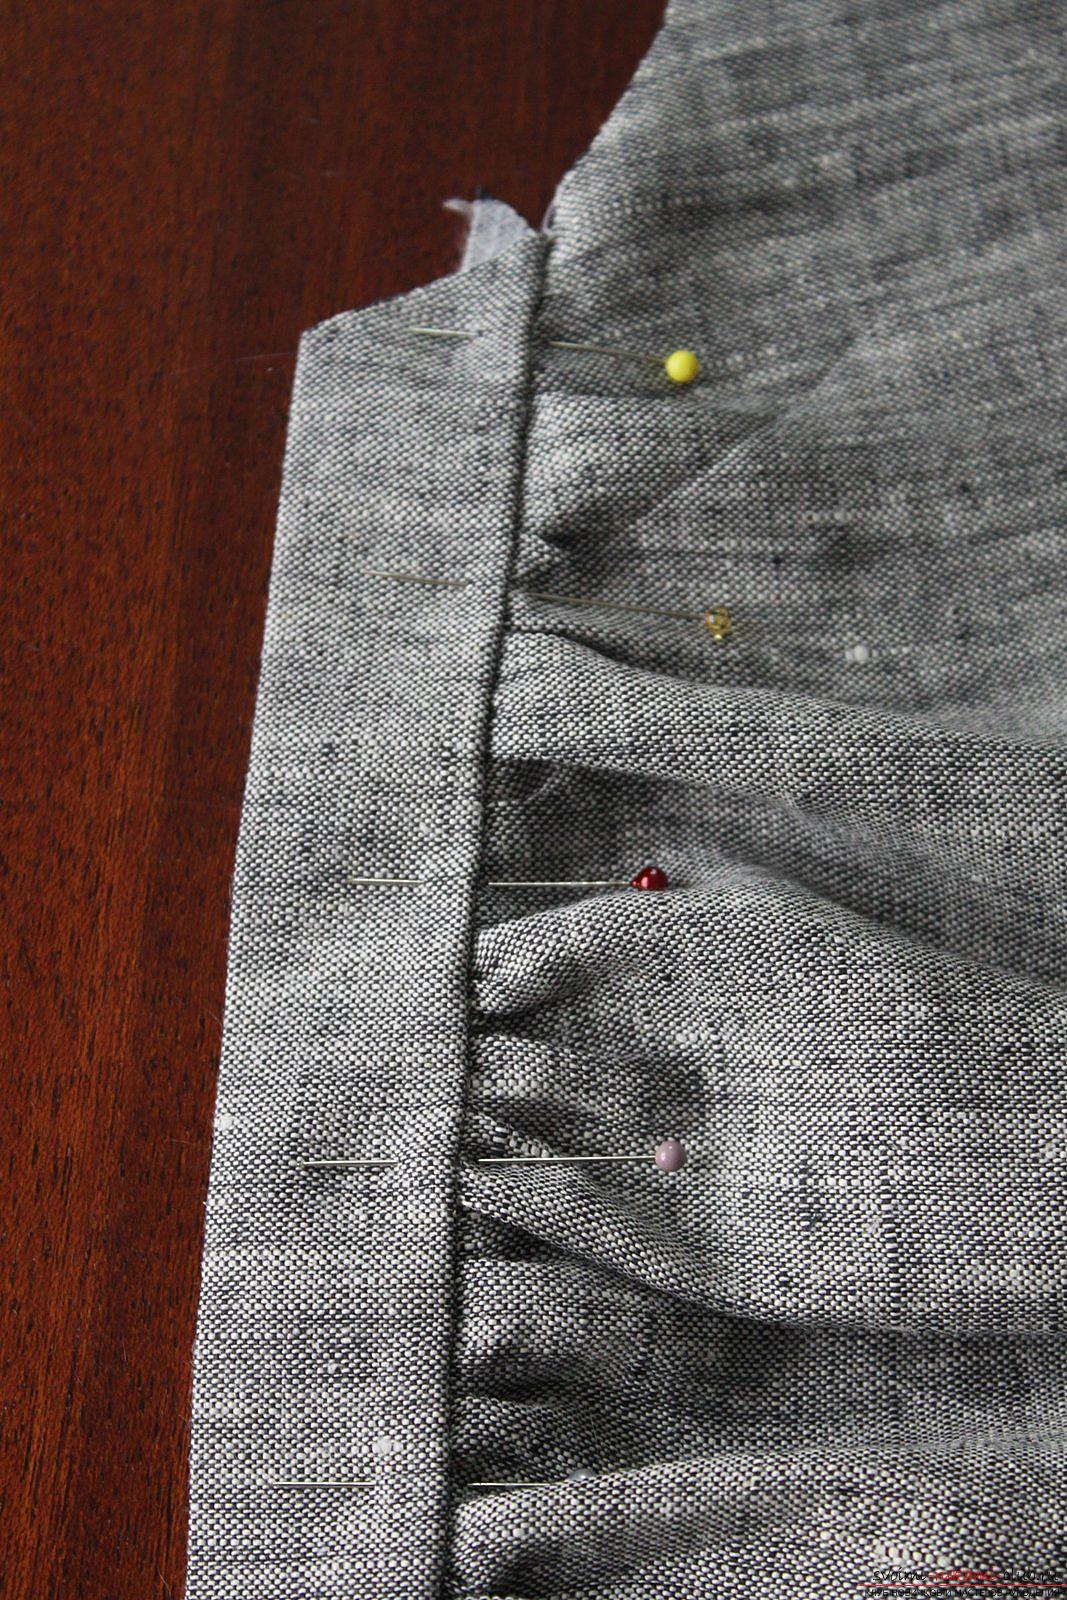 We lay a straight line in the seam.
 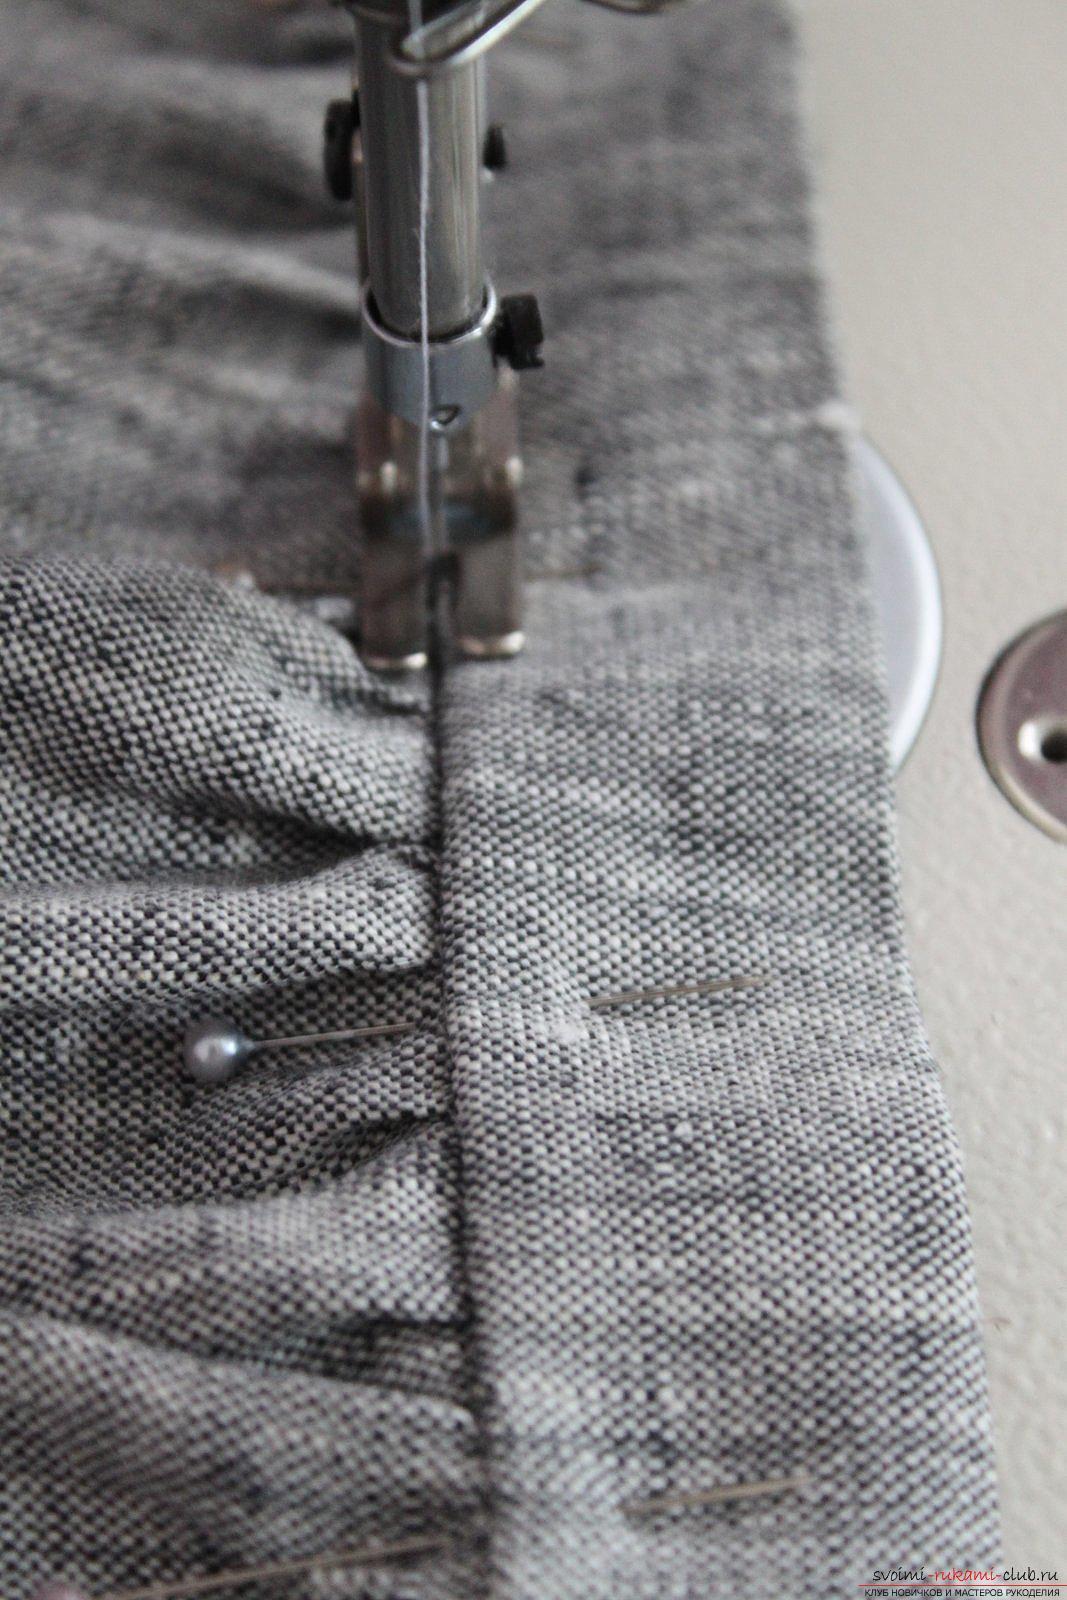 Apply the upper part of the back to the bottom, and remove the excess in the counter fold in the middle.
 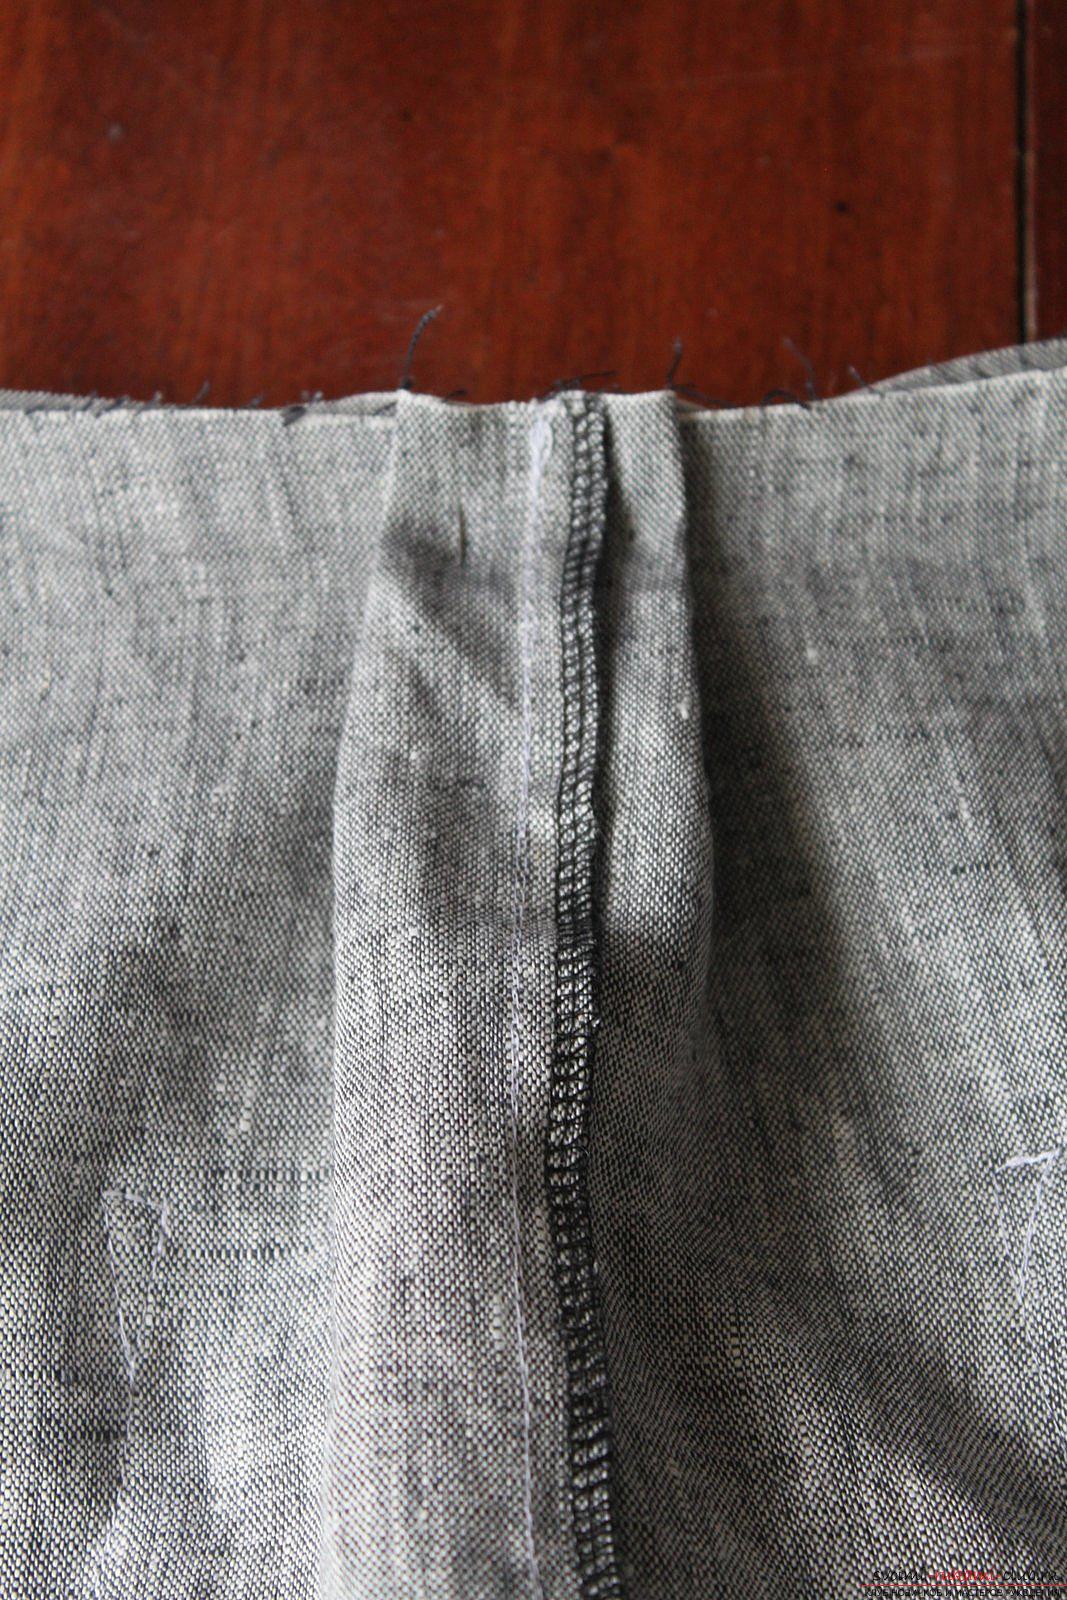 The upper part of the dress is sewn from the bottom by 1 cm from the slices. We sew sections.
 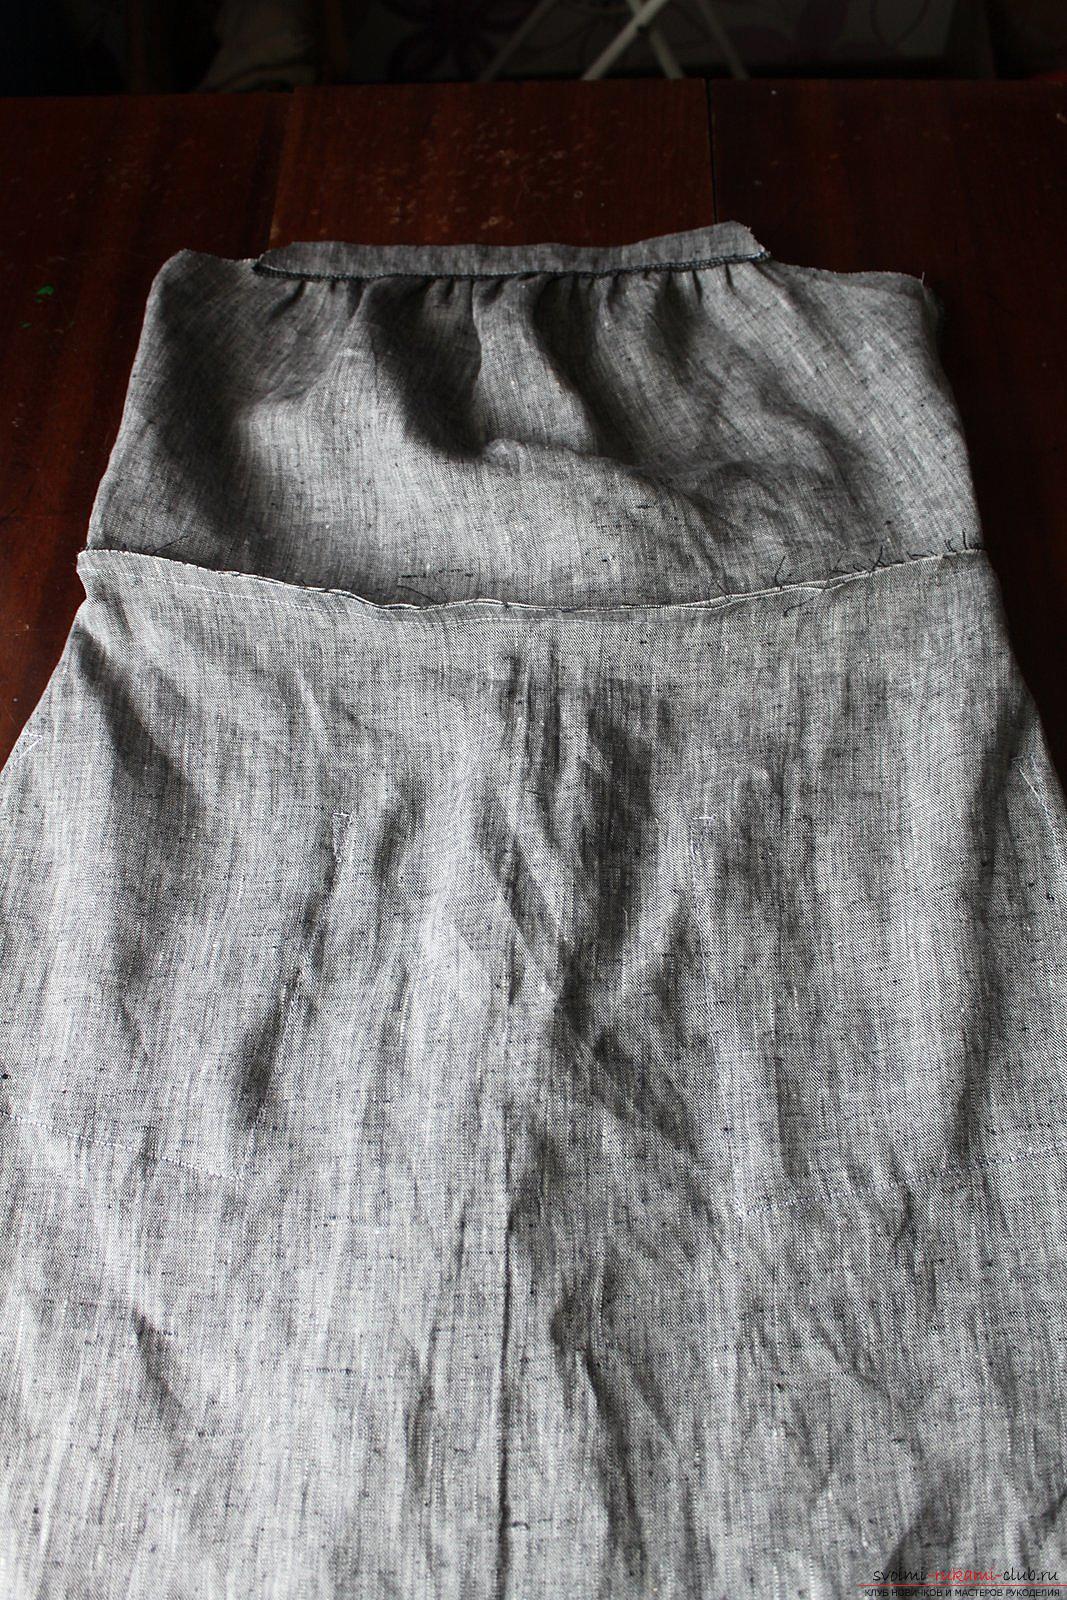 We grind the pieces of the uppers (which were cut along the oblique) by 7 mm from the slices. We are rousing.
 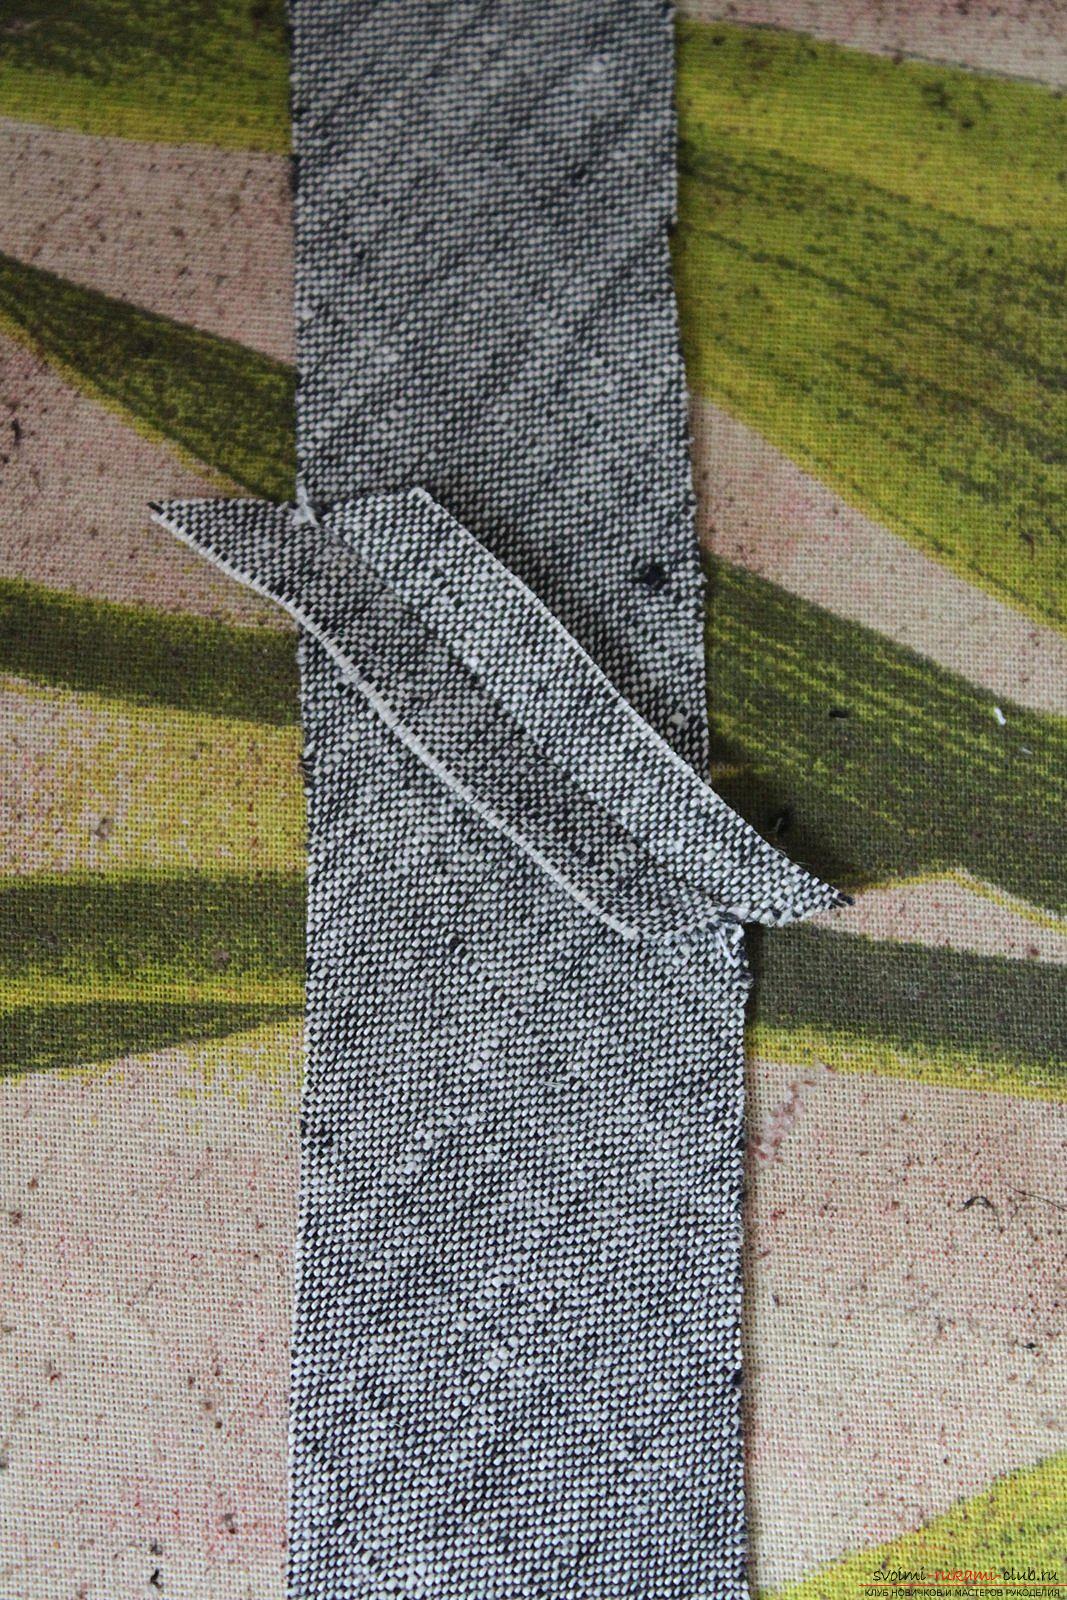 We press down the allowance of grinding the top of the dress with its bottom. Slanting bake iron lengthwise in half.
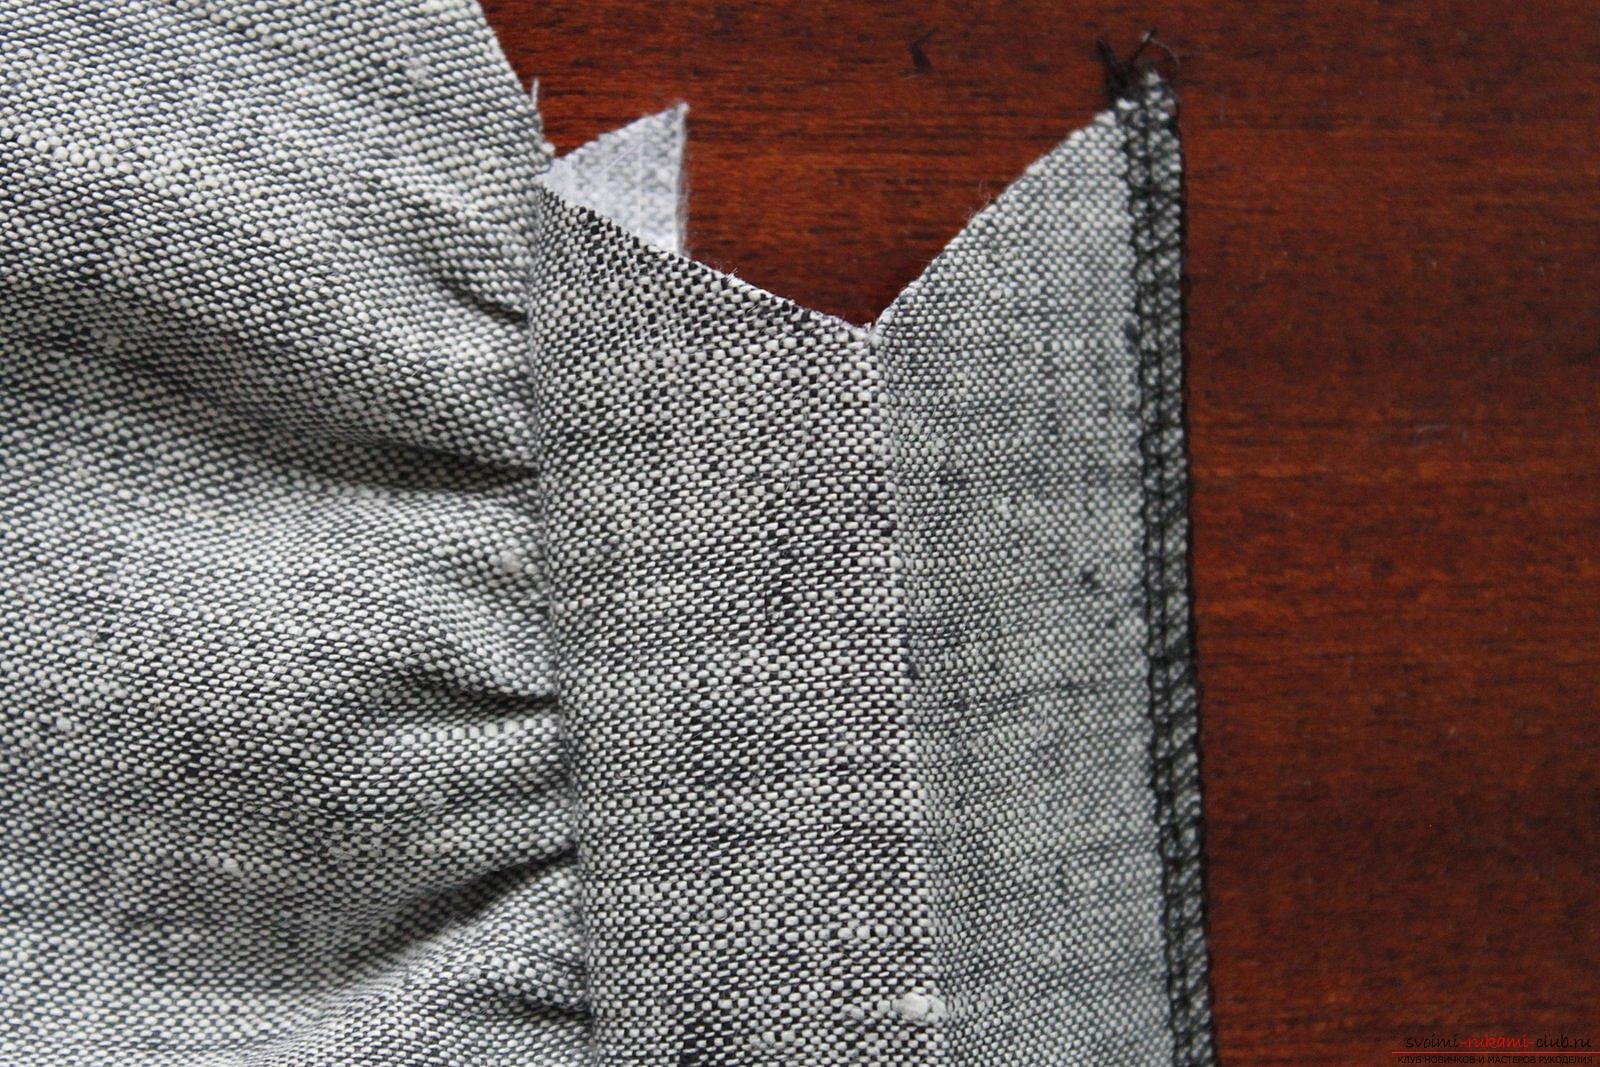
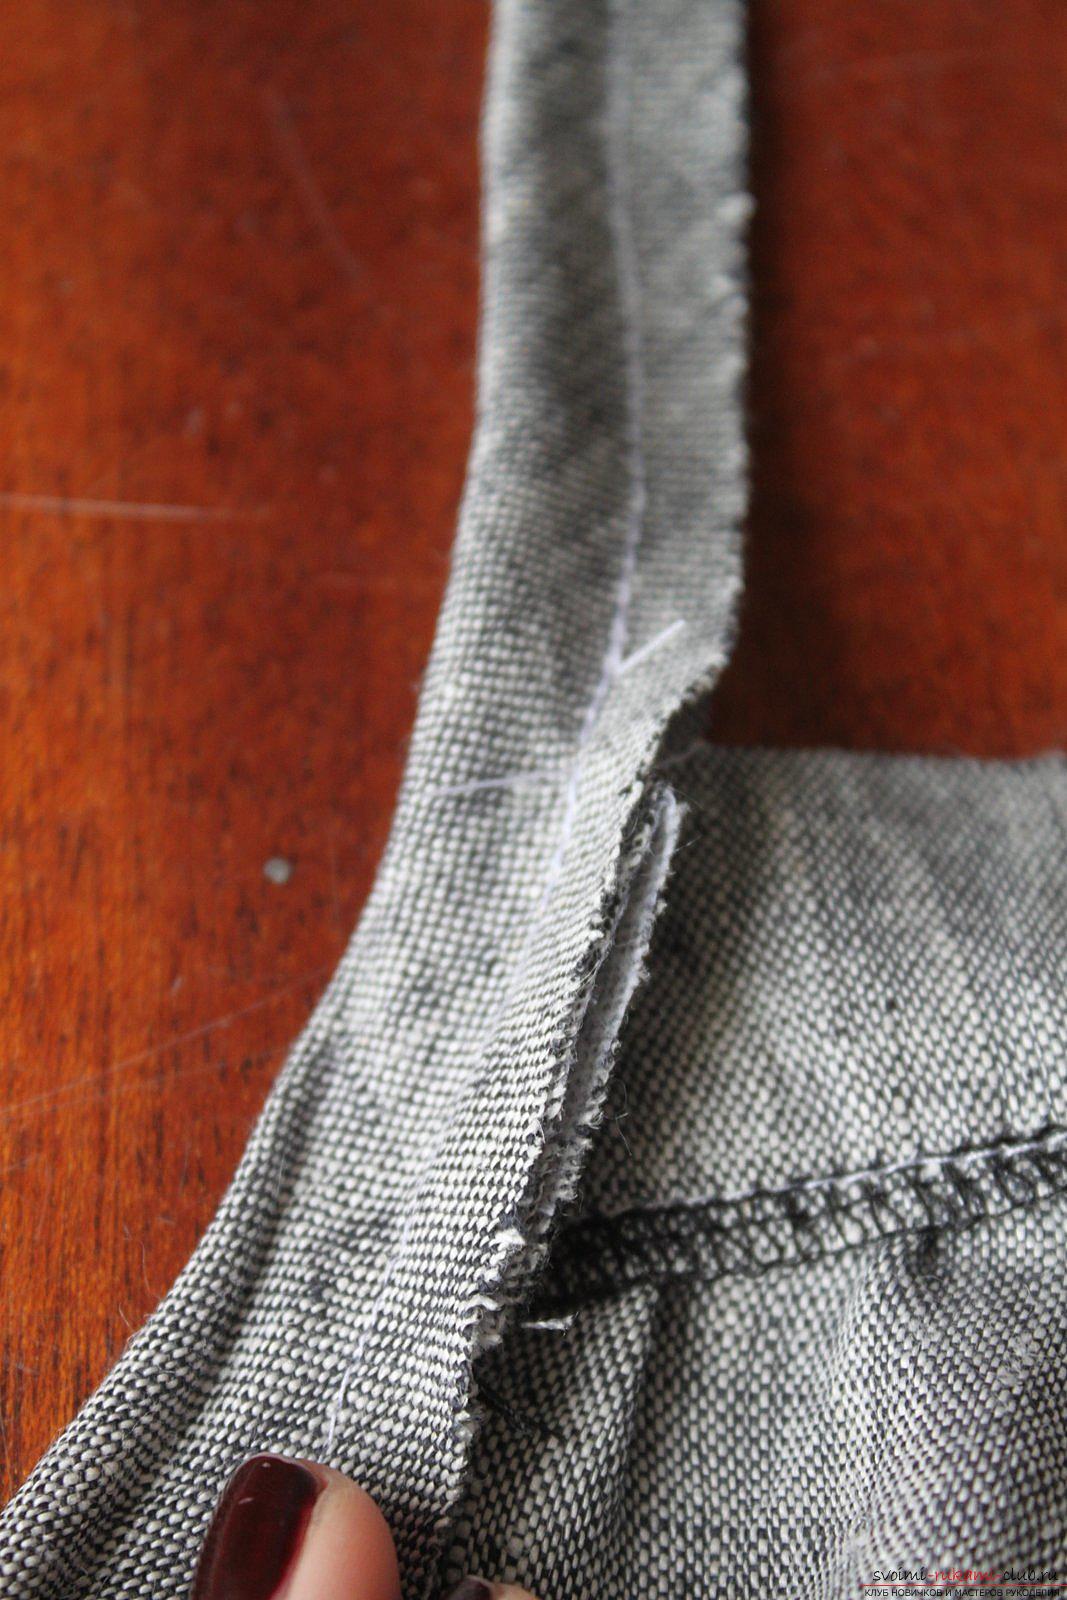
 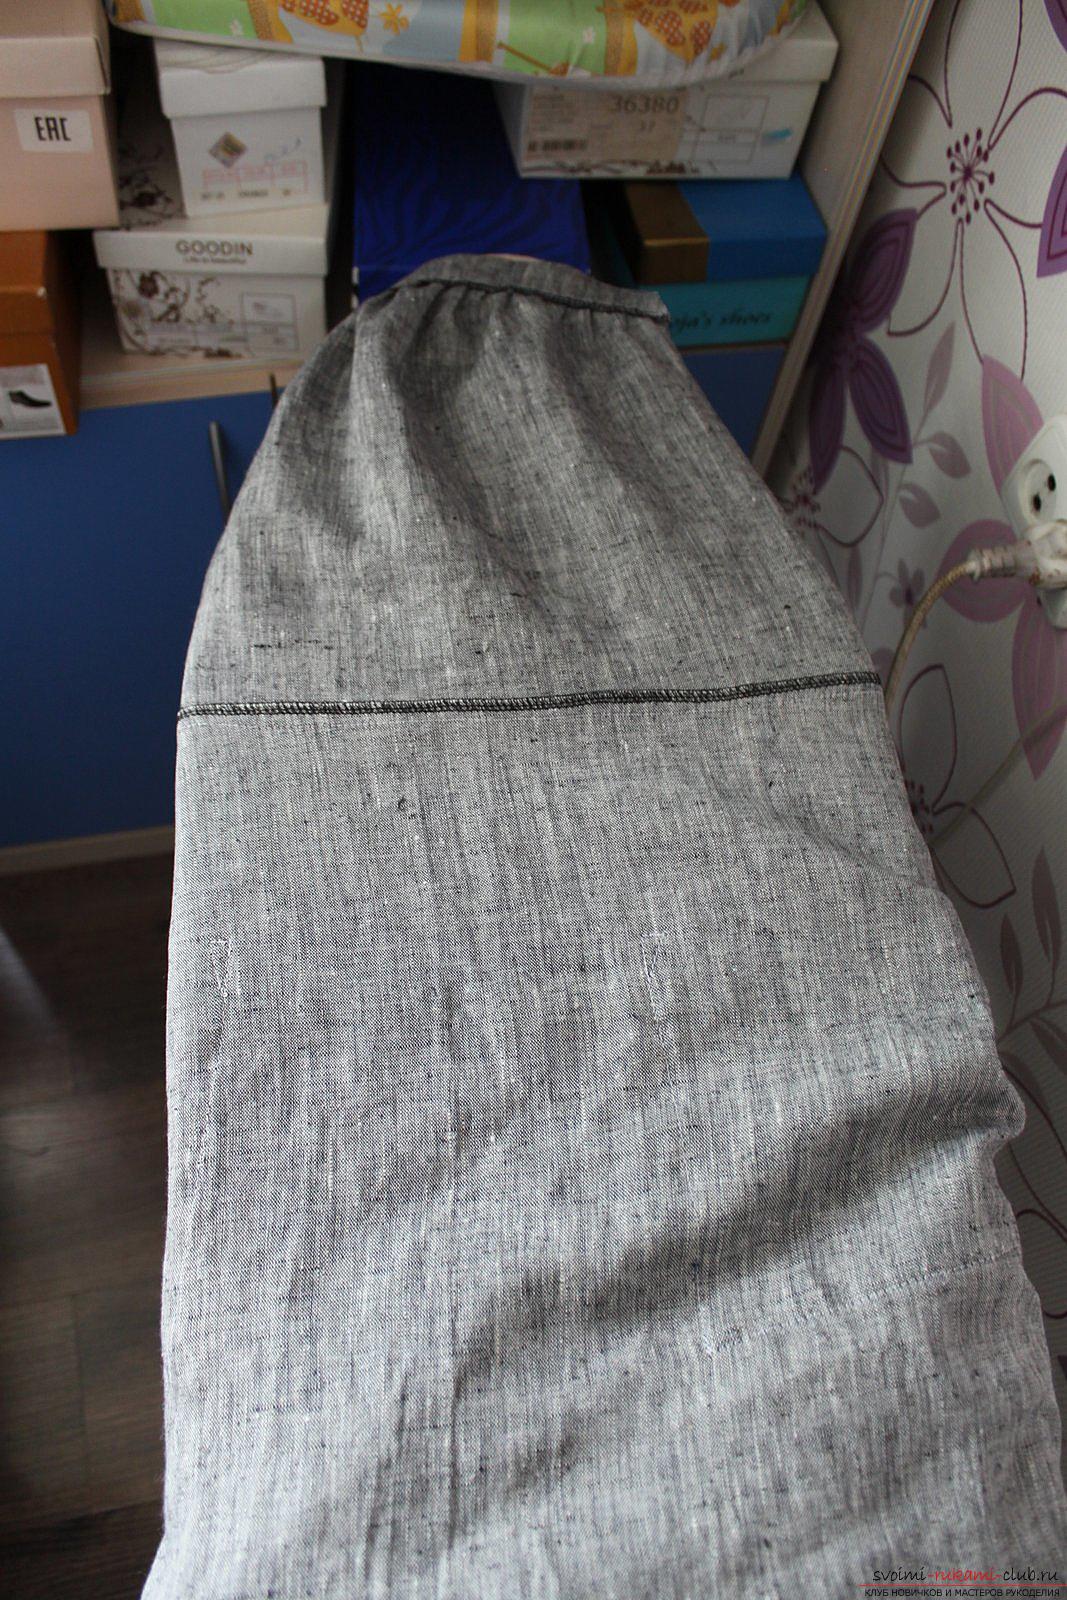 The seam of the oblique bake (the one in the middle) is applied to the upper cut of the back, to its middle and to the line of 1 cm from the slices.
 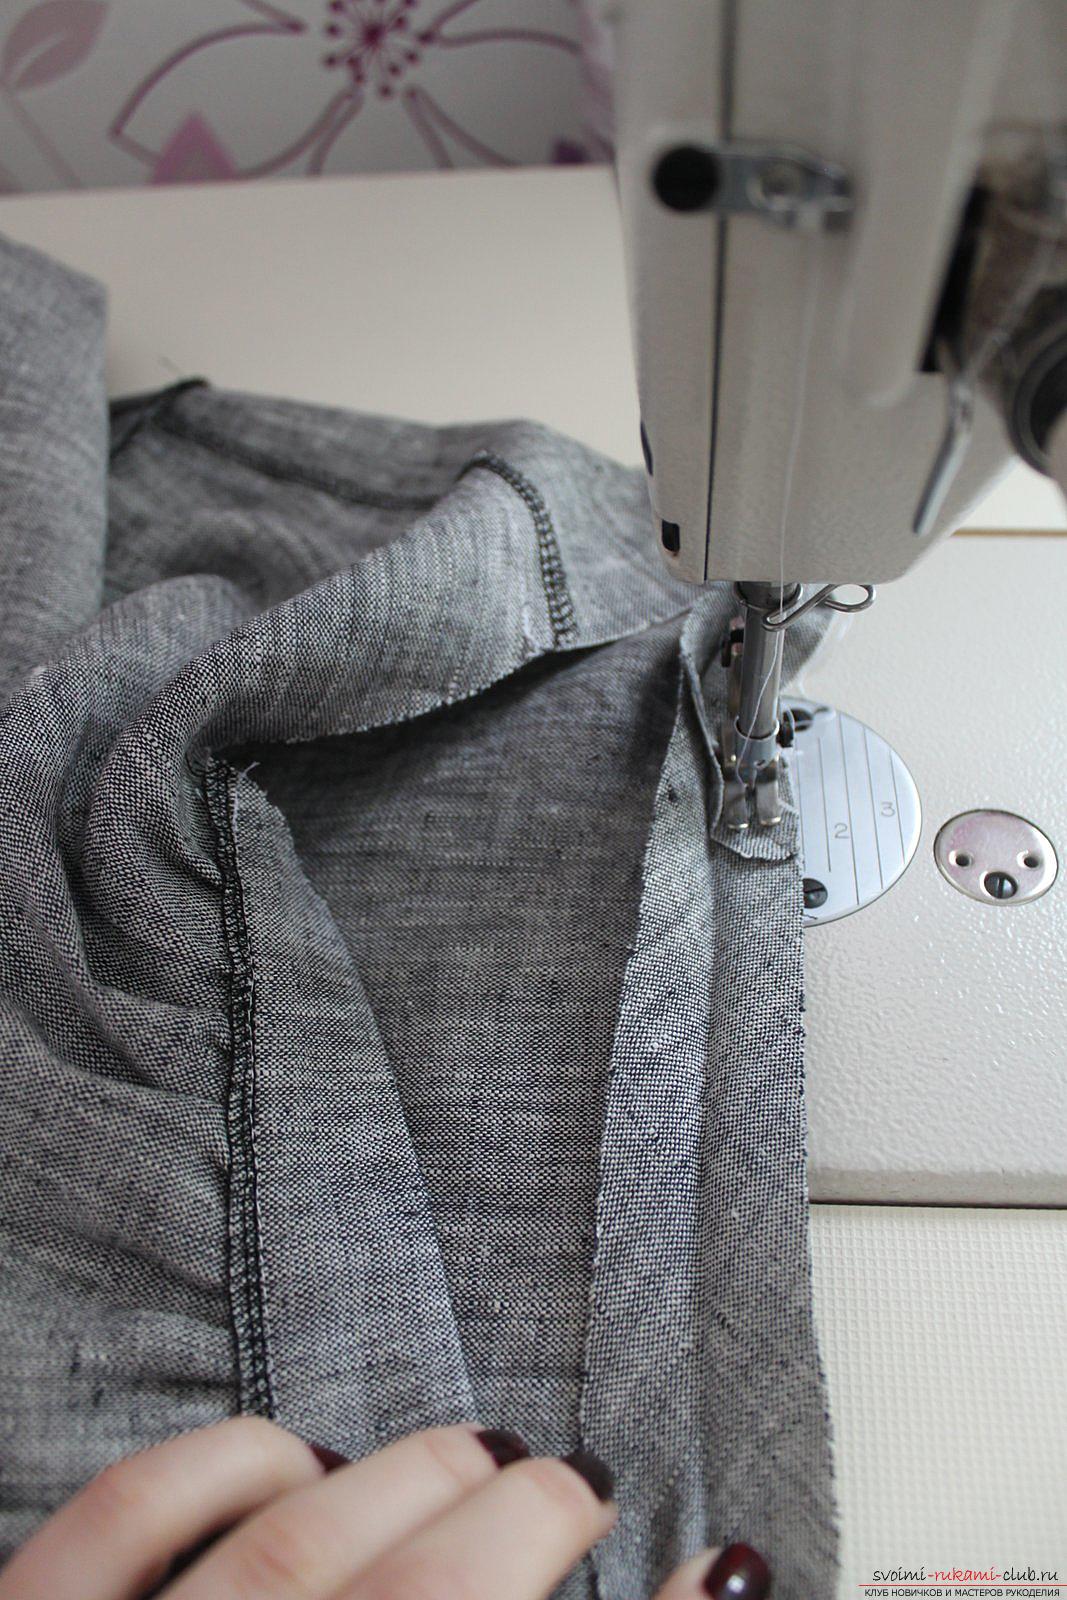 Then from the middle in the other direction.
 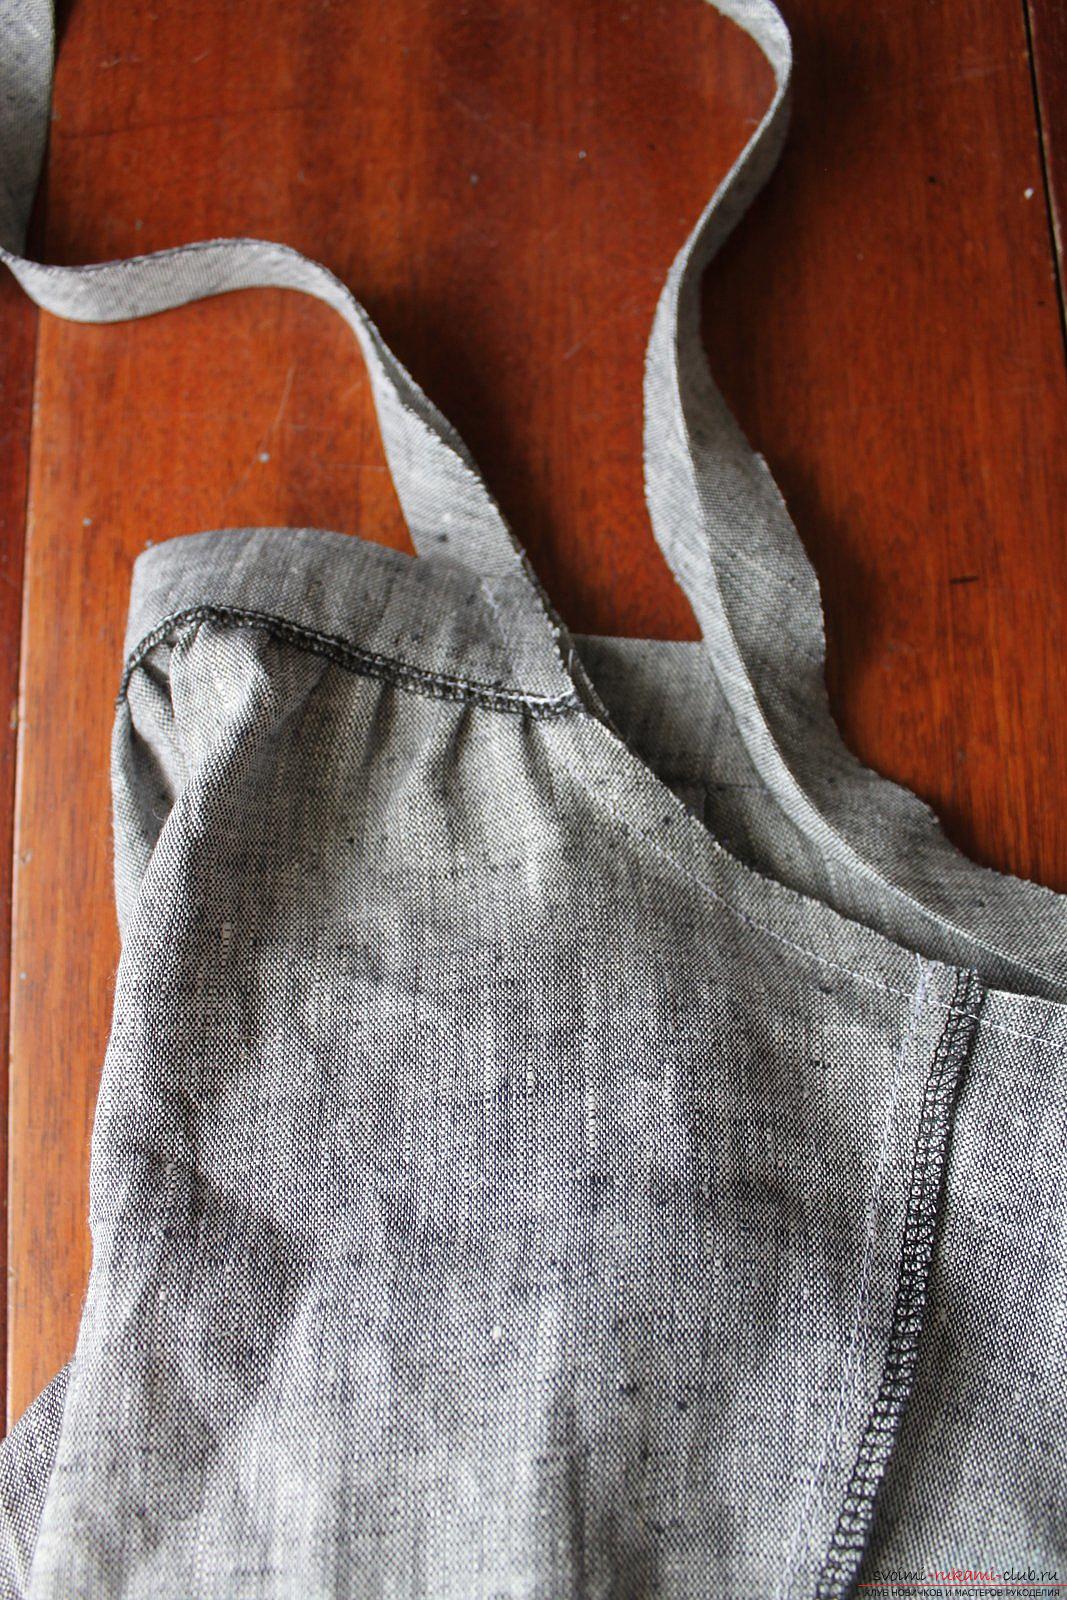 Now add the face to the inside and add 1 cm to its point to the point where the seam starts sewing and ends to the top of the dress.
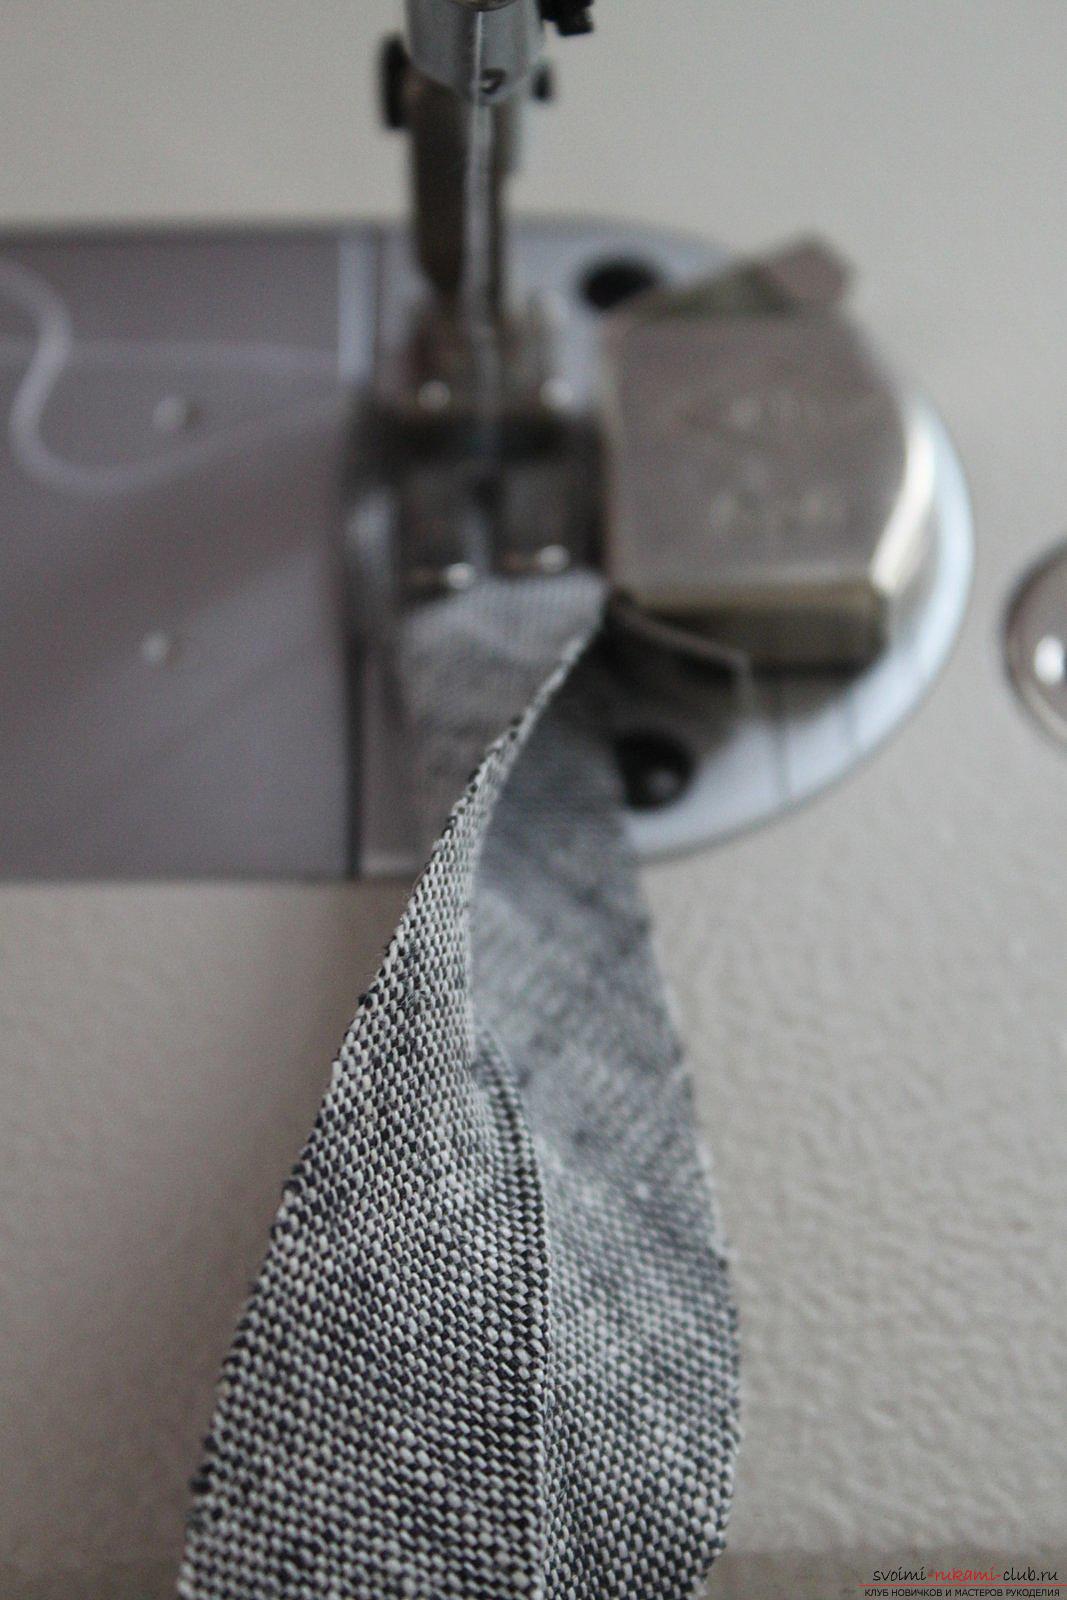
 On the formed strings we cut the allowance up to 3 mm approximately (we make it not too narrow, then the seam does not break).
 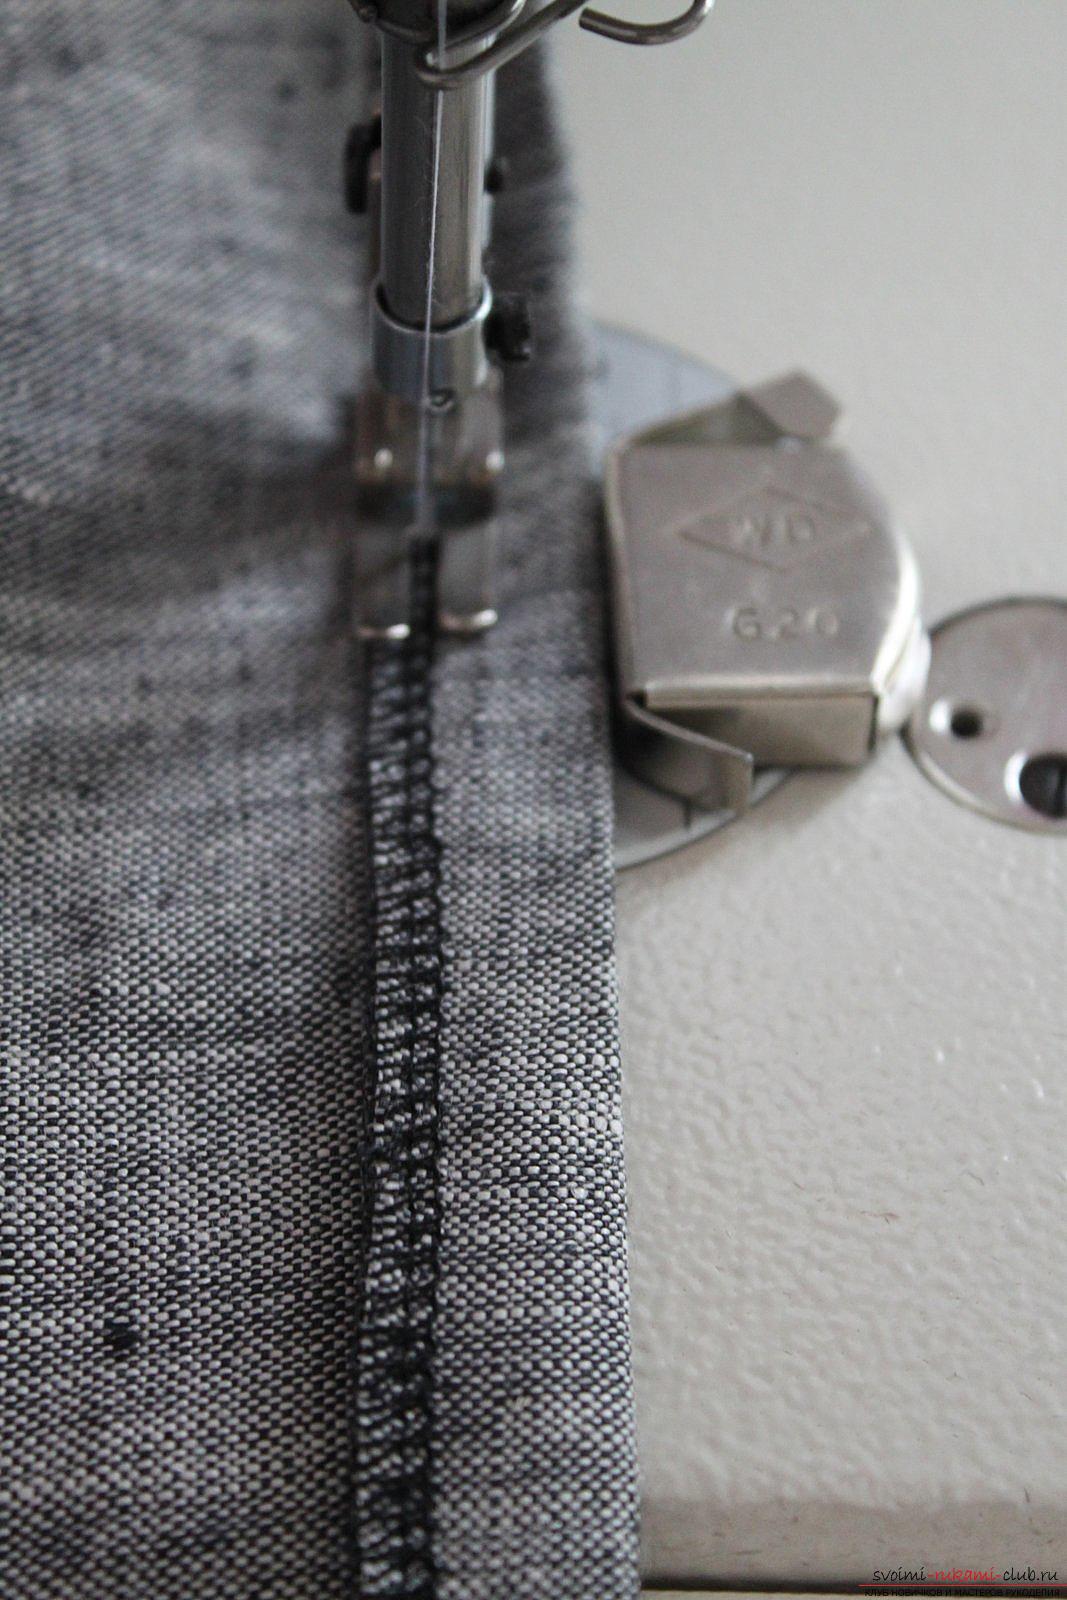 At the end of the string (in one layer) we pin a pin.
 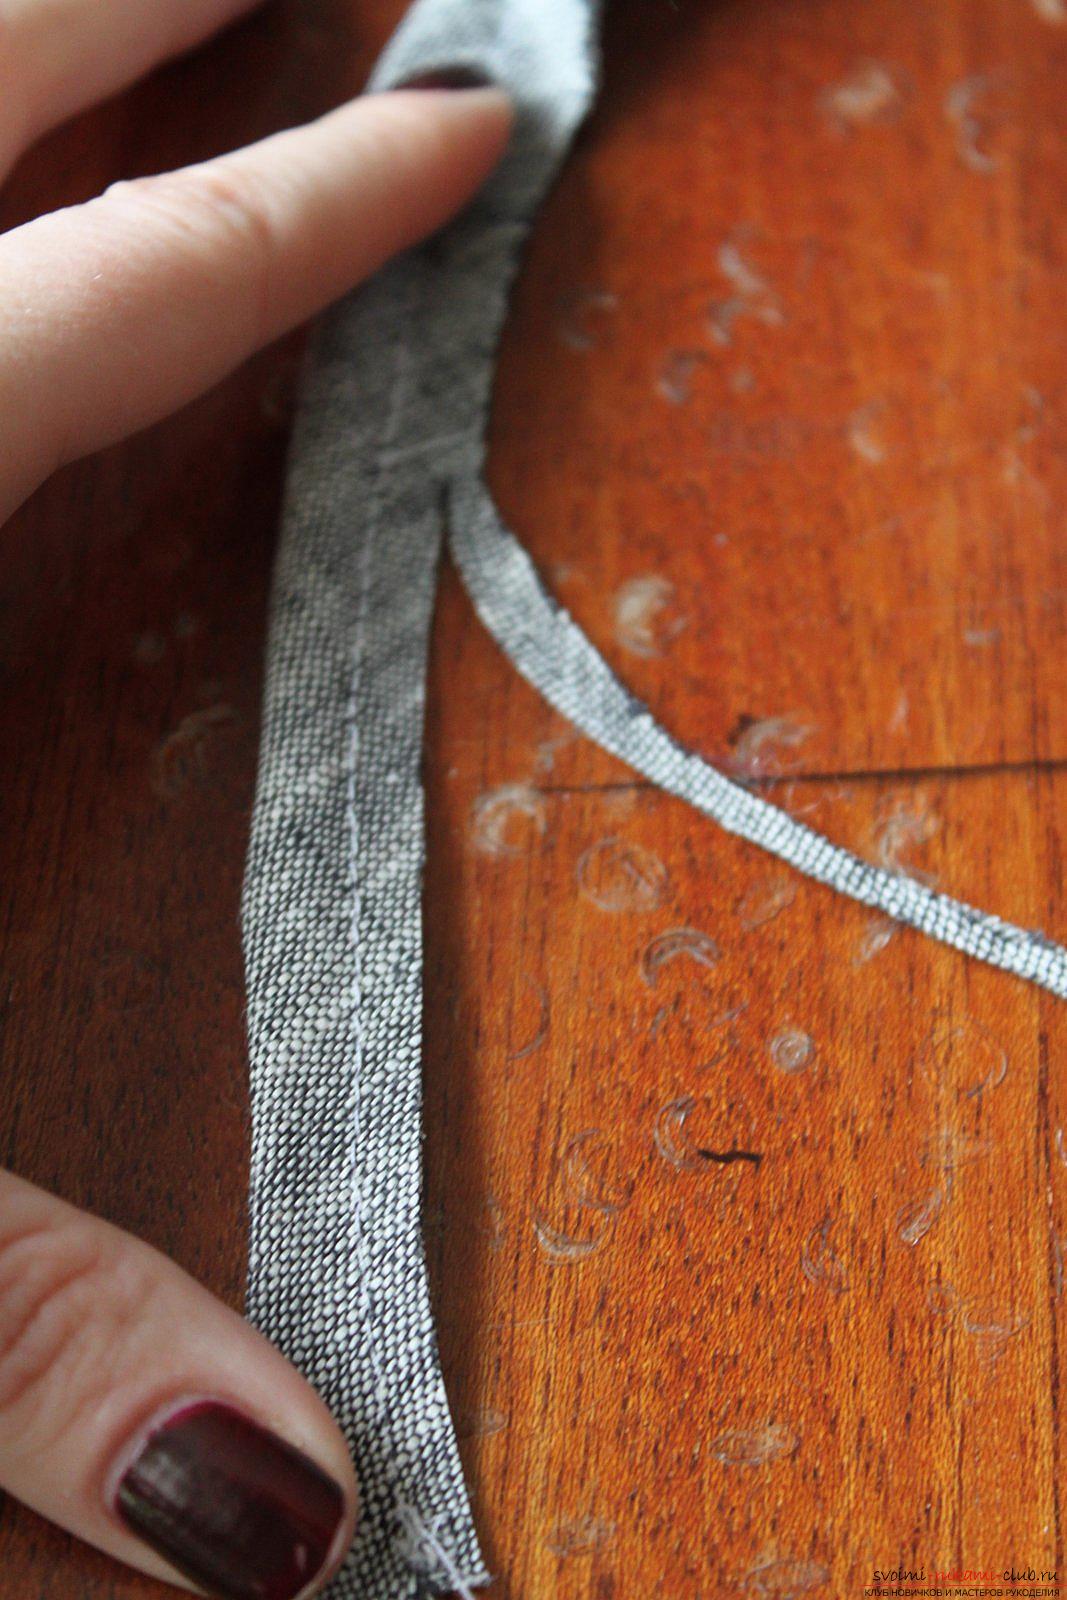 The loan omits its "head" inside the string.
  And we twist the cord.
 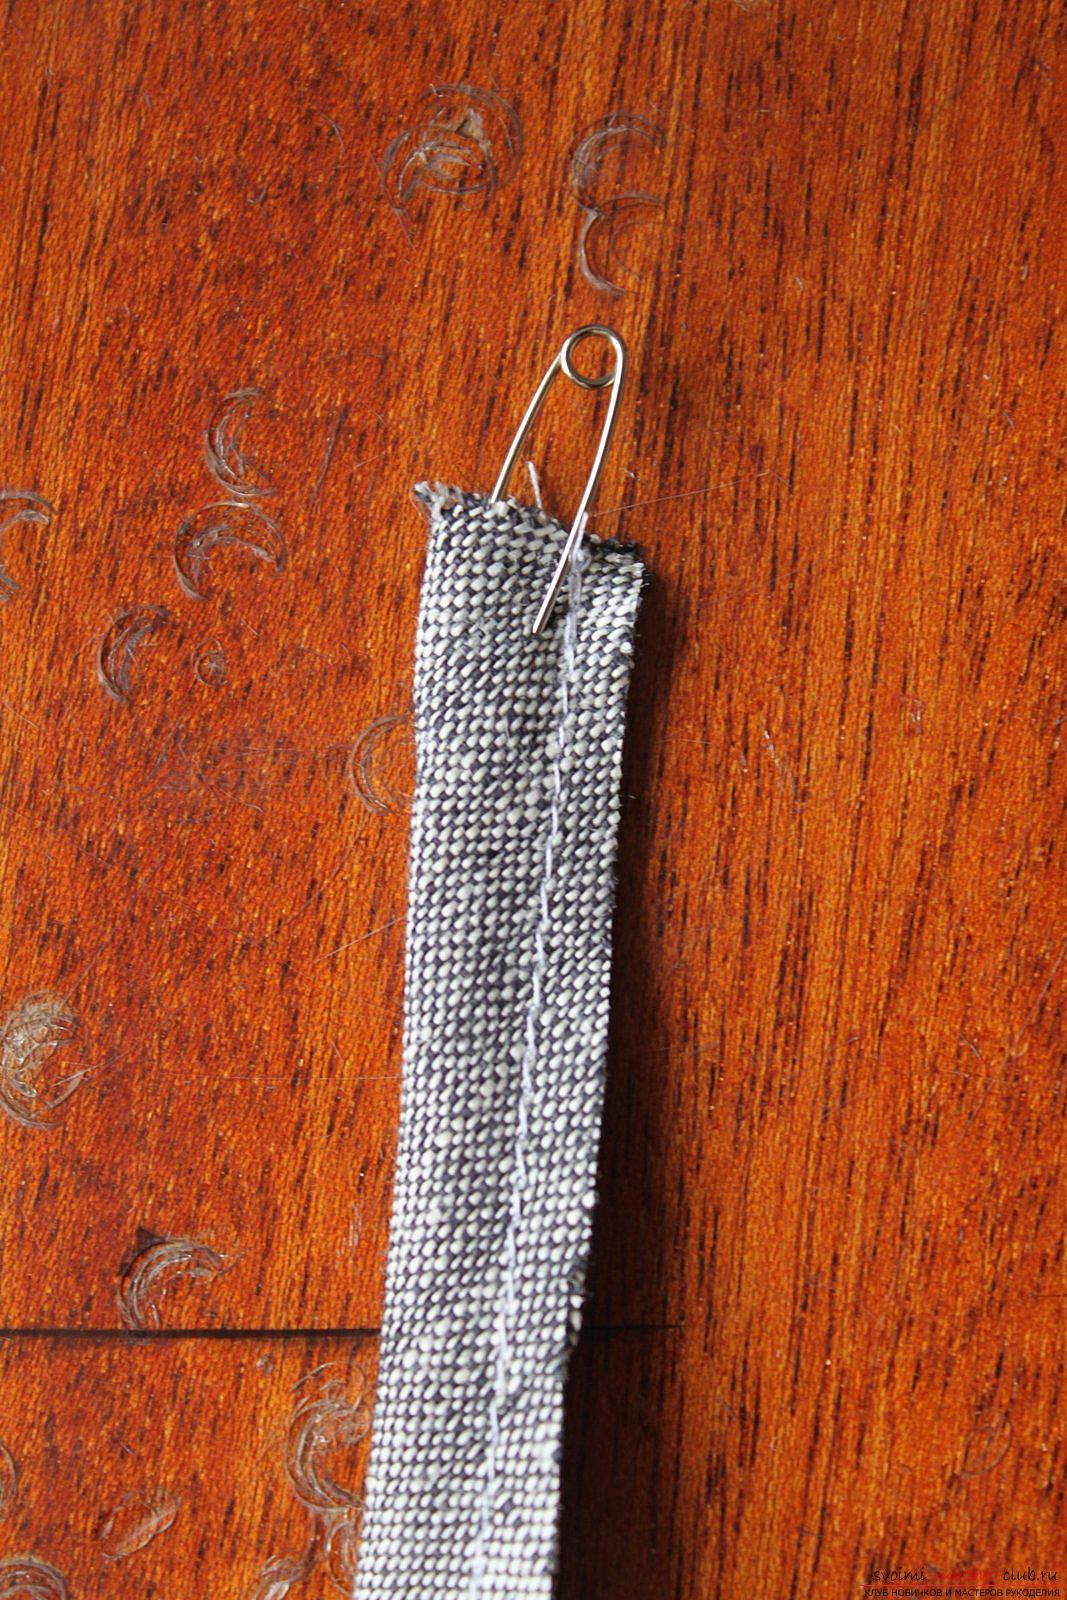 On the wrong side, we fold the uppers (which goes into the cord) and are scribbled from the front side directly into the seam.
 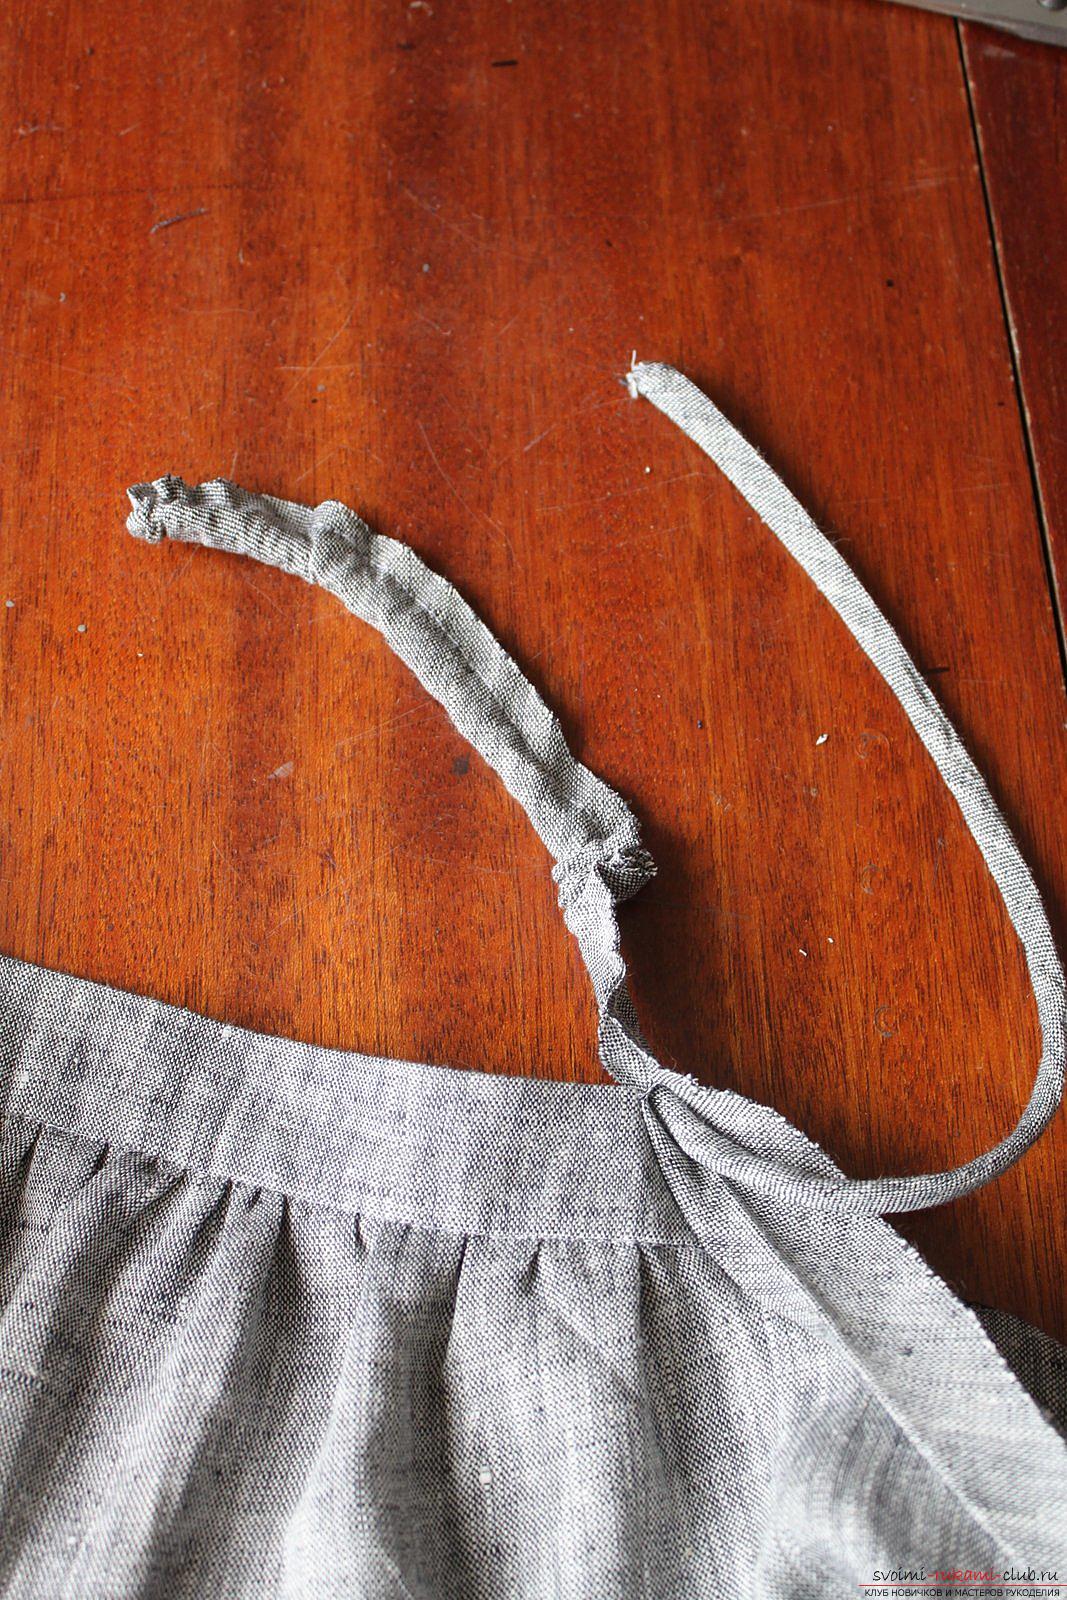 Fold the bottom of the dress by 1.5 cm and lay a finishing stitch by 1.3 cm.
 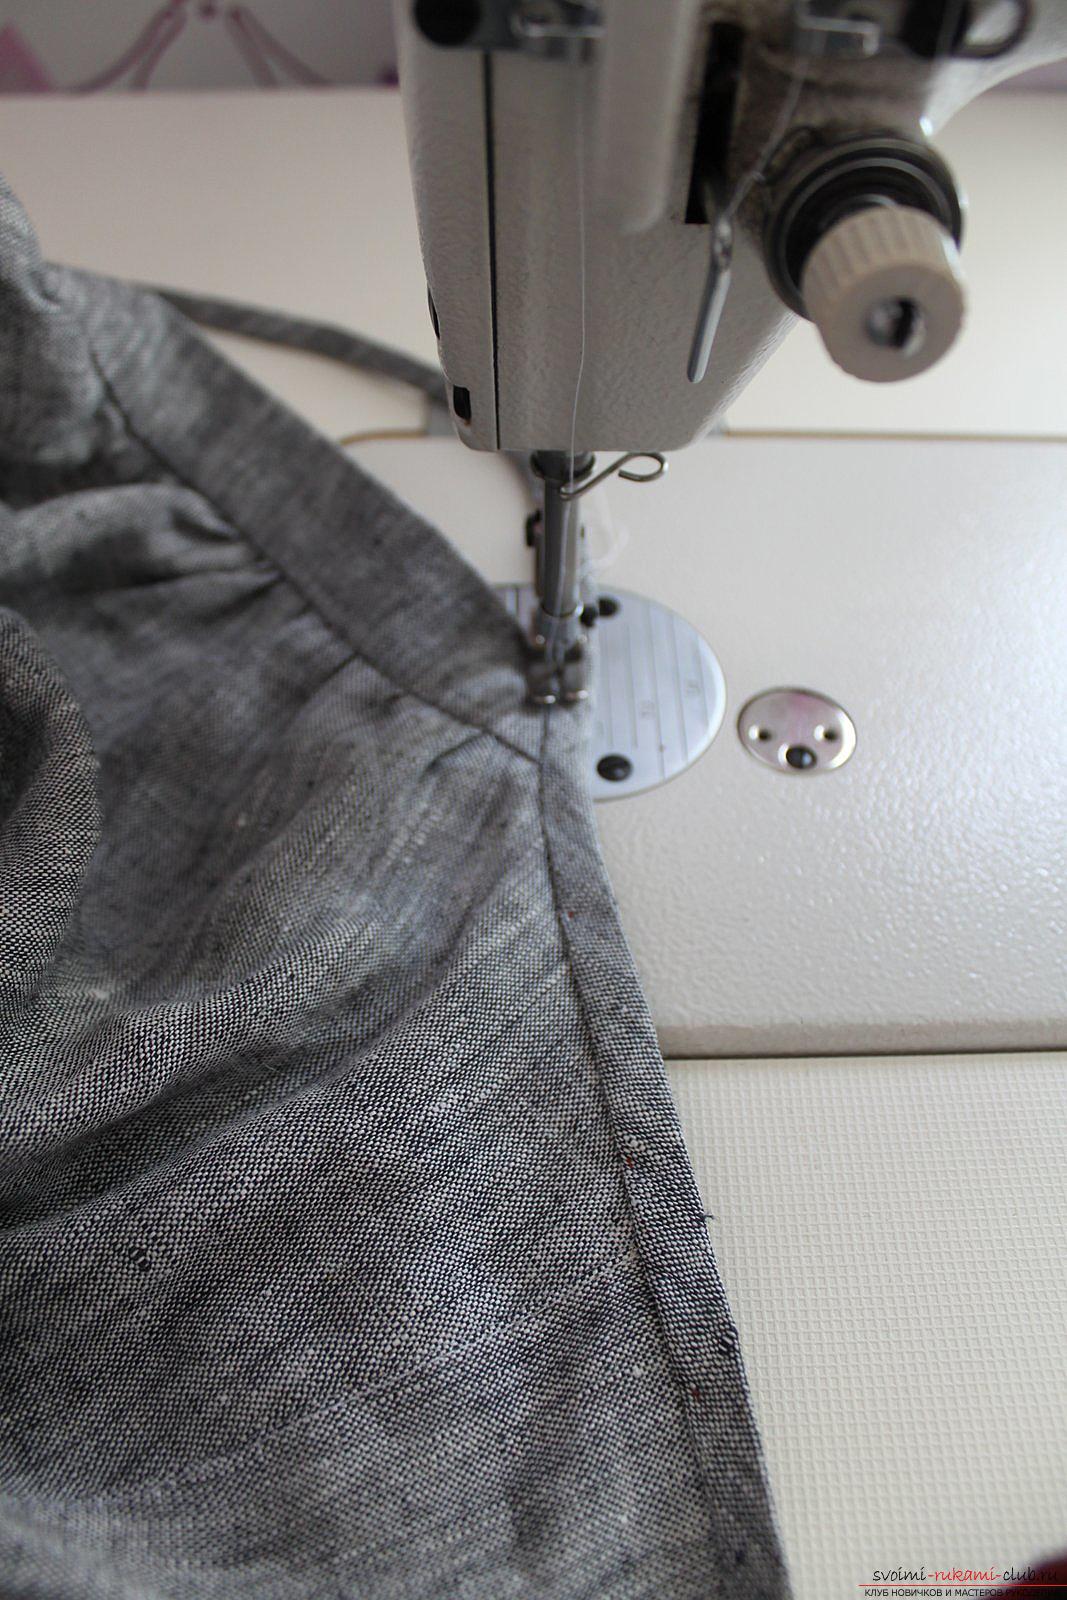 We iron the dress once more, we clean it from sewing garbage. We put on and wear it all summer with pleasure and comfort.
Comments
Related posts:
 This detailed master class with a photo and description will teach you how to make origami for beginners - an origami-crown made of paper.
 This detailed master class with a photo and description will teach you how to make origami for beginners - an origami dog made of paper.
 This detailed master-class sewing will teach how to sew your own knitted sweatshirt
 This detailed master class - a crochet lesson for beginners - will teach you how to tie a needle bed with your own hands.
 This detailed master class contains a quilling lesson for beginners and will teach you how to make yourself a quilling ballerina.