
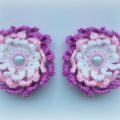
This detailed master class - a crochet lesson for beginners - will teach you how to tie a needle bed with your own hands.
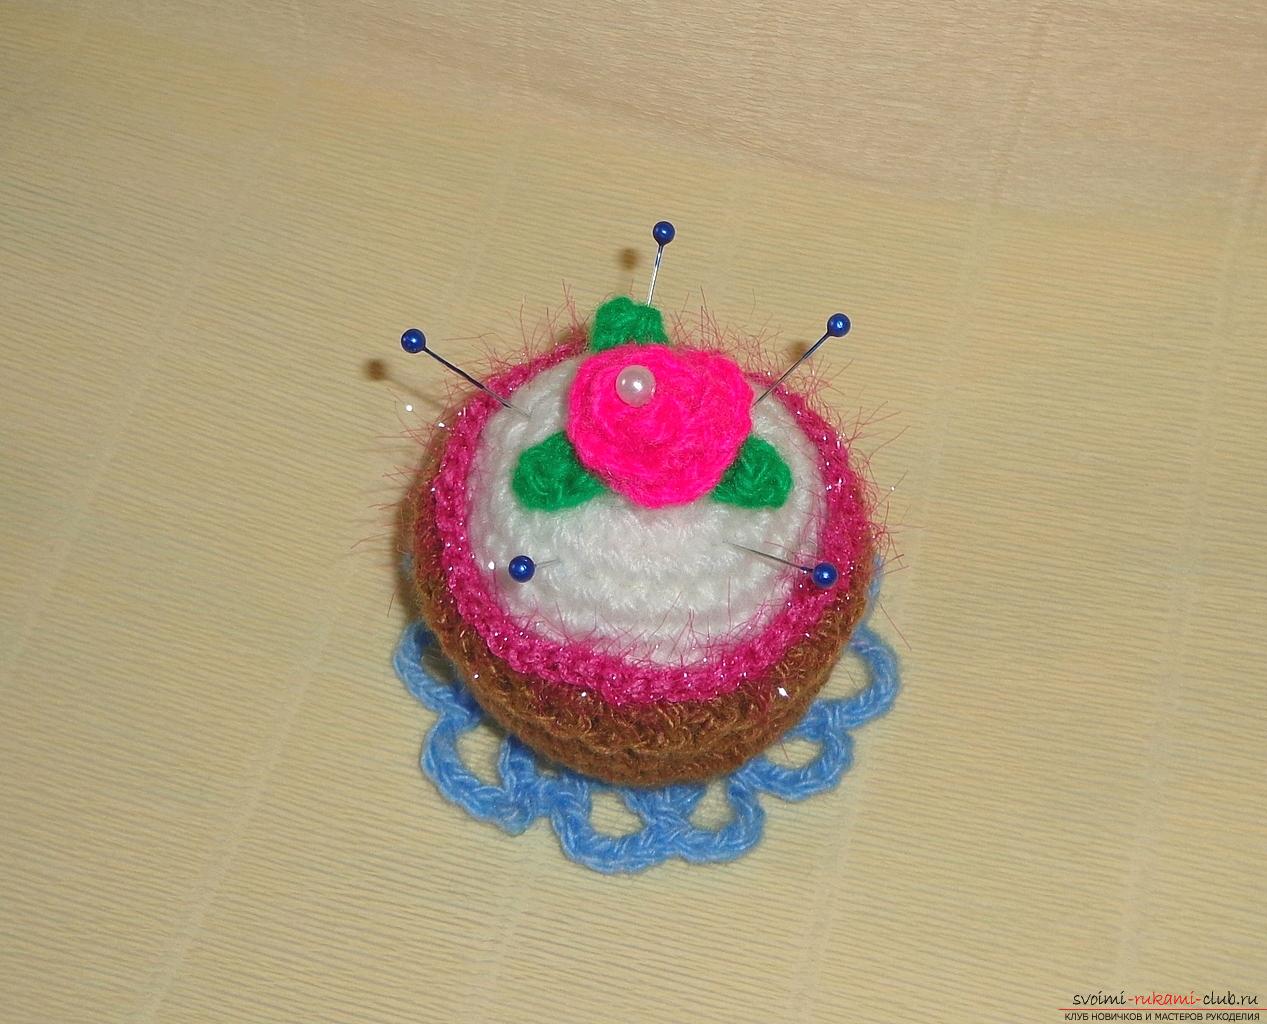 This crochet lesson for beginnerswill tell you how to create with your own hands a needle bed in the form of a cake. For knitting crocheted needle can use acrylic or wool. The thread should be of medium thickness. Of course, the colors of yarn can be chosen to your taste, but I liked these colors. Needle was bright, tender and original. Such a needle bed can be linked both for yourself and give to a loved one who is addicted to sewing. The needle bar is compact, light, neat and easy to use. For knitting needles such materials:
We start to knit from a cake, that is it is necessarybrown yarn and hook for knitting the bottom of the cake, I knit crochet under number 2.5. As it is necessary, we dial a chain of 3 loops, we close in a ring. 2 row - we tie in a circle to get a smooth circle. 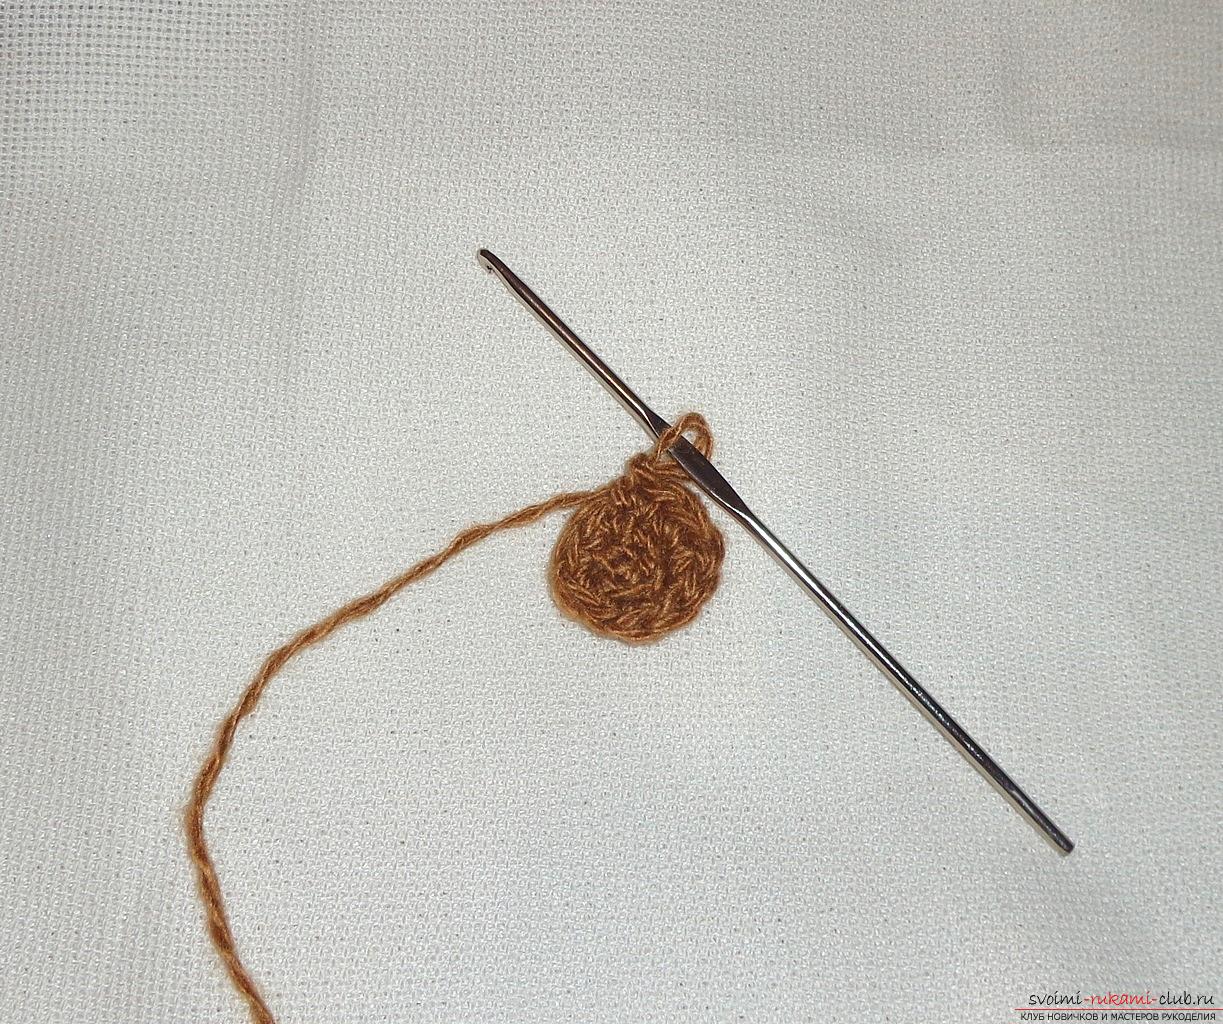 3 row - from each loop of the row you need to make 2 loops. That is, the number of loops will be doubled. 4-5 rows - from each 2 loop of the row you need to make 2 loops.
 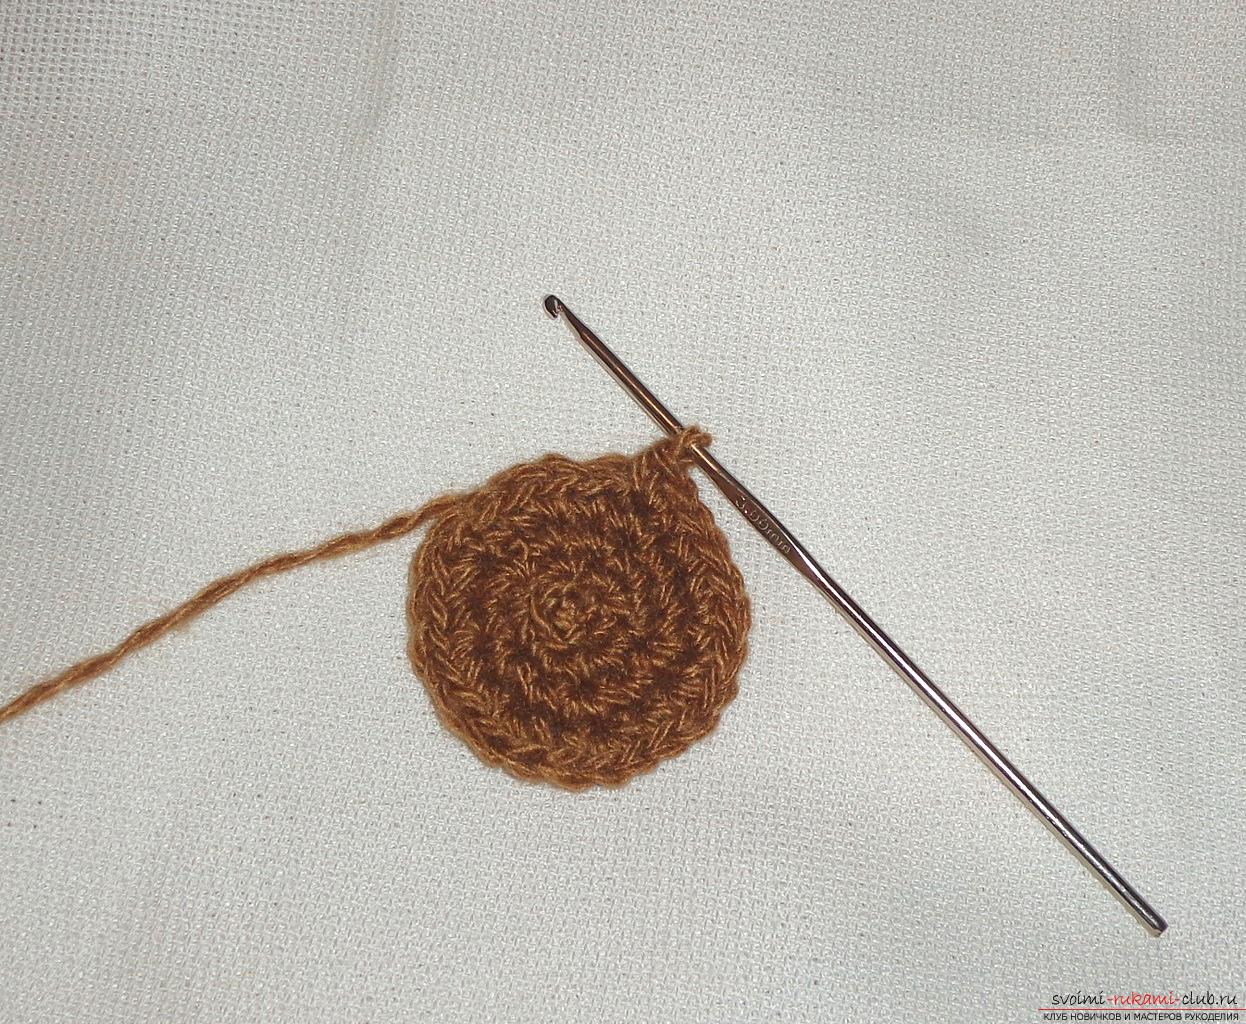 6-7 rows - in these rows the addition of loops is notIt is required, therefore it is simply tied. You can already begin to form the bottom of the cake. This requires a circle of cardboard. Cut a circle of cardboard to the size of the bottom, that is, whatever size of cake you want. Cardboard circle to paste to the bottom and continue knitting.
  8 row - from each 2 loop of the row you need to make 2 loops.
 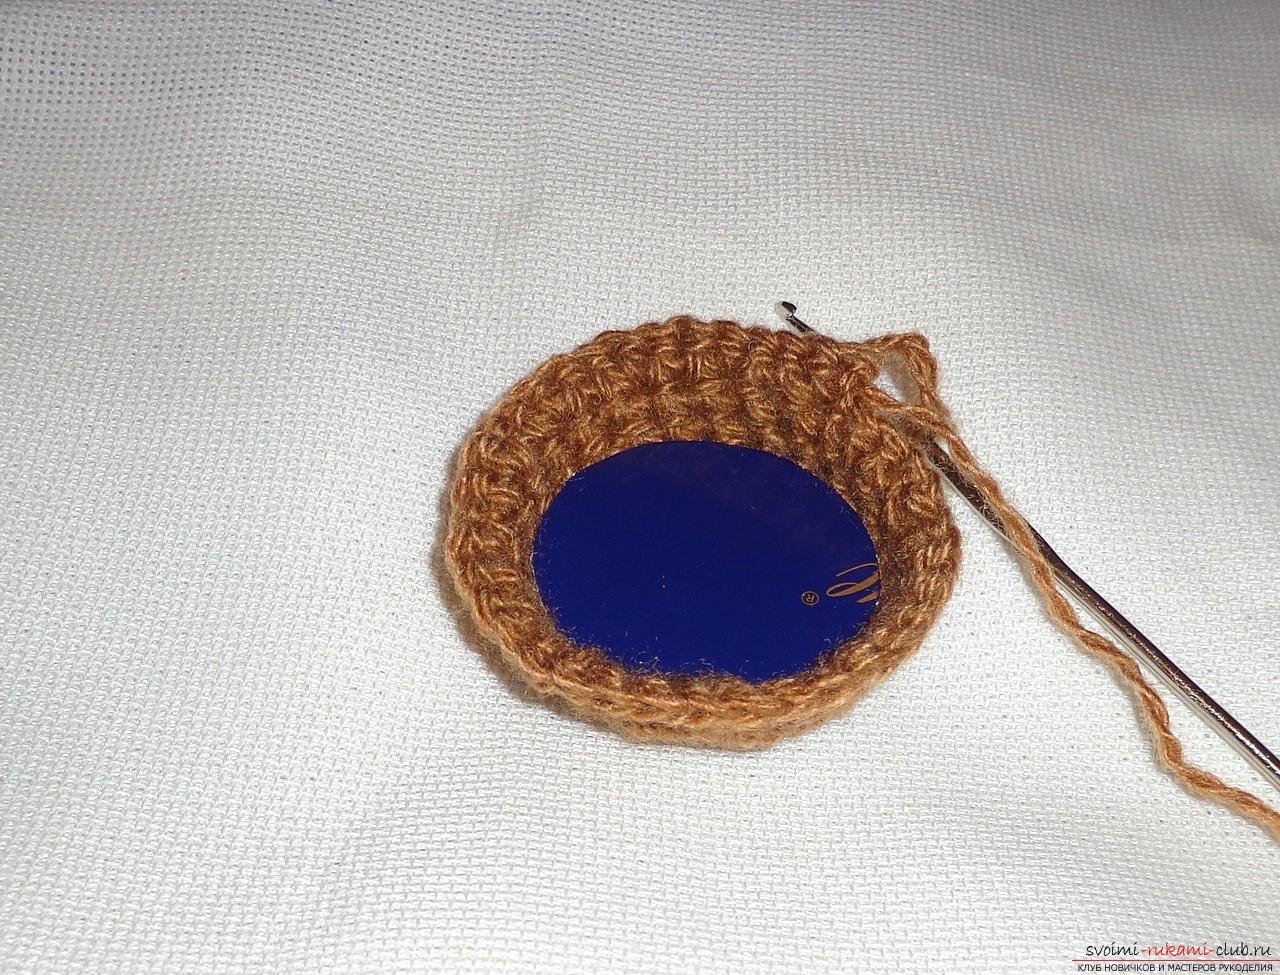 9-13 row - in these rows the addition of loops is not required, so they are simply tied.
 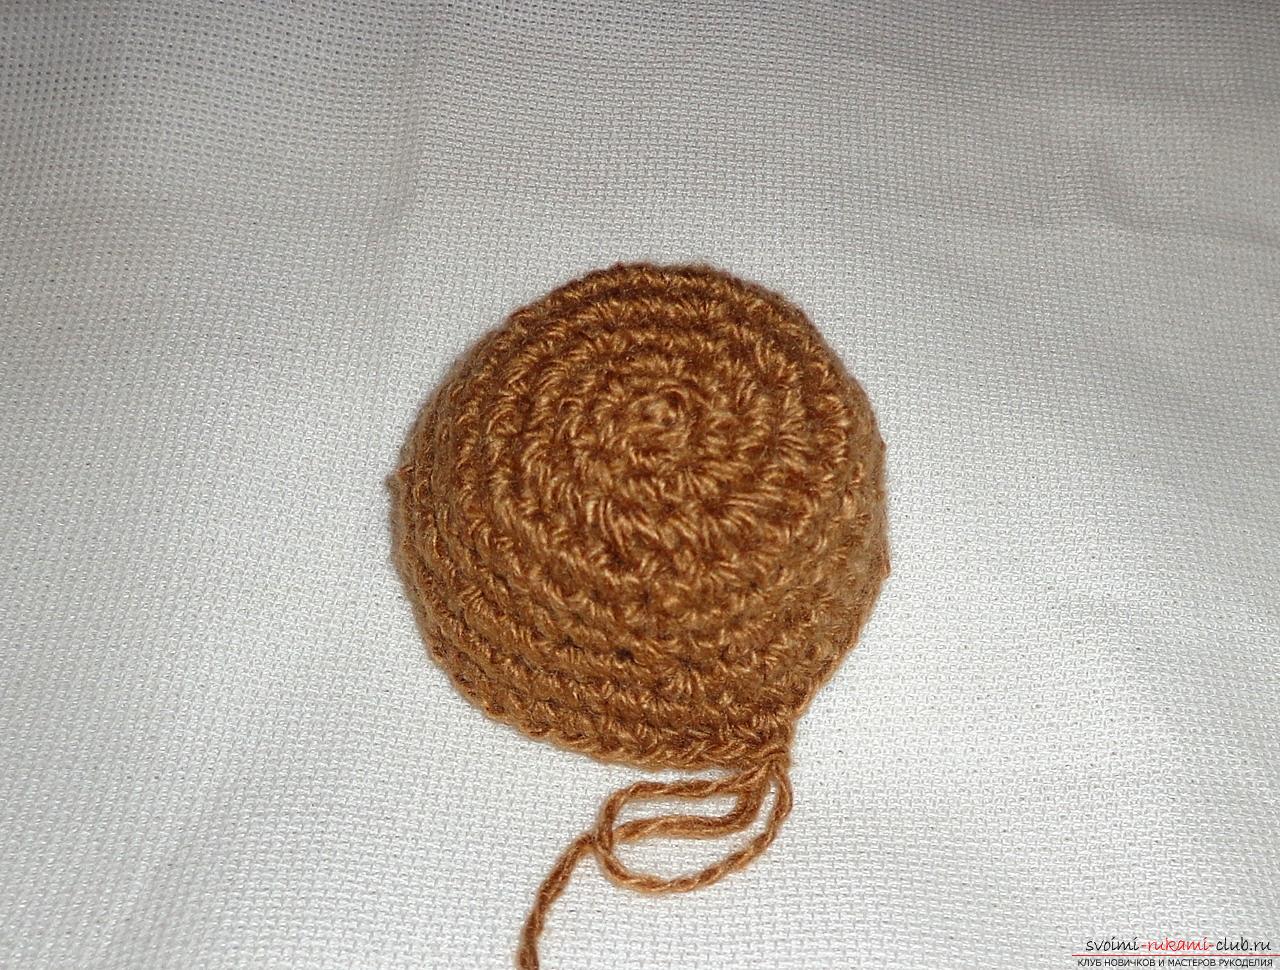 14 row - tie this row with columns with a crochet. Begin to fill the sintepon with the bottom of the cake.
 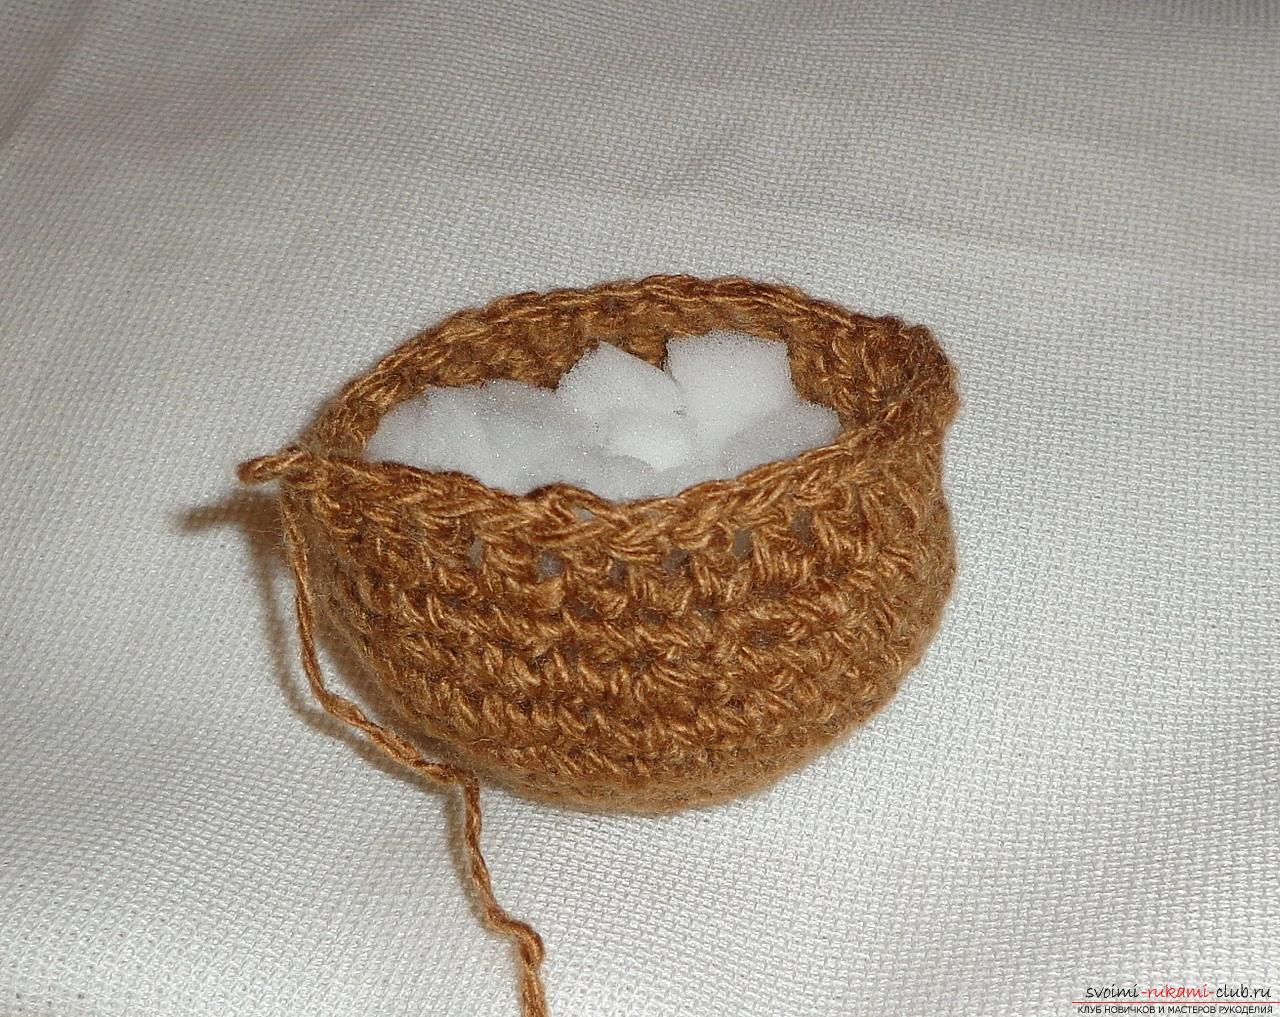 15 row - also tied with columns with a crochet, andthen tuck the bottom of the cupcake into one row of sticks. The result is a rim, thanks to which the cake will keep the shape. We cut off the brown thread with scissors, we will not need it, since the lower part of the cupcake is ready.
 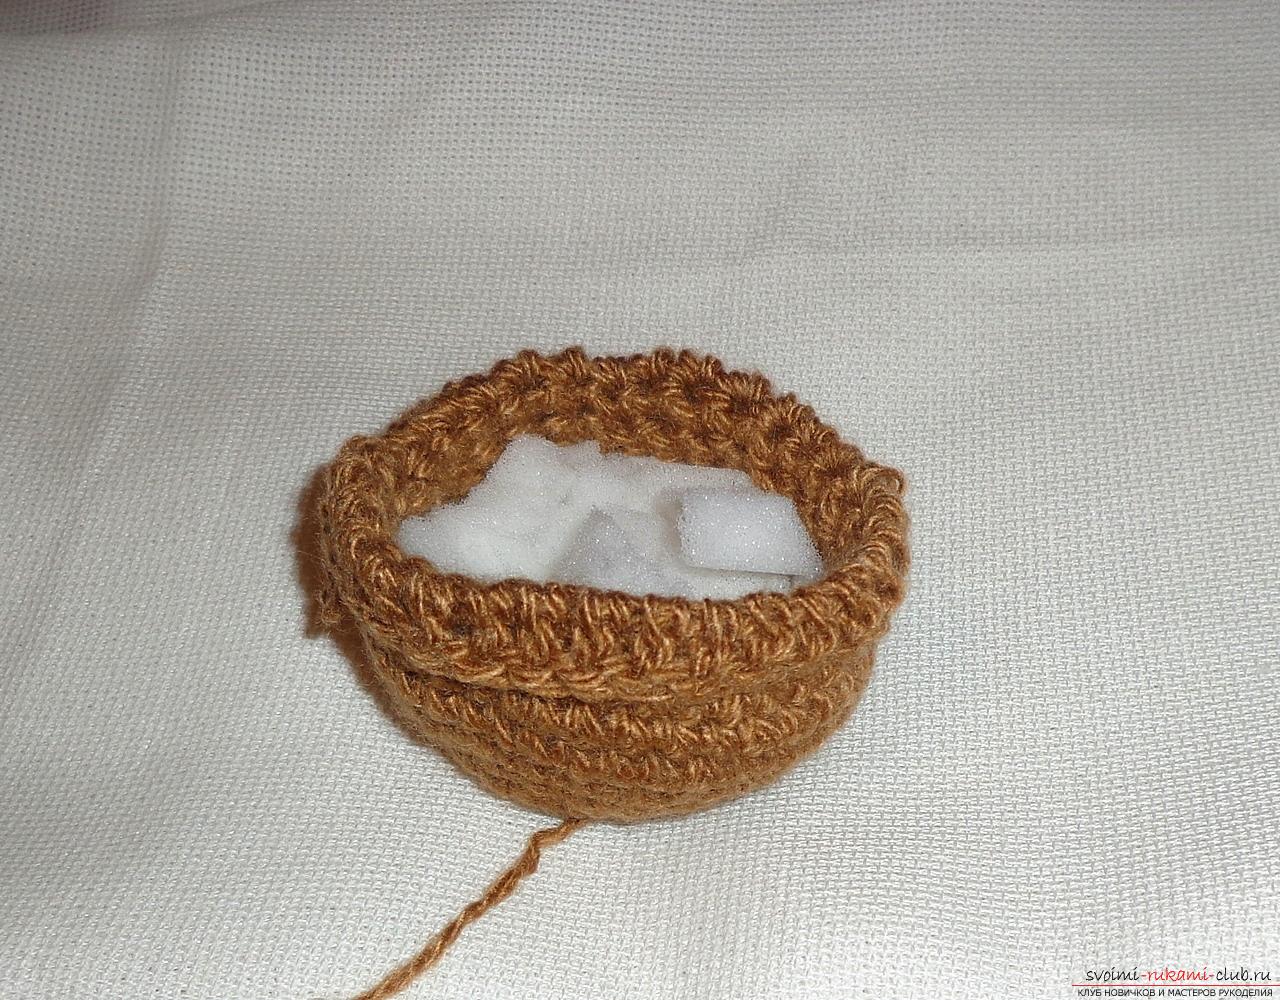 The upper part of the cake is knitted from white yarn andcrochet number 2,5. As it is necessary, we dial a chain of 3 loops, we close in a ring. 2 row - we tie in a circle to get a smooth circle. 3 row - from each loop of the row you need to make 2 loops. That is, the number of loops will be doubled. 4 row - in this row the addition of loops is not required, so it is simply tied. 5 row - from each 2 loop of the row you need to make 2 loops. 6-7 row - in these rows the addition of loops is not required, so they are simply tied. We cut off the white thread with scissors, the upper part for the cupcake is ready.
 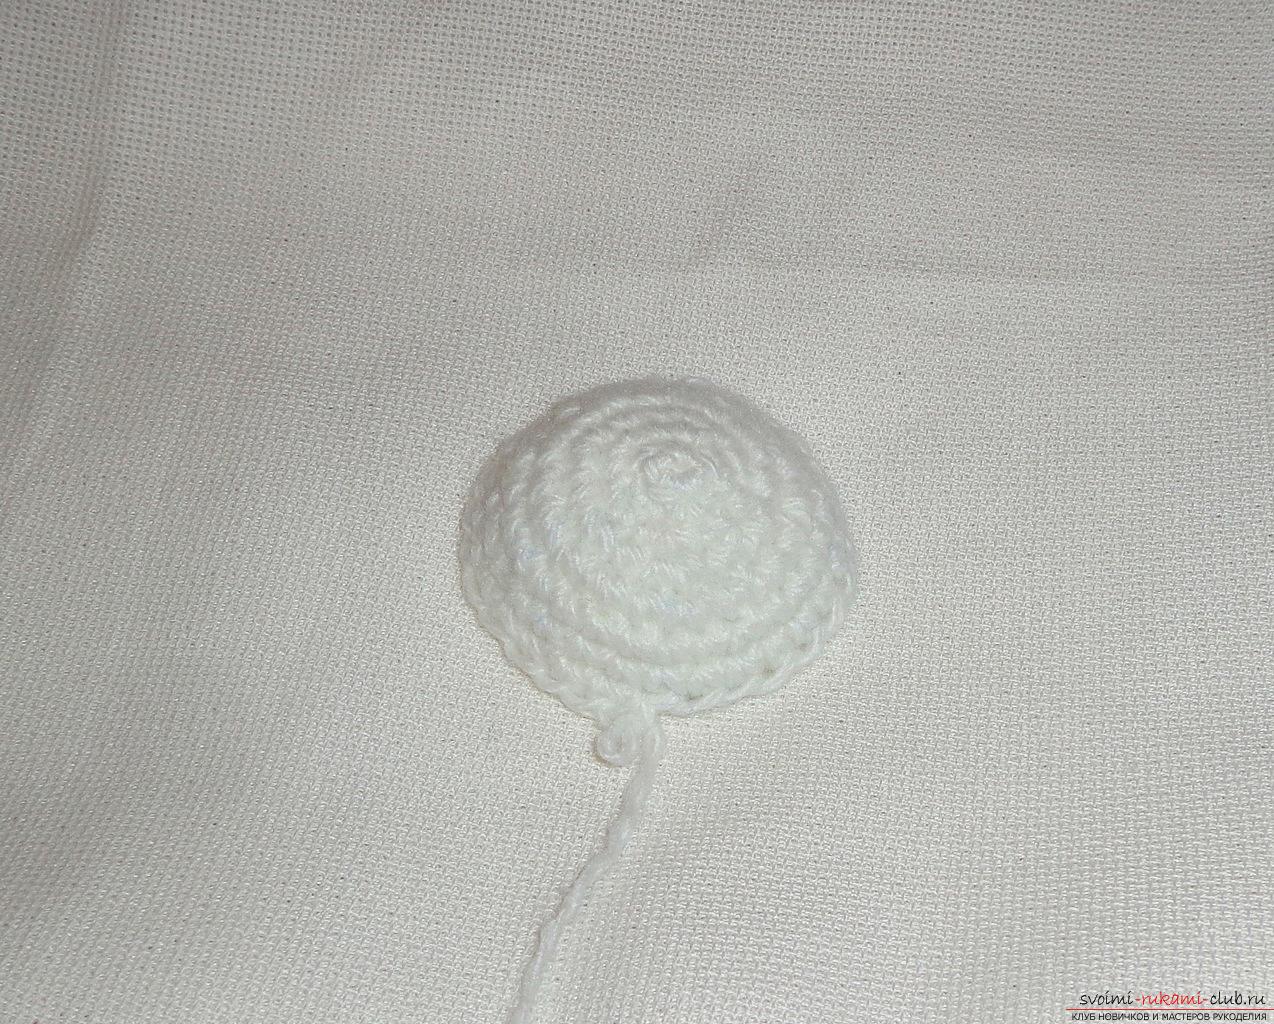 The upper white portion of the cake is obtained a littleless than the lower part, so it is inserted into the lower part. The lower part is well filled with sintepon, smear the upper part with glue from the bottom and glue it to the brown part, forming a cake.
 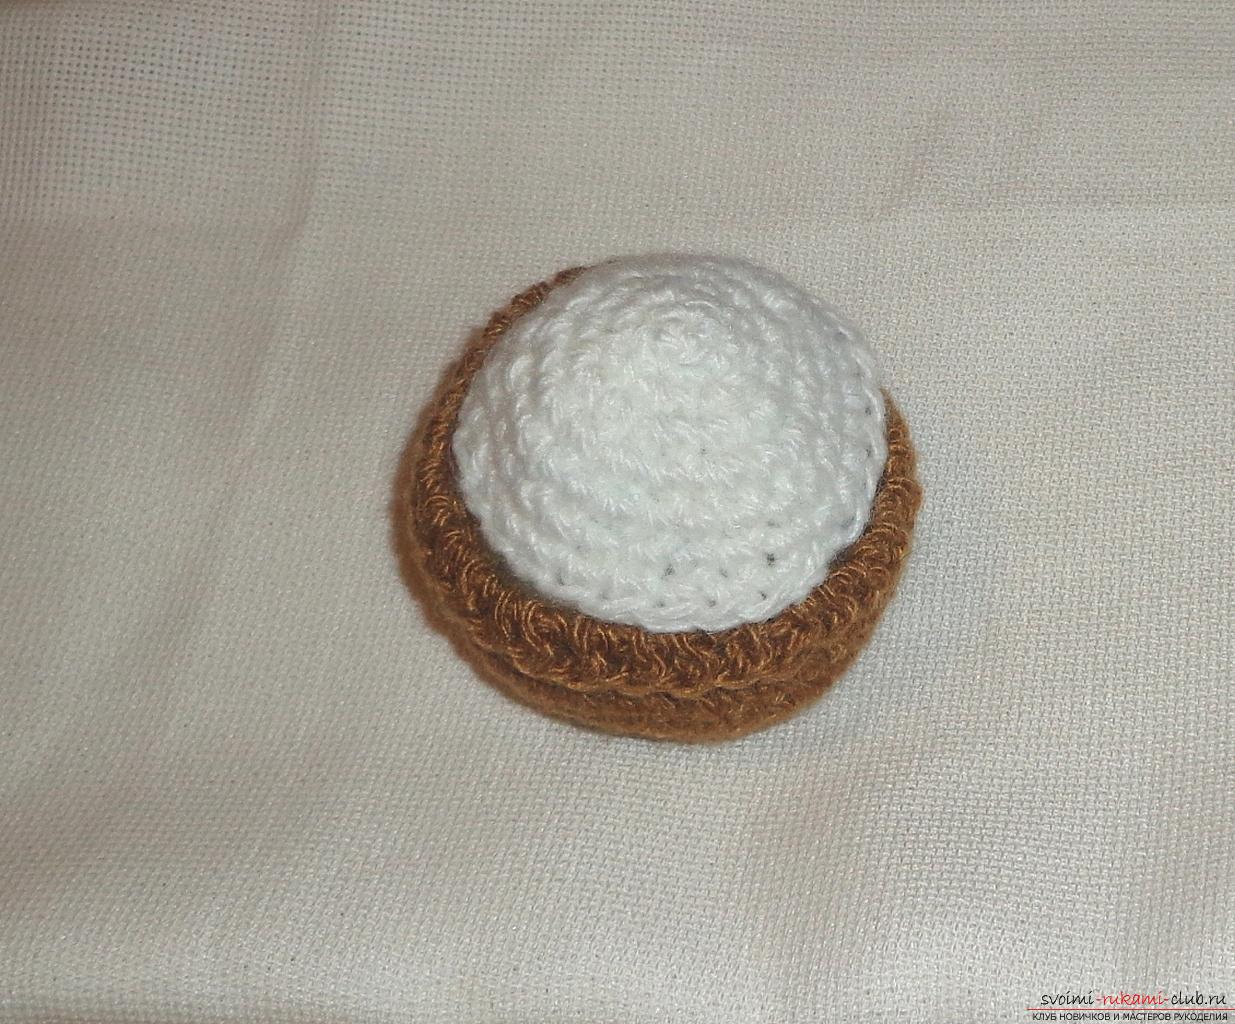 We take for work pink yarn, but with a lurex thread. To tie a chain of 48 loops, this will be a small bezel for a cupcake.
 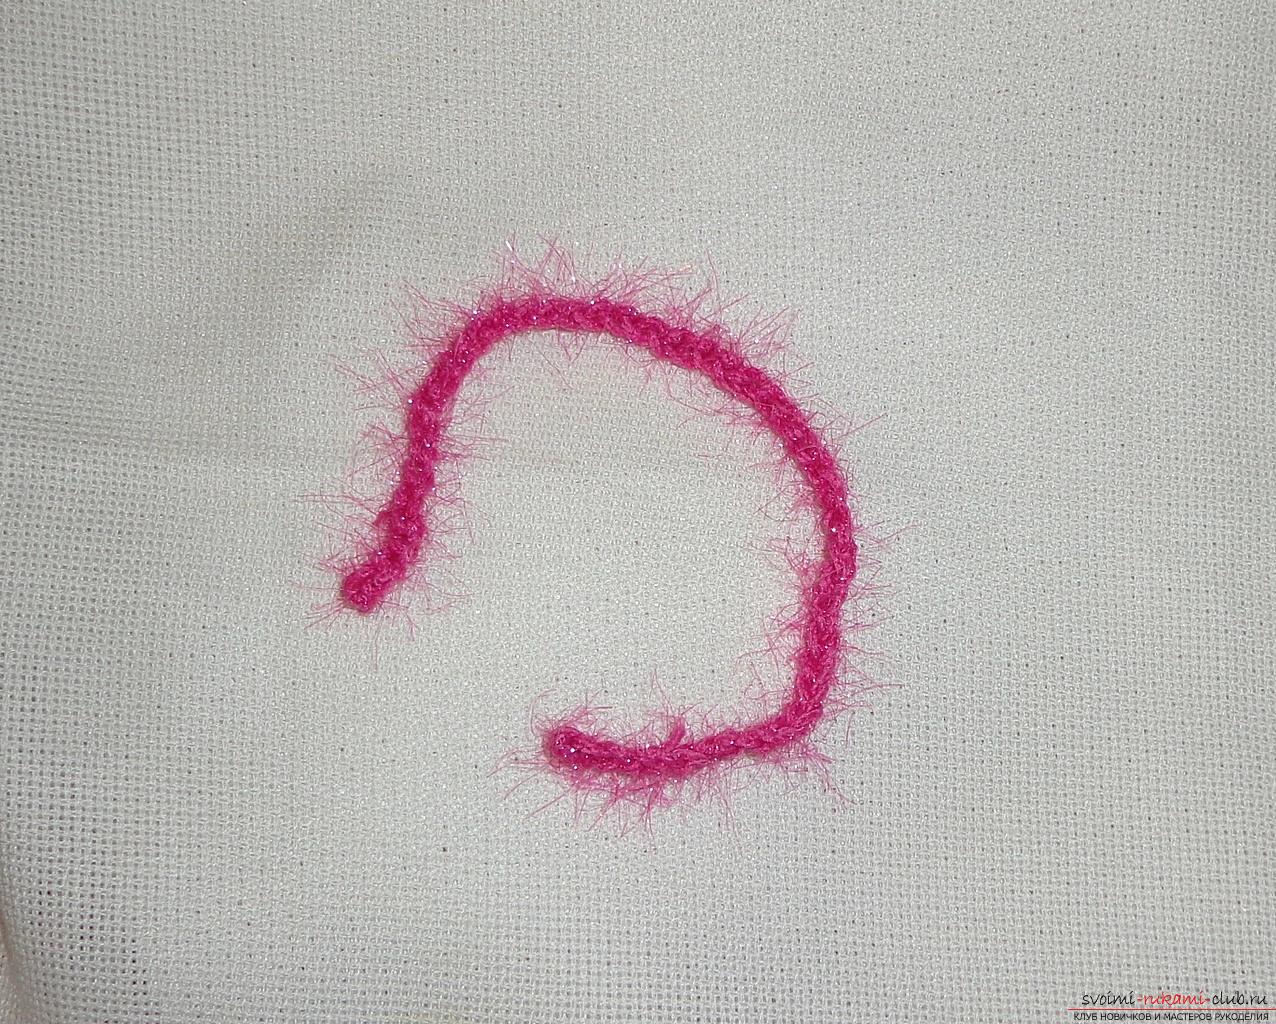 We glue a chain of pink yarn in a circle.
 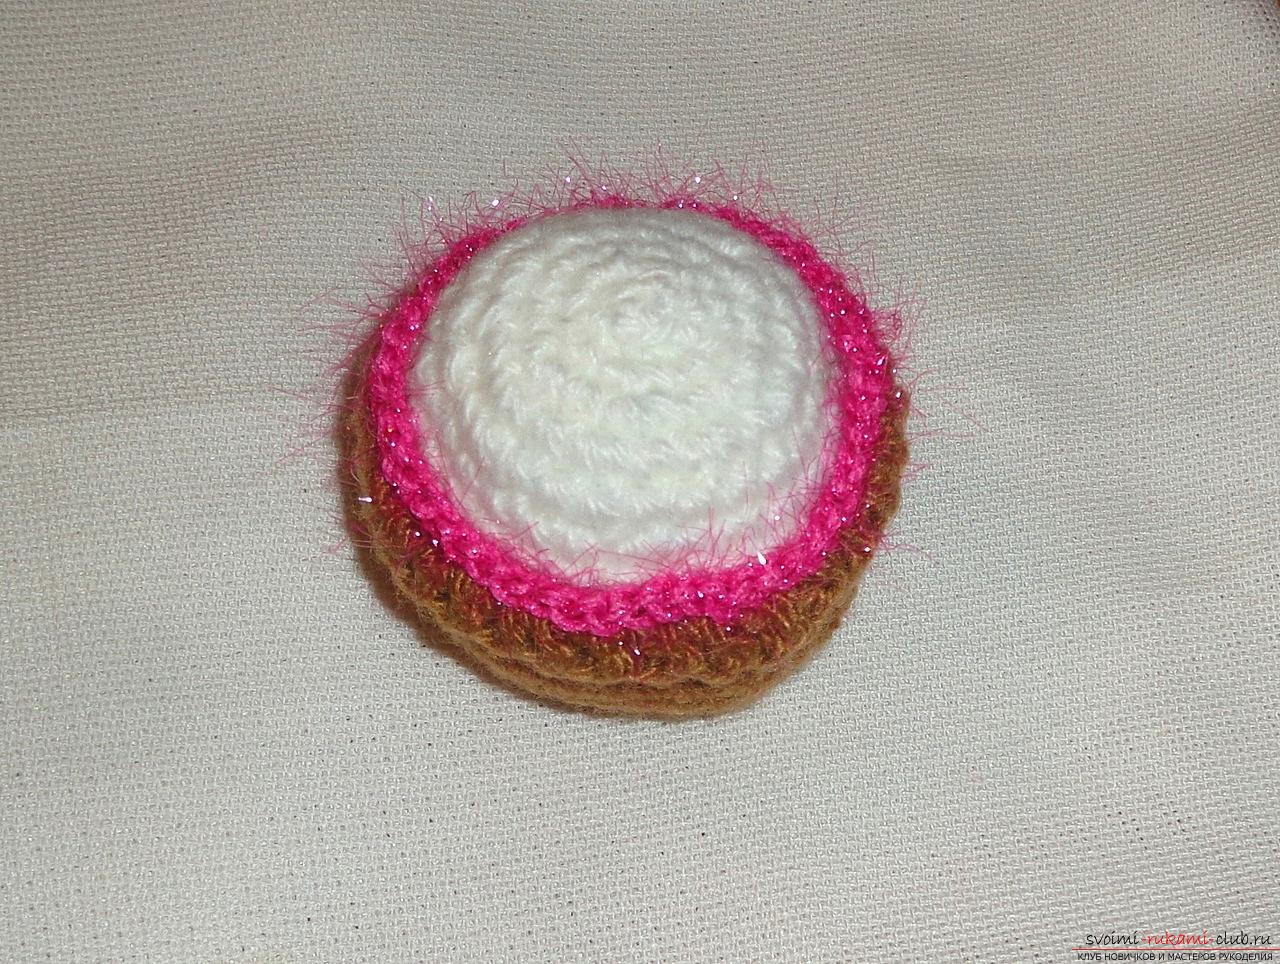 Napkin for cake is made from blue yarn and hook №2,5. First, a chain of 4 loops is typed, closed in a circle and tied around, passing through the center of the workpiece.
 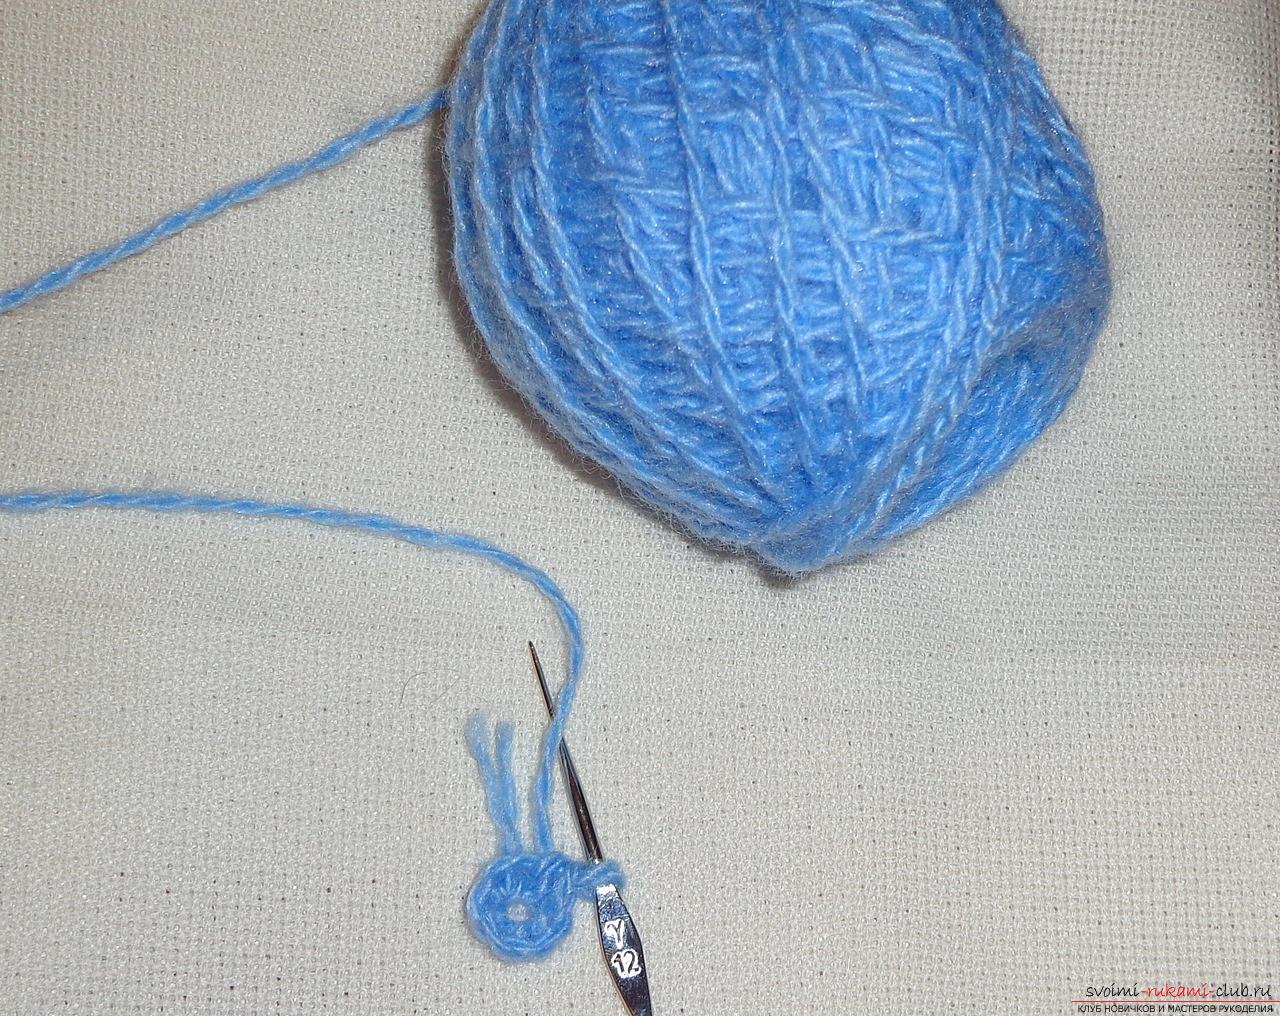 Then we knit with semirings, the first row consists of 5 semirings consisting of 5 loops.
 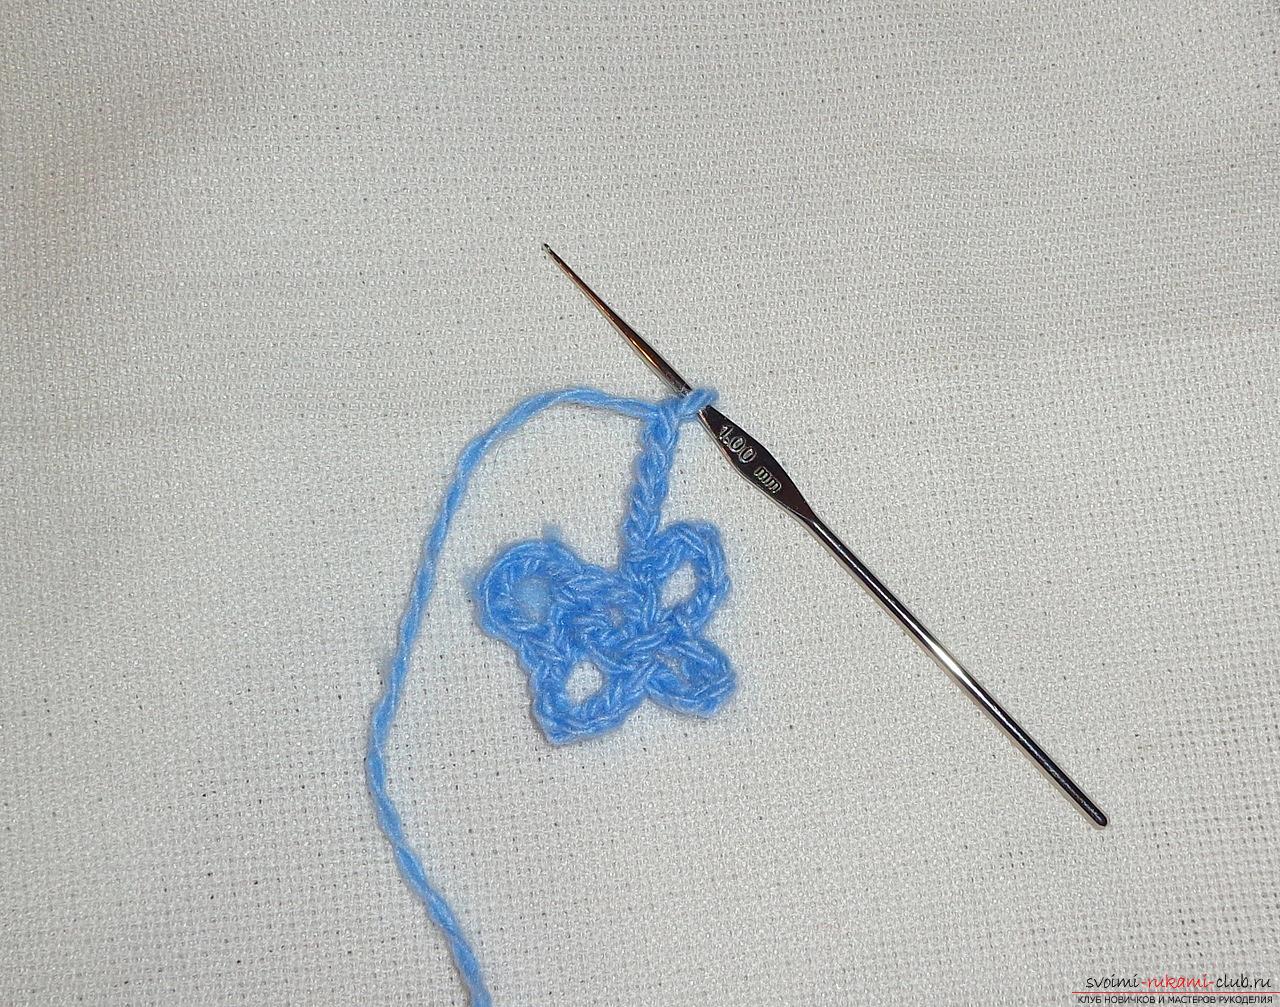 The second row consists of 9 semirings consisting of 5 loops.
  The third row consists of 12 semi-rings consisting of 5 loops.
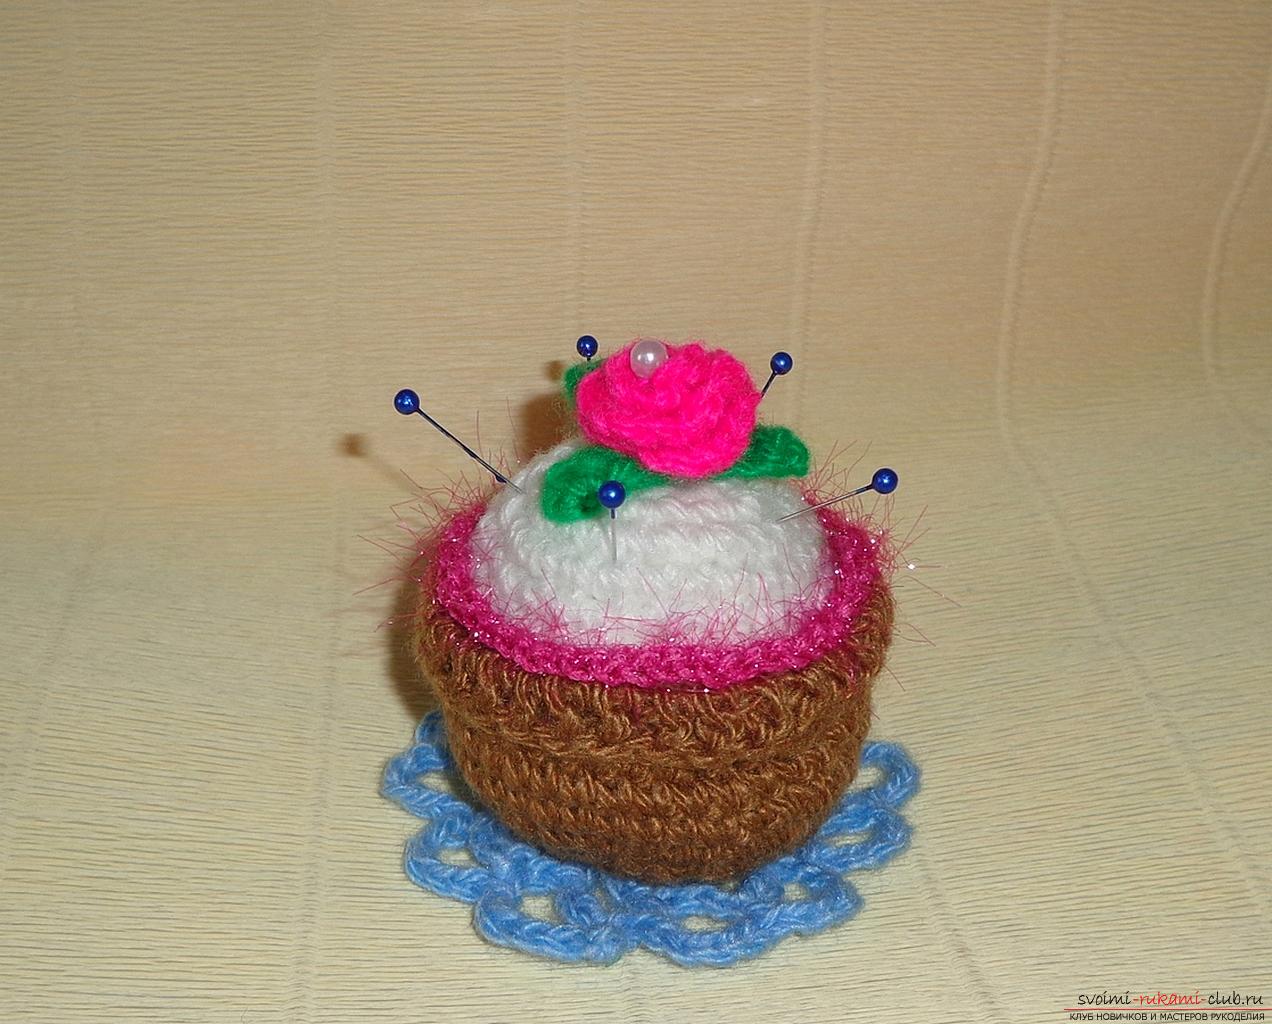
 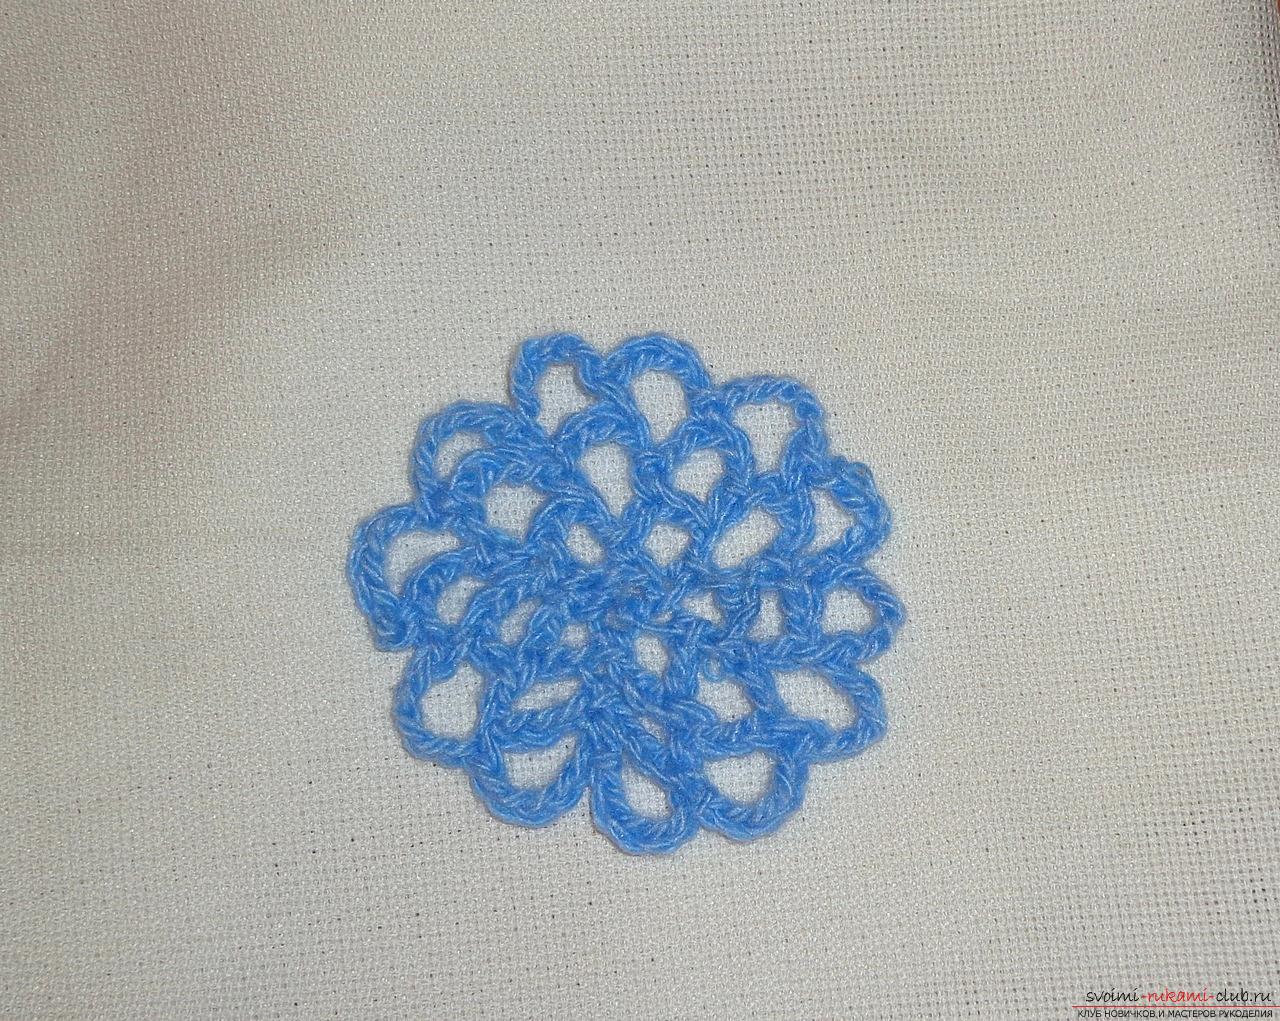 Napkins do not need to be starched, it keeps the shape well. The napkin must be glued to the bottom of the cupcake.
 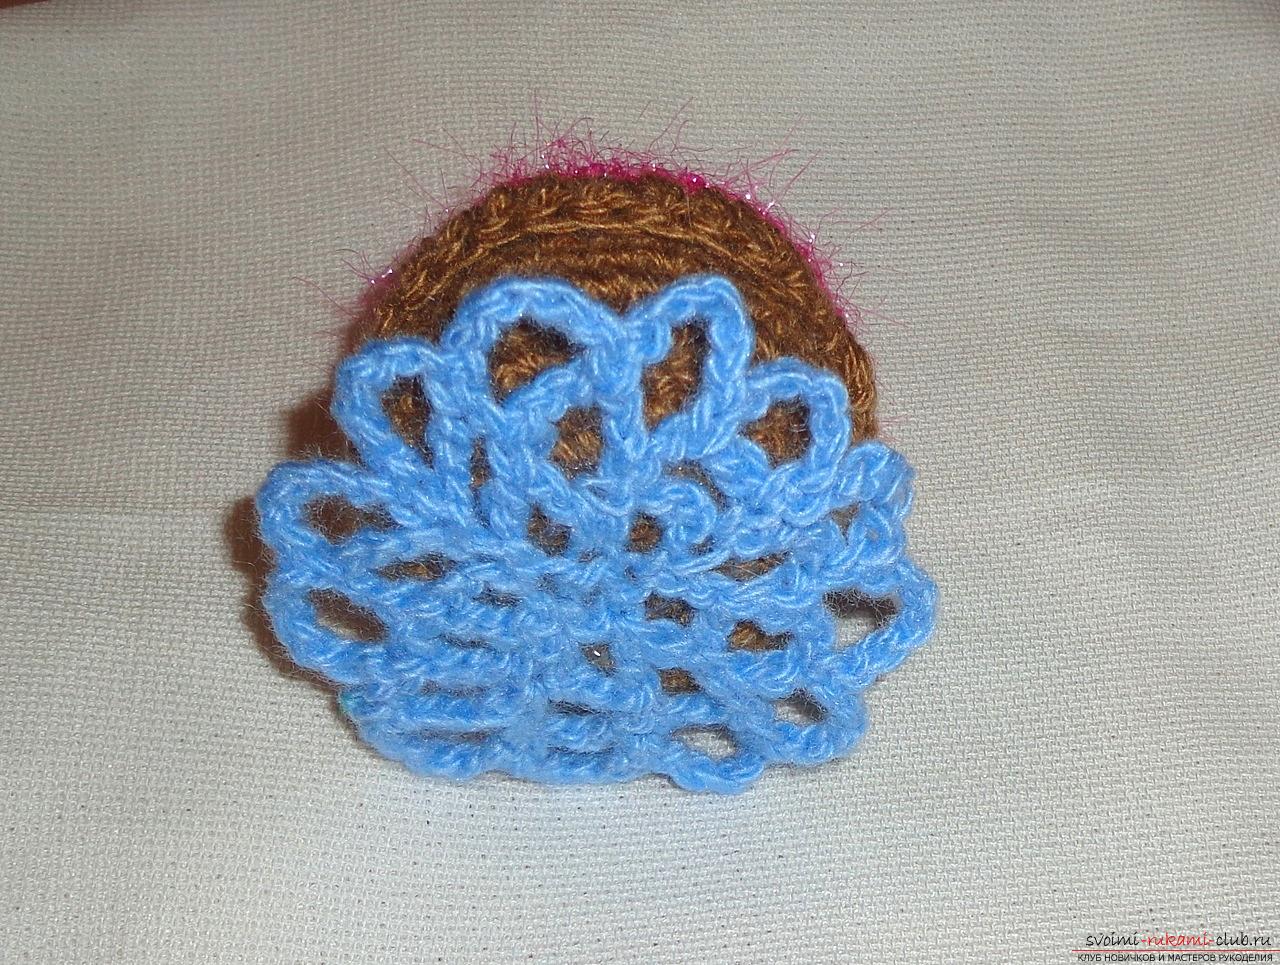 Now we are going to decorate the cake, for thisit is necessary to connect the rose with the leaves. The leaves are knitted from green yarn and hook No. 2. Pick up a chain of 4 loops and tie in the opposite direction. One leaf is ready, bind just 2 more leaves.
 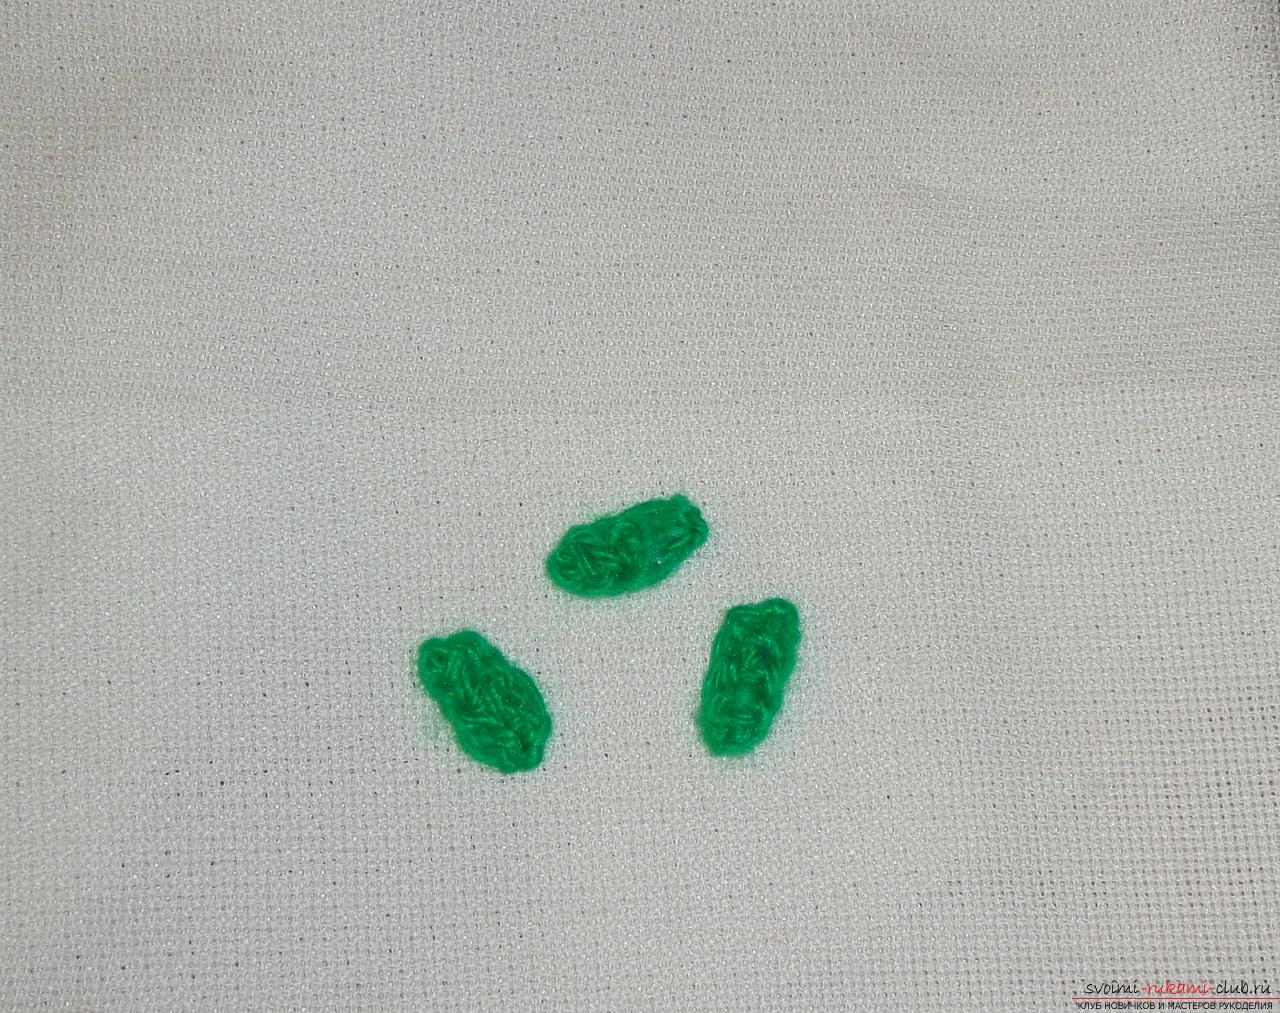 We knit a rose from pink yarn and hook №2. Tie 4 petals from 4 loops, then tie 3 petals from 4 loops, and then 2 petals out of 4 loops. The rose is ready. Cut the pink thread with scissors.
 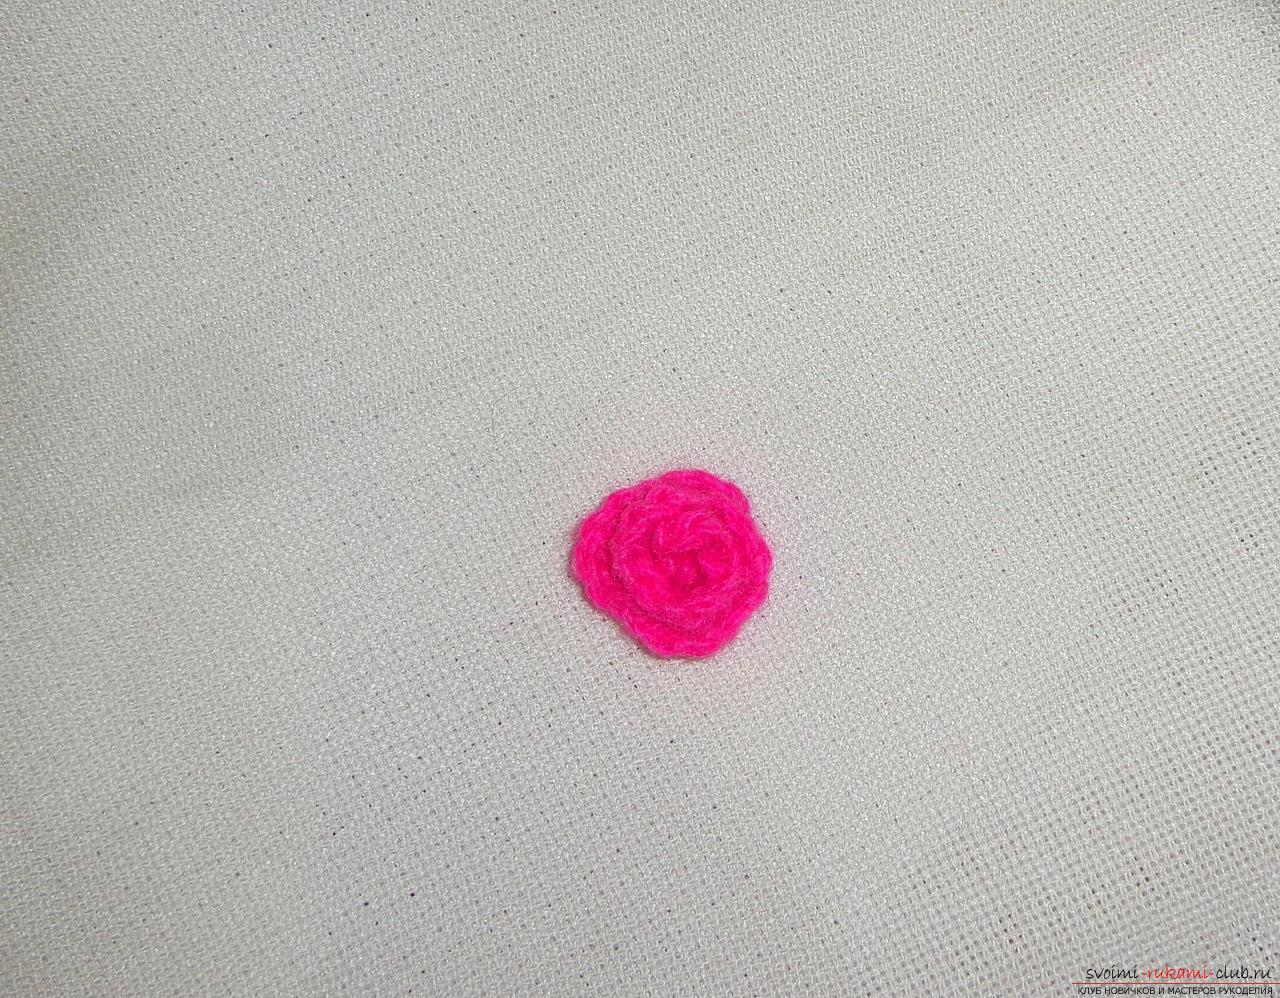 Top green firstleaves, and then on top of them a rose. Put a white bead of medium size in the center of the rose. The color of the bead can be any, but, in my opinion, a white bead is very suitable for these colors.
 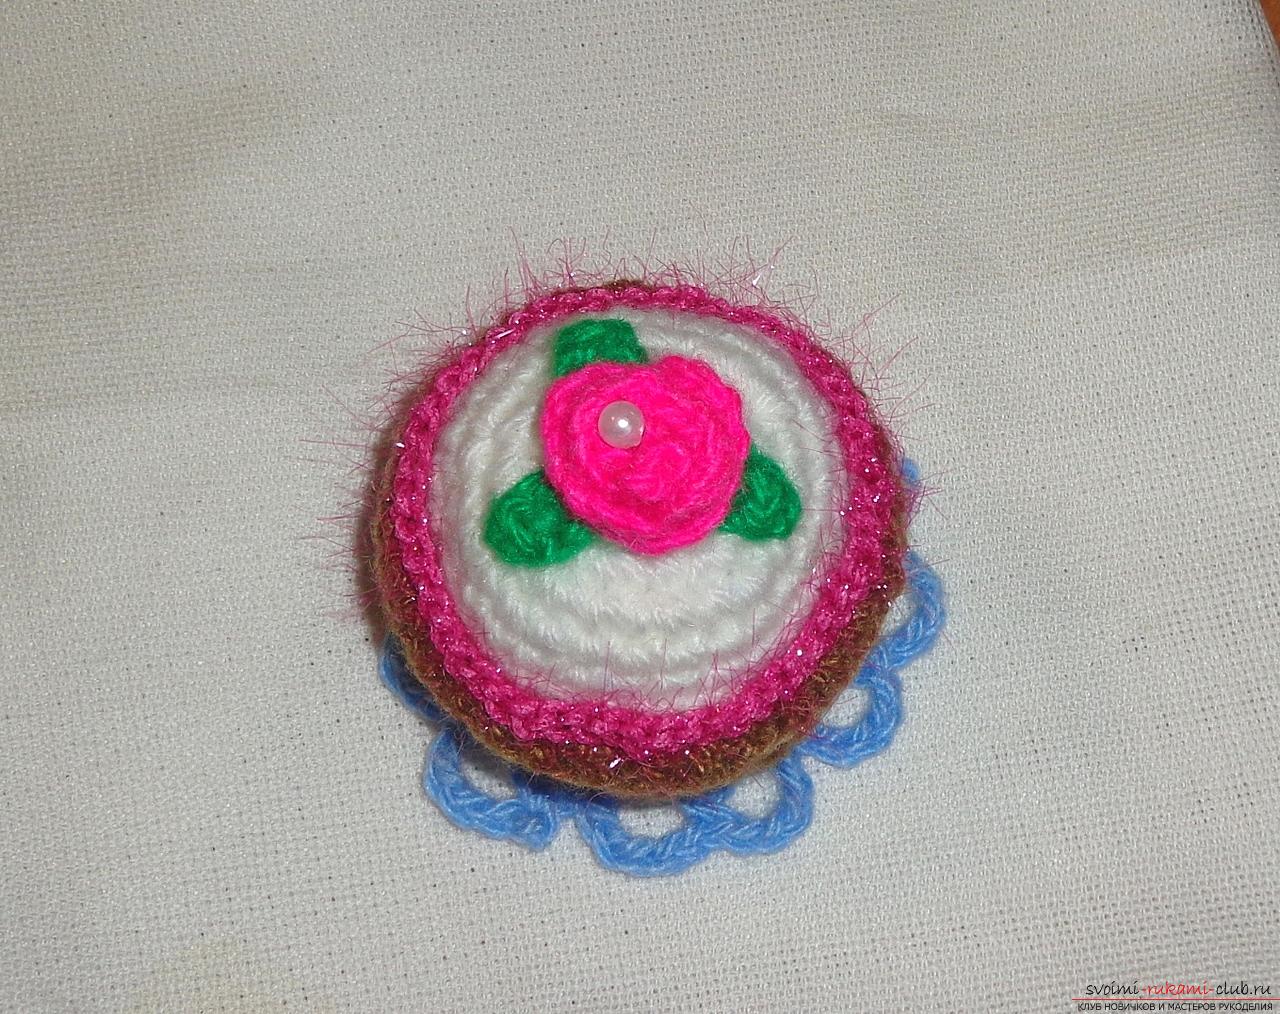 Needle-cake ready! It can be inserted into needles and put the needle bed on the shelf or to the sewing machine. Needle is so beautiful that you can simply put it on the closet as a souvenir or give it to a child.
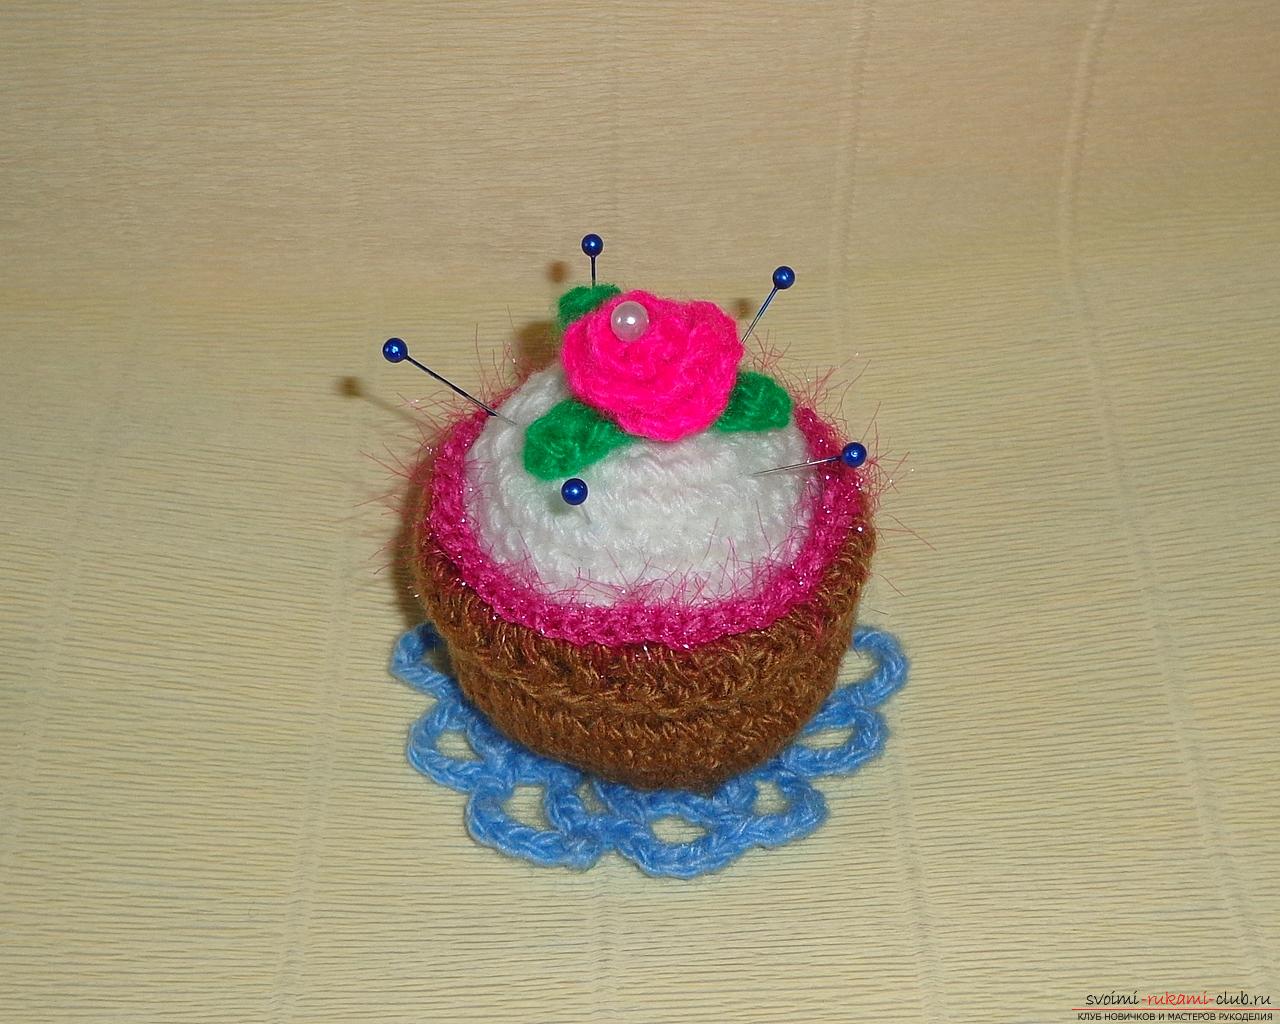
Comments
Related posts:
 This detailed master class contains a crochet lesson and will teach you how to bind berries by yourself.
 This detailed master class of crochet crochet colors will teach you how to tie a hair band with your own hands.
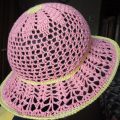 This detailed master class contains crochet lessons for beginners and will teach you how to crochet a summer hat.
 This detailed master class contains a quilling lesson for beginners and will teach you how to make yourself a quilling ballerina.
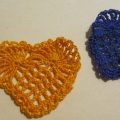 This detailed master class will teach you how to crochet beautiful valentines.