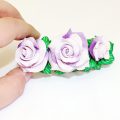
This detailed master class with photo and description will teach you how to make your own flowers from polymer clay for hair clips.
 To make your own flowers from the polymerclay for a hair clip, it is necessary to prepare the following materials: - Polymer clay (plastic) of yellow and green color. Red color at will - from it the decor will be made. - Liquid plastic - Skalka - Paper with texture (corrugated) - Base for barrette (automatic) - Stack with a ball - Blade - Acrylic paints, fine brush, pastel and lacquer if desired
 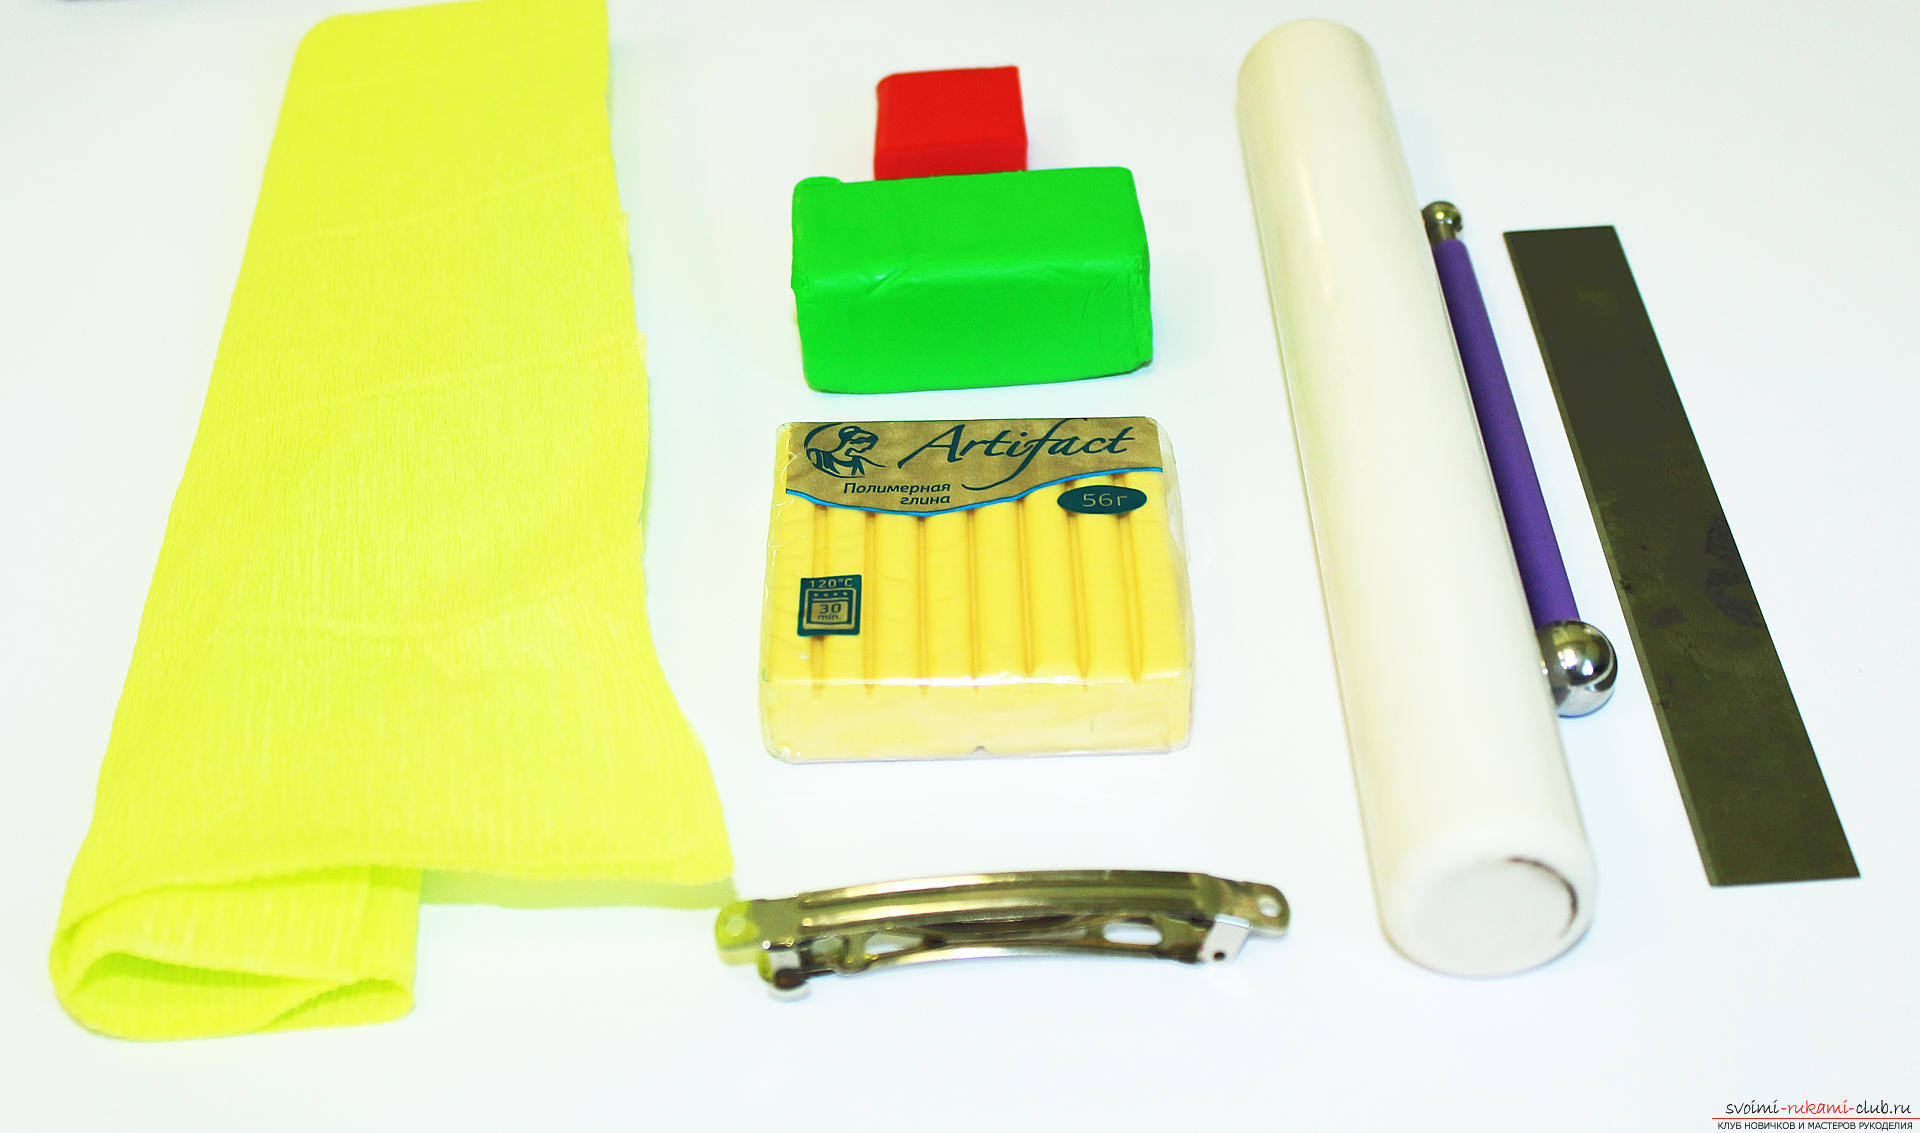 From yellow plastic we form thin cakes. To do this, we knead polymer clay, divide into small parts, we roll balls from these parts and each ball is flattened with fingers. We put all the cakes on a piece of corrugated paper.
 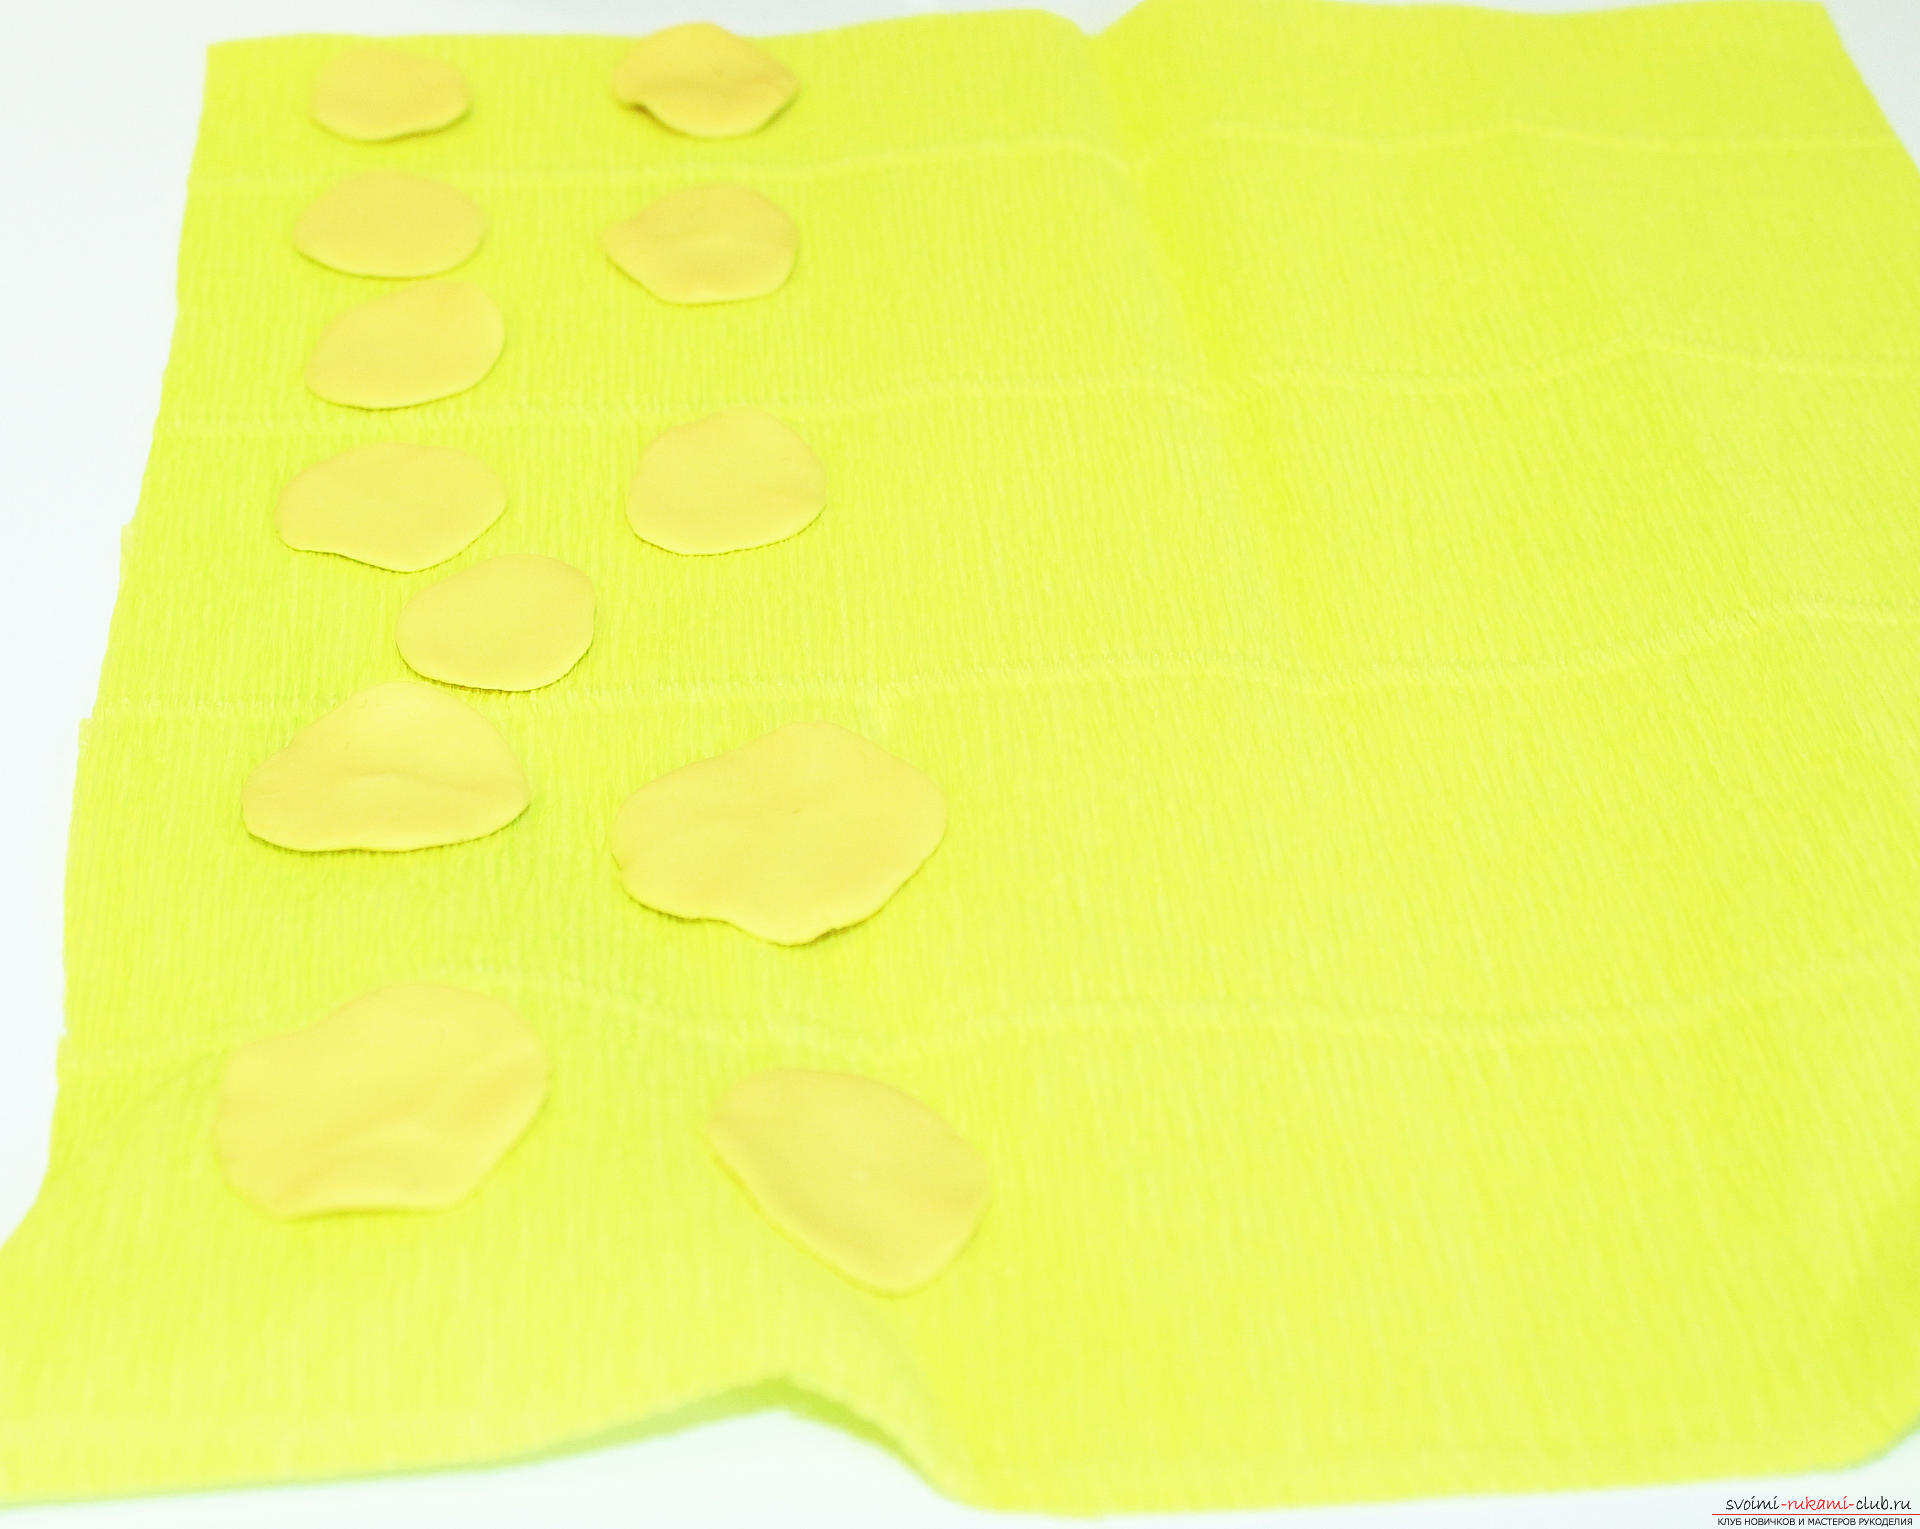 Cover the tortillas with paper.
 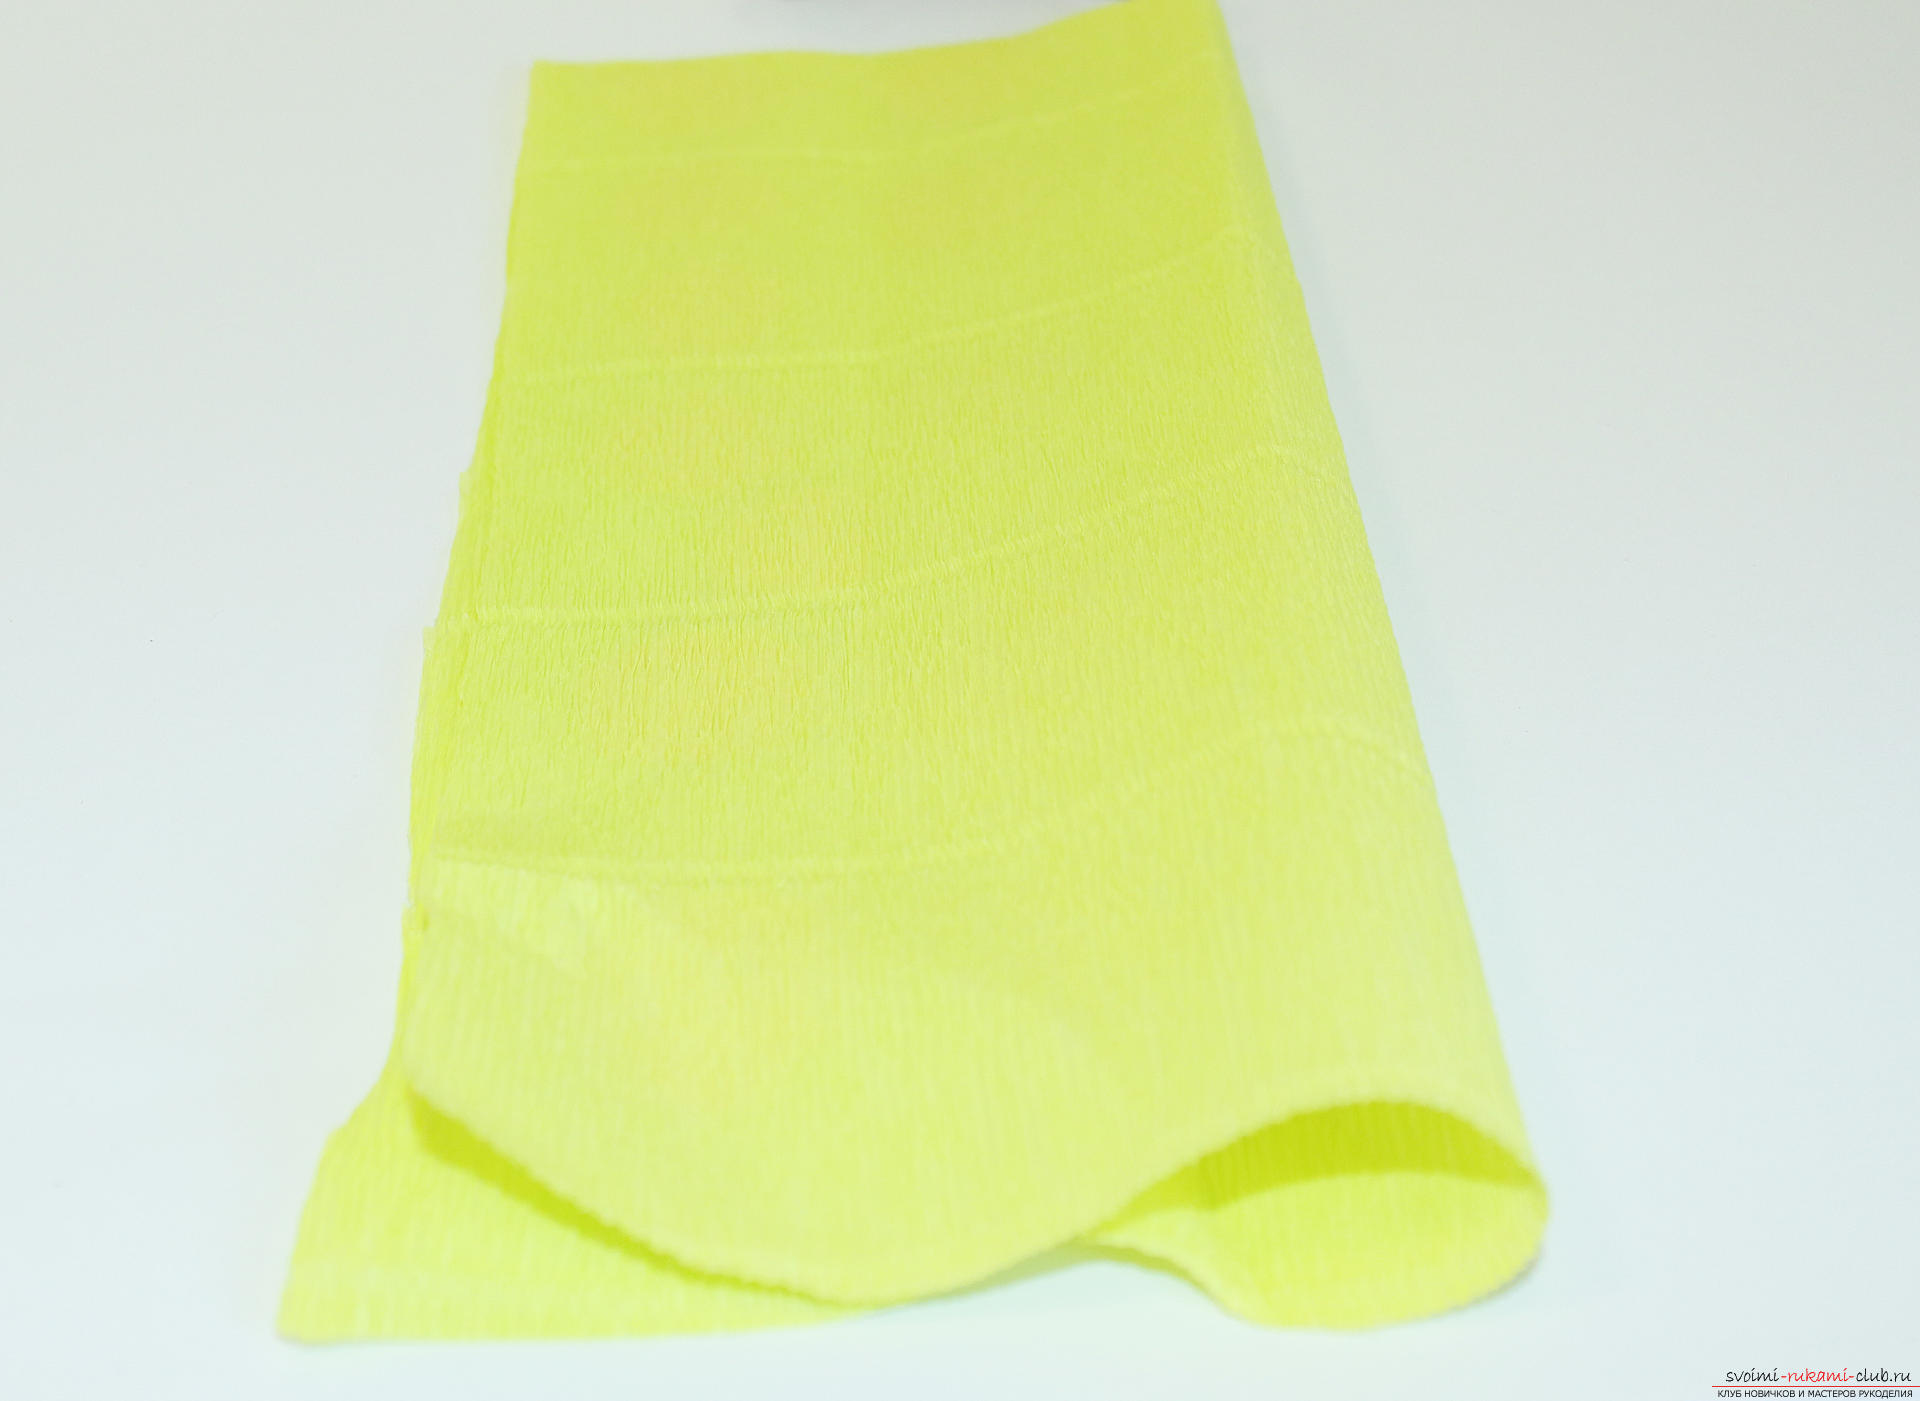 Rolling rolling on paper, so that the invoice is imprinted on flat cakes on both sides.
 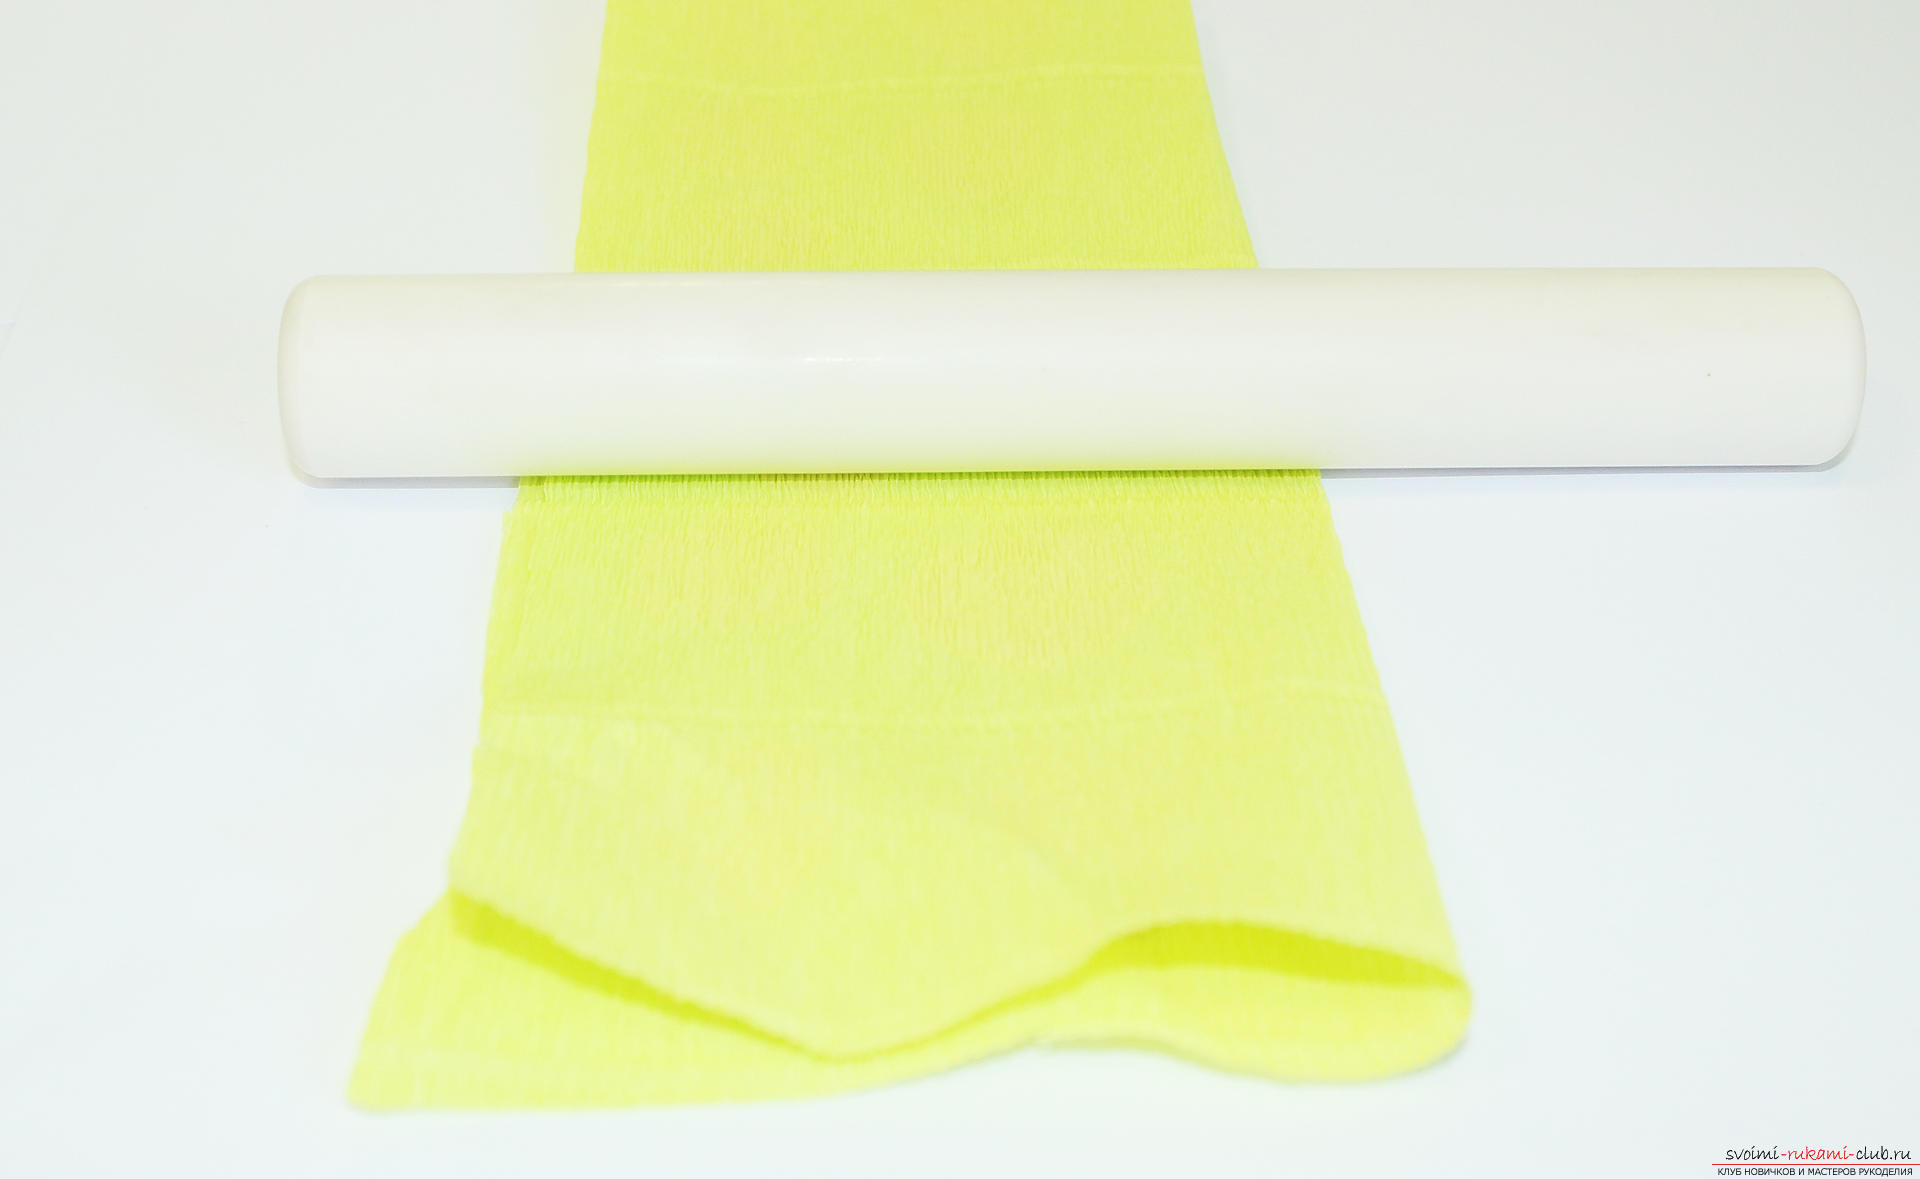 Gently remove the petals from the paper. If the plastic was well bent and if it does not crumble, the petals will be removed without effort and tears.
 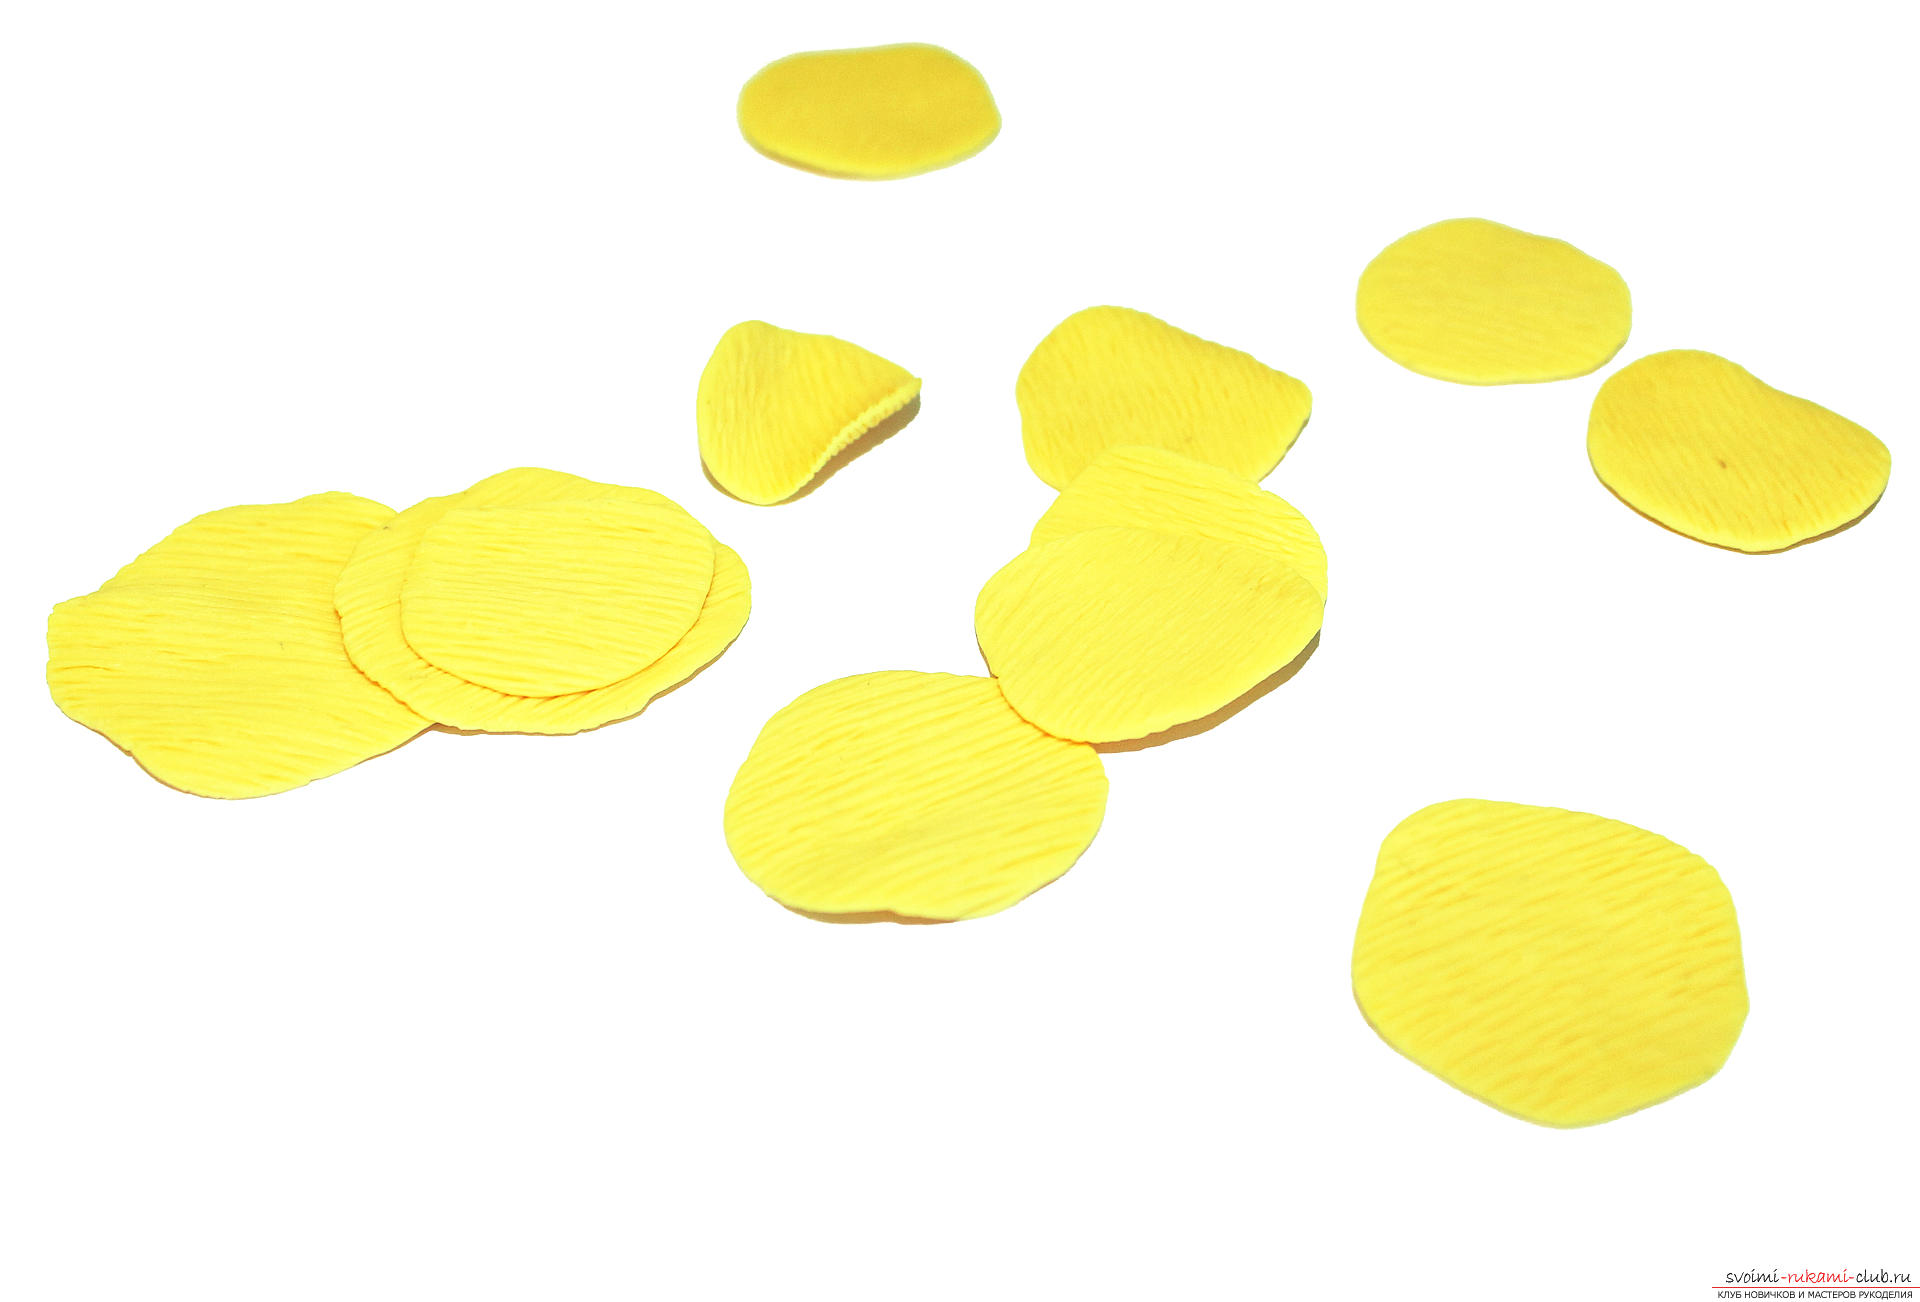 We put the petal on the palm and stack the ball with a petal more natural shape. At the same time, we try not to damage the invoice.
 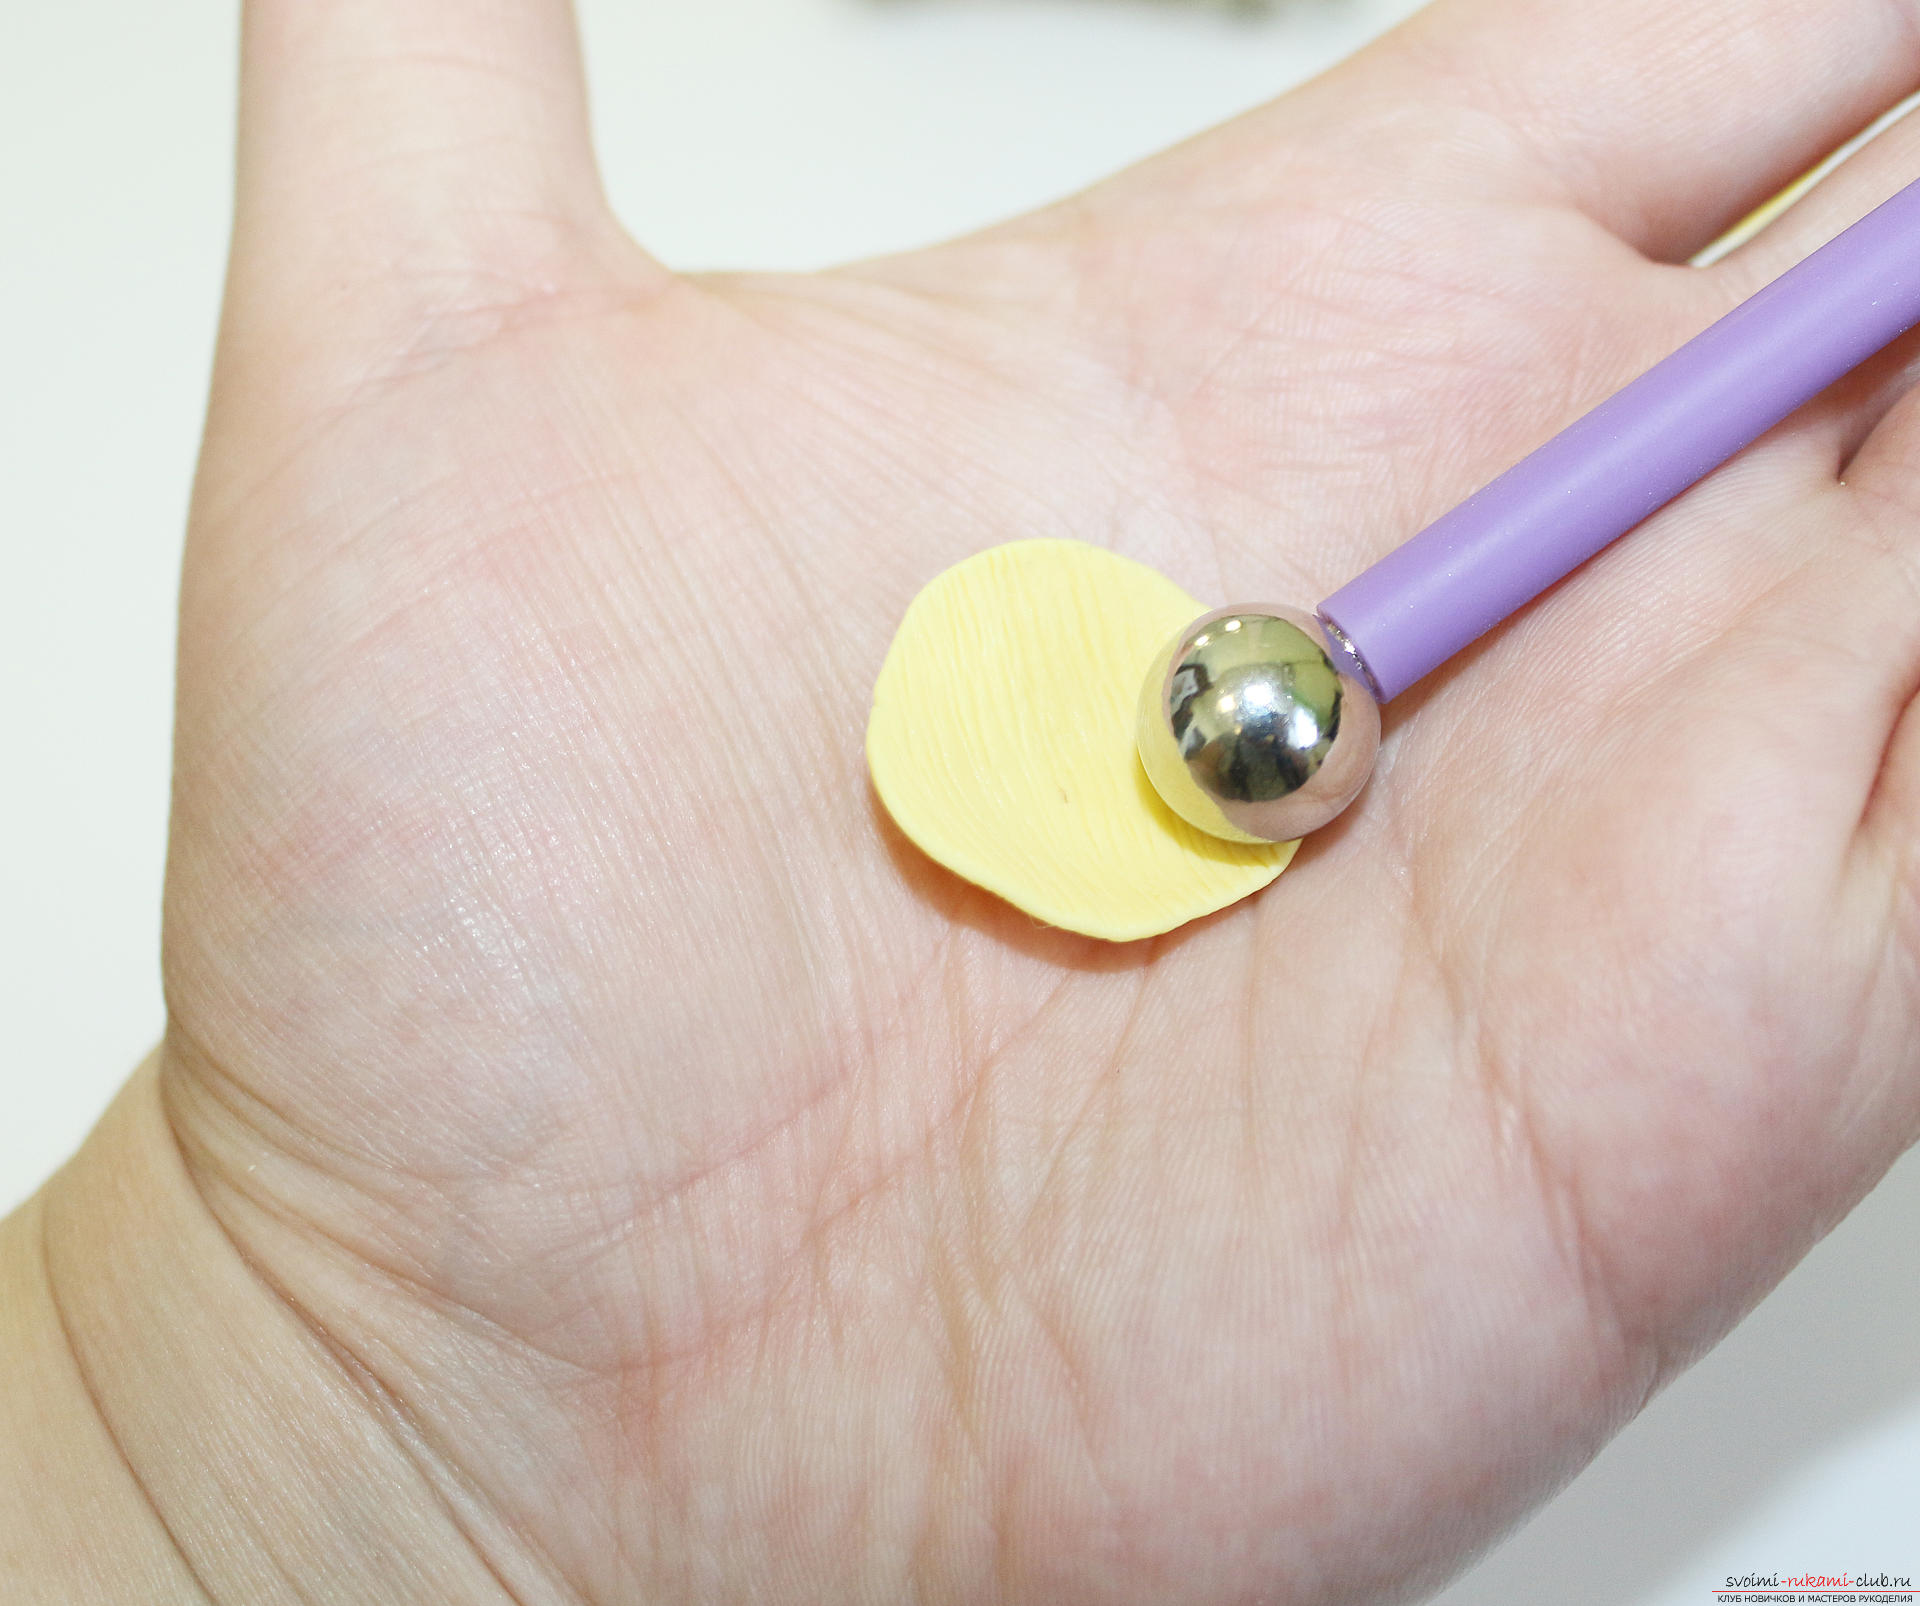 The petals turn out to be slightly curved, this will create a volume when assembling the flower.
 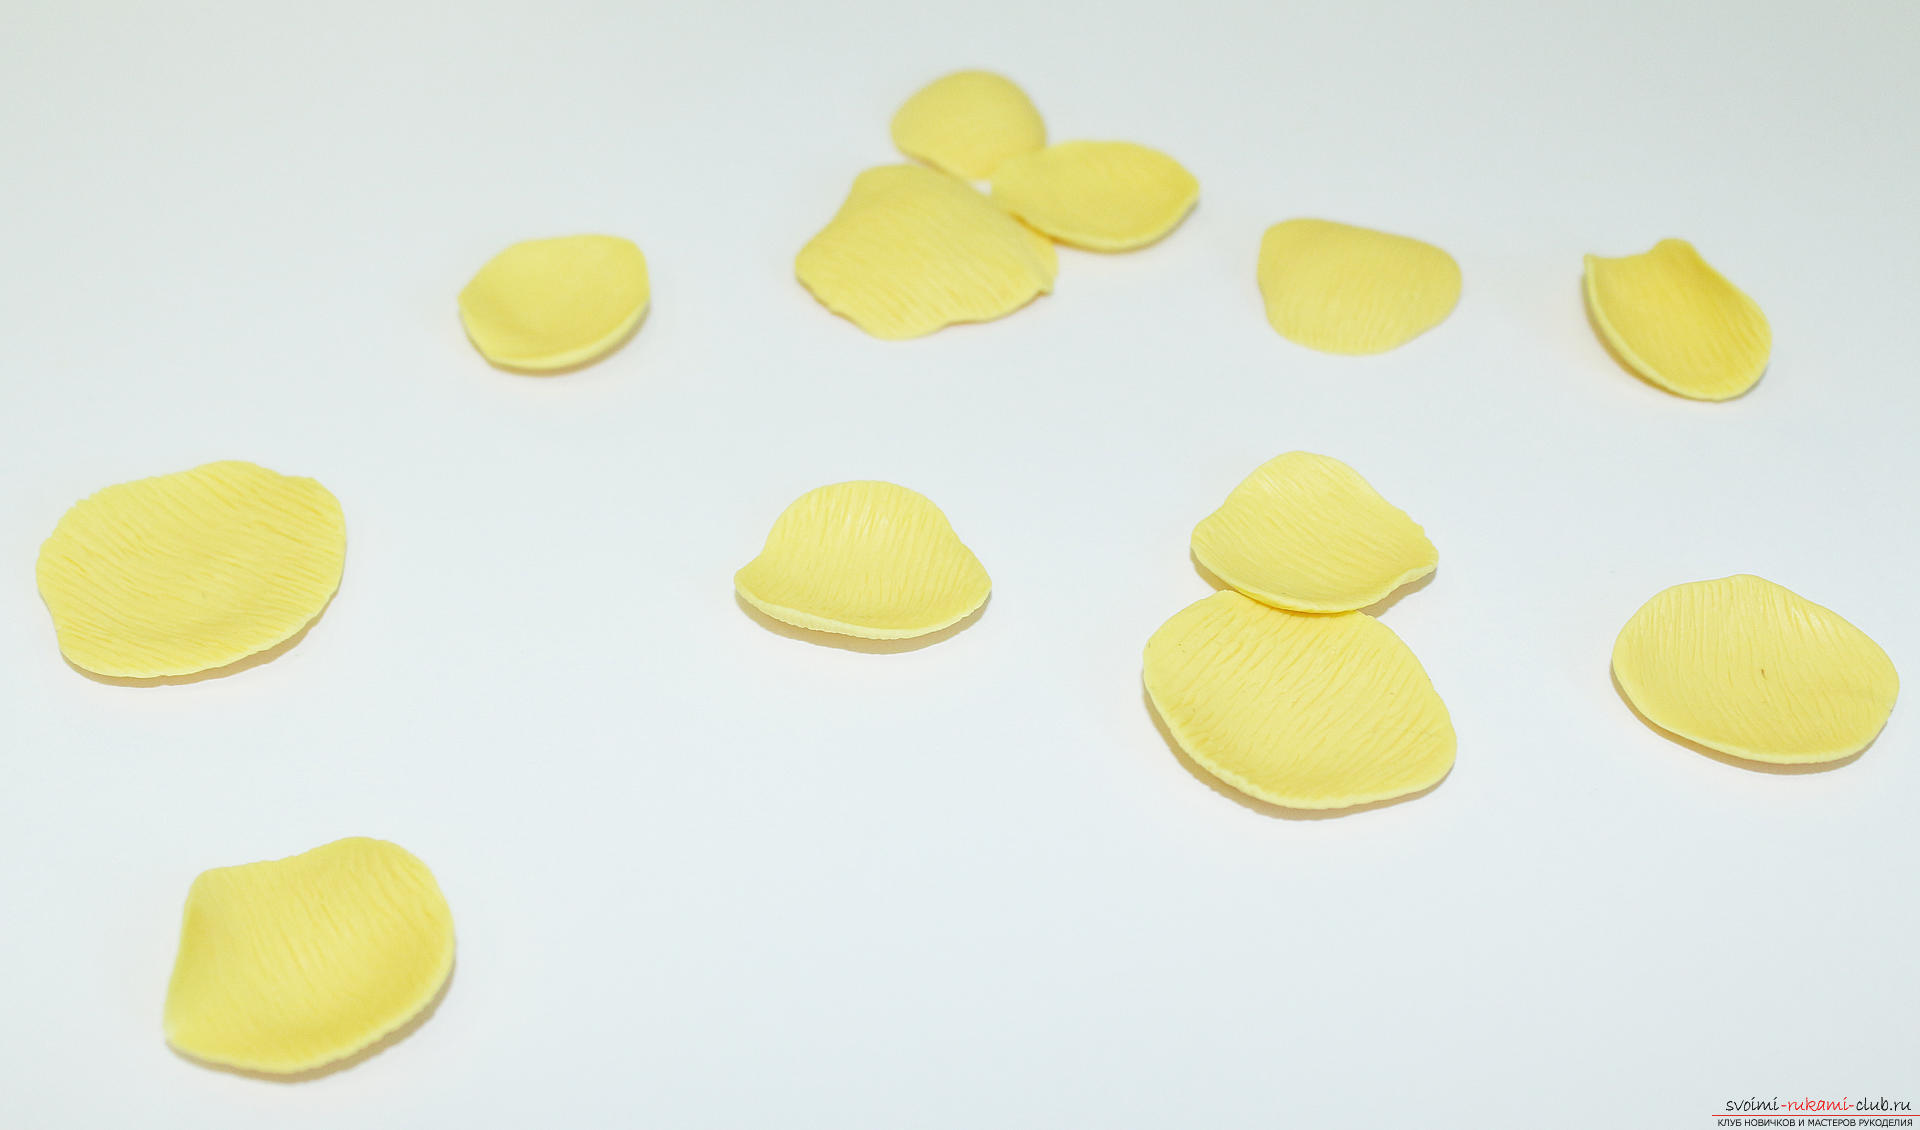 We roll a ball from a piece of yellow polymer clay, we form a droplet of it.
 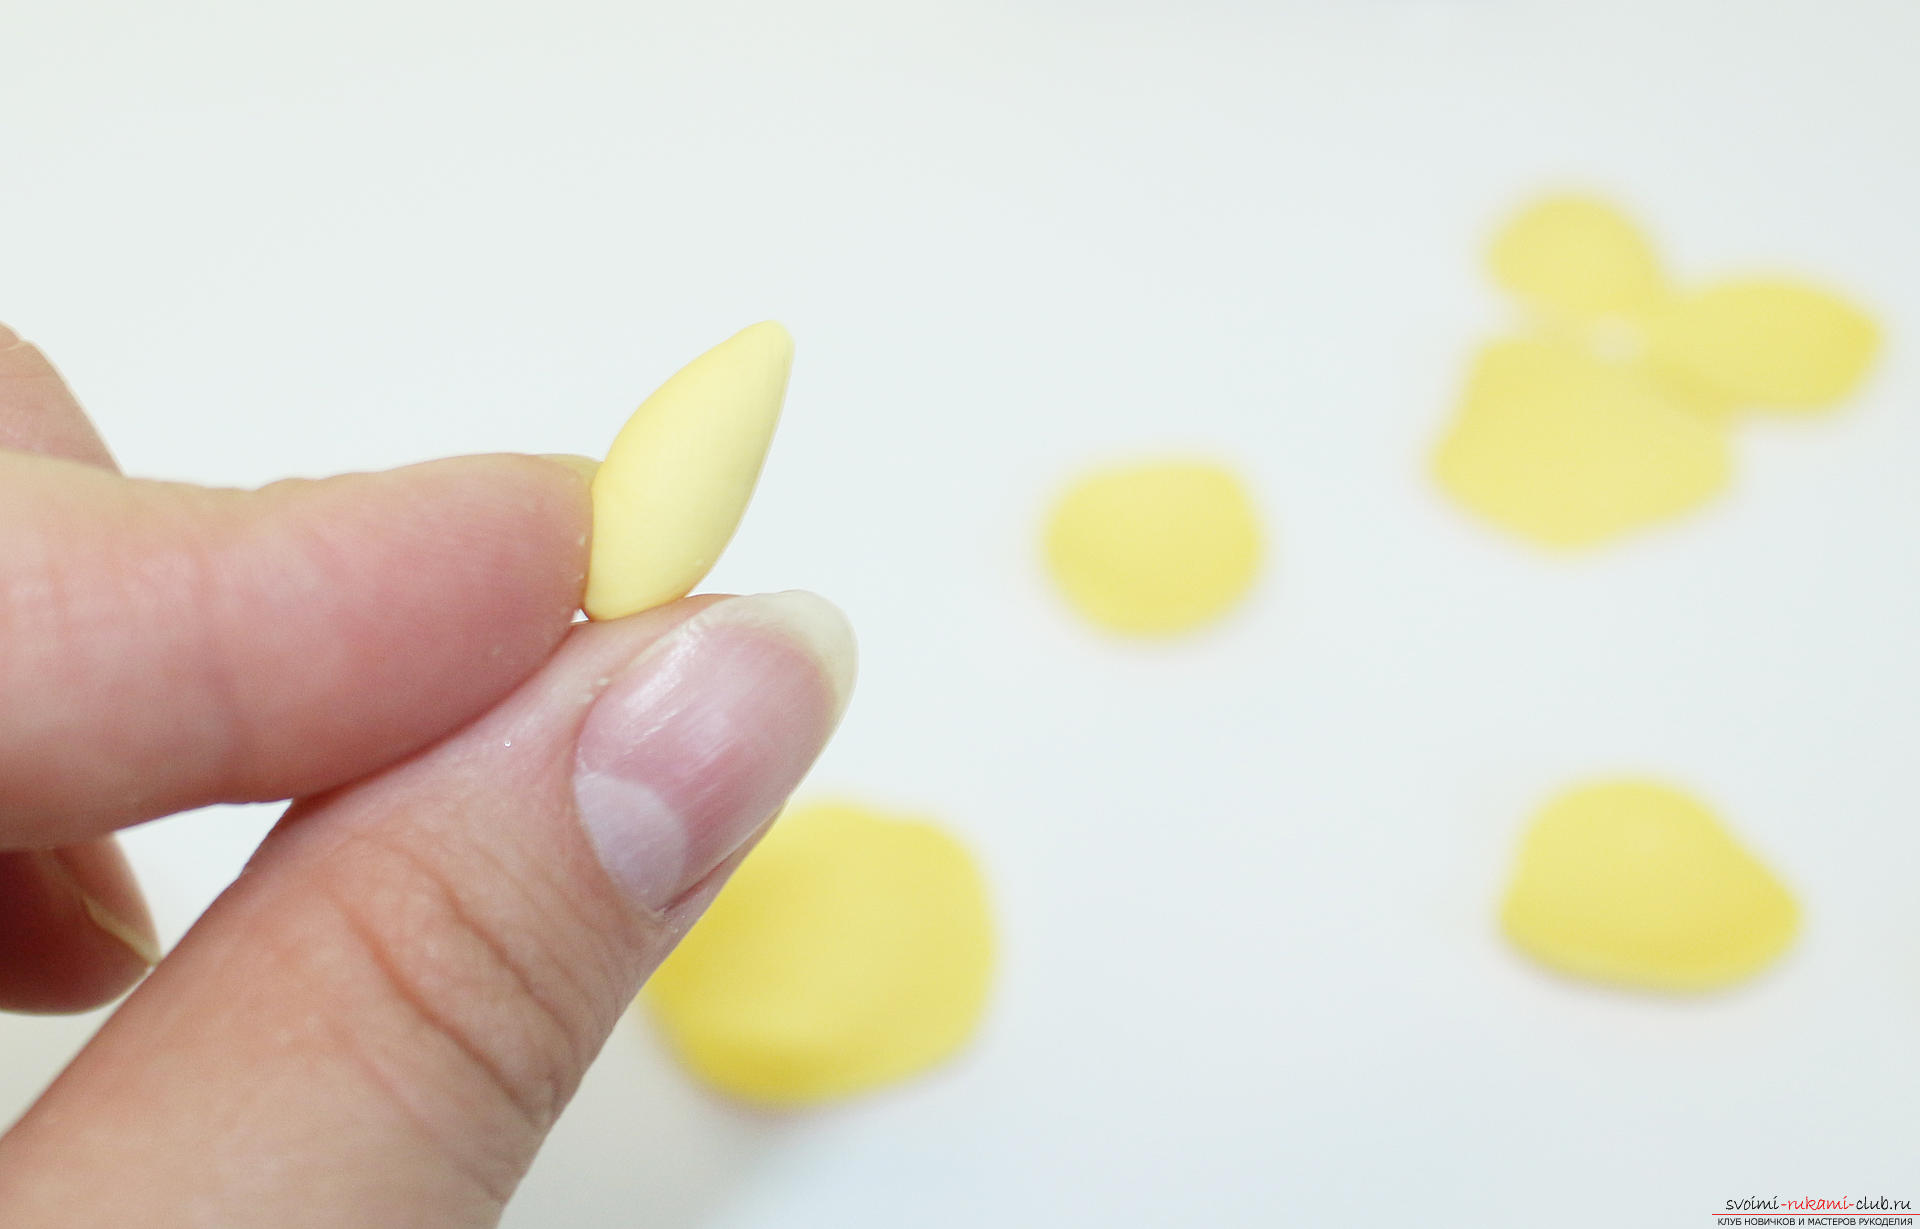 We take the smallest petal and wrap it with a droplet, and the sharp part of the droplet needs to completely close this petal.
 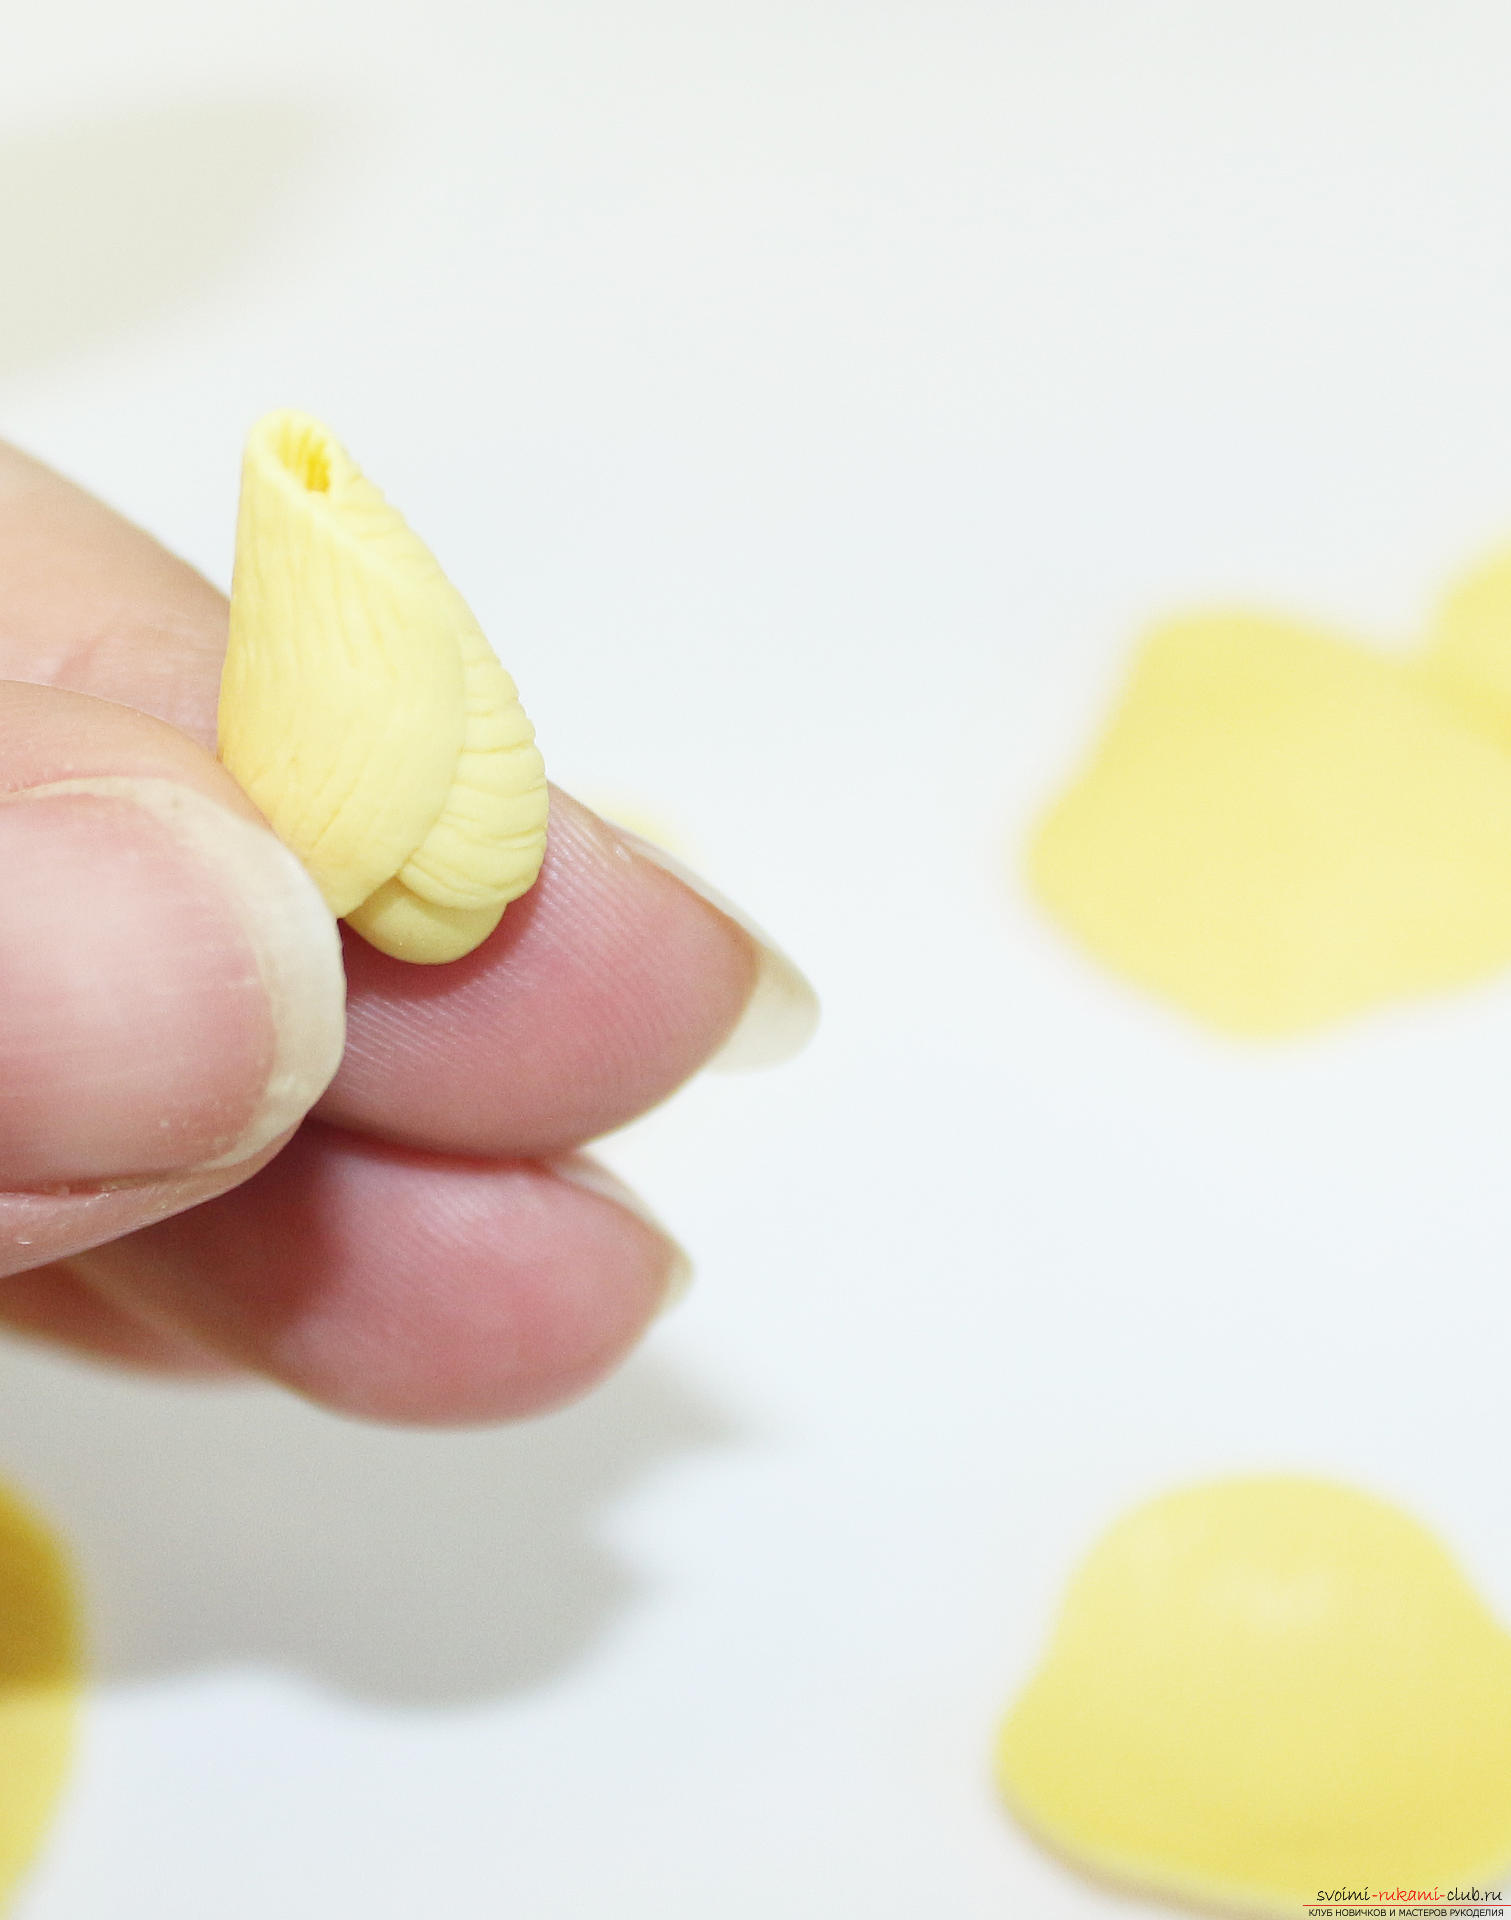 Apply a new petal to the base. The middle of the new petal should be applied to the junction of the parts of the first petal.
 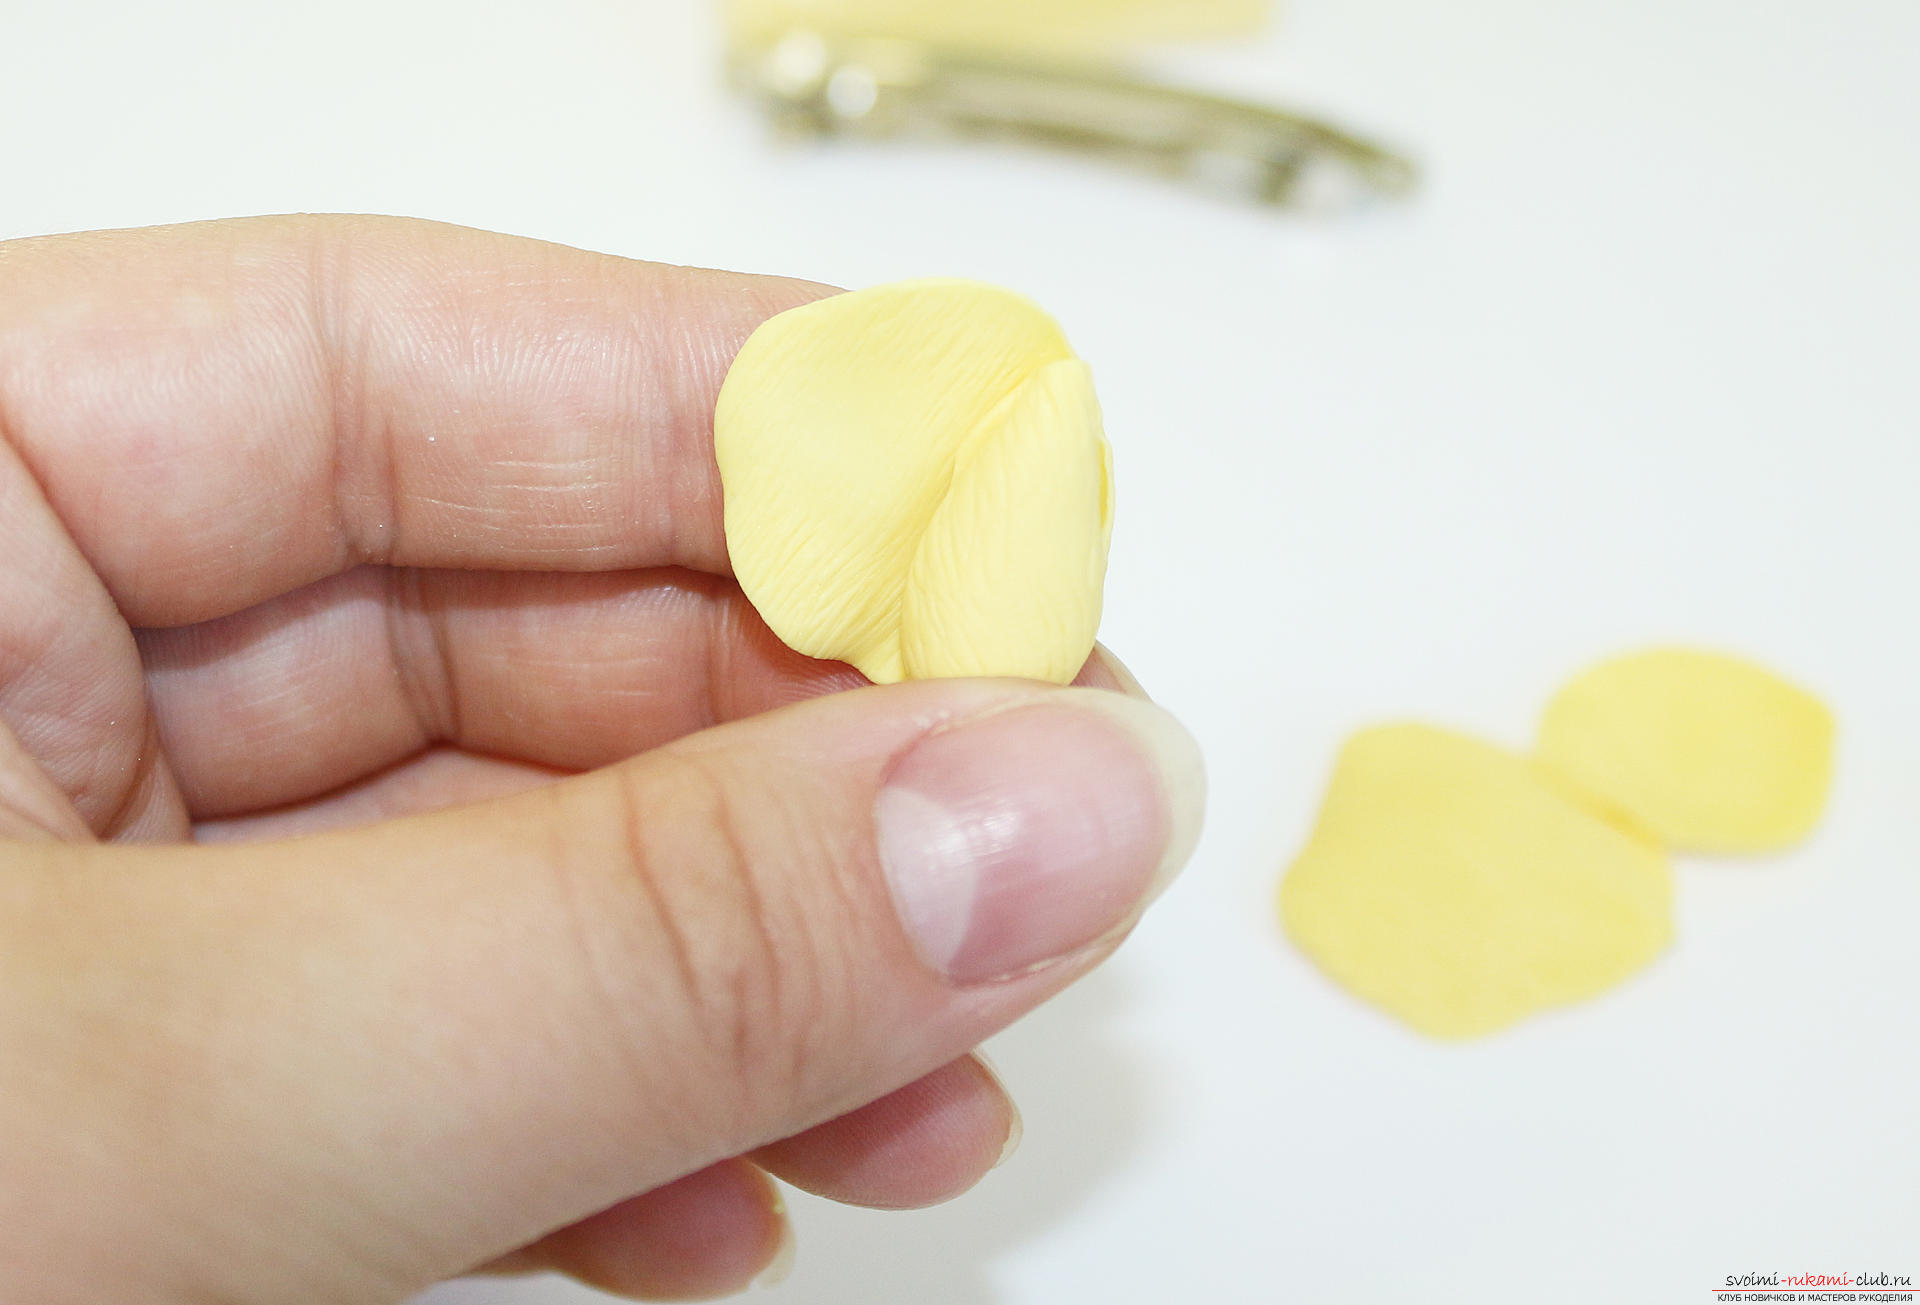 The next petal should be placed opposite the first, both wrap around the base.
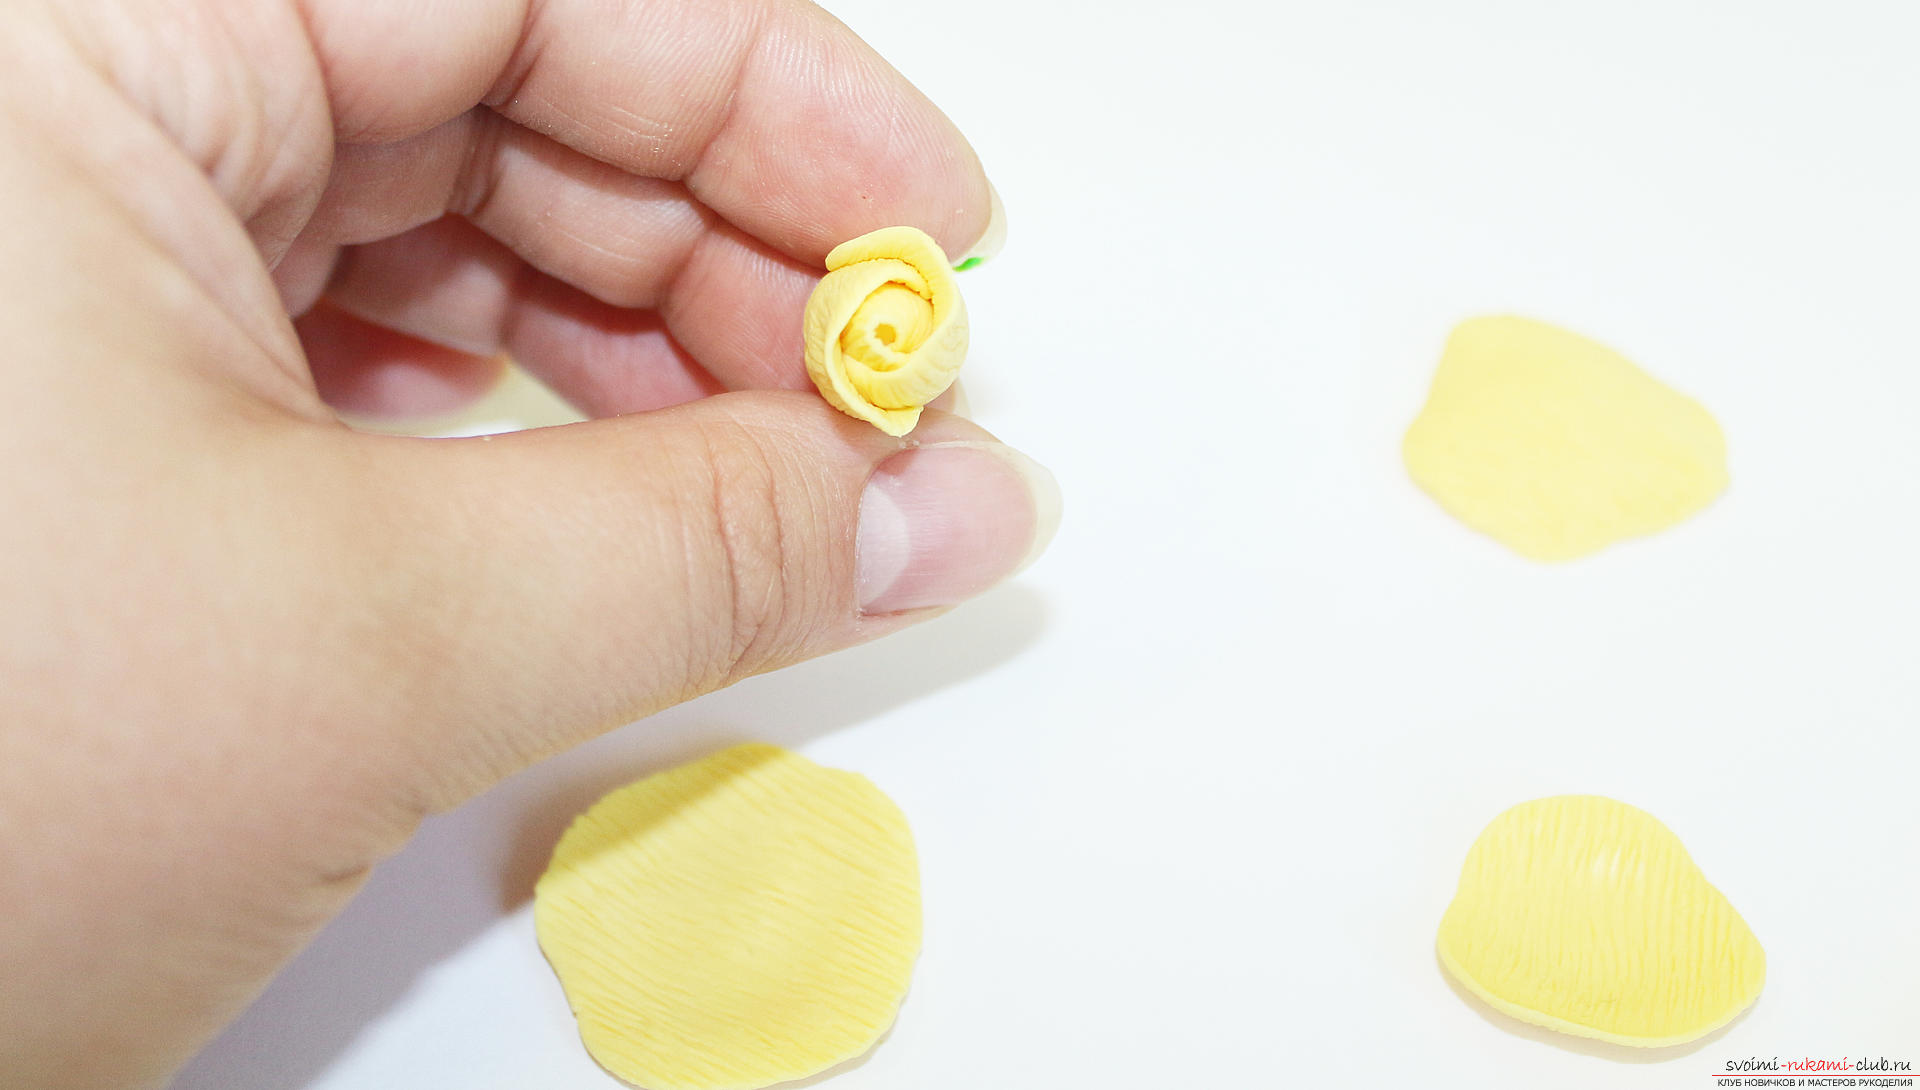
 The next series goes in checkerboard order, i.e. At the junction of the previous petals, the middle of the petals of the new row falls. Also on this row it takes one or two petals more than in the previous row.
 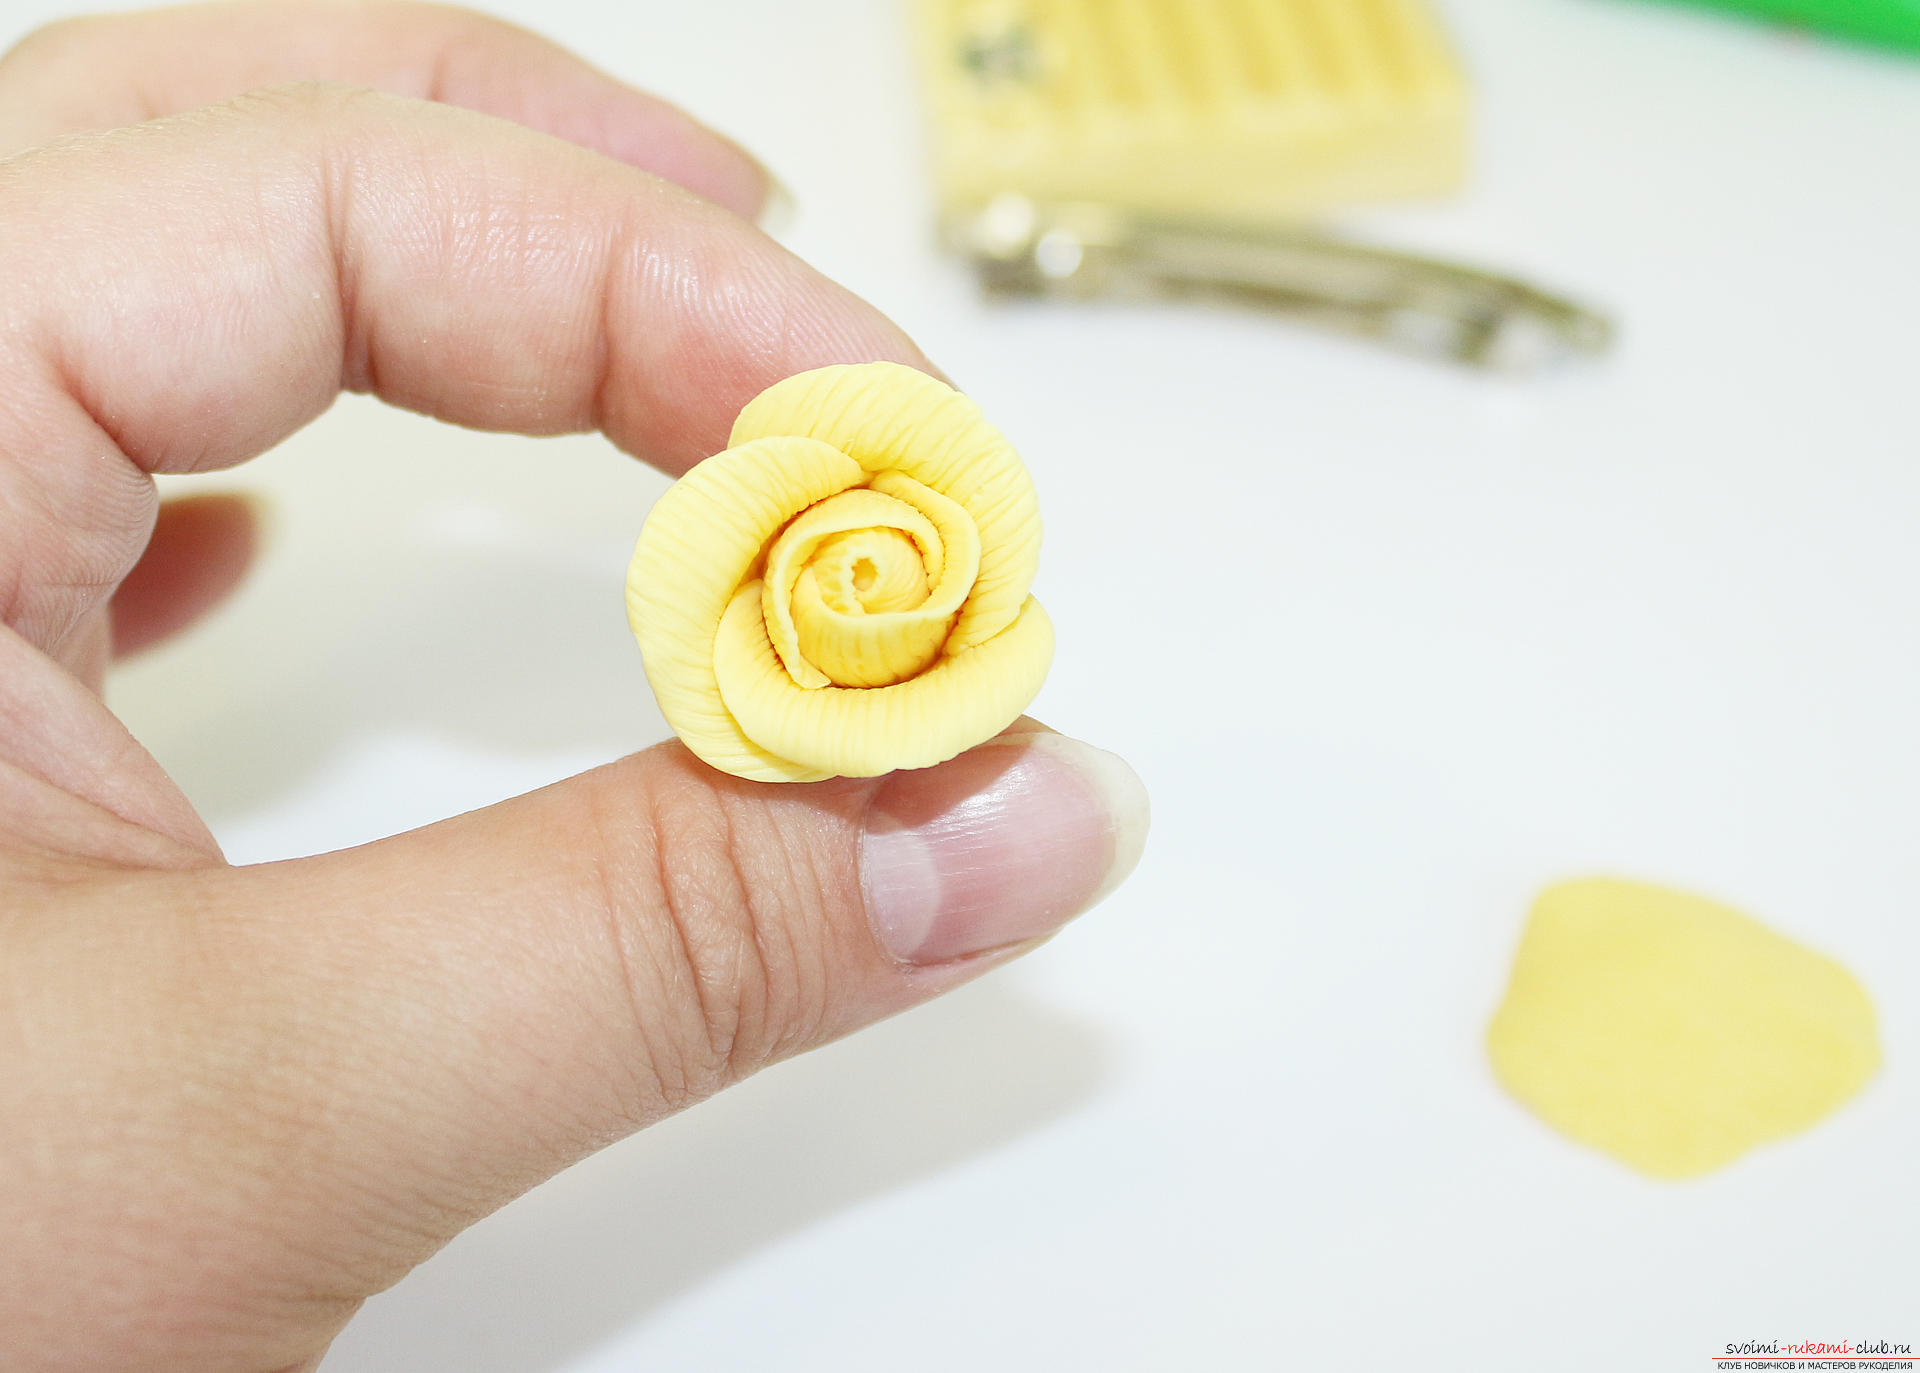 The petals are attached lapally, i.e. The first petal is hidden under the last one.
  We begin to fasten the next row, the first petal of the new row is again fastened to the joint of the petals of the previous row.
  Each petal, as it is glued, is slightly stretched and bent to the outside, so the flower will be more realistic.
 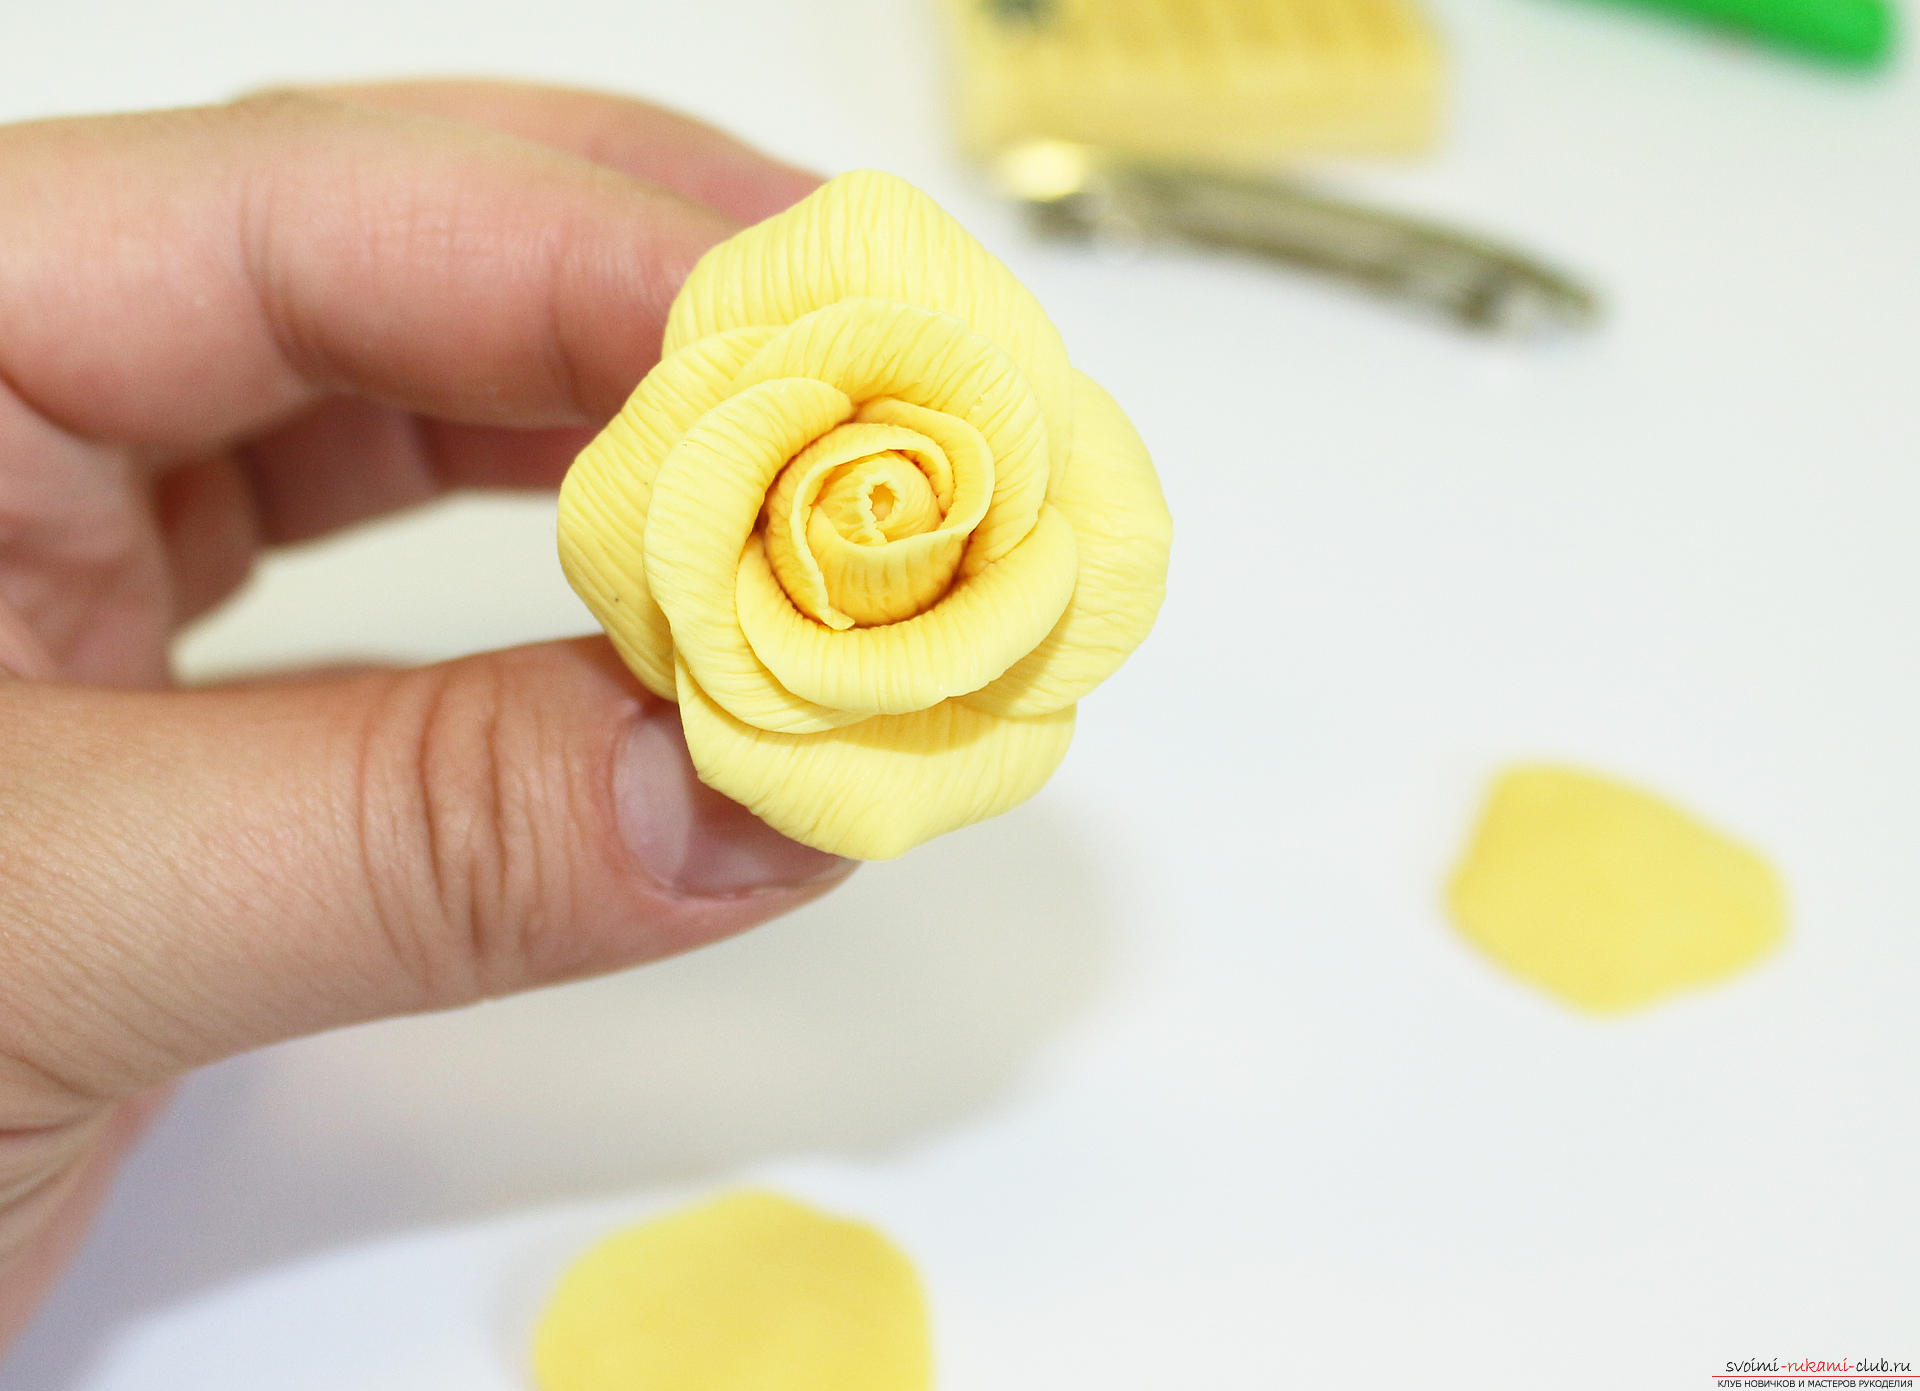 We continue to form a rose flower, until it reaches a sufficient volume, it took me 5 rows and 15 petals.
 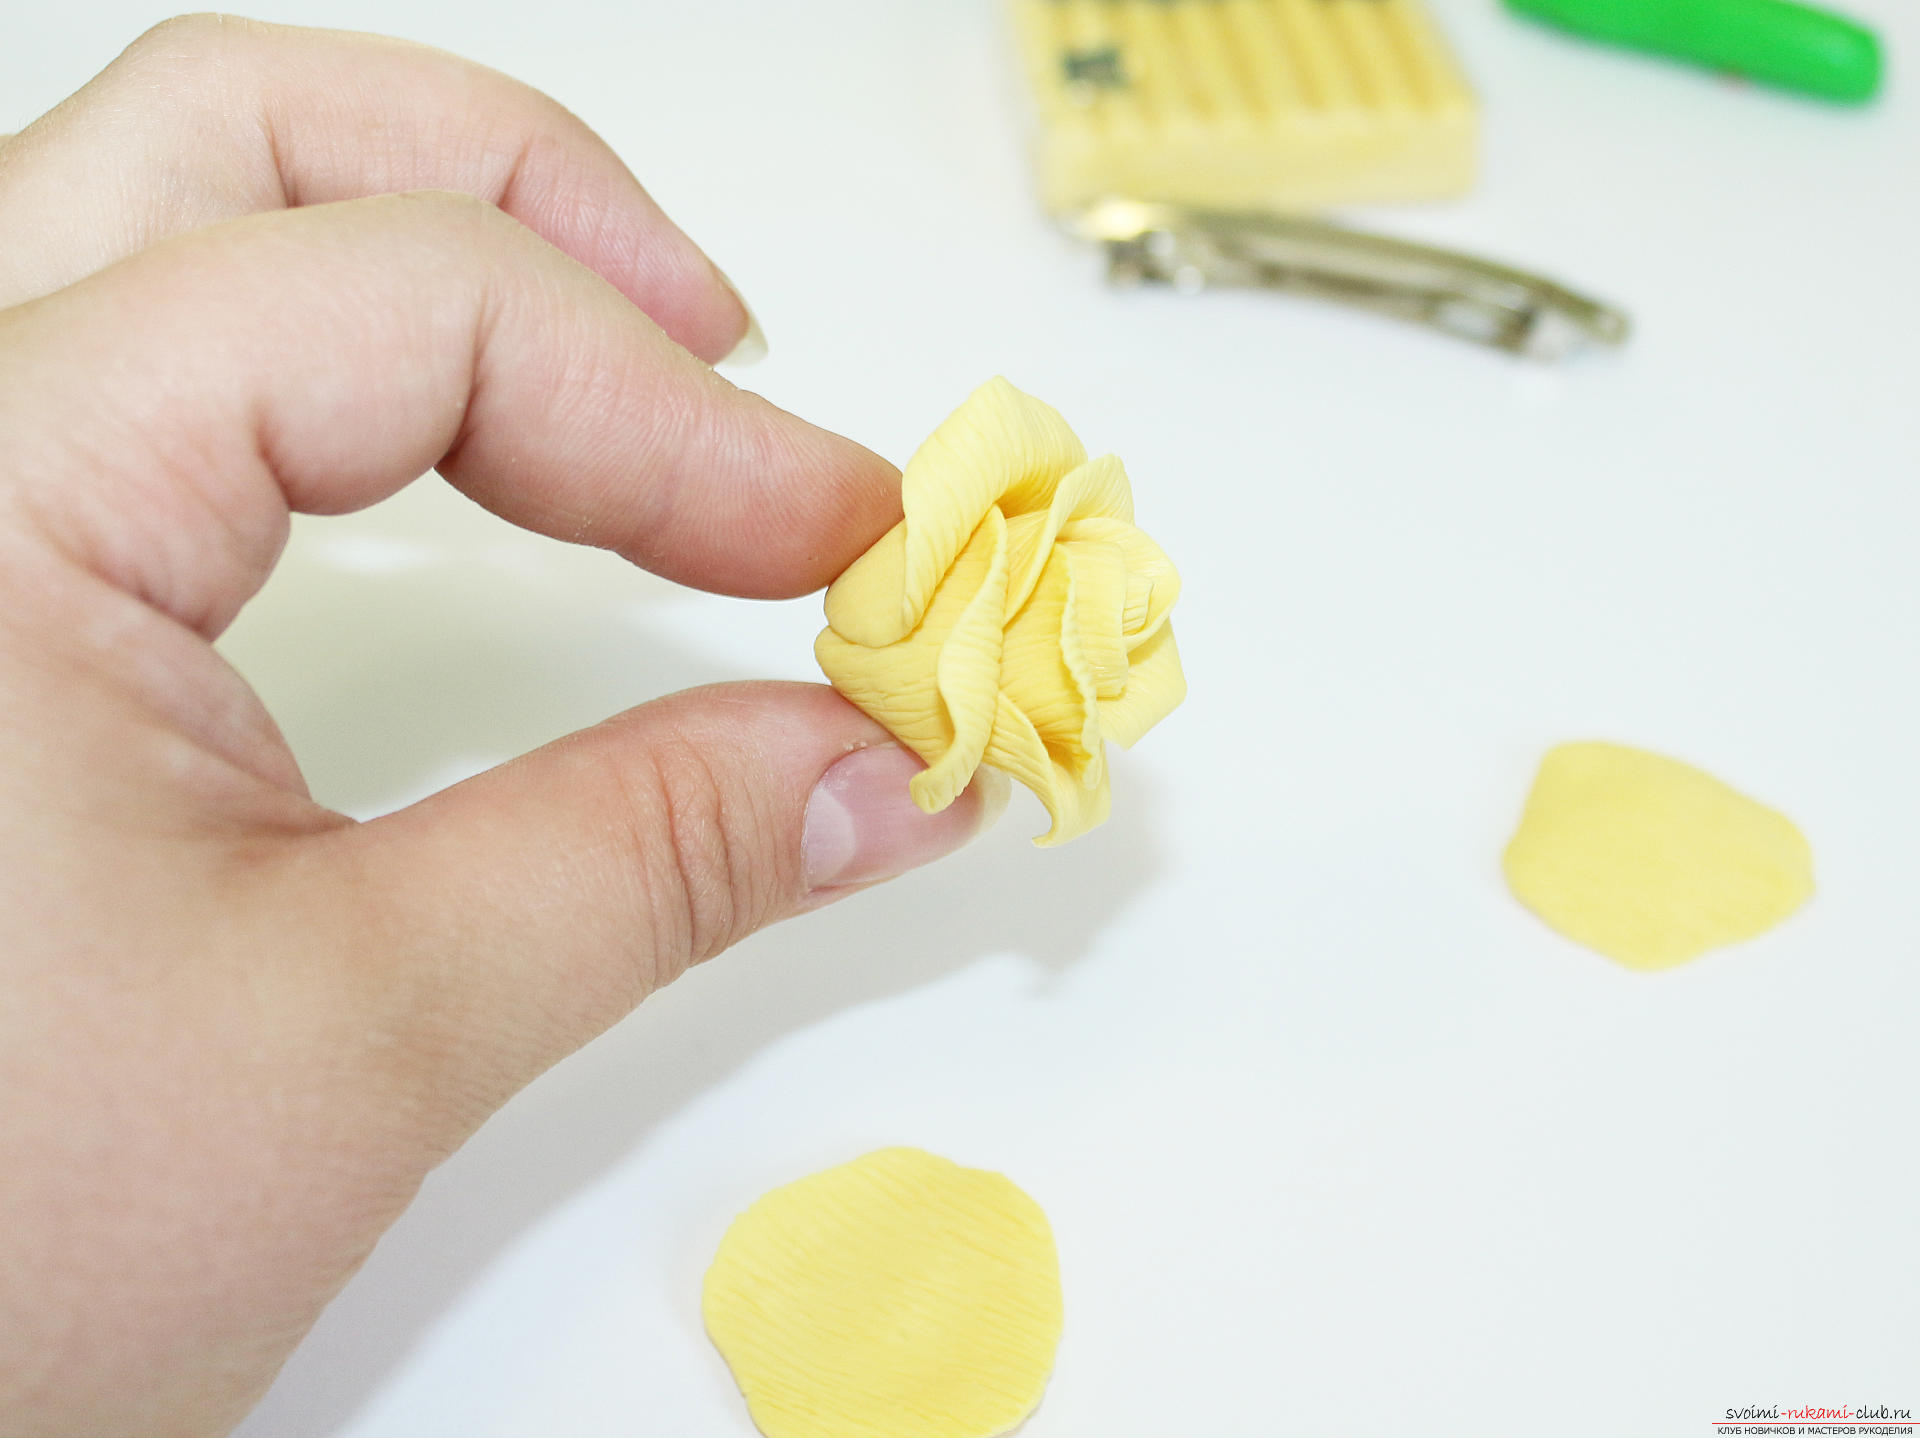 I bend the petals outward so that the base of the bud can not be seen. The leg, for which we hold the flower, needs to be tightly formed and not stretched.
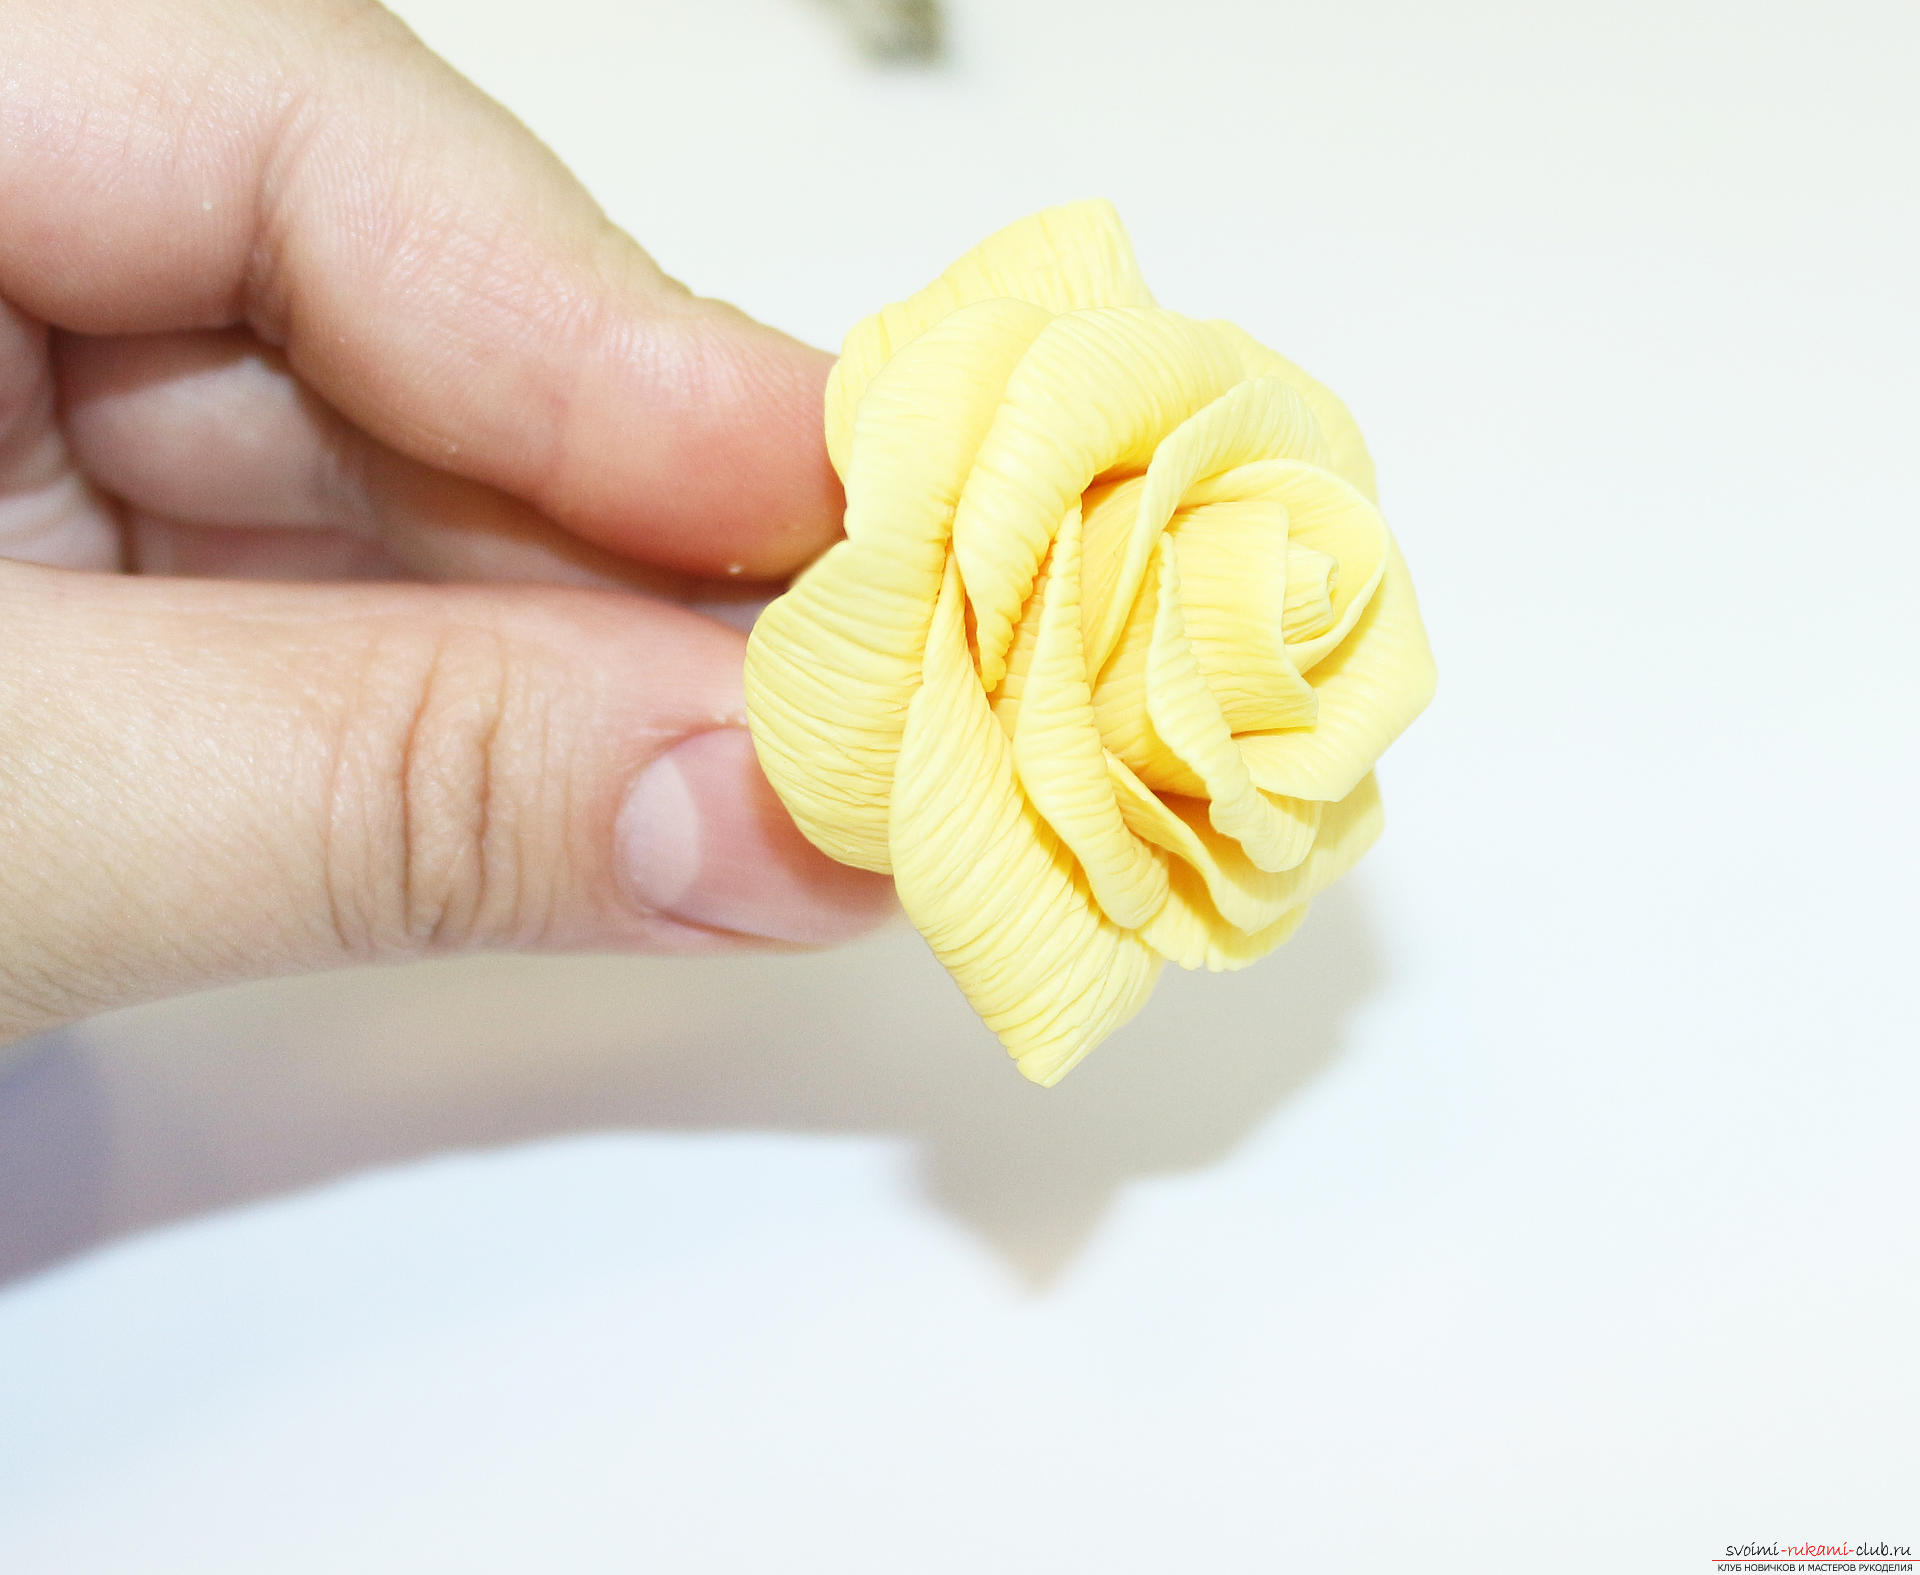
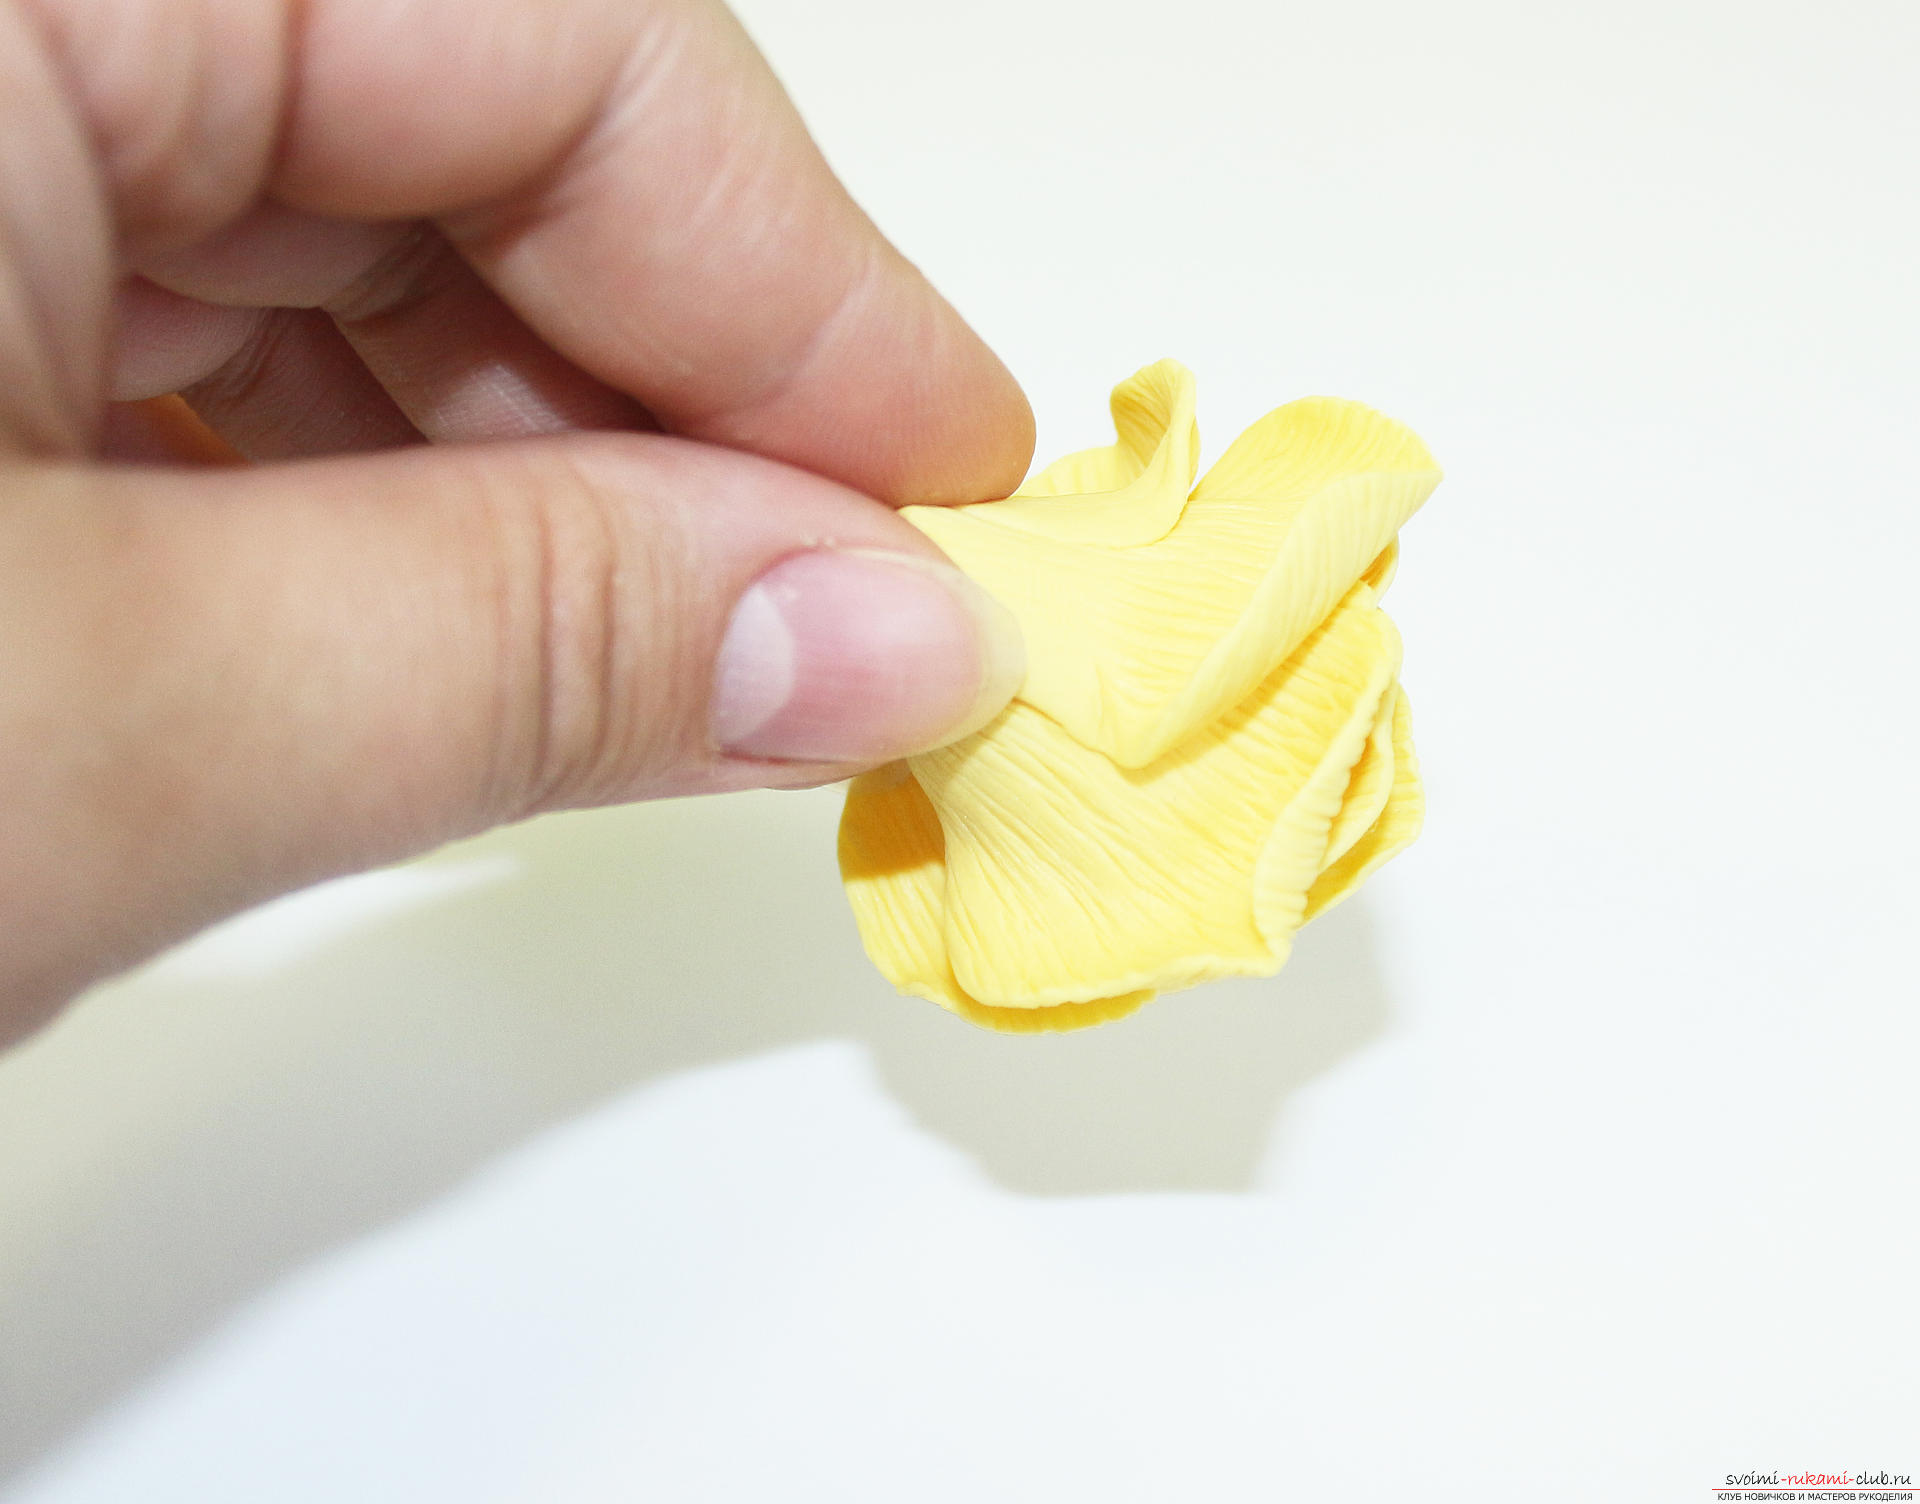 When the flower has formed, the last time we correct its petals - they should not be glued together.
 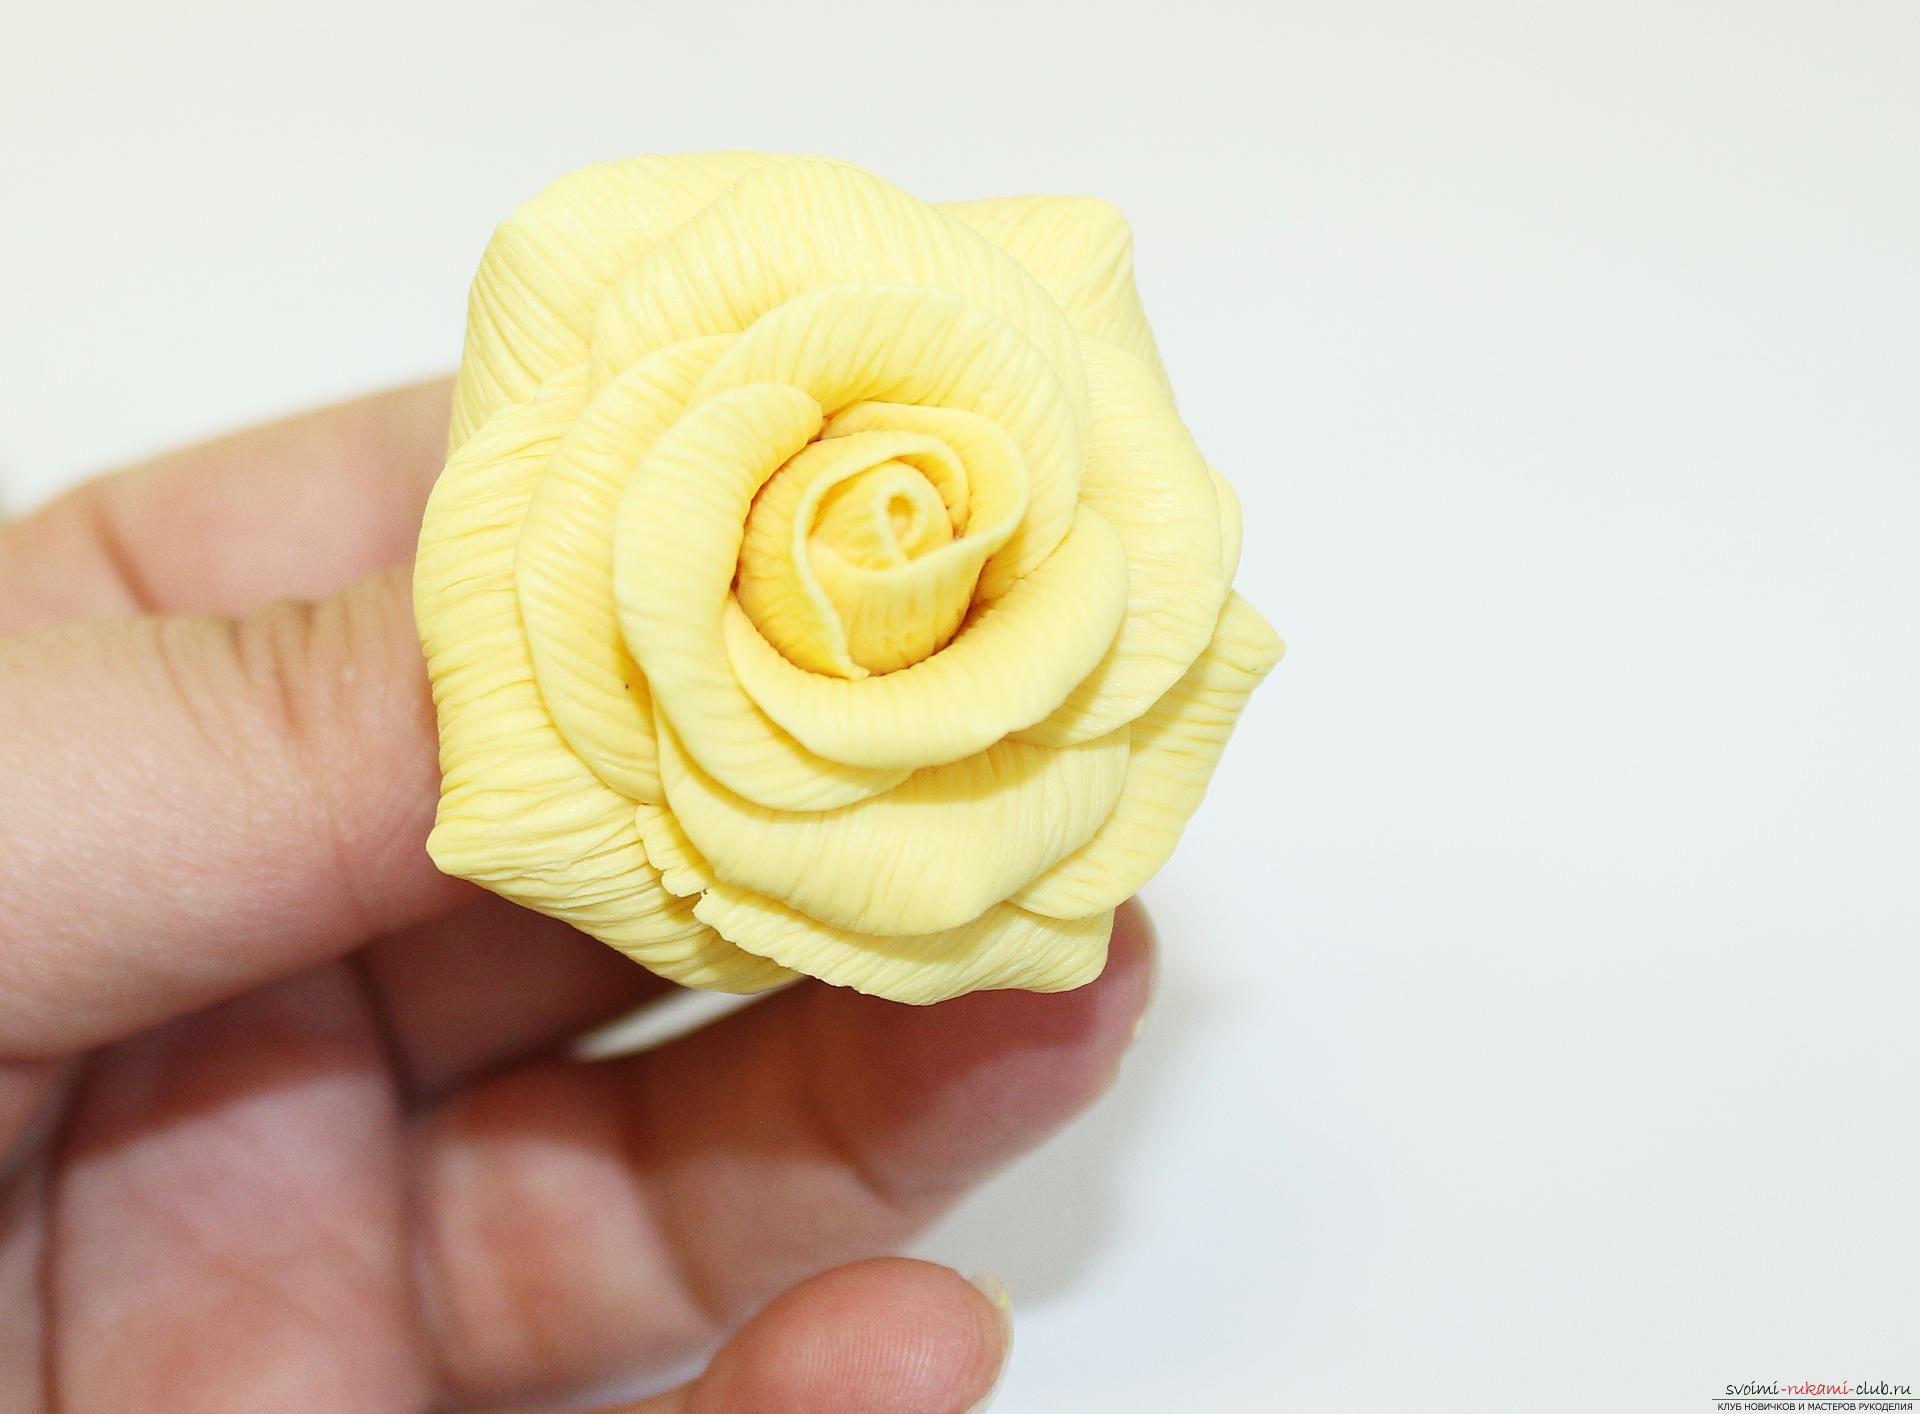 We cut off the leg, the flower should have absolutely flat surface for gluing.
 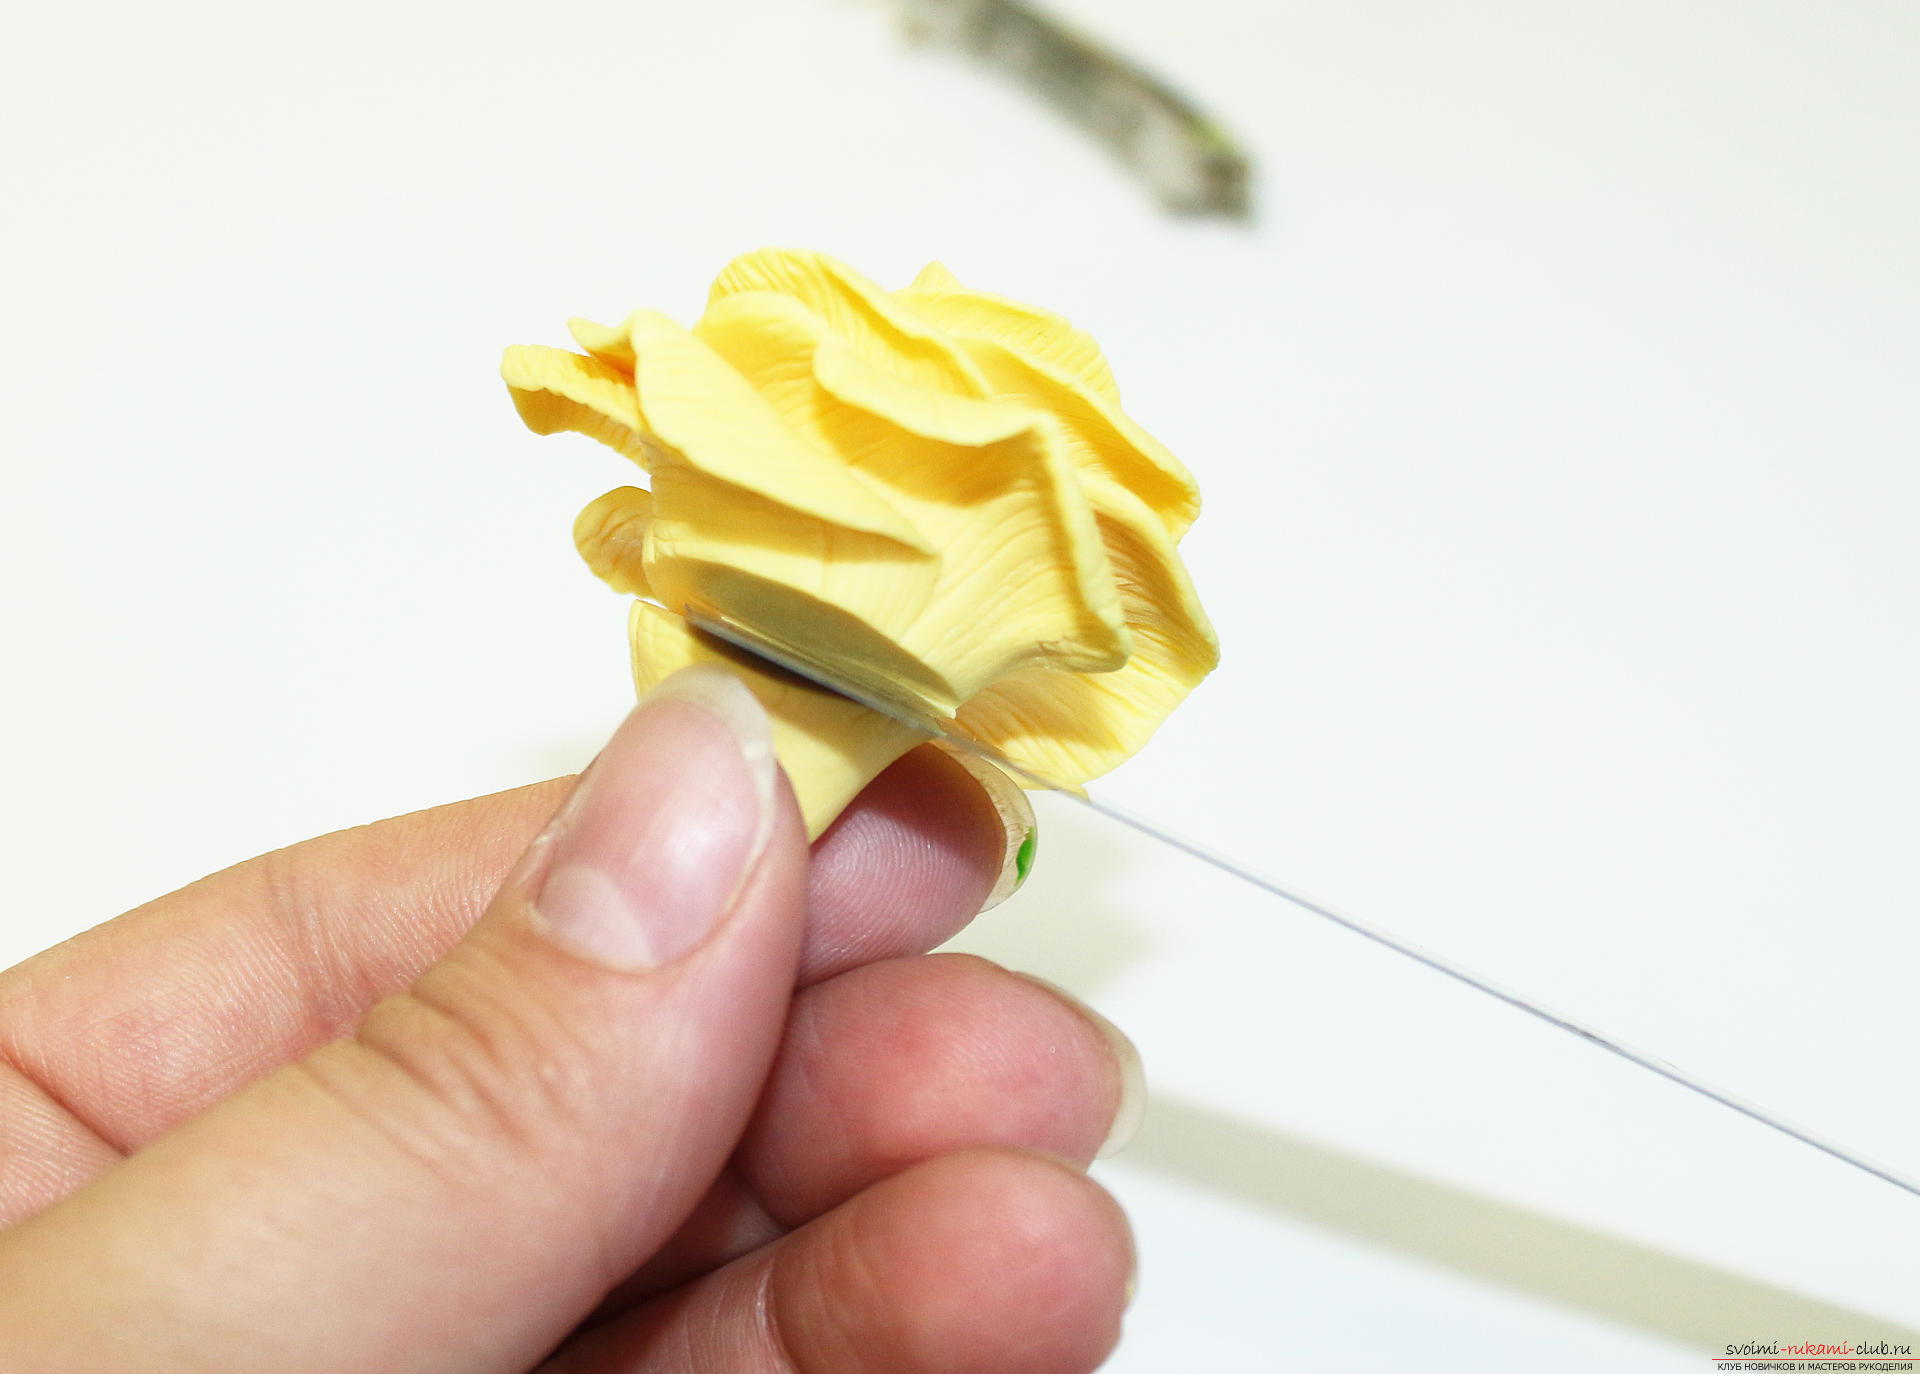 Form a bud from two or three levels of petals.
 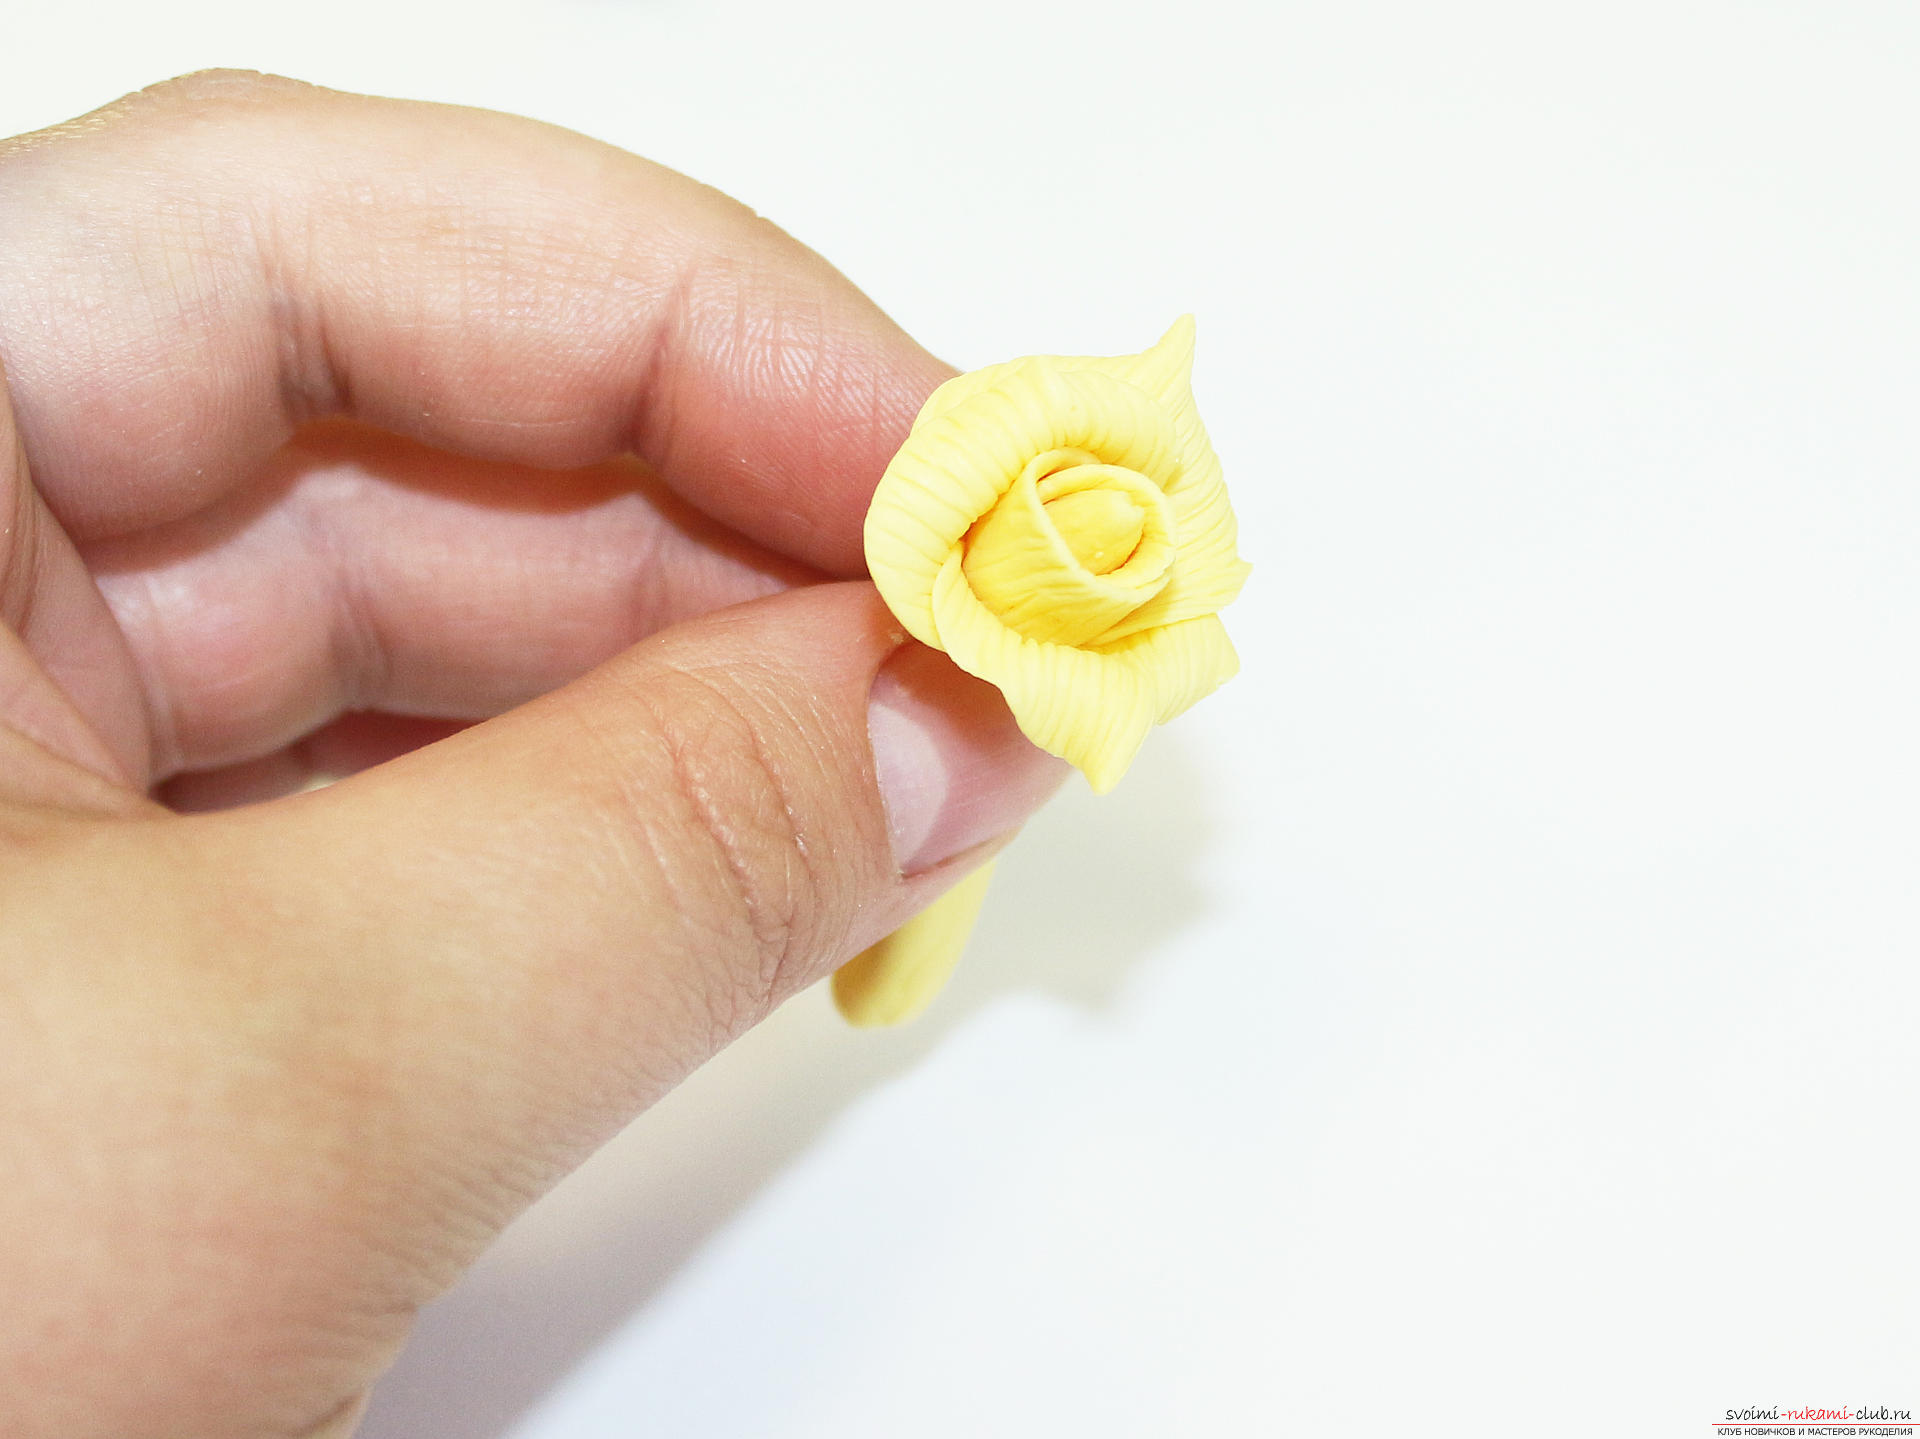 We unroll its leg and leave it for gluing.
 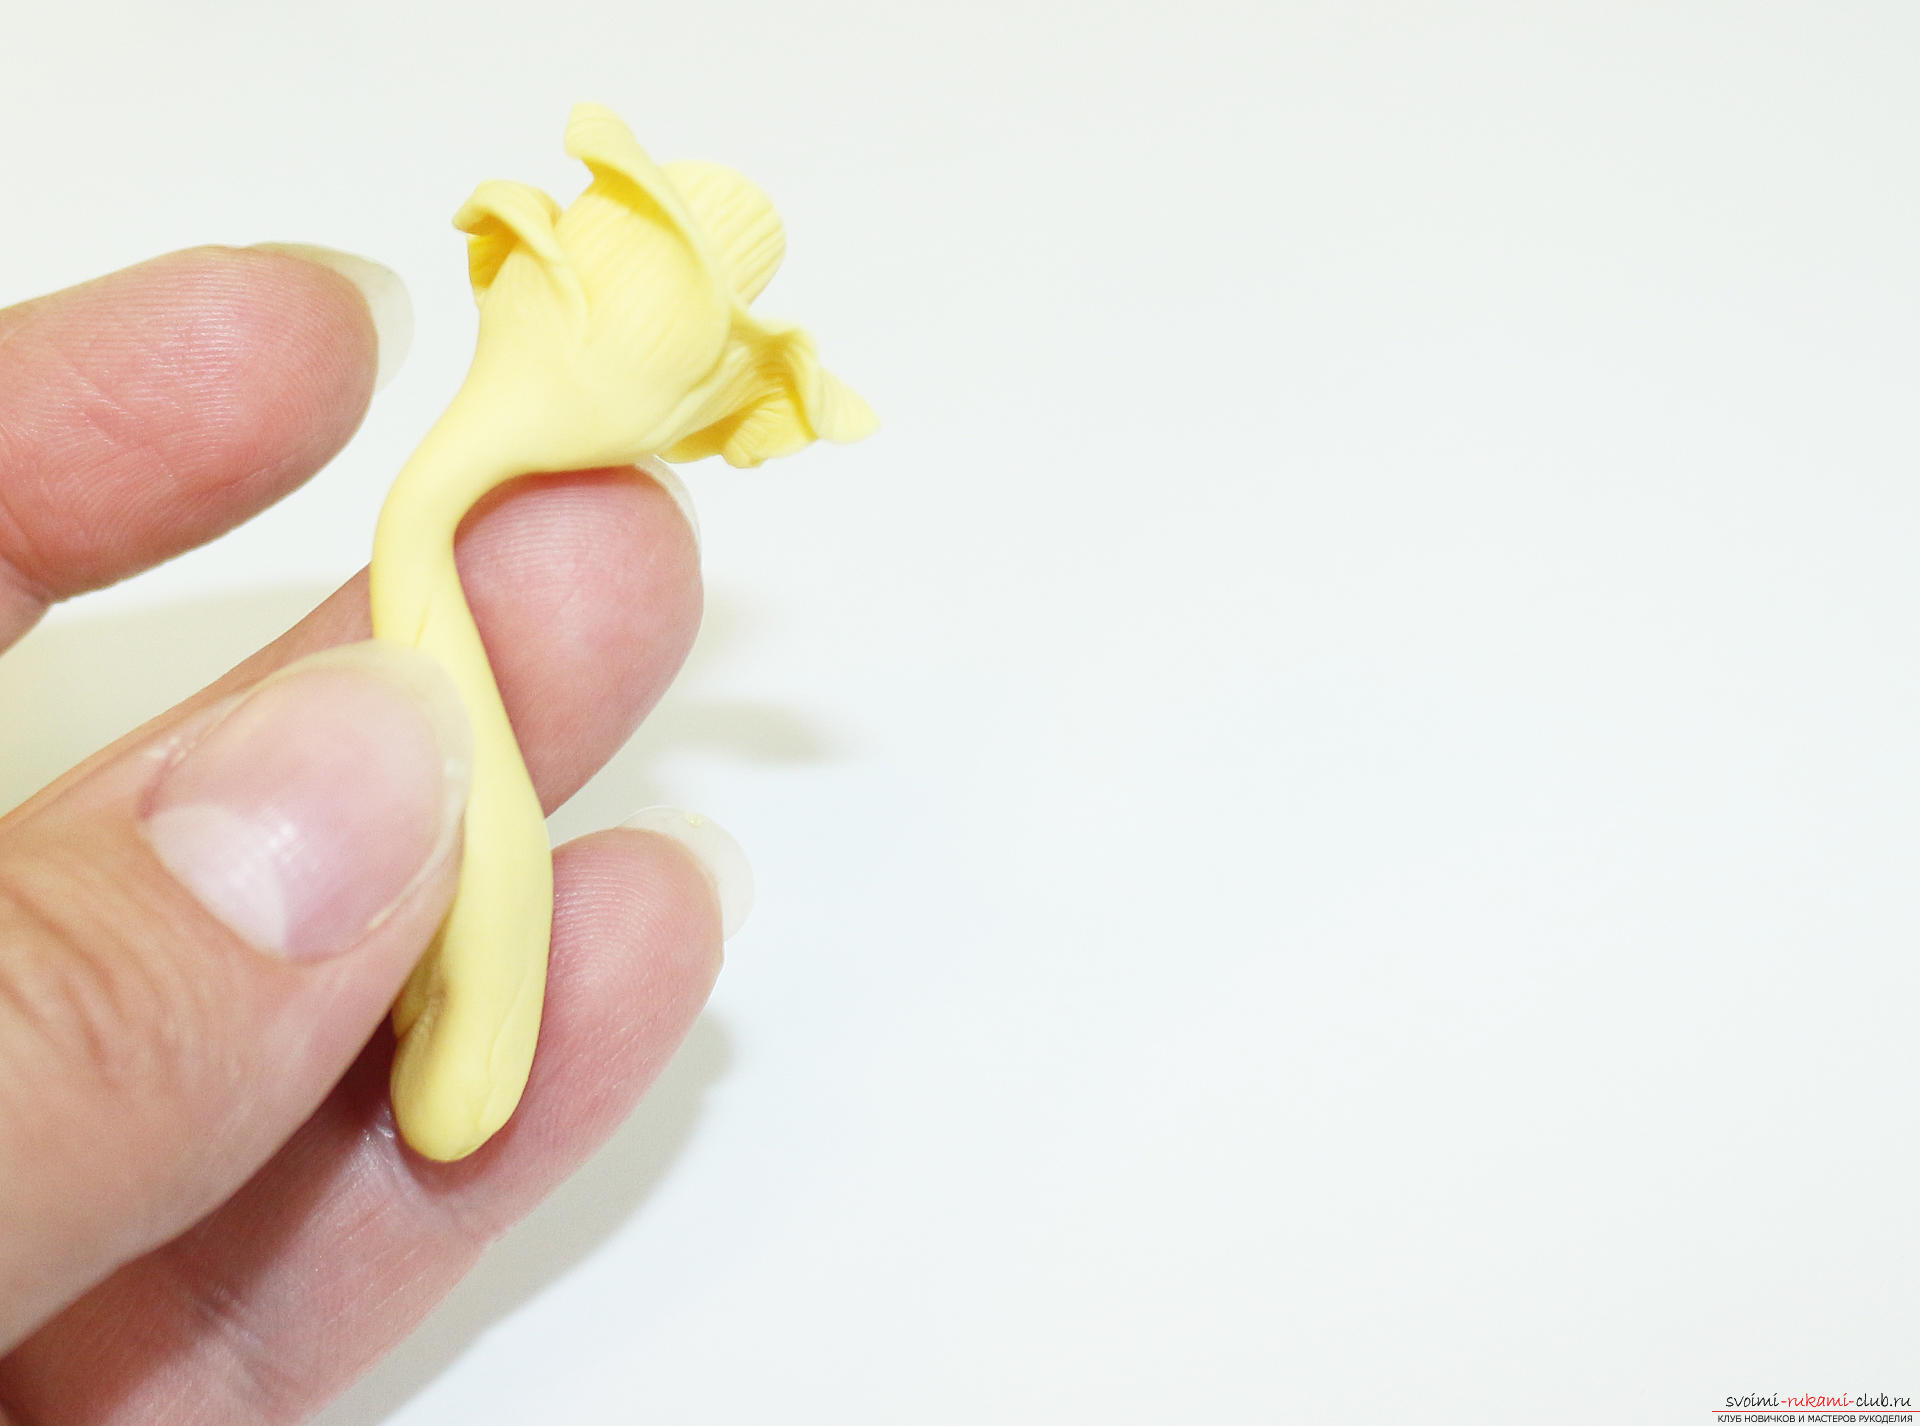 Just form an undisclosed bud of only three petals, we also leave the foot.
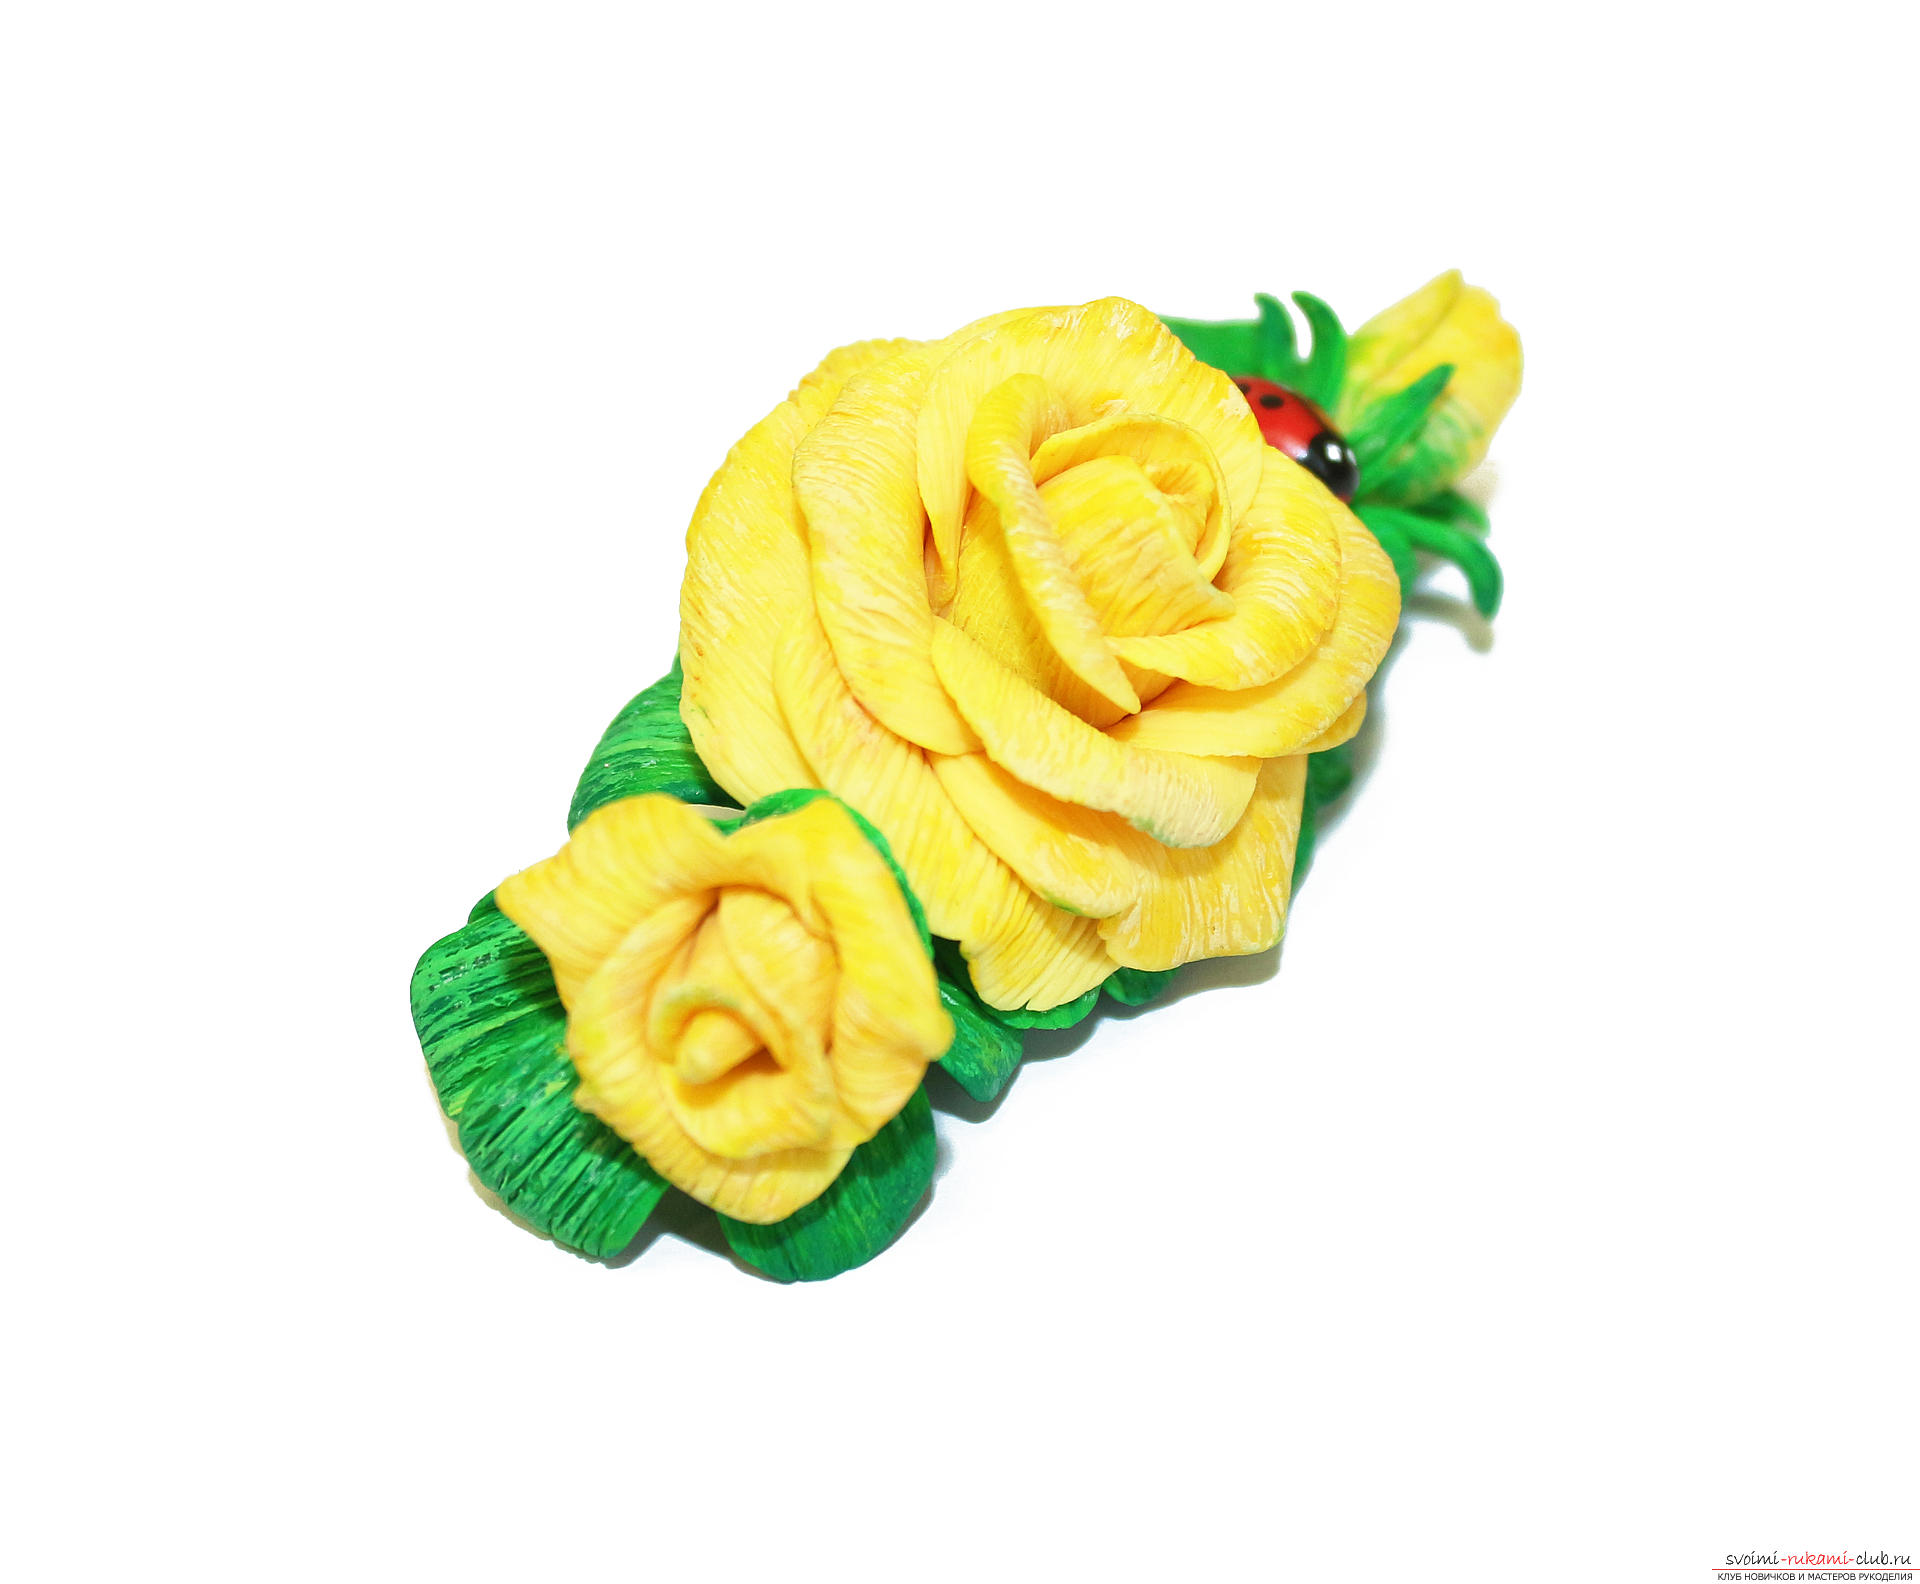
  At this stage we have got two buds and one flower.
 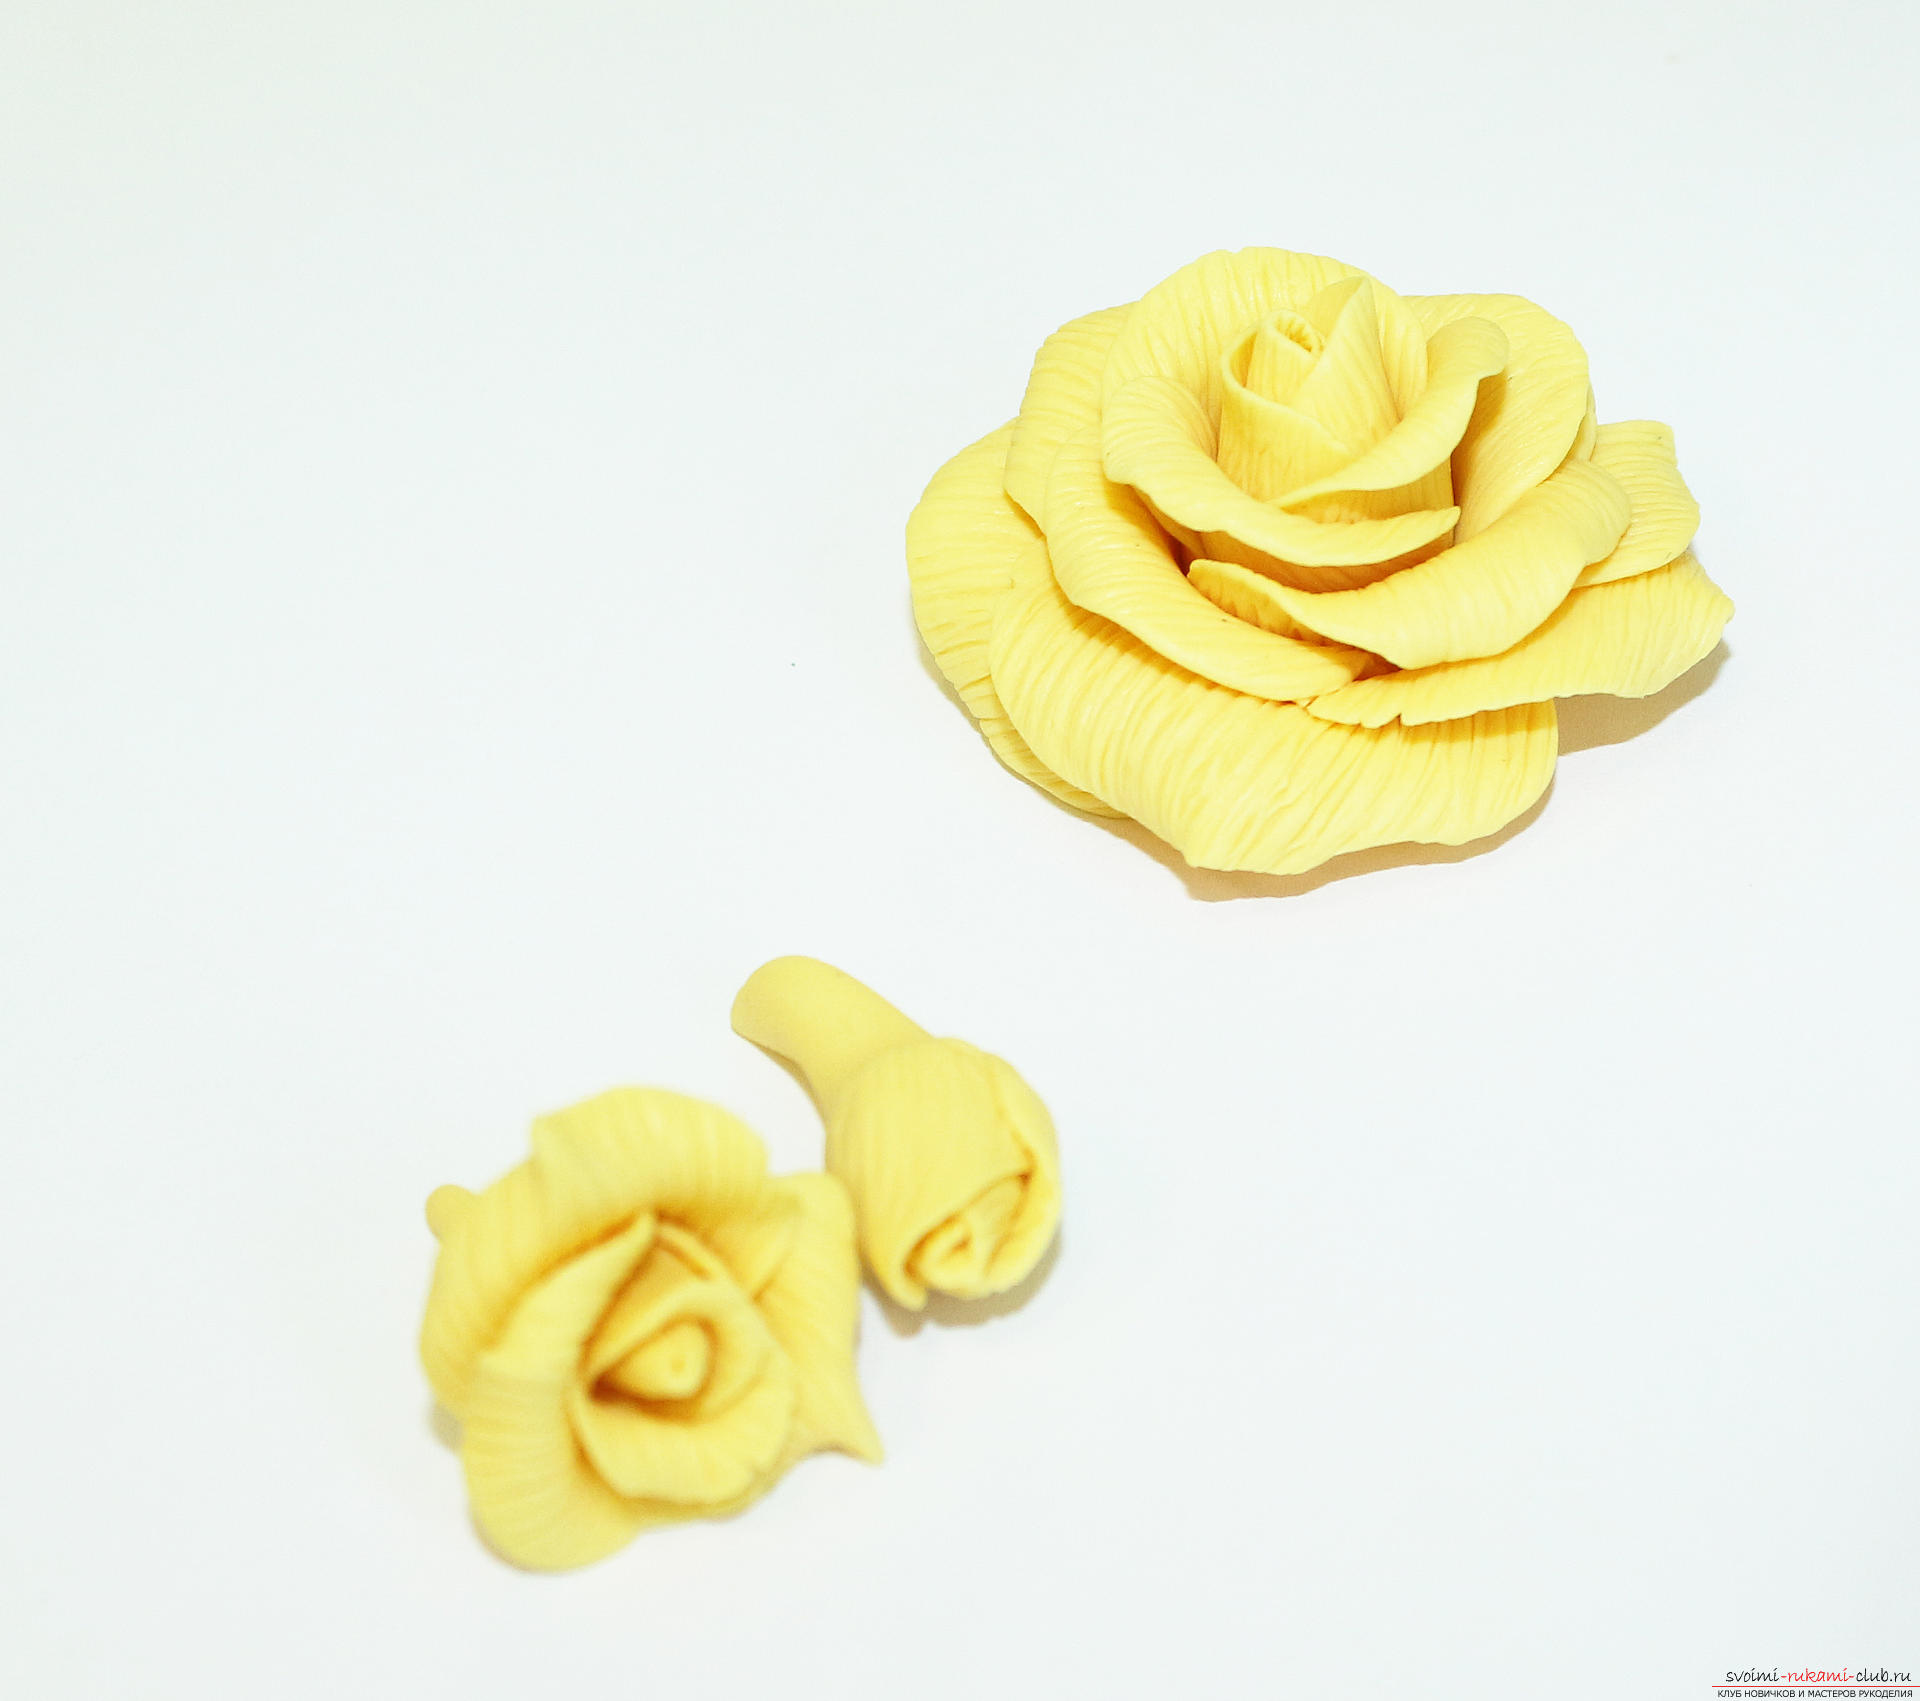 Roll out the green plastic and glue it to the base of the barrette.
 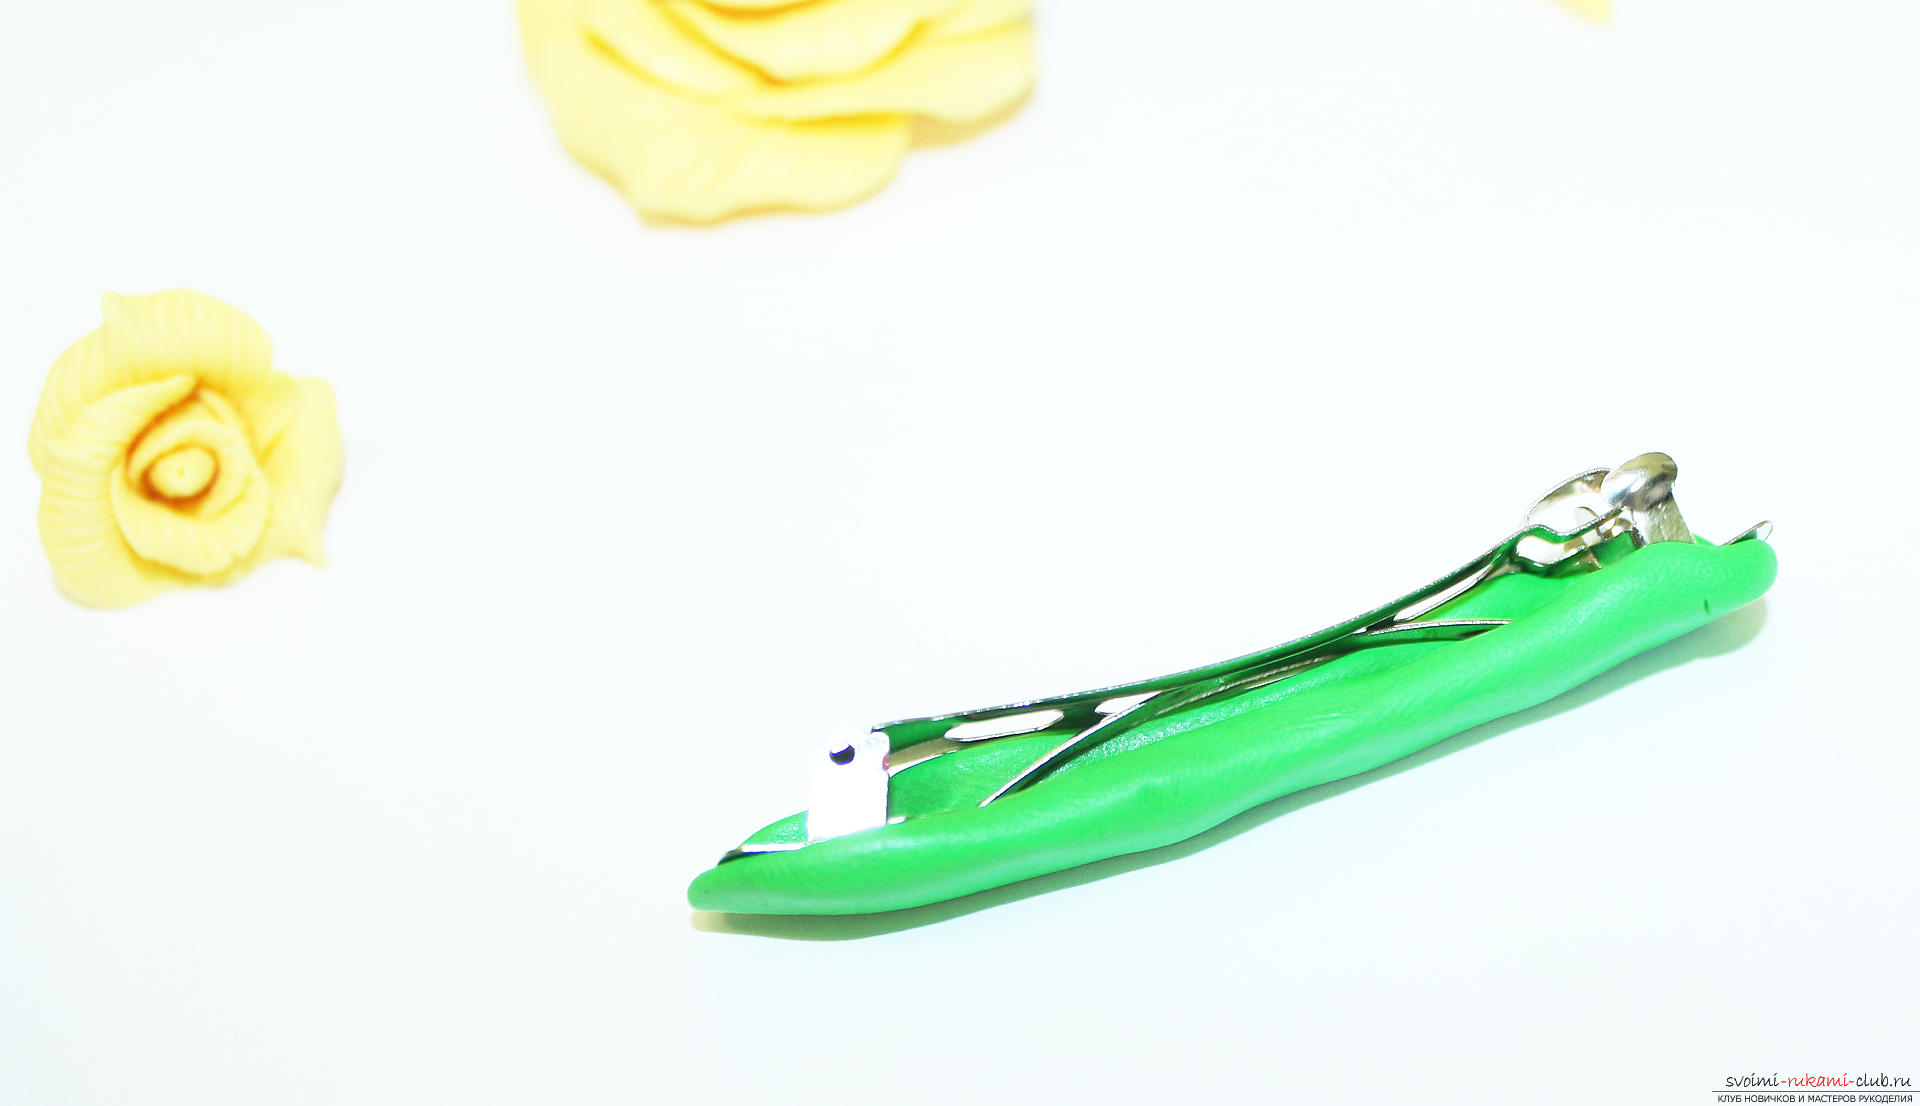 View from above.
 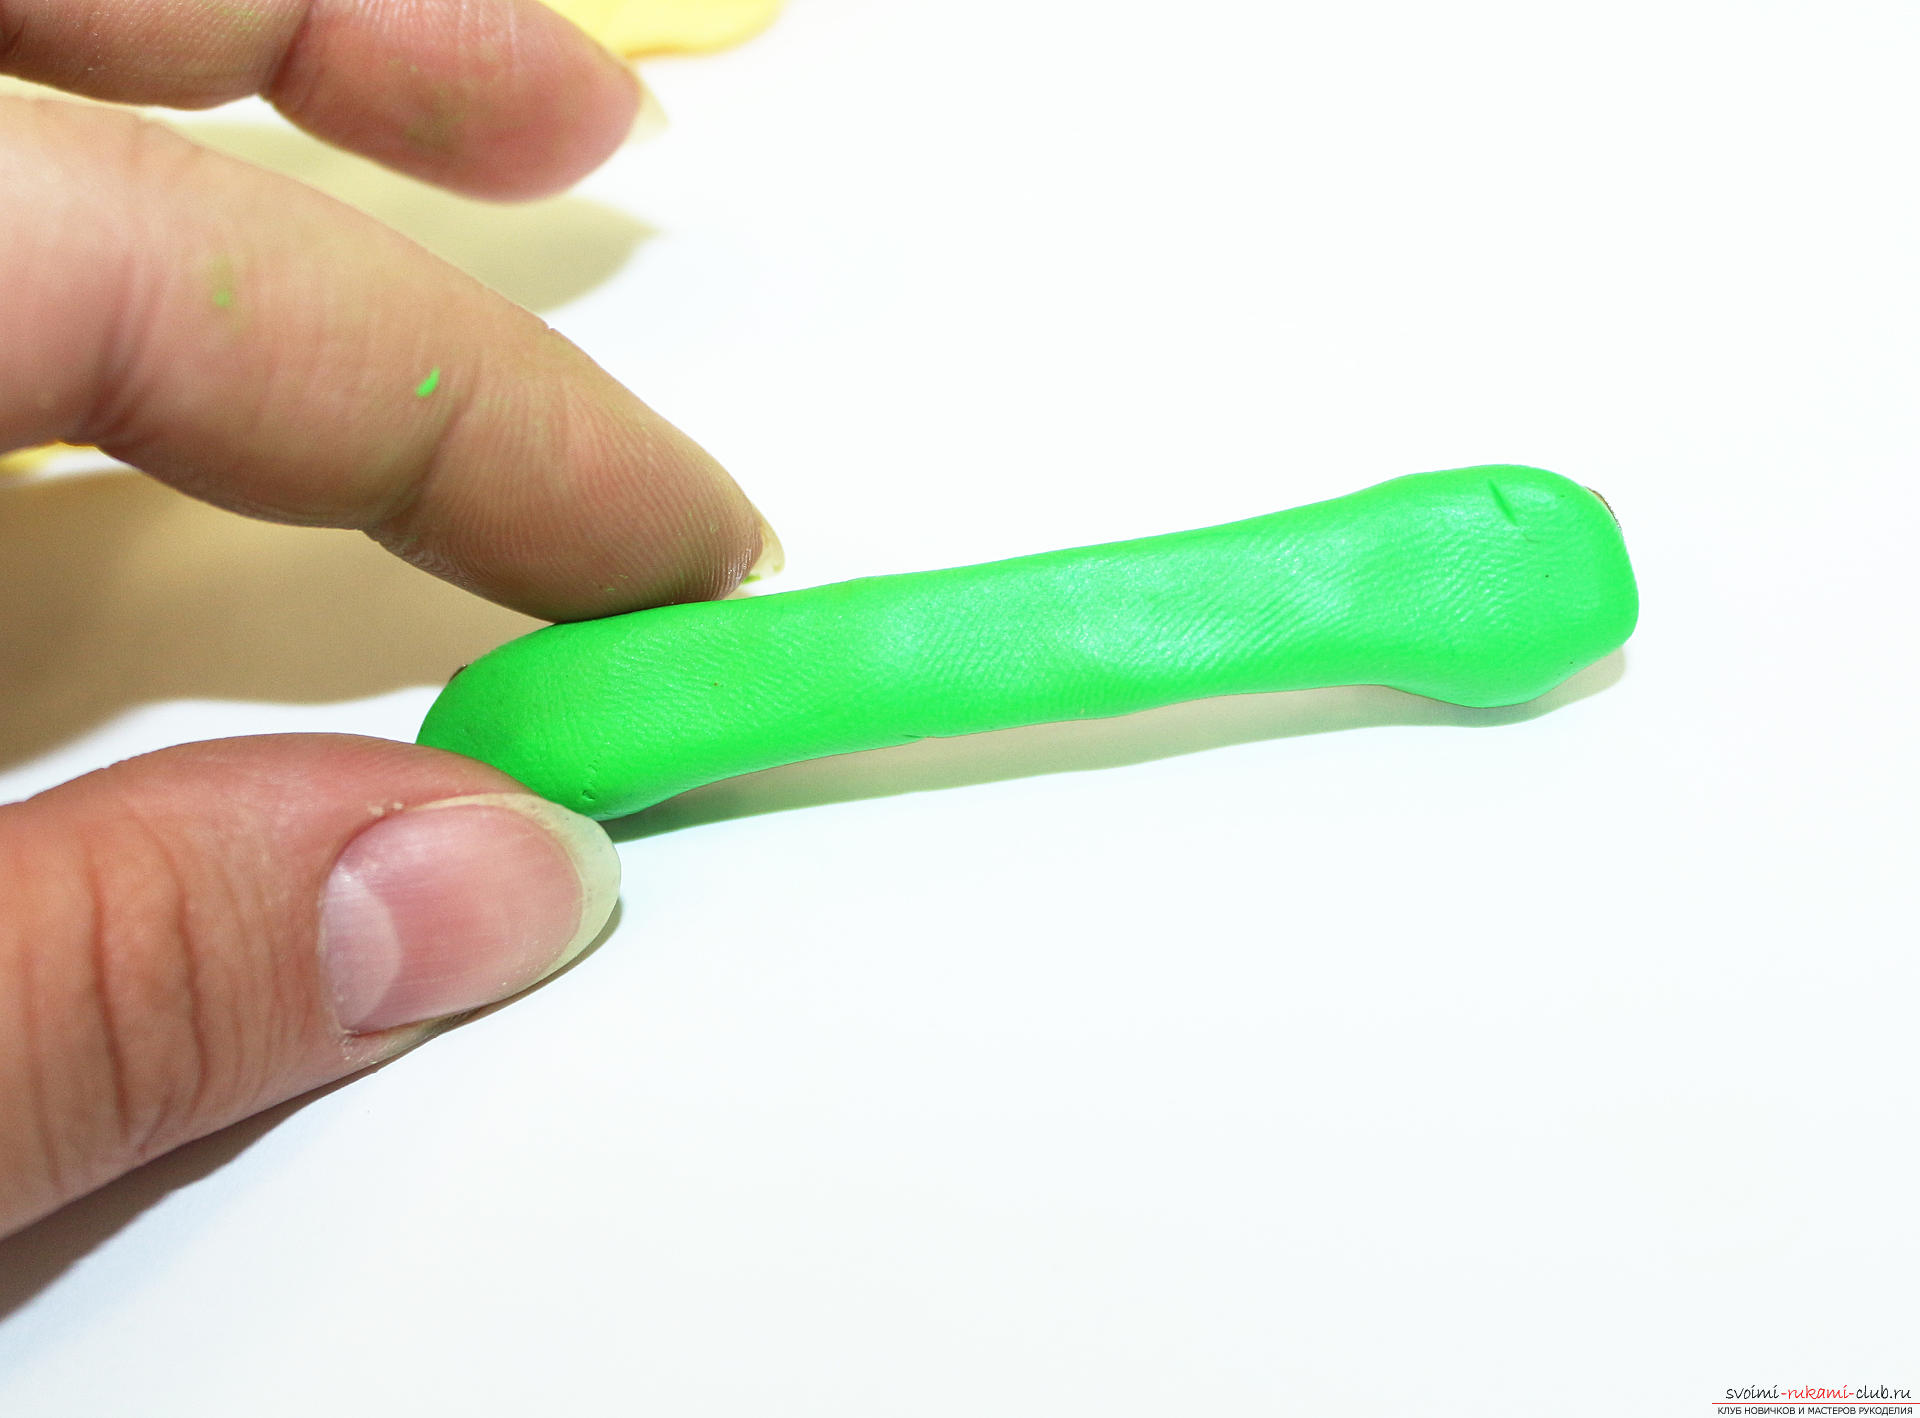 On the inside, you can leave the coating smooth.
 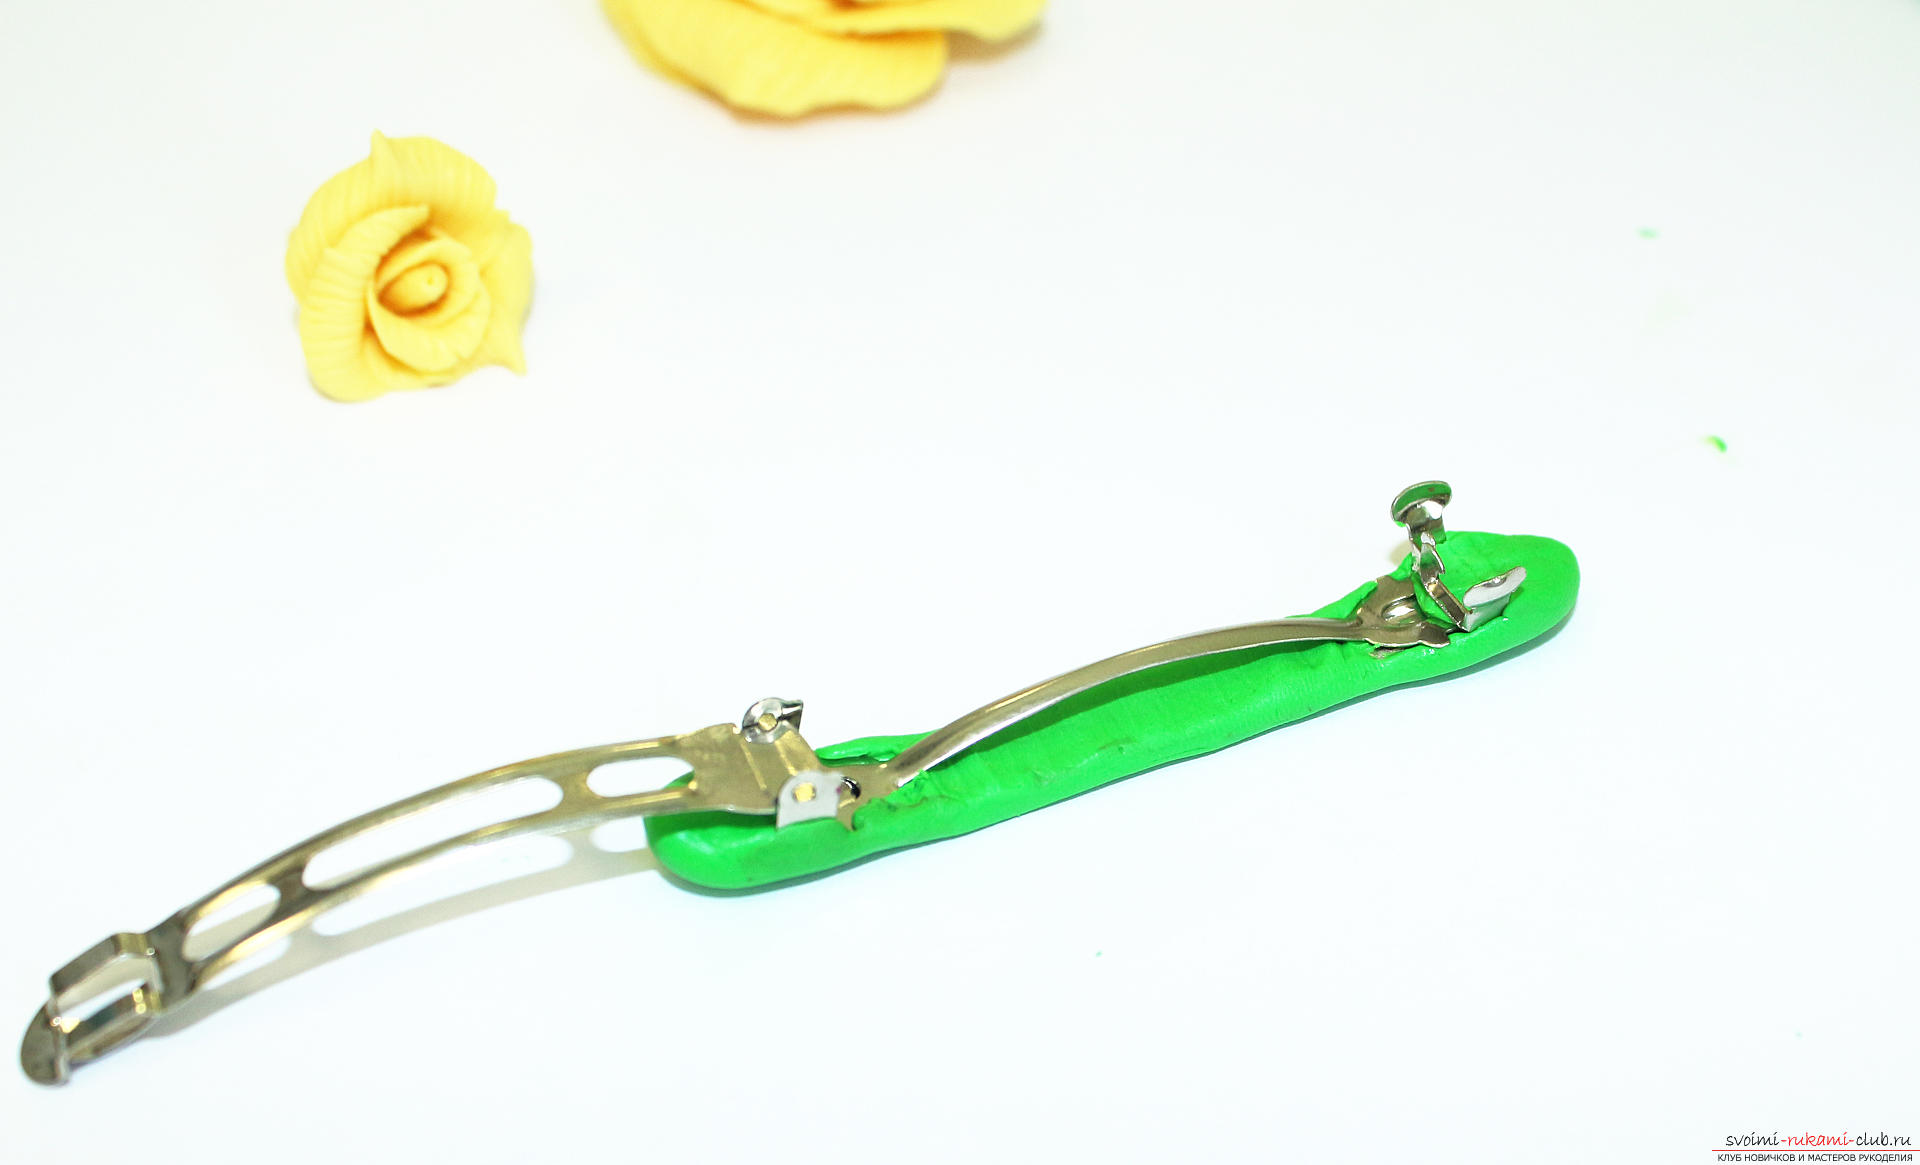 Or "dodge" it with toothpicks to make the texture.
 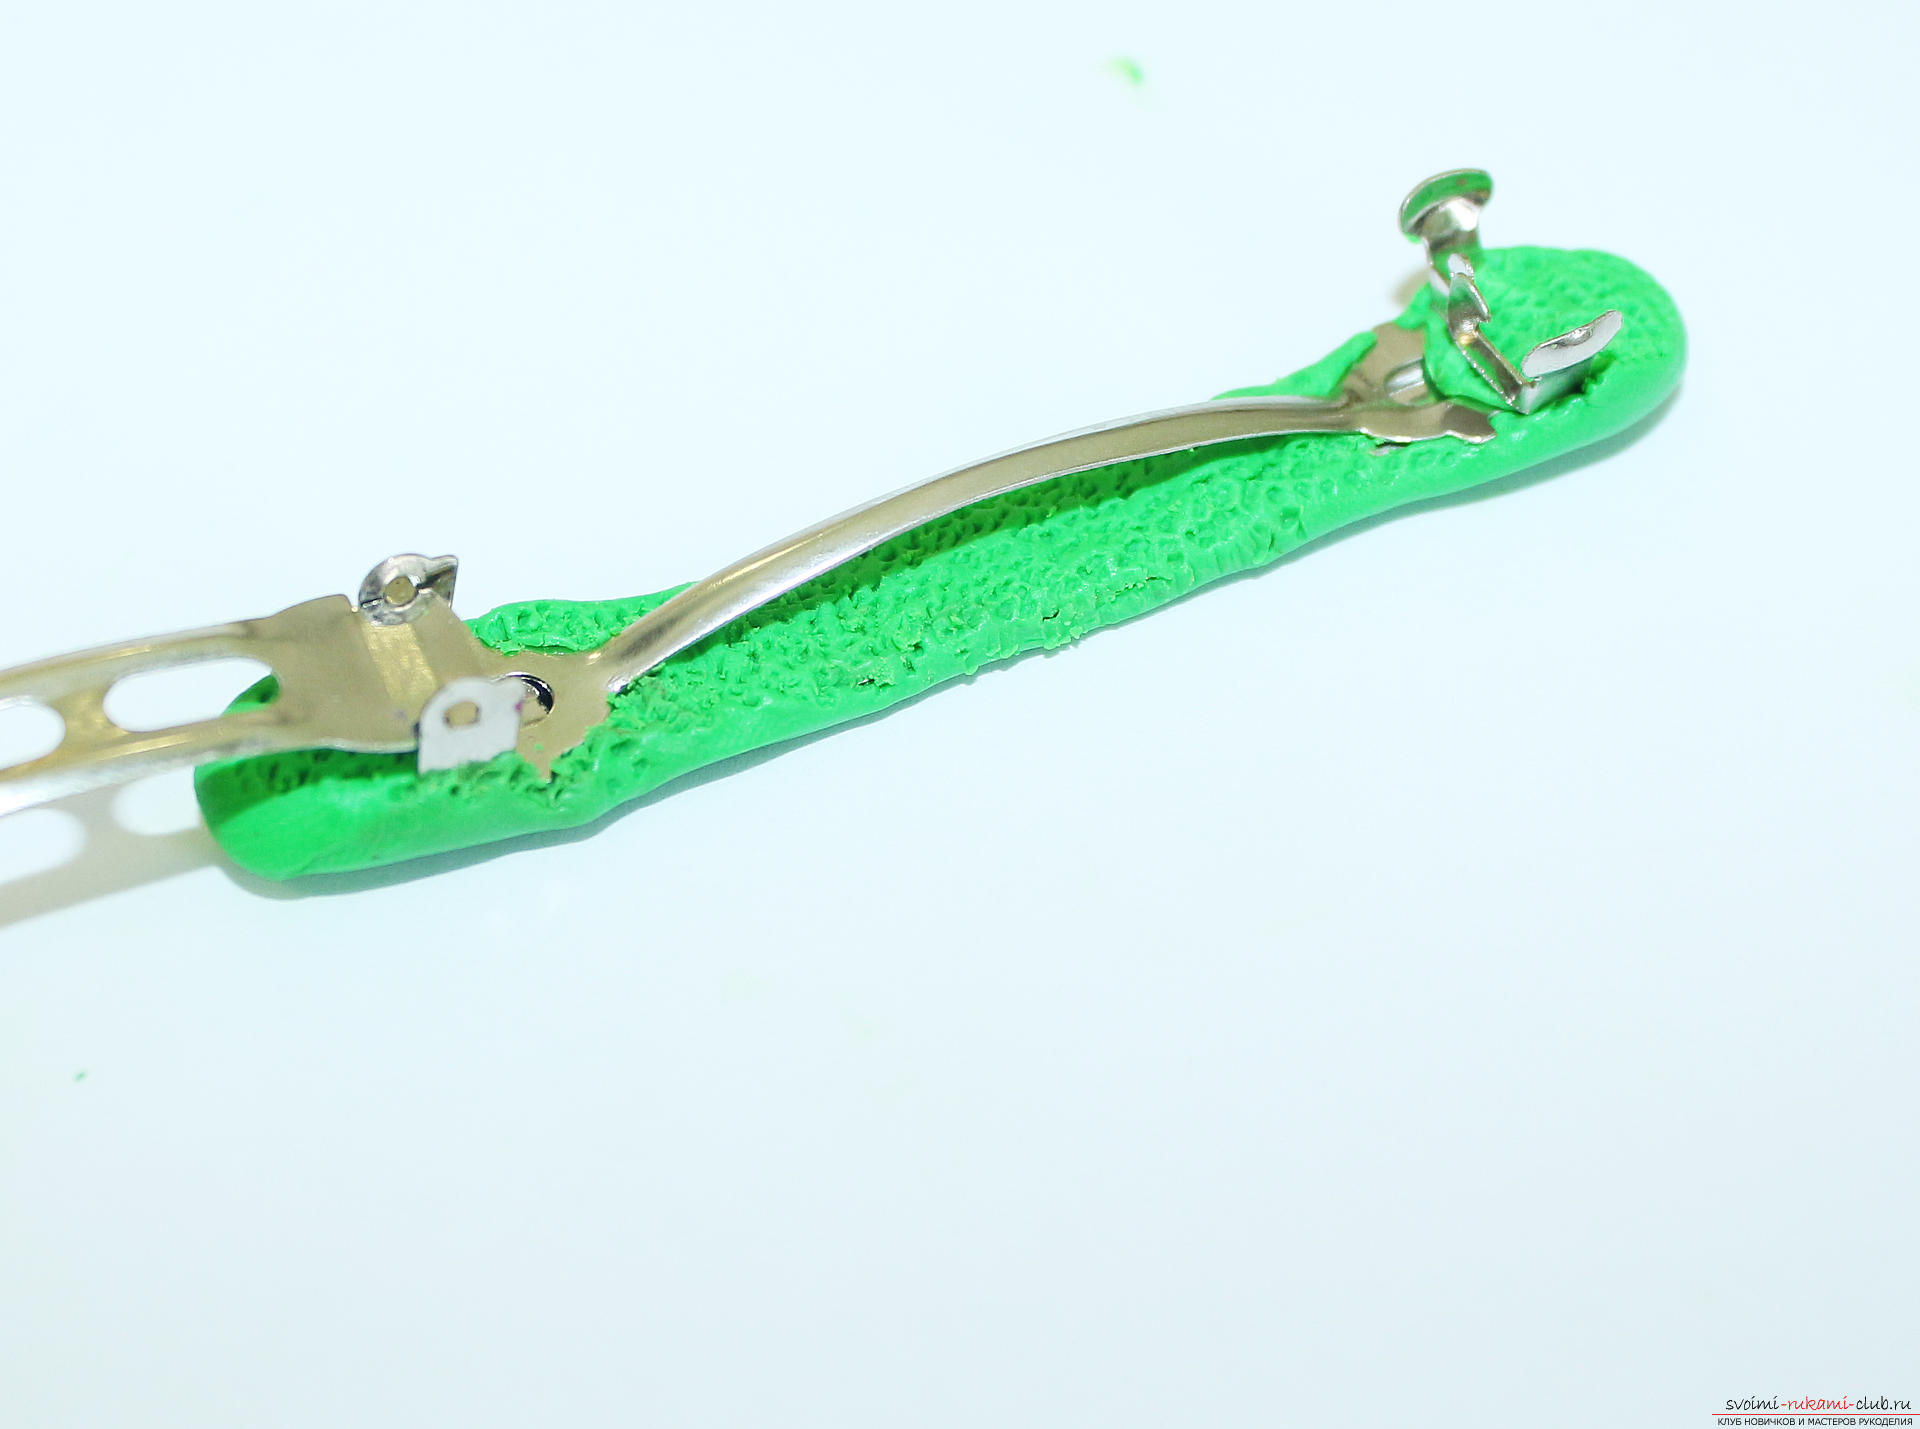 From green plastic we form droplets, flatten them and texturize the corrugated paper.
 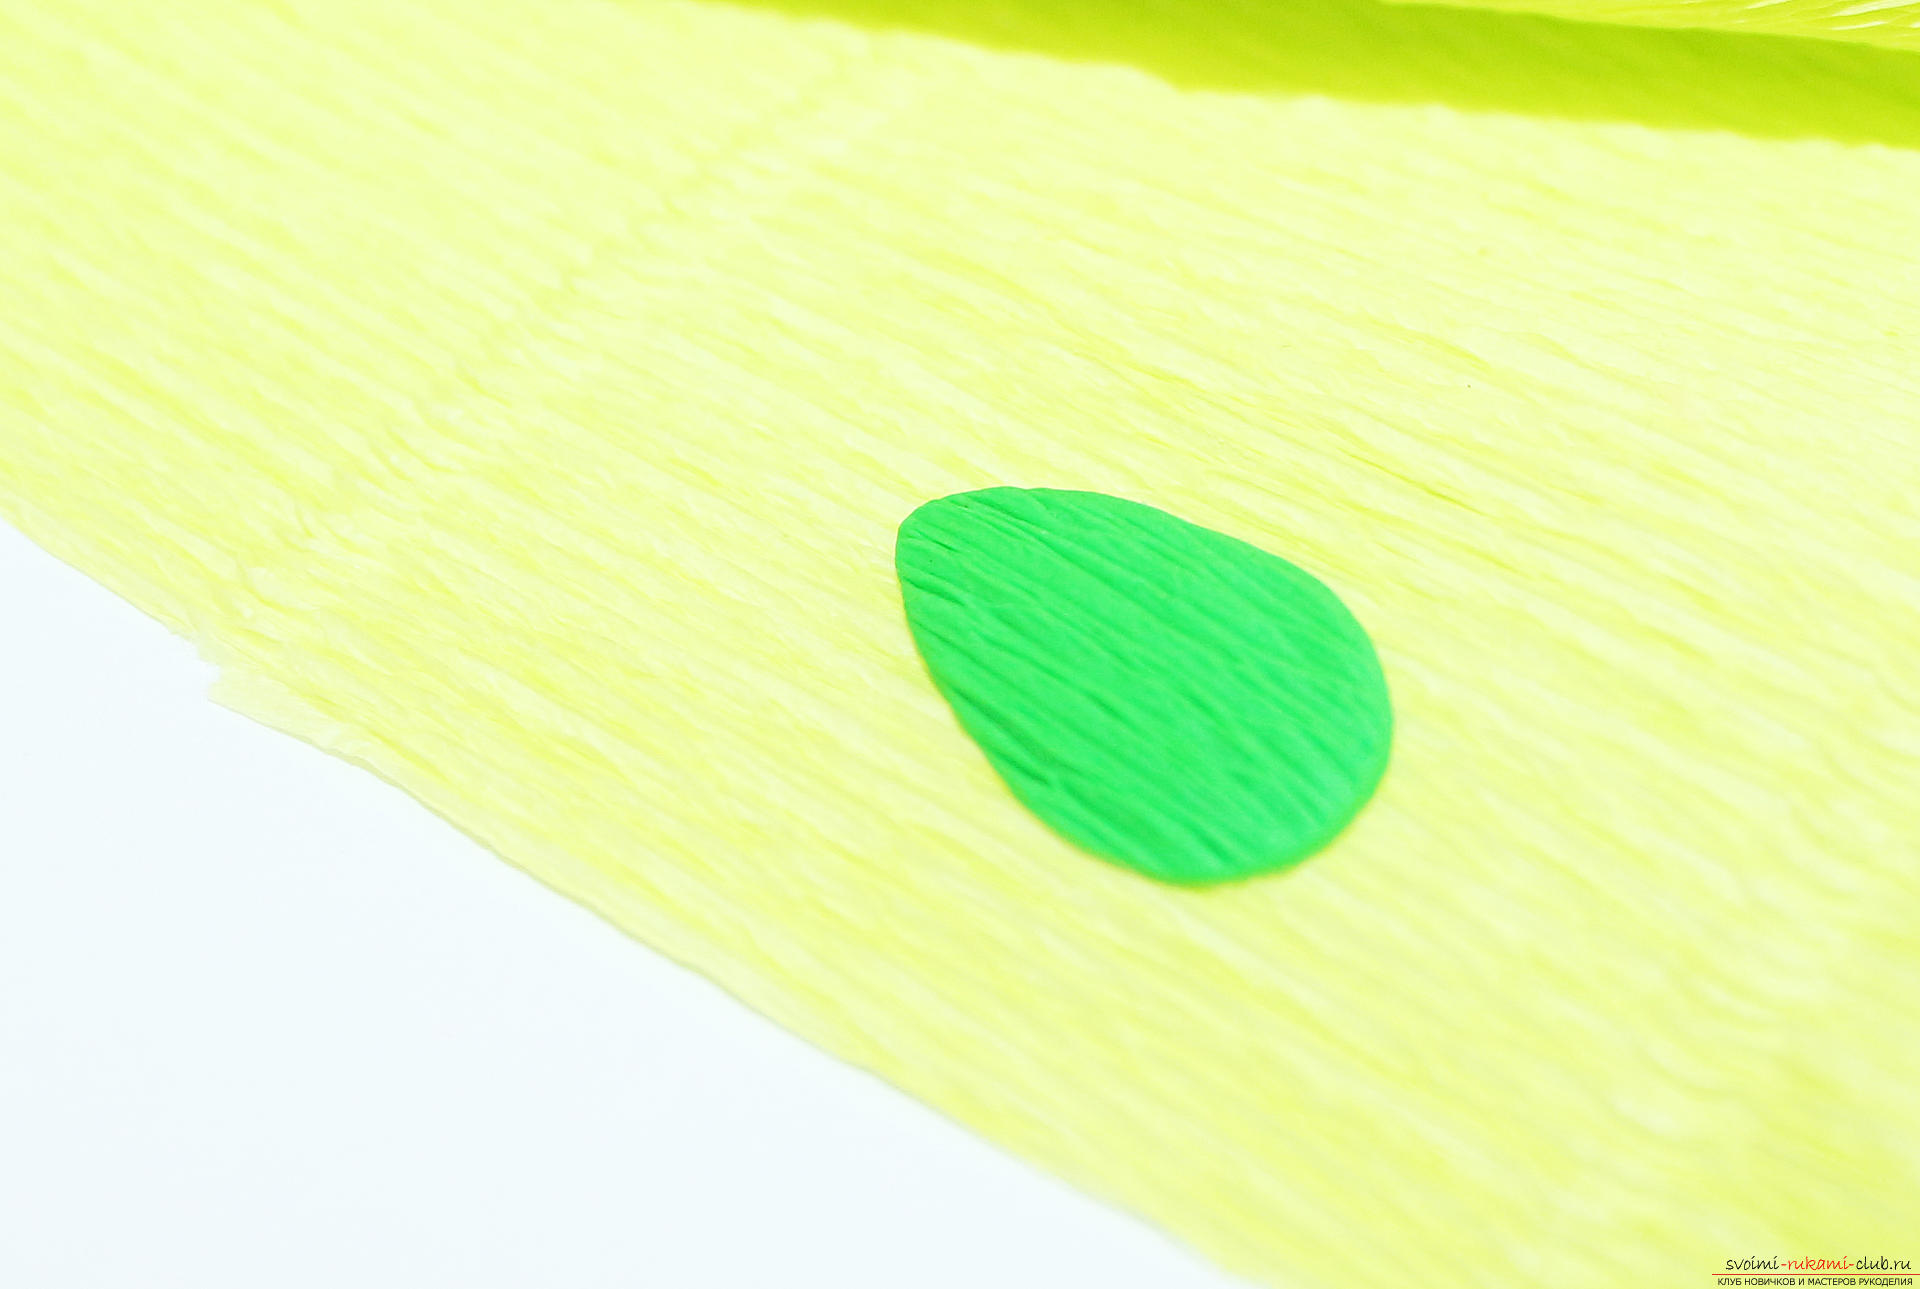 We do this in a few sheets. Some will turn out to be wide, some narrow.
 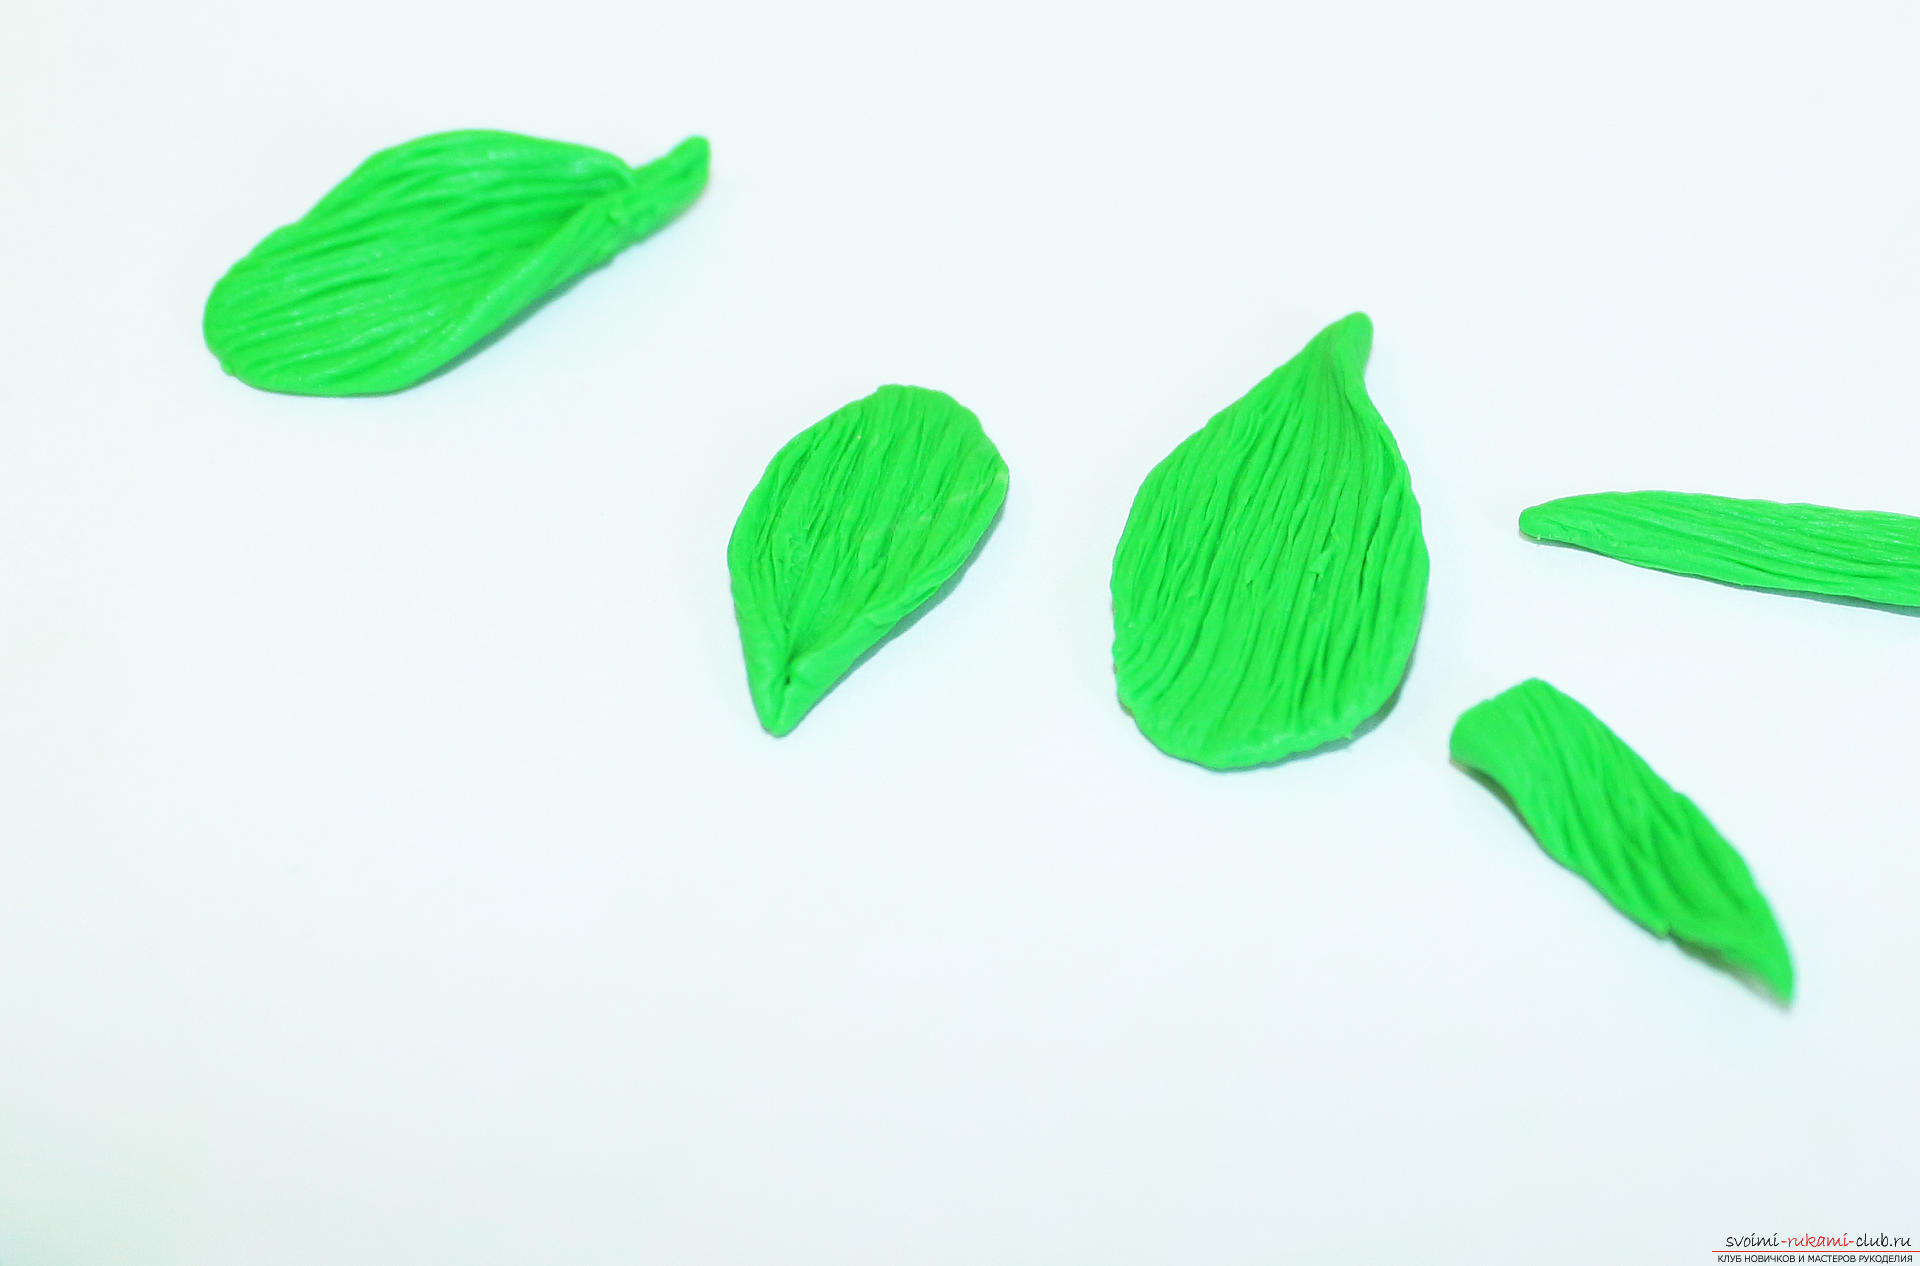 We start to stick these leaves from the edge of the base. Of course, they need to hide the basis.
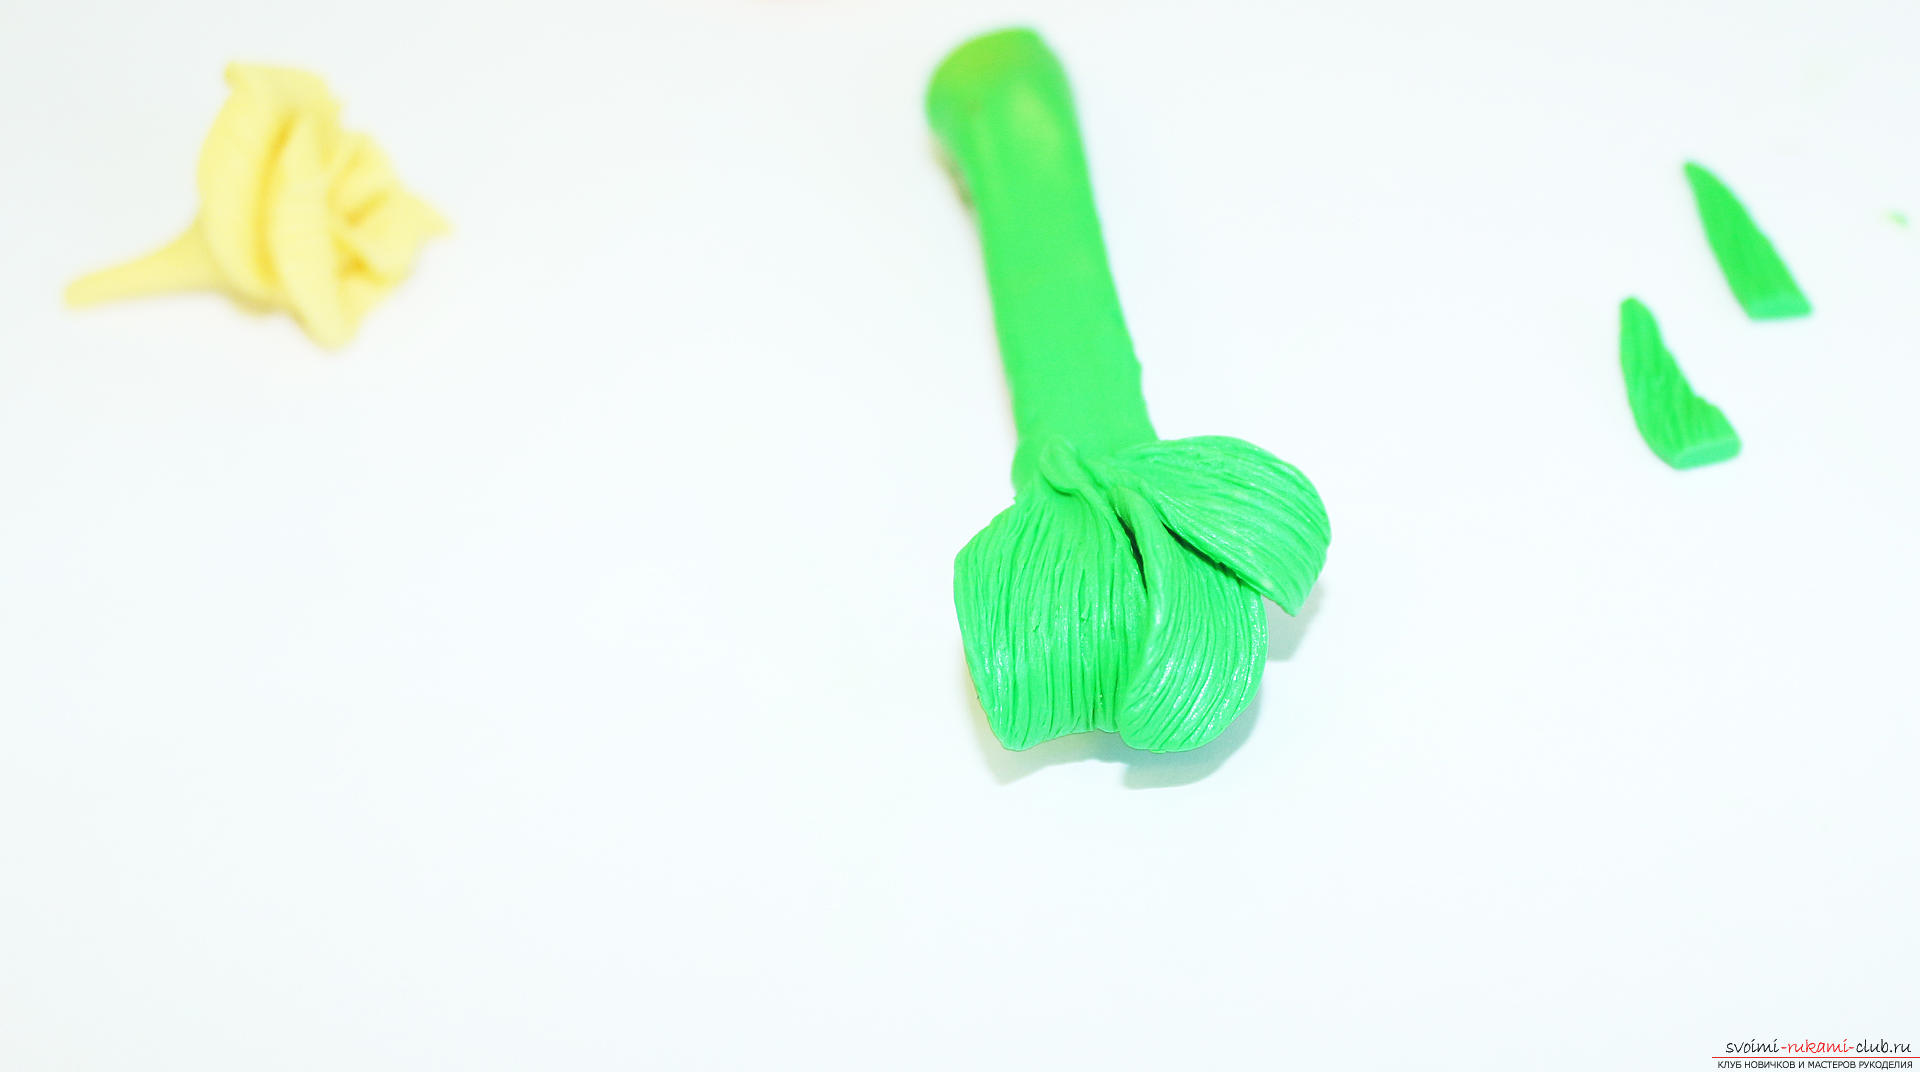
 Those leaves that turned out thinner than the others, are glued to the smallest bud with sharp edges outwards.
  We glue it to the barrette.
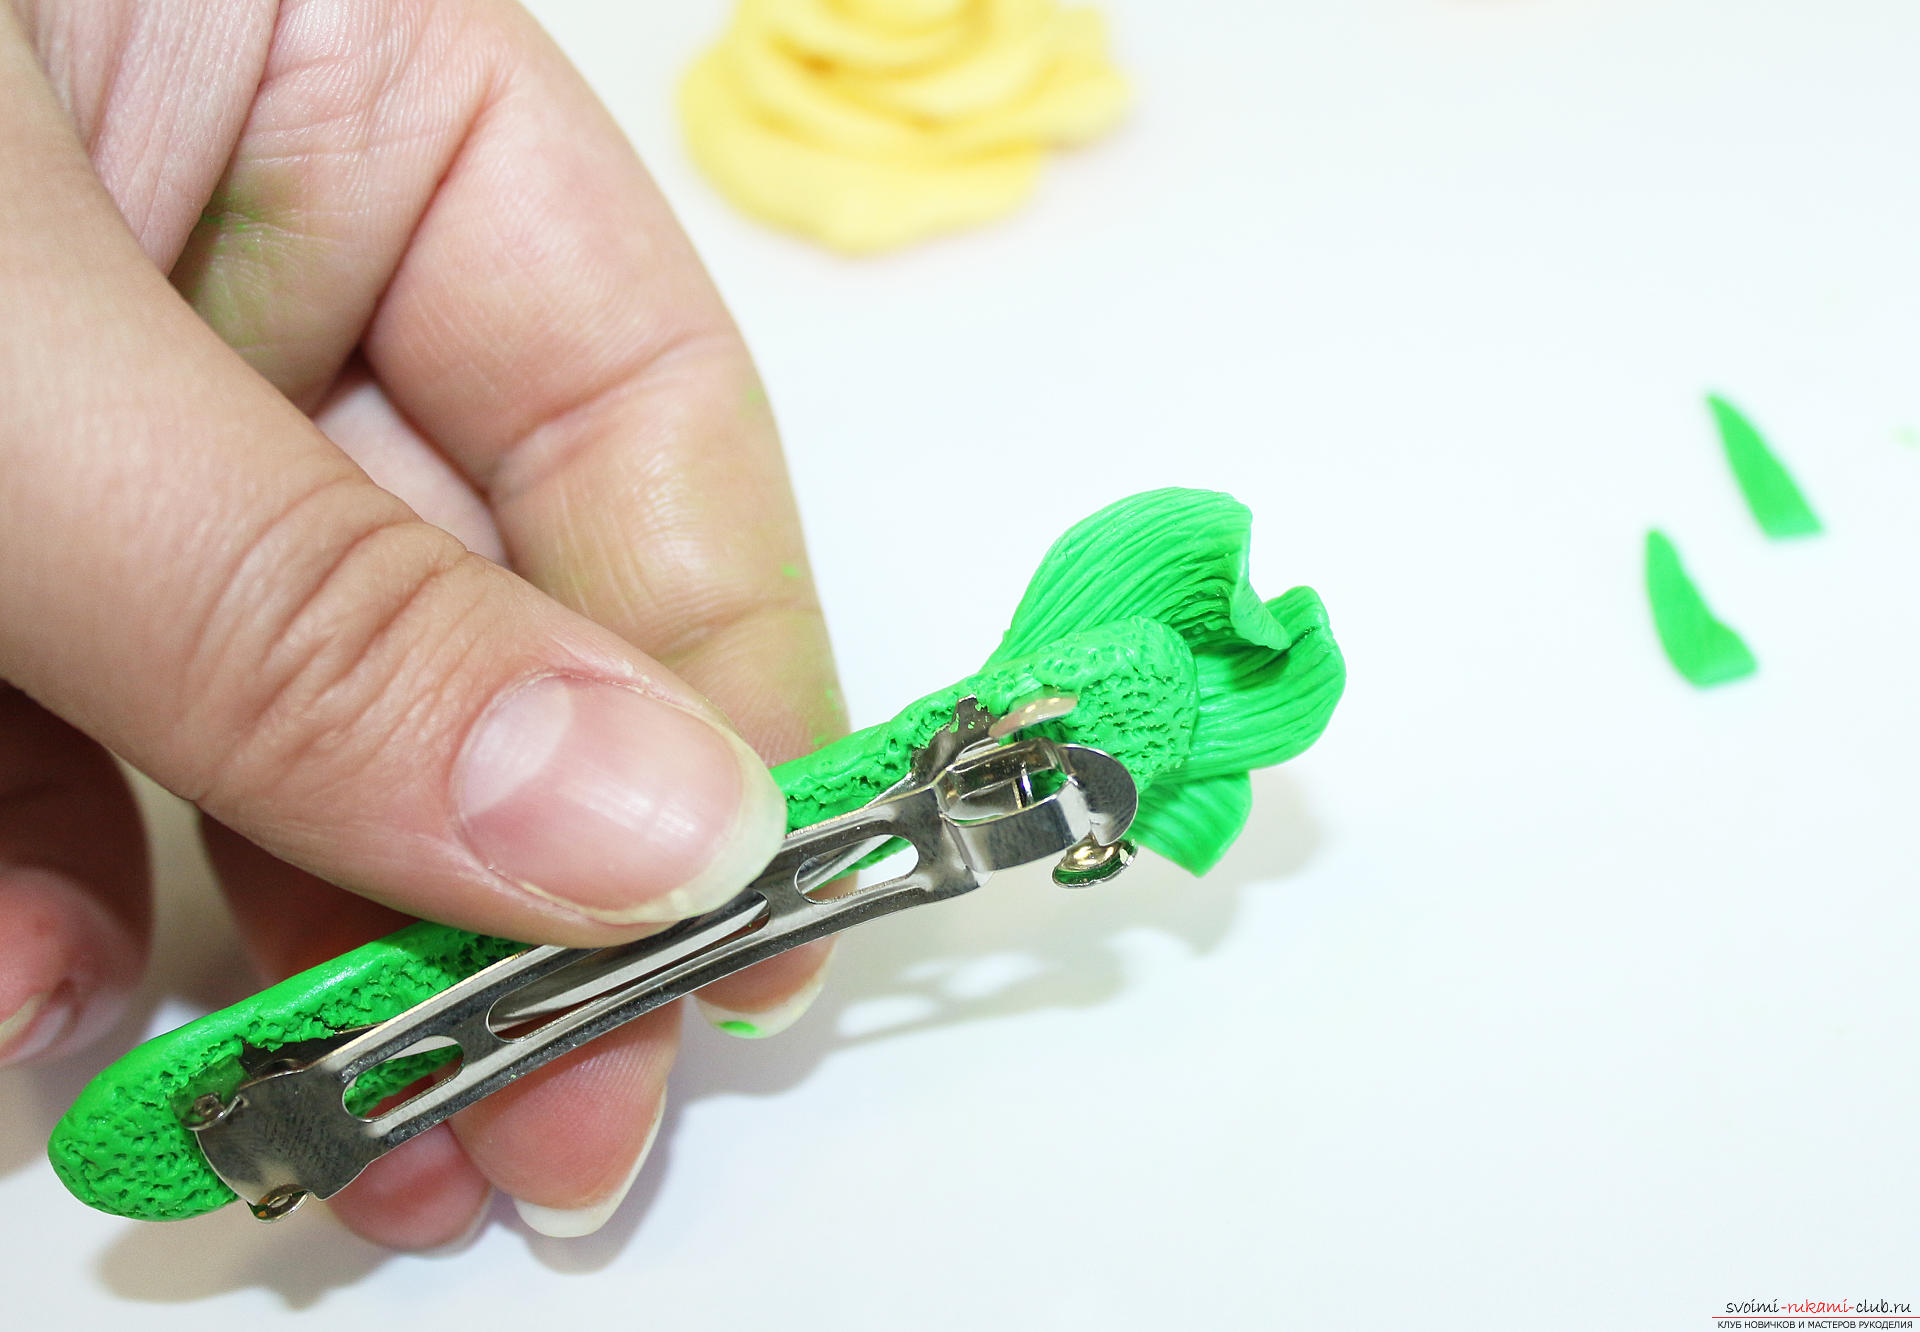
 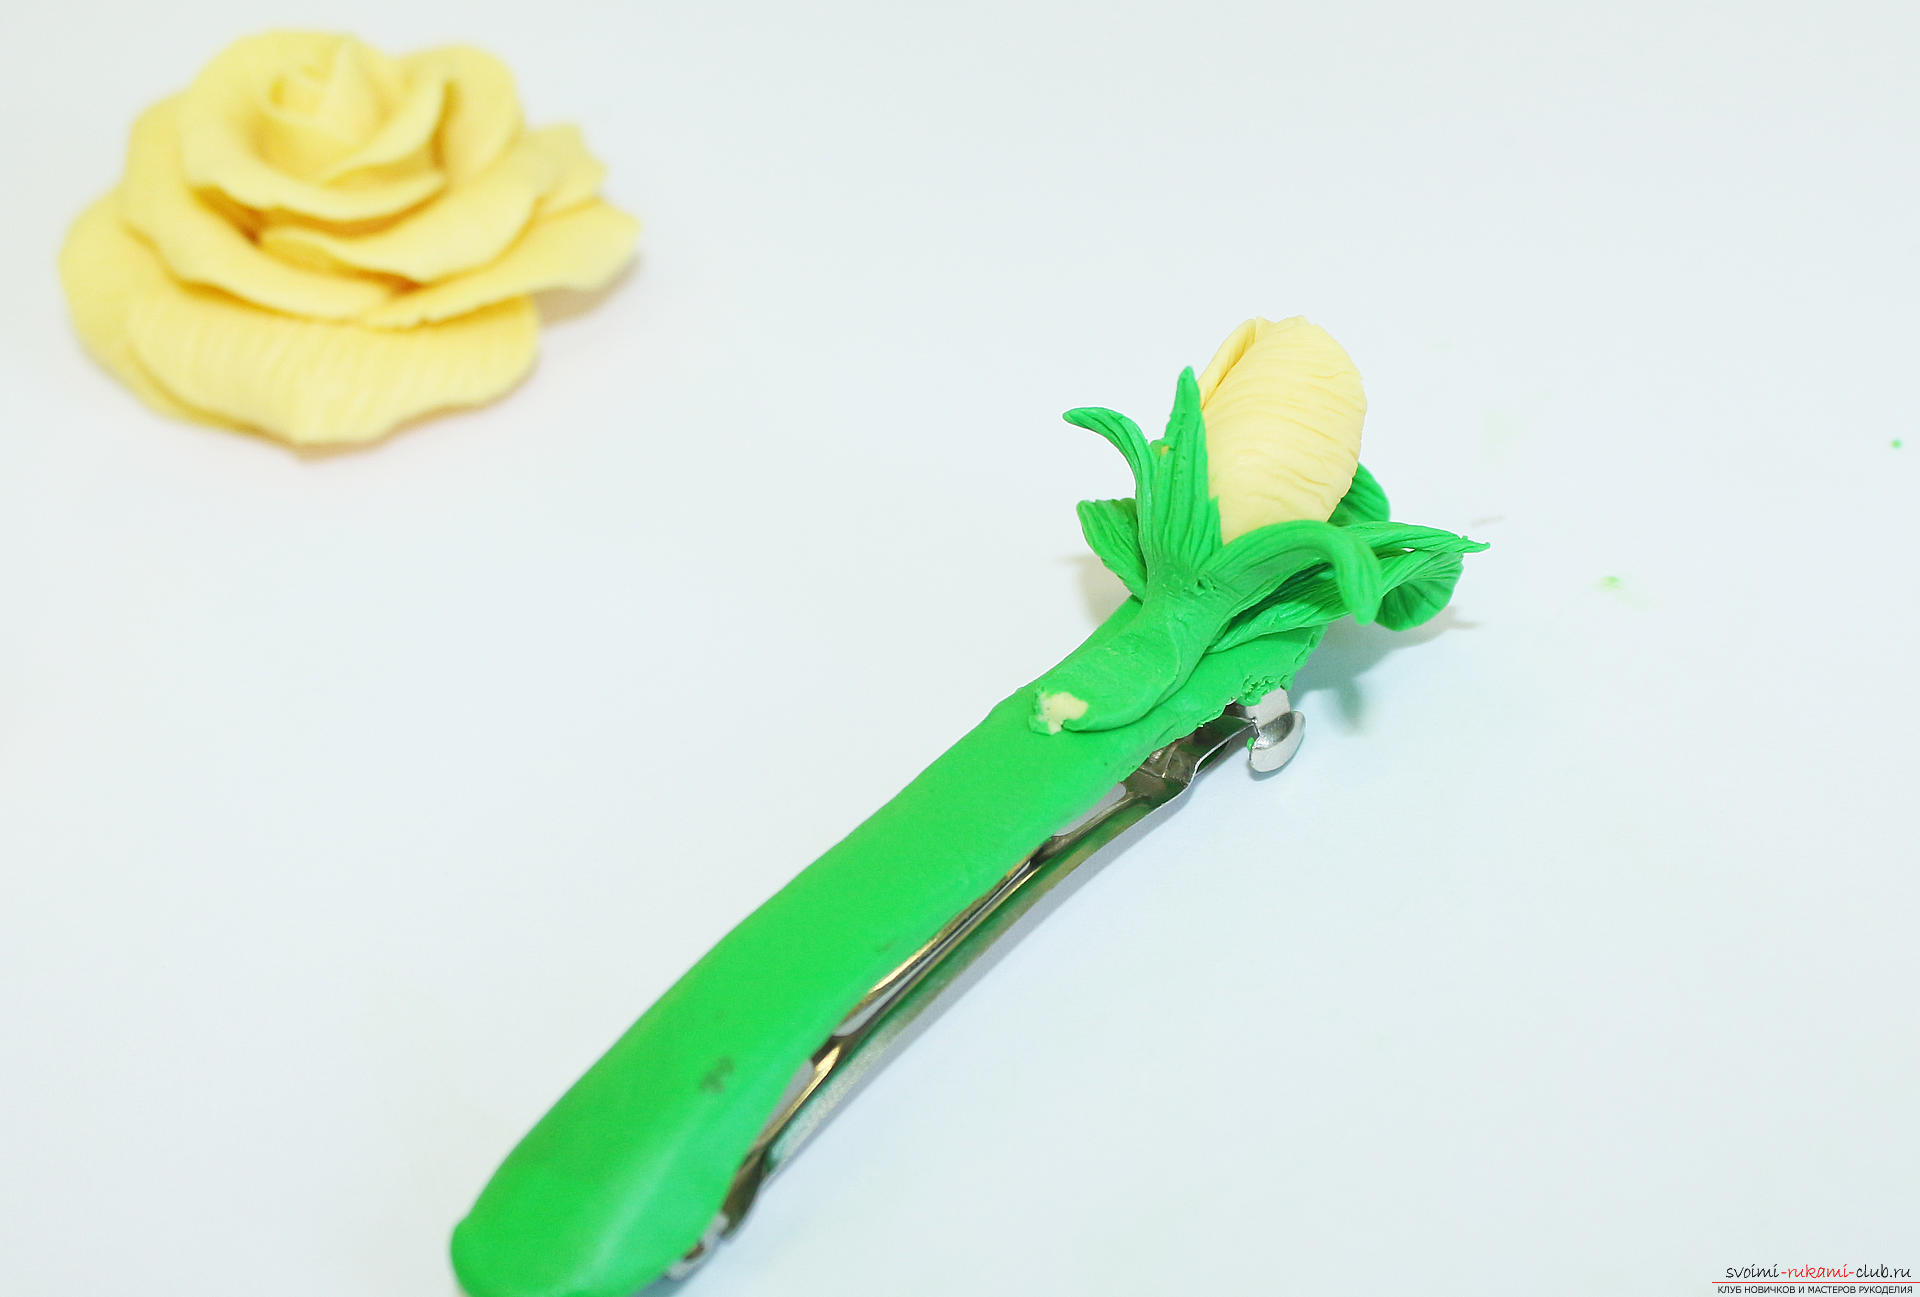 We cover the place of gluing with new leaves.
 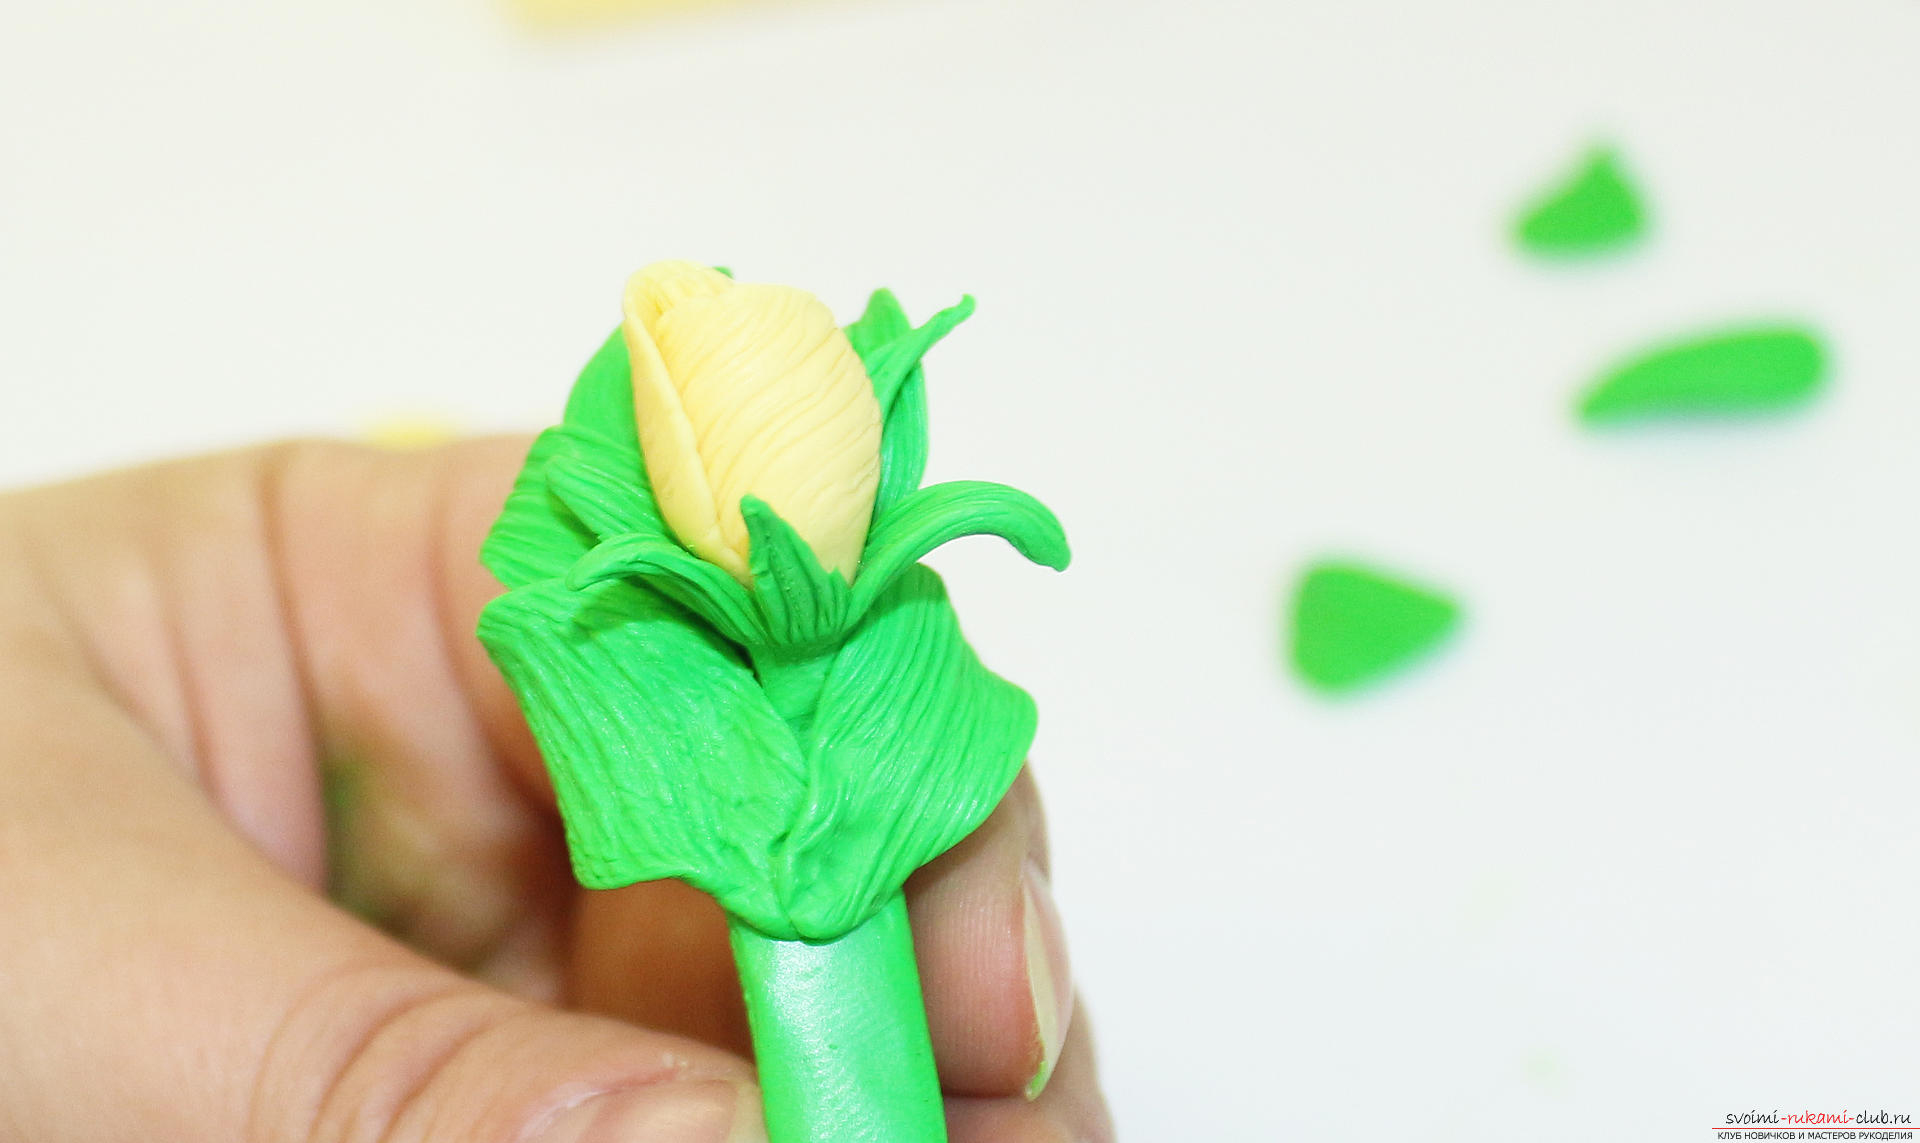 On the other hand, we do the same - first we glue several leaves, hiding the base, then on the middle bud we glue several green leaves.
 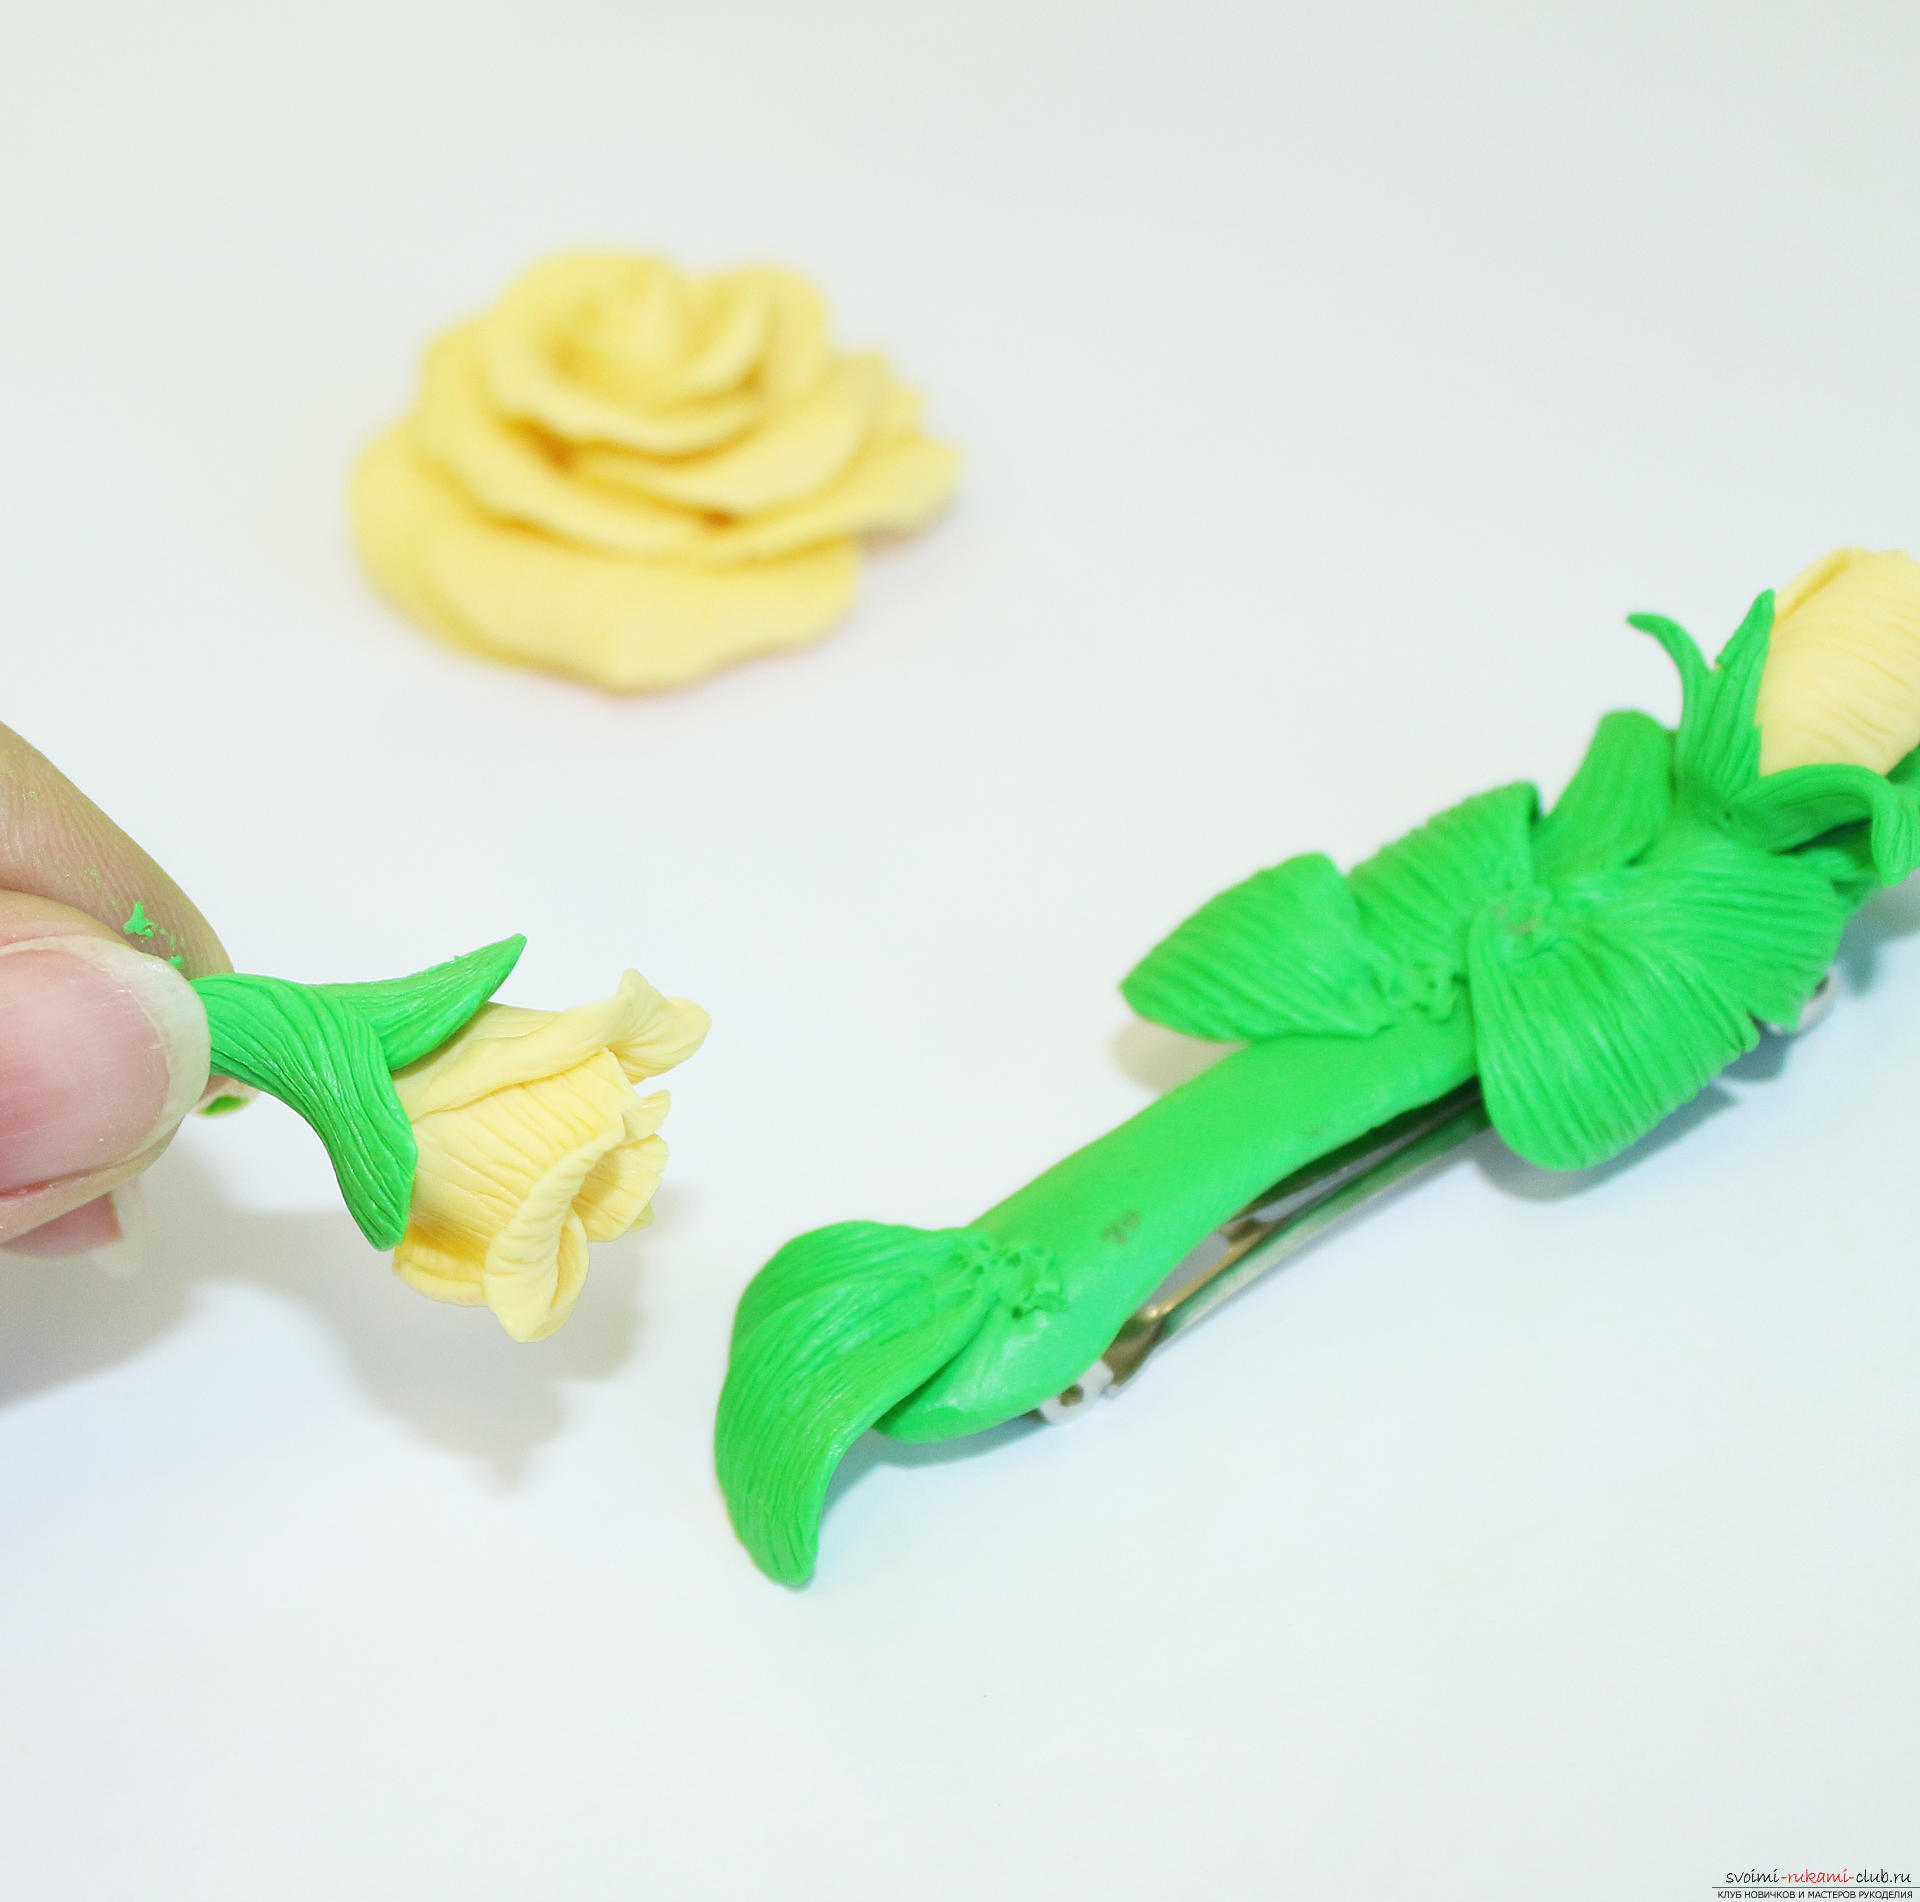 And glue to the middle bud base.
 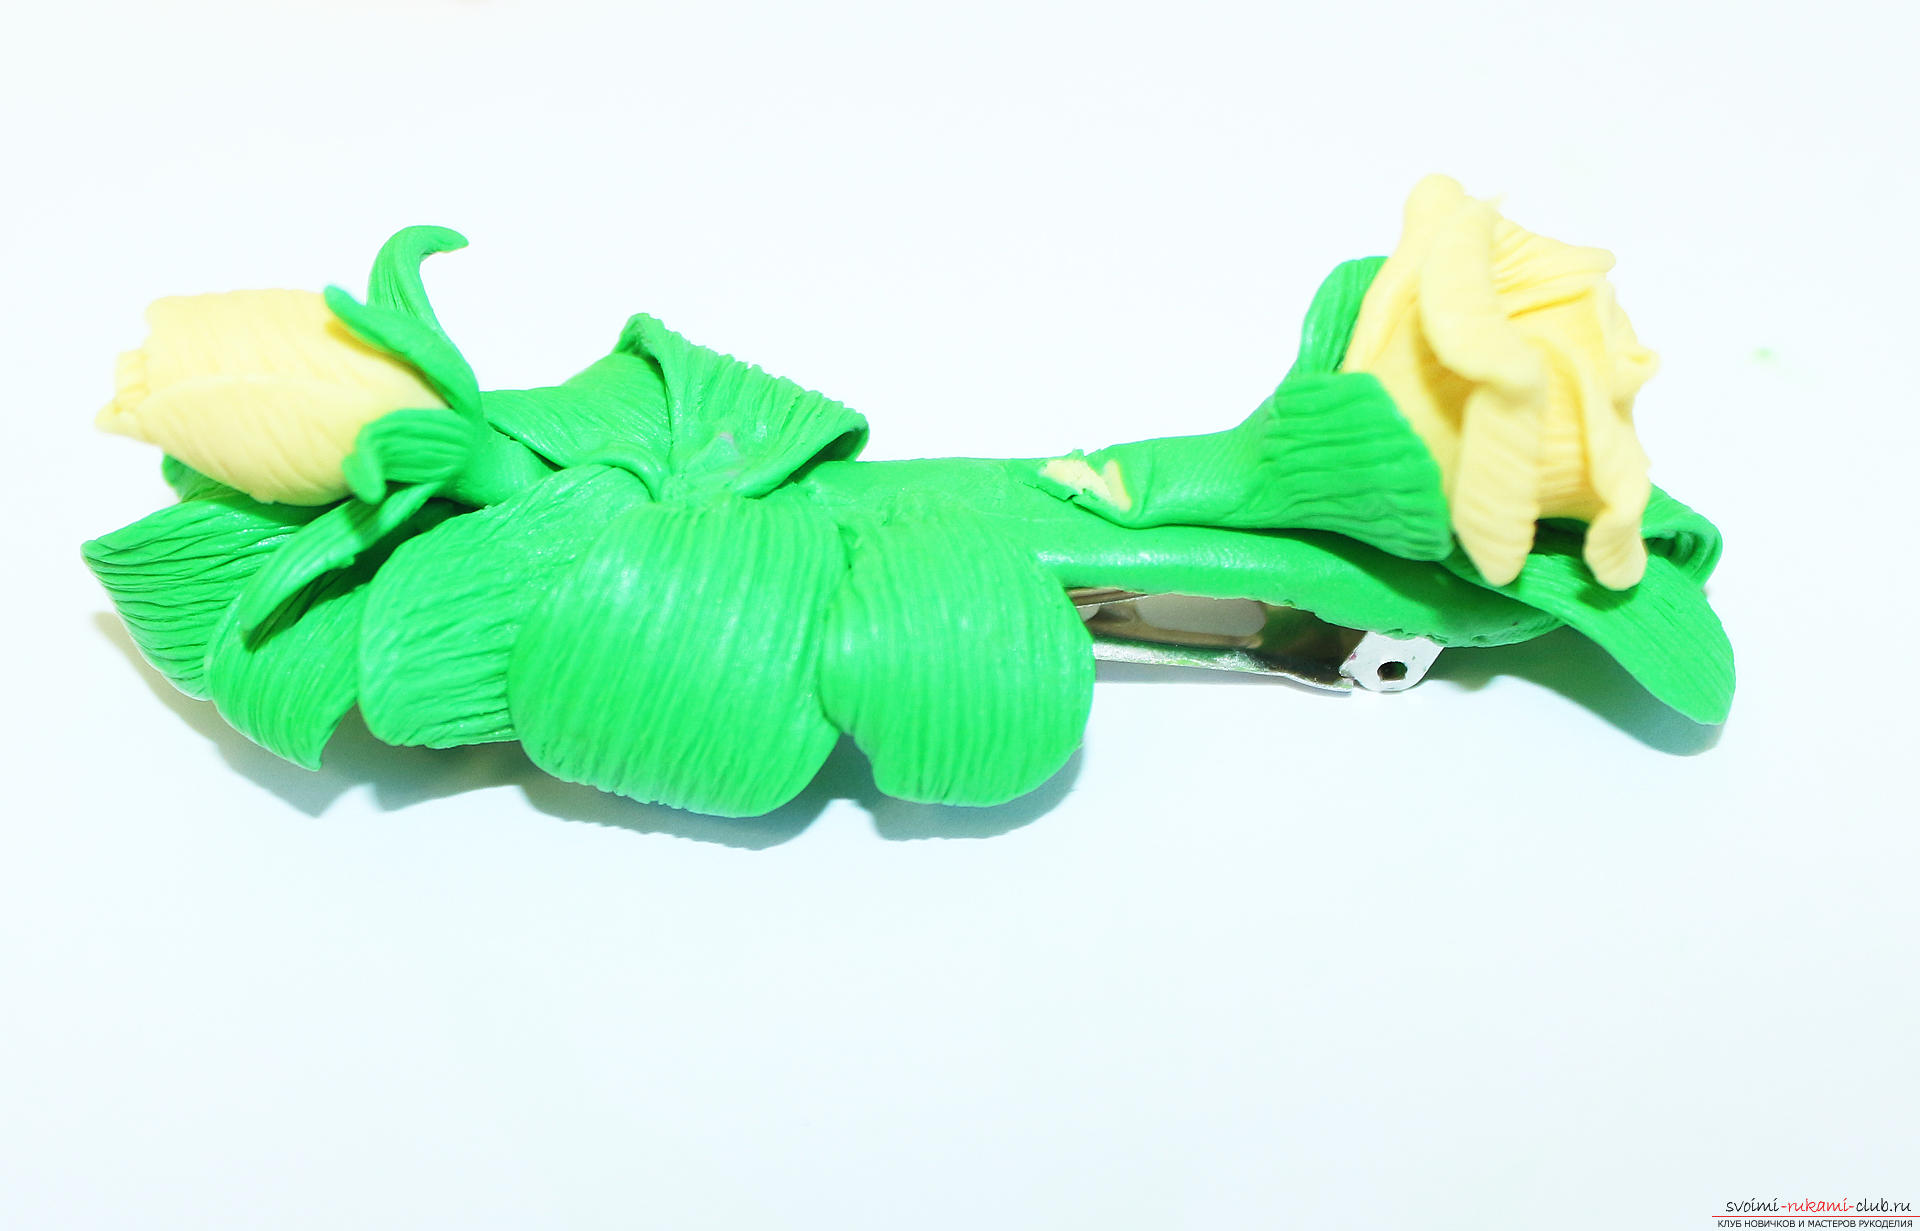 We close all free space with textured sheets.
 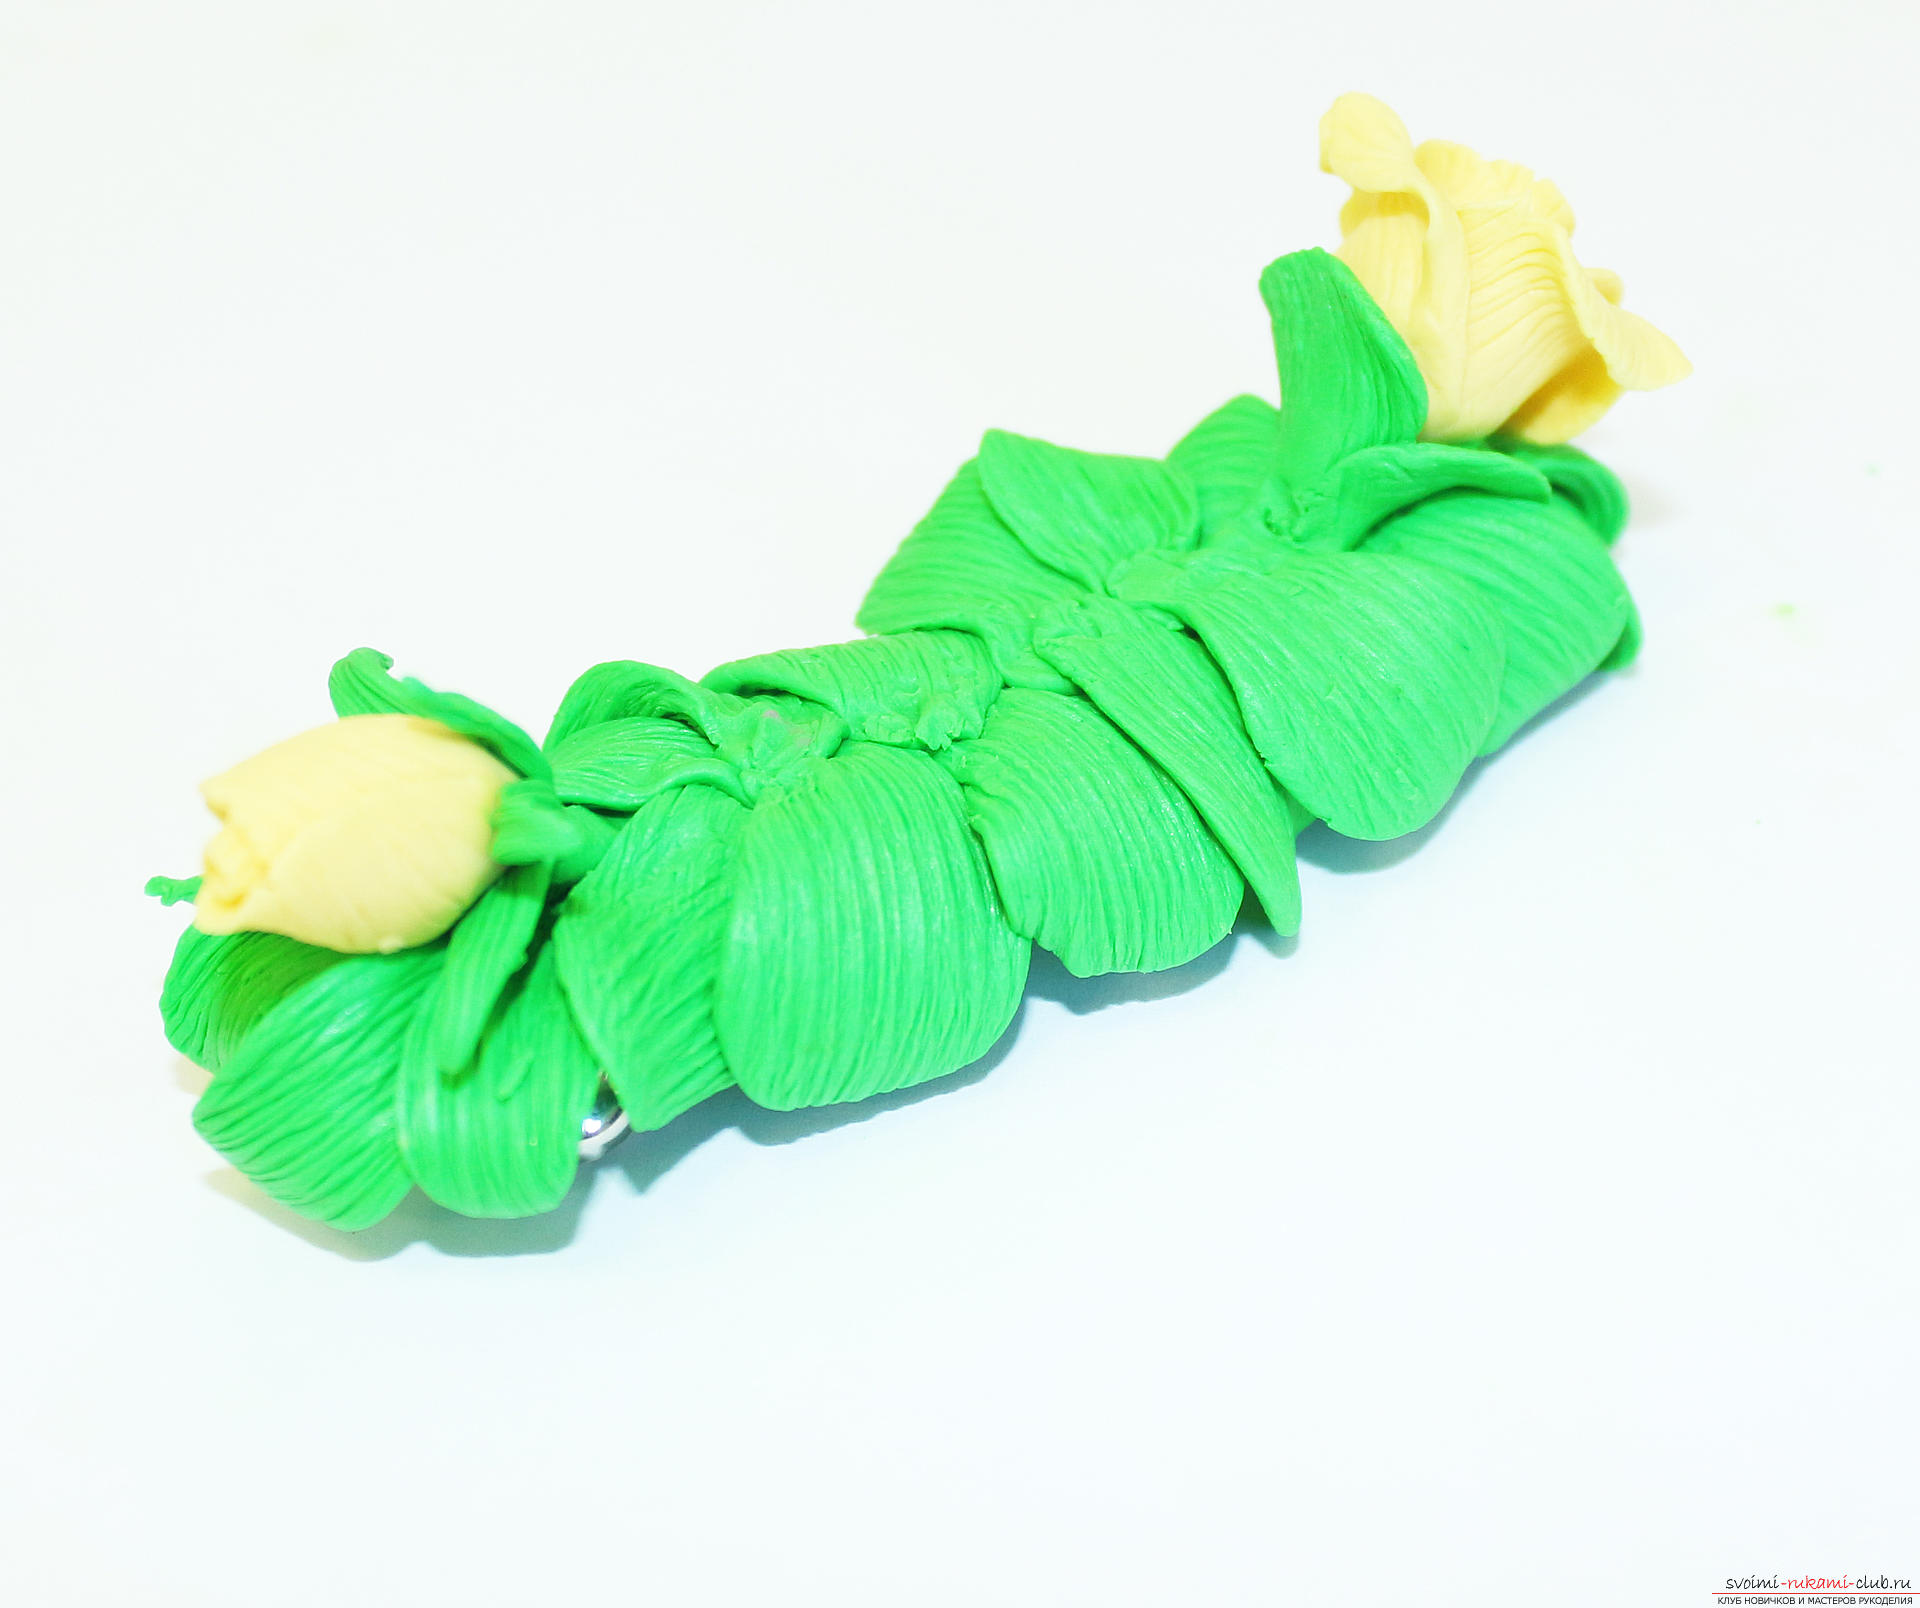 In the center of the hairpin, pour a little liquid plastic instead of glue.
 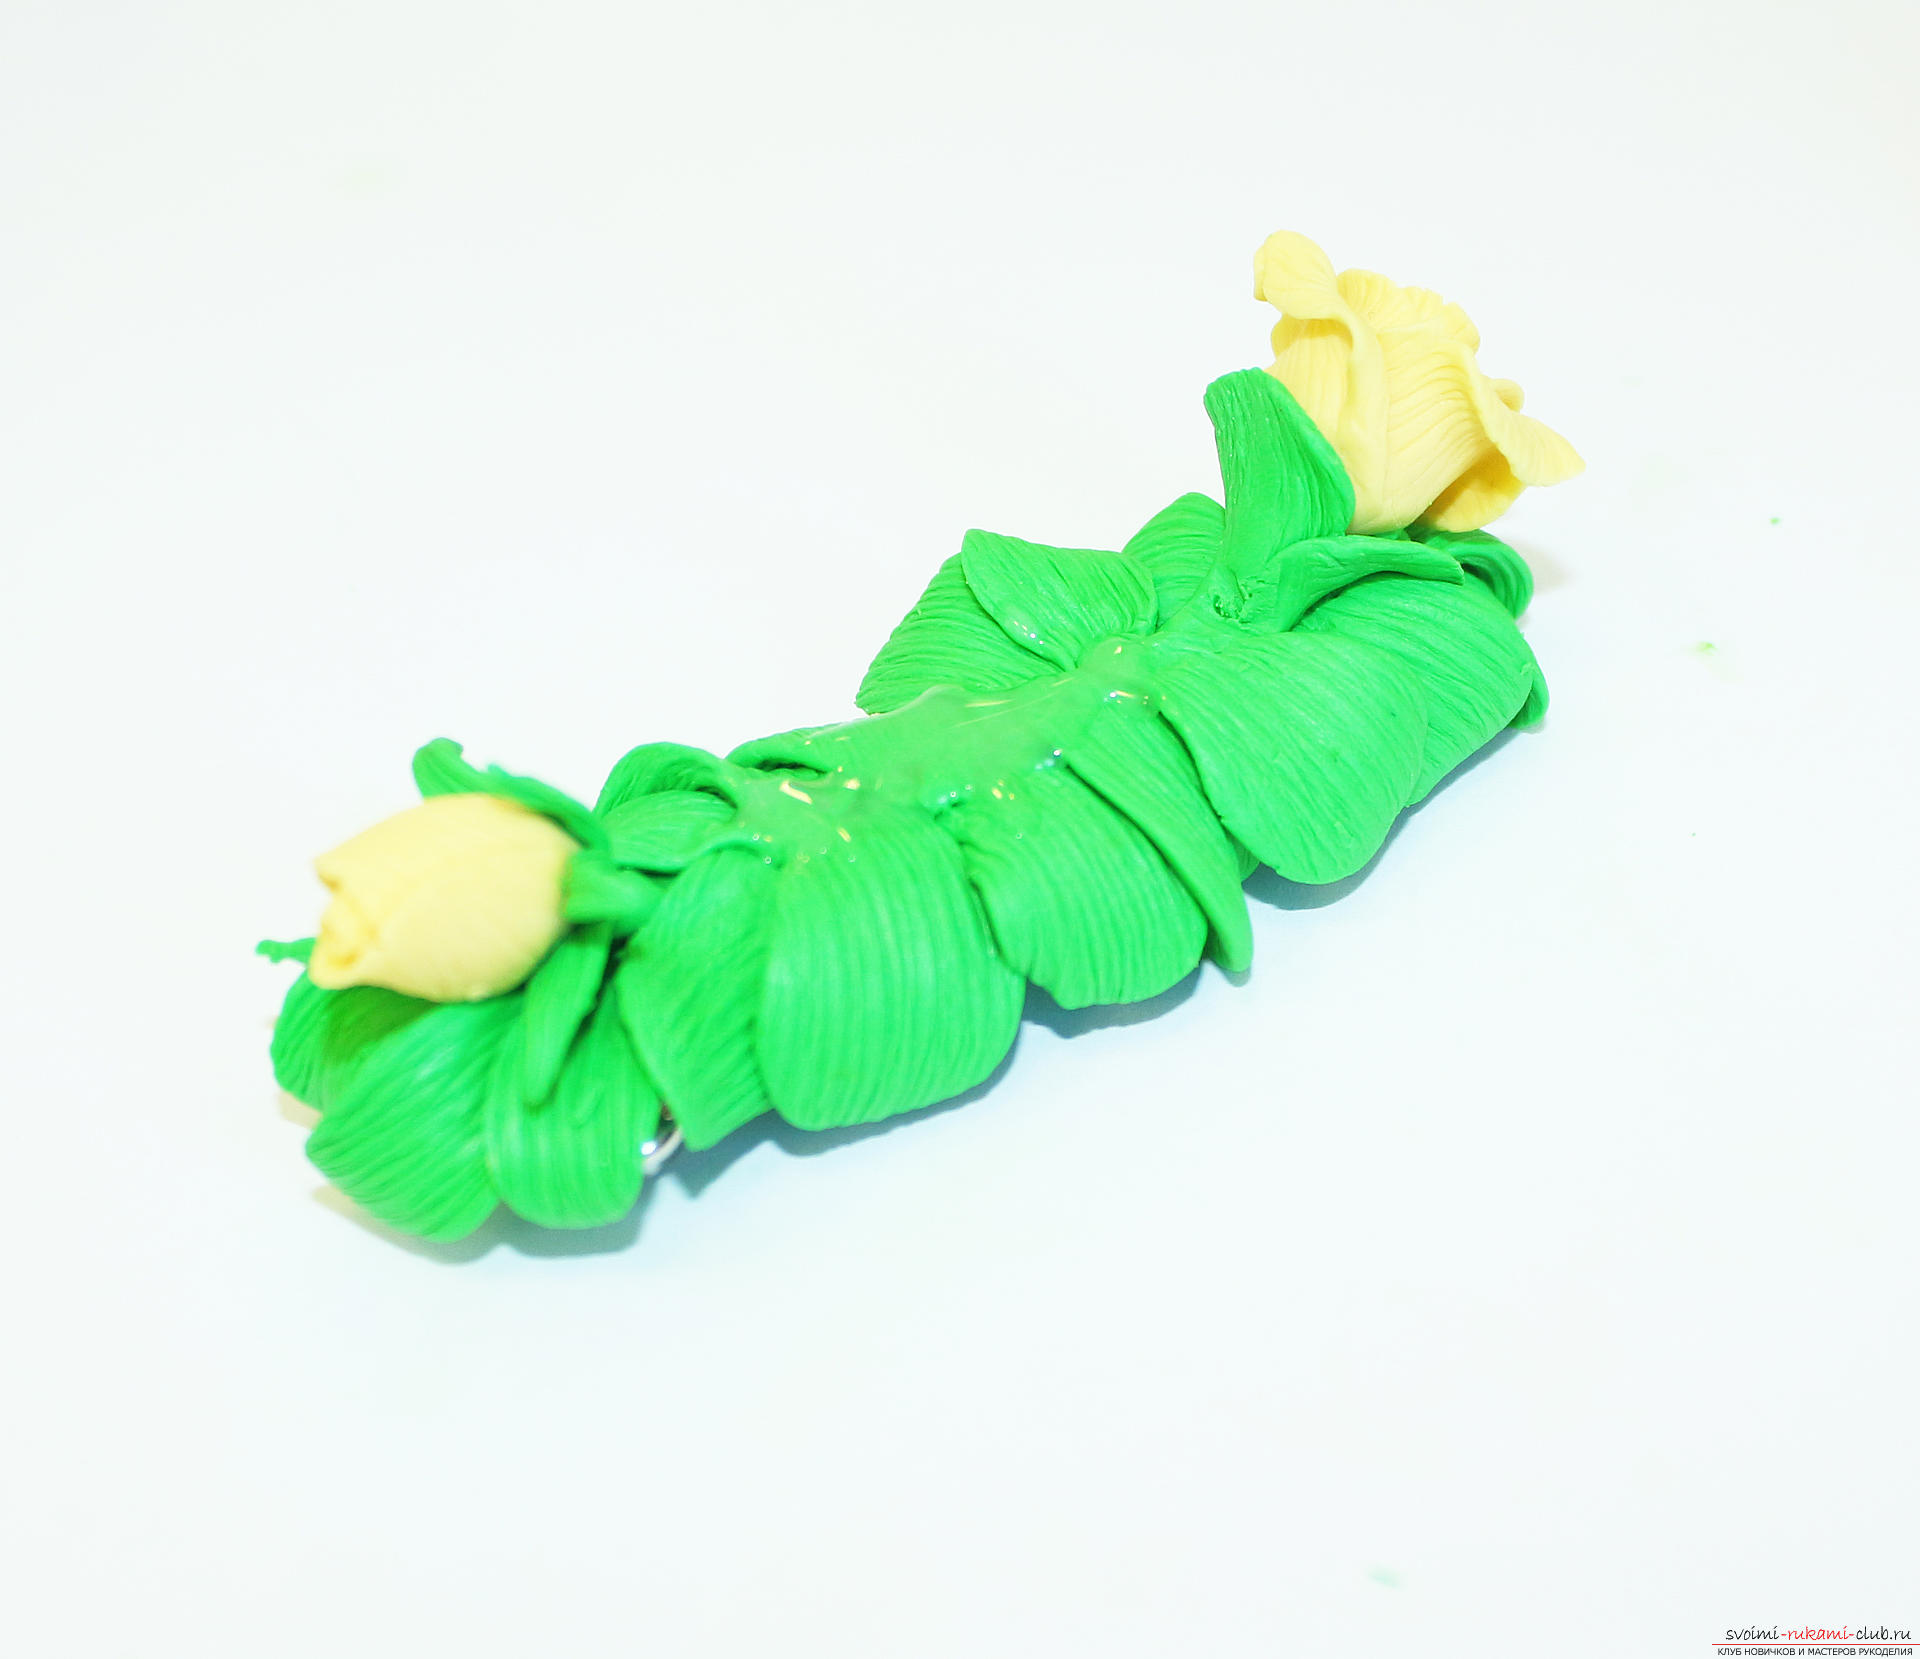 Gently put the large flower in the center, turn out its lower petals, so that they hide the place of gluing. If desired, the product can be toned with pastel or acrylic paints.
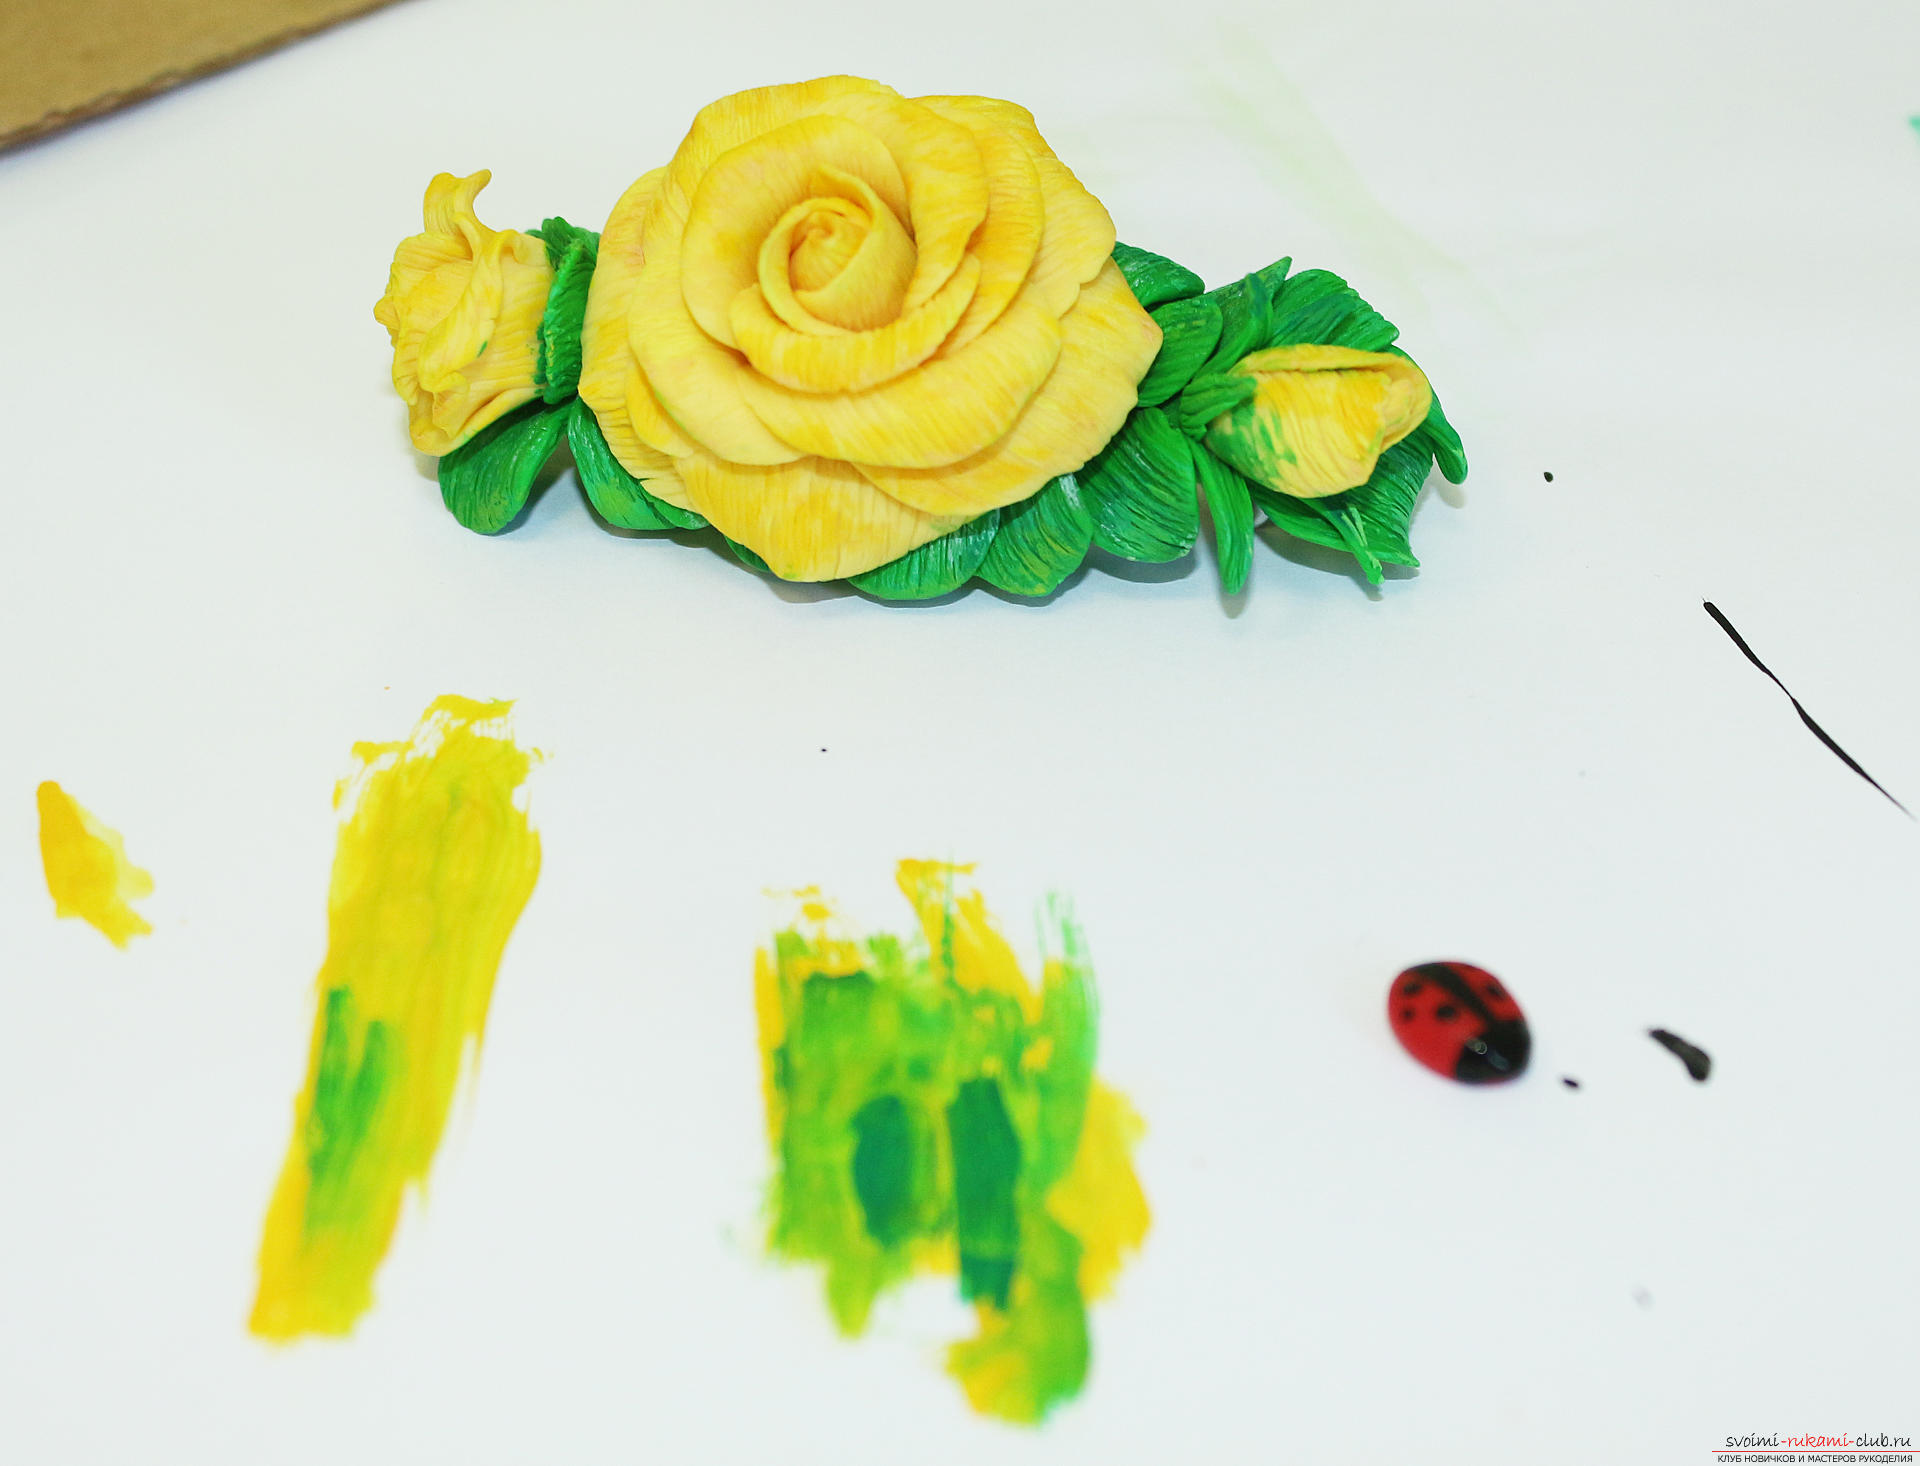 Decor: roll a ball of red plastic, lightly press it against the work surface and bake. After baking, we put a symbolic pattern imitating a ladybug. After baking, you can paste the decor on a leaf or a flower. My hairpin turned out this way.
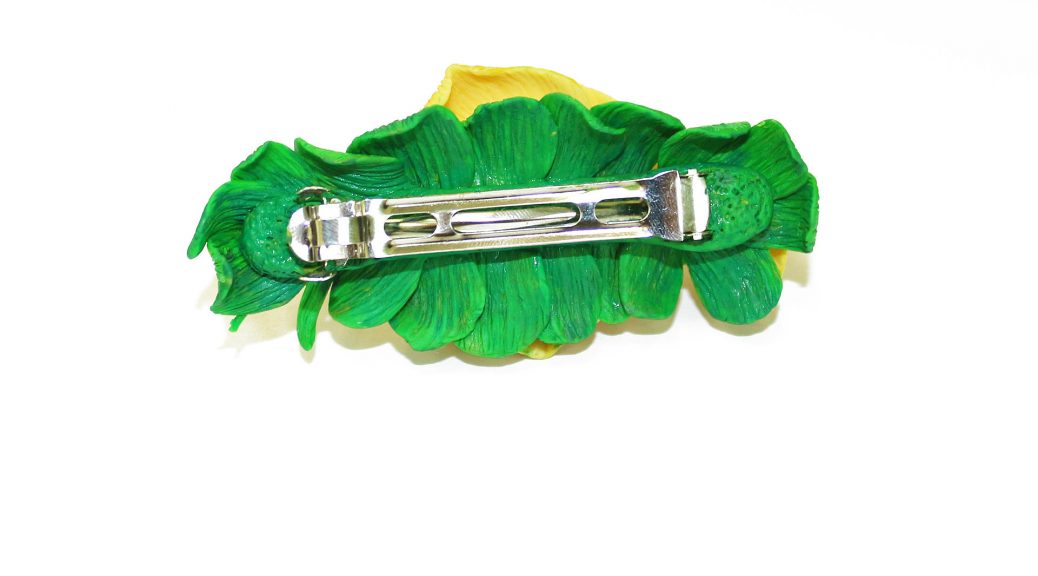
 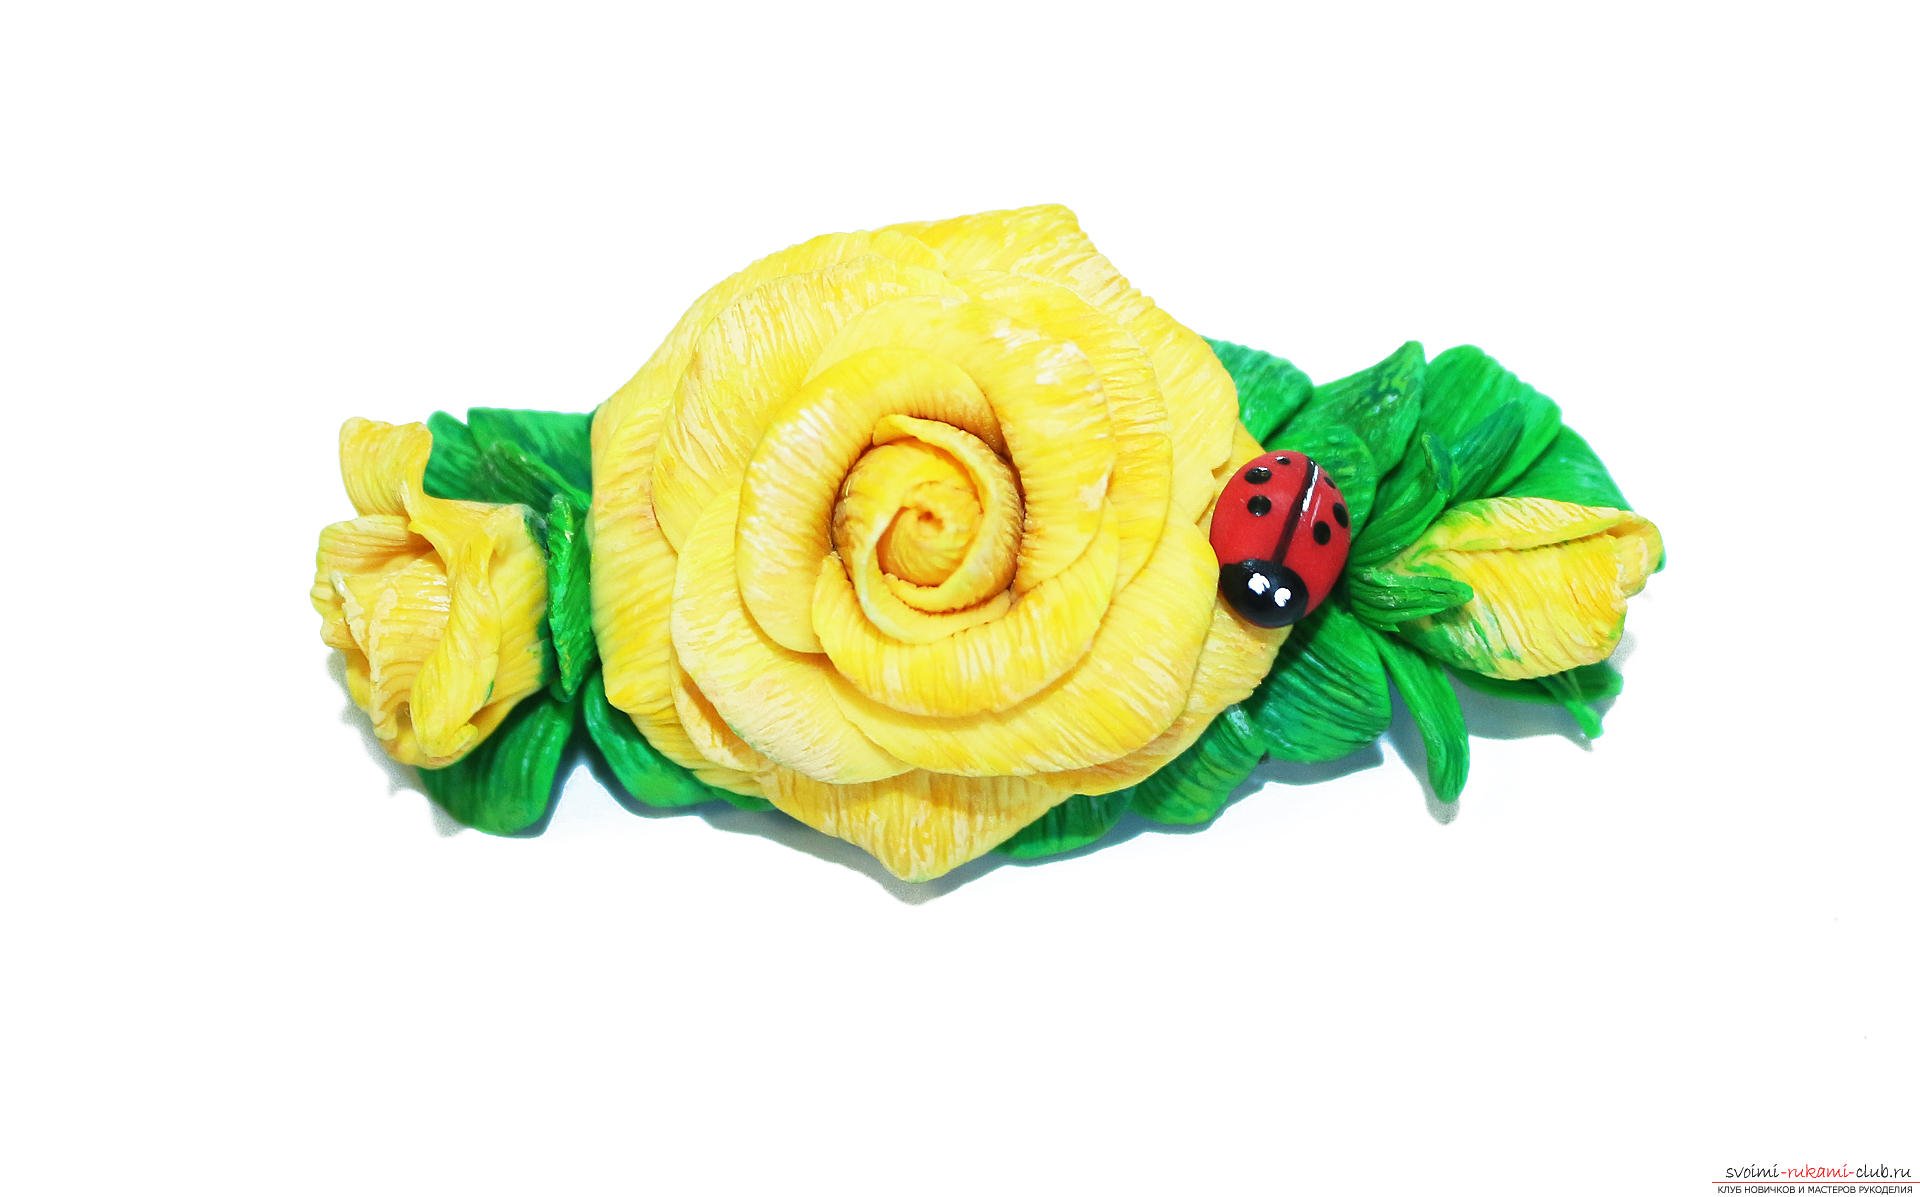 Turnover.
Comments
Related posts:
 This detailed master class with photo and description will teach how to create with your own hands a set of jewelry made of polymer clay - a pendant and earrings with a turtle.
 This master class with a photo and description will teach you how to make flowers - roses - from polymer clay in texturing technology.
 This detailed master class contains the technique of working with polymer clay and will teach you how to make Keynes and beads from polymer clay.
 How to make earrings from polymer clay in the form of snowmen, detailed master class with photo and description
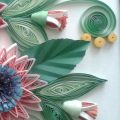 This detailed master-class will acquaint you with quilling technique, teach you how to make quilling flowers and quillings.