This master class contains the idea of a gift for February 14 daughter. You will learn how to sew a toy bunny.
Any exotic toy today to buyabsolutely not a problem. But the more choices in stores, the higher the value of exclusive handmade crafts. Try to sew your little girl a pretty bunny, in which all your love and tenderness will be invested. 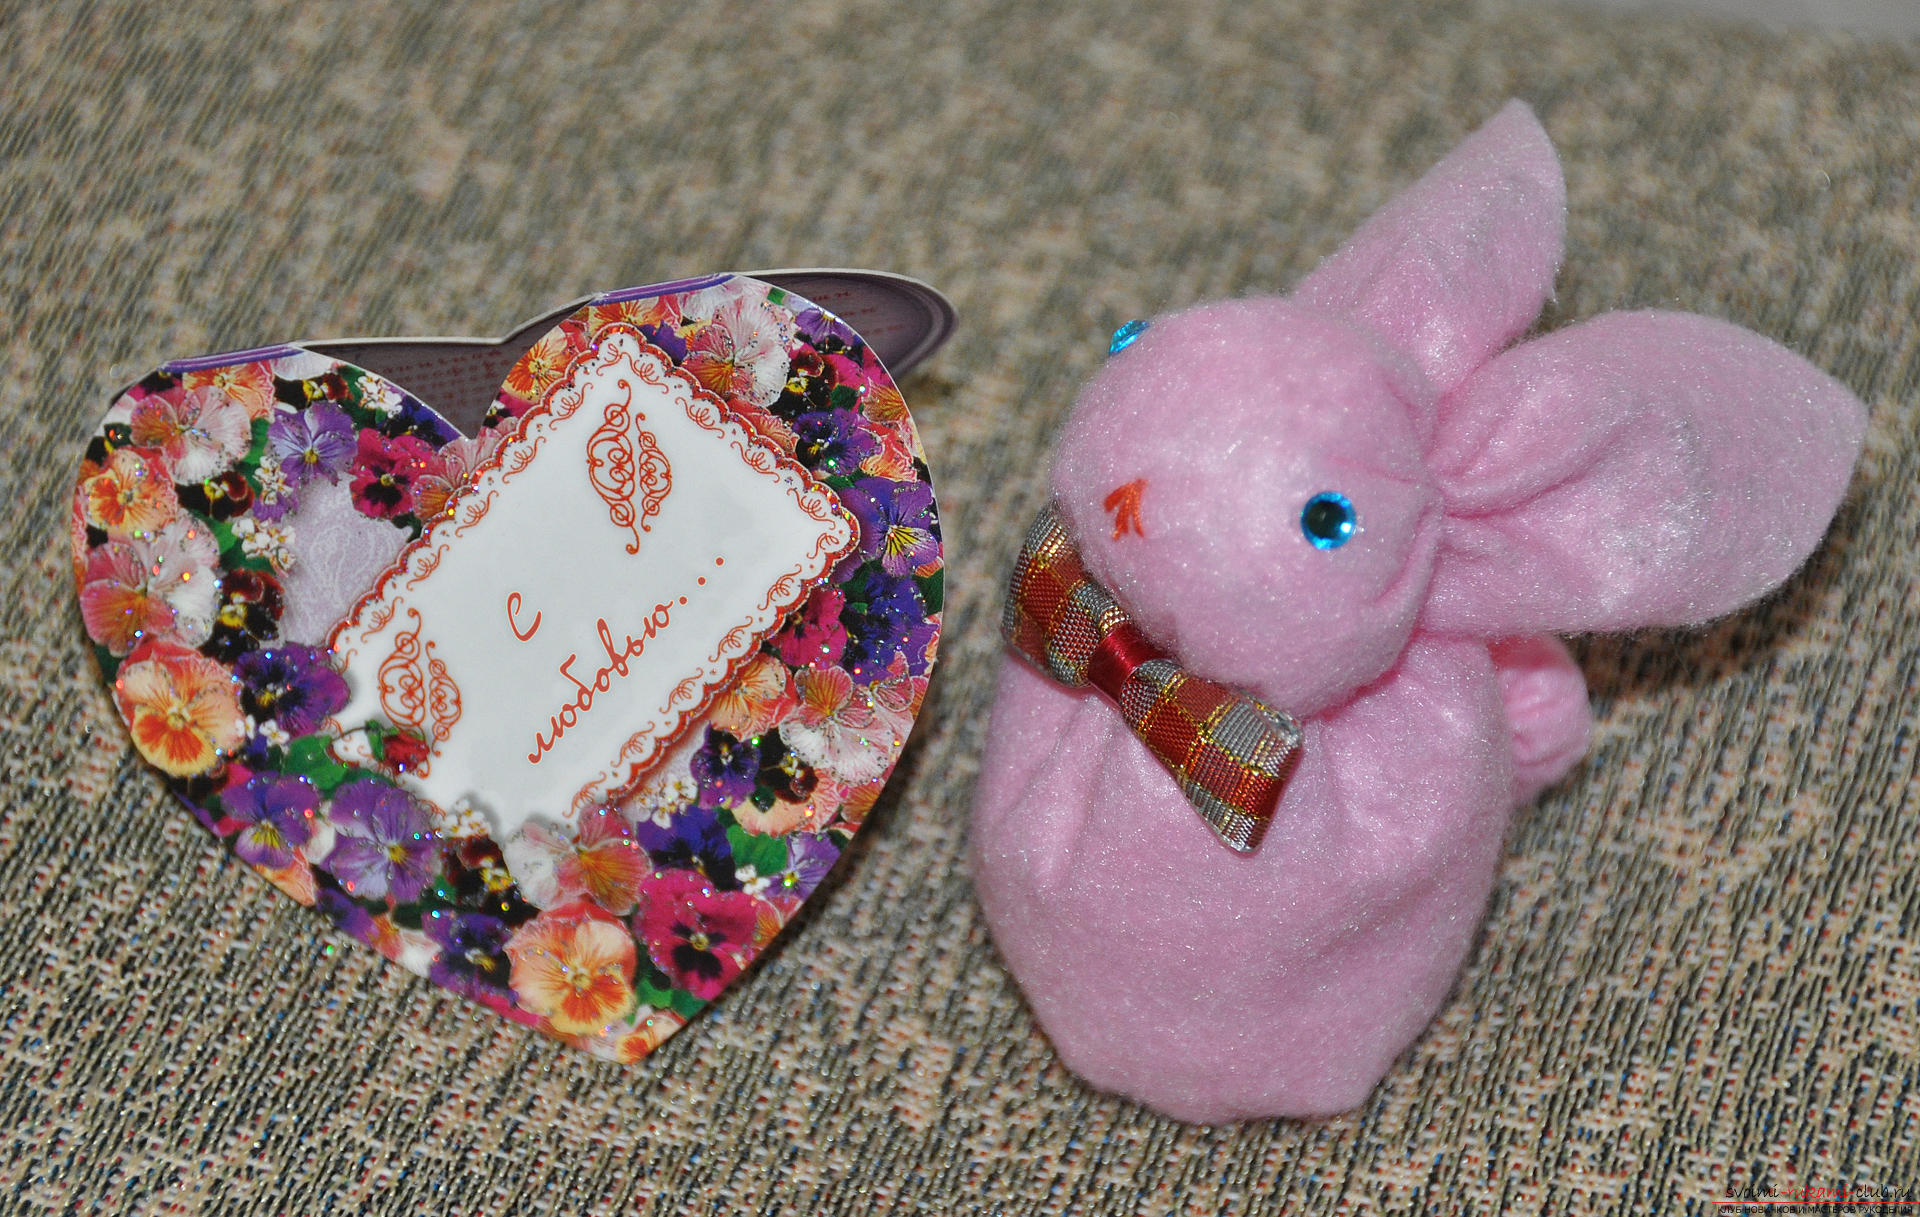 To sew a cute bunny you will need:
- a piece of non-woven fabric, for example, a thin felt (I took pink);
- thread for sewing the appropriate shade (that they were not visible),
- sintepon,
- scissors, pencil and ruler;
- elements of decor - blue strasiki on the sticky layer for the eye, red thread for the spout, bow of the ribbon for decoration.
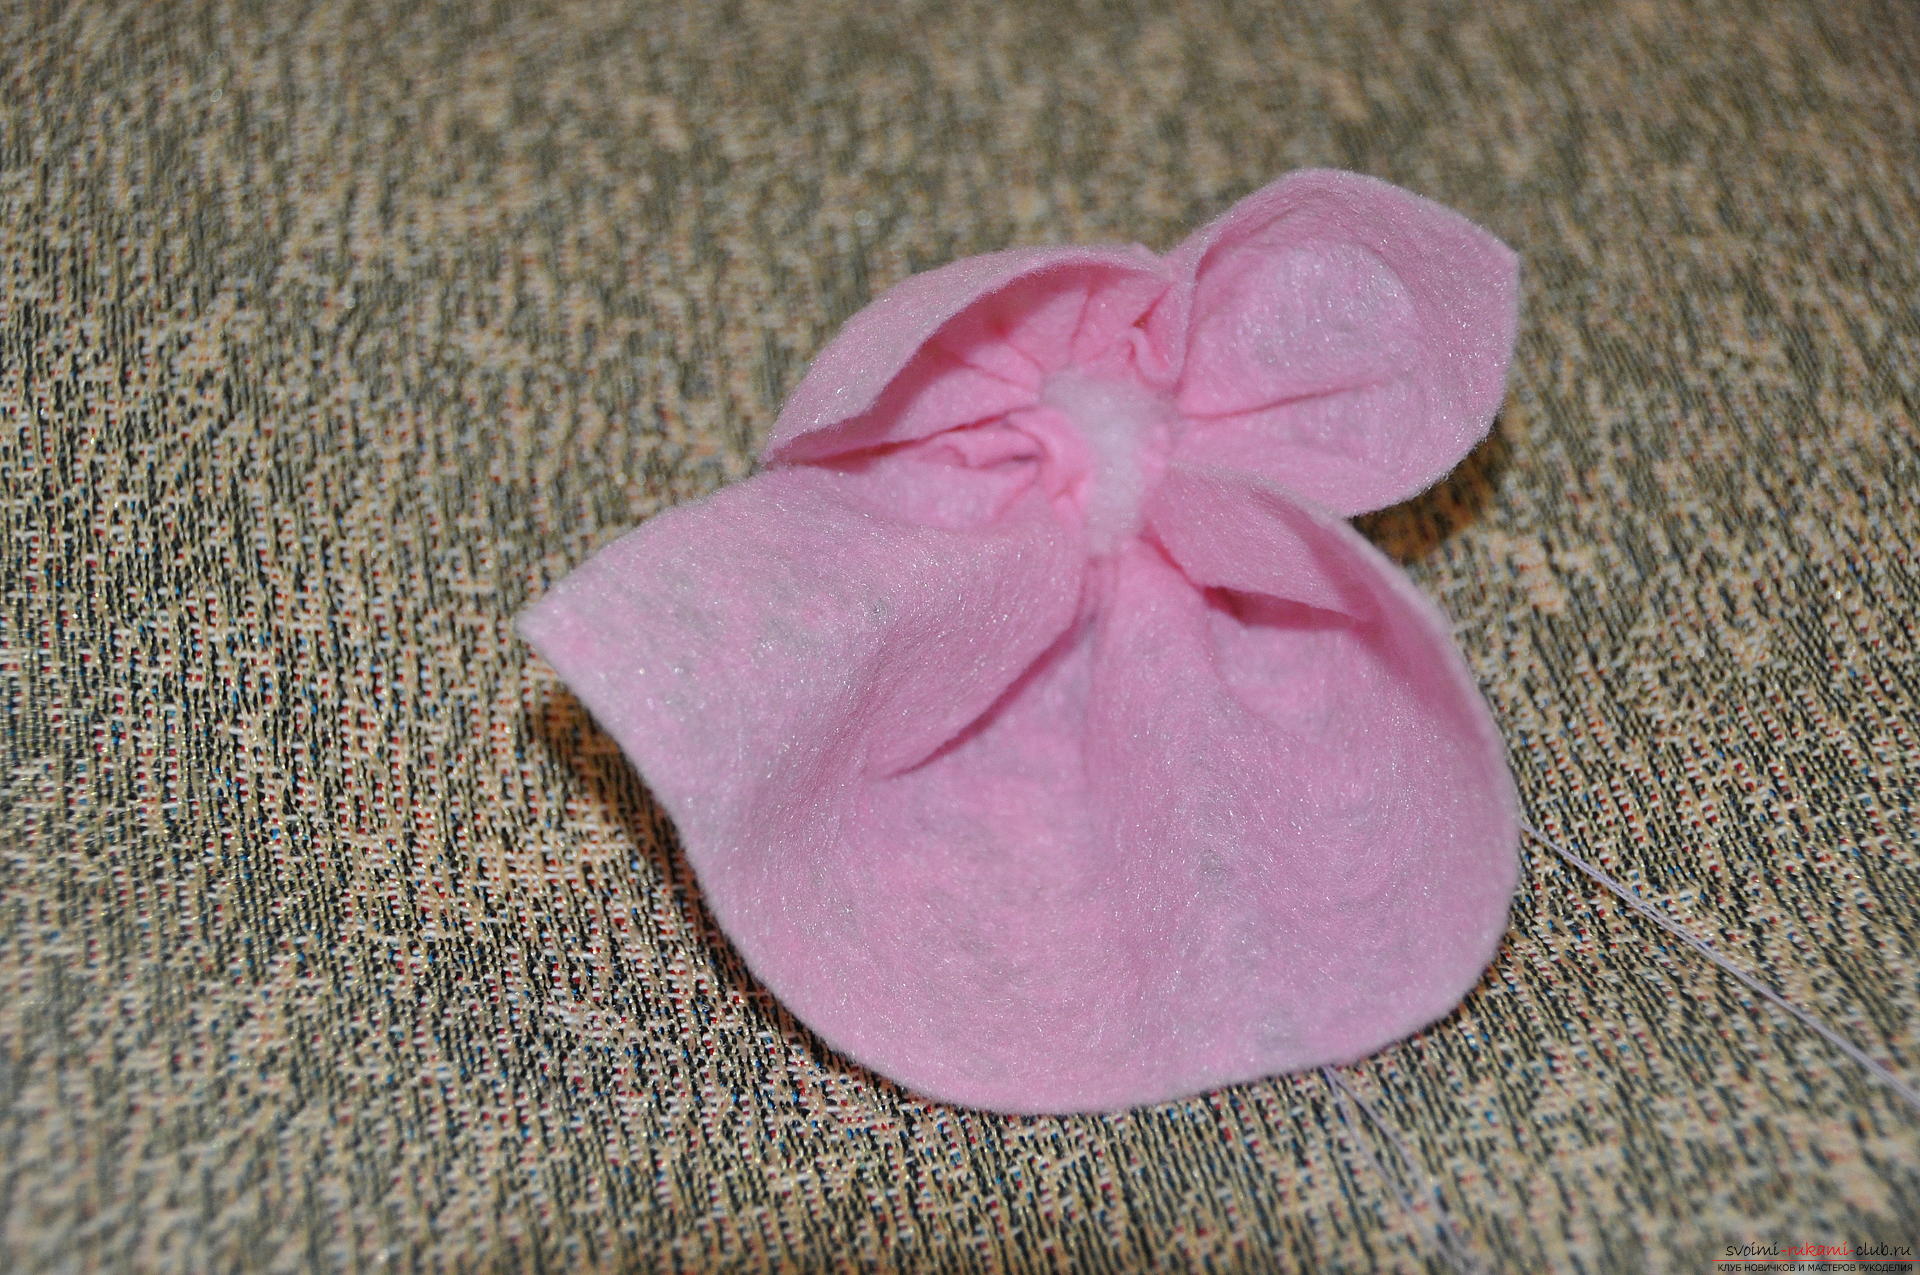
We start our creativity with cutting out the necessaryflap, it should be square - 15x15 cm. You can take more - as you want, but less is not worth it - it will be inconvenient to work with such a small toy. 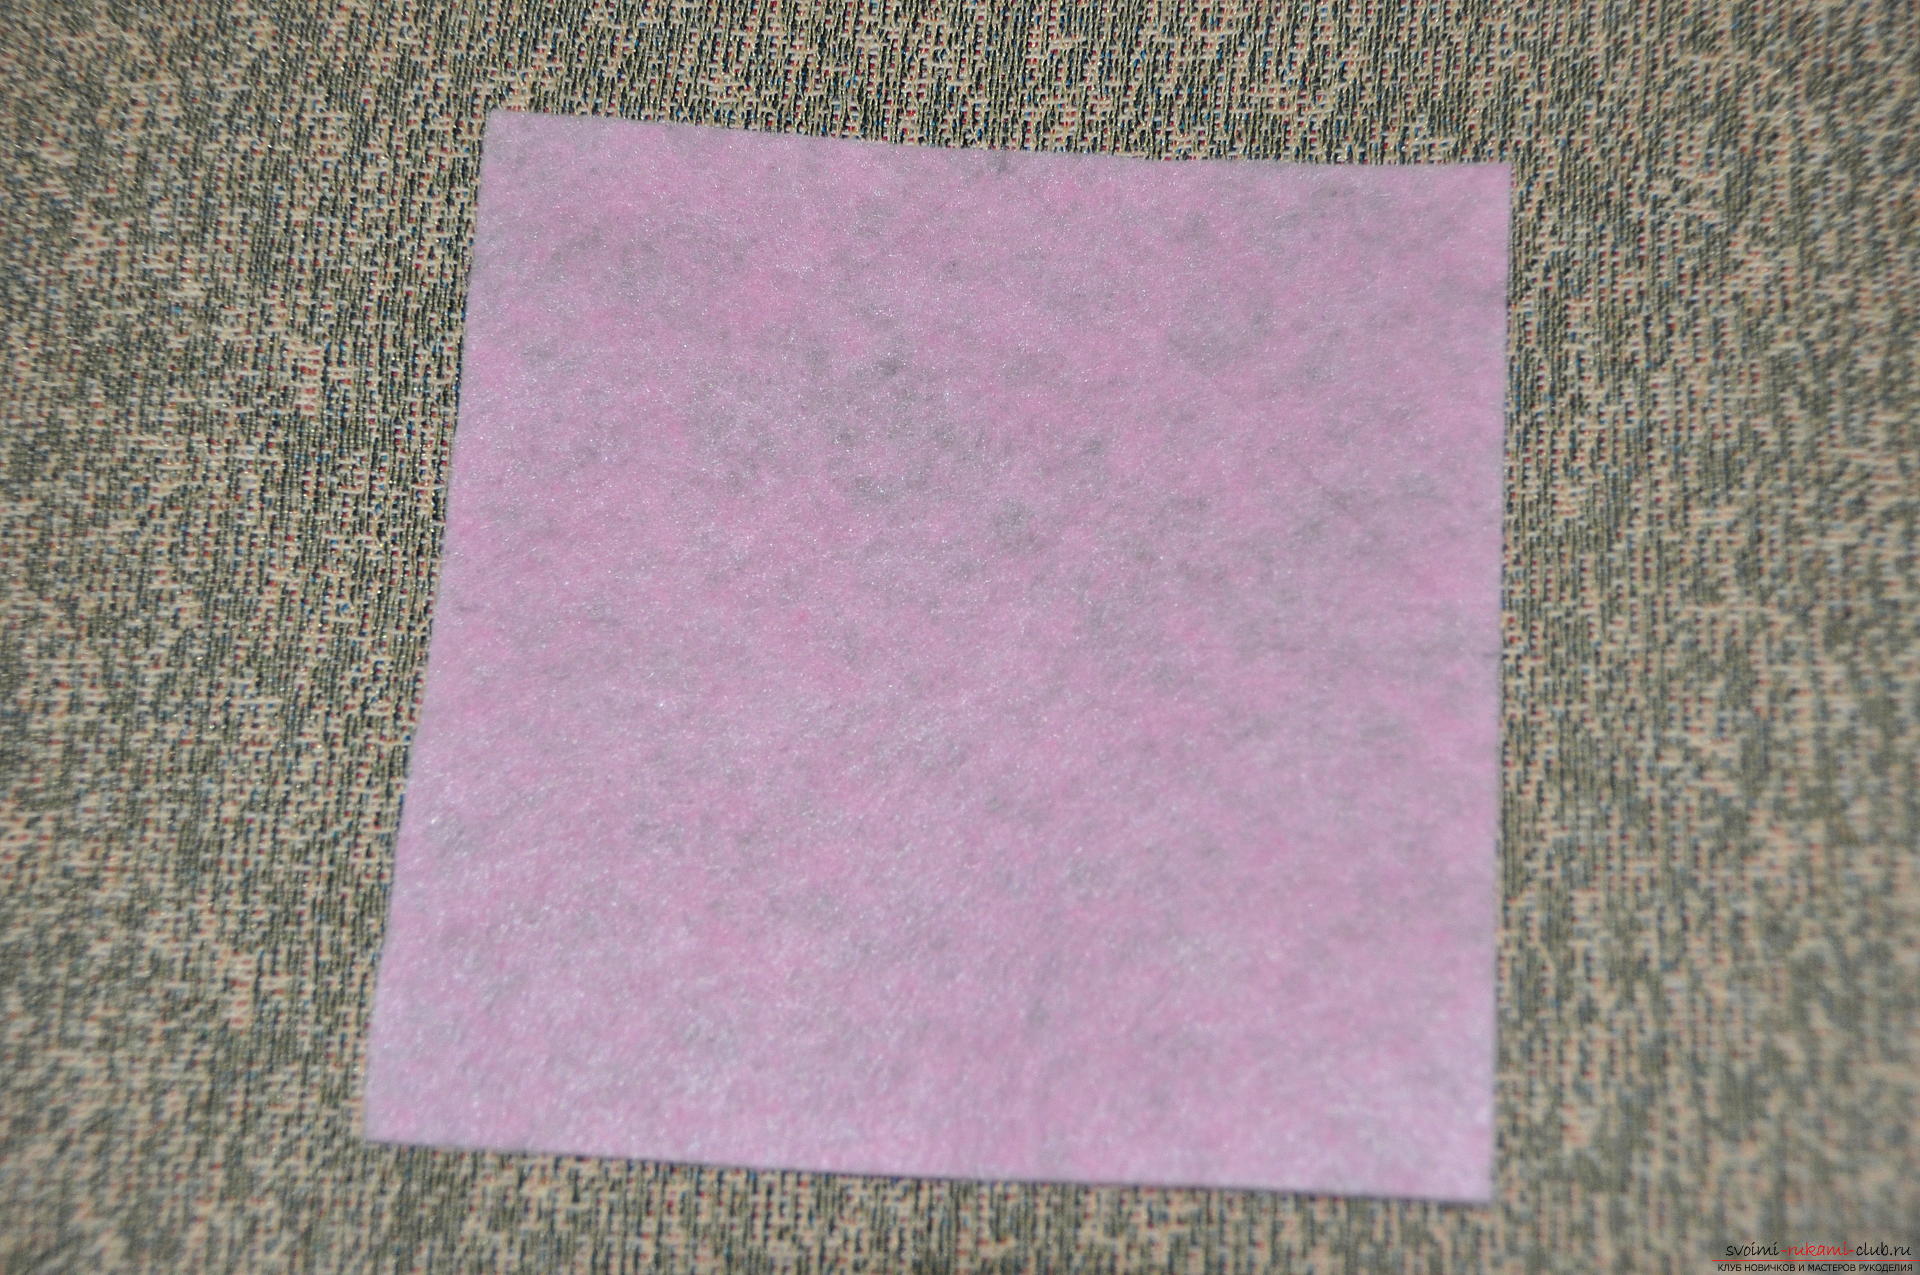 Then on the three sides we mark the middle (7.5 cm from the corners) and draw an equilateral triangle with a pencil. Seredinki can be found without a ruler - by folding the sides in half.
 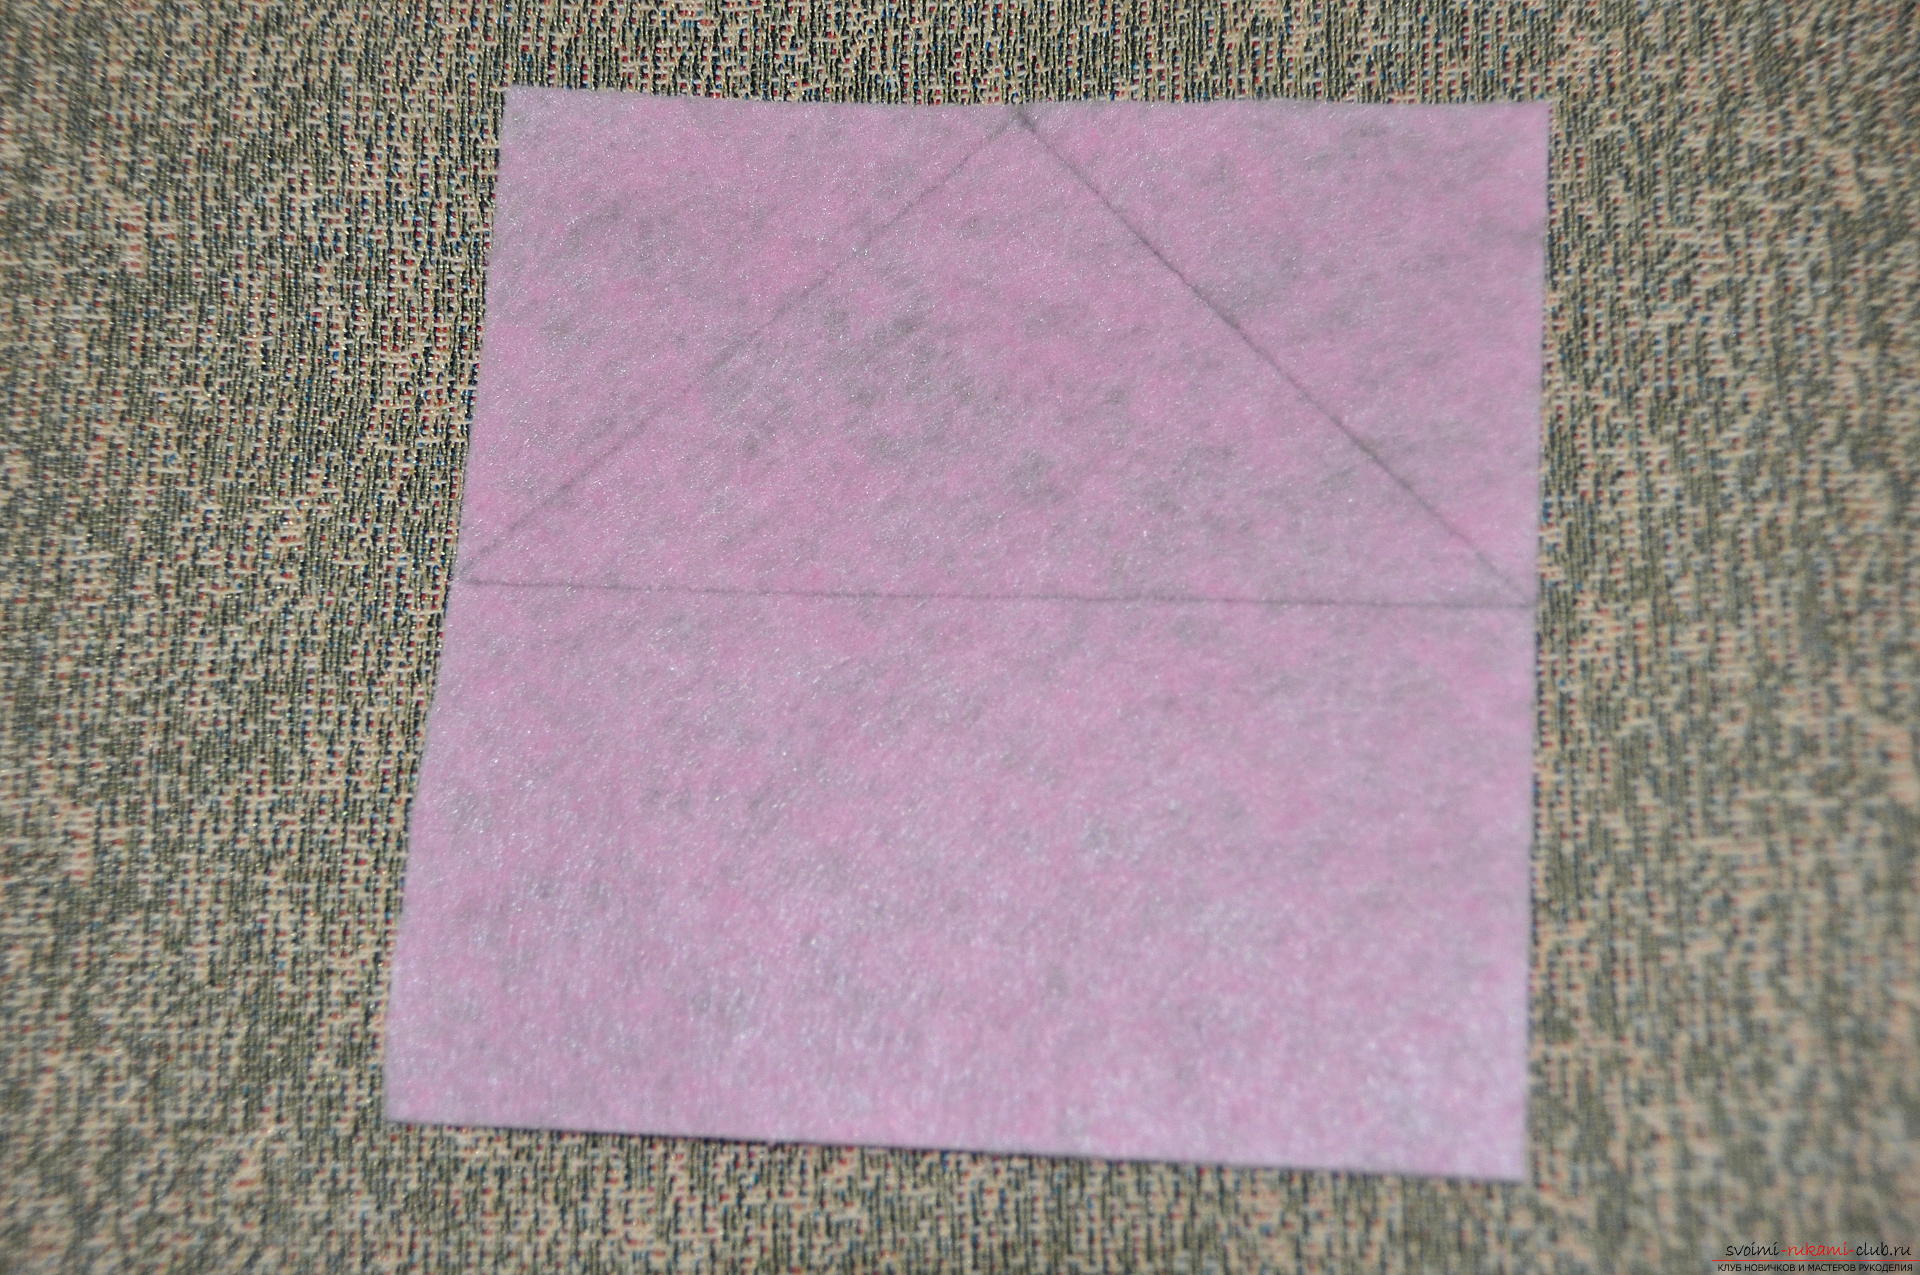 Next, take a thread and a needle and repeat thistriangle with usual stitches. A little trick - at the first stitch do not make a knot, but leave the tail, thread with a needle and do not cut. Thus, the beginning and end of sewing will be close.
 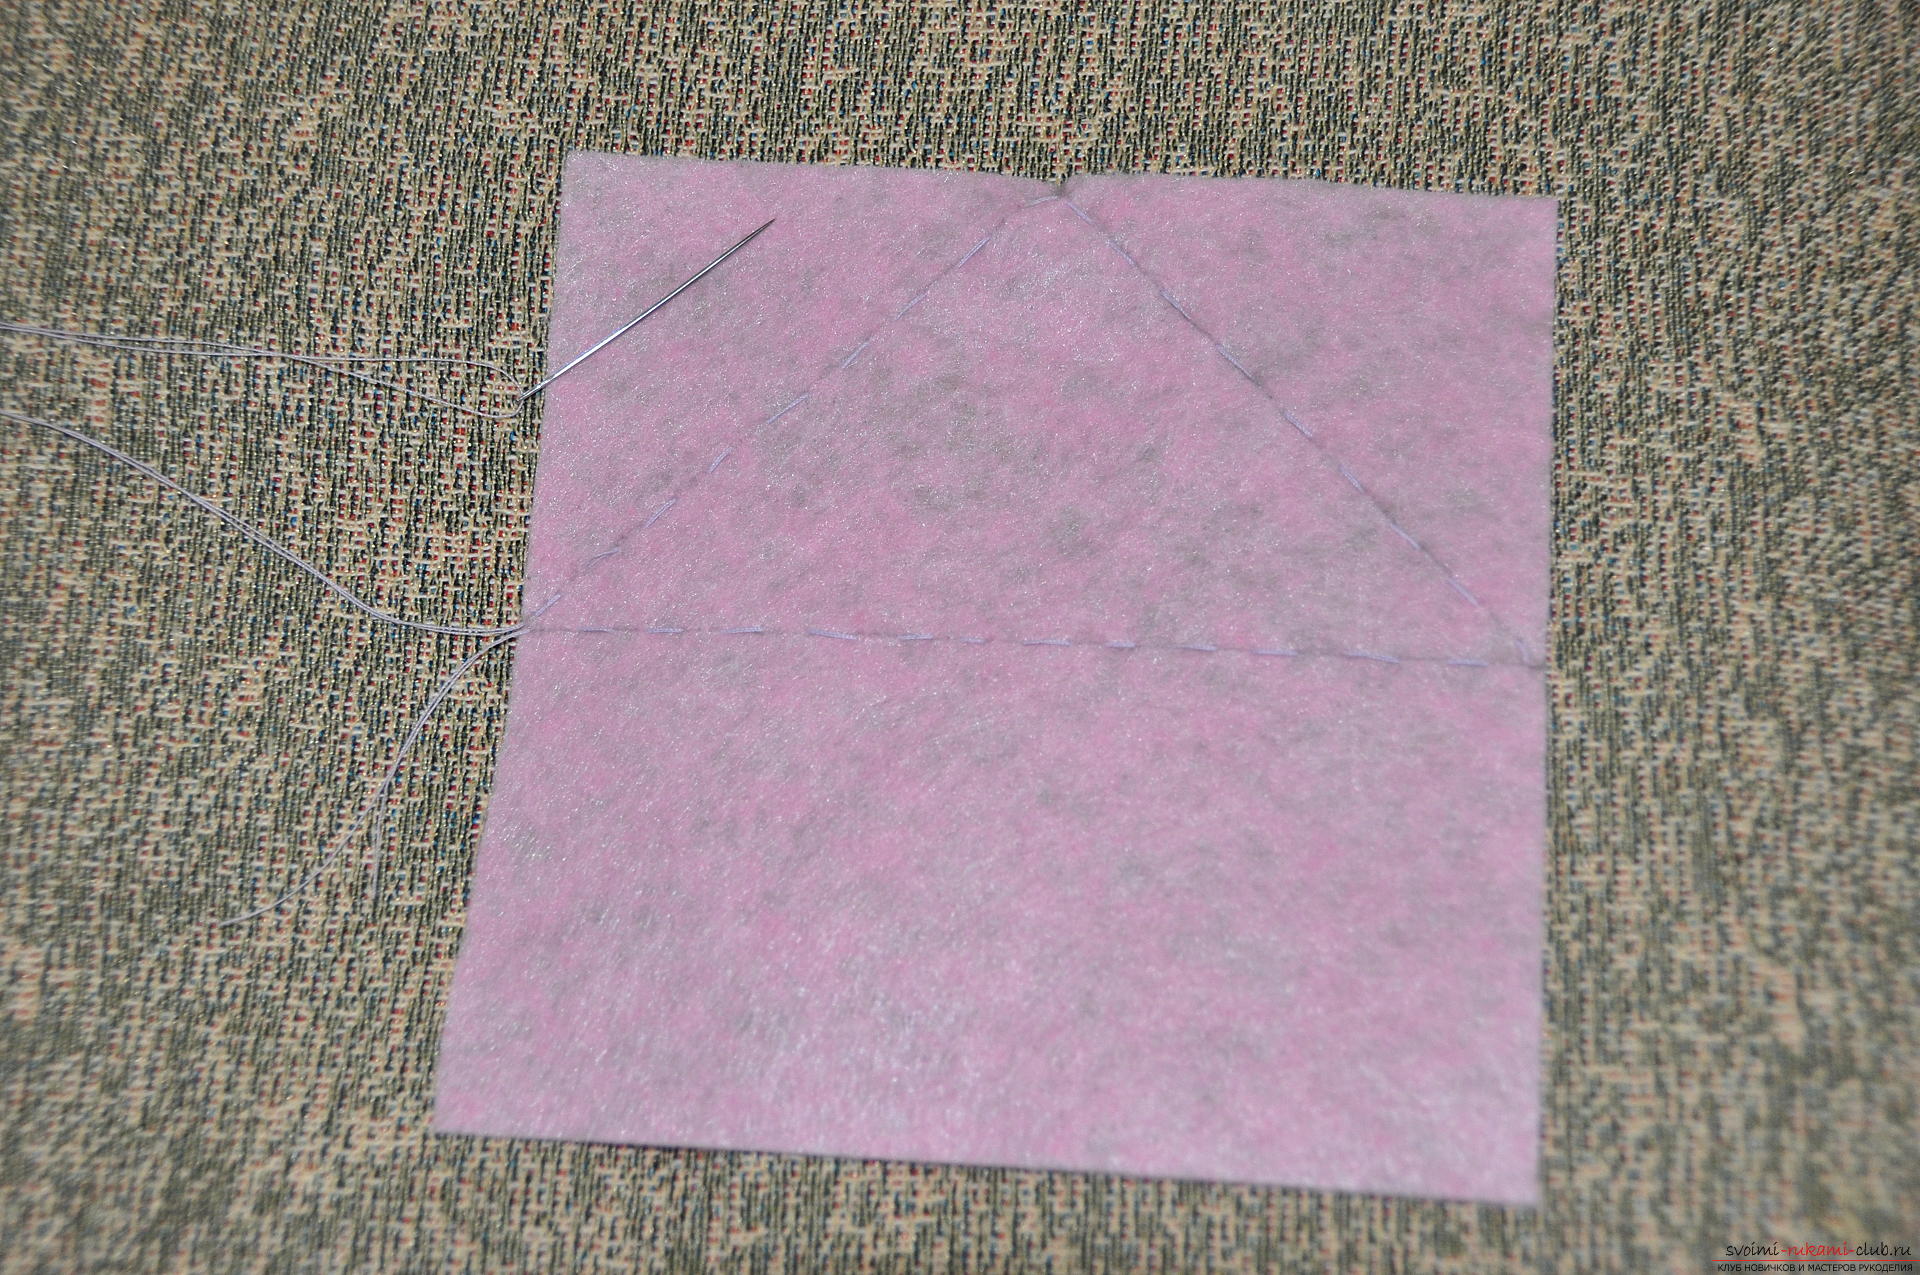 Form a small lump of sintepon and put it in the center of the triangle.
 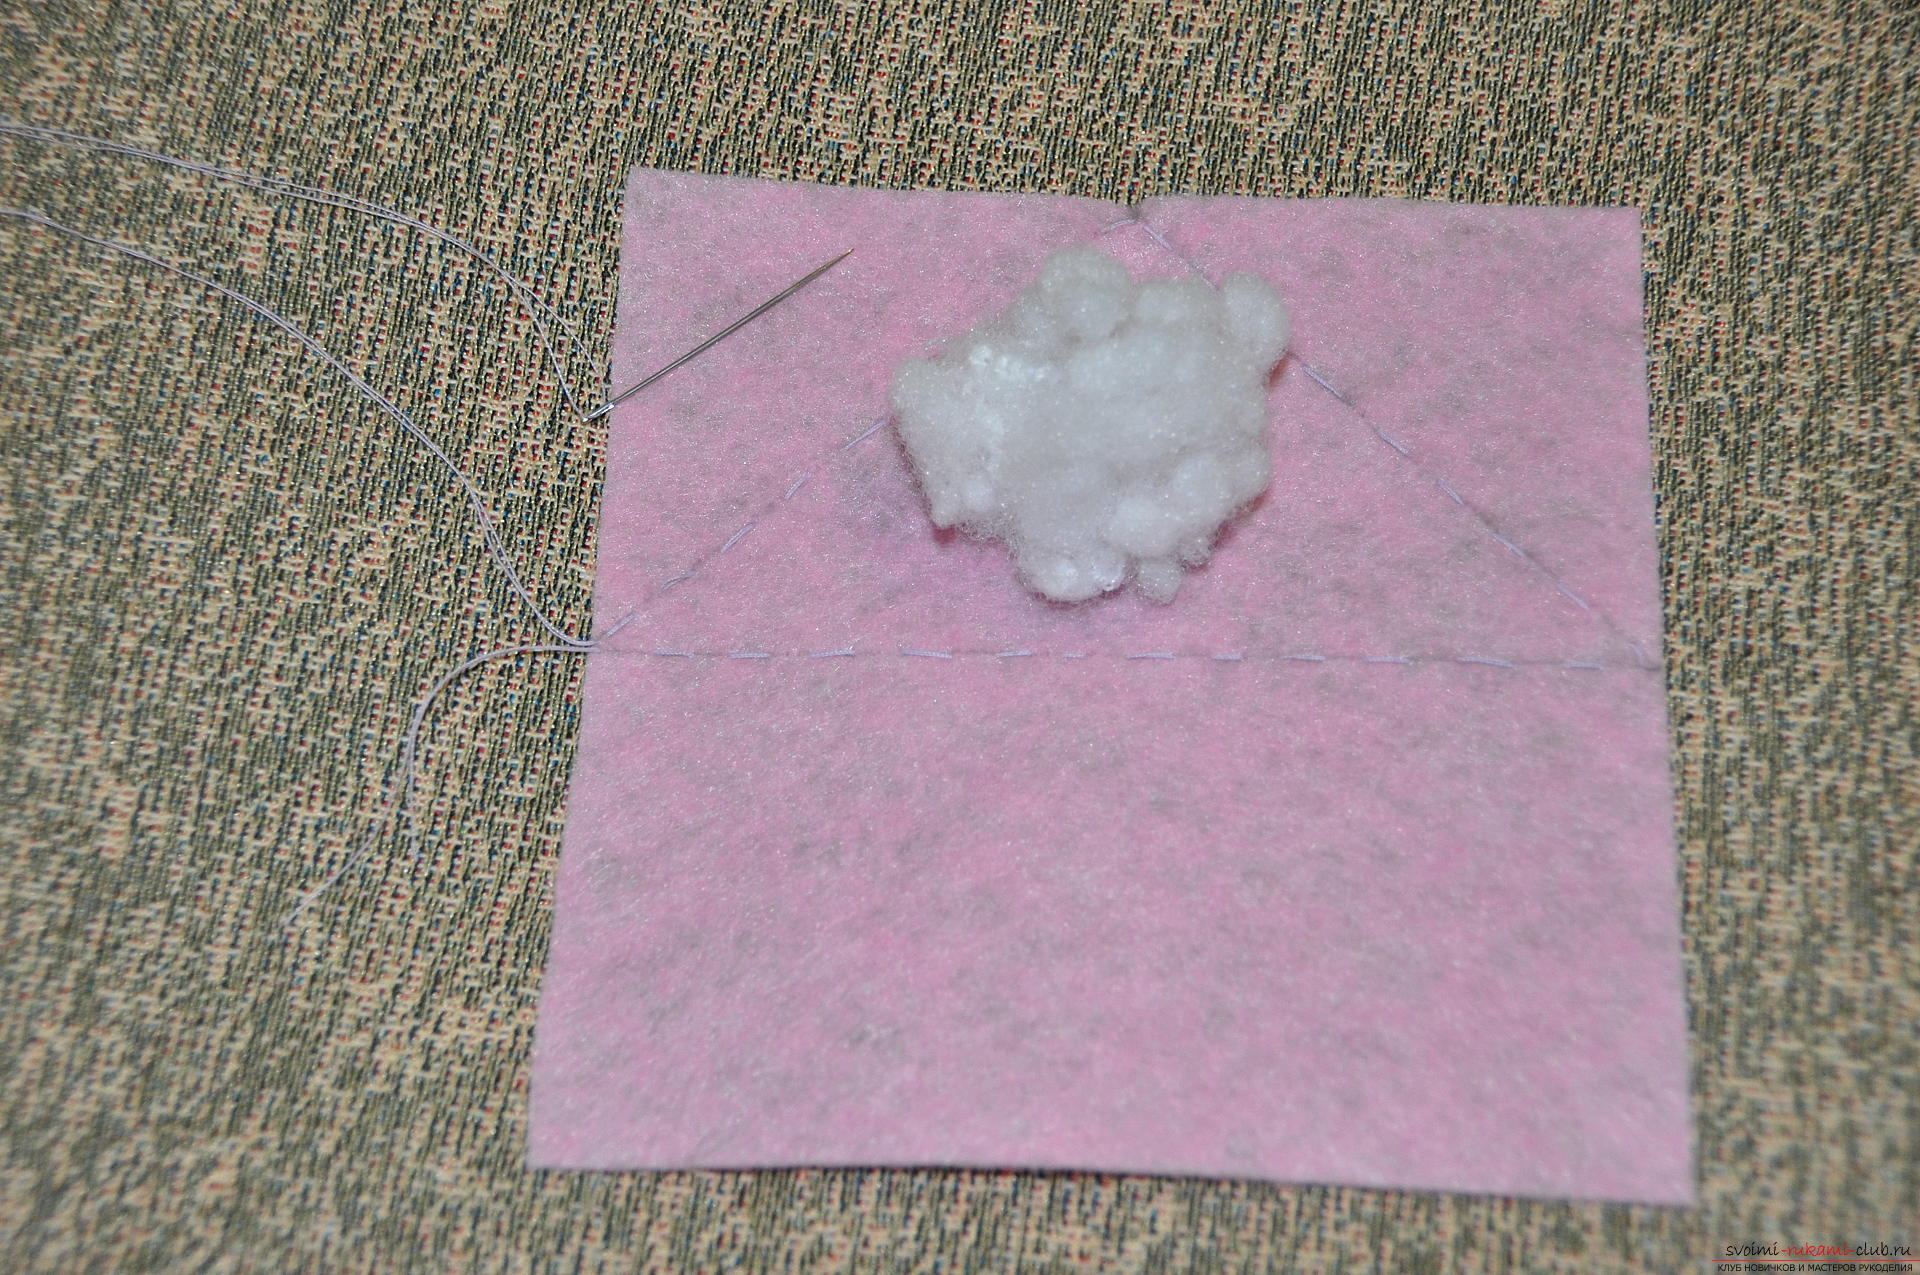 Then gently pull on both ends of the thread, pulling down the triangle.
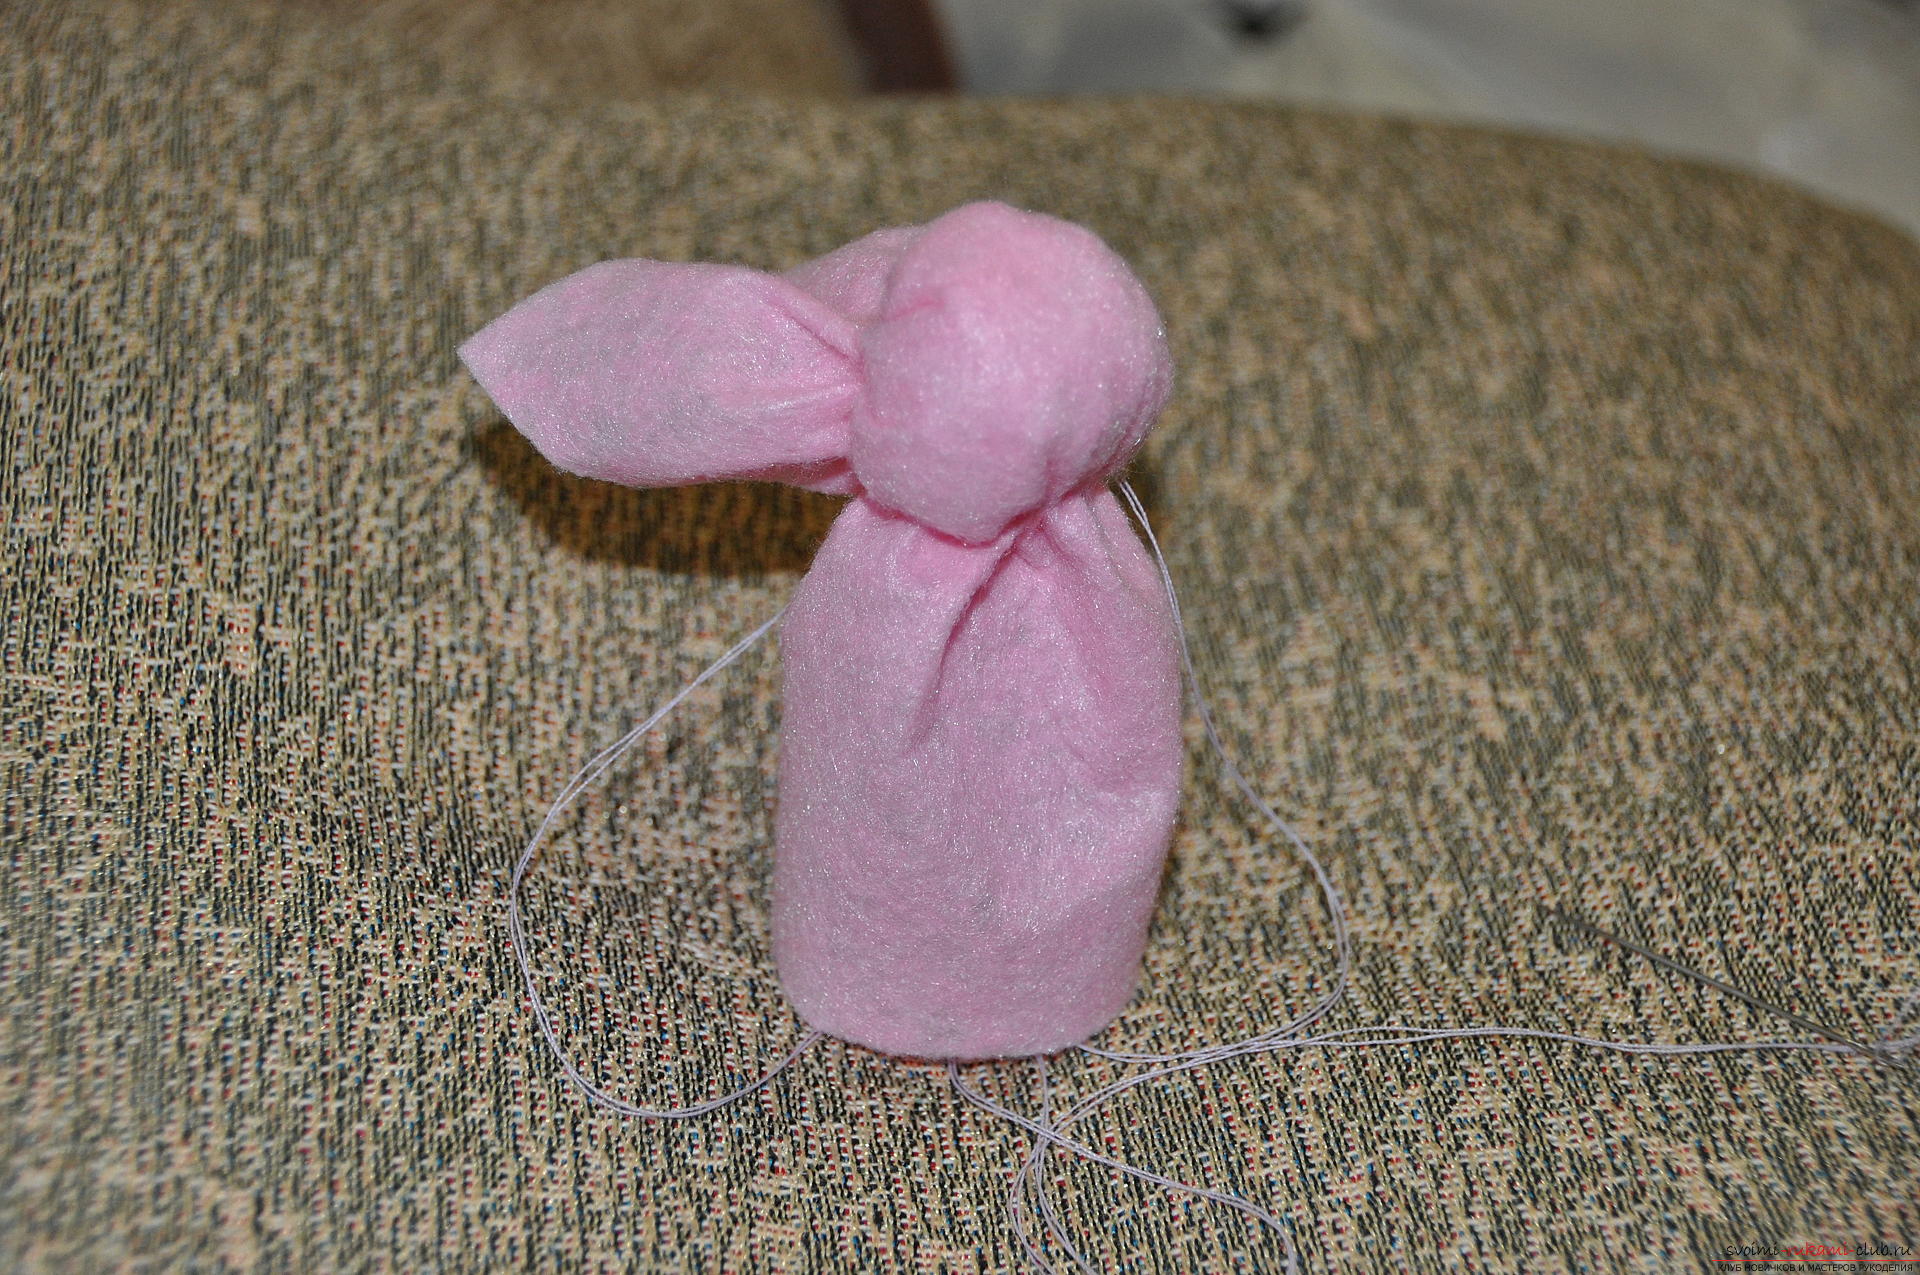
 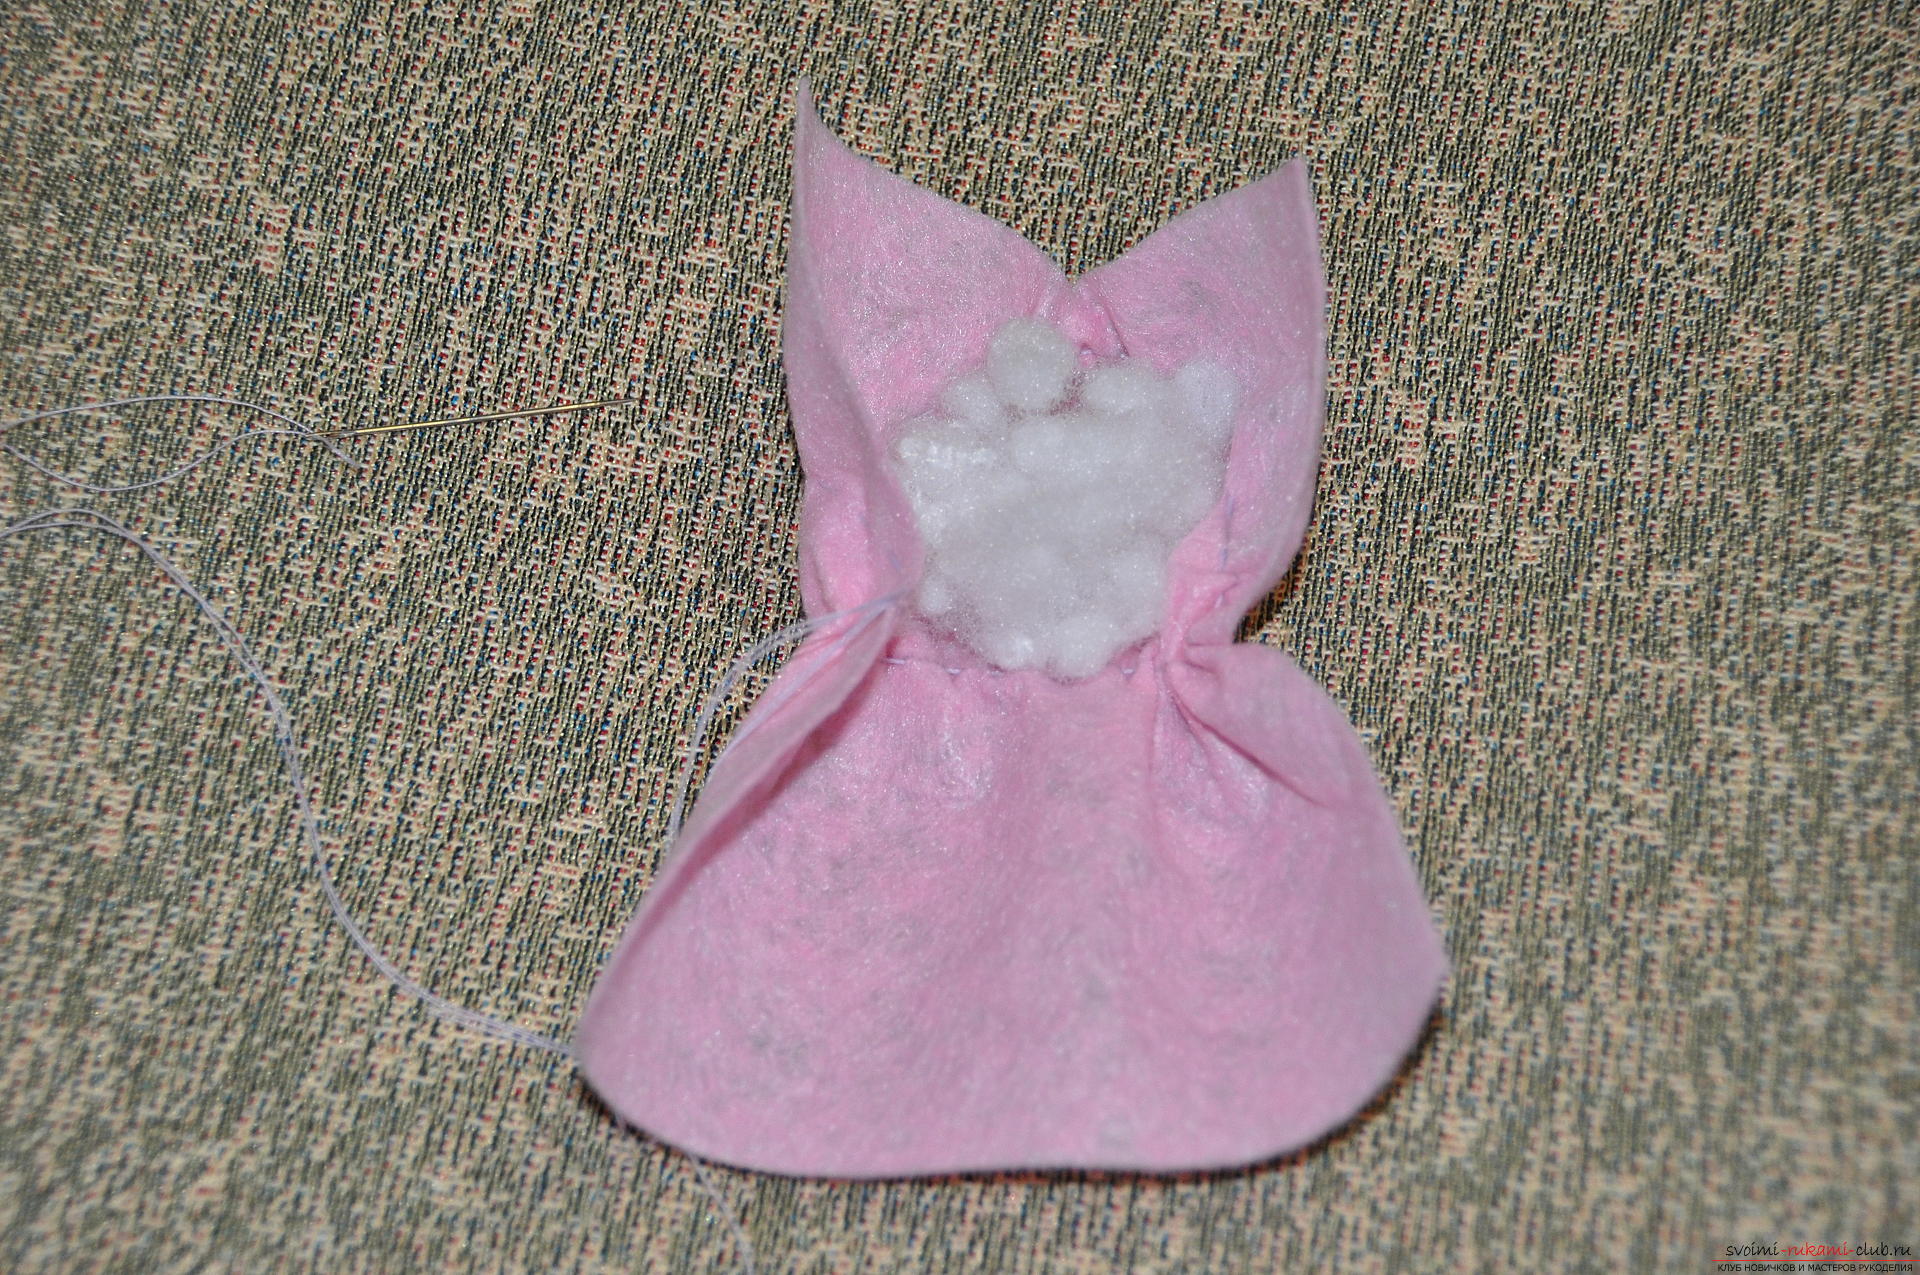 In the process of contraction, see that the earsthe future bunny formed symmetrically. Pulling to the end, tie two thread ends, and you will get a head with ears. The end of the thread without a needle can be cut.
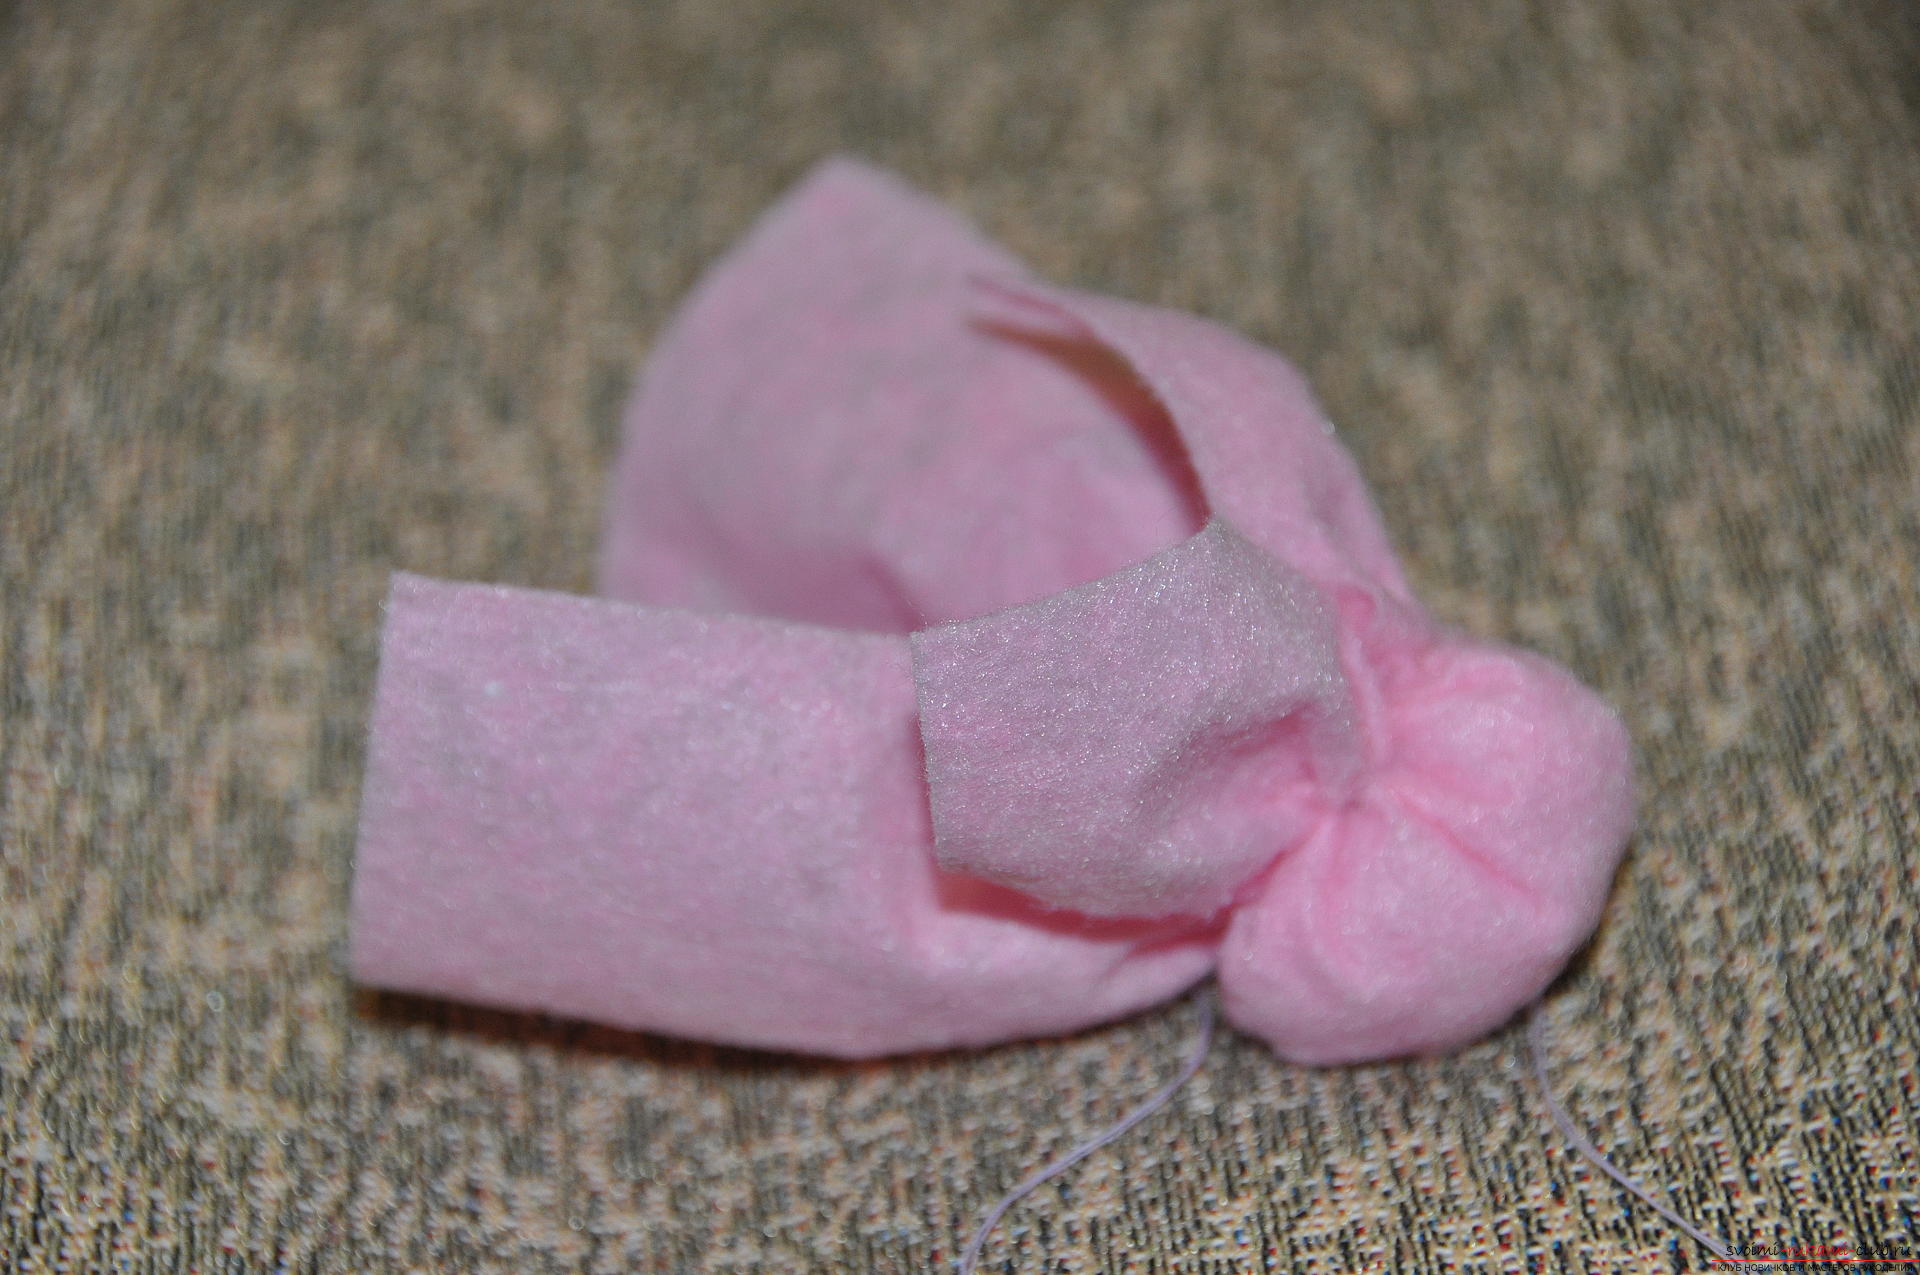
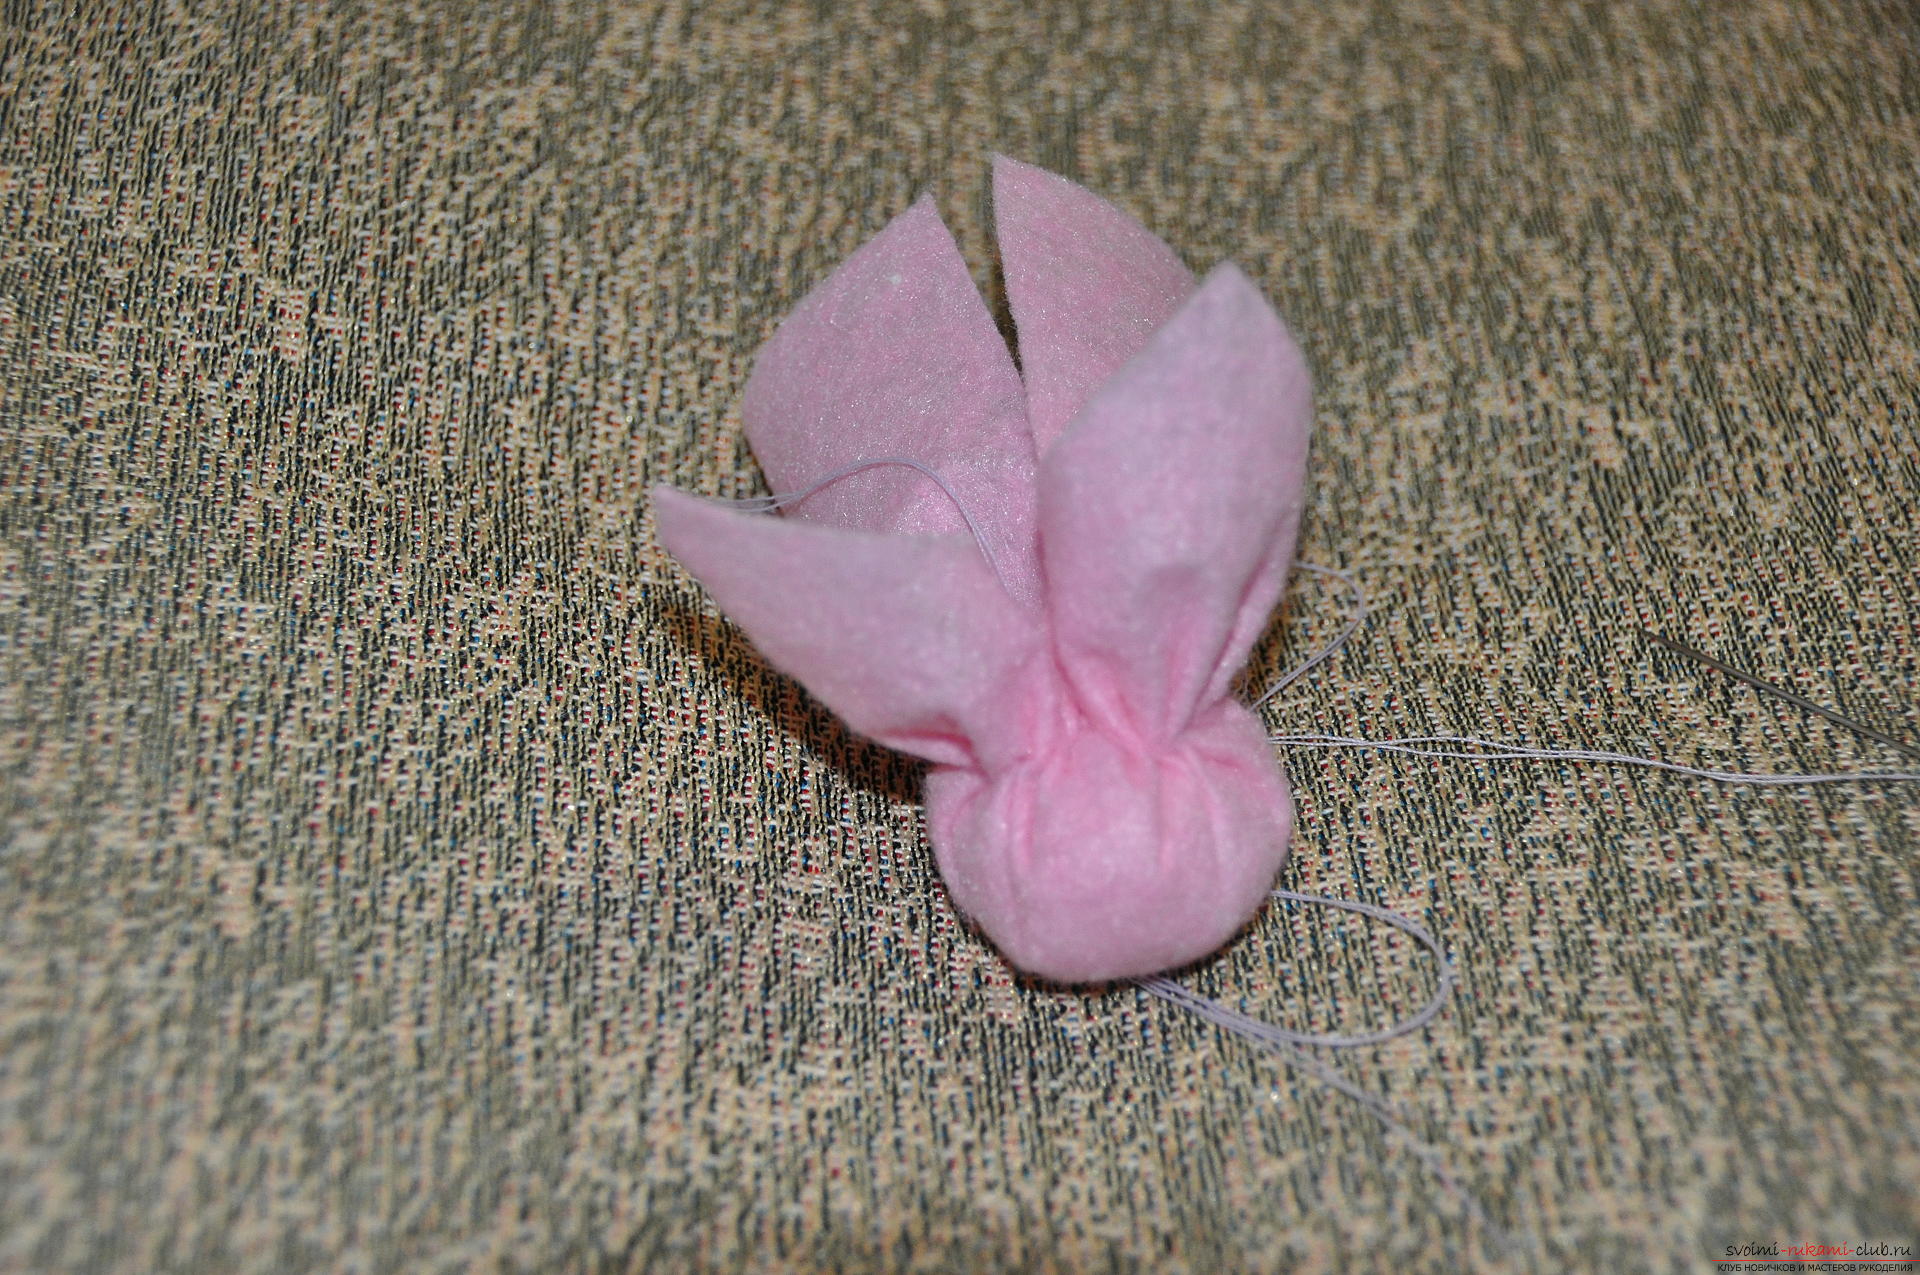
 To the ears were more accurate, a little "grab" them with threads at the very bottom. Thread with a needle and do not cut it off!
 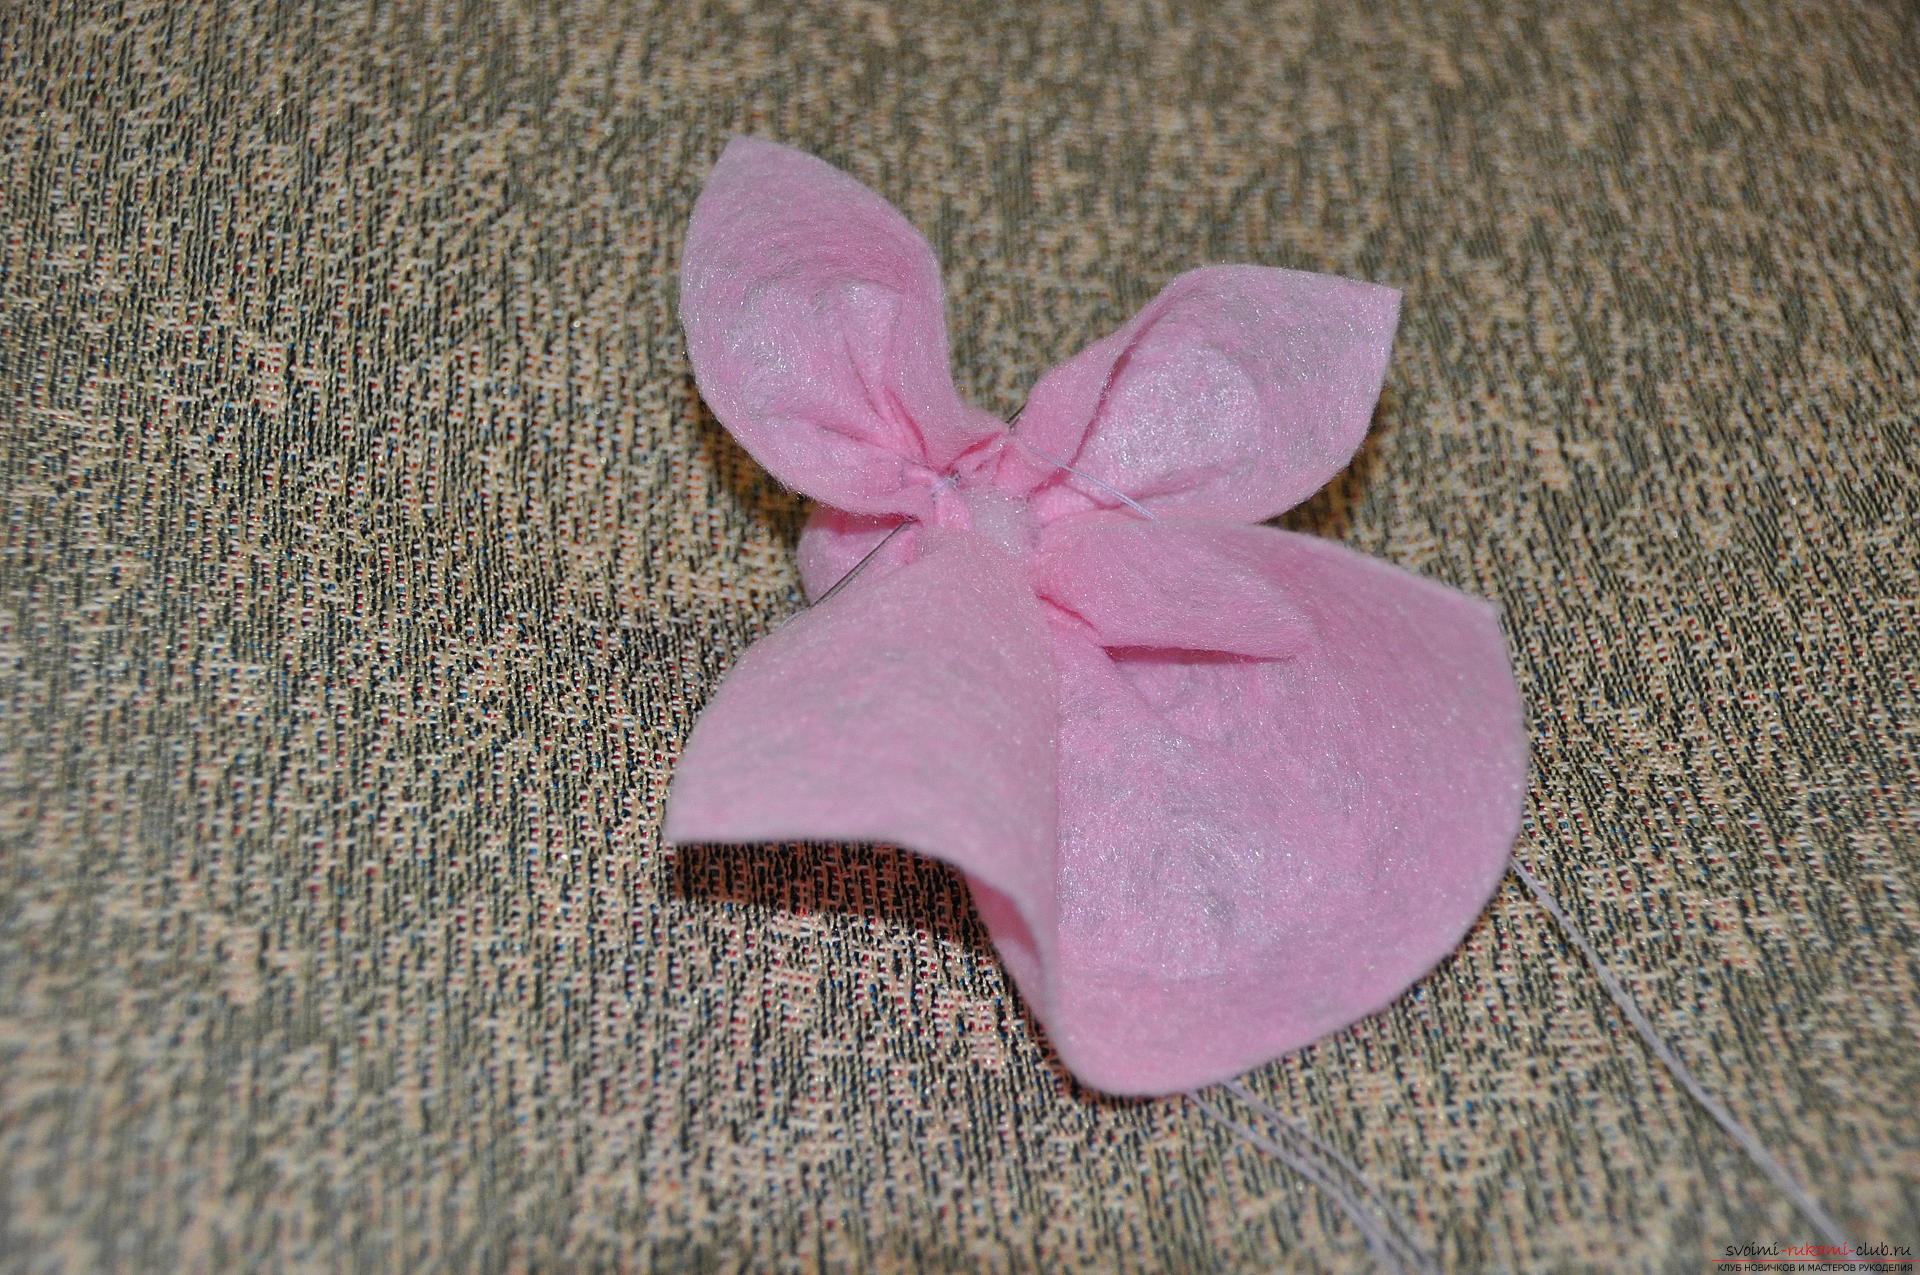 Spread the ears and the bottom of the rabbit. This is how the article looks at this stage.
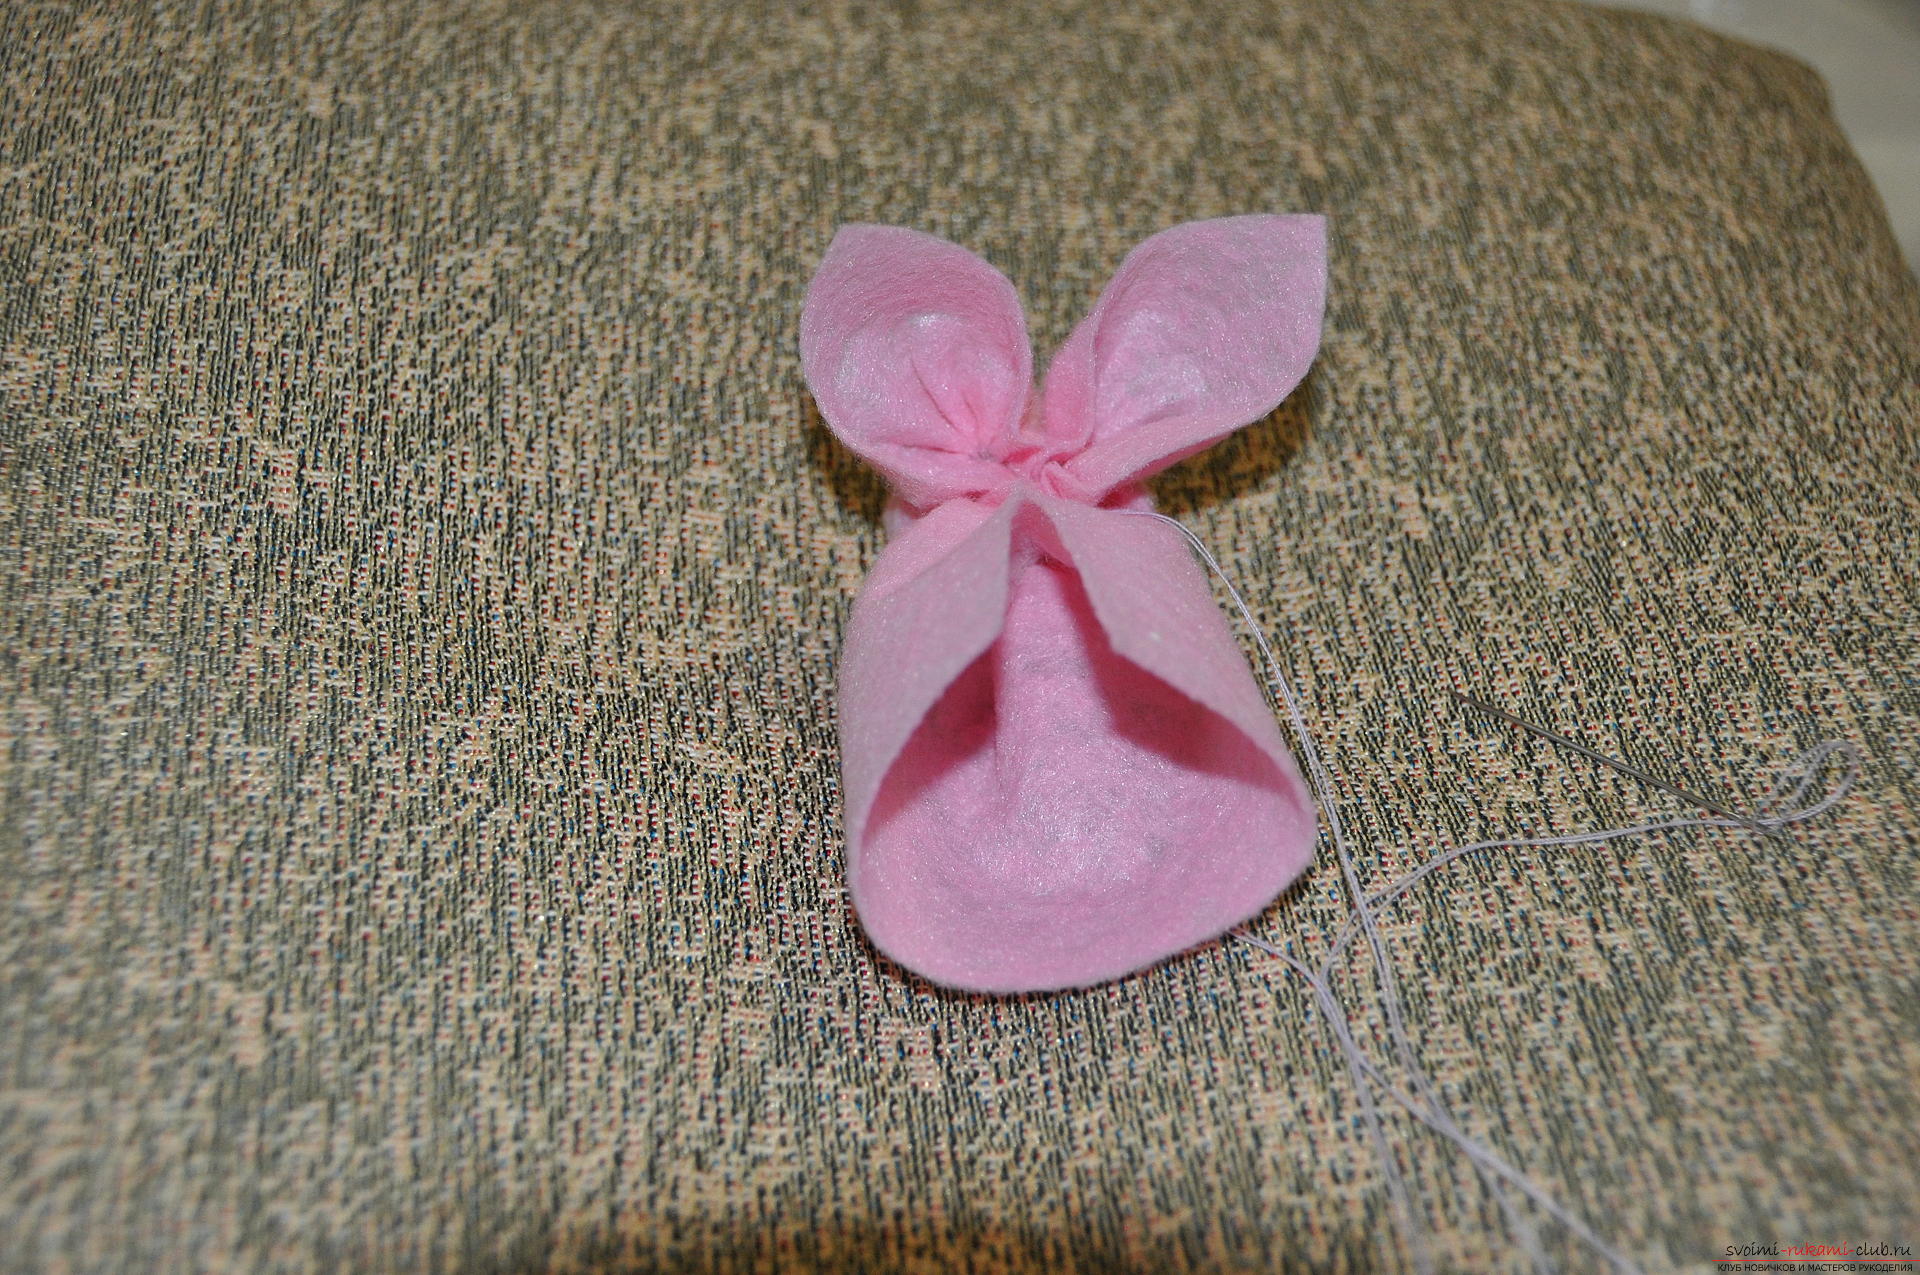
 That part of the craft, from which the body will be a rabbit, is turned inside out, as if putting it on your head.
 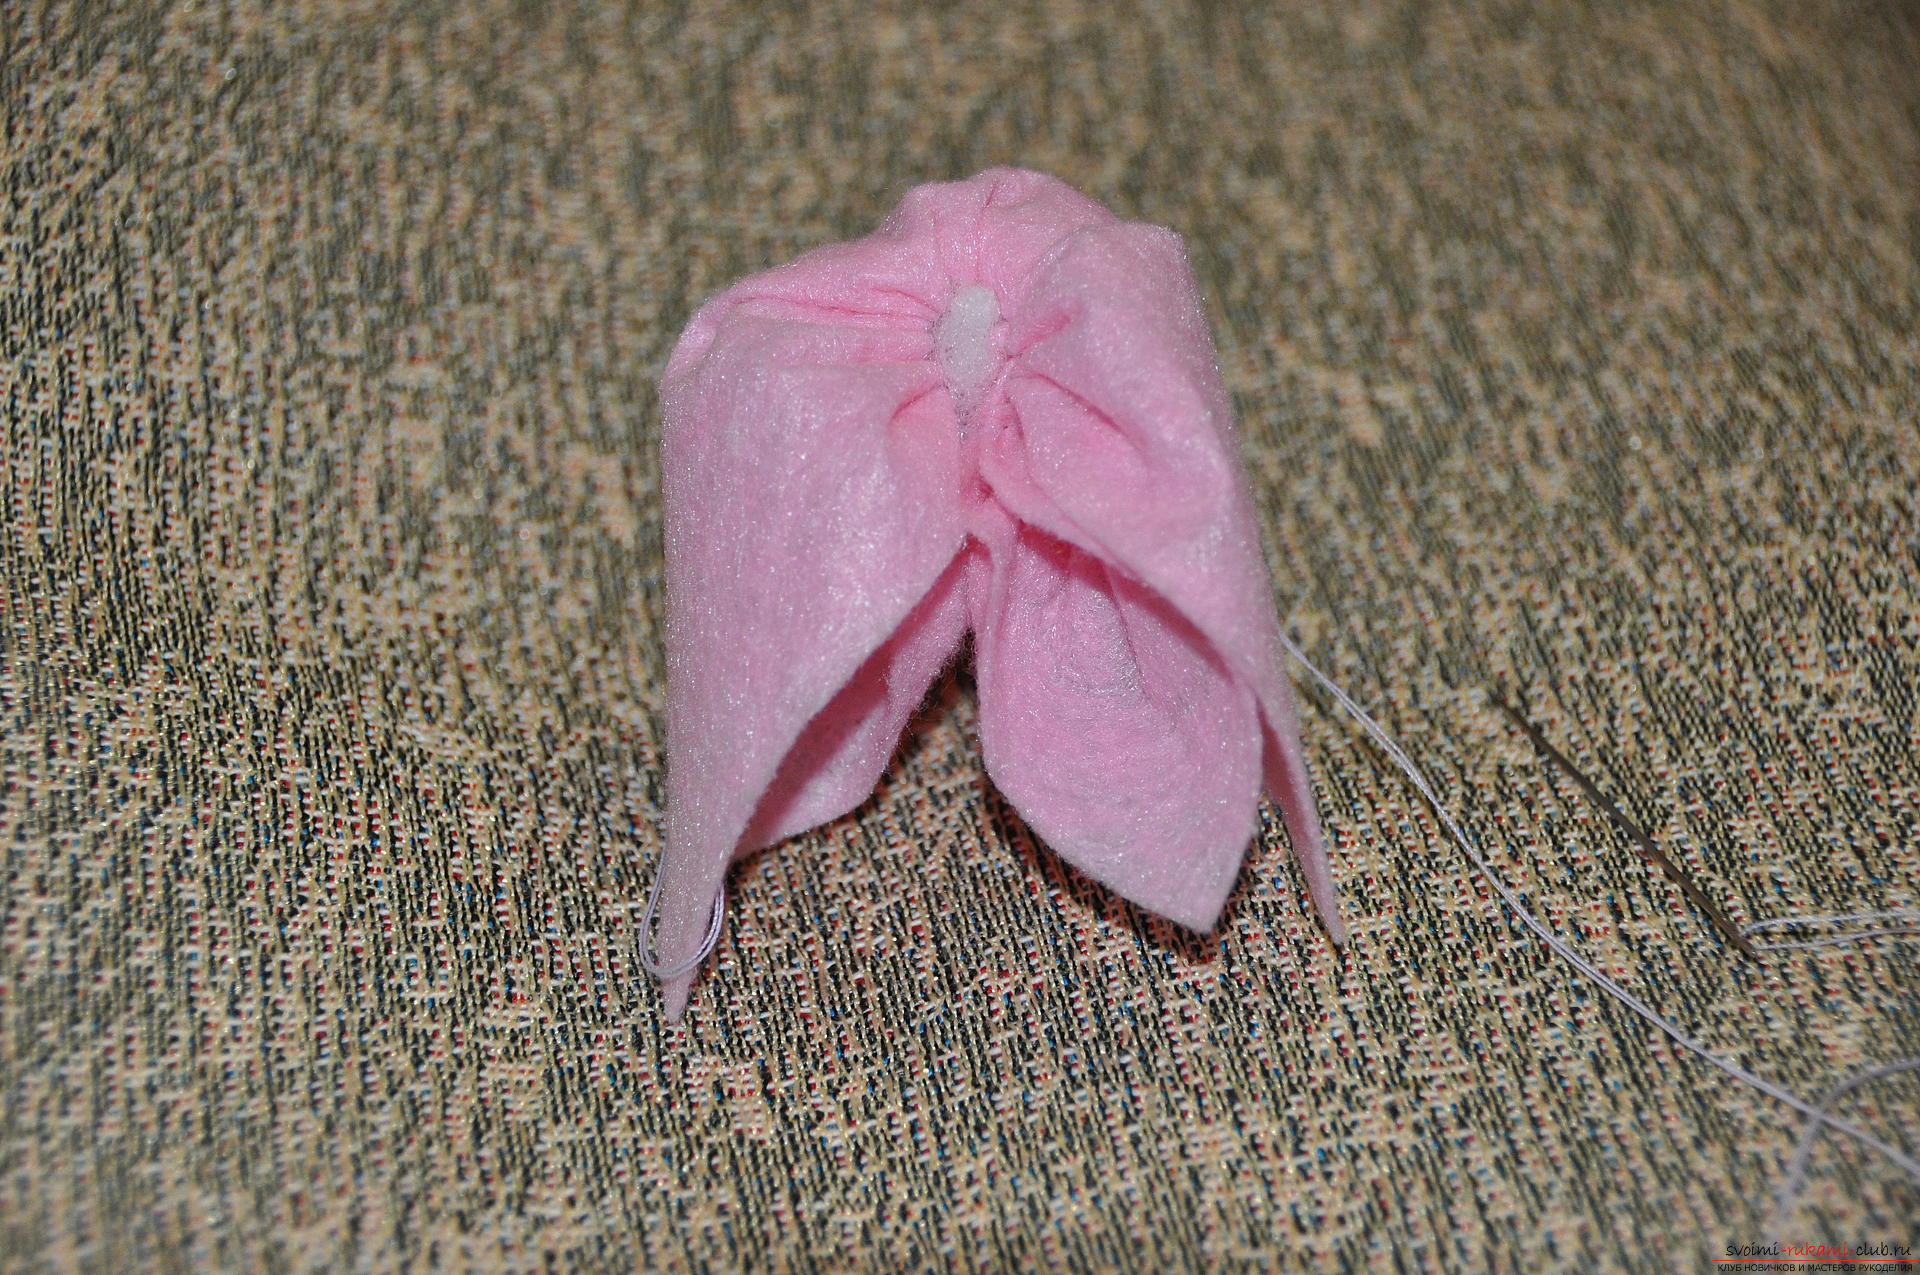 And start sewing the dorsal suture. Just do it carefully, so as not to grab the ears.
 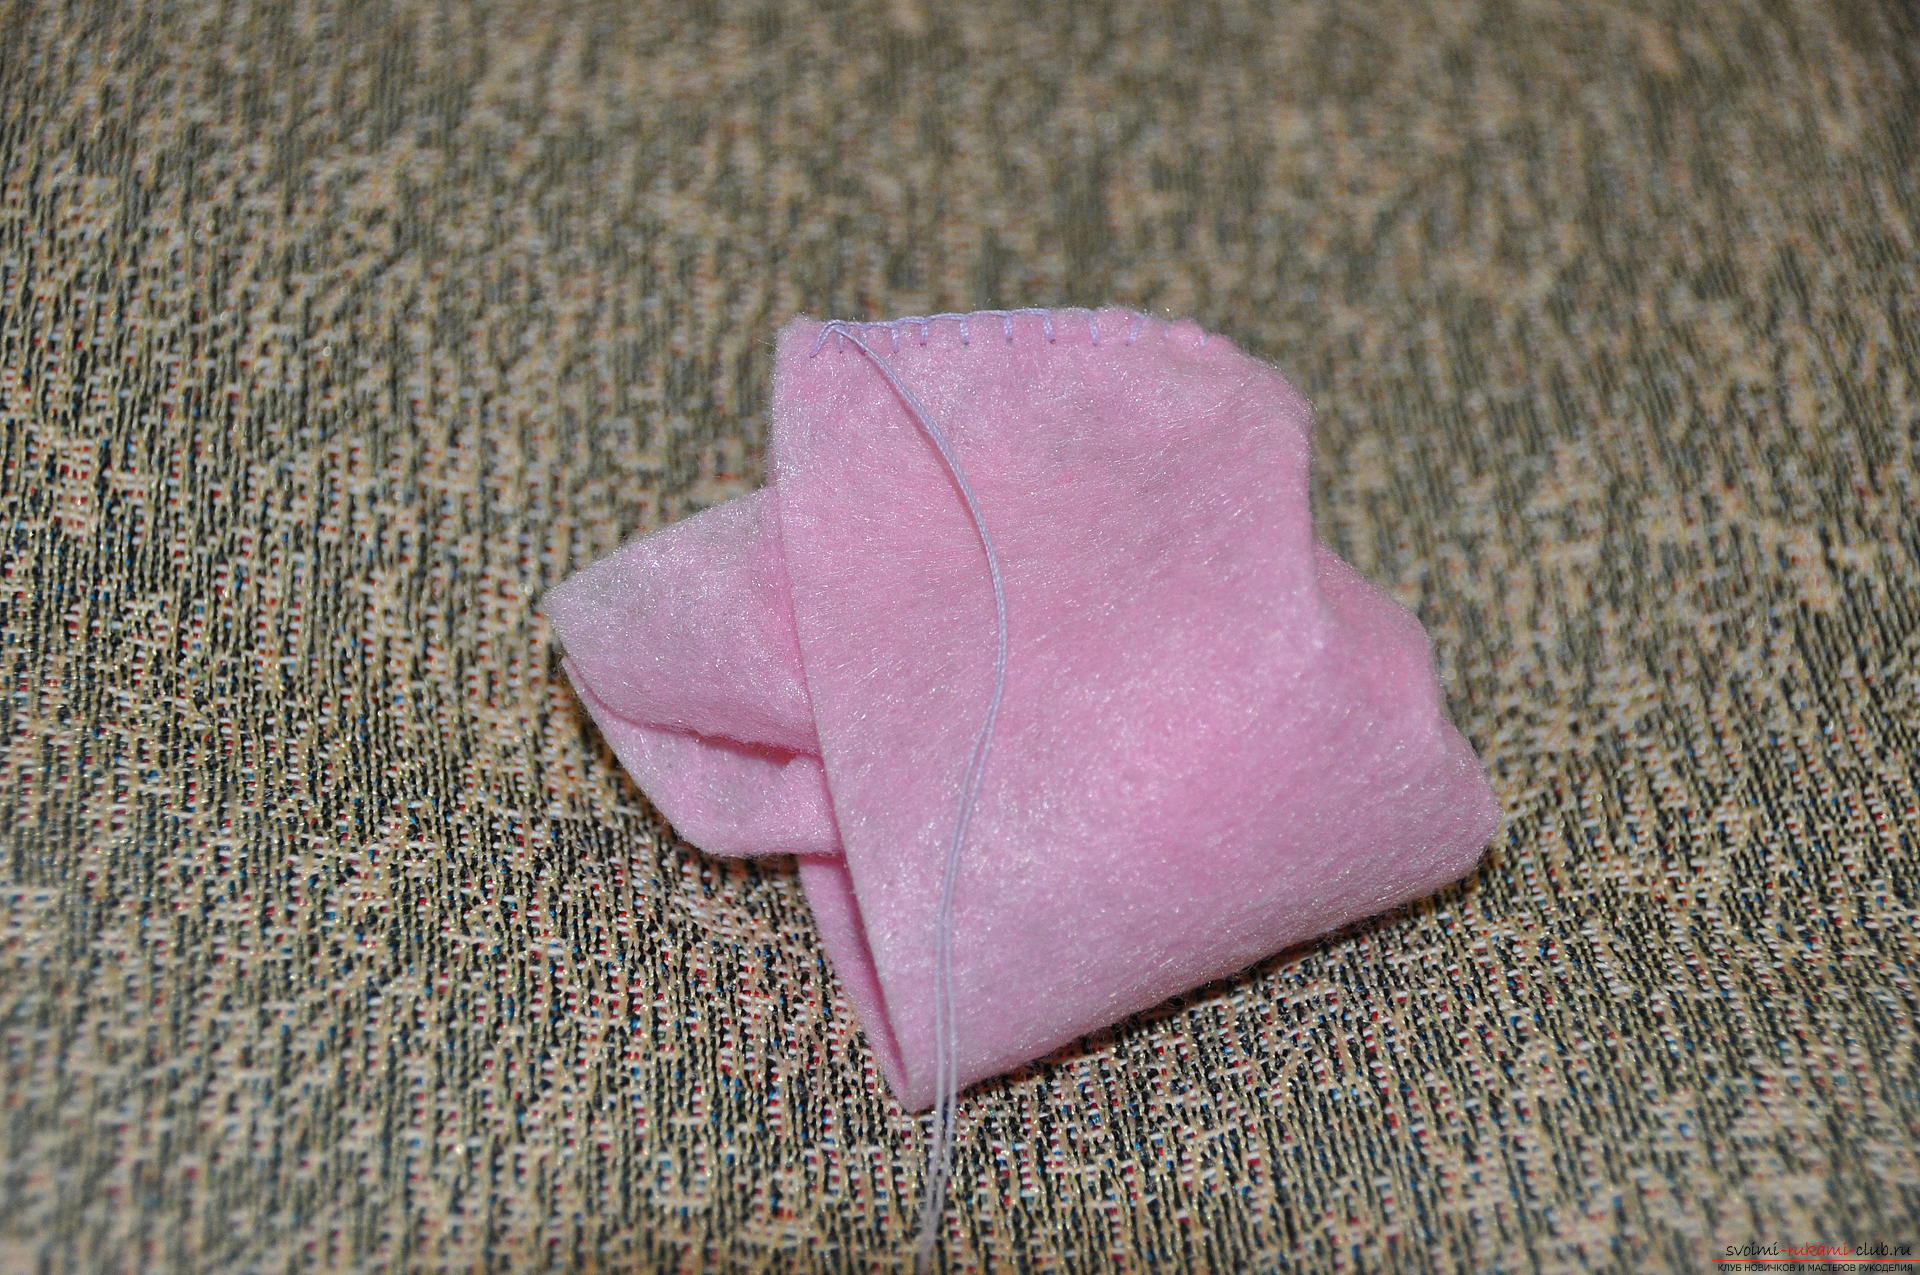 Turn the toy out and fill the body with a sintepon.
 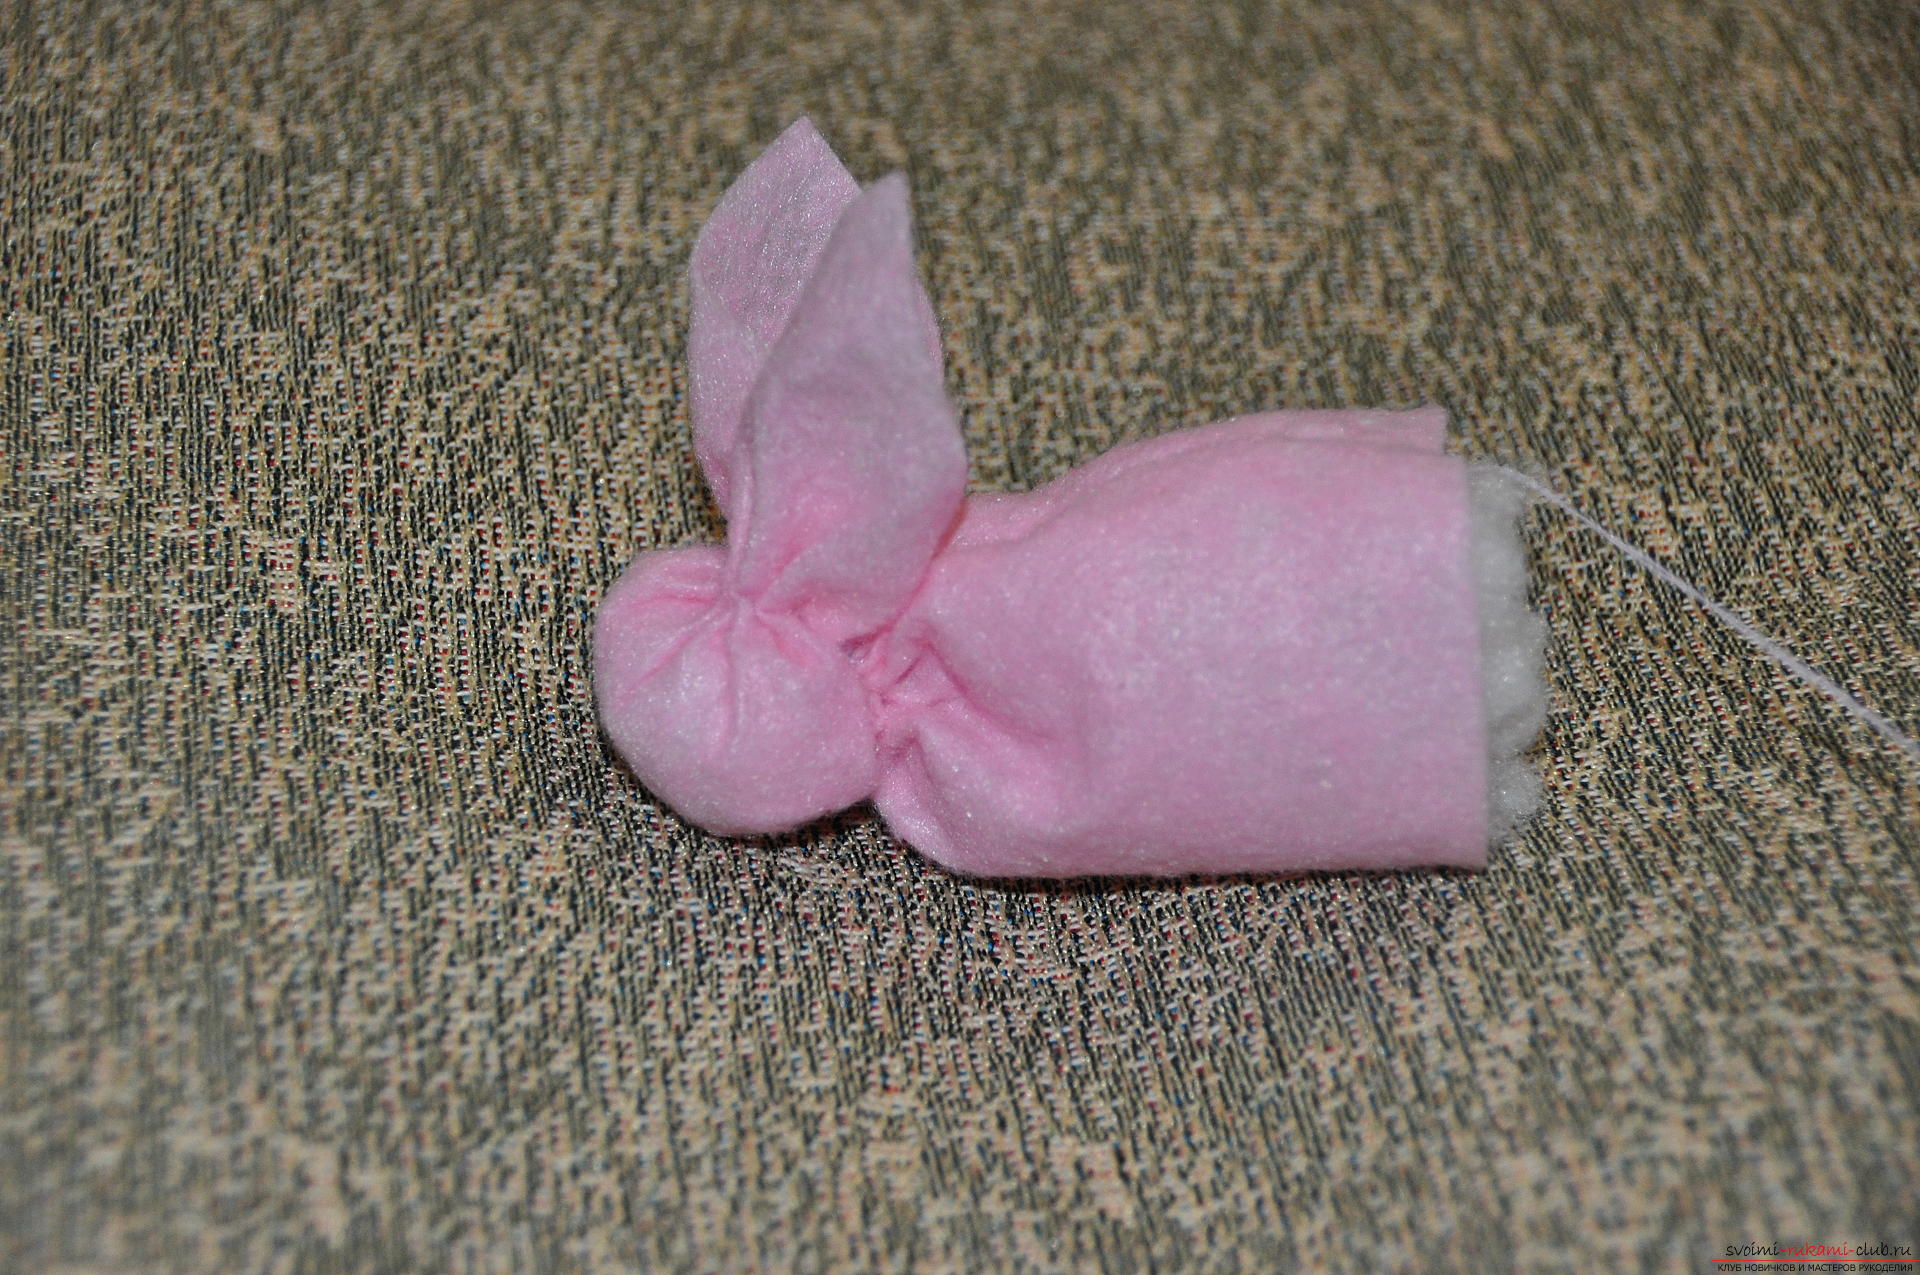 On the bottom edge go through the usual stitches.
  And pull the bottom of the rabbit. Only now the thread can be fixed and cut off.
 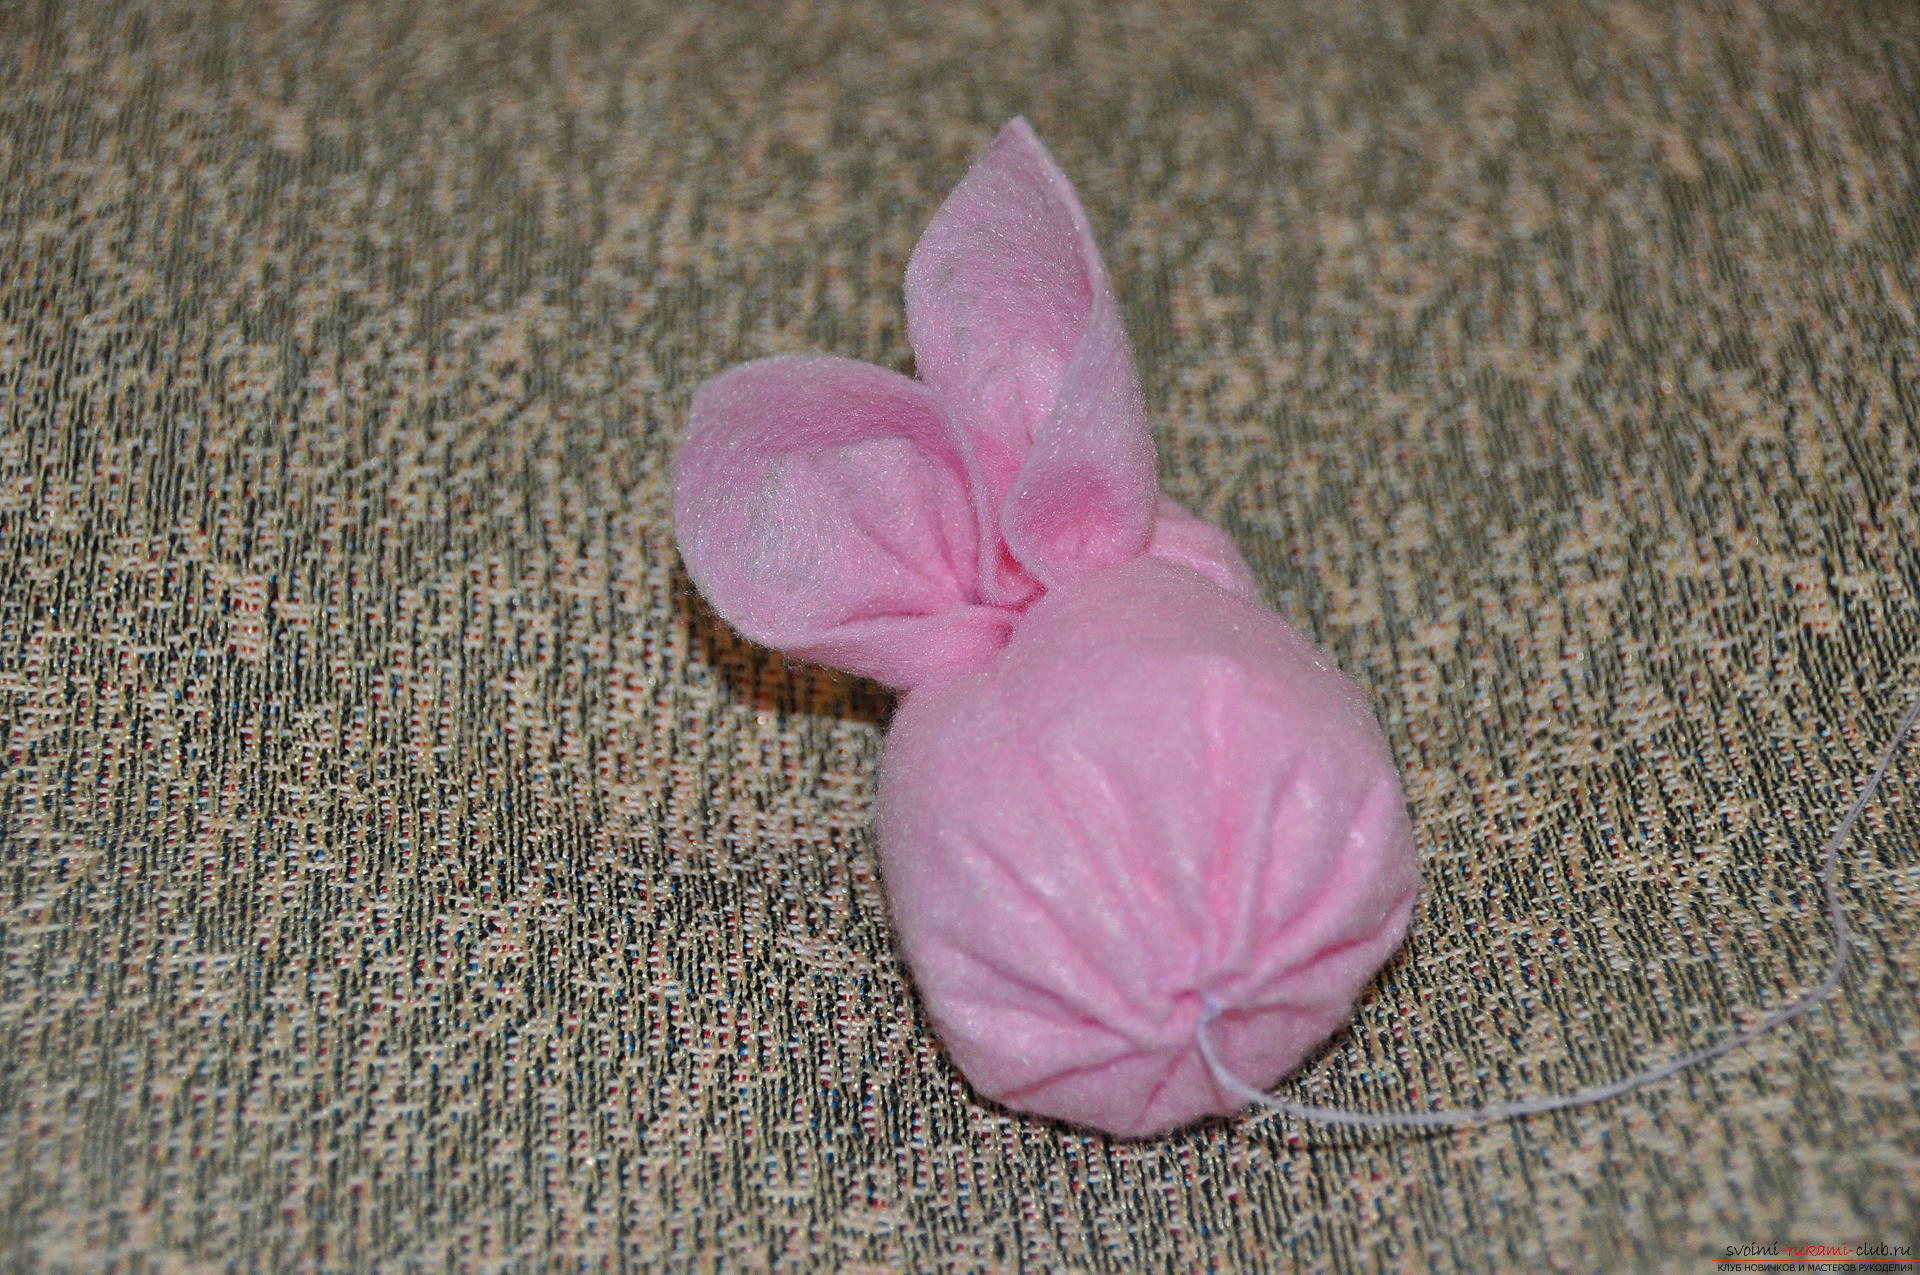 That's how it looks for your bunny.
 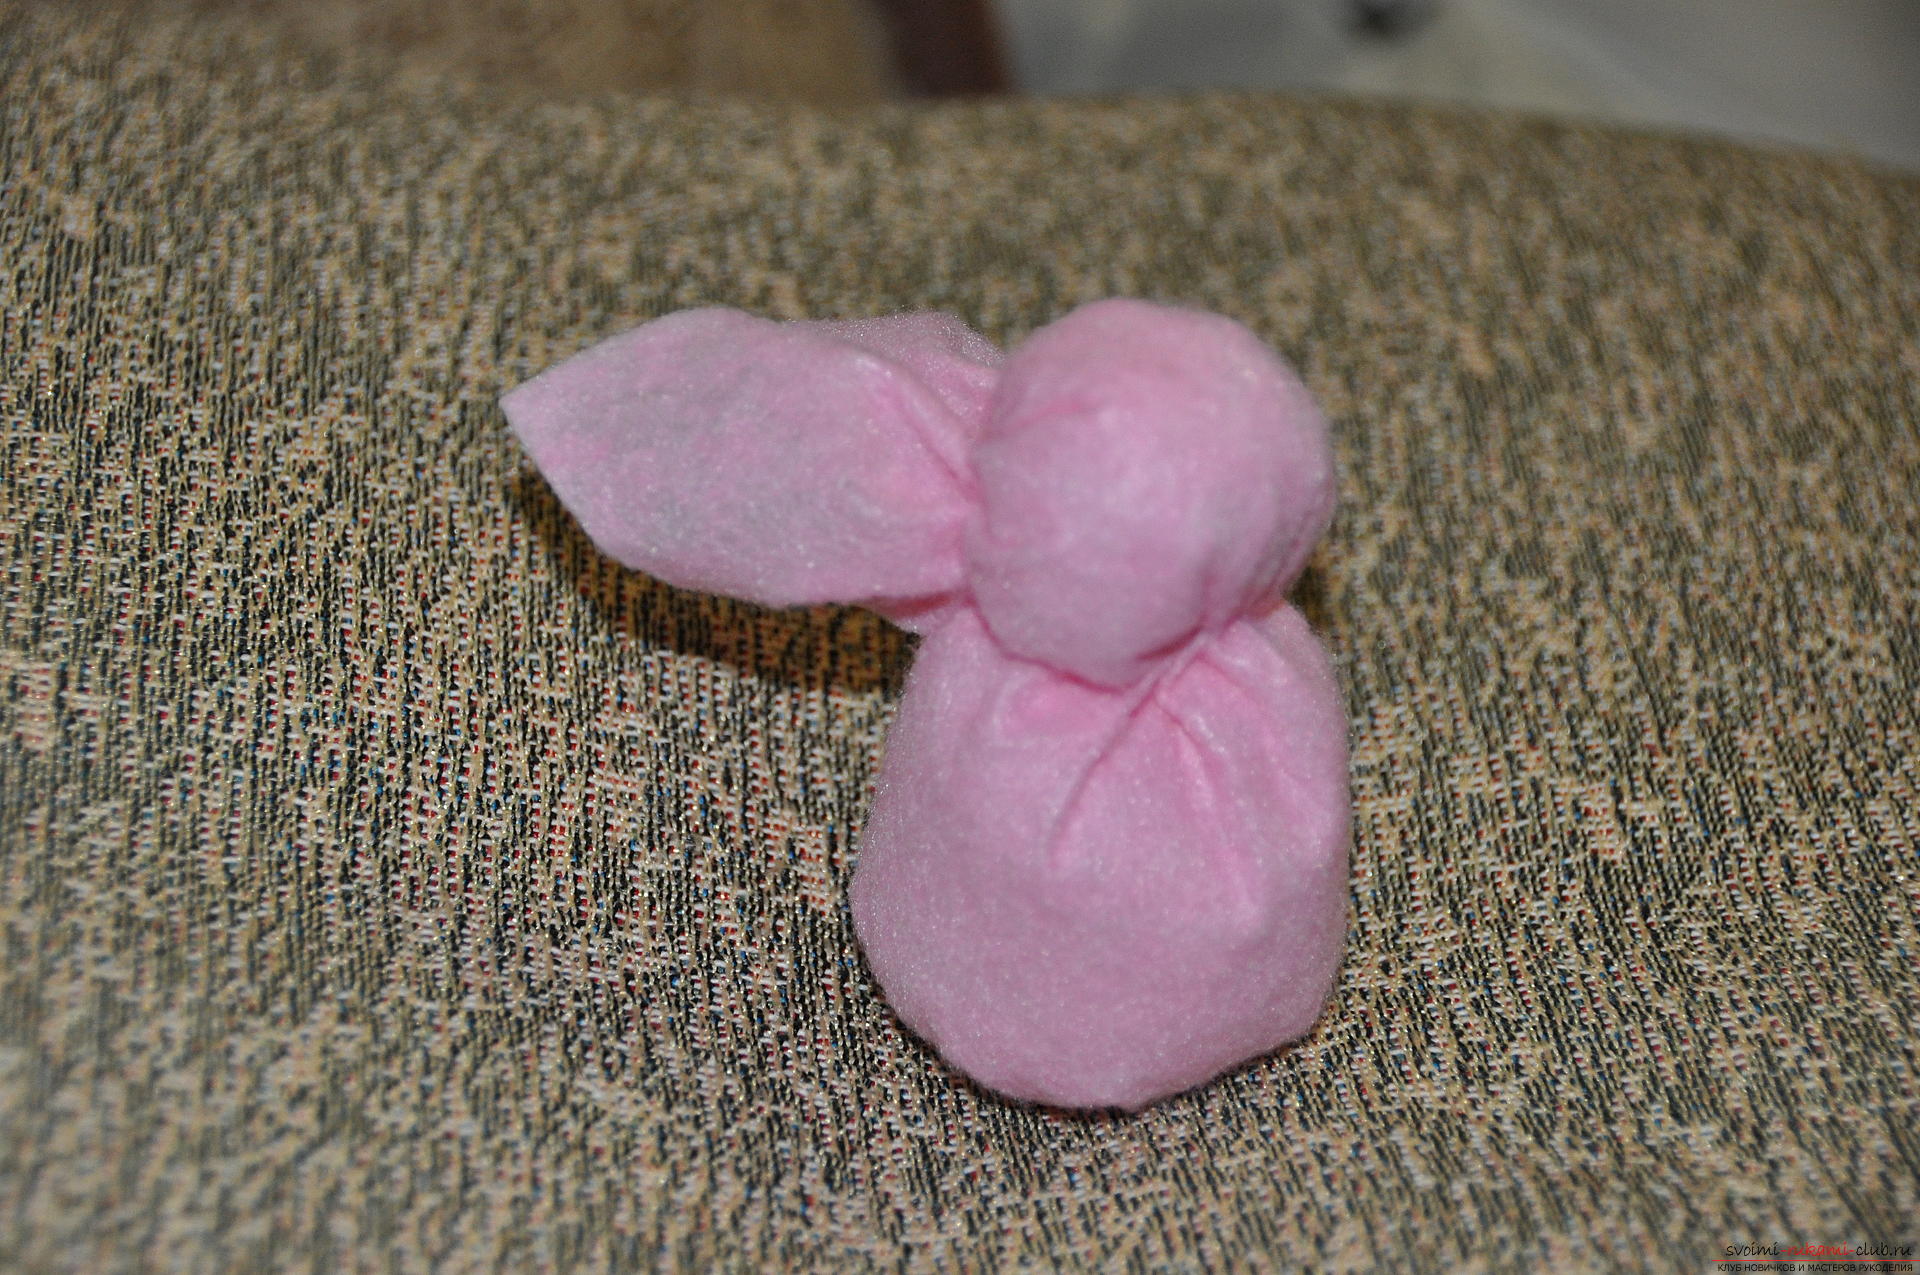 Now we need to make a tail. Cut a circle from the fabric.
 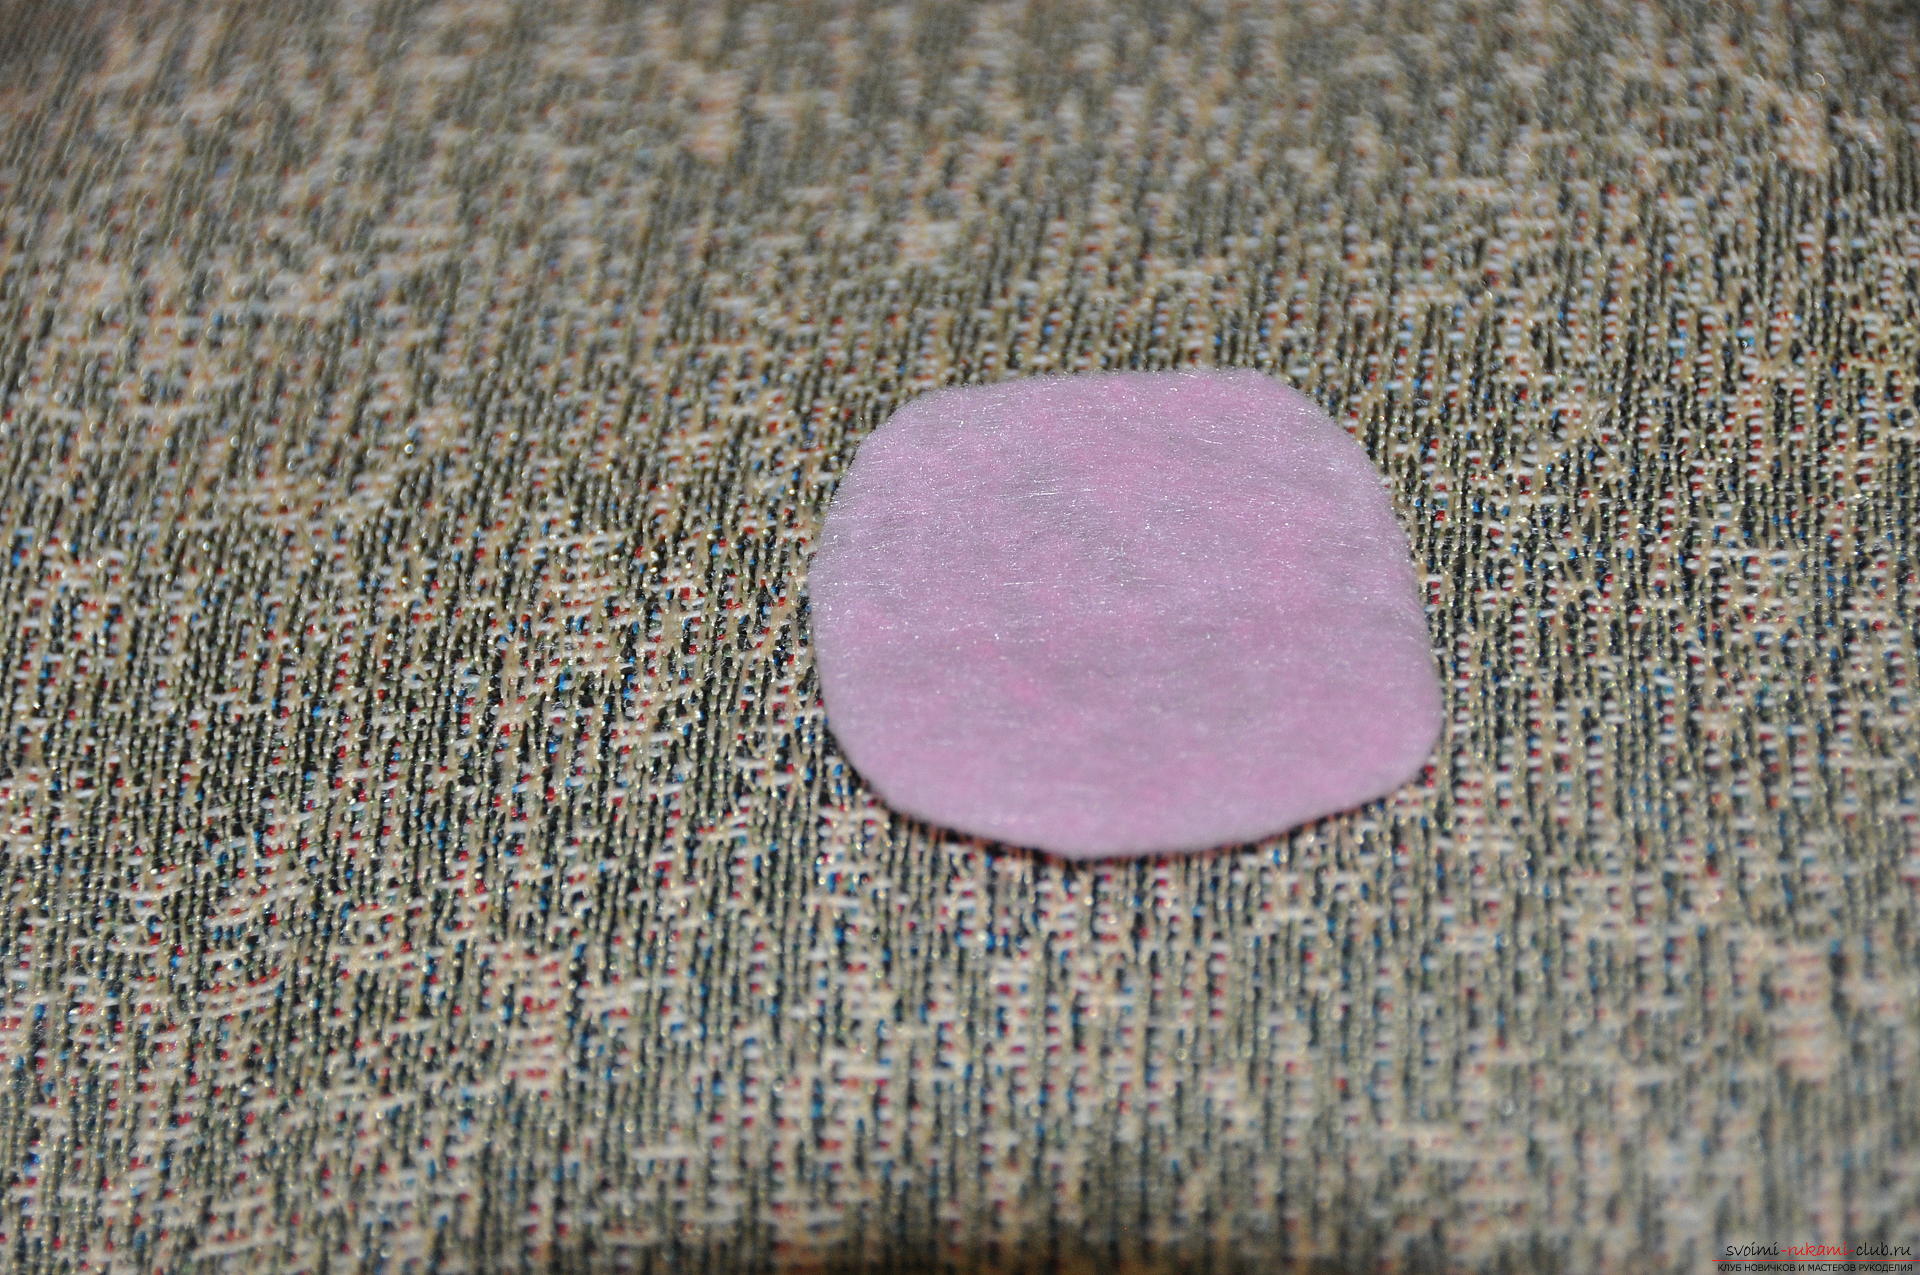 Sew it around the edges of the usual stitches, put a lump of sintepon and pull. This will be a hare's tail.
 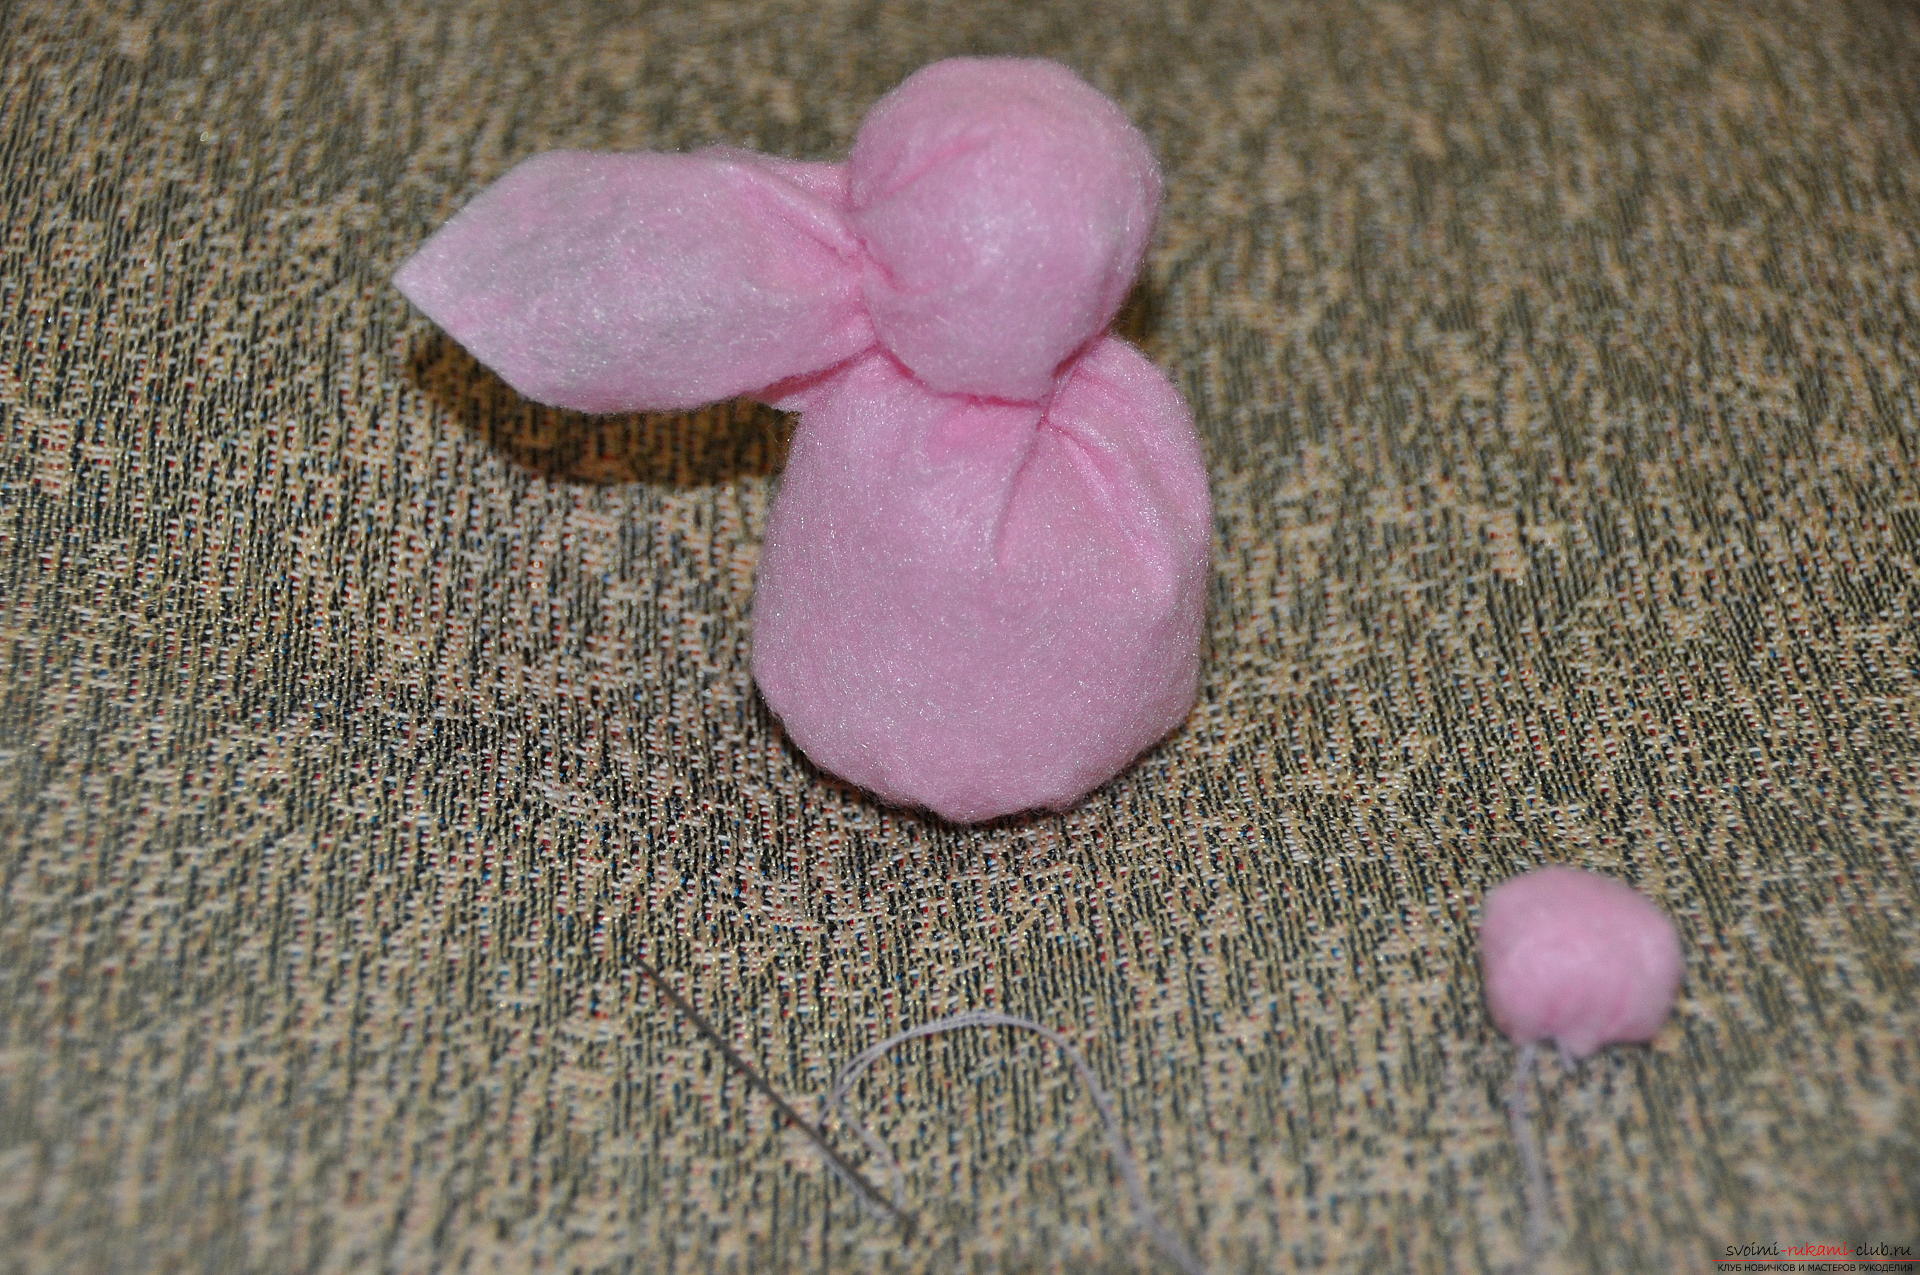 Sew it on the rightful place.
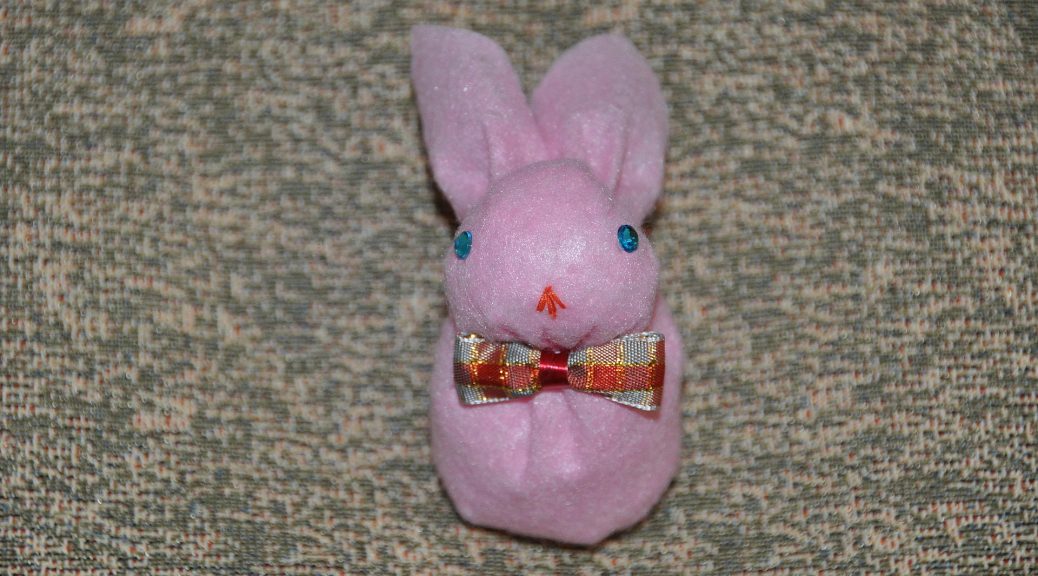
 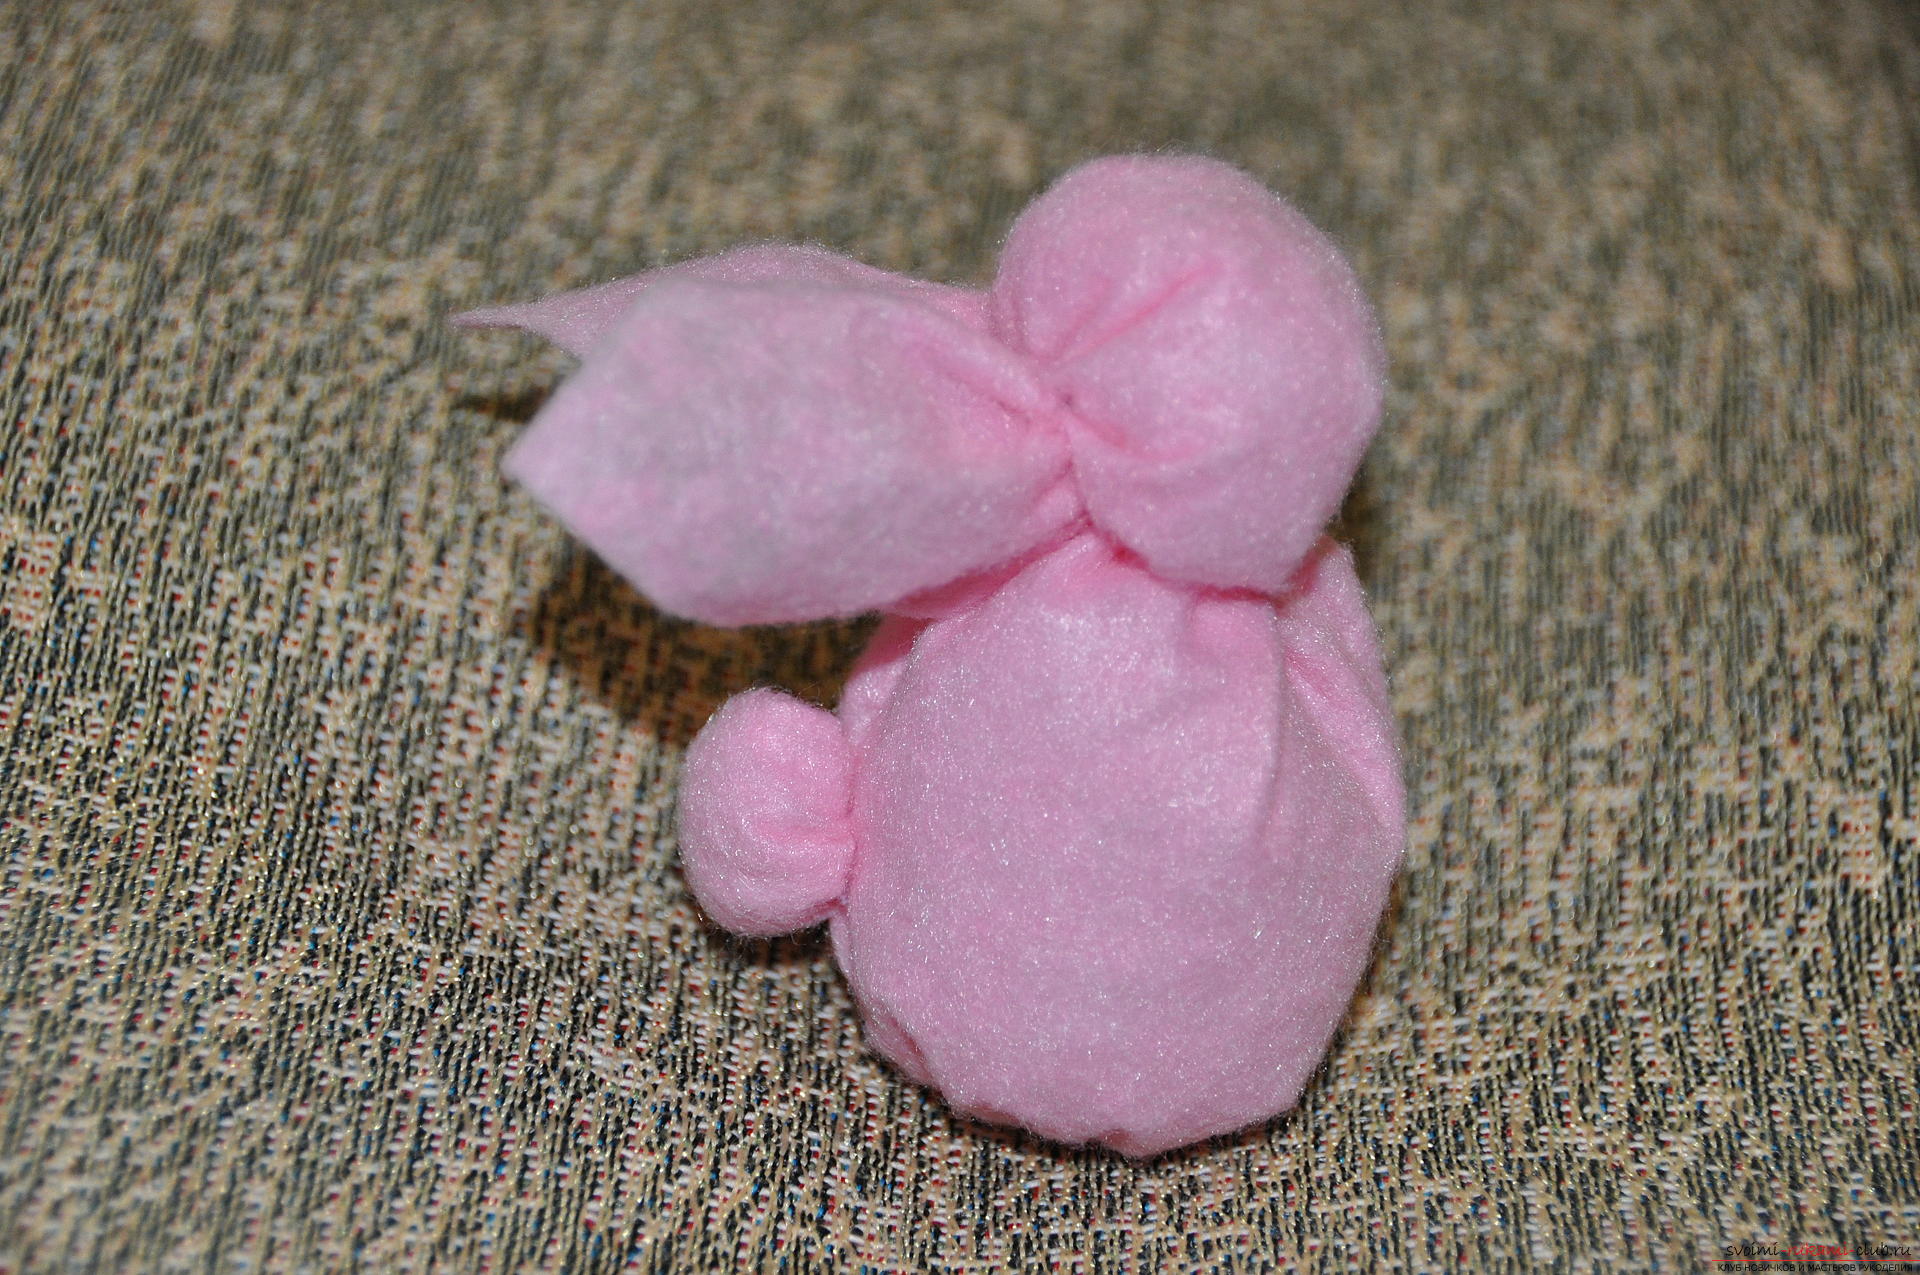 Now the most interesting is that we start finishing. This is the most favorite stage when you can show your imagination! I embroidered the nose with red thread, and for the sparkling peephole came blue stripes on the sticky layer, although they can also be embroidered.
 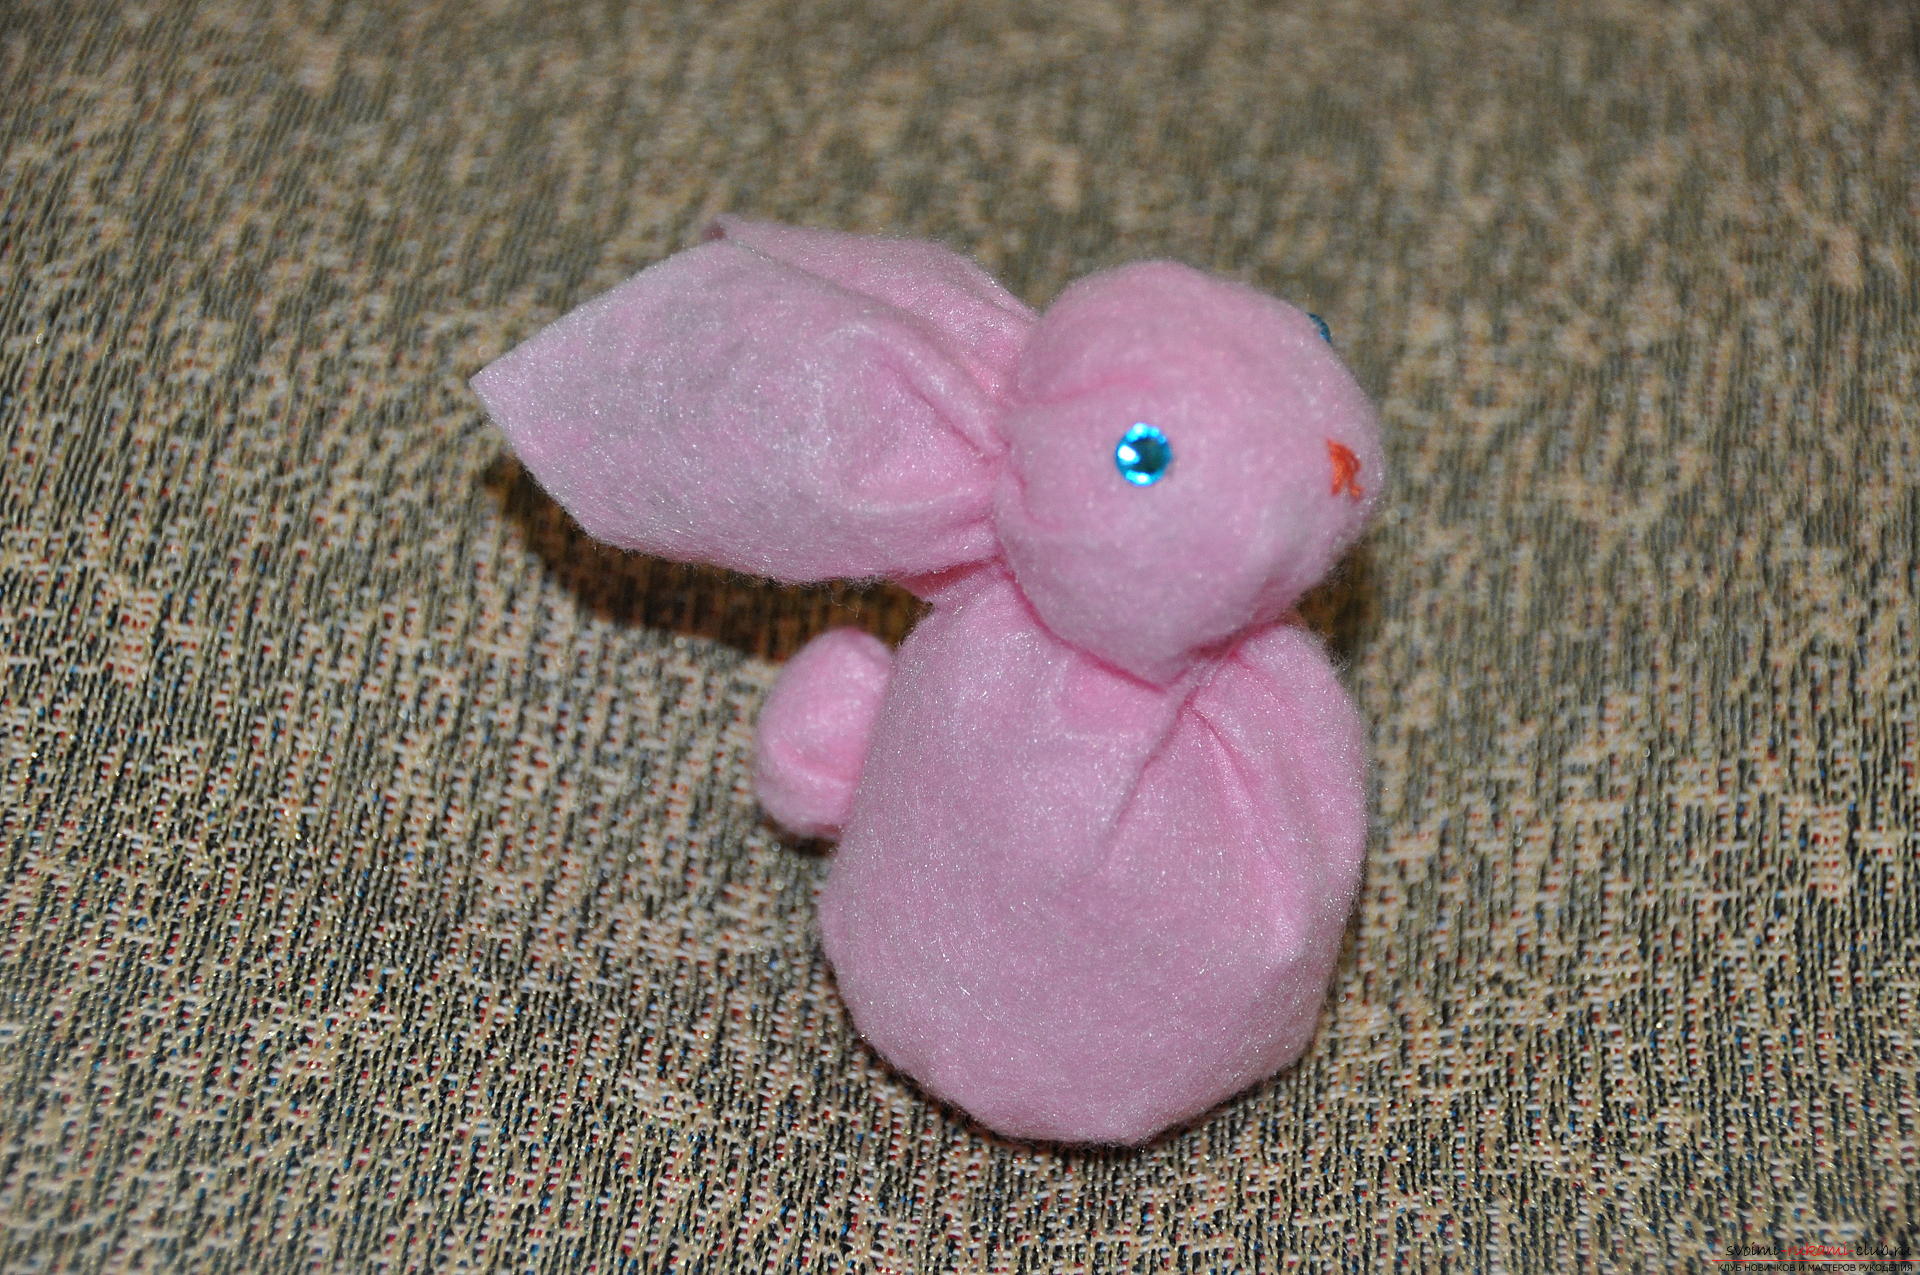 Then from the ribbon we'll build a dandy bow and fix it in place.
 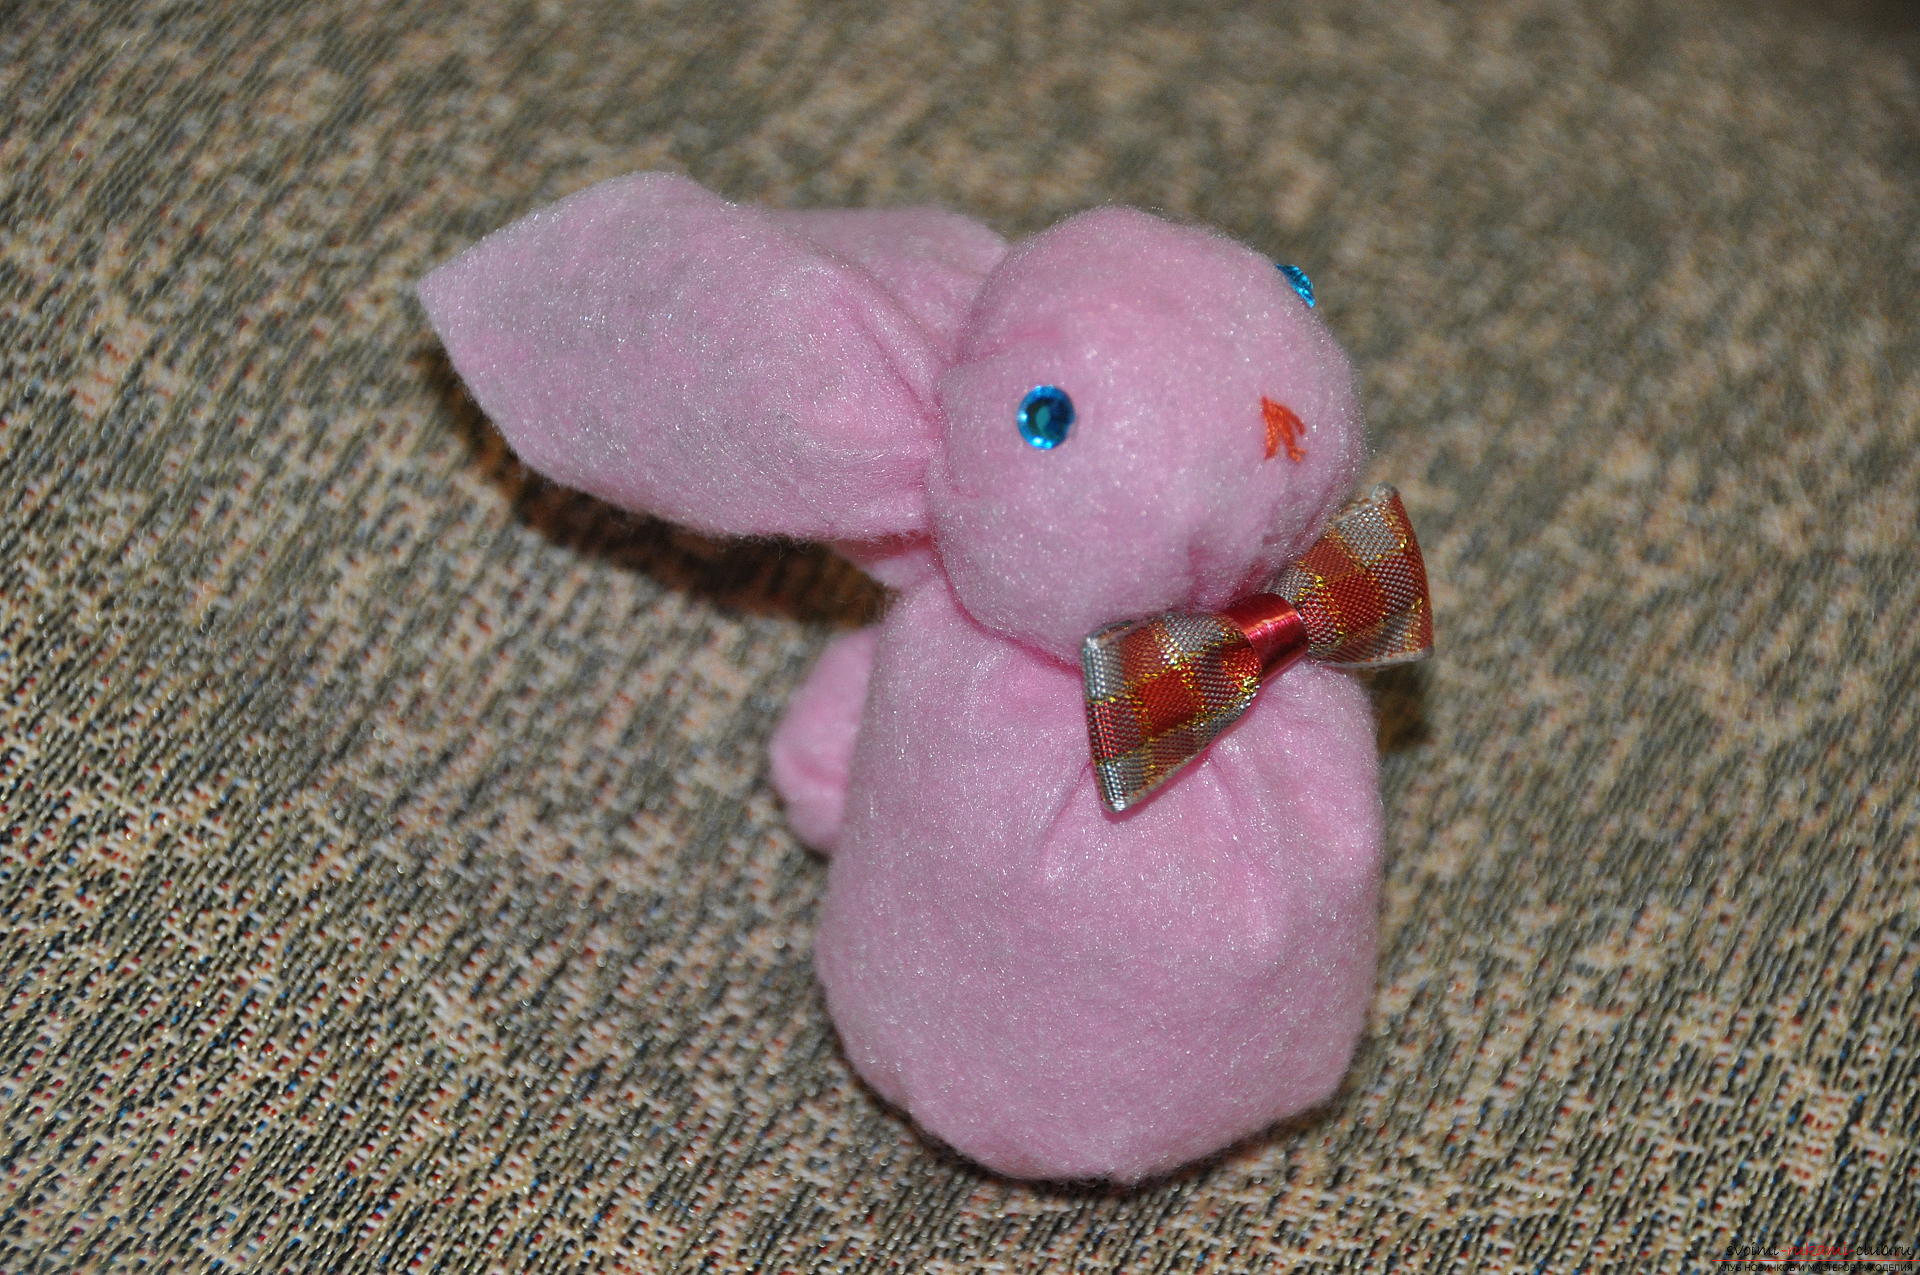 Here is a little rabbit! Any girl will be delighted with such a gift!
 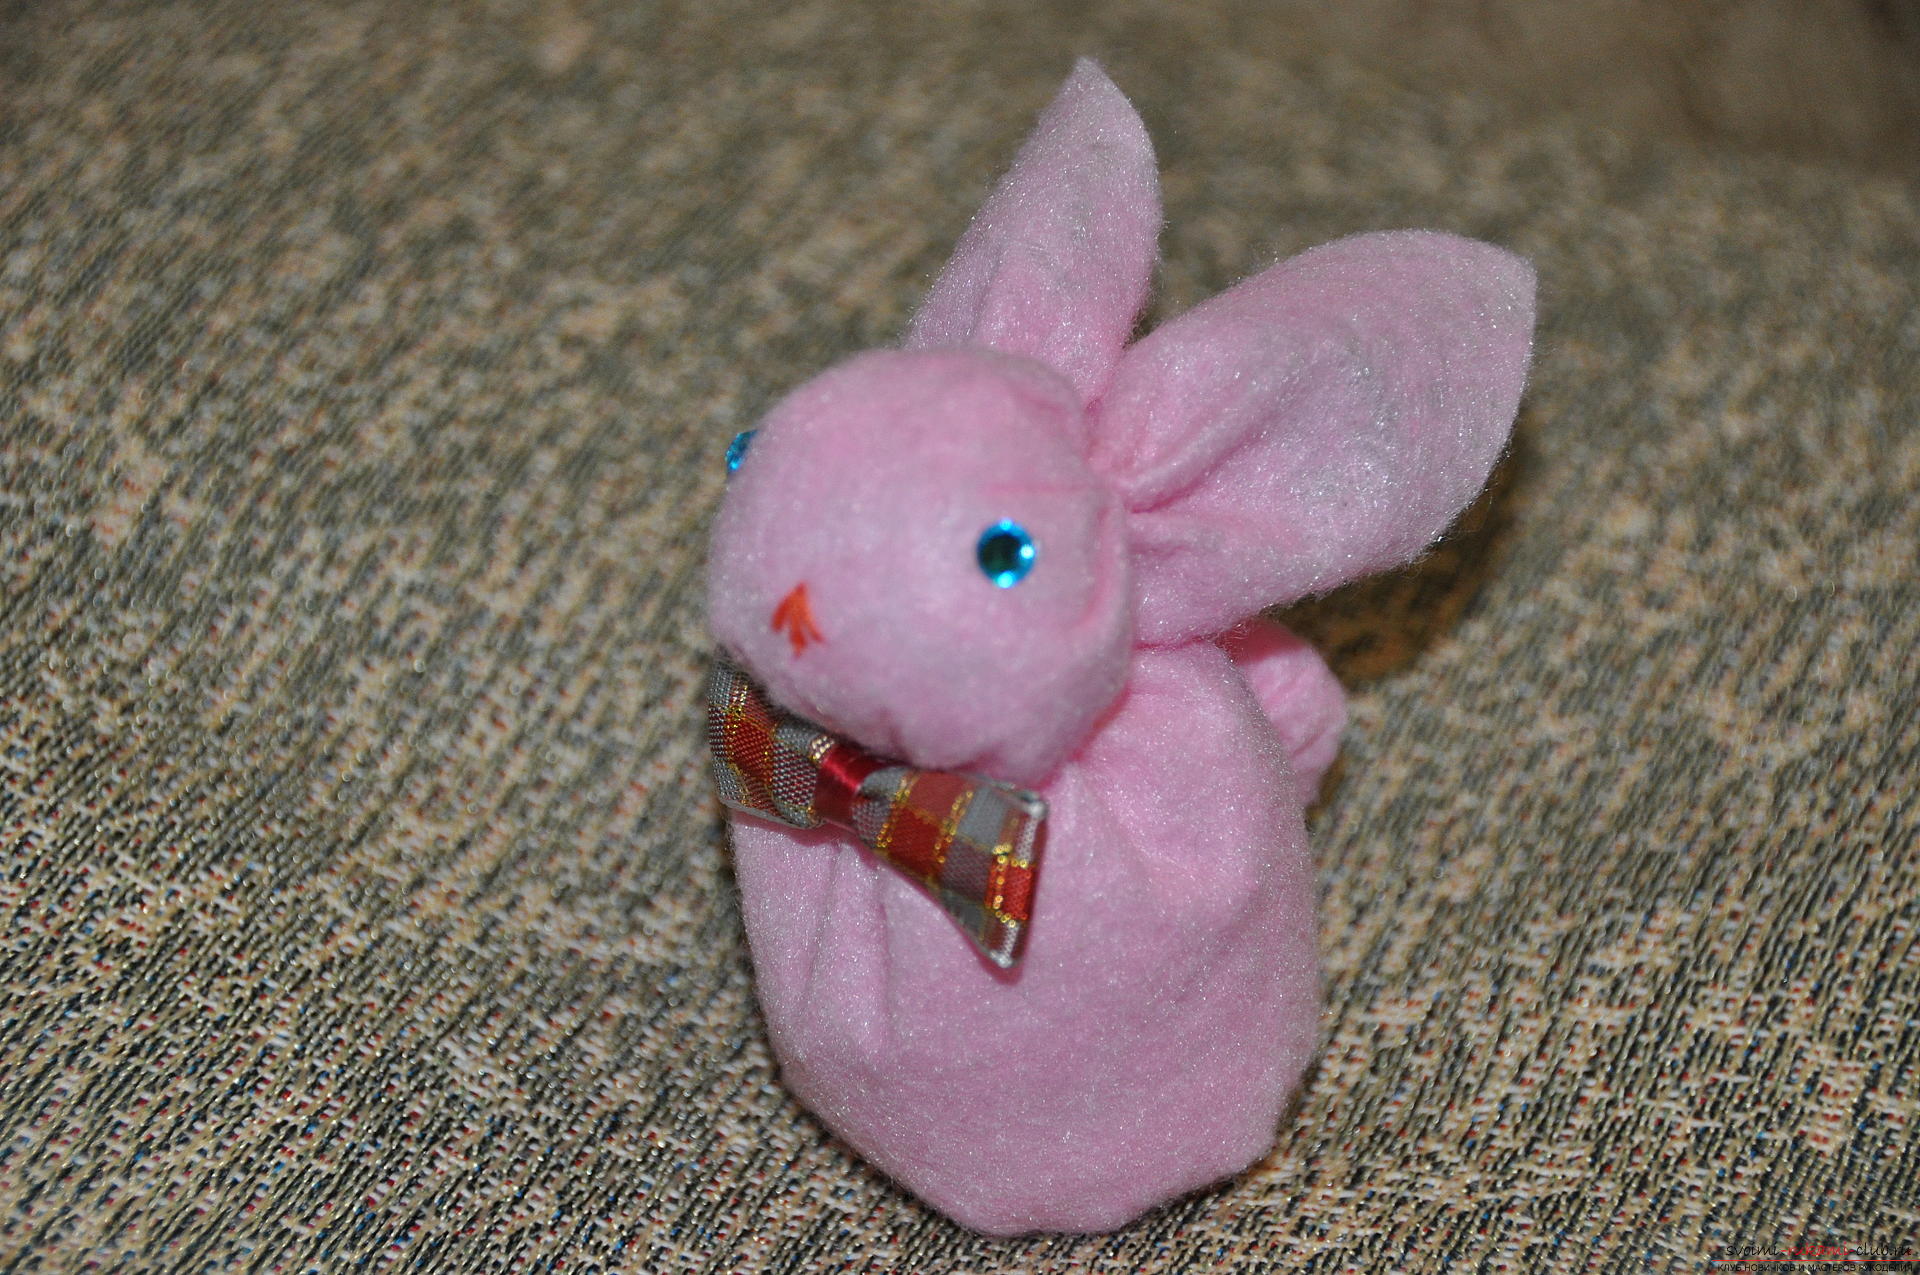 What else can be changed in this craft? First, the main material for it. The square for the toy can not be cut from the fabric, but knit or crocheted. Bunny from such a knitted fabric will look very interesting and unusual, because such material is more ductile. Secondly, he can sew paws, in which you can put a heart or flower. Thirdly, in the decoration you can show all your imagination and decorate the hand-craft as much as possible in an original way. As for my bunny, it turned out just like that!
 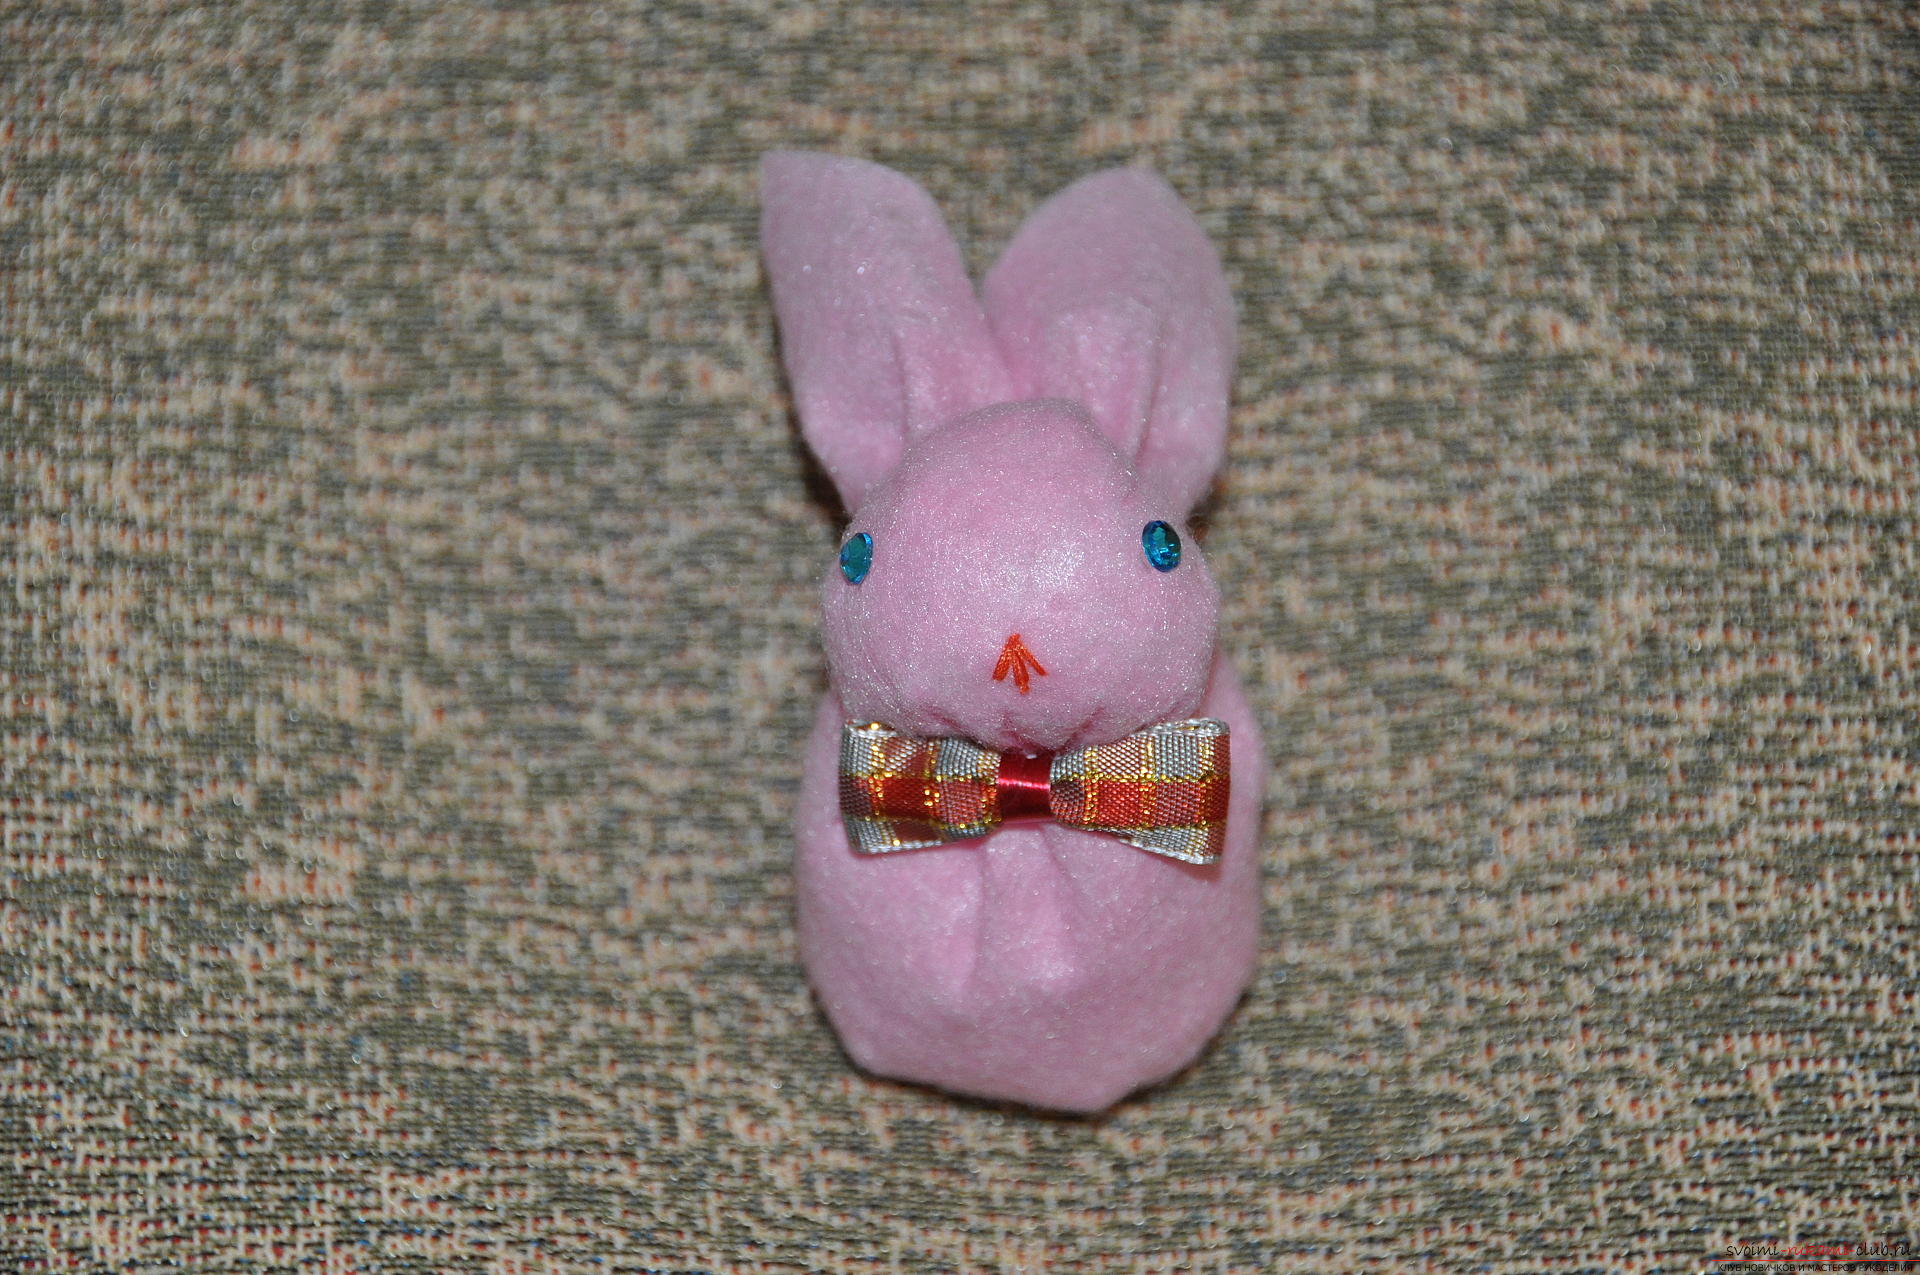 Attached to it a pretty valentine and we will present the bunny as a gift for a wonderful holiday - Valentine's Day! Love and be loved!
Comments
Related posts:
 This master class will teach how to sew the original valentine on February 14 - fish from felt.
 This master class will teach how to sew a toy Dolly of sheep from the felt with her own hands.
 This master class will teach you how to make a toy out of felt - a monkey.
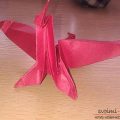 This detailed master class contains an origami-dragon scheme from paper, which you can make with your own hands.
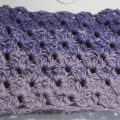 This detailed master class with a photo contains crochet snatch crochet patterns.