
This master class contains crochet lessons and descriptive schemes for creating a related toys for children - "Chanterelles"
In this master class I want to tell you howYou can tie a cute and sweet chanterelle for your child with a hook. Fans can knit with knitting needles, but of course it will look a little different, and knit toys are better crocheted than knitting needles. Spokes are also great for knitting sweaters, hats and children's shoes, for example, pinets. Knitted chanterelle fits as easy as playing with a child, you can also tie a toy as a gift. Either provide a school or kindergarten to an exhibition of handmade crafts. The chanterelle turns out to be pleasant to the touch and soft by using the appropriate yarn and filling material. I use artificial yarn for knitting, or acrylic, mixed with wool. Due to the dense filler, the toy keeps its shape perfectly and can sit on its own, that is, it does not need to be supported. 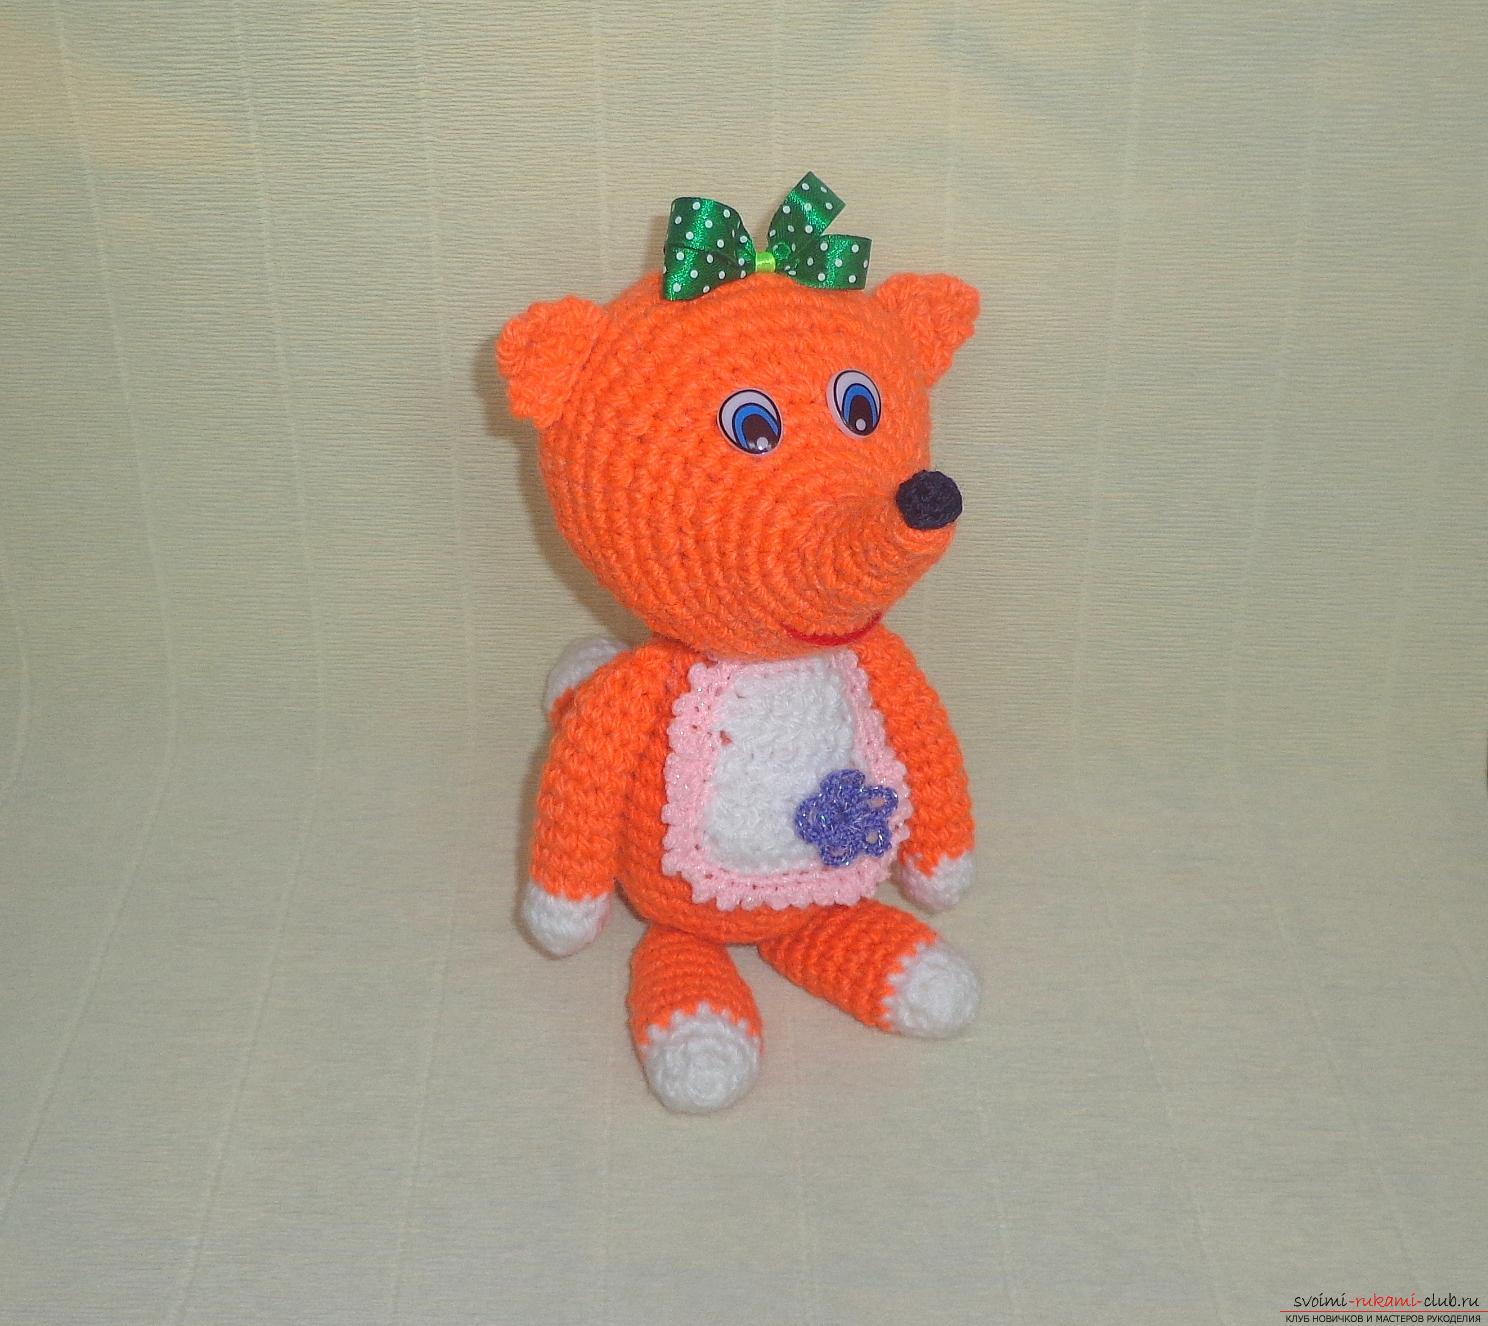 For knitting the chanterelles, such materials and tools will be required:
- yarn of red color;
- yarn of white color;
- yarn of pink color;
- yarn of lilac color;
- black yarn;
- yarn of red color;
- eyes -2 pcs .;
- satin ribbon green in white peas (width 1 cm);
- satin ribbon of light green color (width 0.5 cm);
- glue;
- sewing needle;
- sewing thread of green color;
- hook number 3;
- filler for toys or foam rubber.
When ready for work all materials andtools you can embark on knitting toys. Chanterelles will be knit from the head, or rather from the nose. To work, you need red yarn and hook number 3. It is necessary to make a chain of 4 loops and merge it into a circle. From the 2nd to 4th row we tie a hook around. In the 5th row, you need to add one loop in any arbitrary place, and tie it around again. In the 7th row, you also need to add 1 loop, and 8 and 9 rows are tied without adding loops. 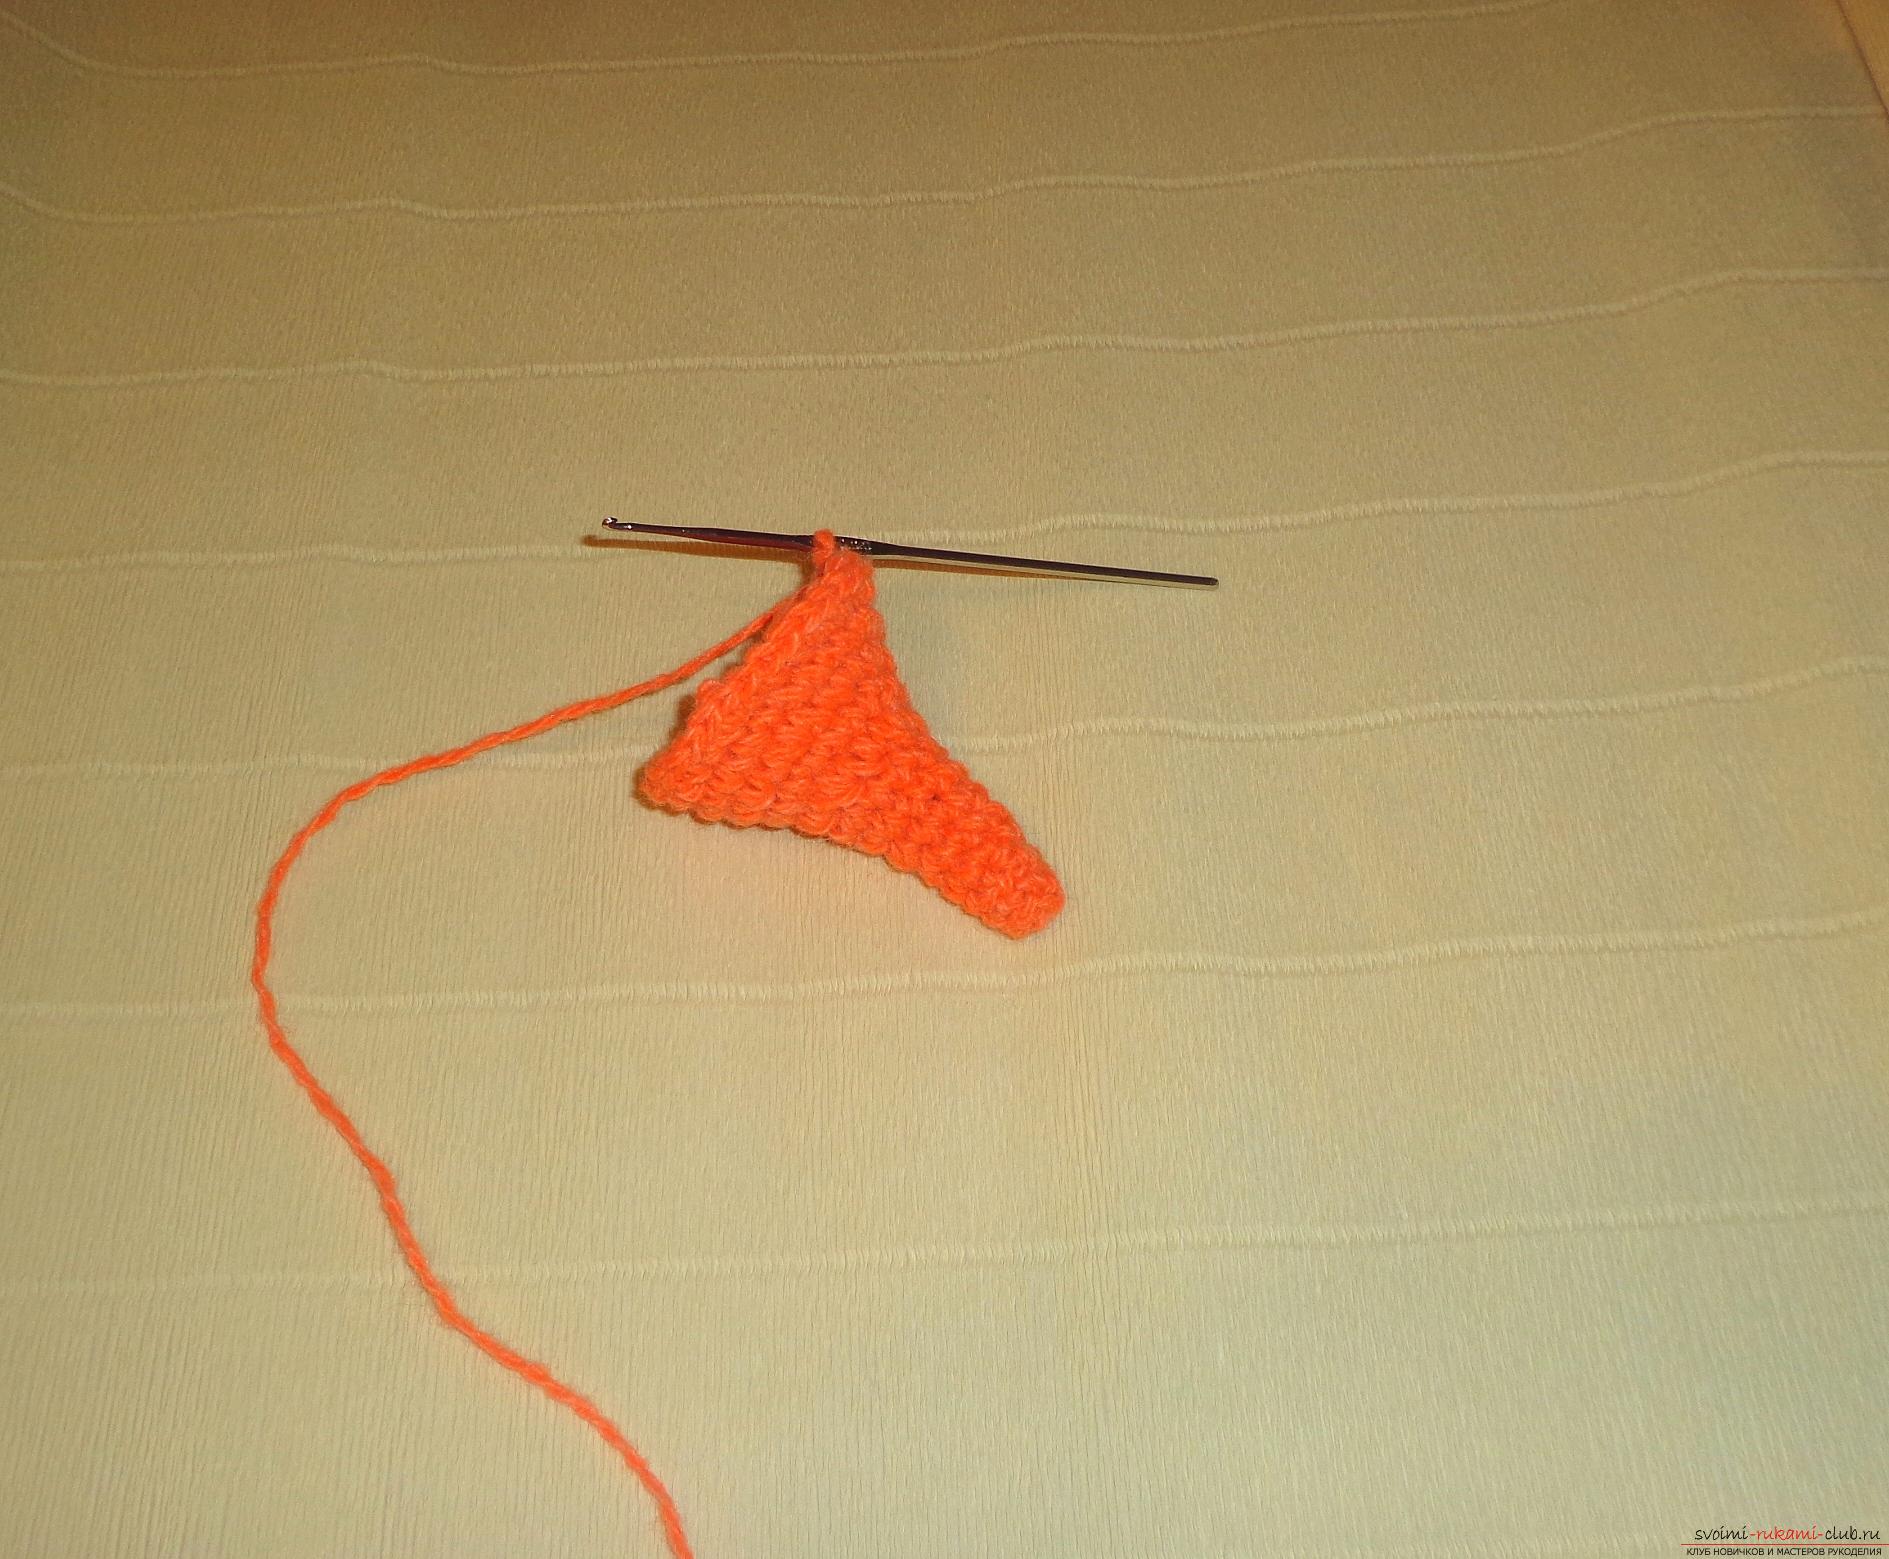 In the 10th row, it is necessary to loosen 1 loop from each loop of the row and once again tie around. Thus, the nose will gradually expand.
 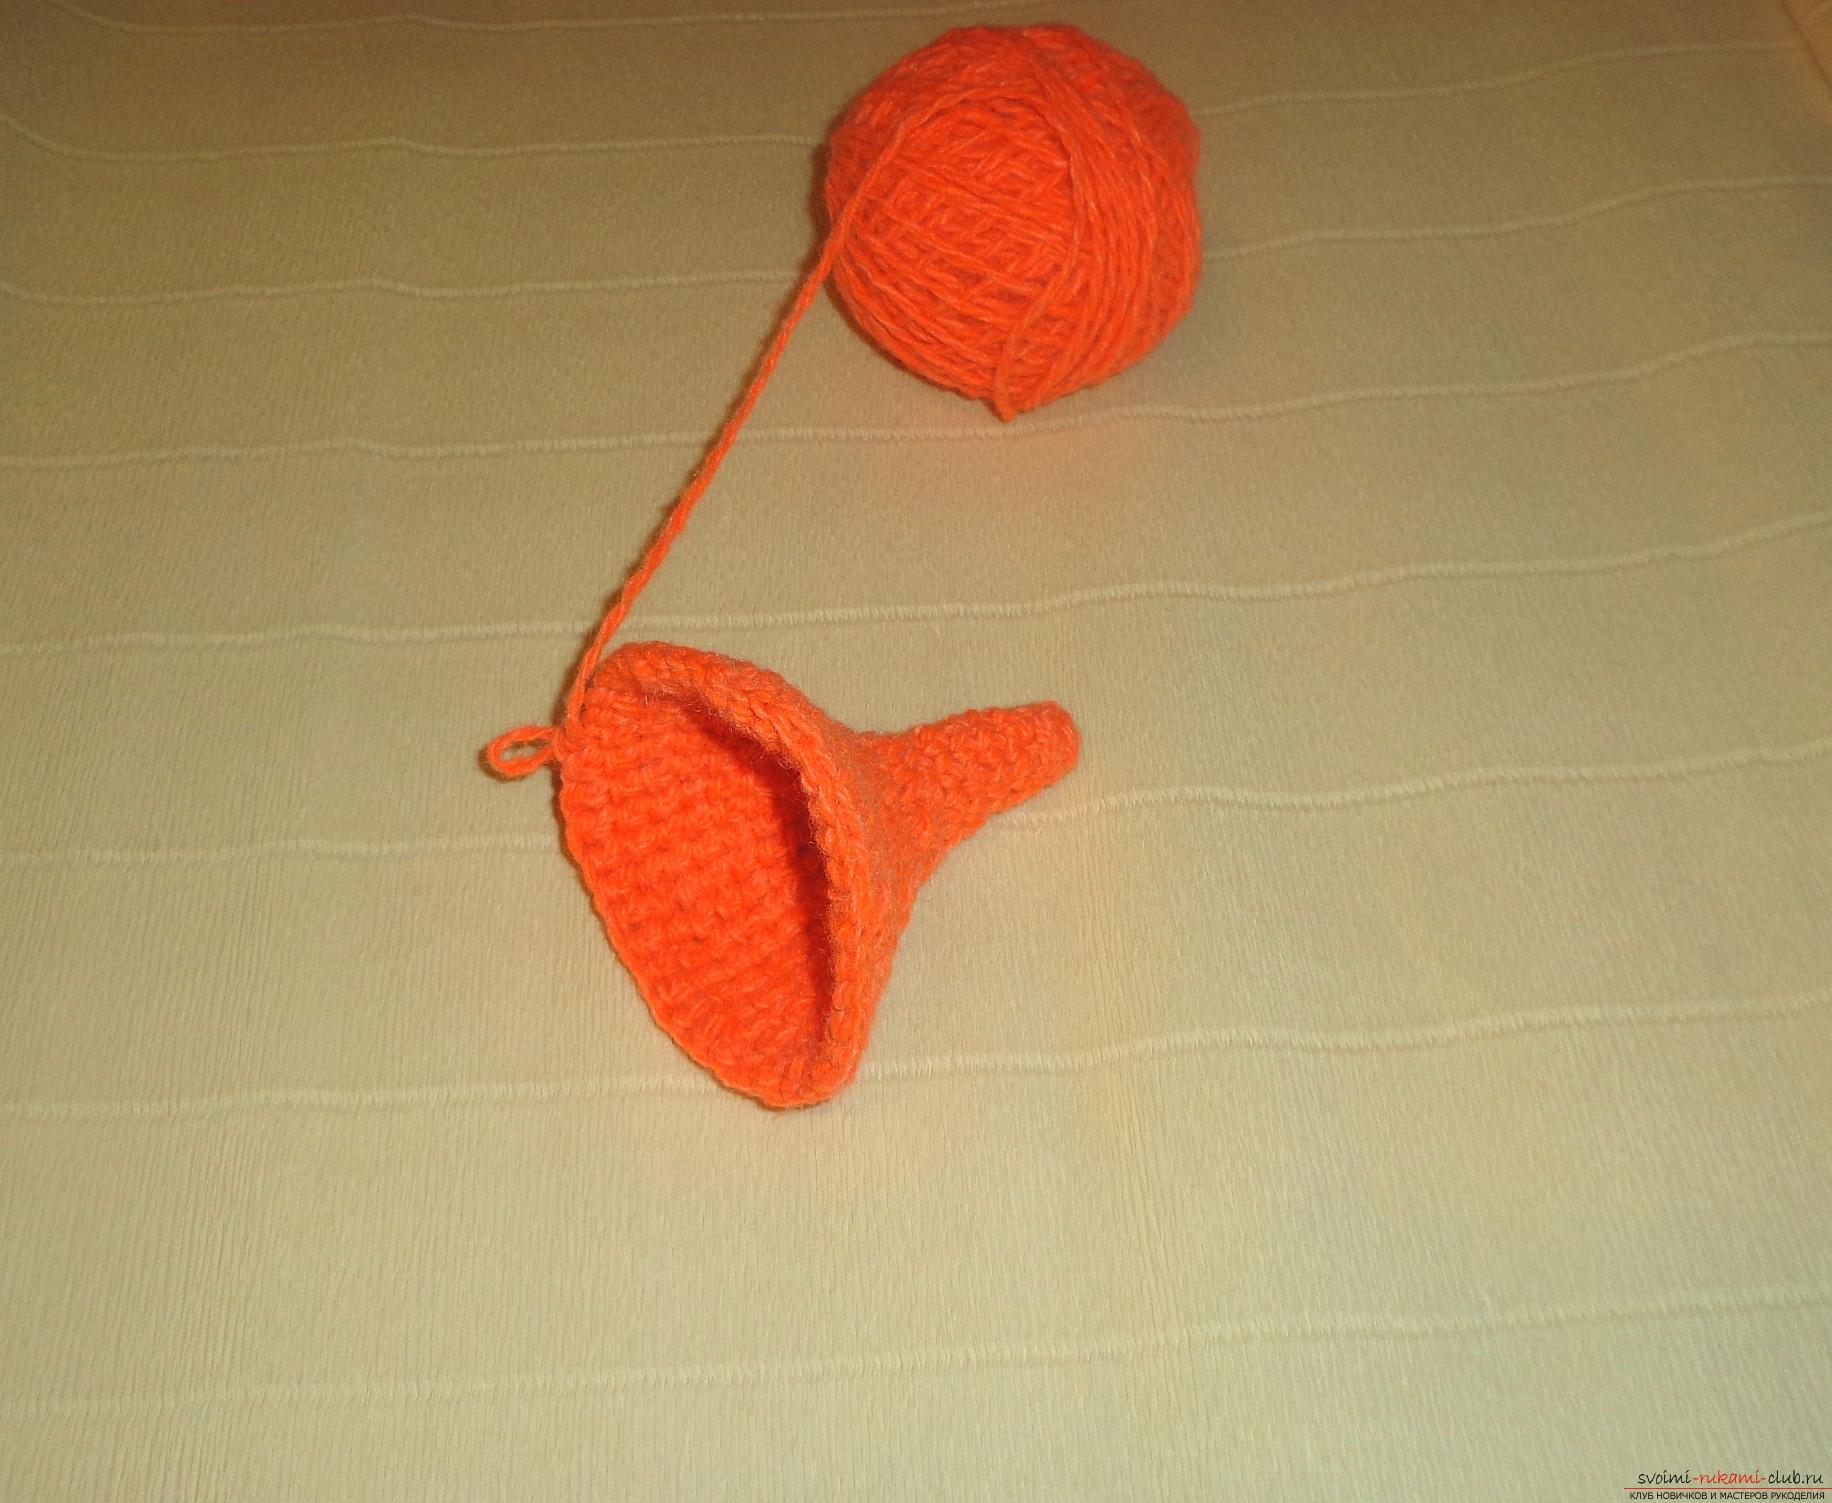 Now we turn to one-sided expansion, andmore precisely we will expand only in the upper part of the nose. The nose must be visually divided into two parts: upper and lower, for convenience you can fix a small clasp to see where what part. Therefore, in the 12th row we make an increase in the loops in each upper loop, and the lower loops are tied without increments, the 13th row is tied without the addition of loops. In the 14th row, it is necessary to add loops, as in the 12th row, and then a series is fastened without the addition of loops. In row 16, two loops are loosened from each loops of the upper part and tied again.
  In the 17th row, two loops ofof each second loop, and 18, 19, 20, 21 the rows are tied without the addition of loops. Next, we move on to reducing the loops, so in row 22, you need to remove 1 loop in each 4-th loop and simply tie it again in a circle. In the 24th row, we make the same reduction as in row 22, and the 25th row is tied without cutting the loops.
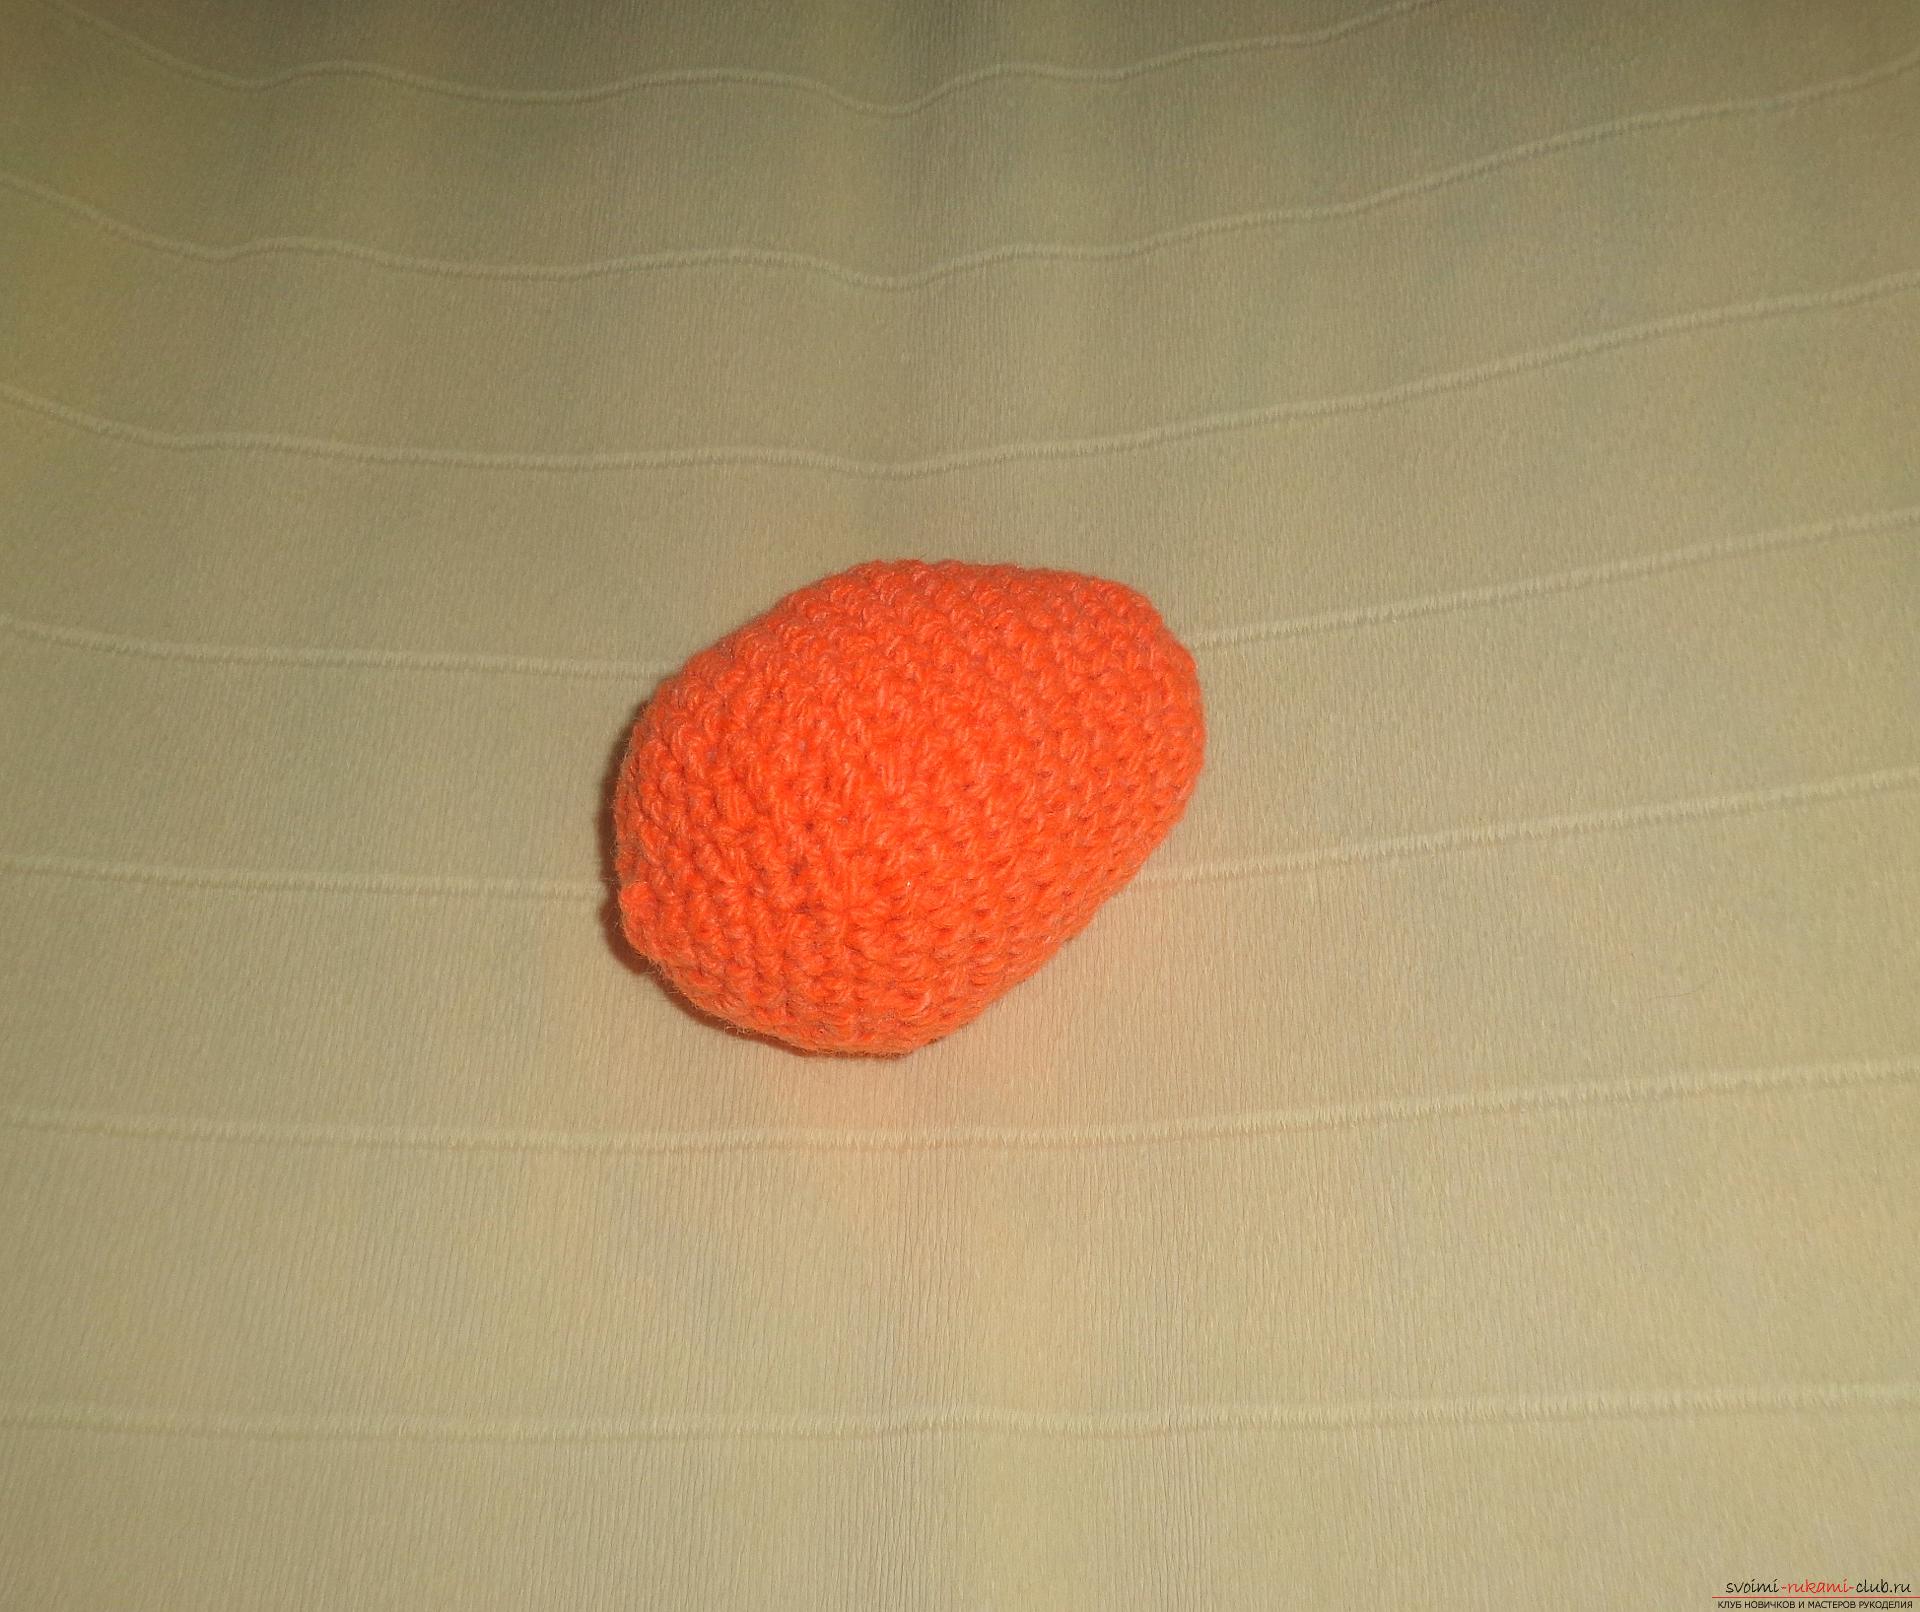
 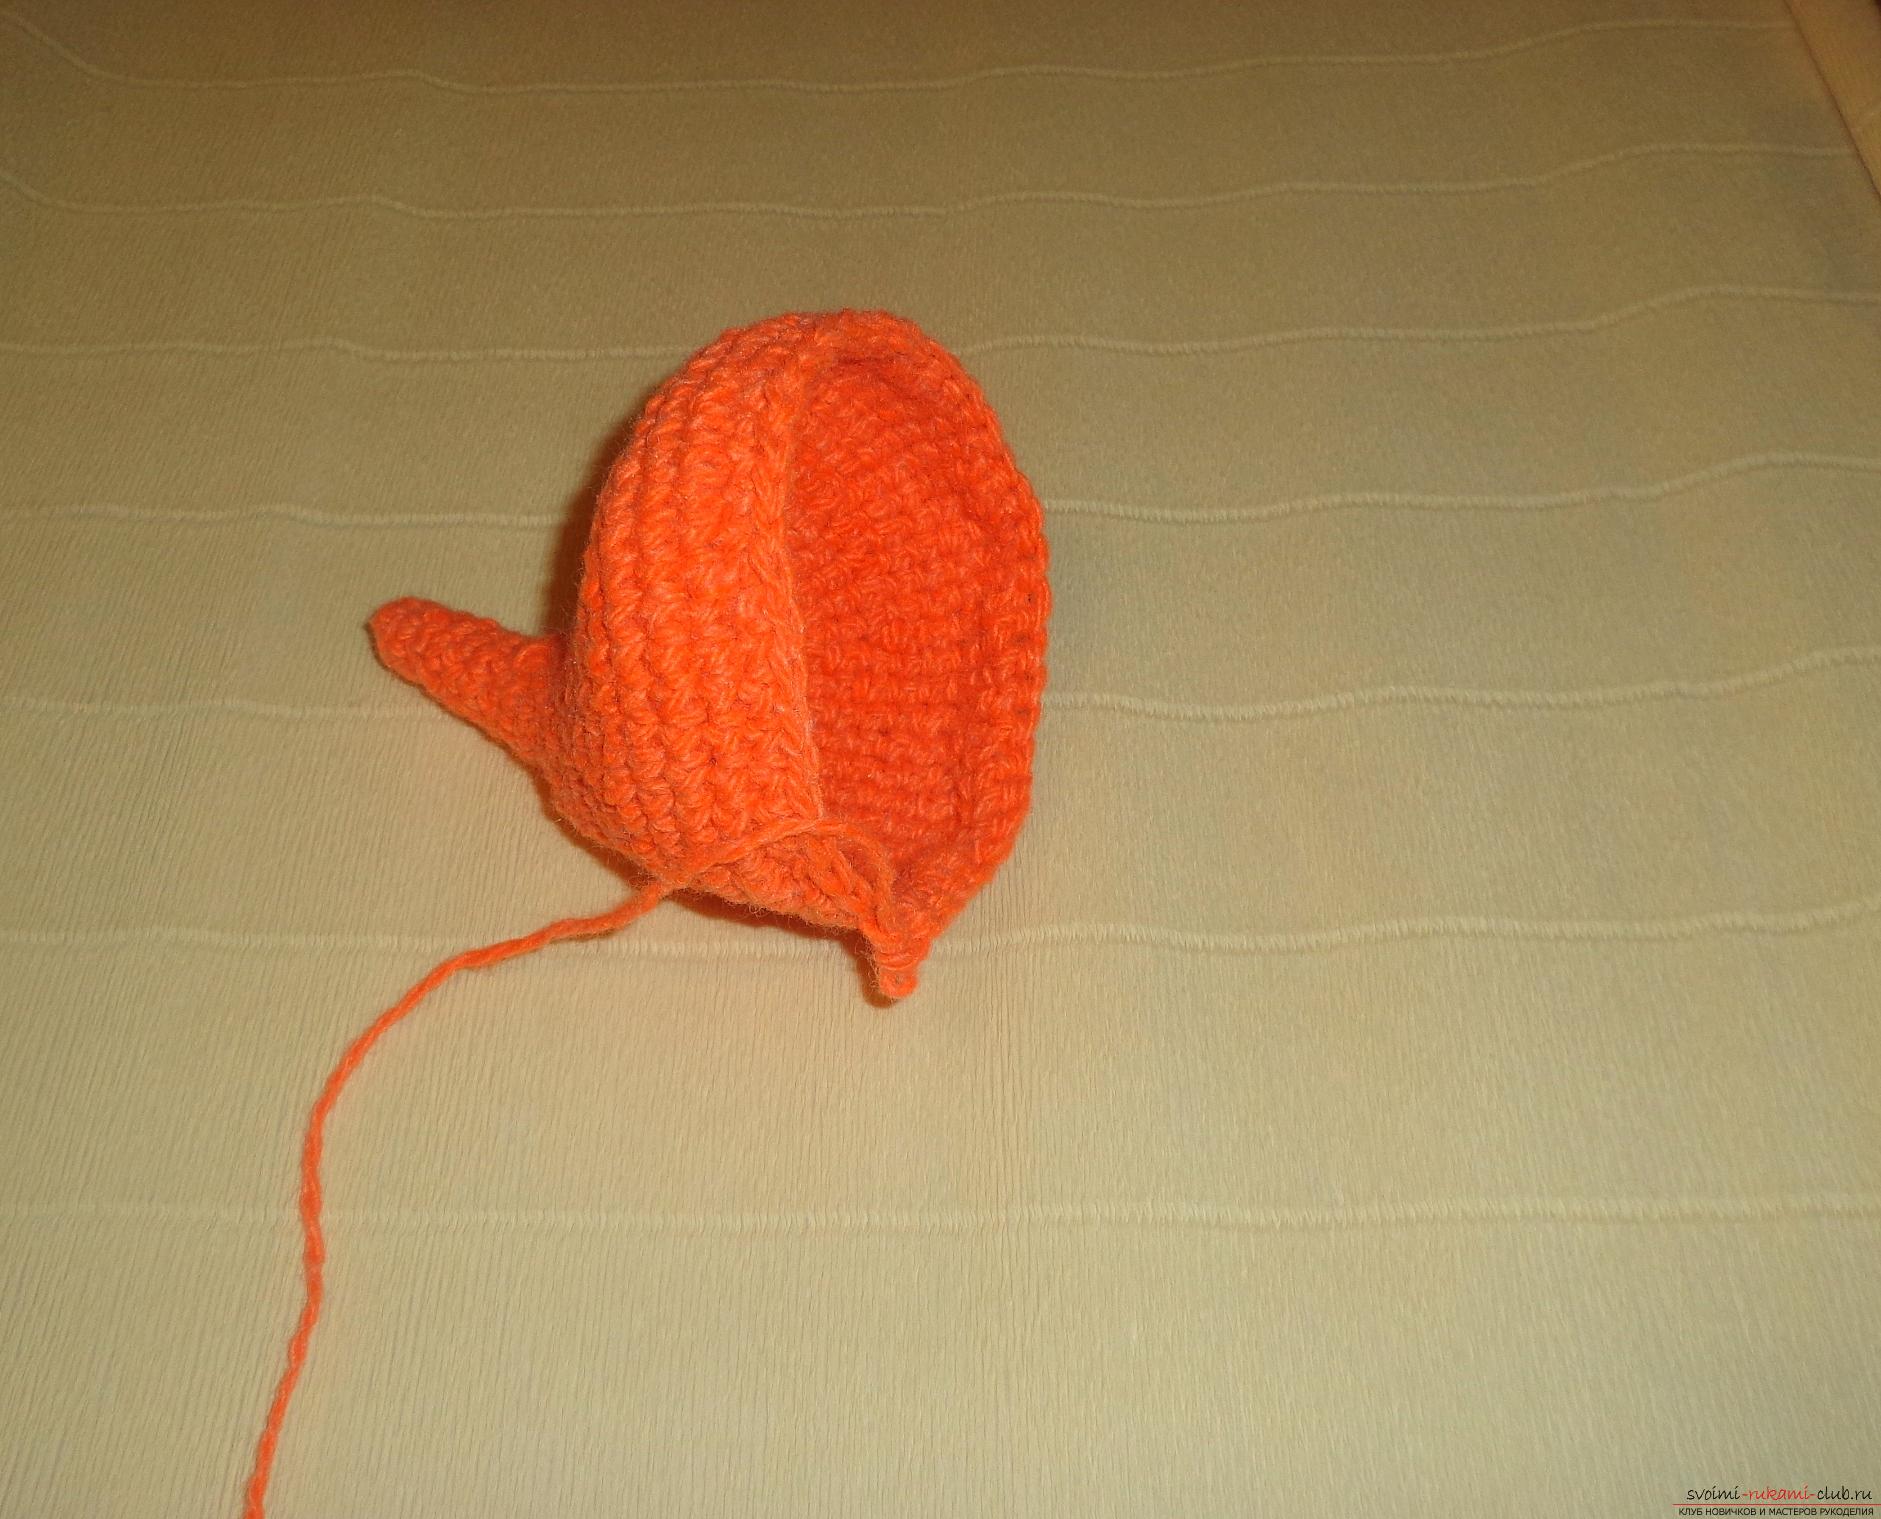 Fill head with foam rubber or otherfiller and continue to knit. In the 26th row, you have to remove 1 loop in each third loop and simply tie it back in a circle. In the 28th row, one loop should be removed in each third loop, and the 29th row is tied without cutting the loops. In the 30th row, you have to remove 1 loop in each second loop and simply tie it again. As the reduction is necessary, fill it with foam rubber.
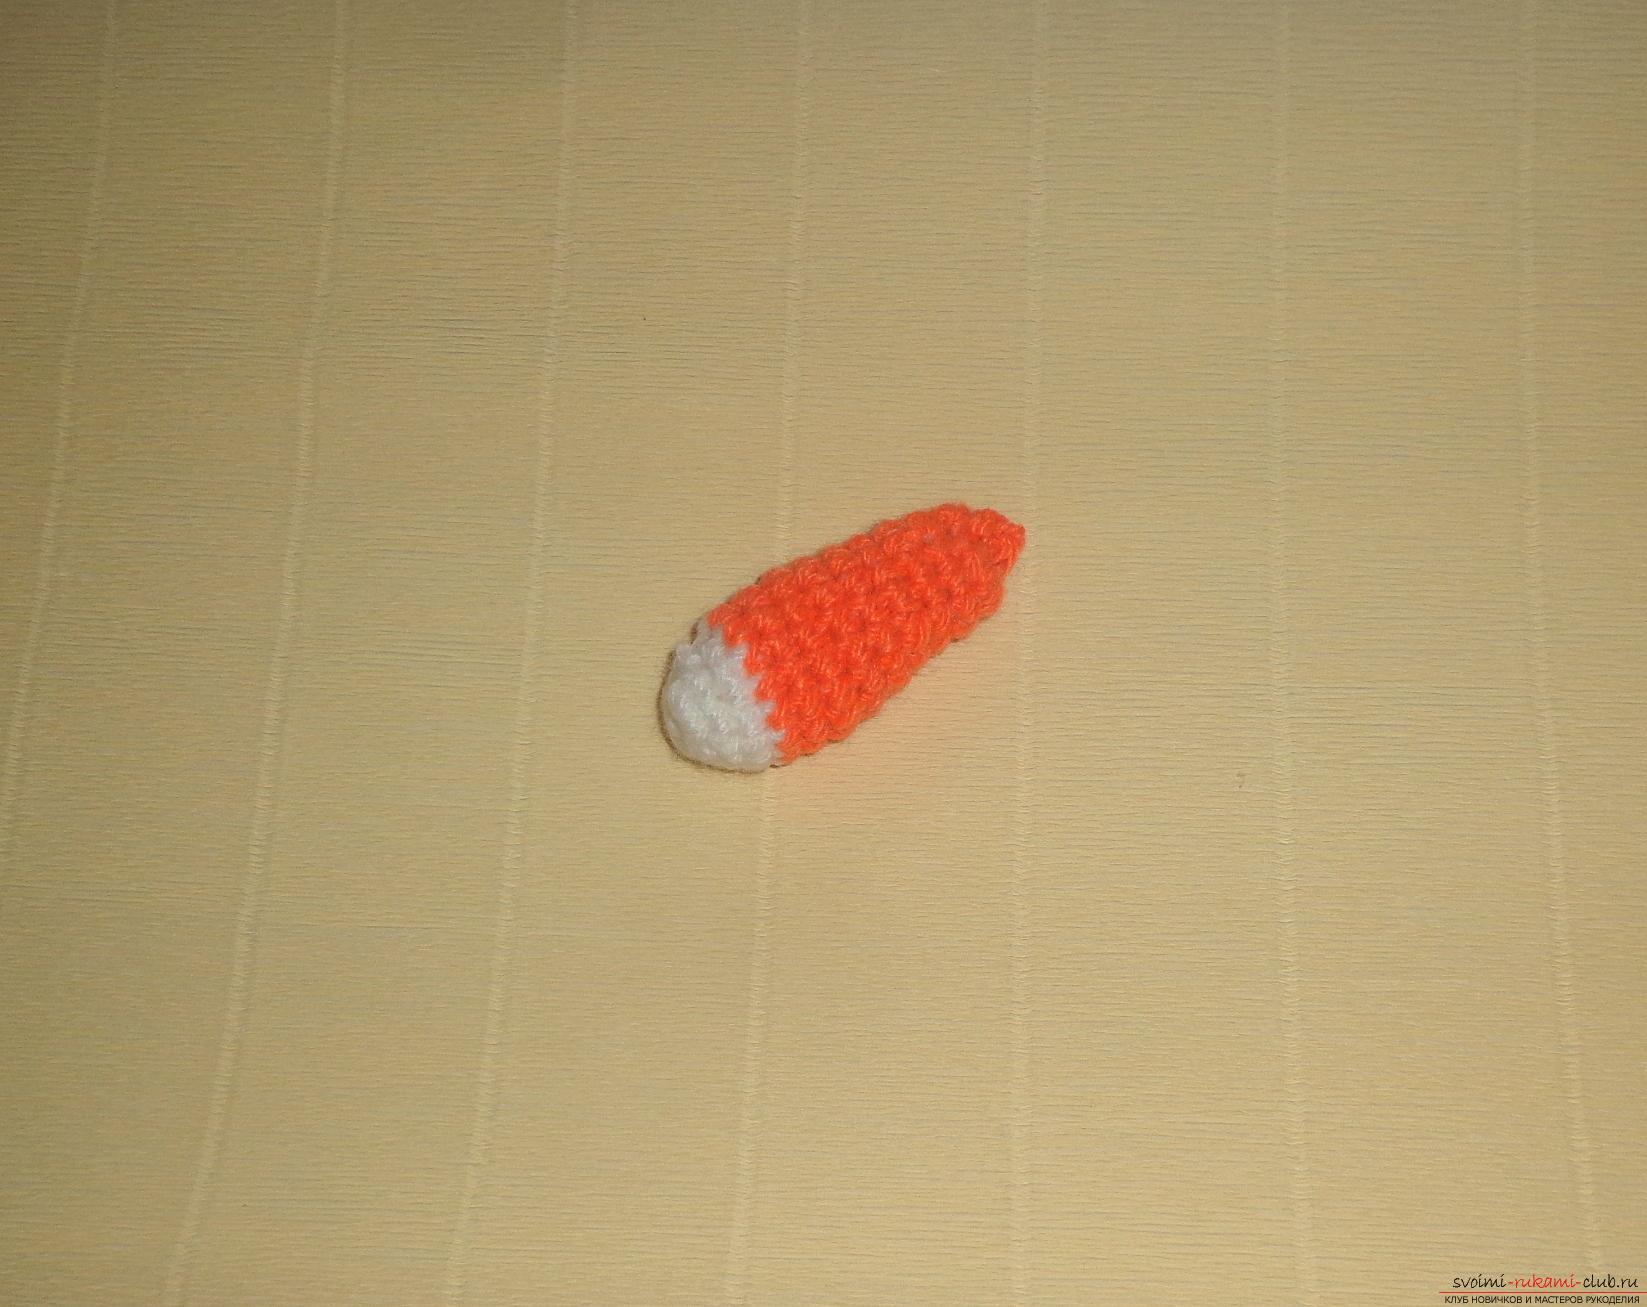
 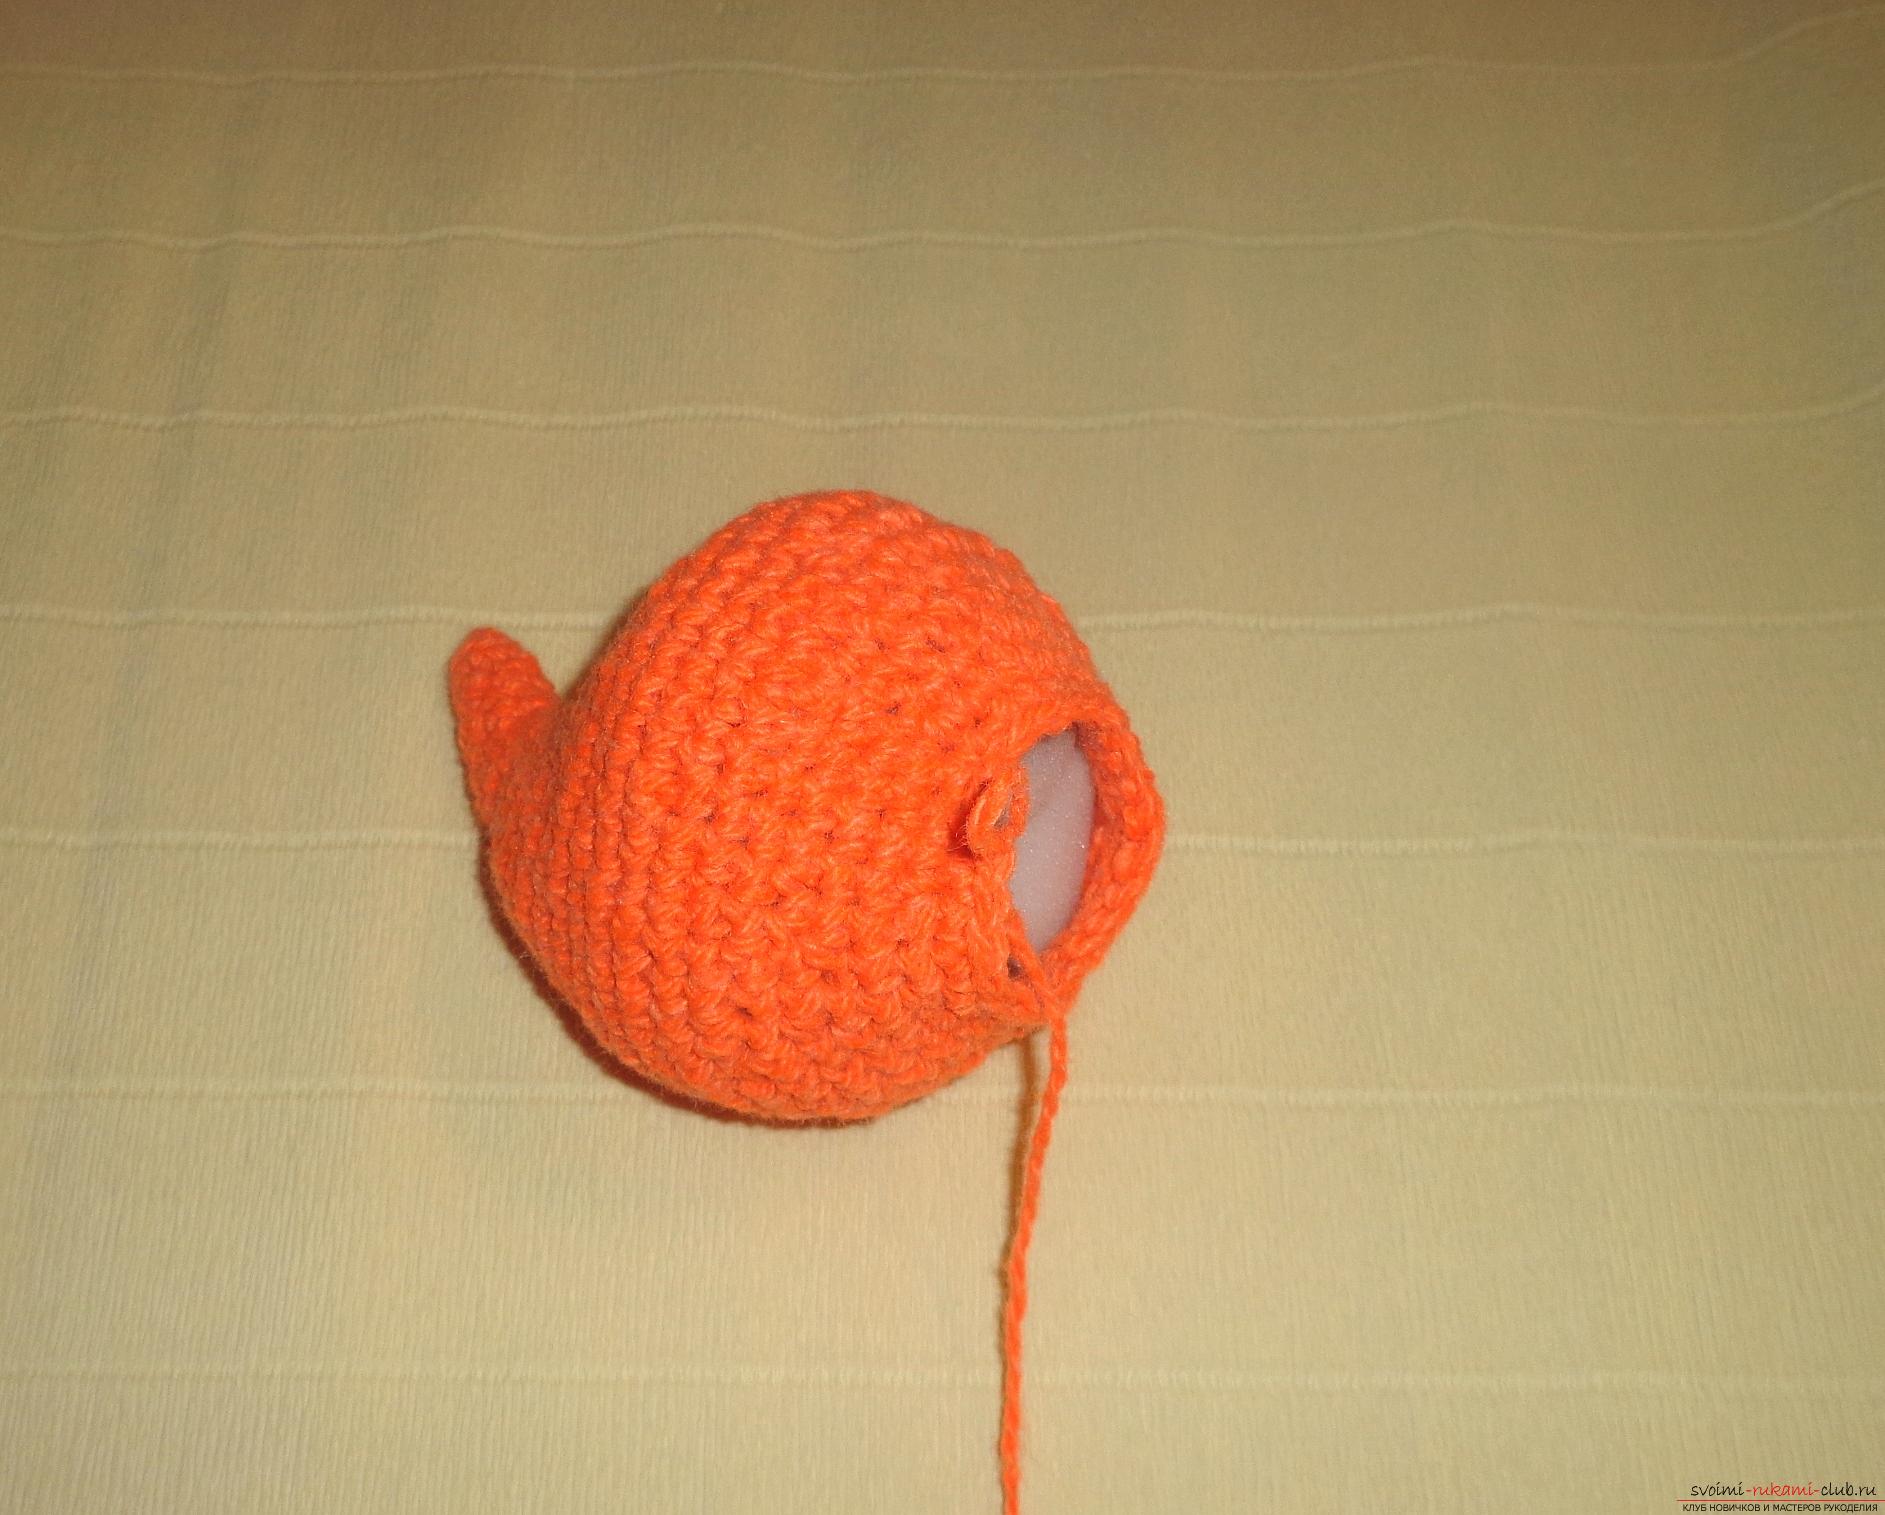 In the 33 row we cut all the loops and fix the thread. Cut the thread and hook it inside. The head is ready.
 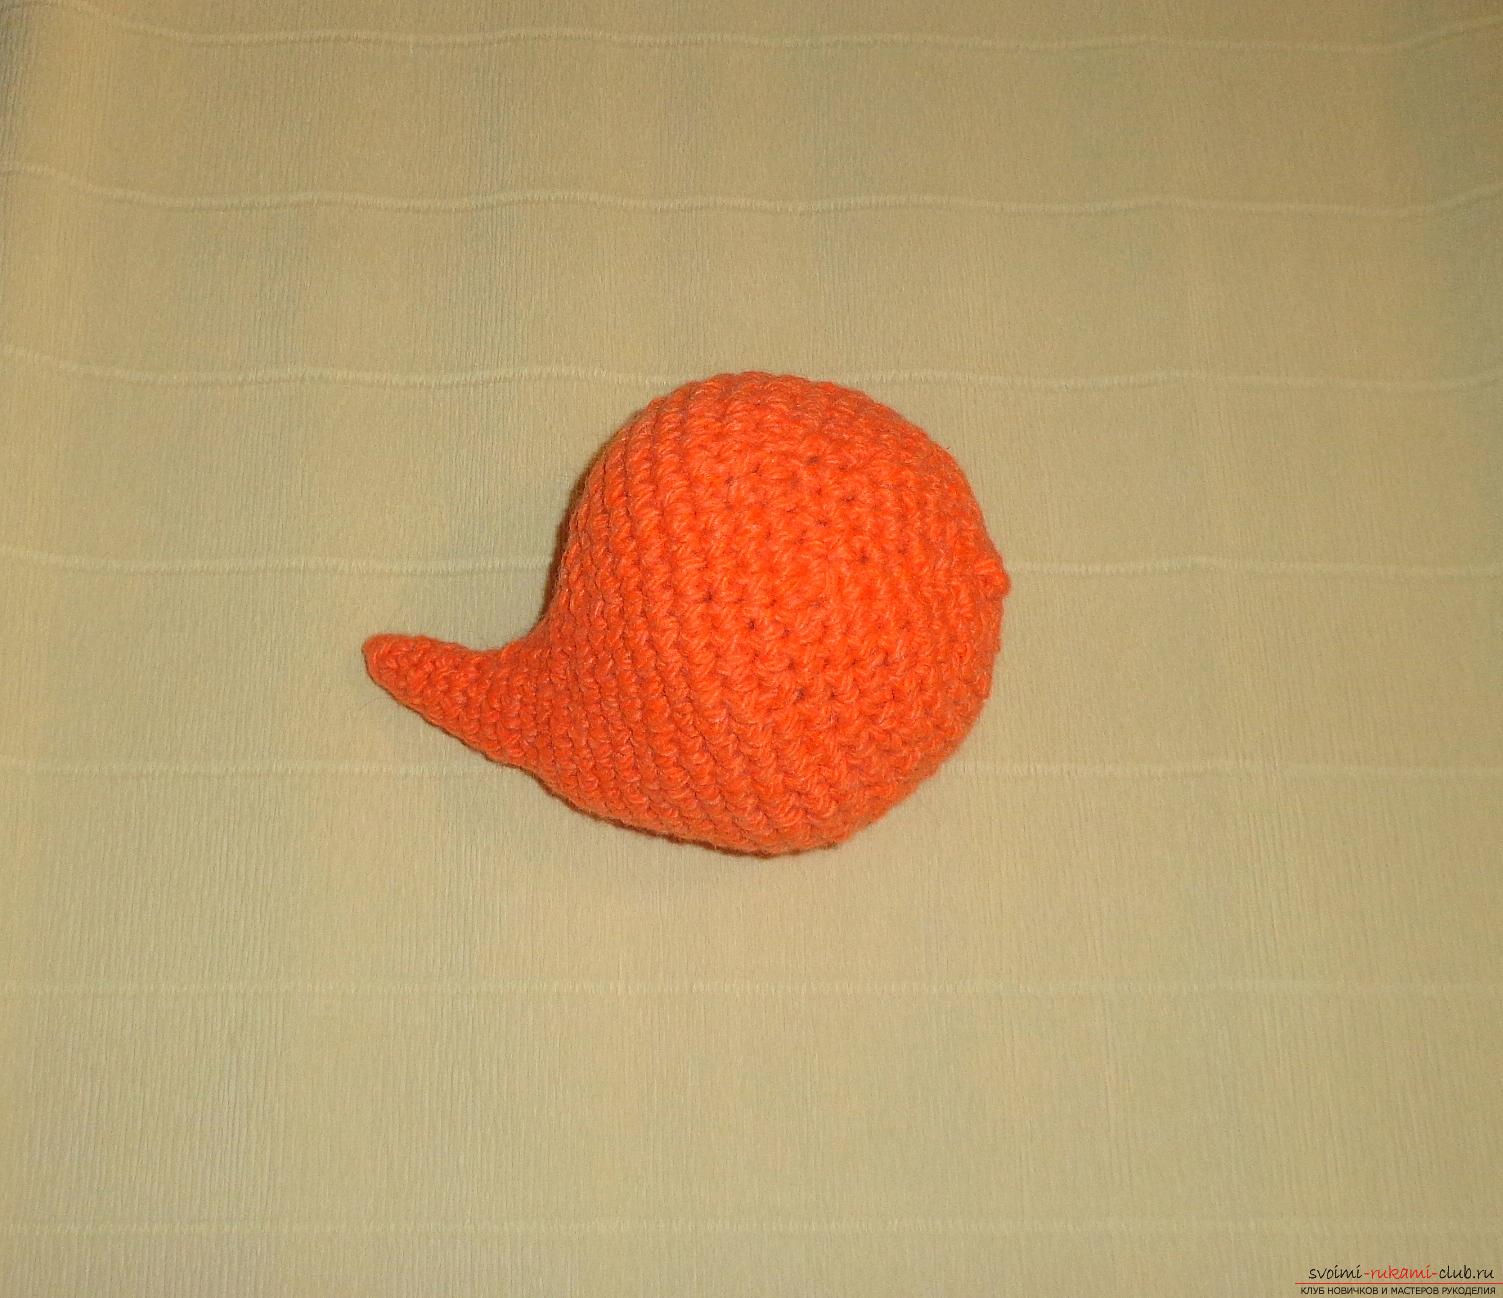 The body is knitted with a reddish yarn. It is necessary to make a chain of four air loops and merge it into a circle. From 2 to 3, we tie the row around the workpiece. And in the 4th row, you need to loosen two loops from each of the two loops. Then tie, as usual, in a circle.
 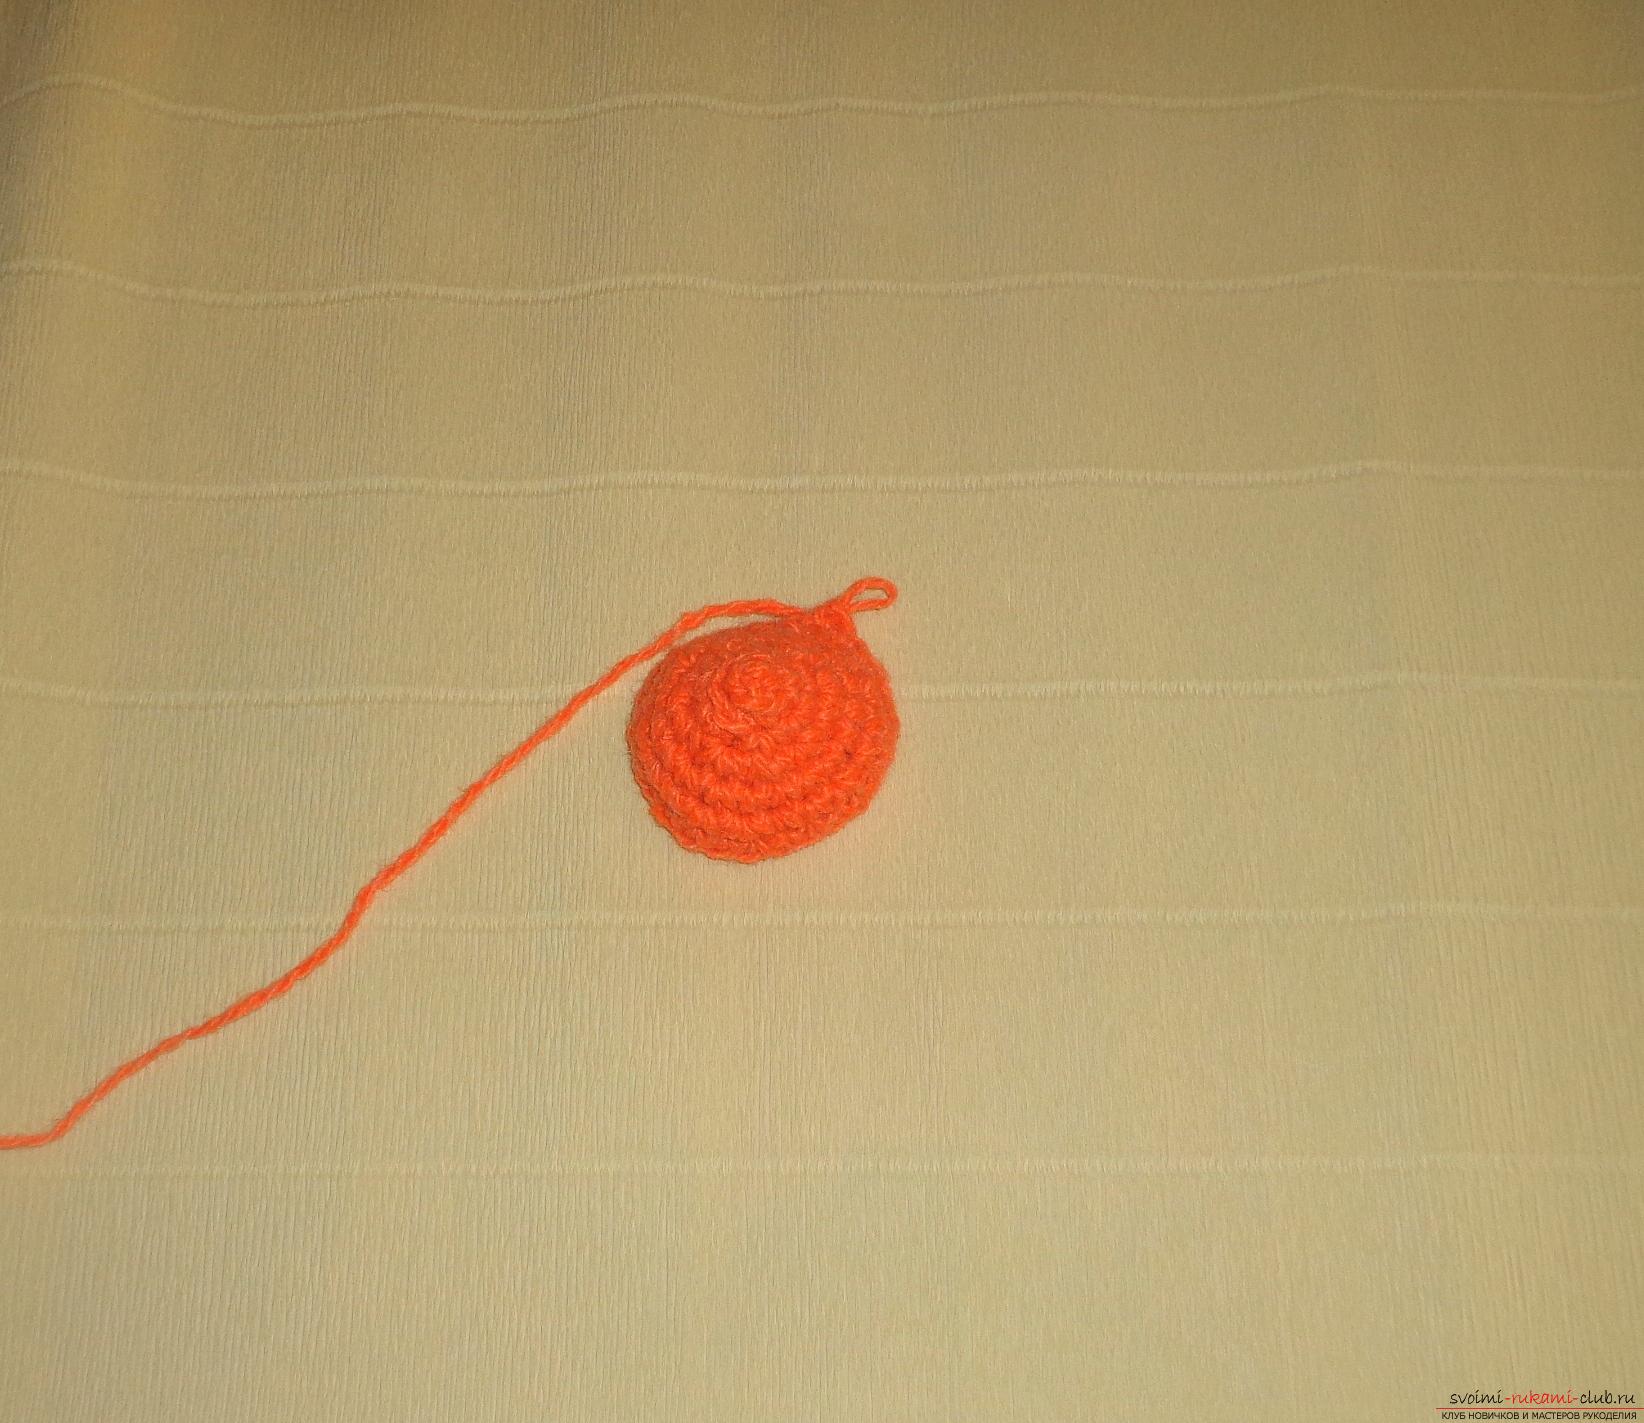 In the 6th row, it is necessary to tie out of each 3 loops of a row two loops each, and tie the next row without adding loops.
 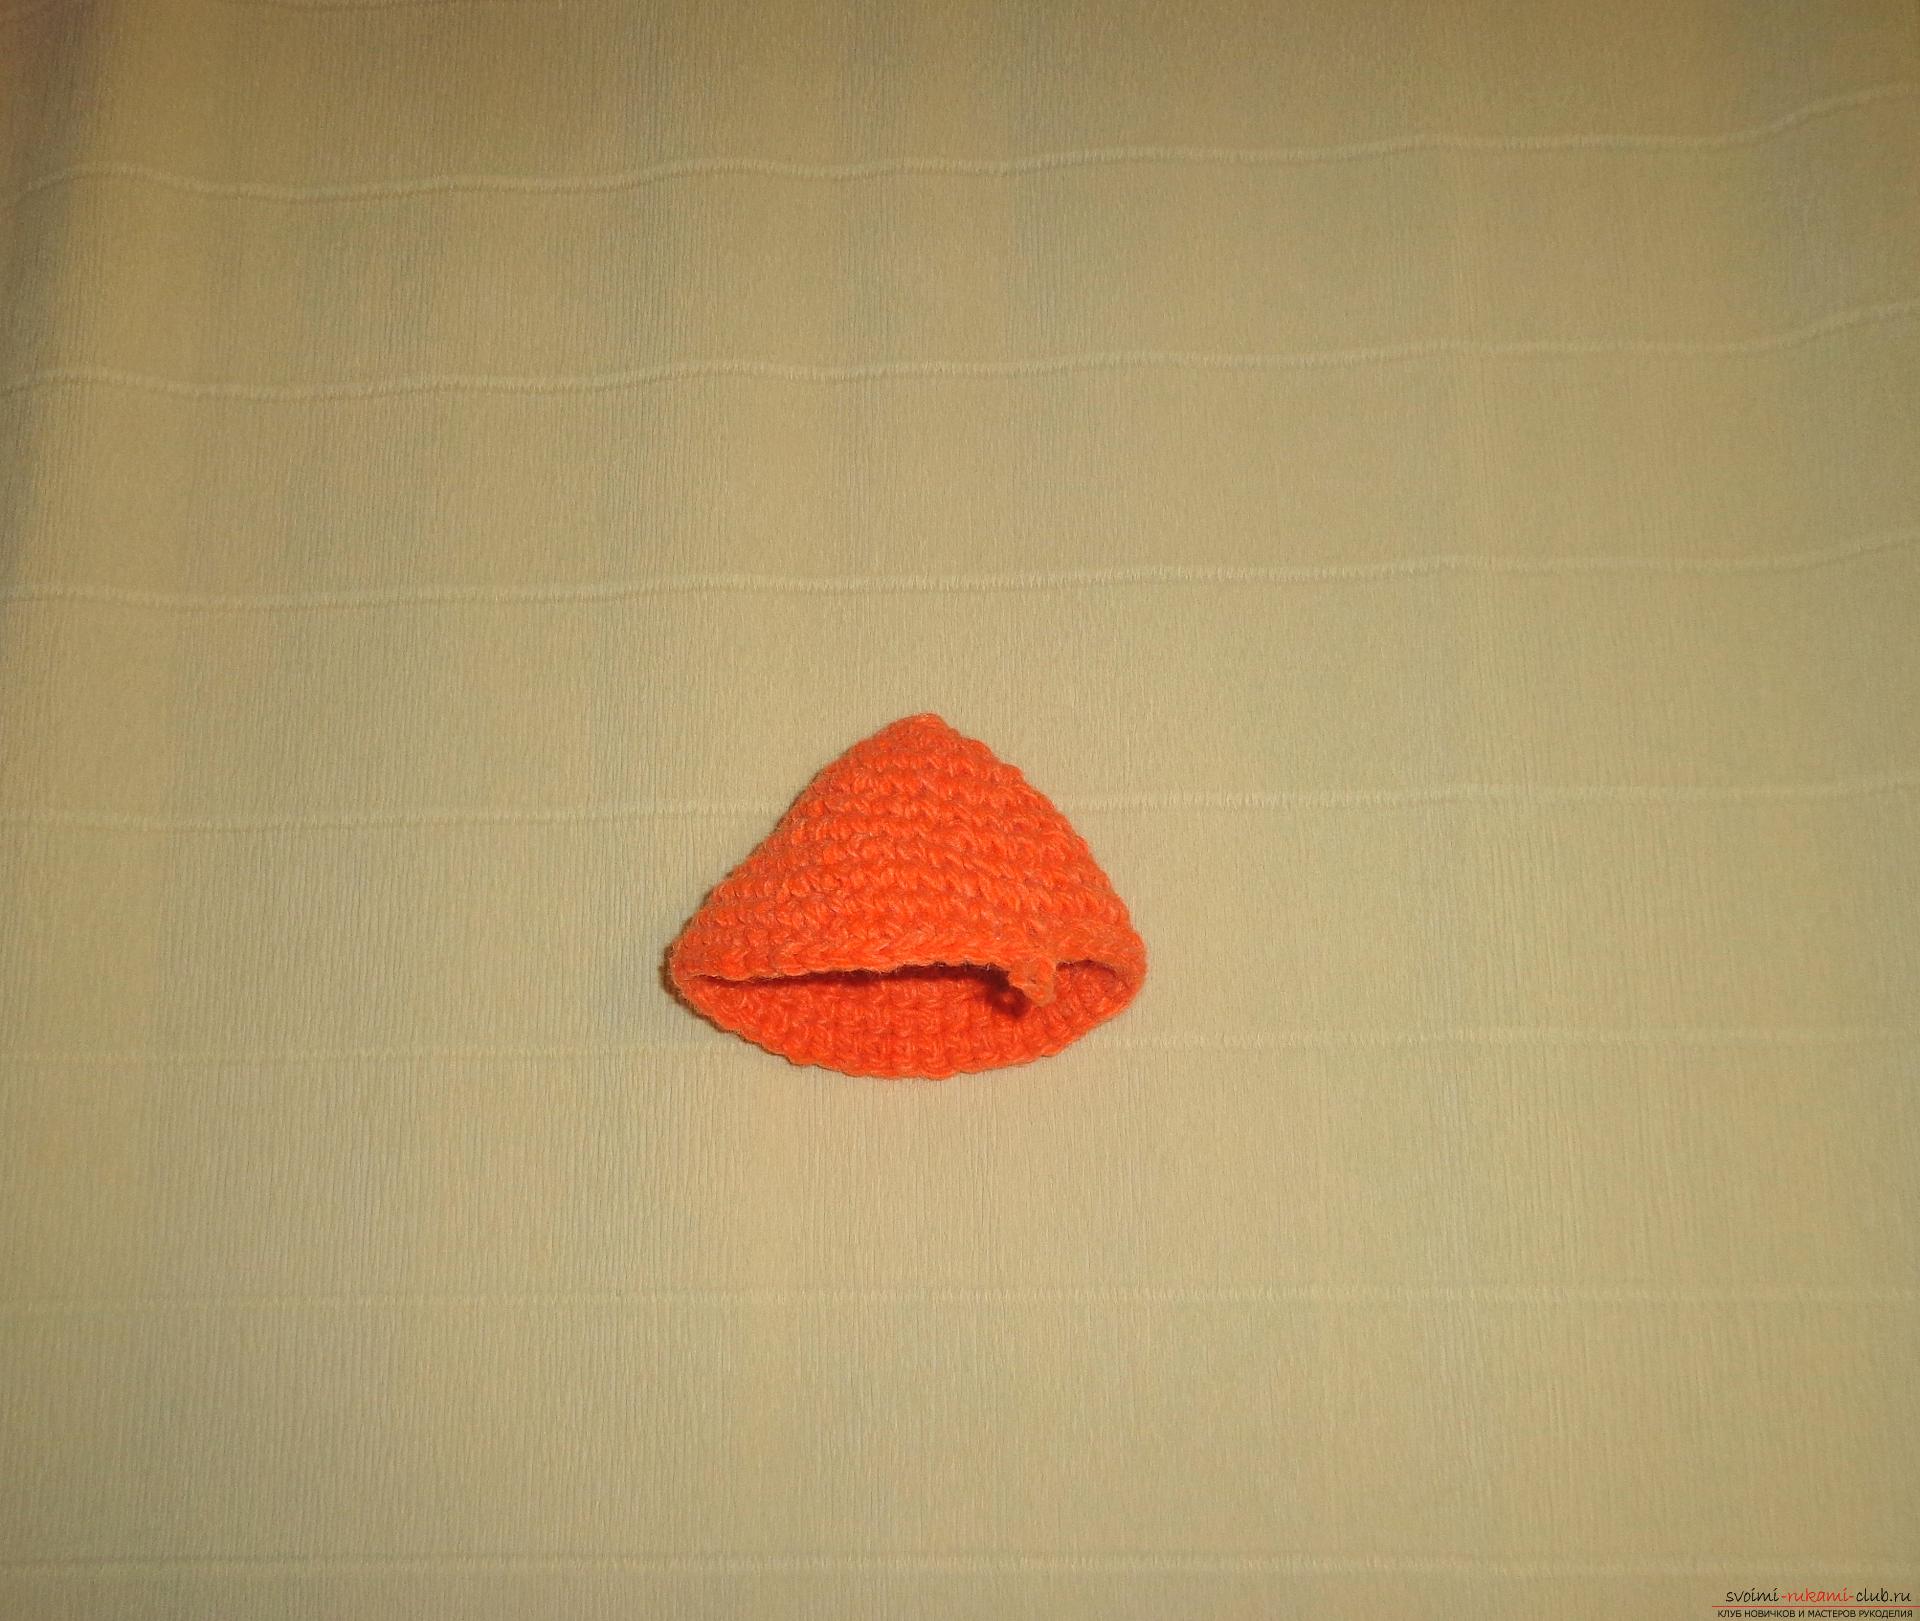 In the 8th and 10th row it is necessary to get out of each 3the loops of the series have two loops, and the rows 7, 9, 11, 12, 13, 14 - are usually tied without the addition of loops. In the 15th row we cut in each 6 loop of the series one loop, and the next row is tied without adding loops.
 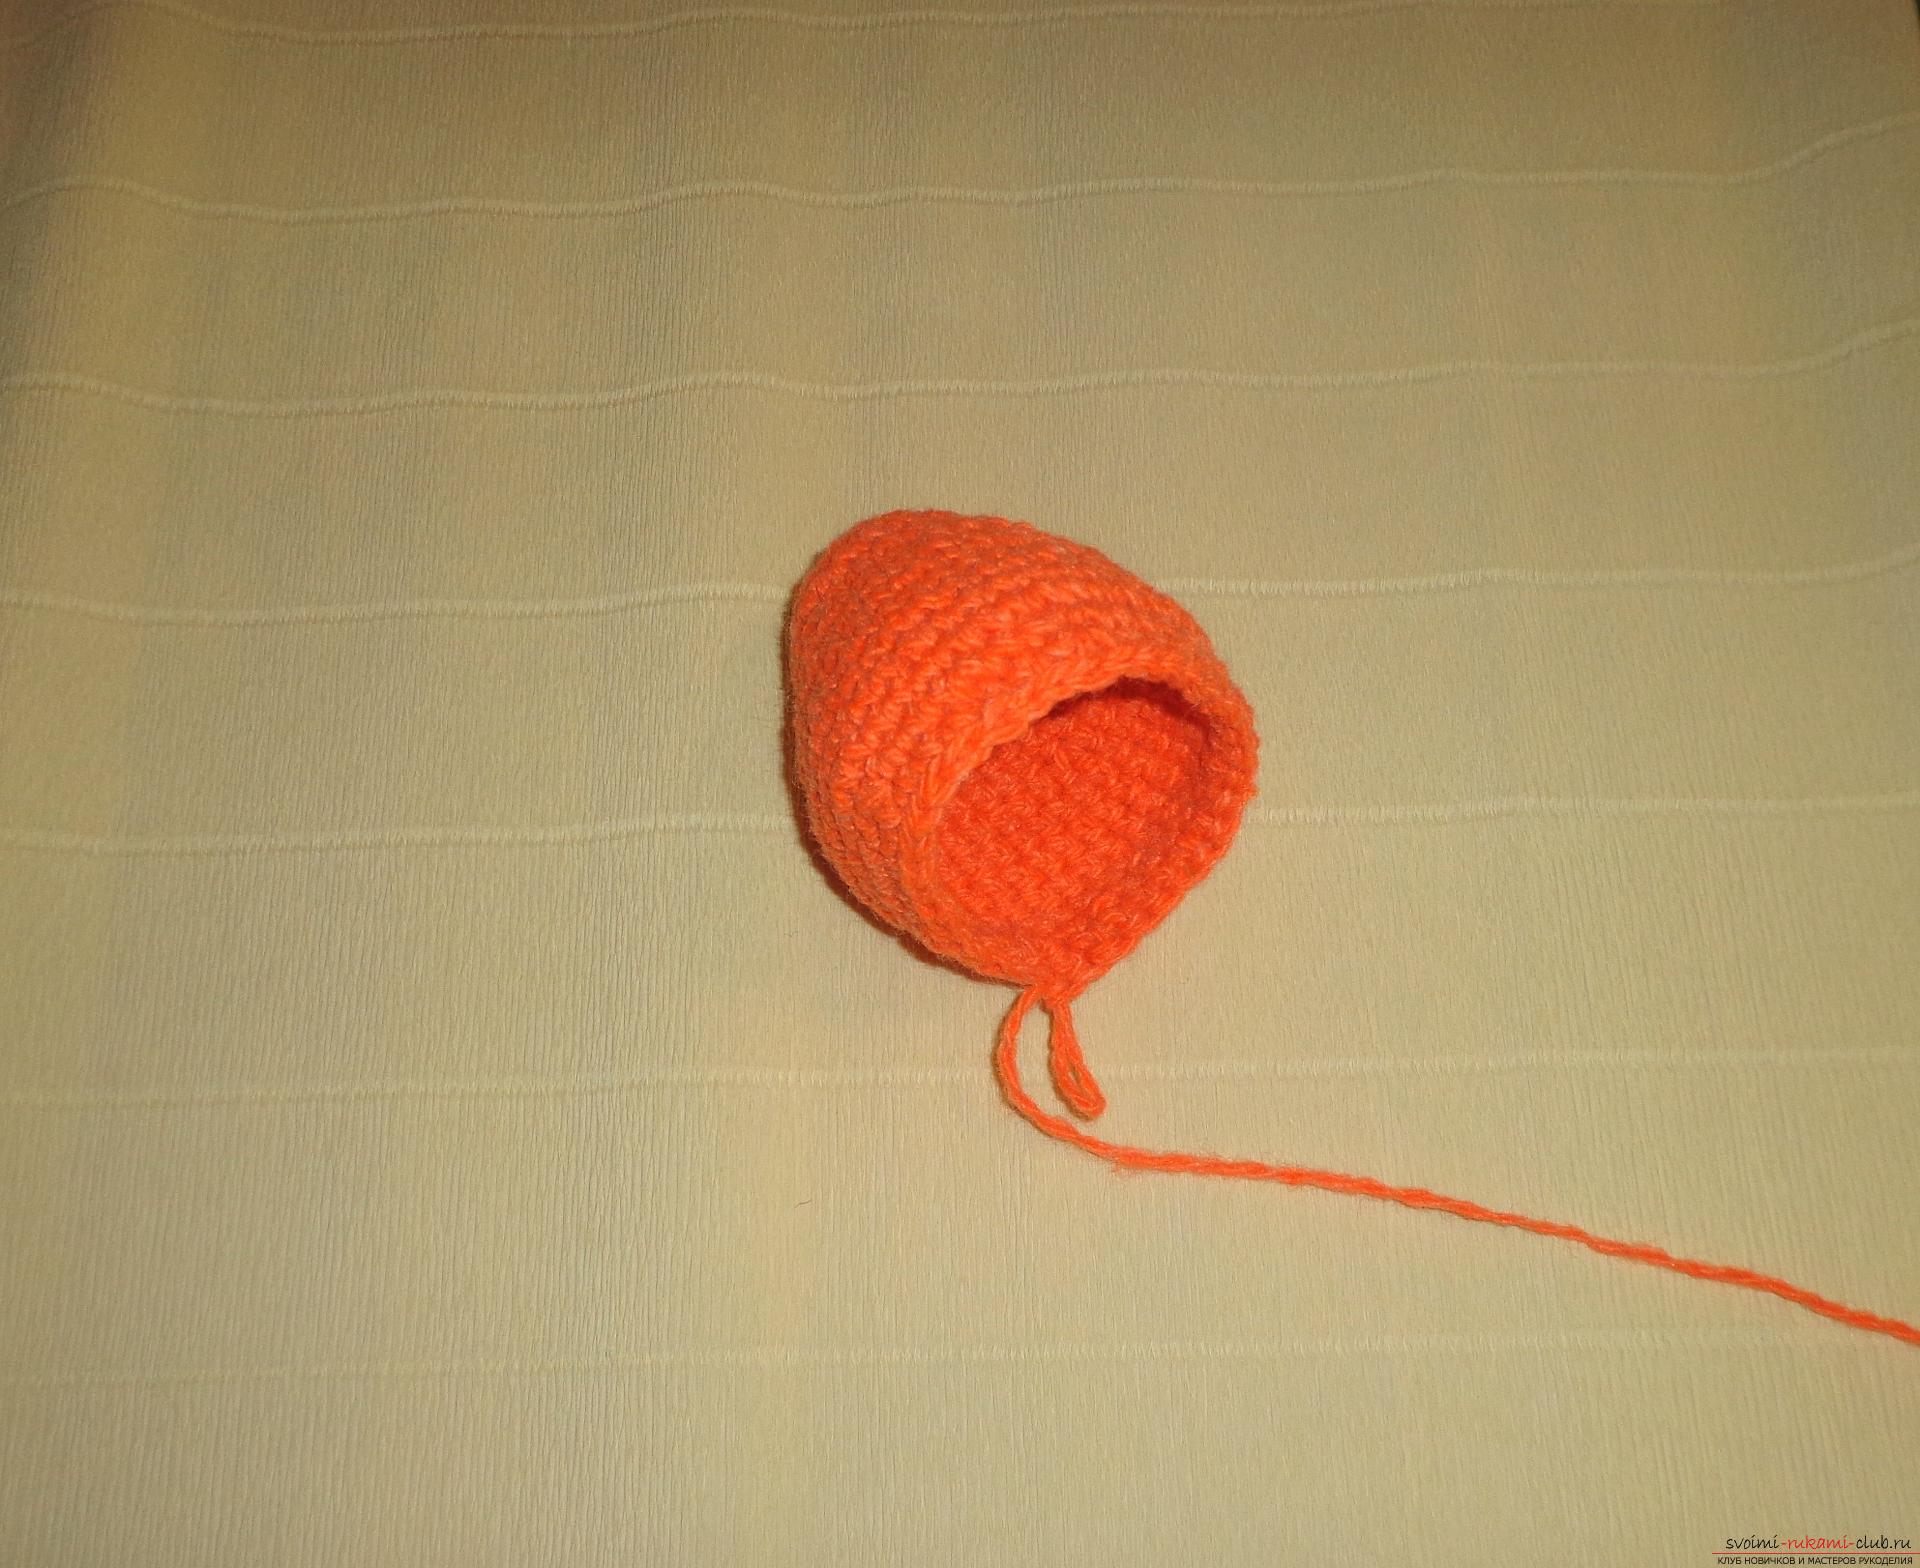 Torso fill. In the 17th row, one loop should be cut in each 5 loop of the row and another string should be tied without cuts. In 19 and 20 rows - to cut in each 3 loops of a row on one loop, and the other row tying without cuts. Supplement the trunk with filler. It is necessary to fill a toy well, so that it then holds a shape. 22-24 row - make a cut in each loop of the row, fix the thread and trim. That's it, the torso is ready!
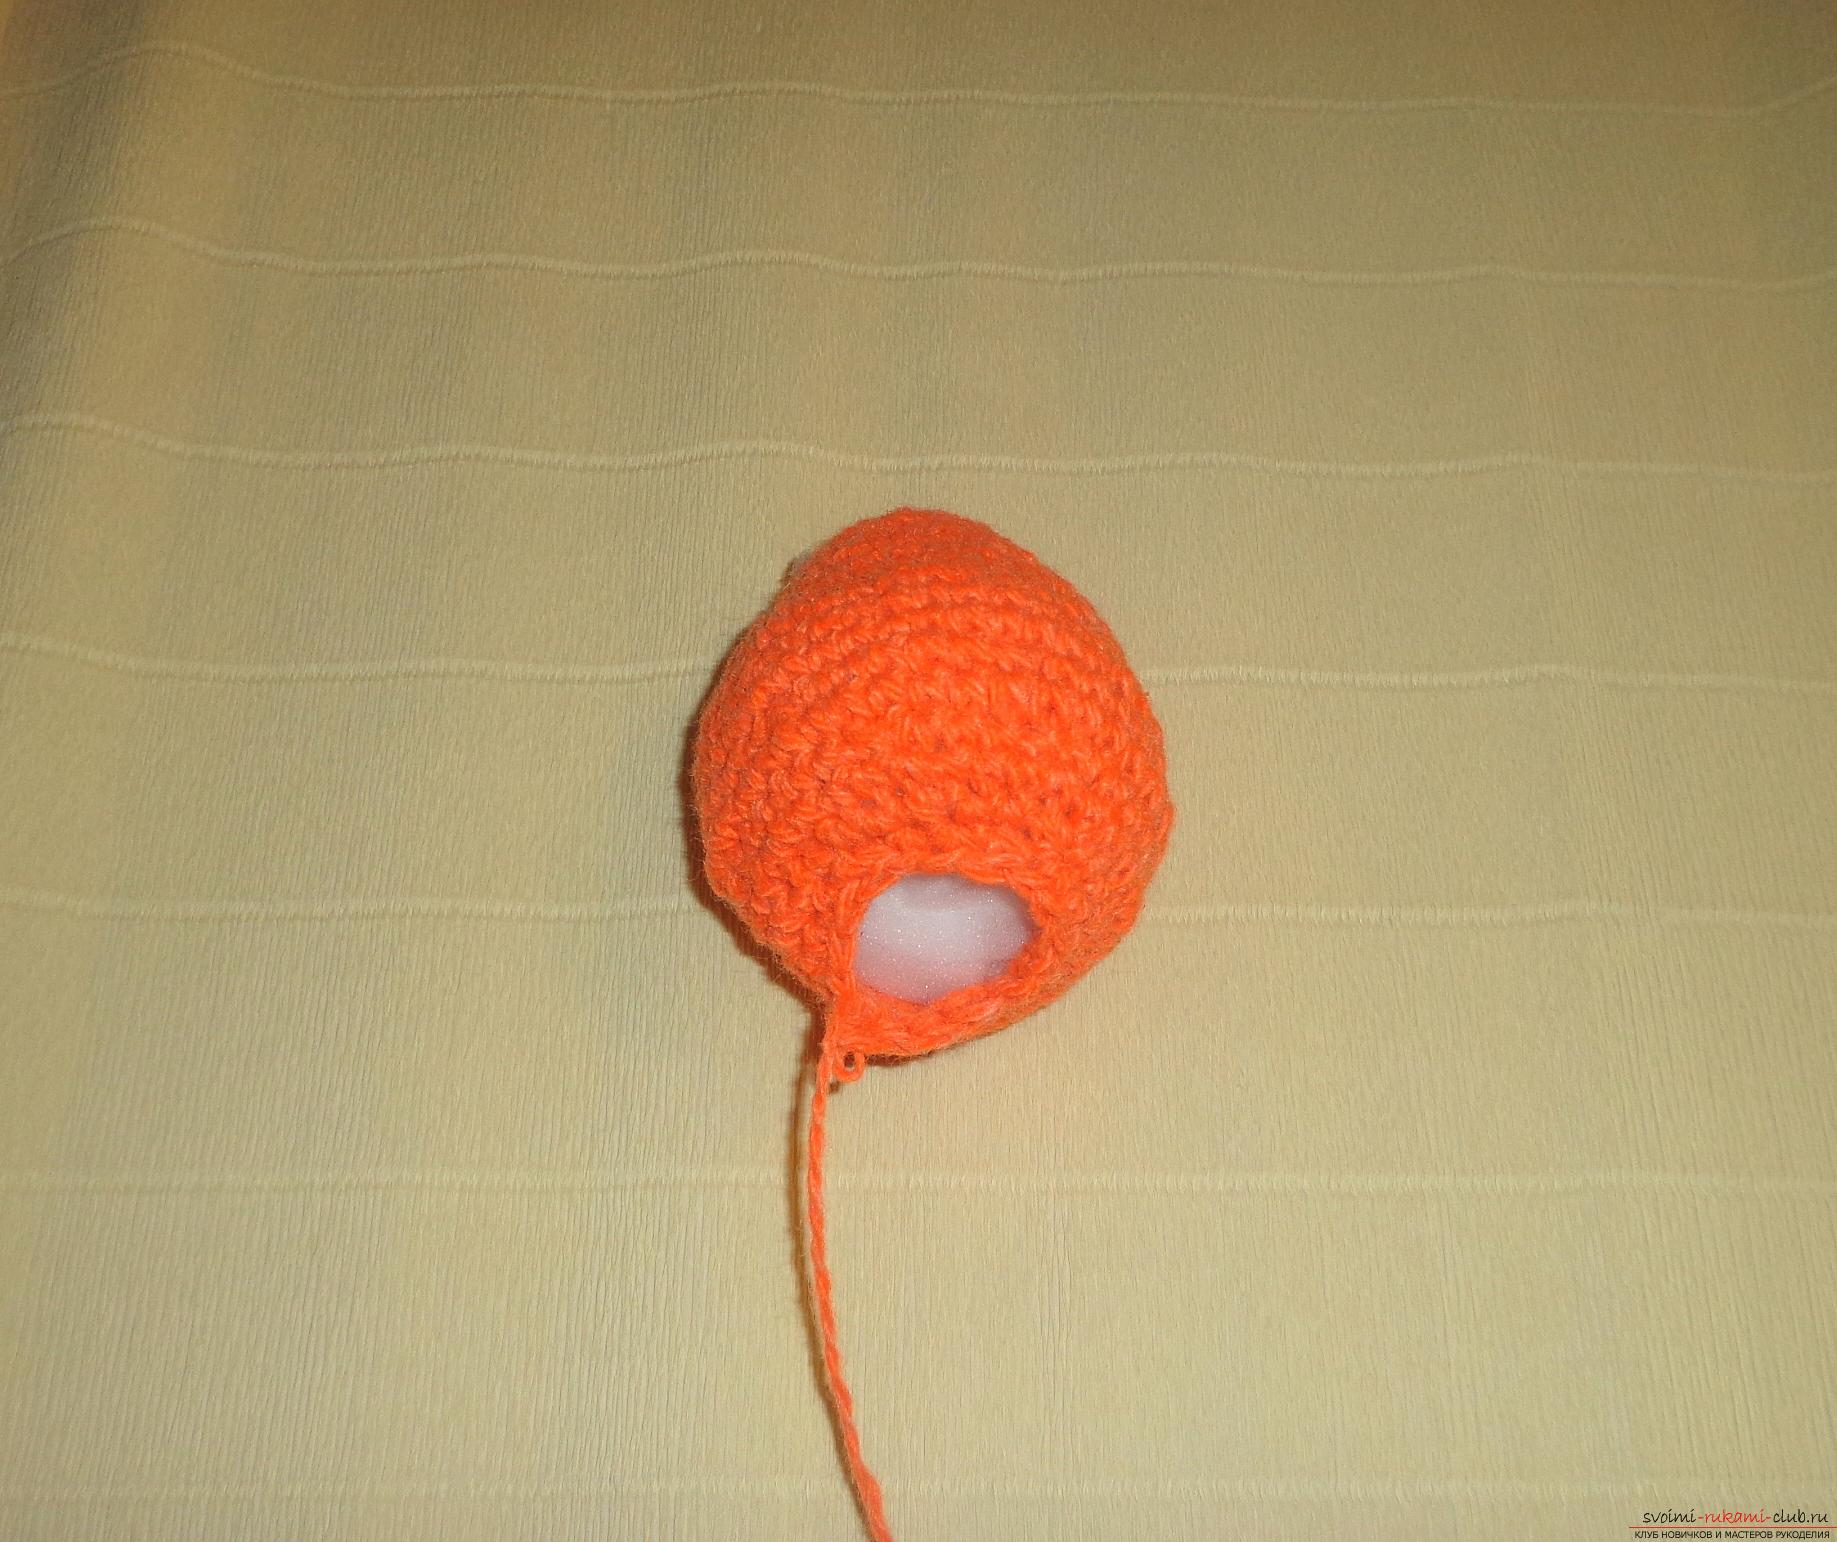
 For knitting the upper and lower legs will be requiredwhite and red yarn. Let's start knitting the lower legs. We make of a white yarn a chain of 4 air loops and combine them, tie a circle. Next, in 3 and 5 rows from each 2 loops of the row, we loom two loops and tie them without adding: 4 tie a string with a white thread, and 6, 7, 8, 9 10 rows are already tied with a red yarn.
 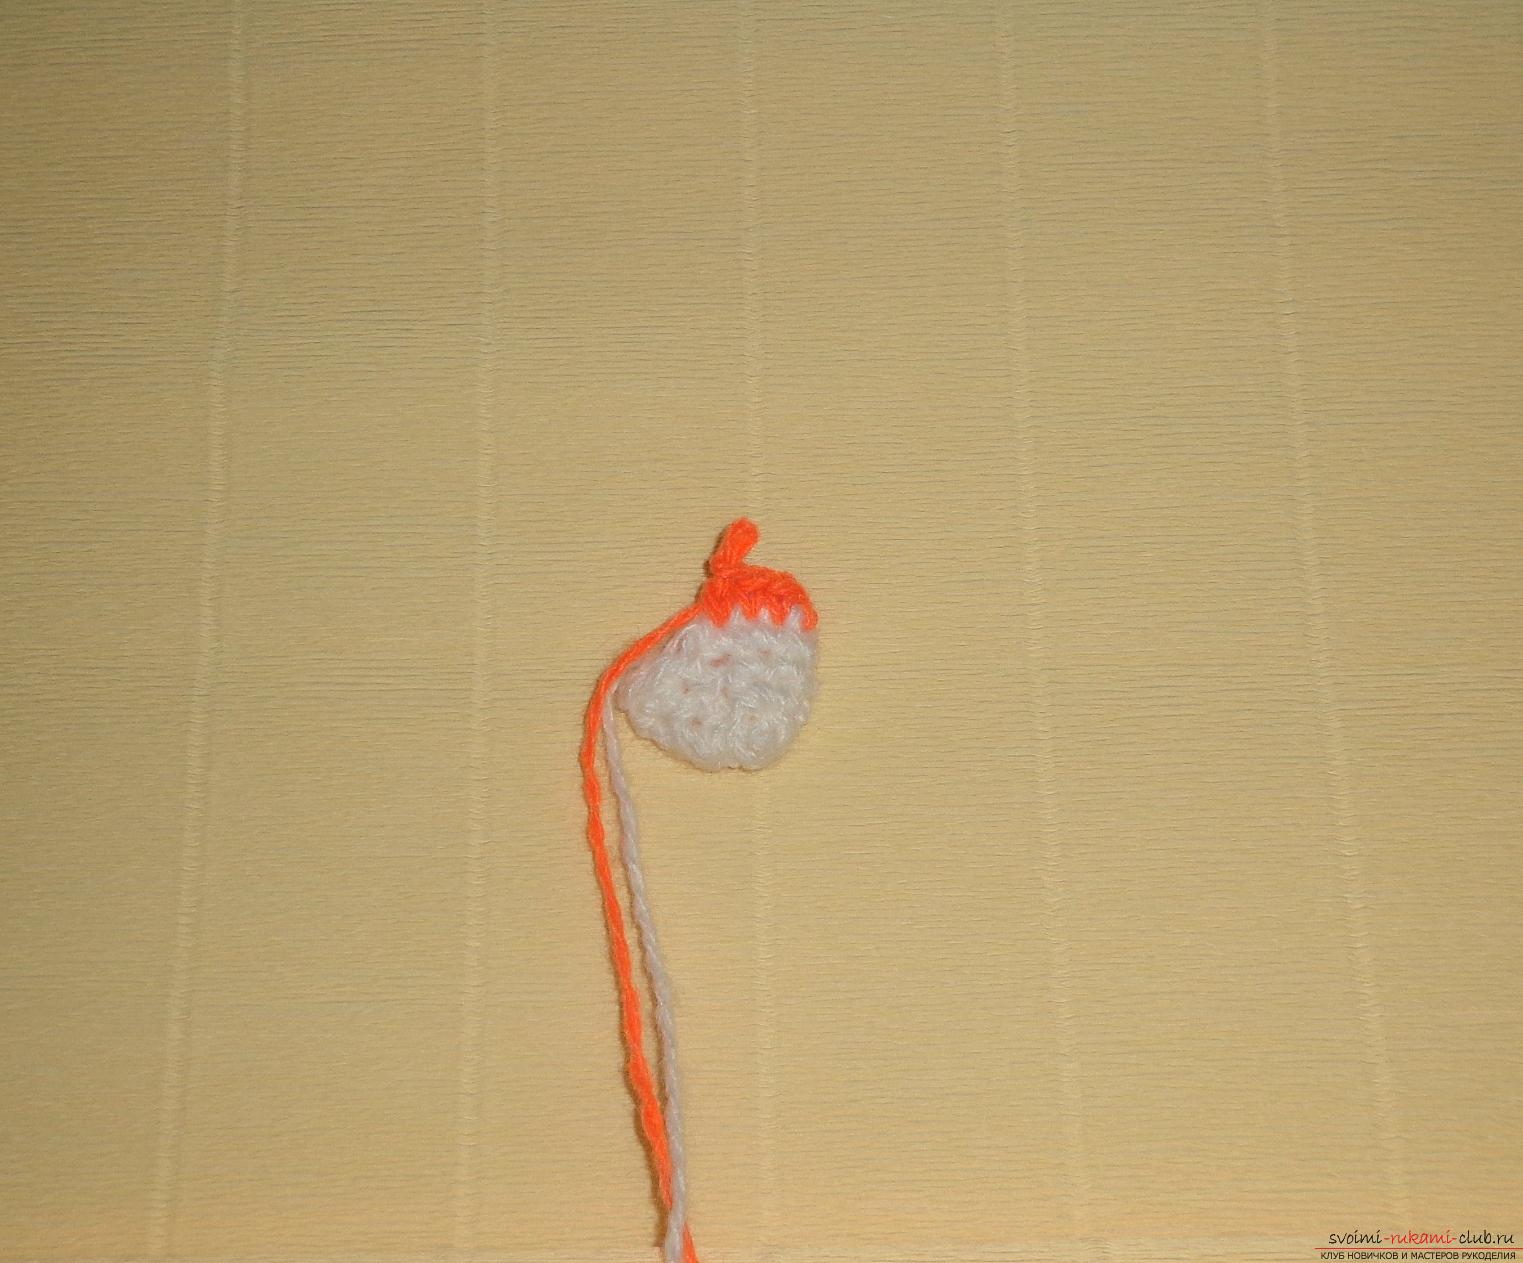 Fill the foot with foam rubber. In the 11th row, we begin to cut the loops, so we tie this row and make the loops down in two arbitrary places. 12 and 13 the row is tied without cutting. In the 14th and 15th row we cut in each loop and fasten the thread.
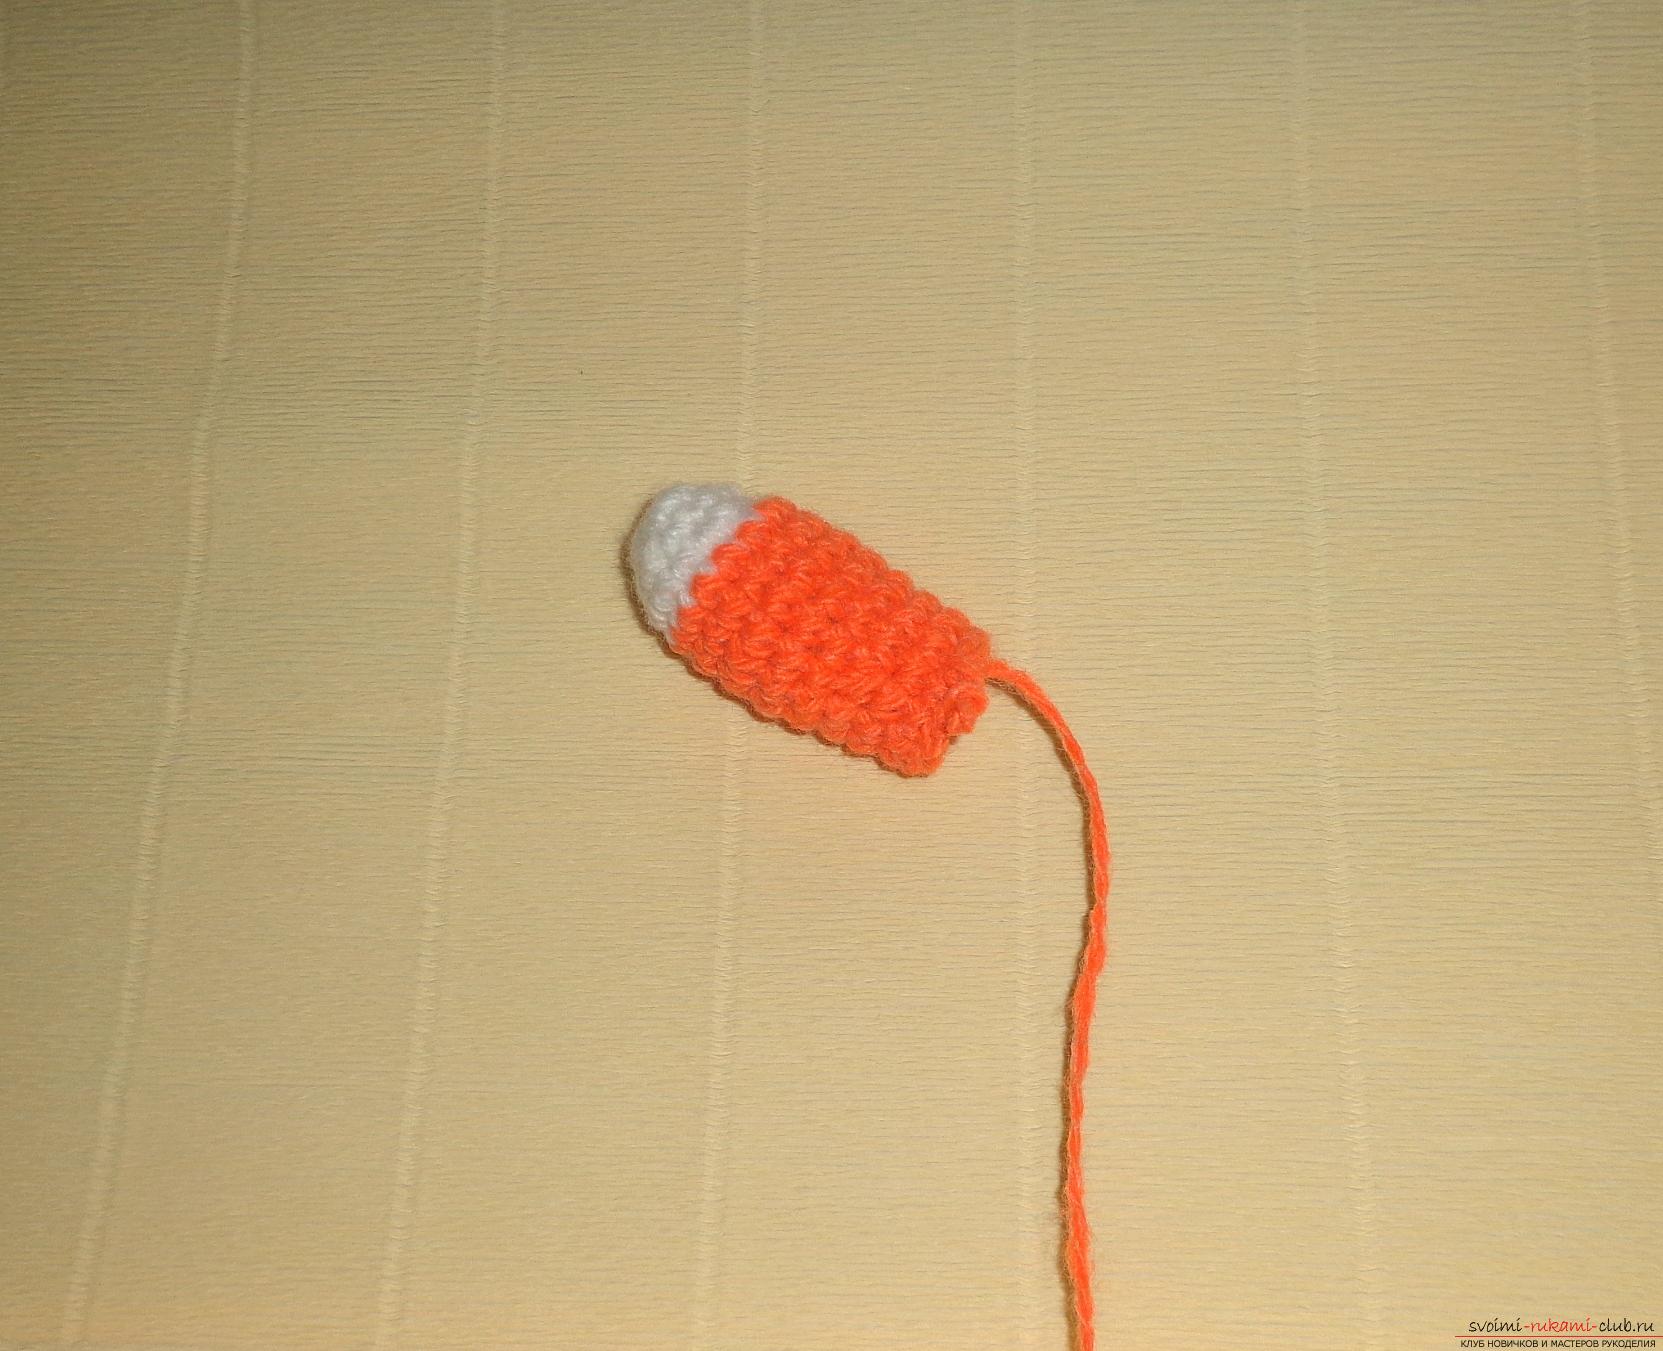
 The second lower foot is knitted in a similar pattern.
  We knit the upper legs for the chanterelle. From the white yarn a chain of 4 air loops is made and unites into a ring, then this ring is tied. To untangle in 3 rows from each 2 loops of a row on two loops, and tie without adding. In the 5th row we switch to the red thread and knit without adding.
 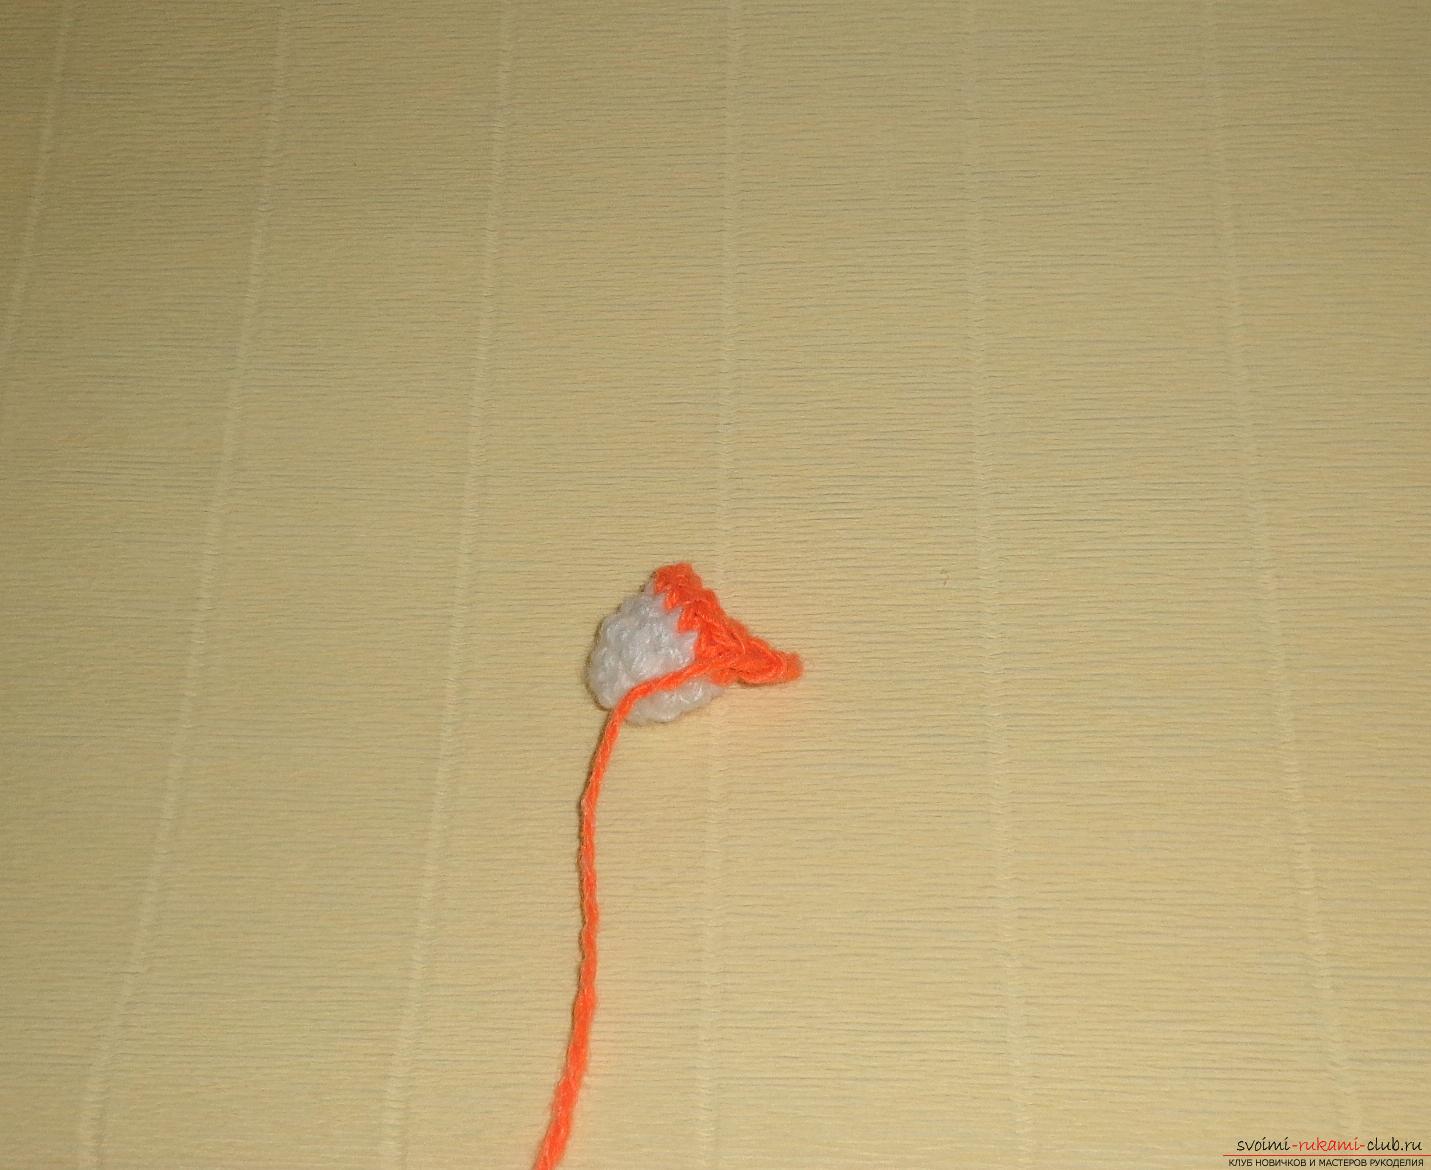 Also tied without adding 6-11 rows, and the foot is filled with foam rubber. In 12, 13, 14 rows - the loops are reduced, and the extra thread is removed.
 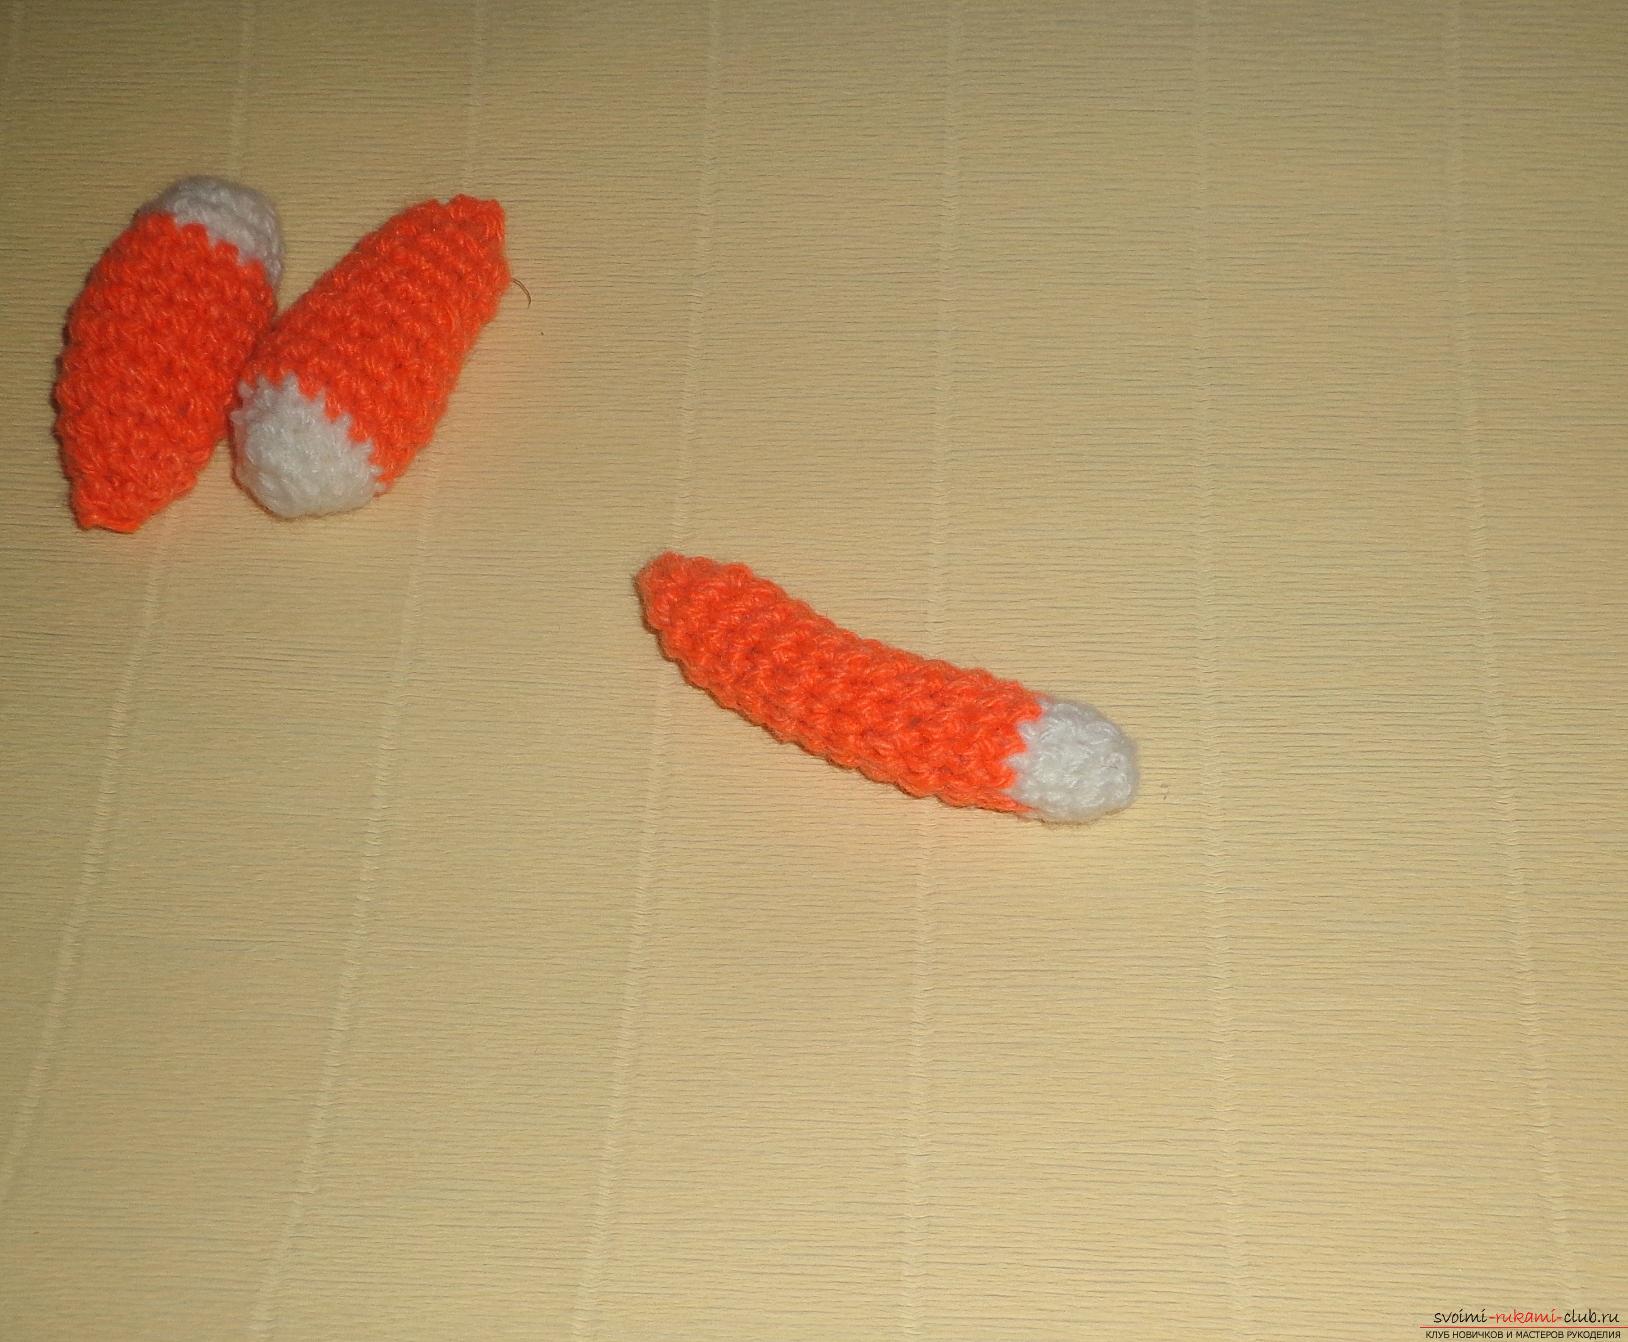 The second upper foot is knitted in the same way.
 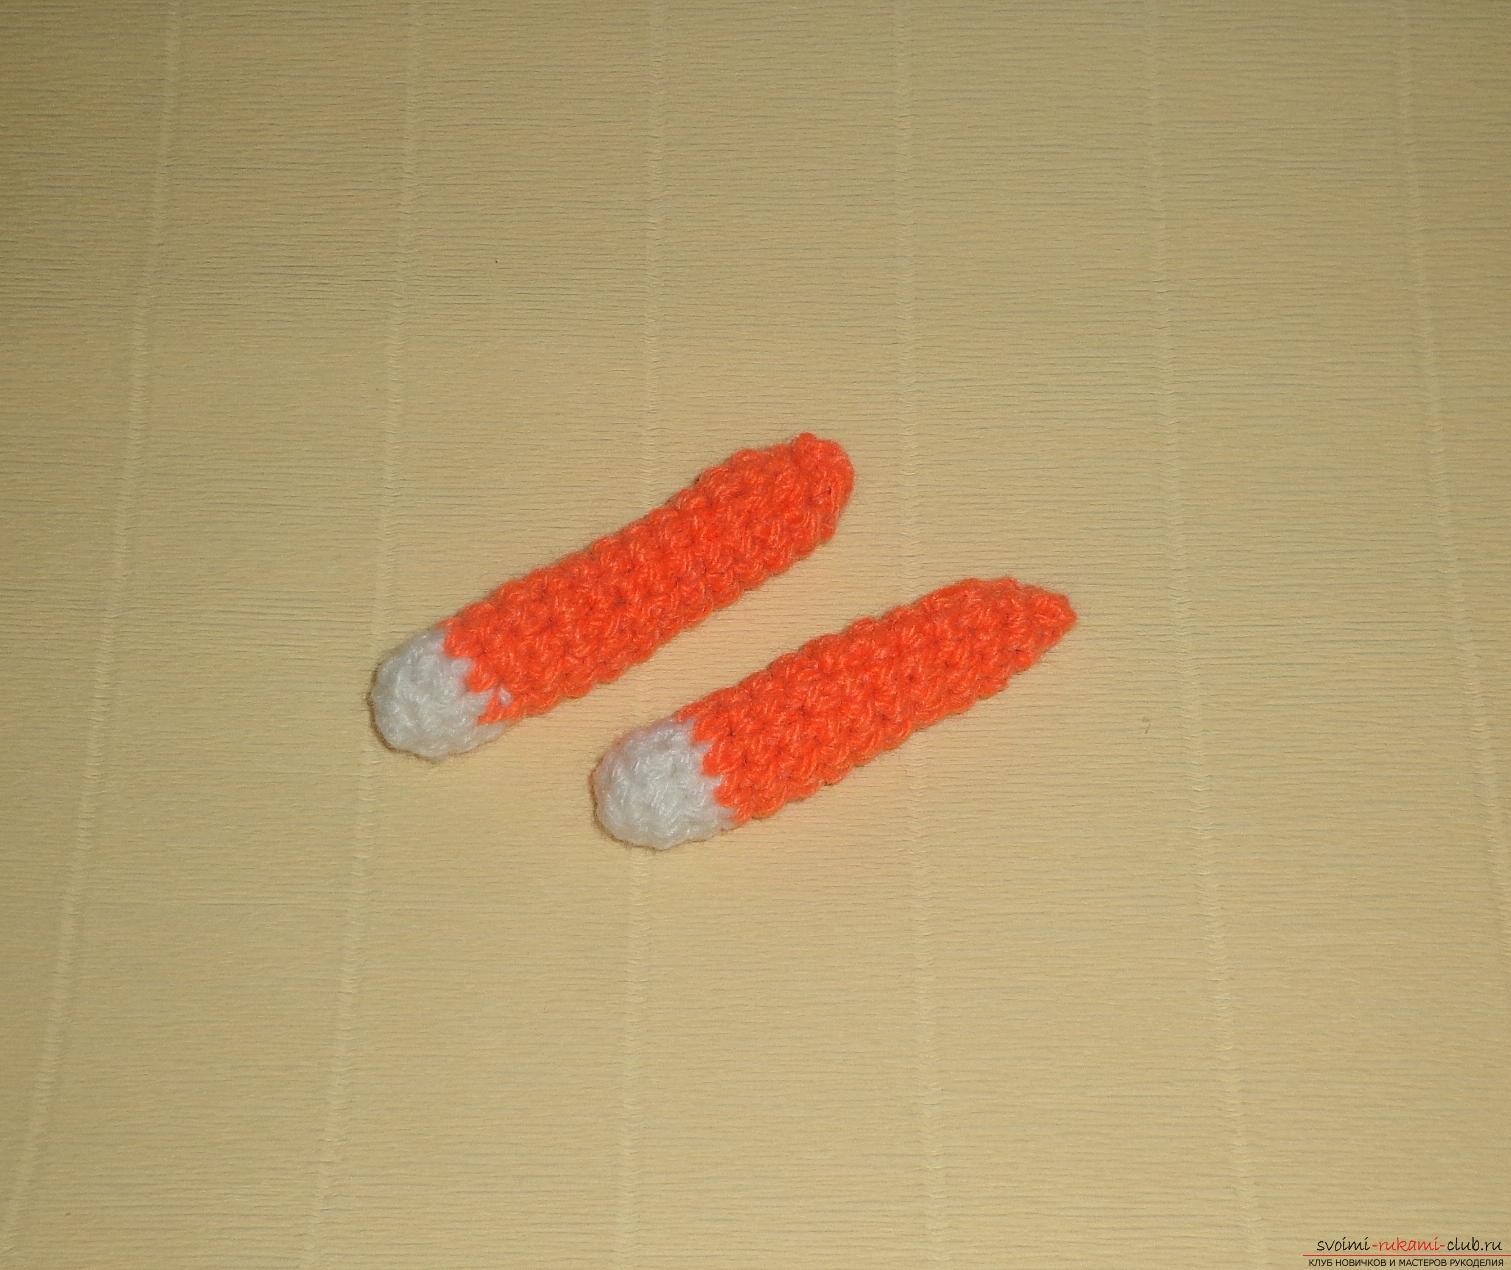 What kind of chanterelle without a tail? Therefore further we knit a tail. From the white yarn is typed a chain of 5 loops. Tied without adding 2 and 3 rows. In the 4th row, loops are loosened in each loop of the row. To tie up without rows 5 and 6 rows. 7-13, the row is tied with a red thread without any additions.
  In the 14th row, loops are cut in 3 arbitrary places and tied. In the 16th row - in each 3rd loop of the row cut the eyelets, and the 17th row to be tied without any reduction.
 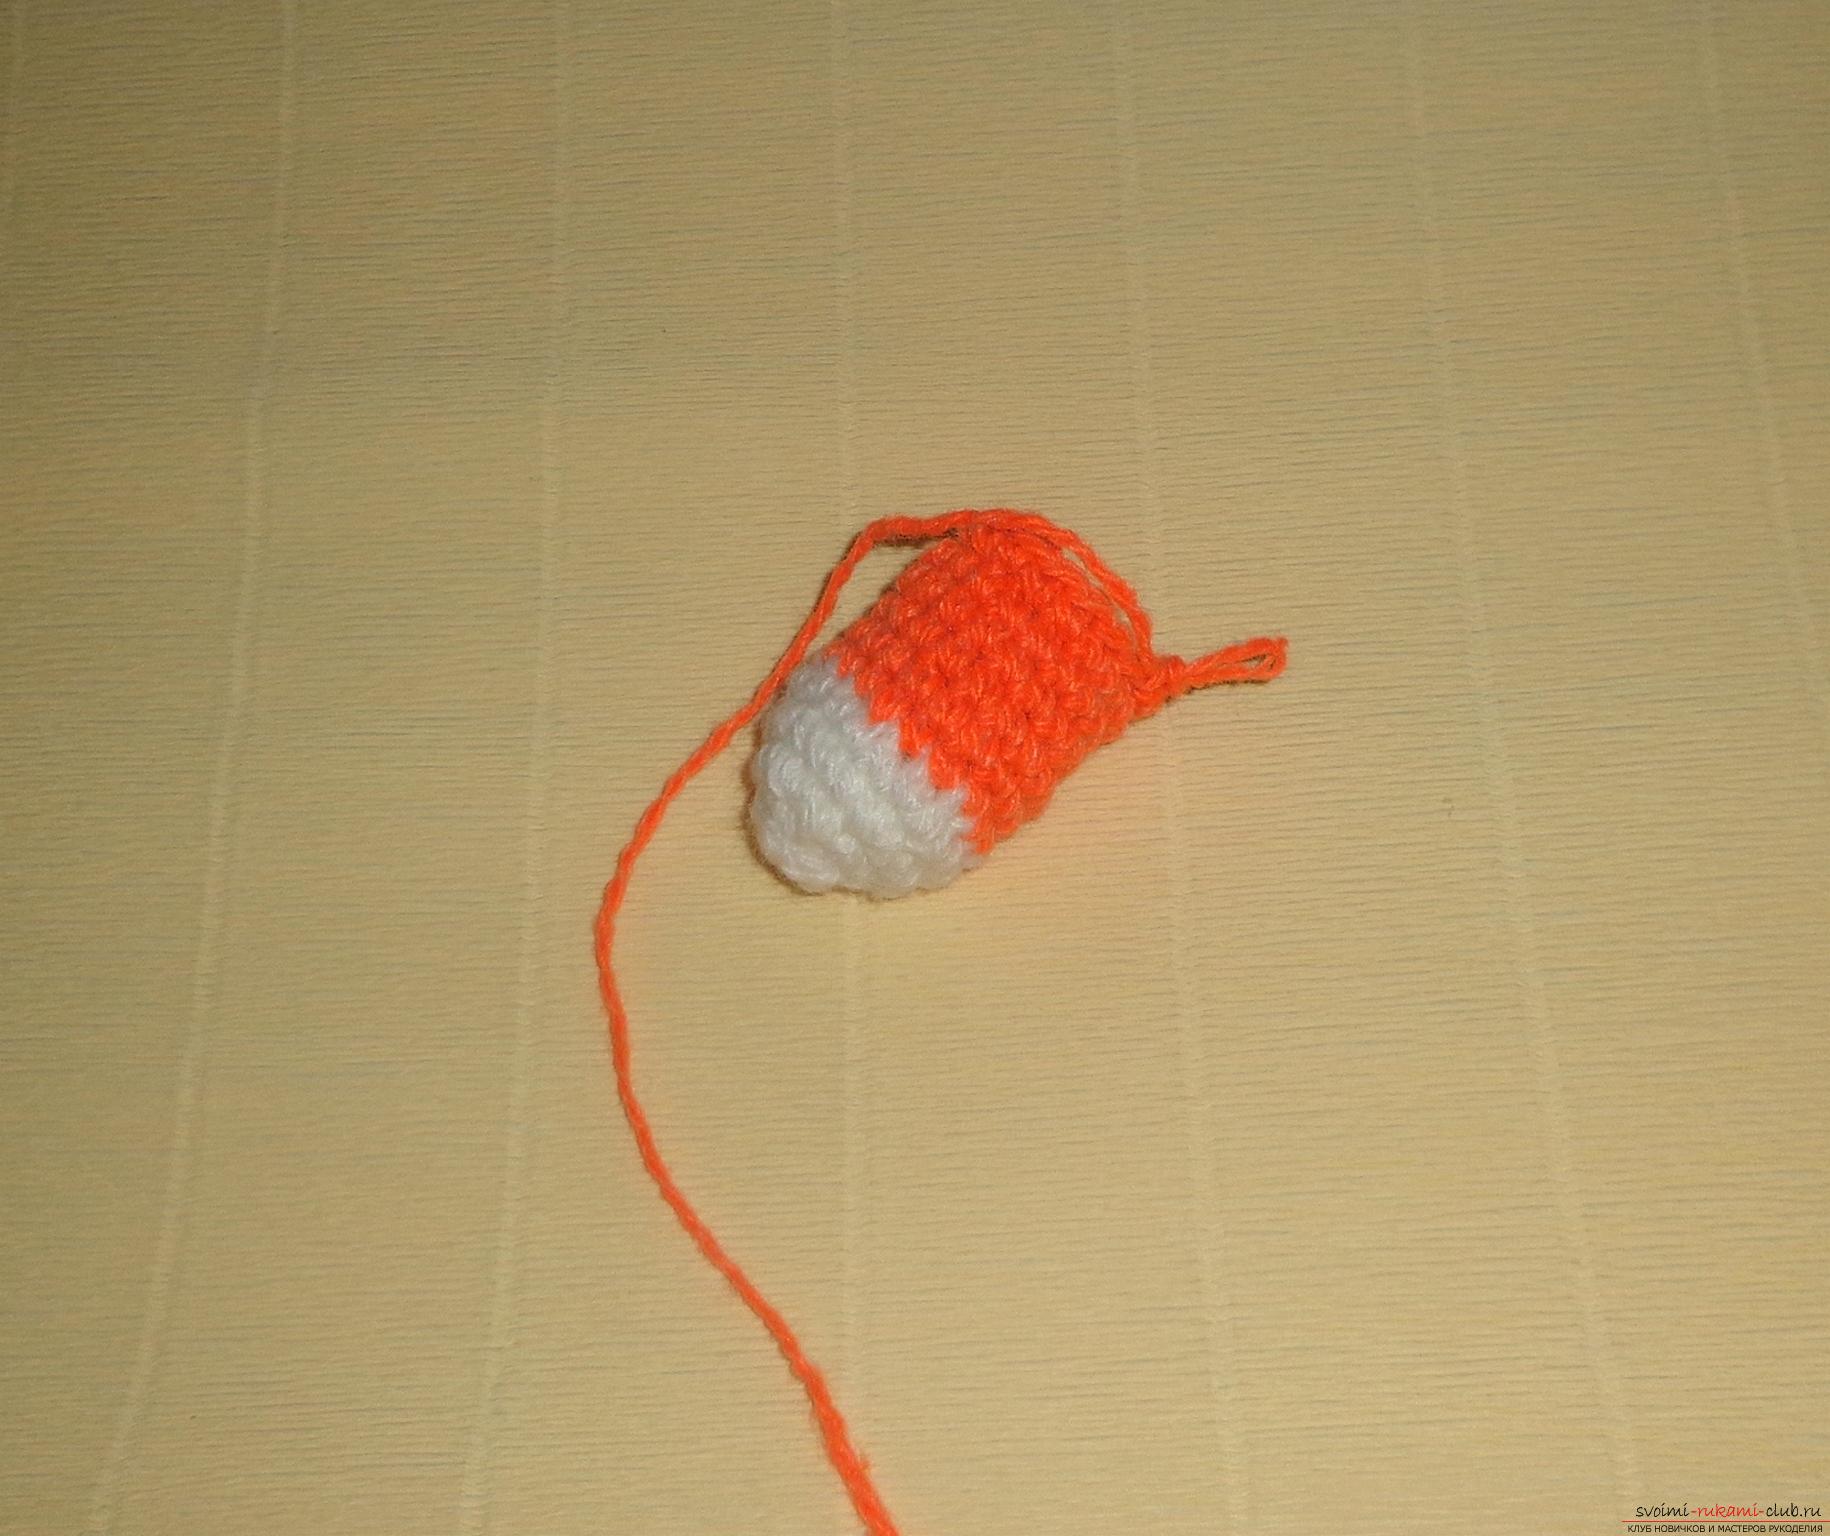 In the 18th row we cut already in each 2 loops, 19 row - to tie without cuts. 20-21 row - subtract in each eyelet, fix the thread and cut off the remainder. The length of the tail was 12 cm.
 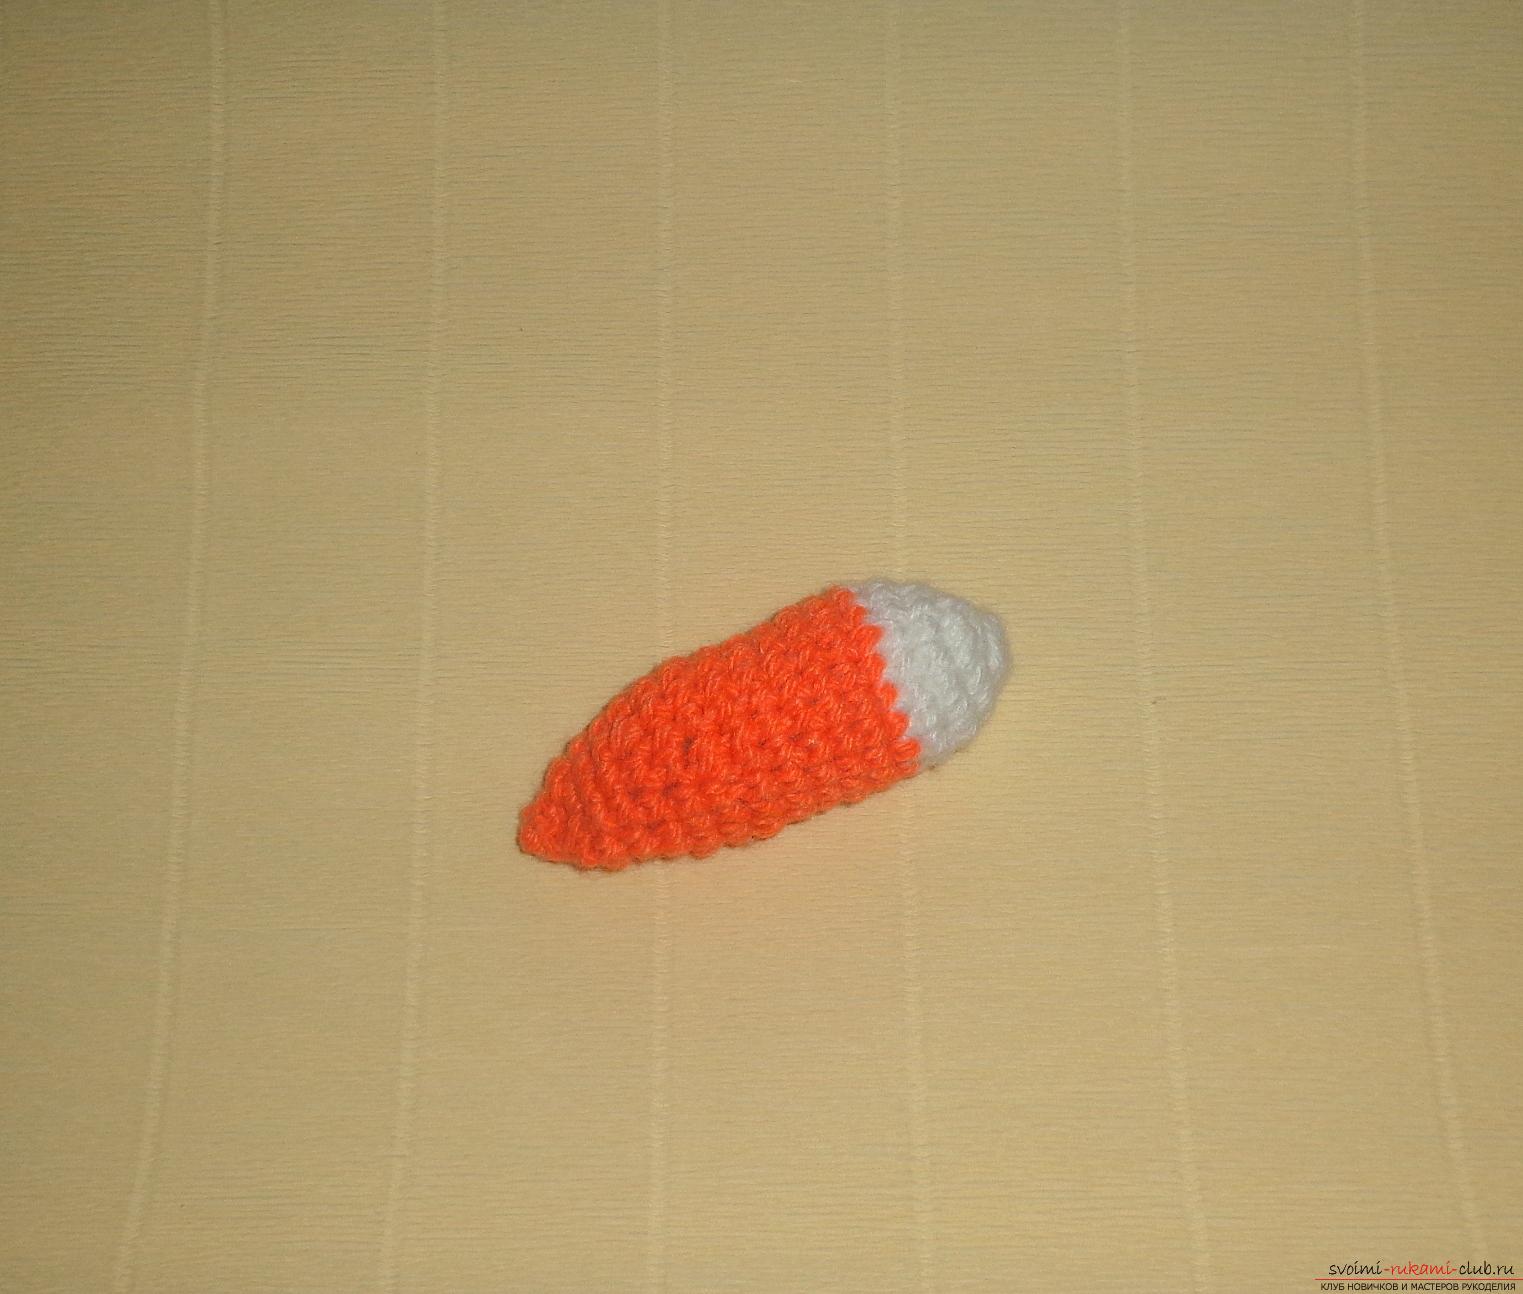 We knit ears from red yarn. We knit this way: dial a chain of 14 loops and tie it in the opposite direction. Fold the resulting blank in half and tie it, passing the hook through the entire workpiece (4 loops are fastened). Then we knit in the opposite direction, but only 3 loops are sewn, that is, the most extreme ones are not tied, so that the eyelet is narrowed. Then we sew one loop and cut the thread.
  One eye is ready, and the second is exactly the same.
 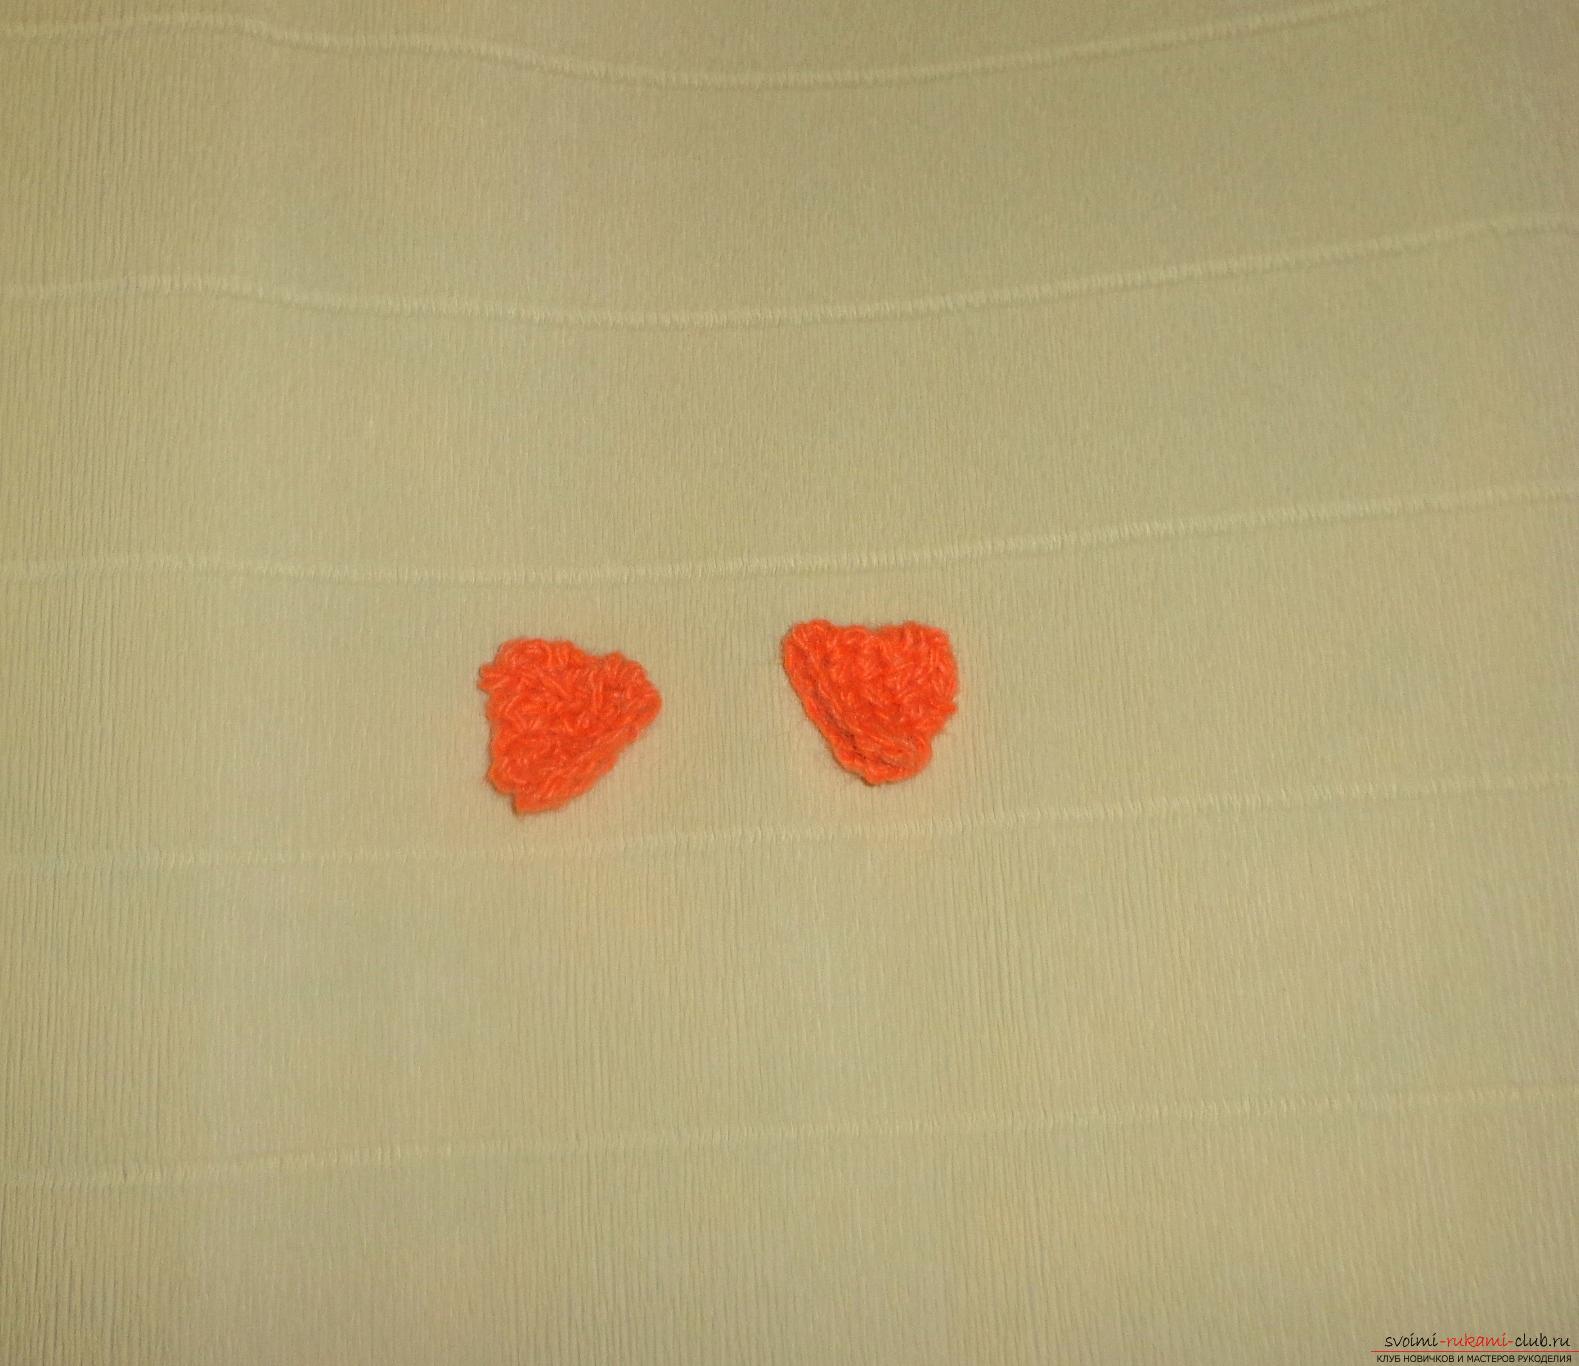 To decorate chanterelles I suggest to tie beautifulapron with a flower and make a bow of satin ribbon. For the apron, we take a chain of white yarn from 7 loops and tie them in the opposite direction. To knit the next 2 rows back and forth, but at the same time we pass the hook into the most extreme loops, thereby the apron will expand. To knead once again in one and the other side. Then, from the most extreme loops (at the beginning and at the end of the row), loosen 2 loops and, thus, tie 2 rows. The next two rows just to tie.
  Now you need to tie an apron with a pink thread,and in the other row to tie a pattern. The pattern is knitted like this: a chain of 6 loops is made, connected with the 1st loop of the chain, and then linked to the next loop. Thus, it is necessary to tie three sides of the apron, that is, one that will not be tied under the head.
 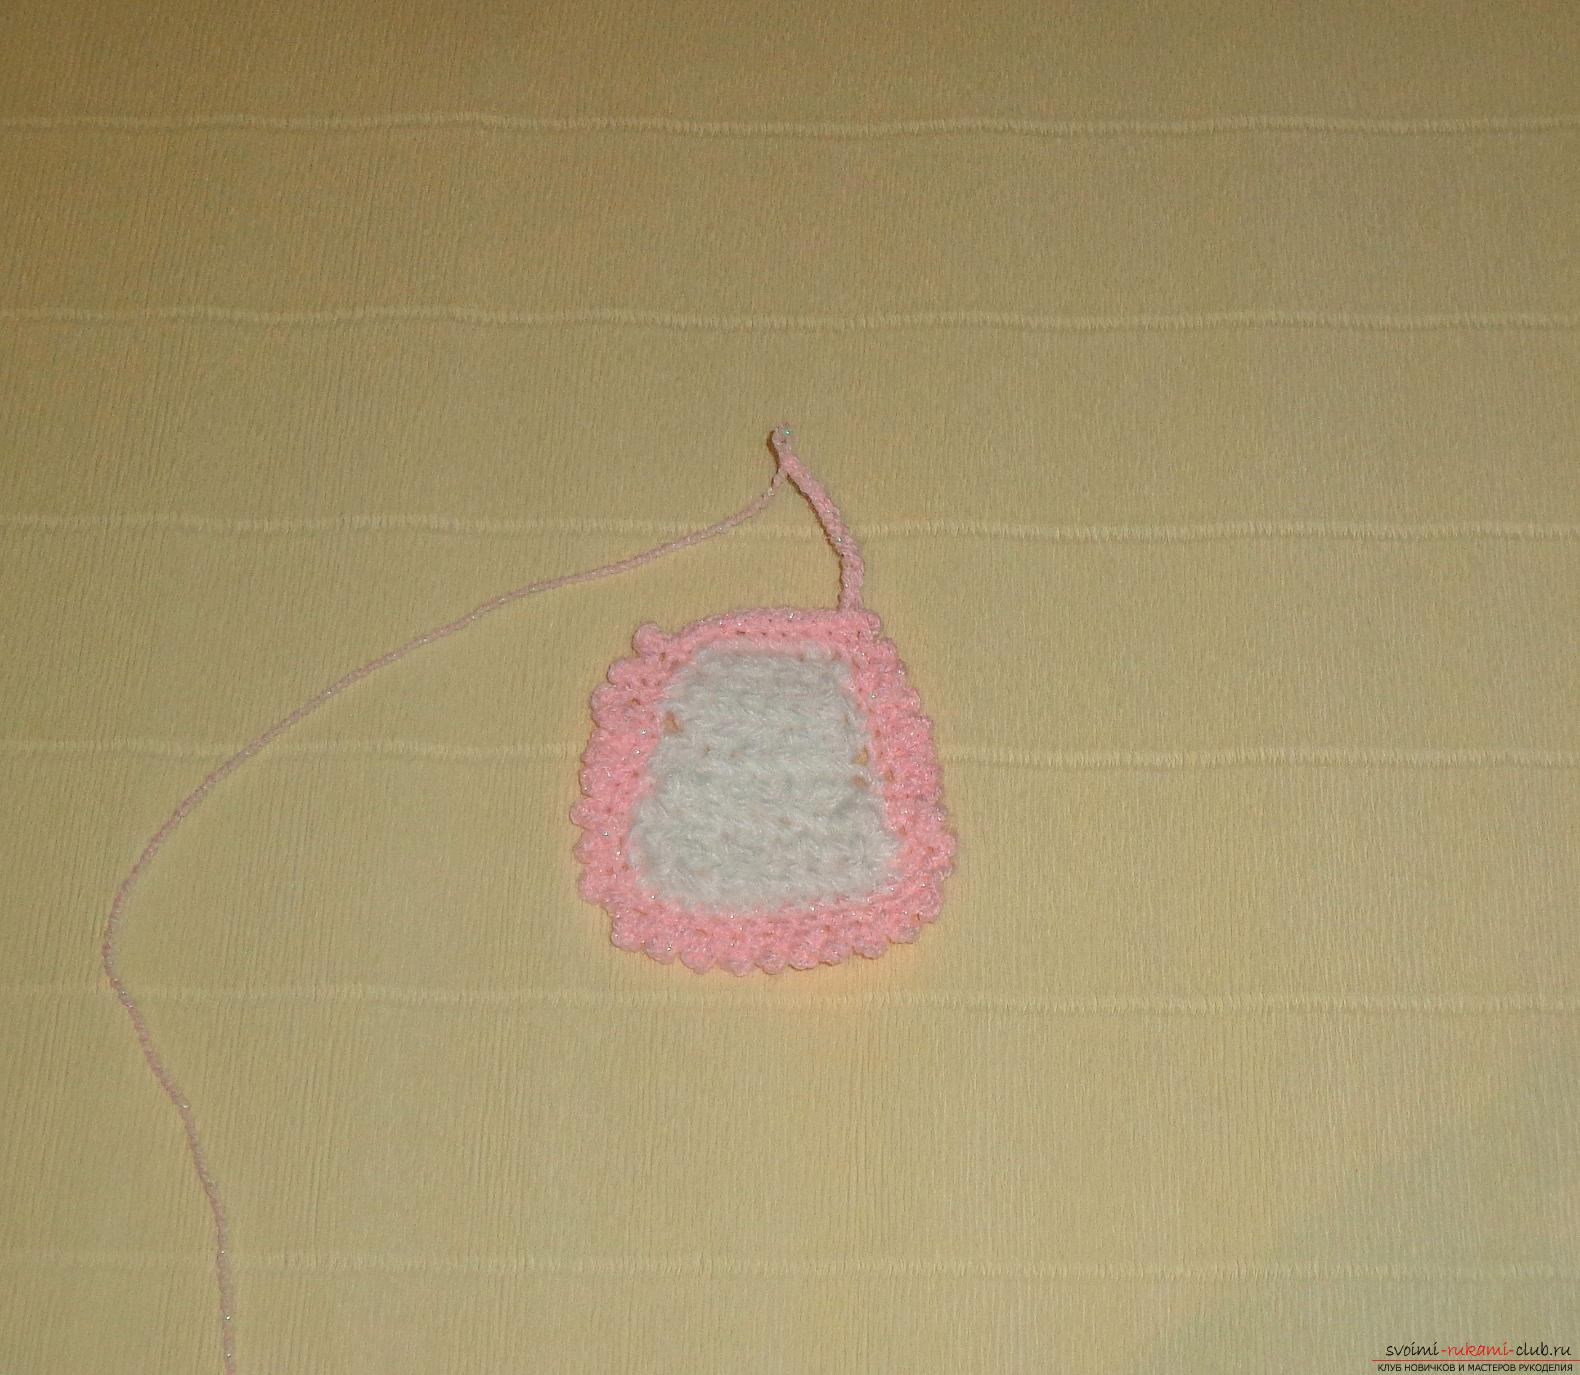 Attach the two aprons to the apron to fix the apron around the neck.
 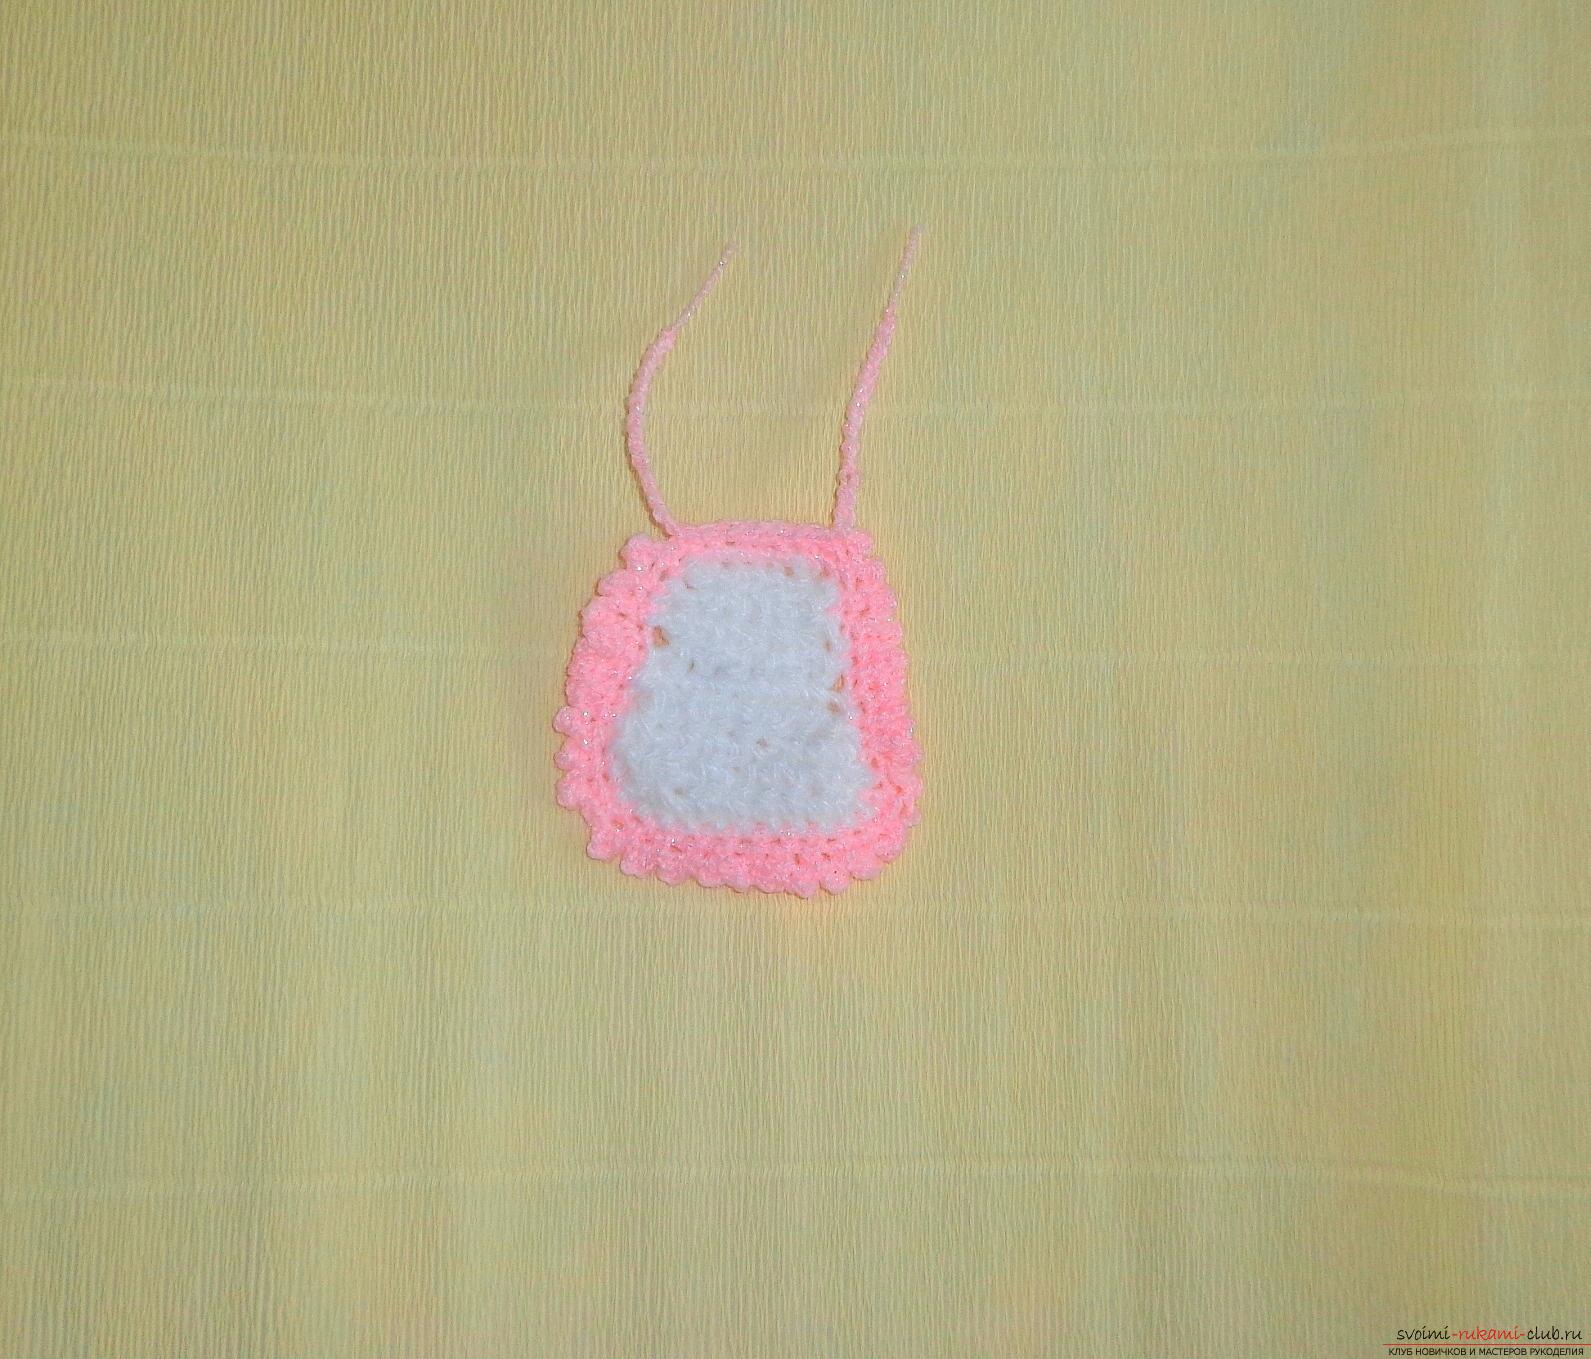 For knitting a flower we take a lilac thread. Dial from 5 loops a chain and connect the first and last loop. Obtain the received ring, passing through the hole (middle), and not into the loop. As a result, you will get a tied ring.
 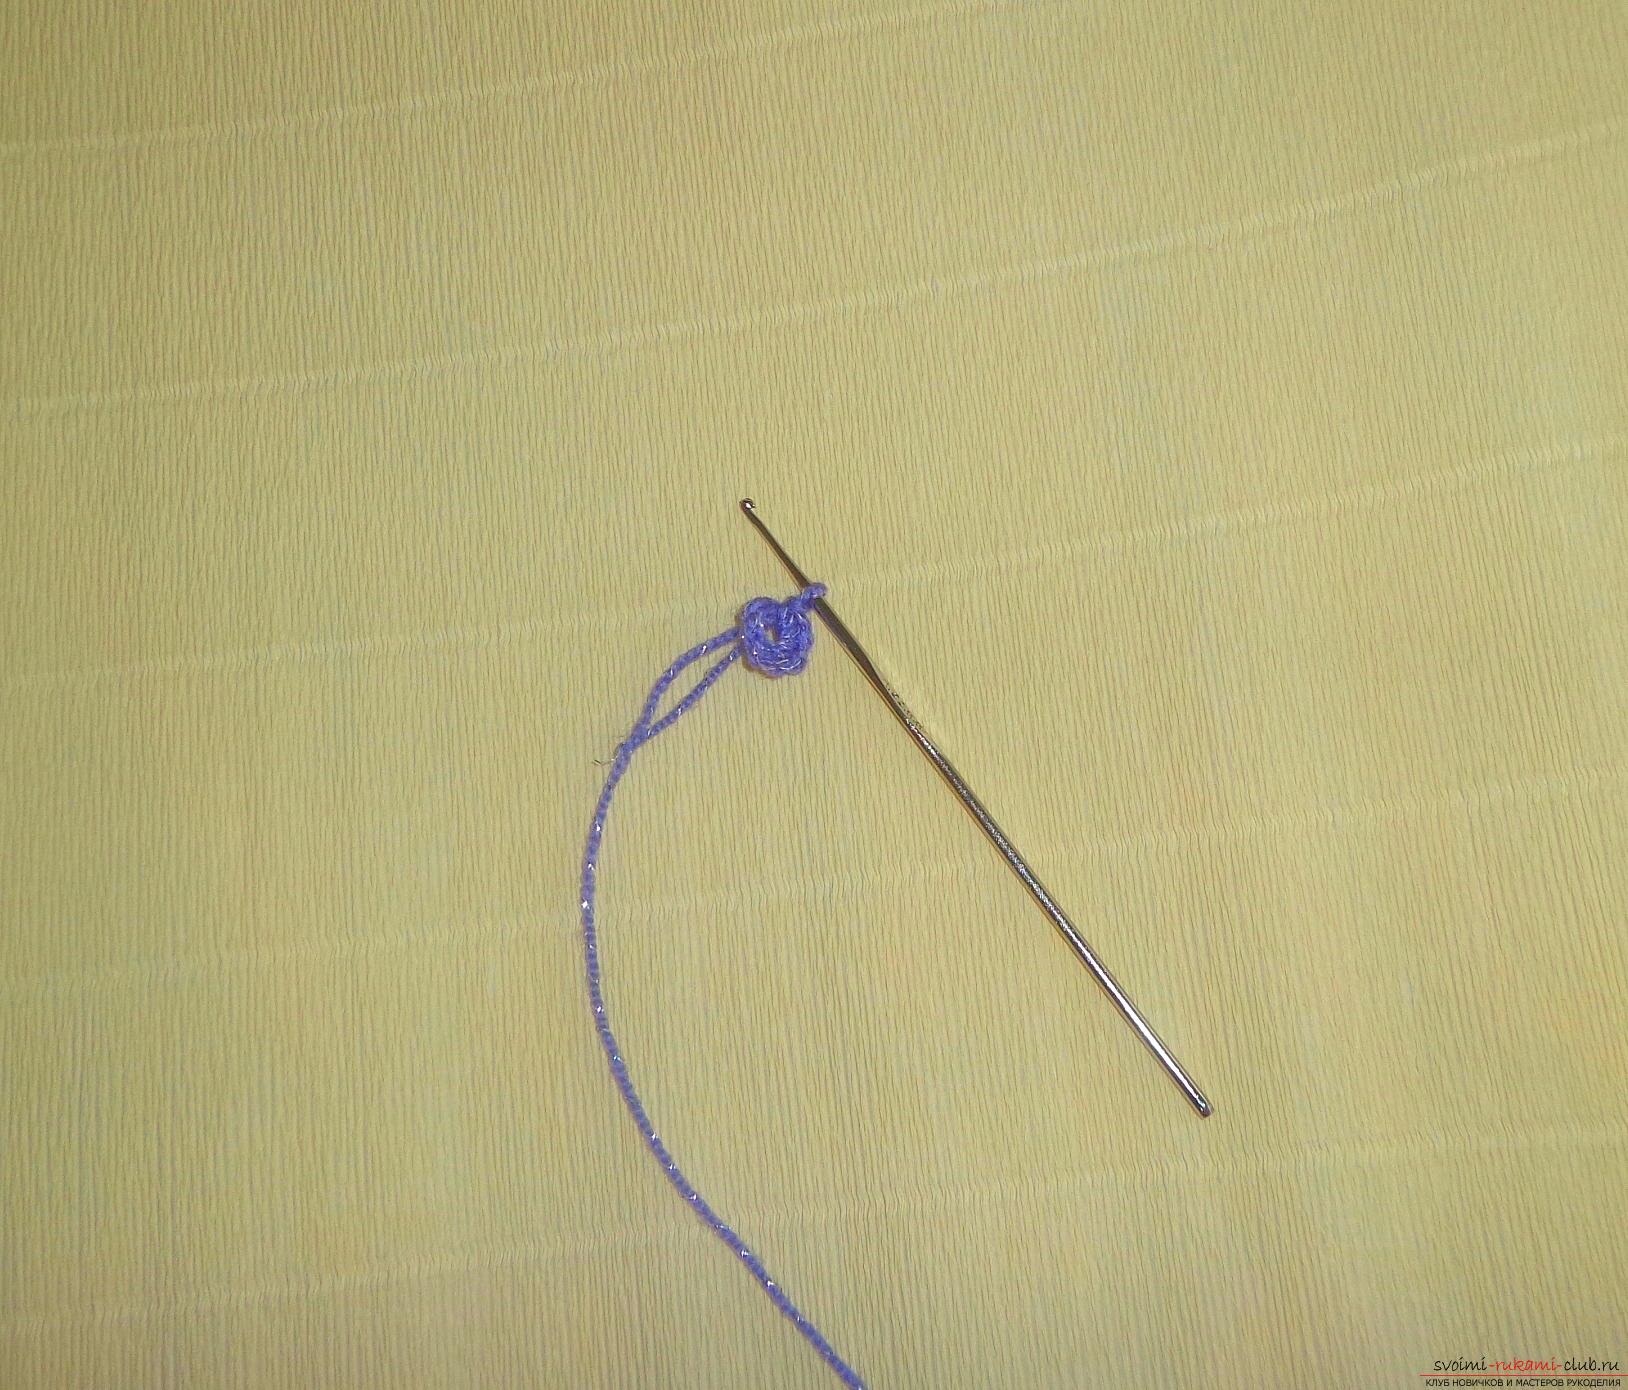 Then from the 7 loops make a chain and thread it into the 2nd loop from the beginning of this chain to make a petal. Such petals should be 5 pieces. Trim the thread, and glue the flower to the apron.
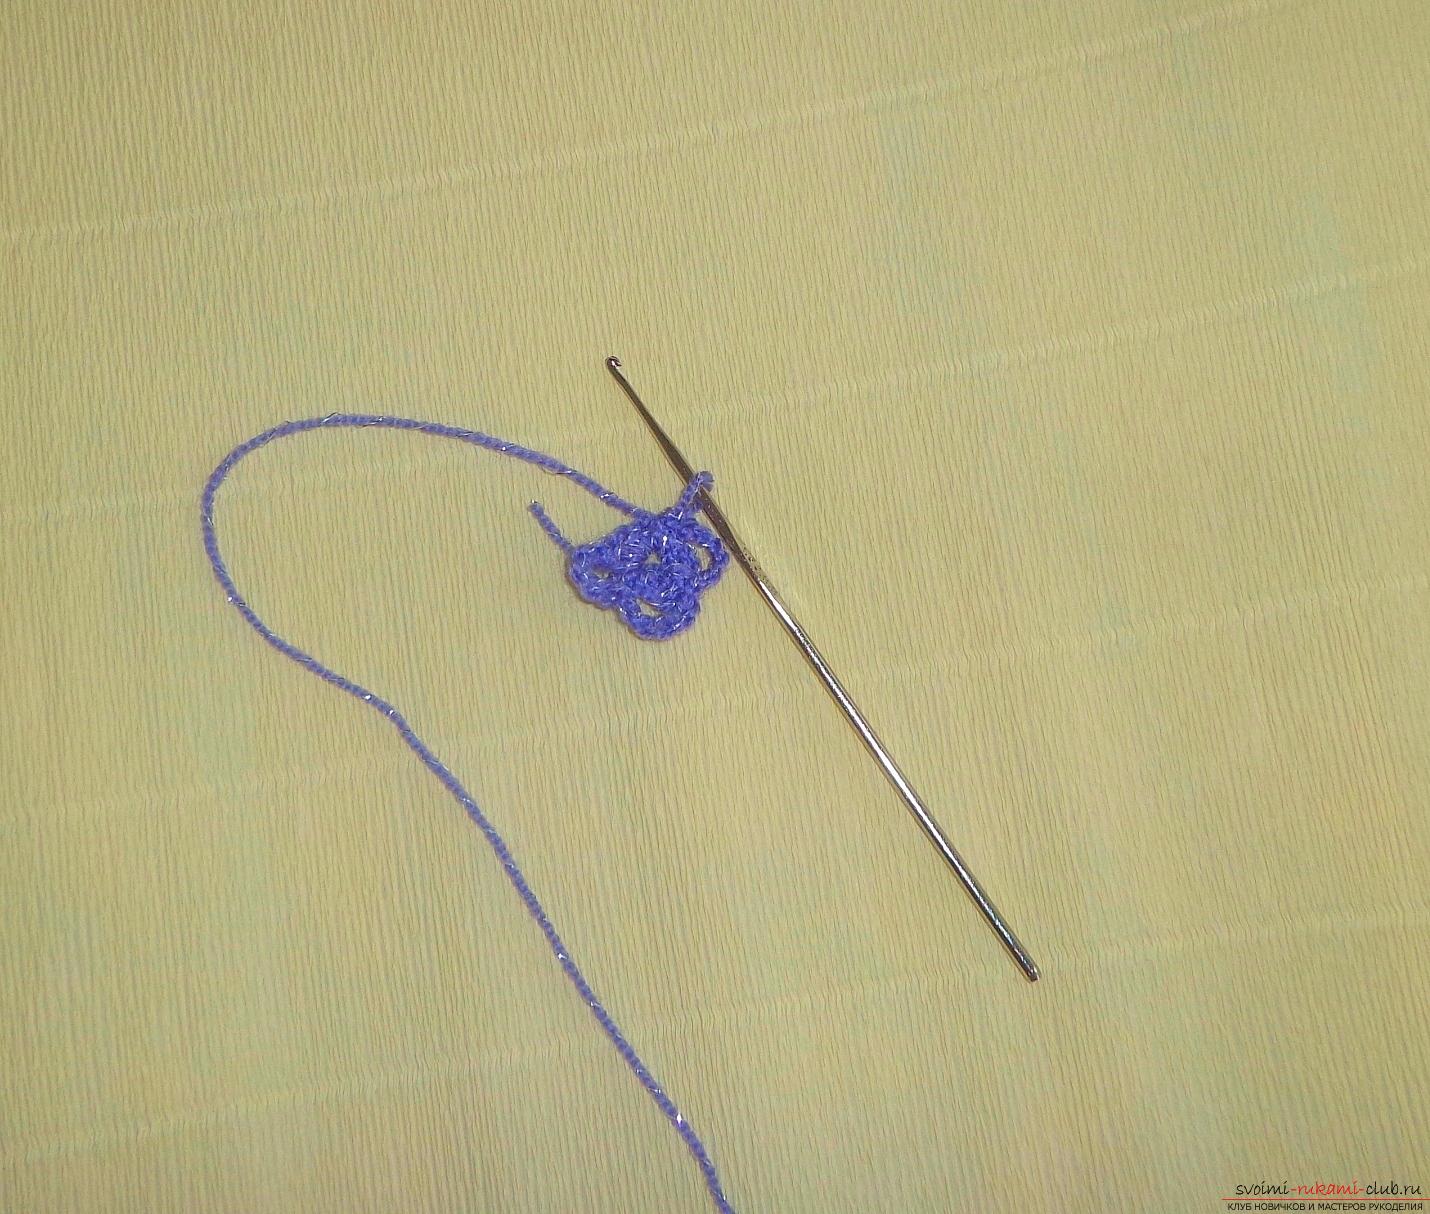
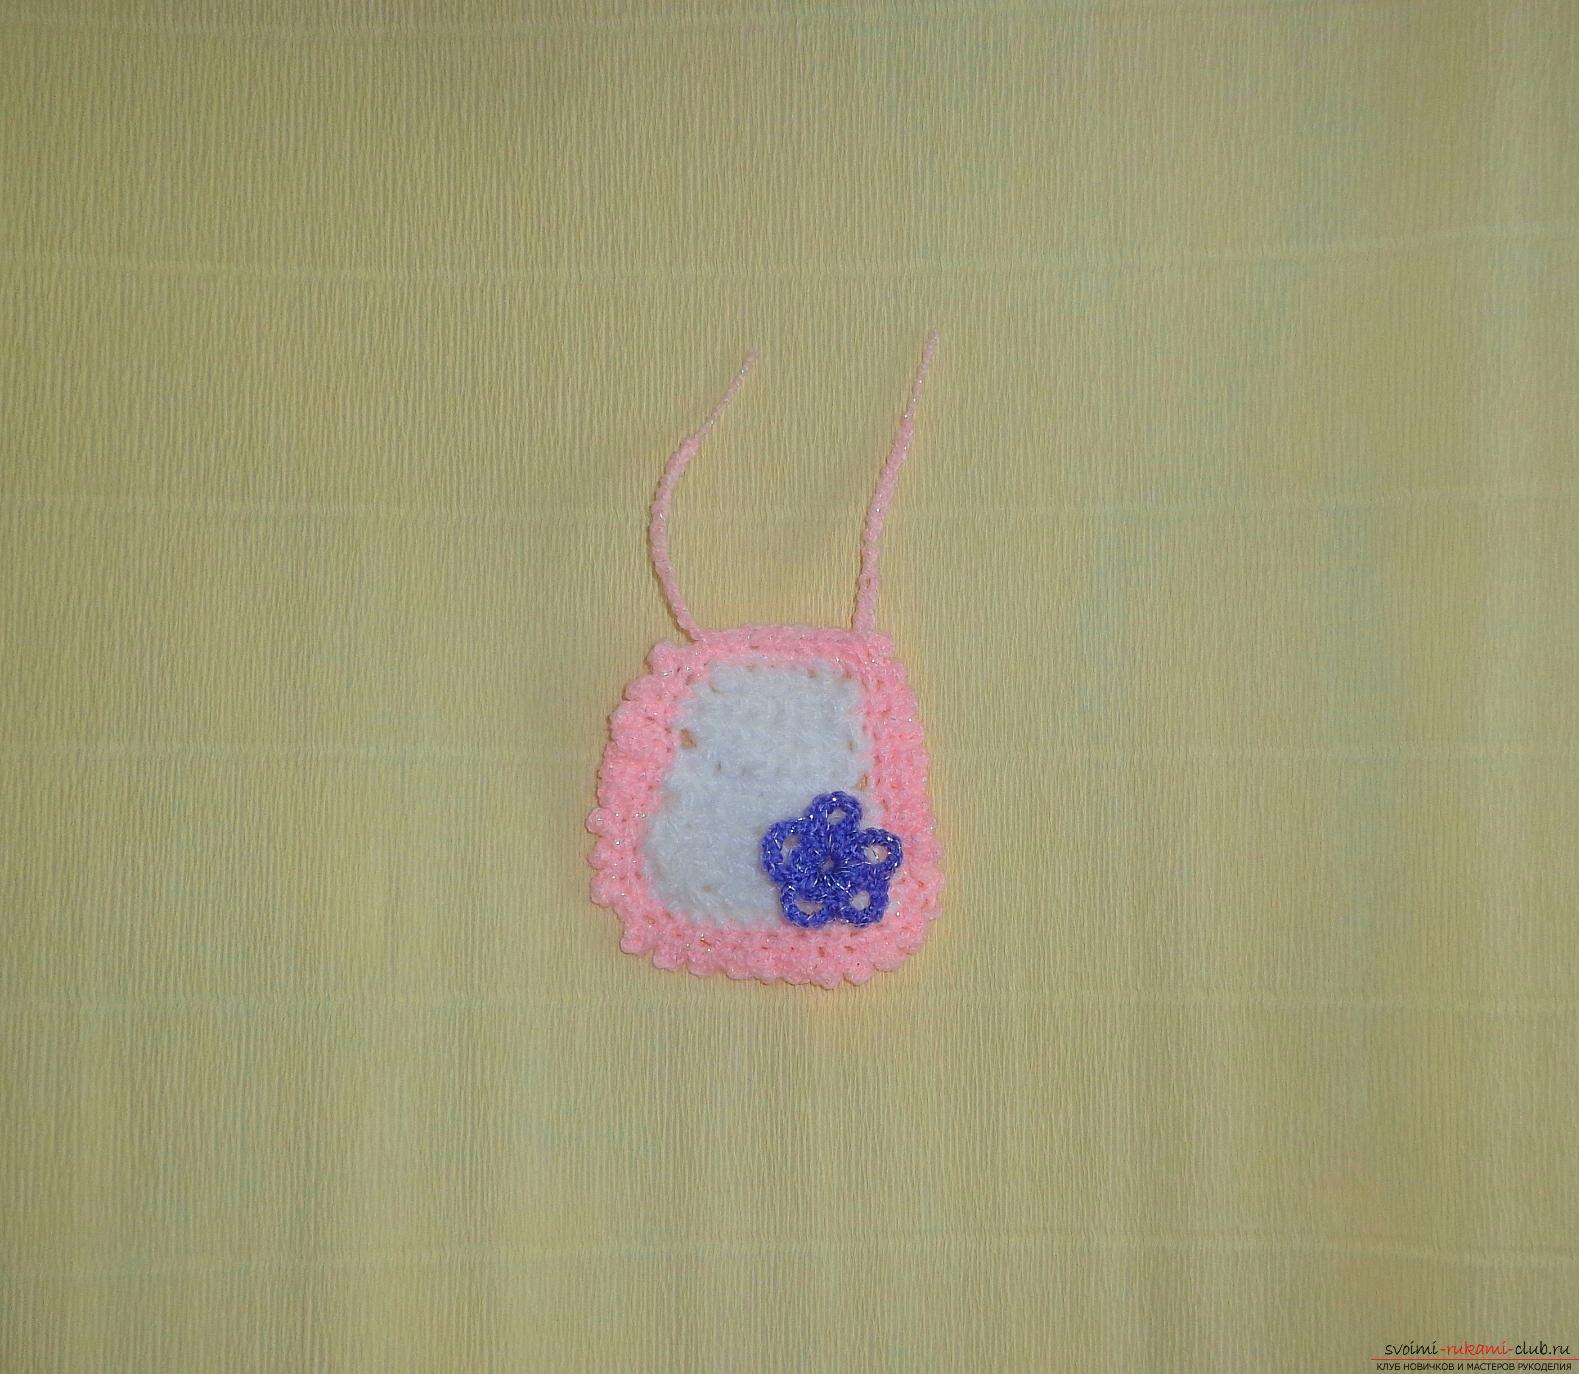 It remains to make a bow of satin ribbon. To do this, you need a special piece of cardboard 6 cm wide. Cut the workpiece in the middle, cutting 1 cm. Wrap the satin green ribbon in the white peas around the billet 2 times. Sew a needle with a thread on a centimeter cut, remove from the workpiece and tighten, fix the bow. Bandaging a bow in the middle with a green ribbon. Bantik paste to the head of chanterelles.
 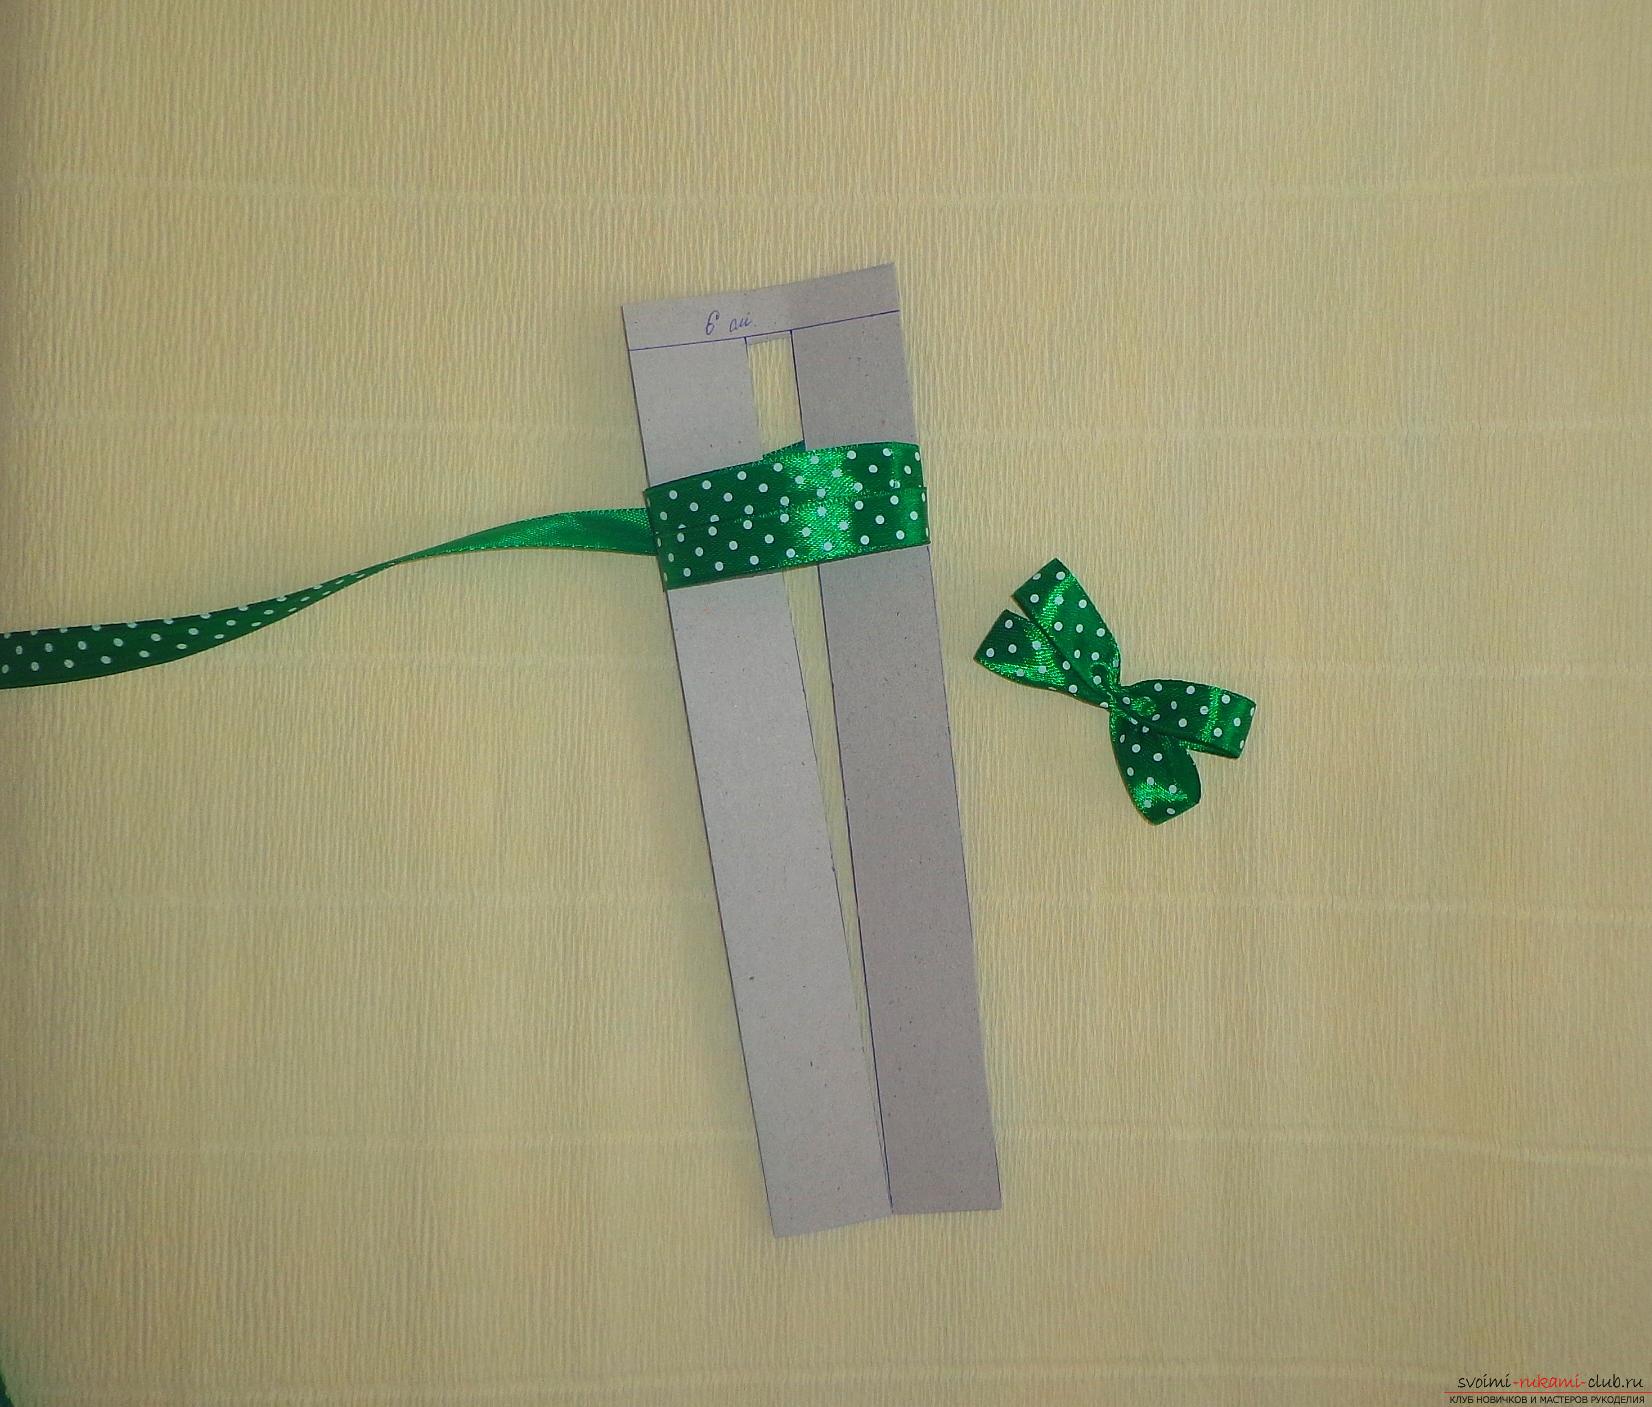 We glue together the head and trunk.
 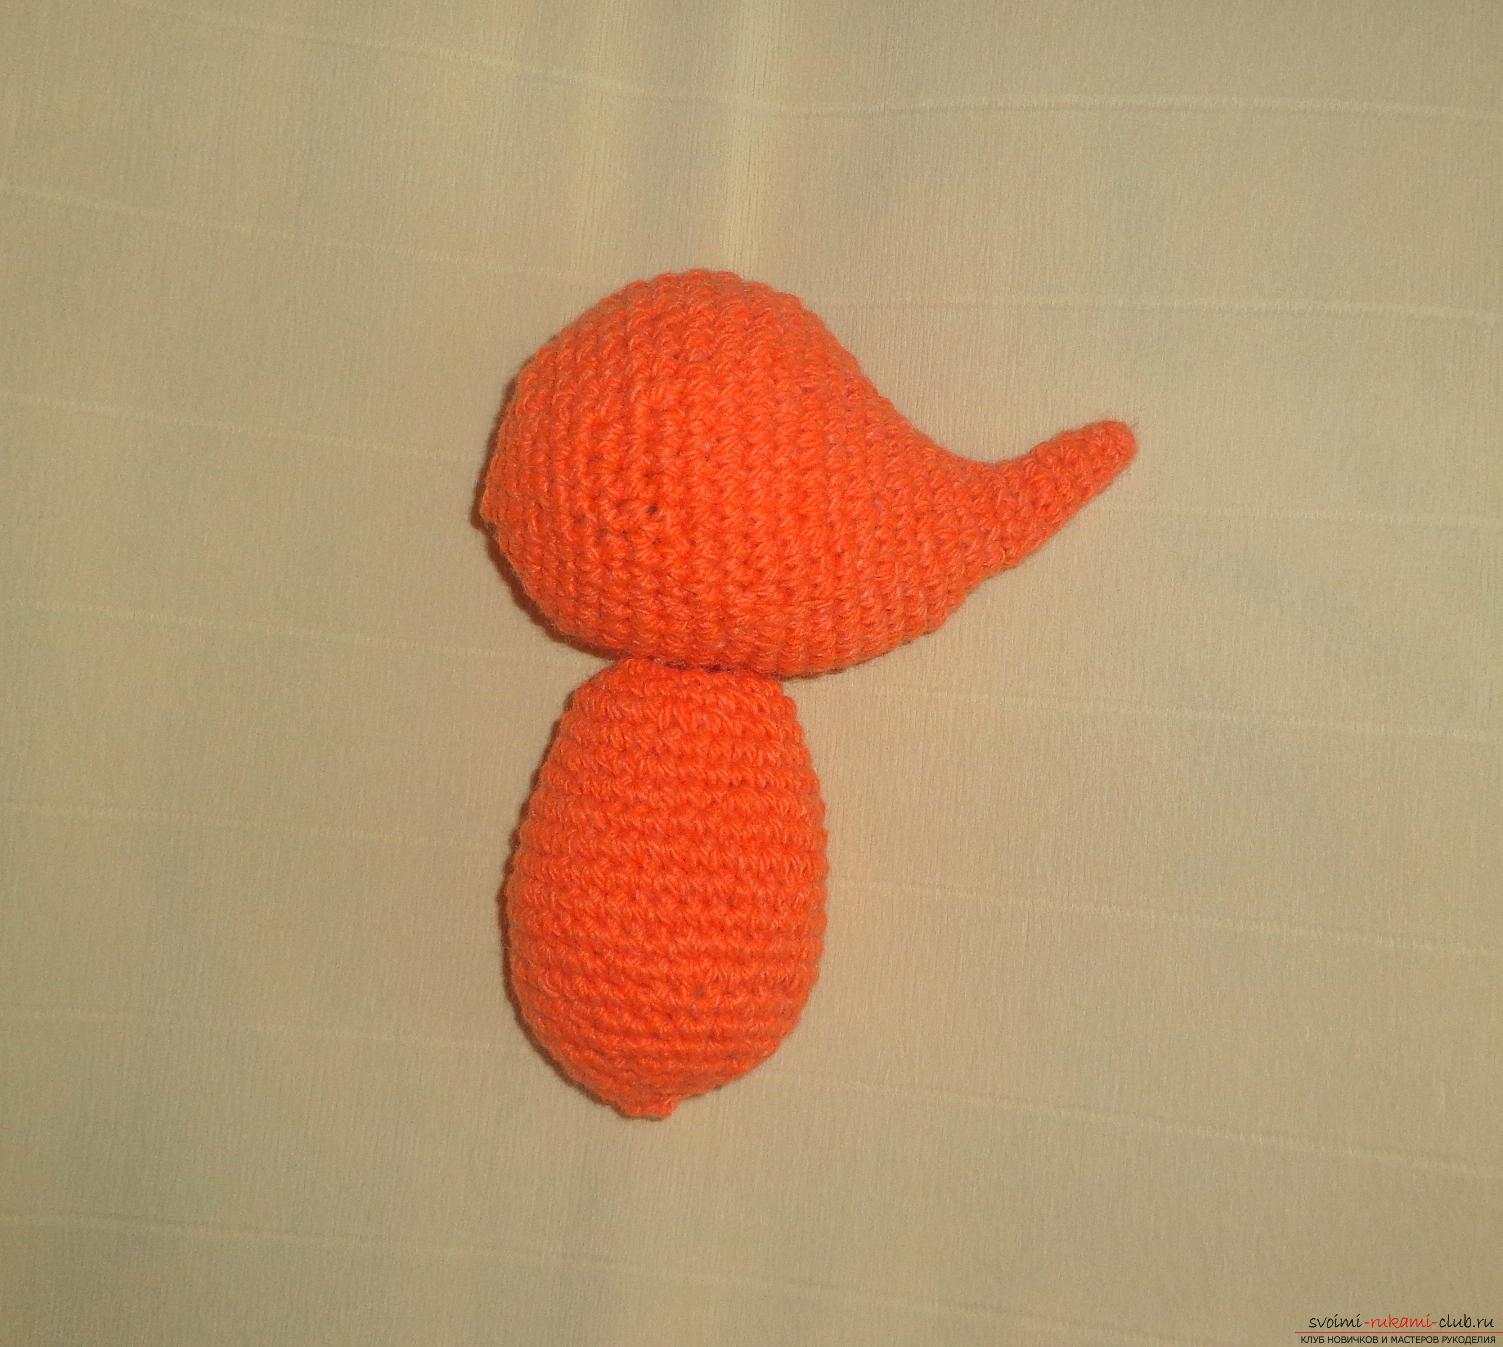 Glue the upper paws, wait until the glue dries.
 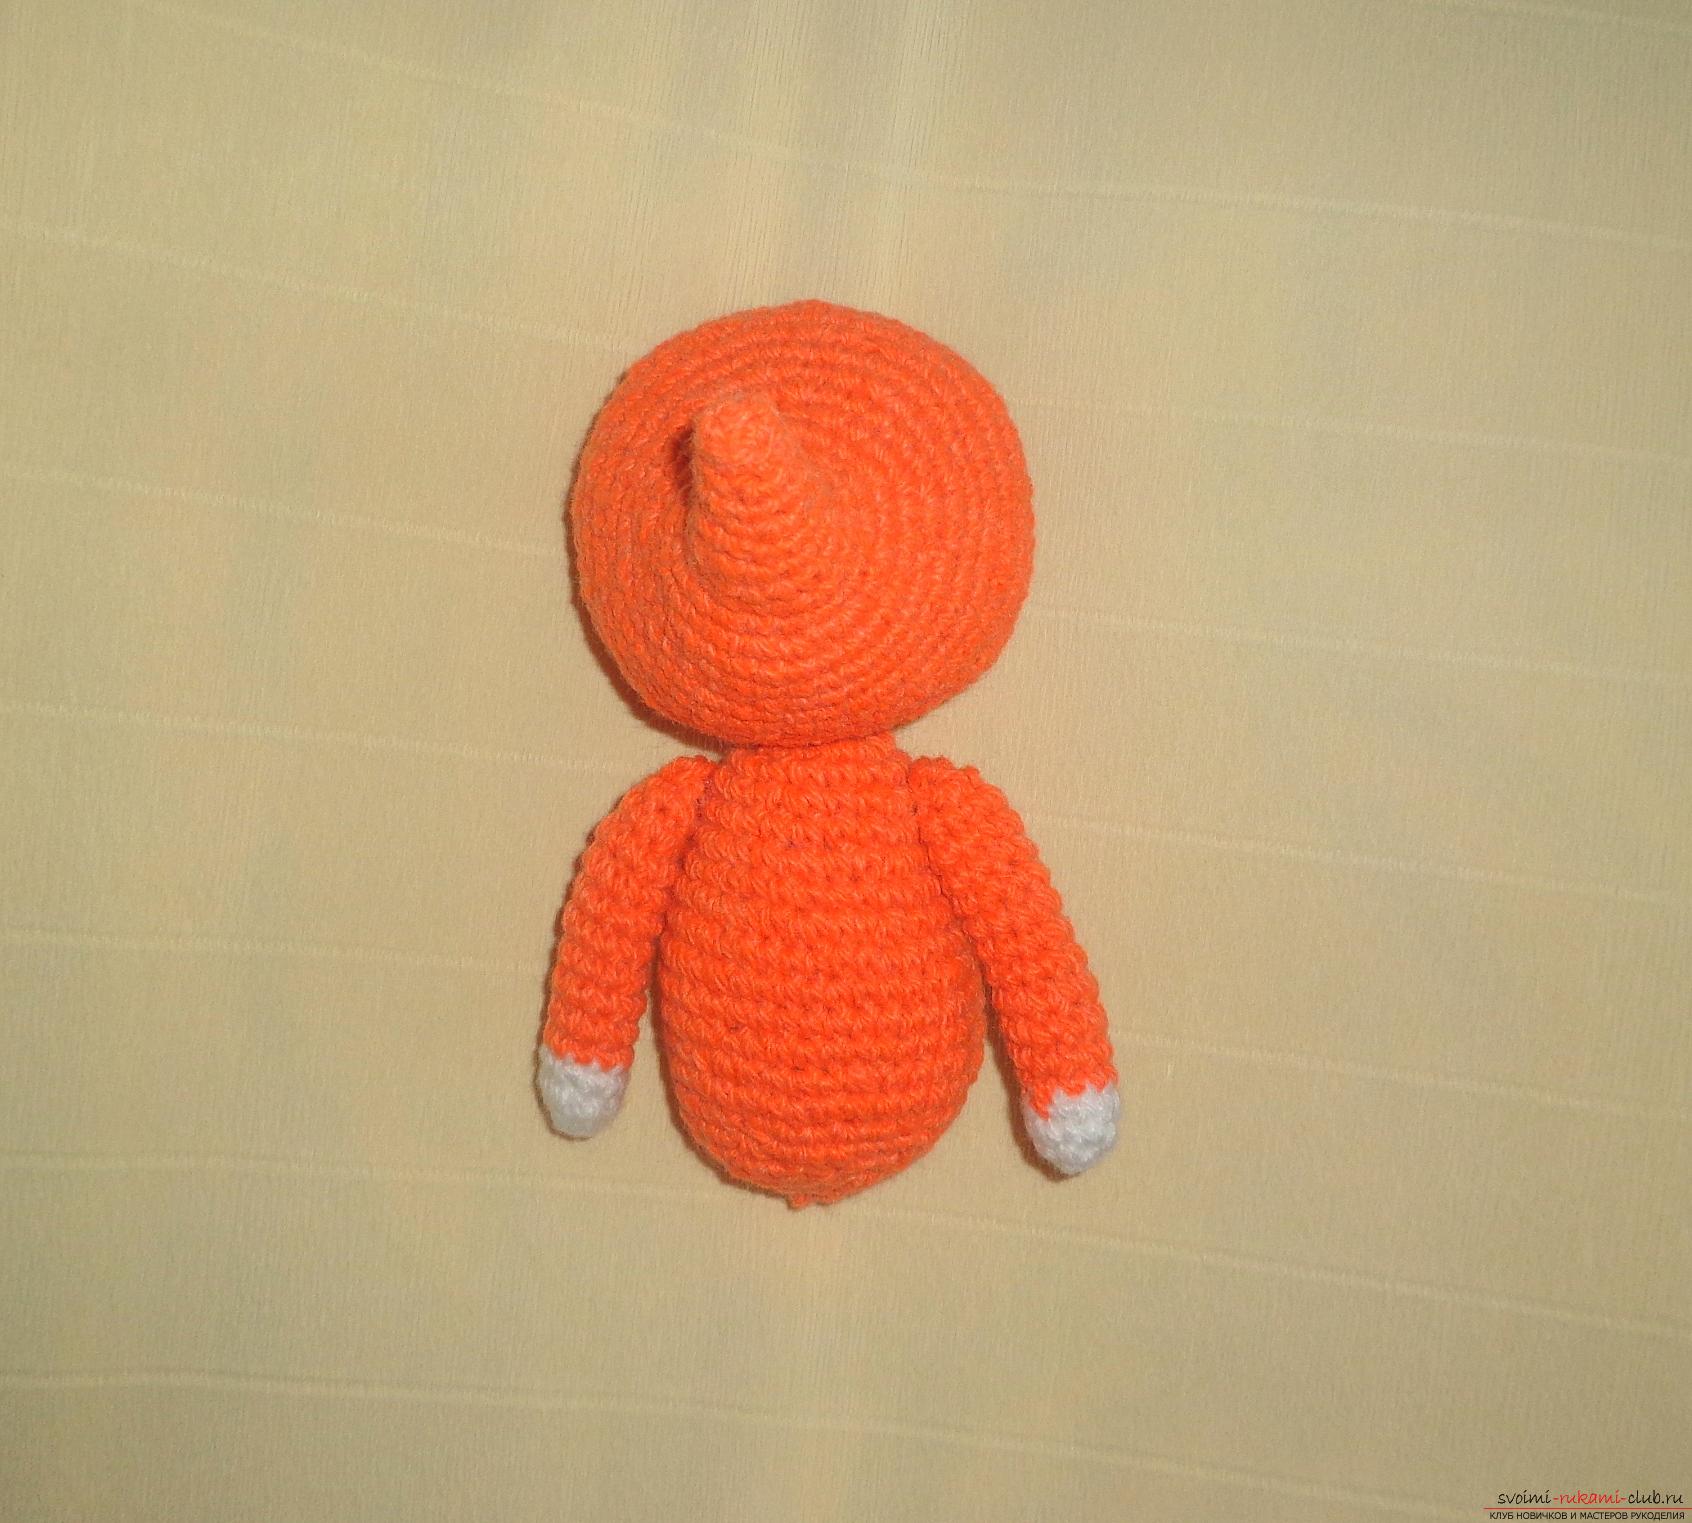 Then glue the lower legs.
 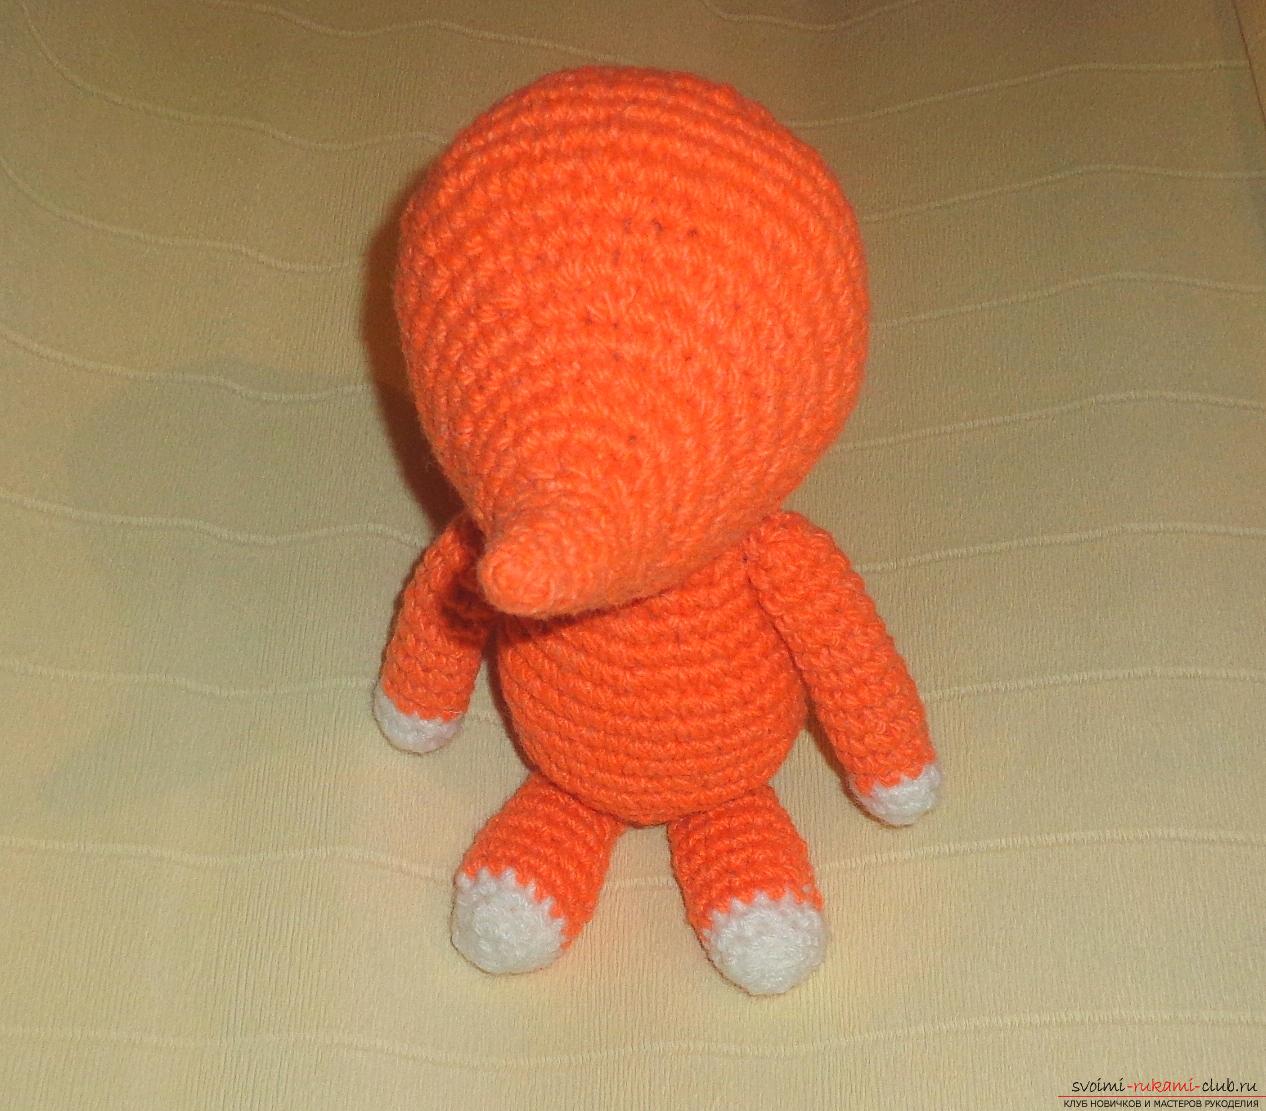 Tail is glued so that the chanter canindependently sit, leaning on the tail and paws. At will, all the details can be stitched together, I prefer to glue together and if that can fix the part to the right place.
 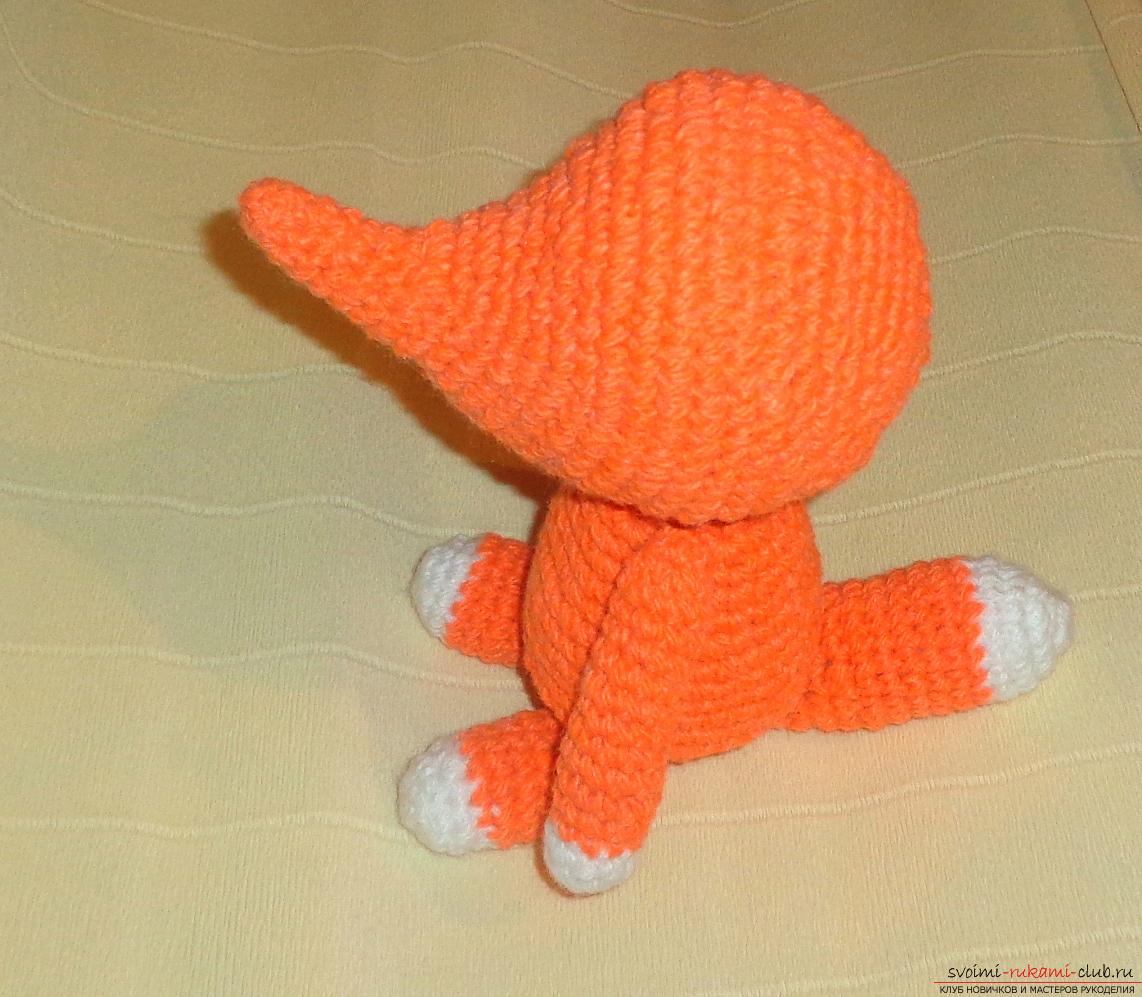 Glue the ears, eyes and bow. From the black yarn tie the nose, that is, dial a chain of 5 loops and connect in a ring, fix the thread and trim. The nose is ready, it too to paste. From the red thread make a small mouth for the chanterelle.
 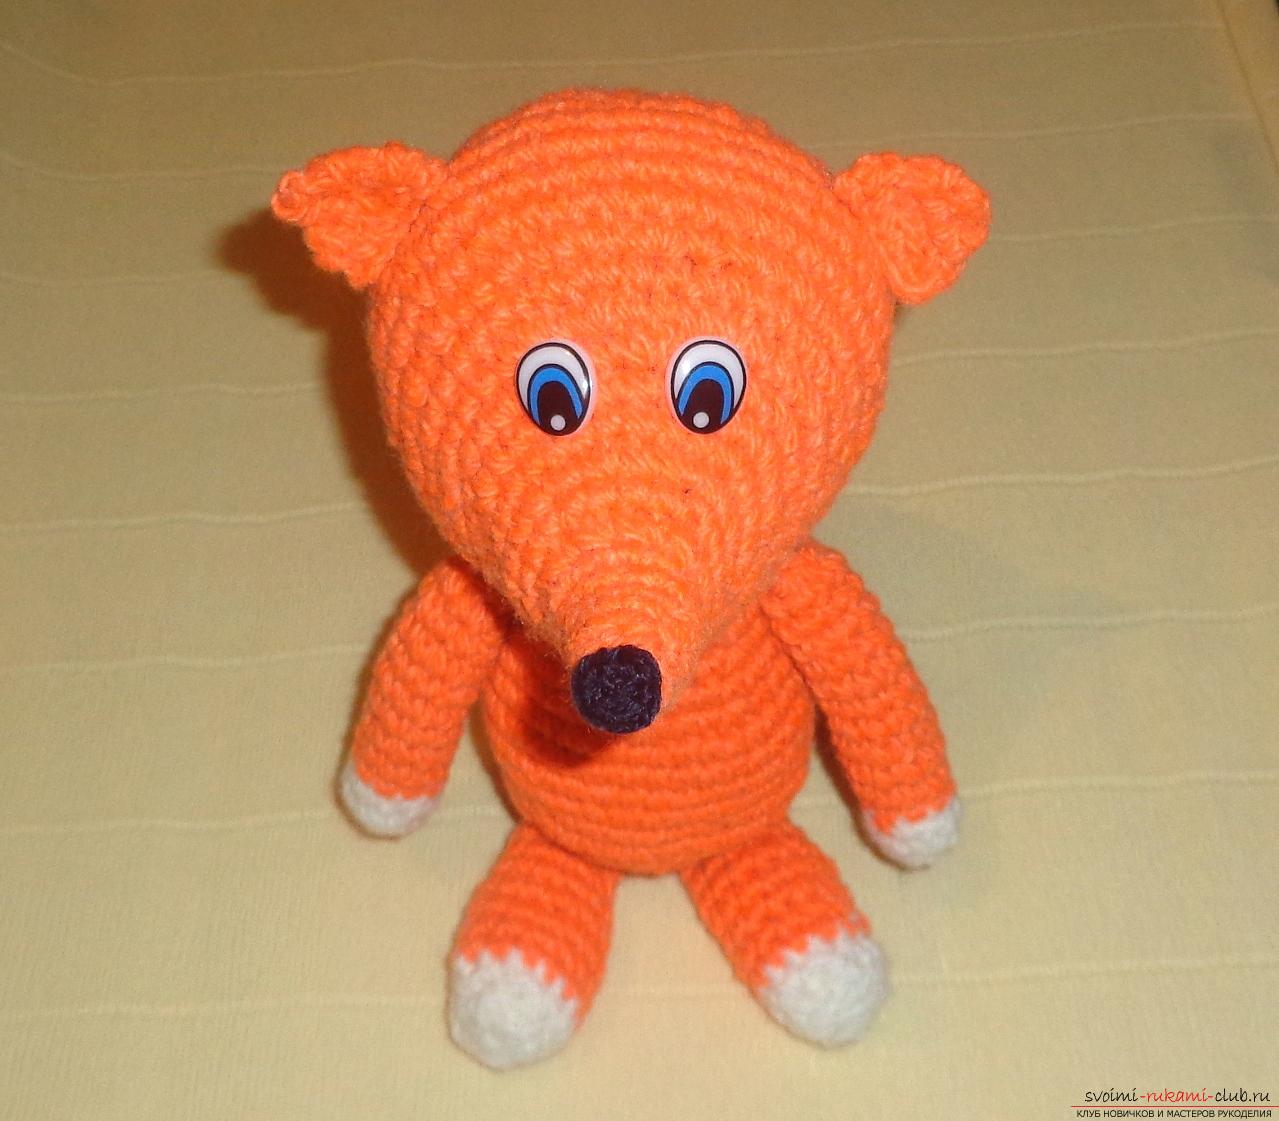 On the neck of a chanterelle tie an apron and fix it with a little bit of glue so that it does not fall off.
  Here is a funny, bright and stylish turns the chanterelle. Knit toys are always exciting and interesting. If a child can knit a little, toys can be made with him.
Comments
Related posts:
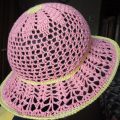 This detailed master class contains crochet lessons for beginners and will teach you how to crochet a summer hat.
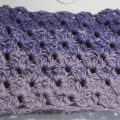 This detailed master class with a photo contains crochet snatch crochet patterns.
 This detailed master class contains a crochet lesson and will teach you how to bind berries by yourself.
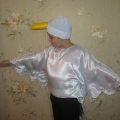 This master class contains sewing lessons from a photo of a carnival costume for children
 This master class of crochet crochet contains a rose scheme and a description of knitting.