
This master class is designed for those who want to learn how to knit Christmas decorations - sprockets
You can tie a star in a couple of hours. We need a Pechork yarn. A children's novelty (100% acrylic, 50 g, 200 m), toe knitting needles (6 pieces), a needle with a large eyelet and synthetic filler (sintepon, holofayber or others). 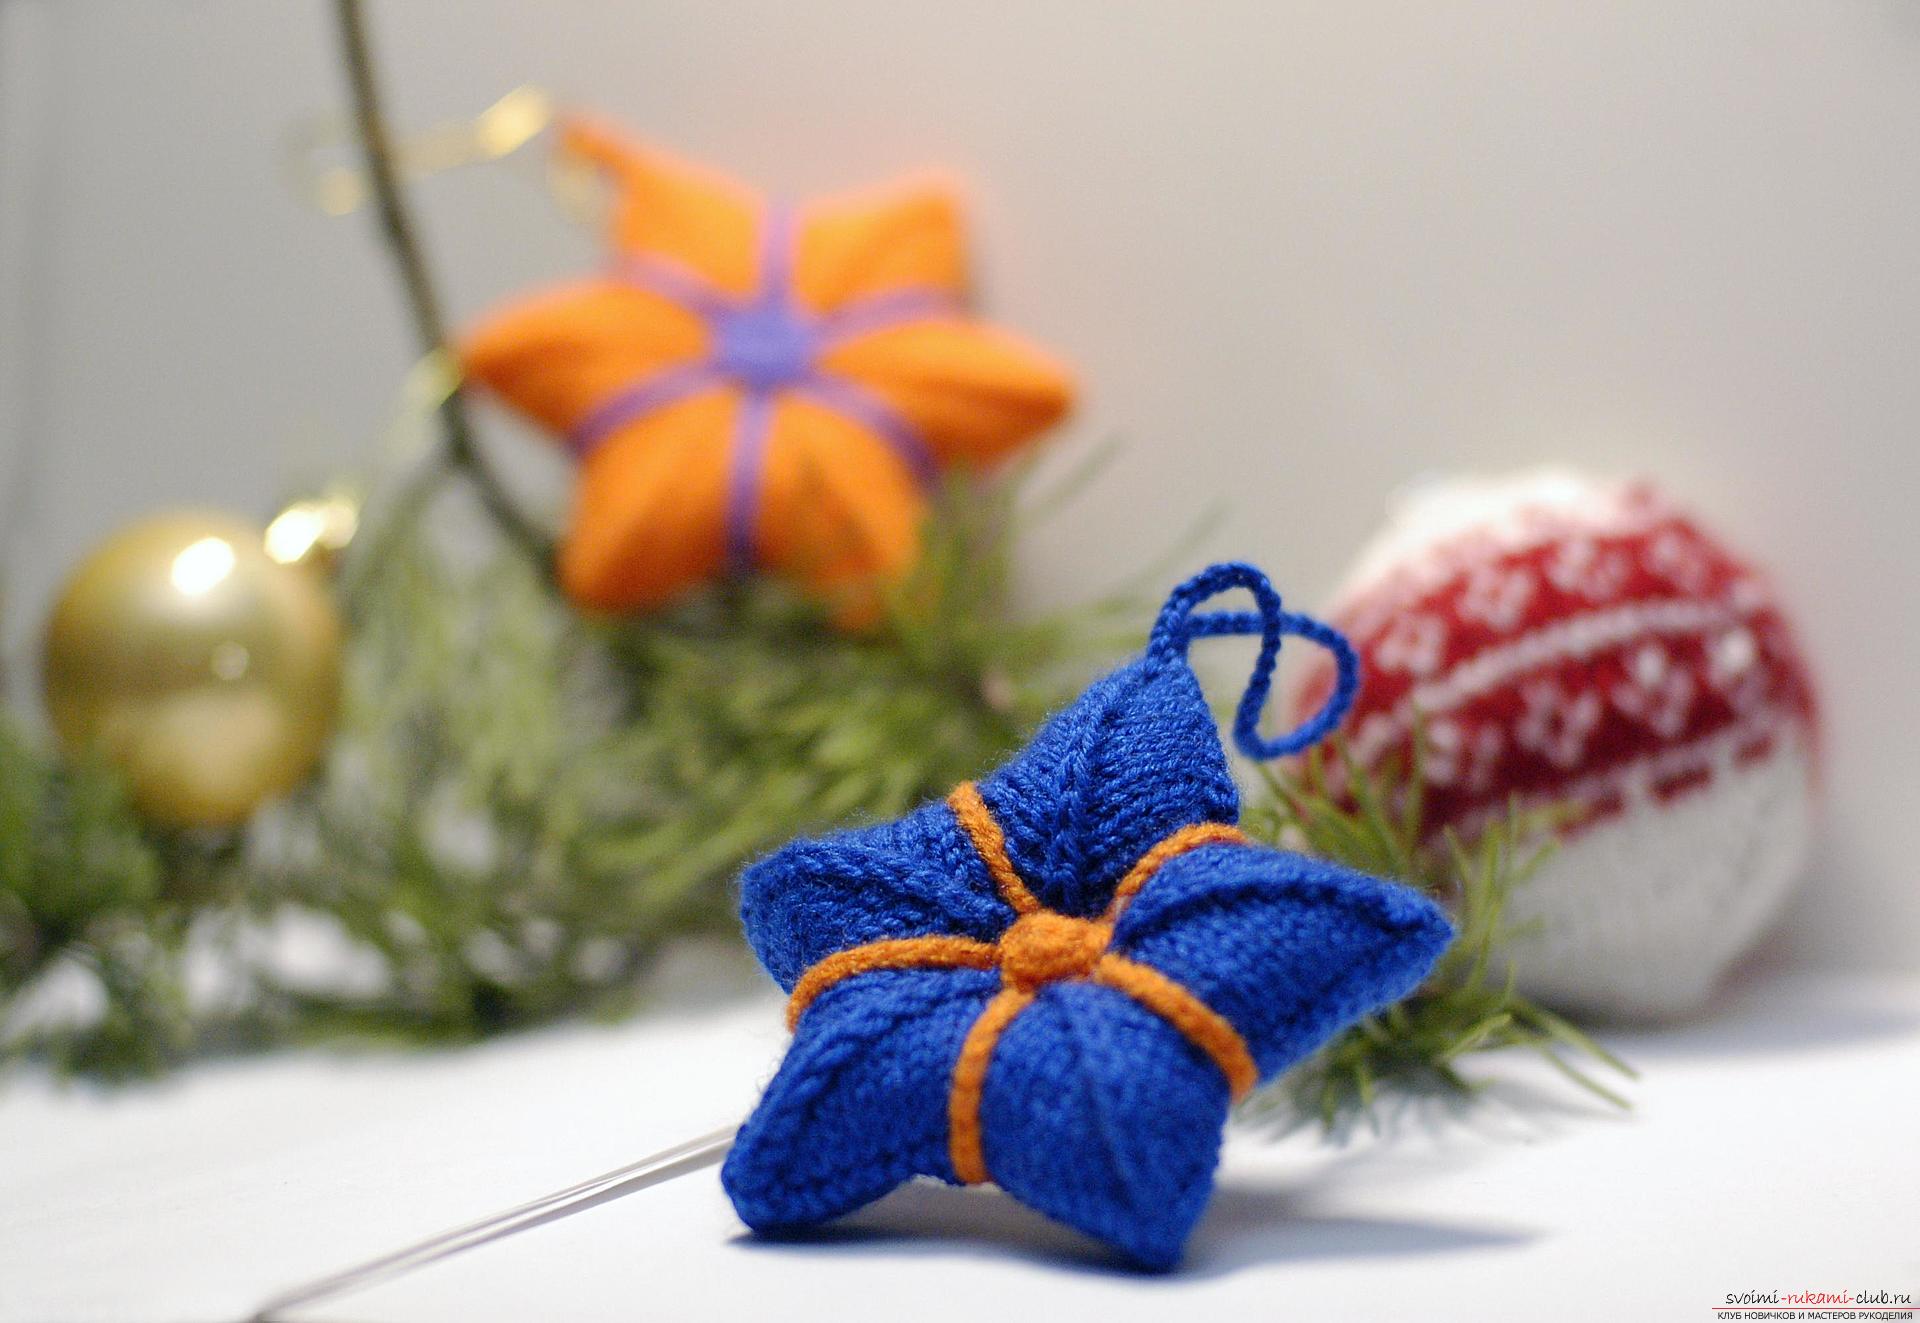 To begin with, we will type 100 loops. 1 row. 100 p.
 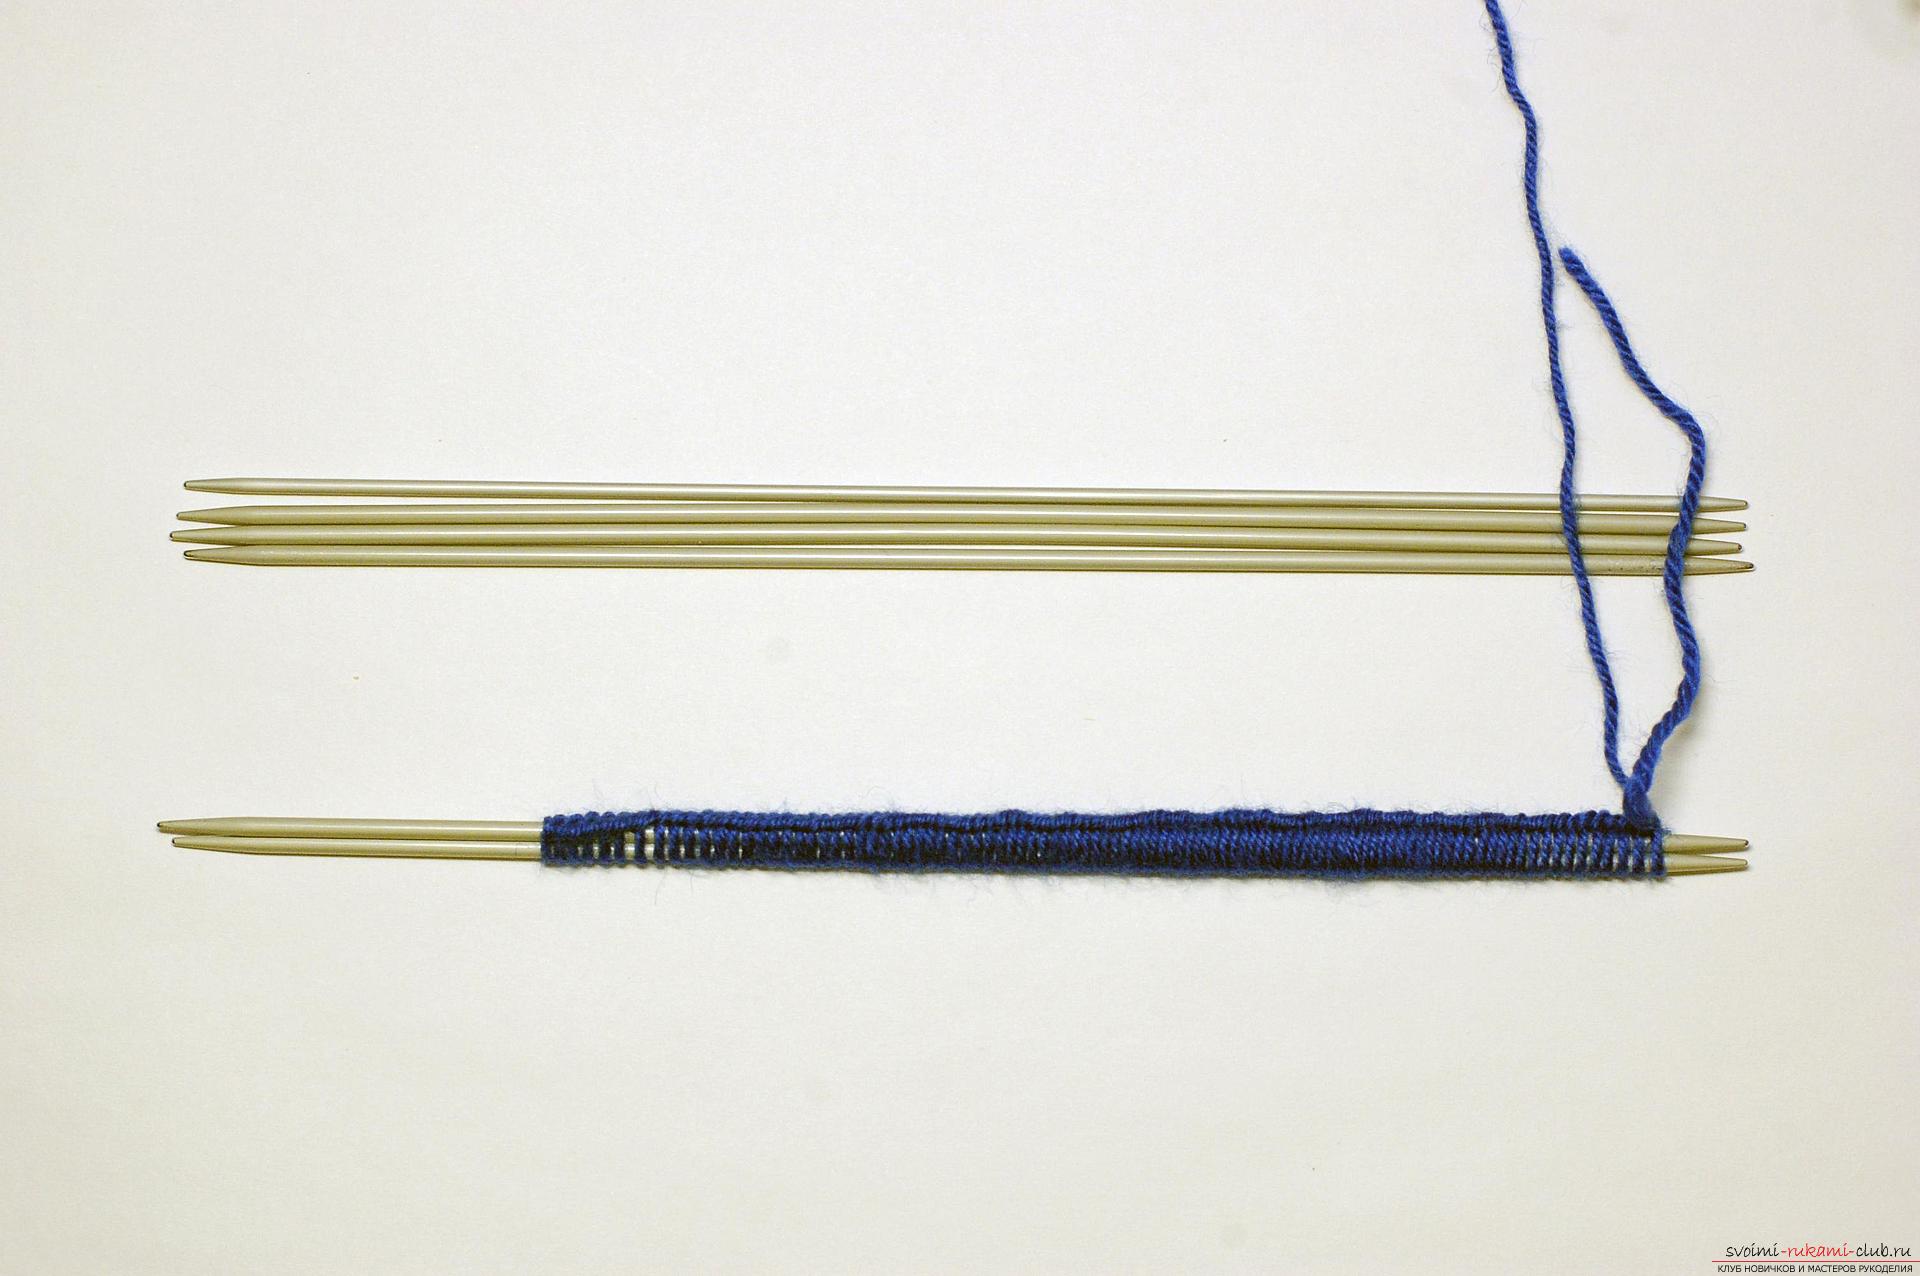 2 row. We split 5 spokes into 20 loops and knit 8 facial loops (lp) with the face loops, then remove 2 sts on the right knitting needle.
 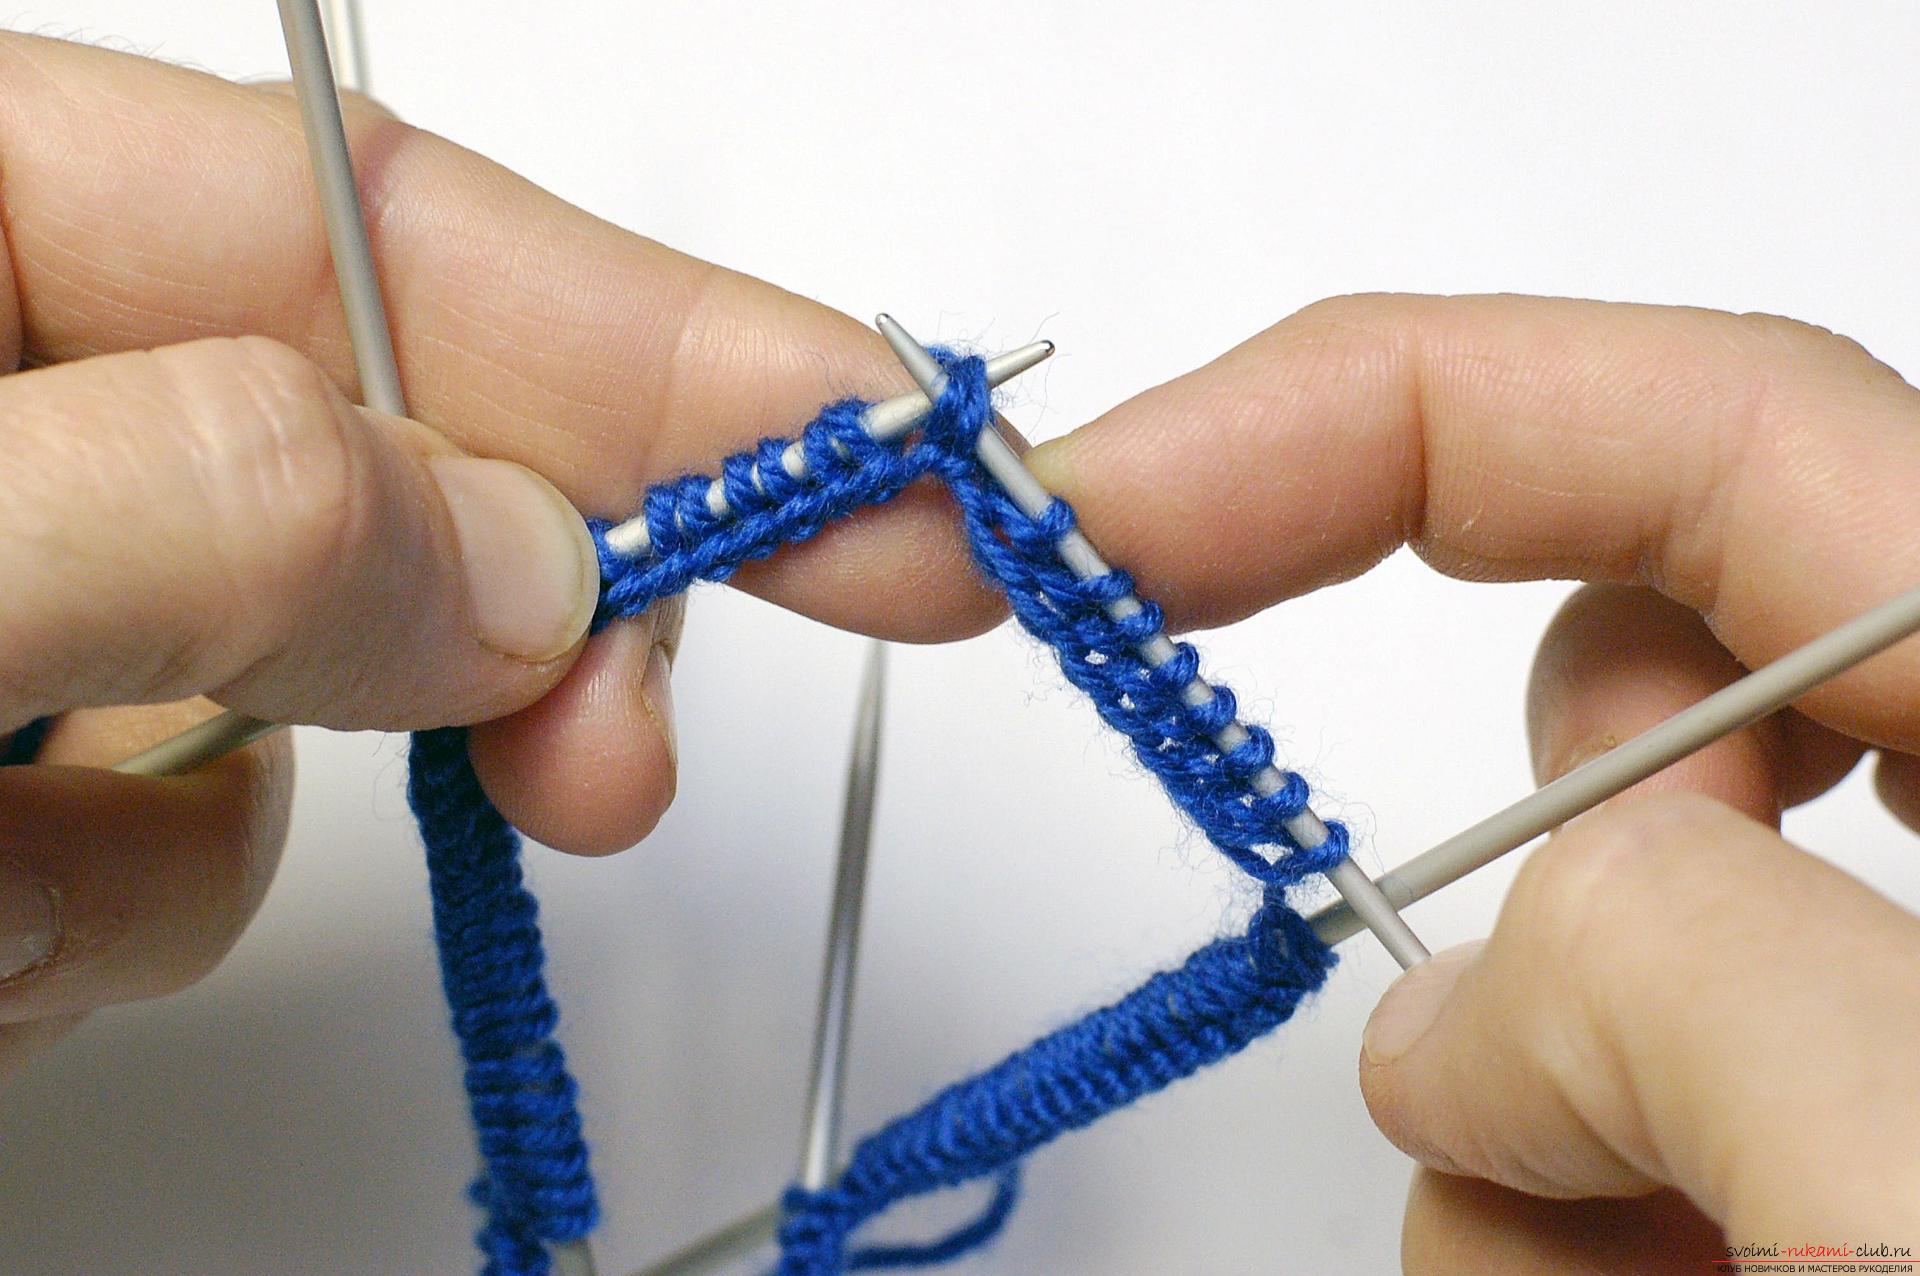 And we sew the next one in a row, like the front one.
 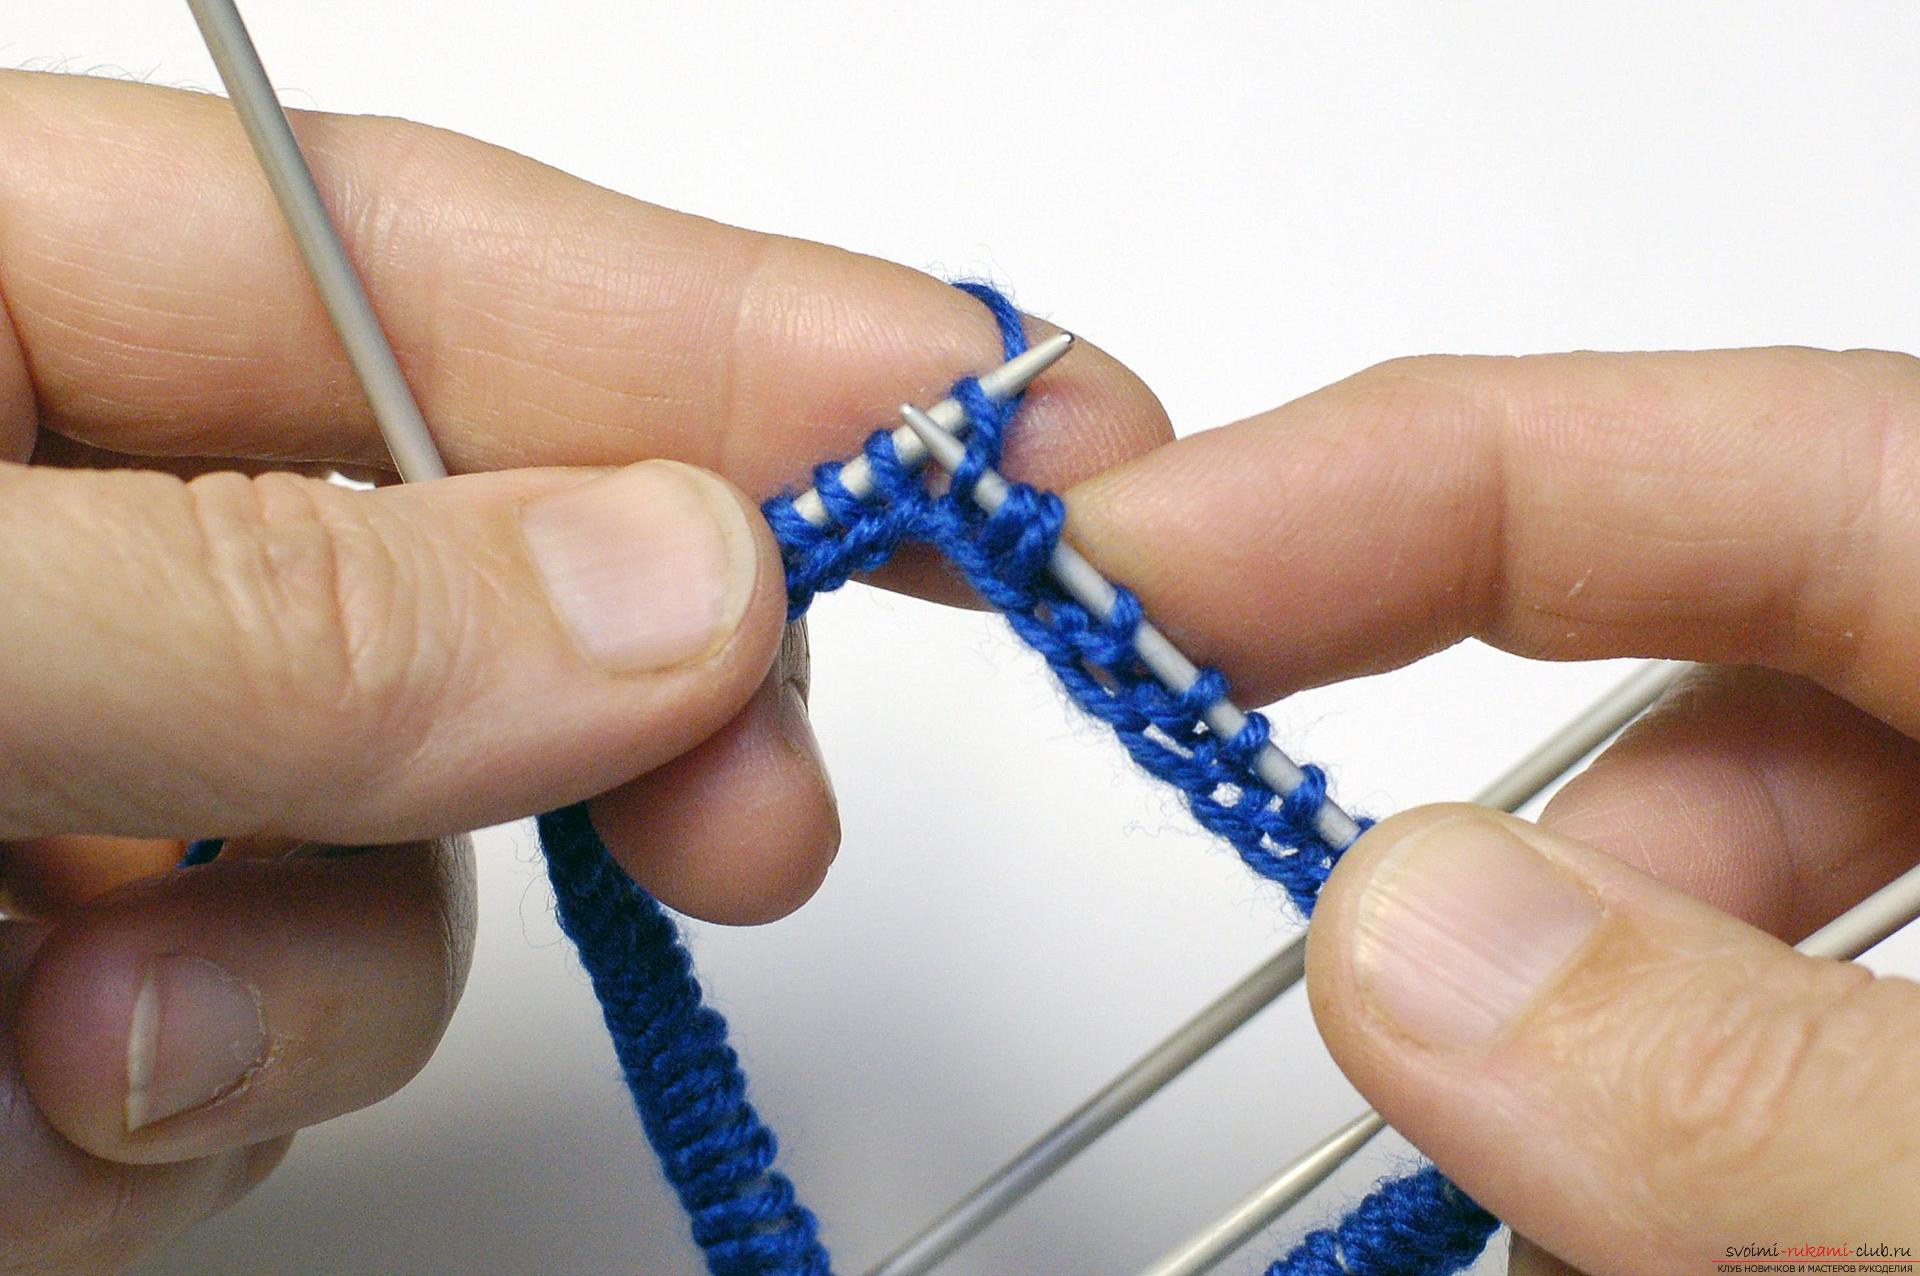 Then stretch the knotted loop into the two taken off.
  And leave it on the right spoke.
 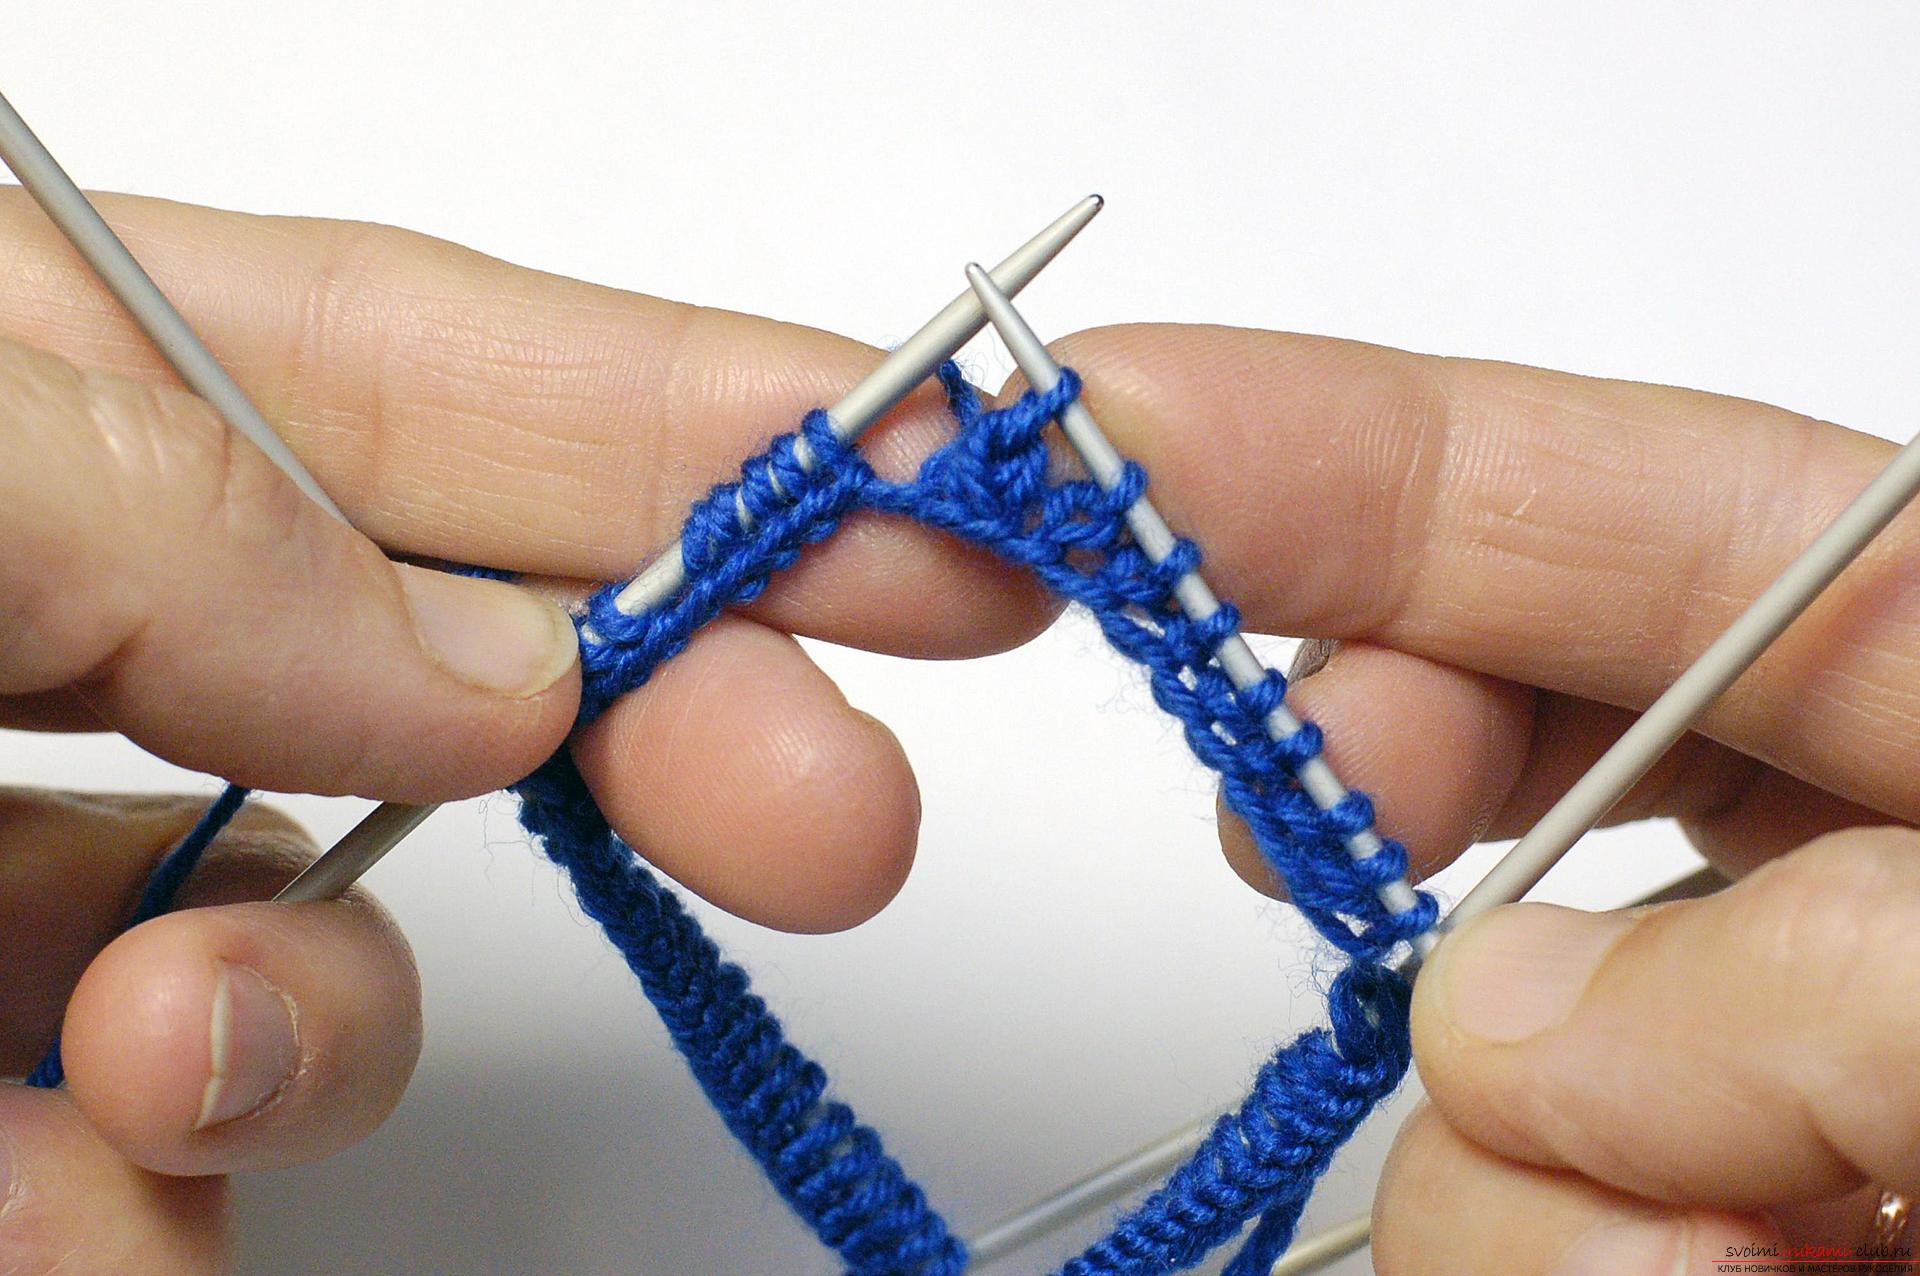 Next, we knit another 8 lb and 1 purl (un). So does the broach. Due to the broaching we reduce the number of loops on the spoke by 2, and in the row by 10. We knit all five spokes. 3 row. 7 lp, broach, 7 lp, 1 ip. A convex, volumetric pigtail begins to form on the site of the broach, which will later determine the spout of the star's beam. And in place of the back of the loop is a groove.
 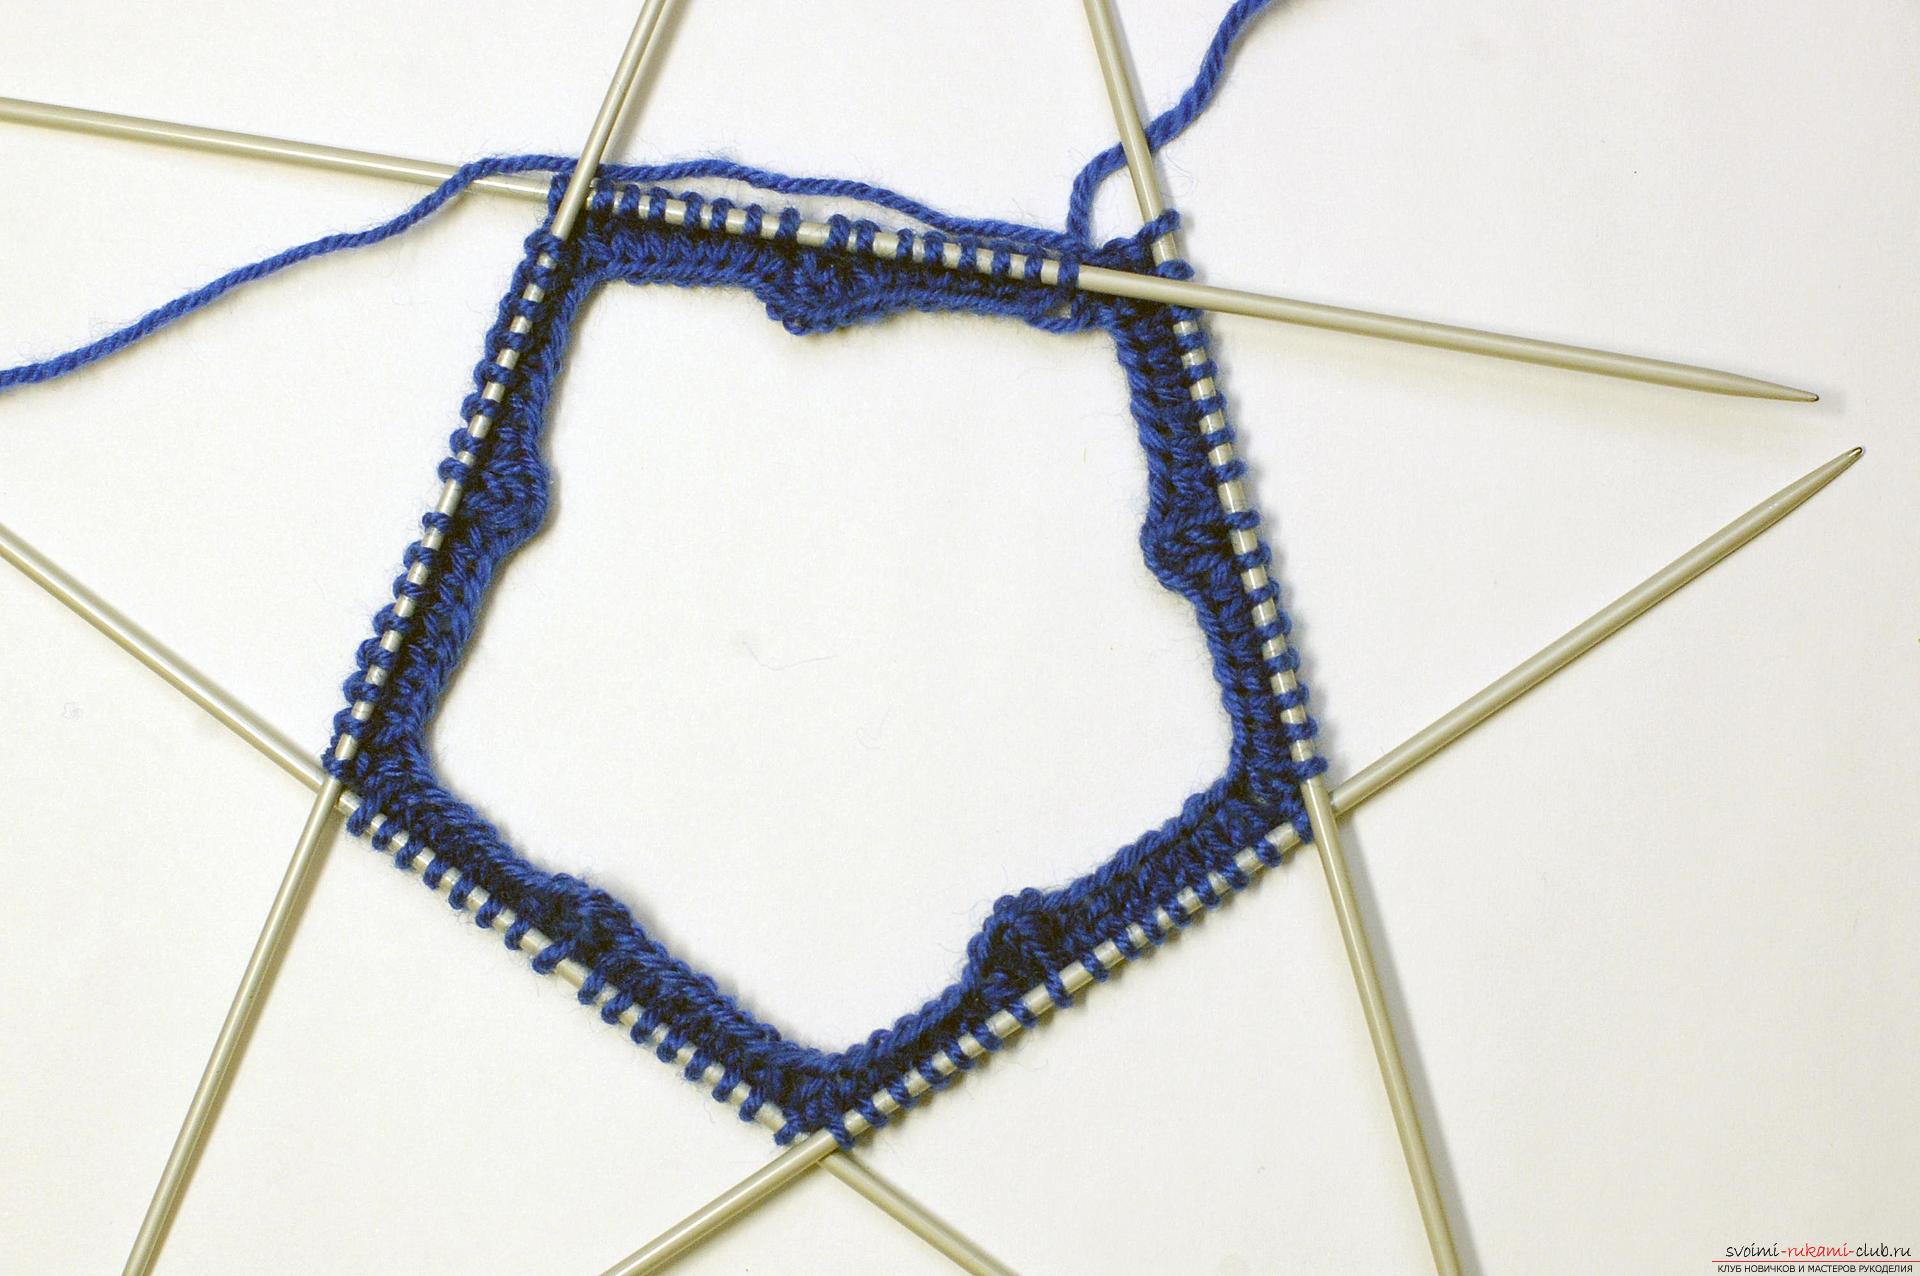 4 row. 6 lp, broach, 6 lp, 1 ip.
 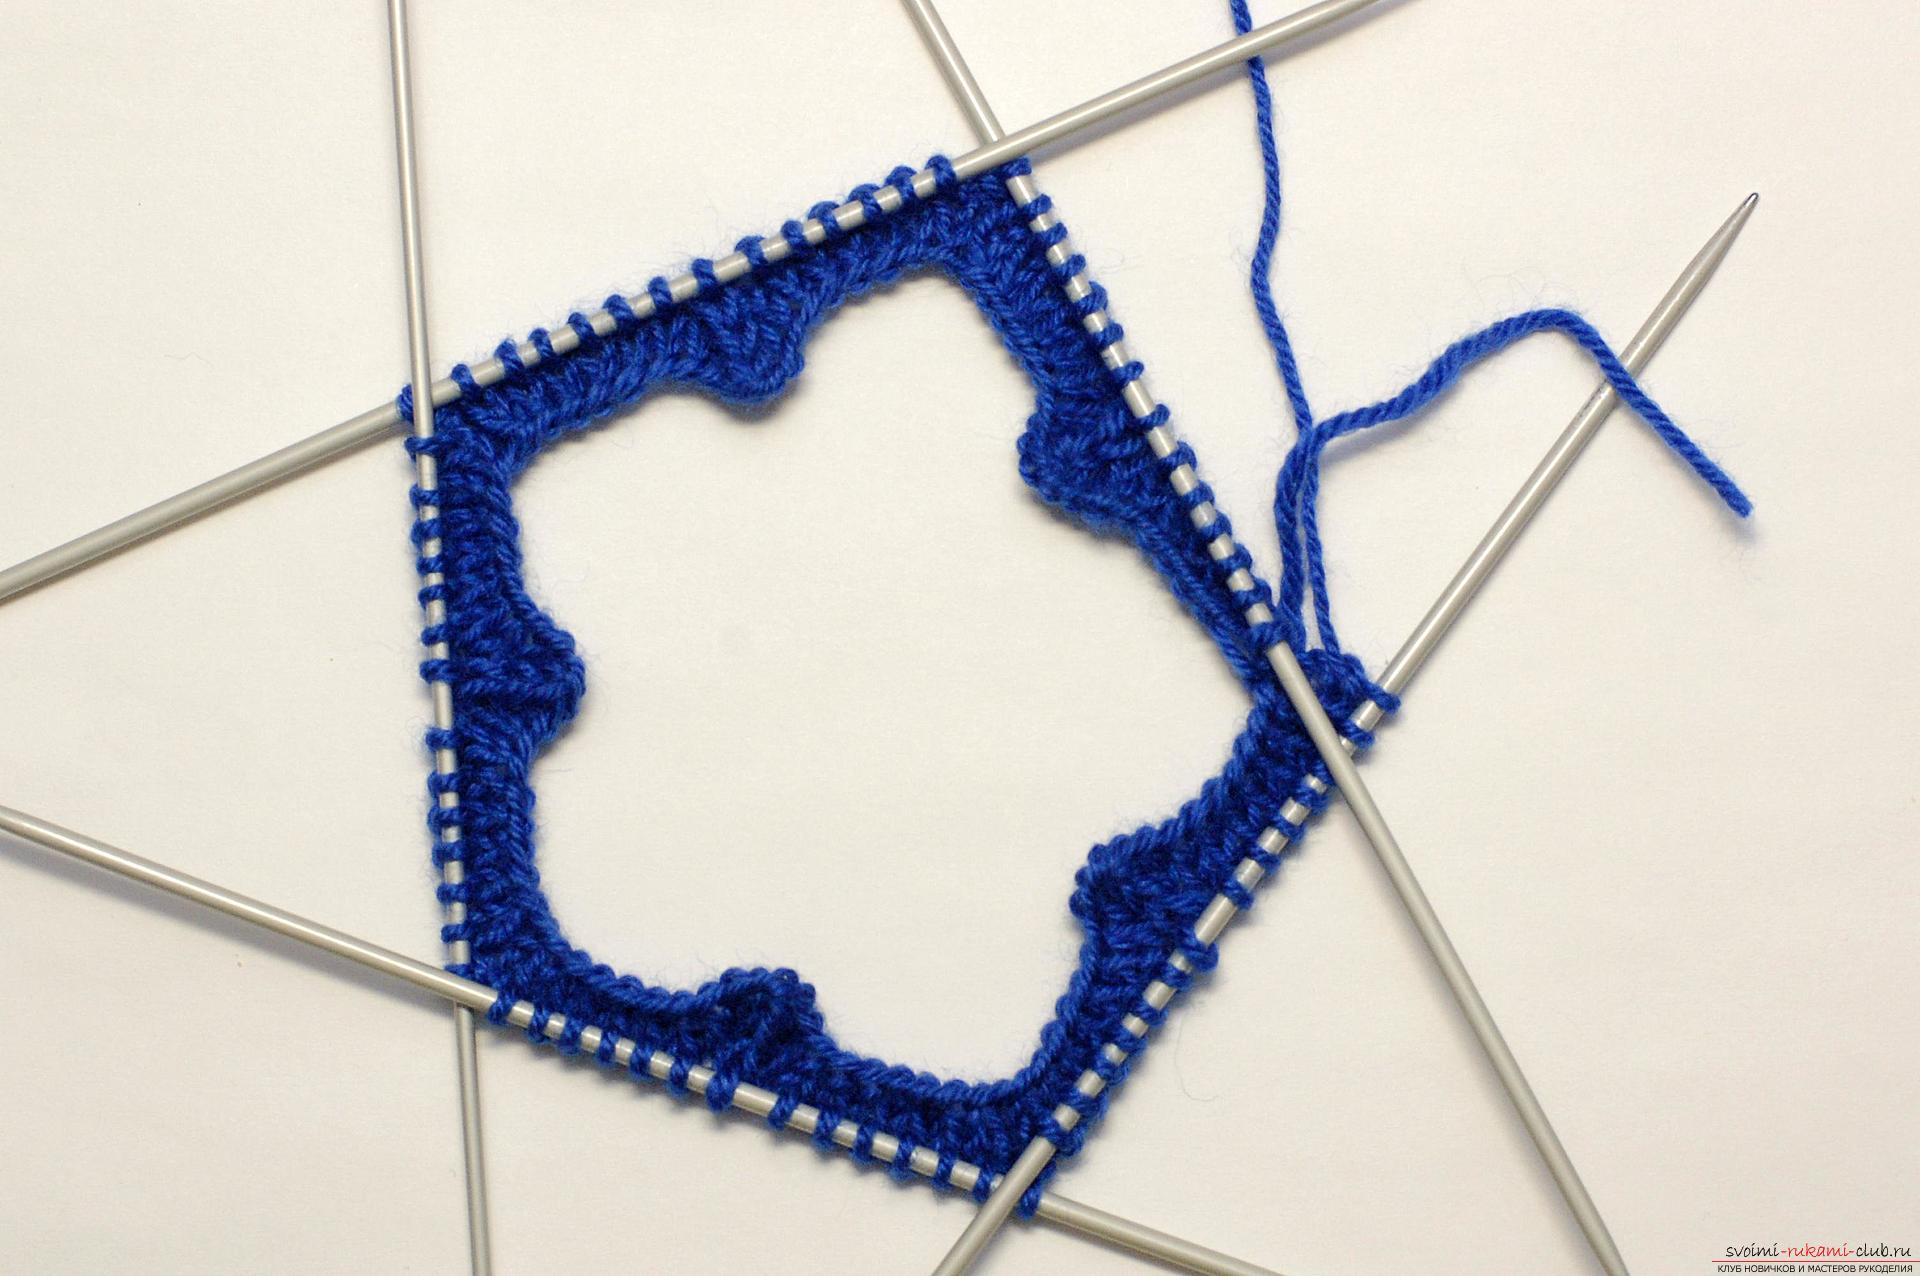 5 row. 5 lp, broach, 5 lp, 1 ip.
 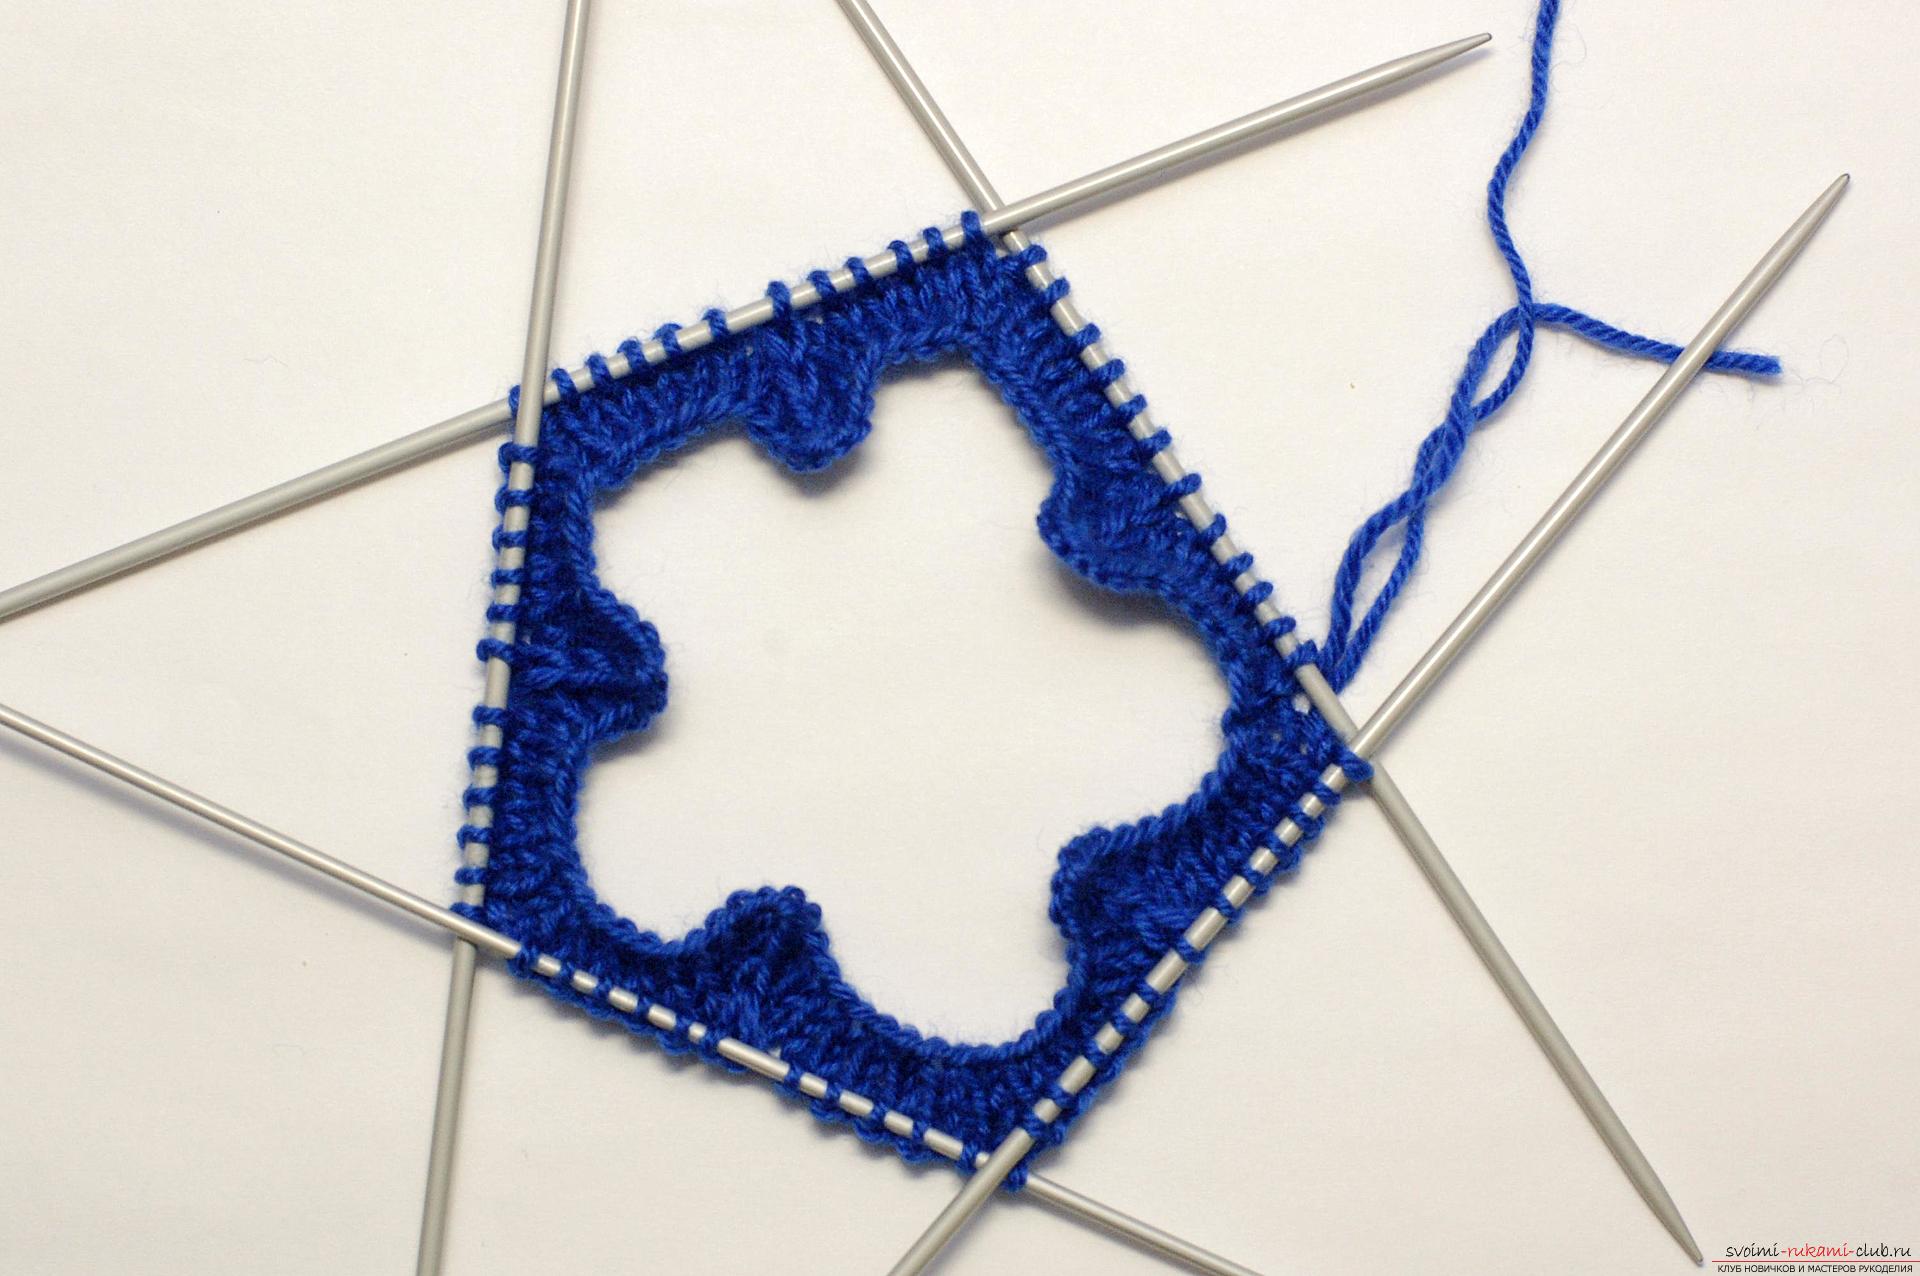 6 row. 4 lp, broach, 4 lp, 1 ip. 7 row. 3 lp, broach, 3 lp, 1 ip. 8 row. 2 lp, broach, 2 lp, 1 ip.
 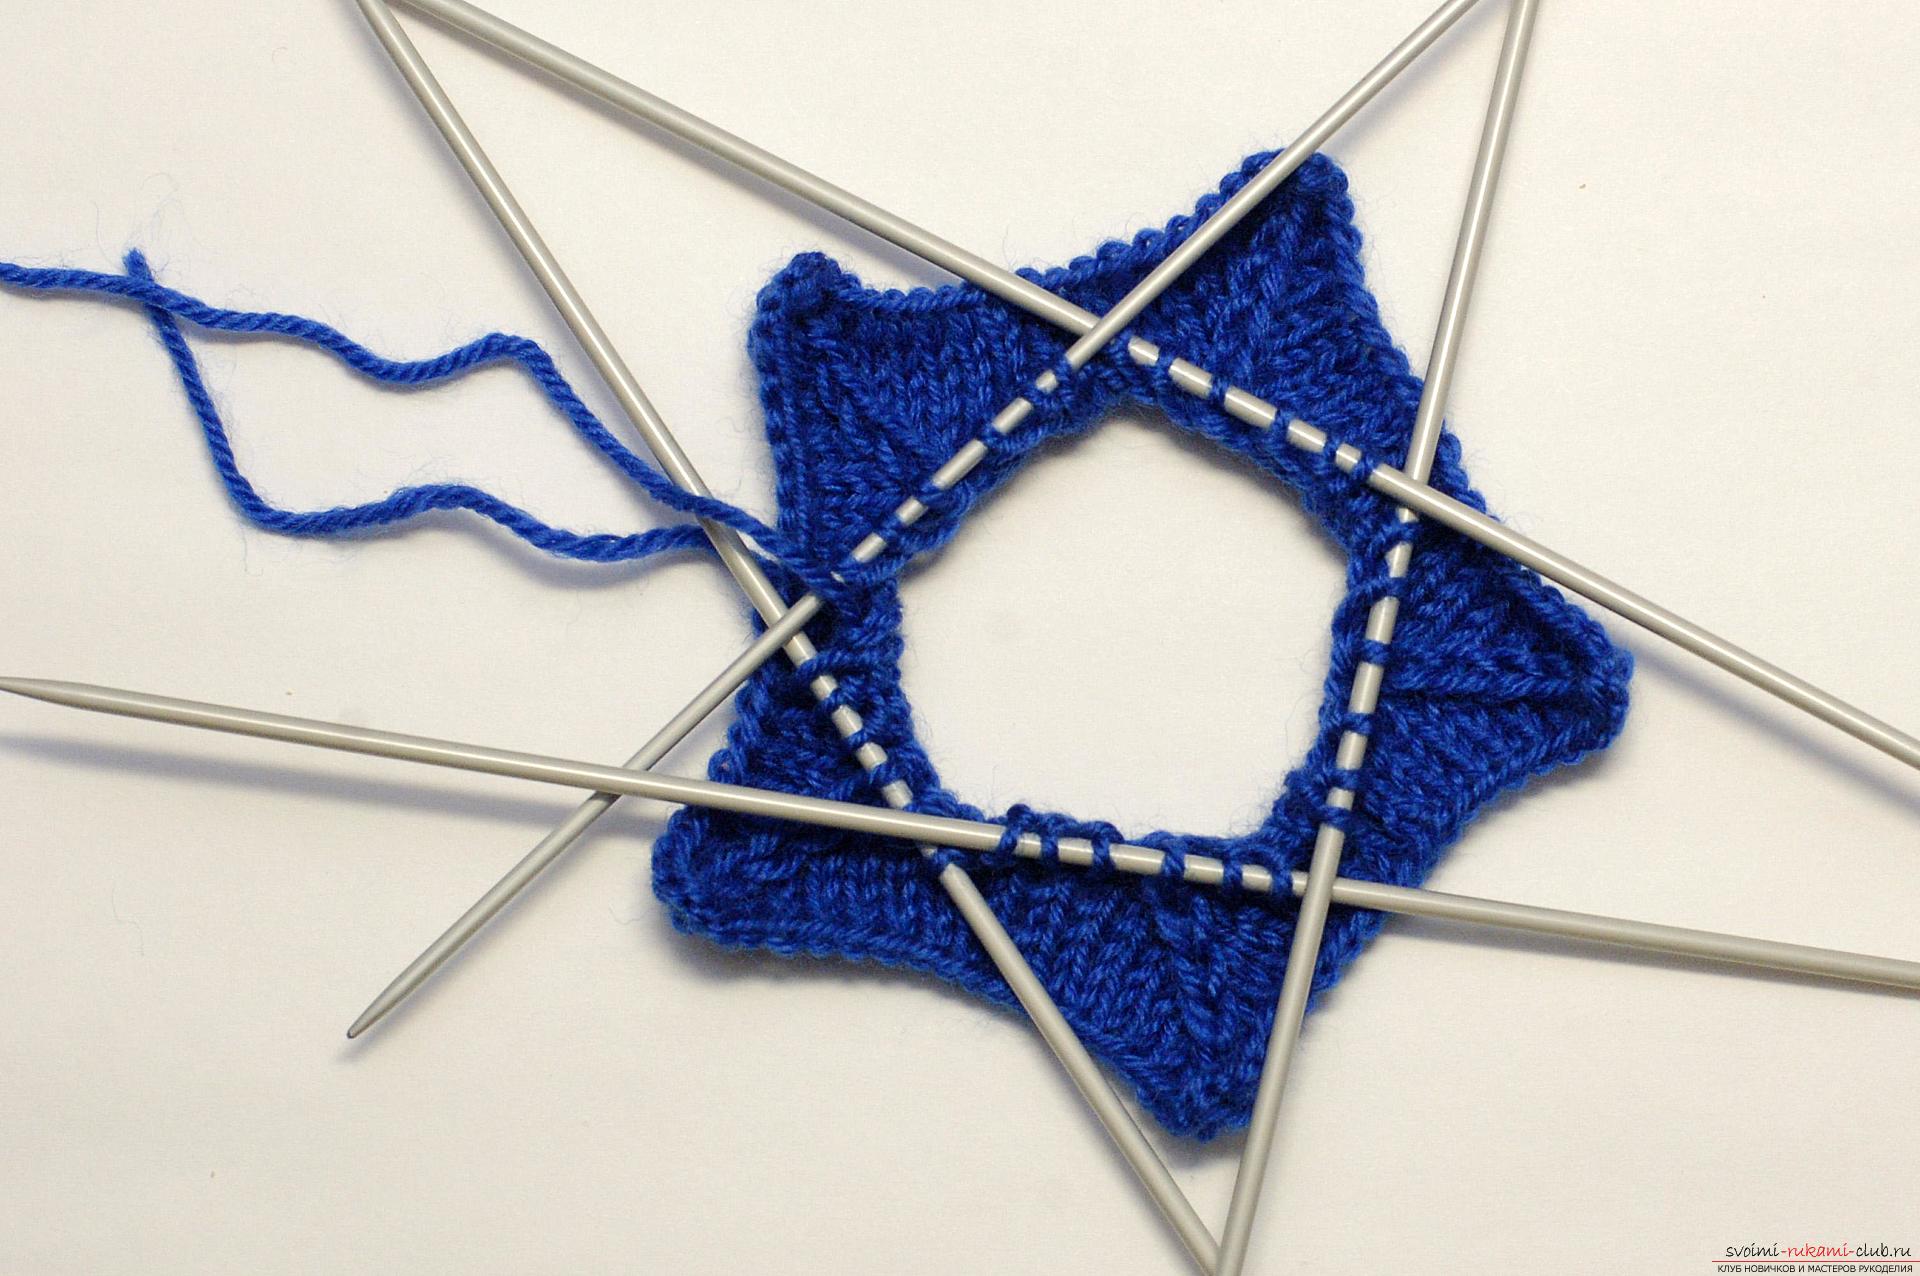 9 row. 1 lp, broaching, 1 lp, 1 ip.
 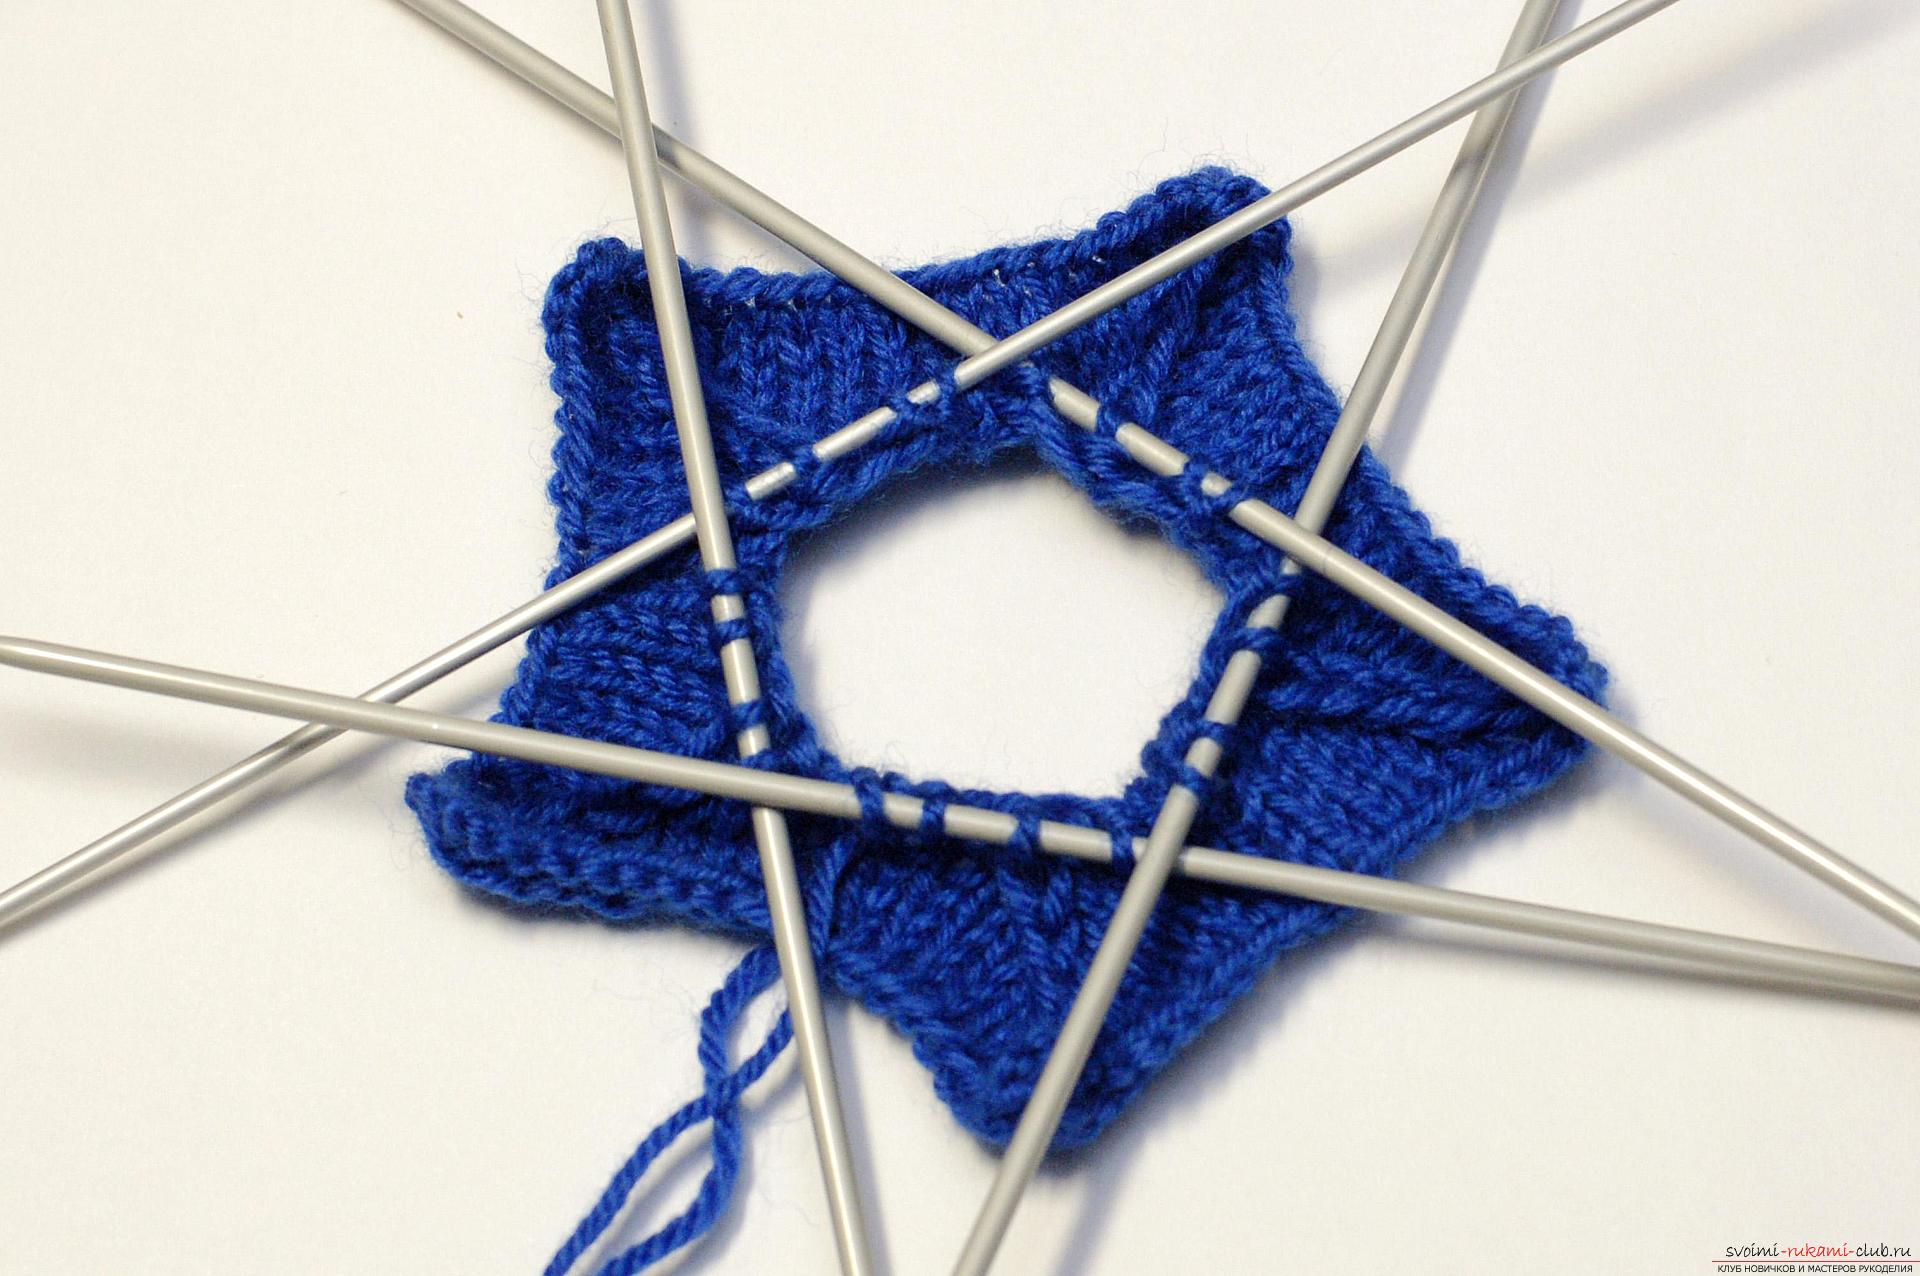 10 row. There are 4 loops left on the spoke. We remove the first two loops as a broach, we sew 1 lp, stretch it into two removed and we knit 1 ip. There are 2 loops left on the spoke.
 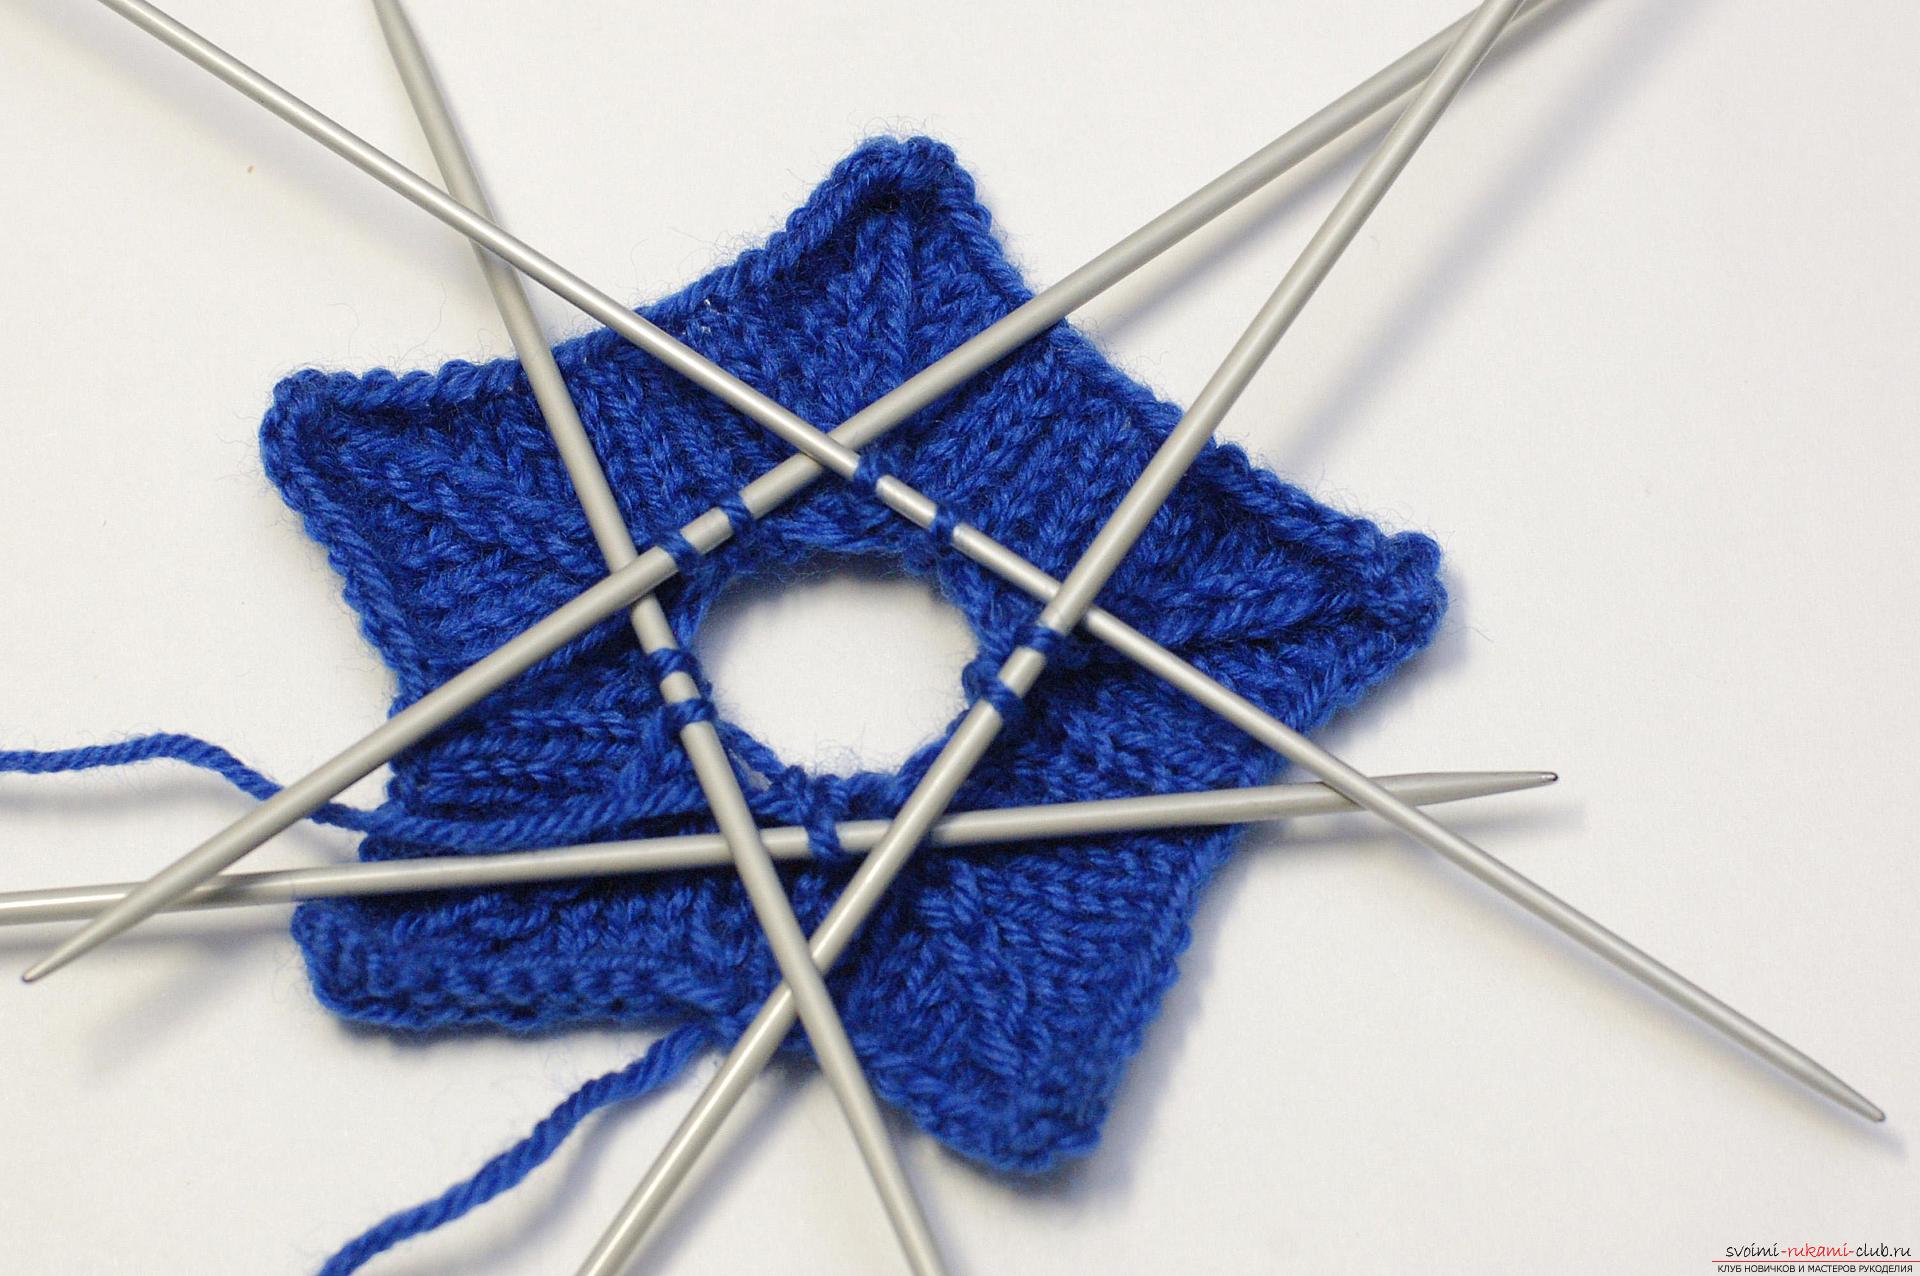 11 row. We impose two loops together on each spoke, cut off the thread and we pull the middle out by stretching the thread inside the loops with the help of a hook.
  Now you can connect the edges of the details with a hook, or you can use a needle with a large eye.
 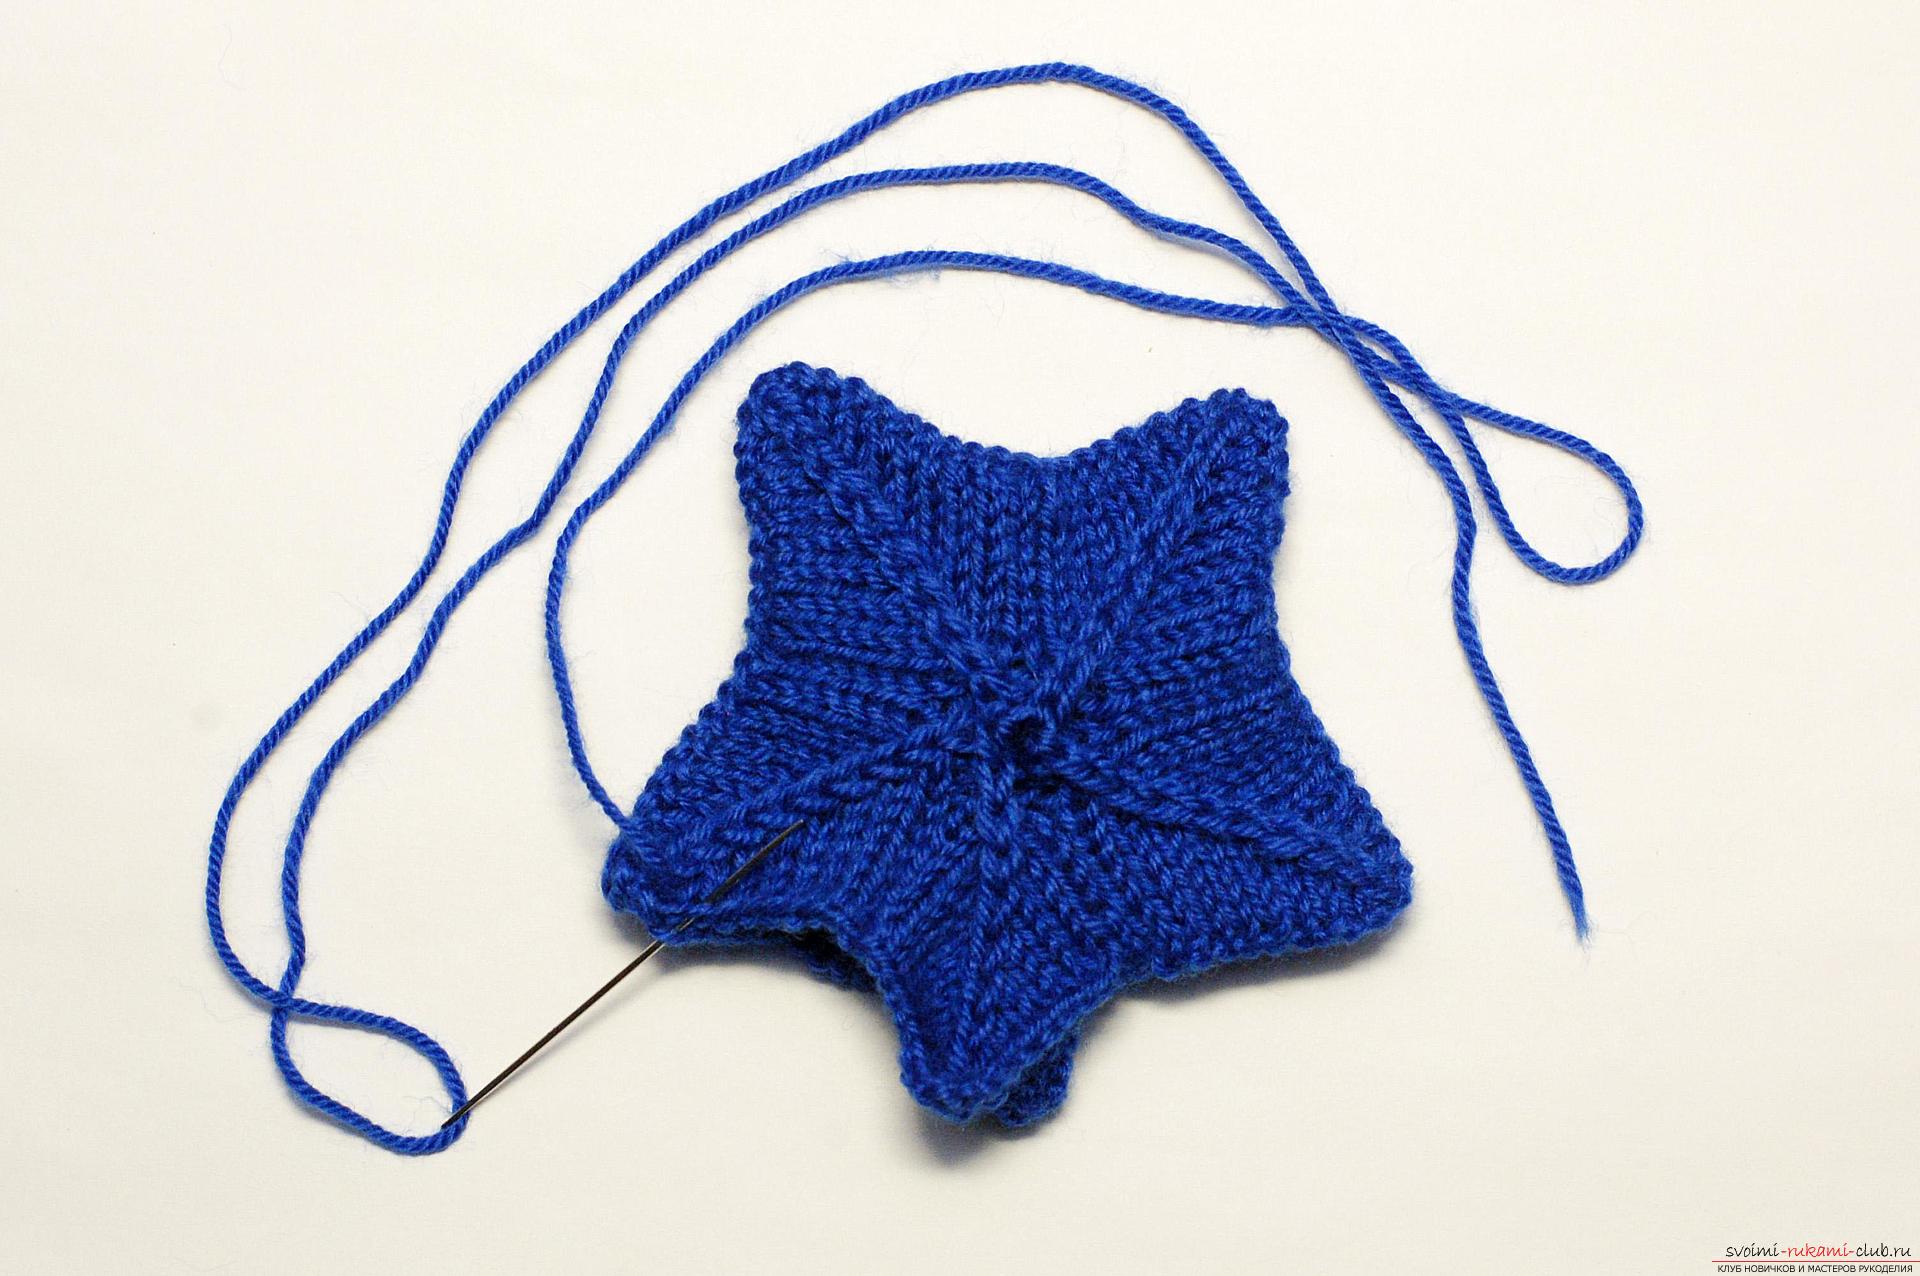 When one ray remained unshielded, it is necessary to fillan asterisk. It is better to fill in small portions, evenly, so that there are no lumps and holes on the surface. From the rest of the sewing thread, you can raise a crochet chain of air loops and make a loop, for which and hang our cozy star on the tree.
 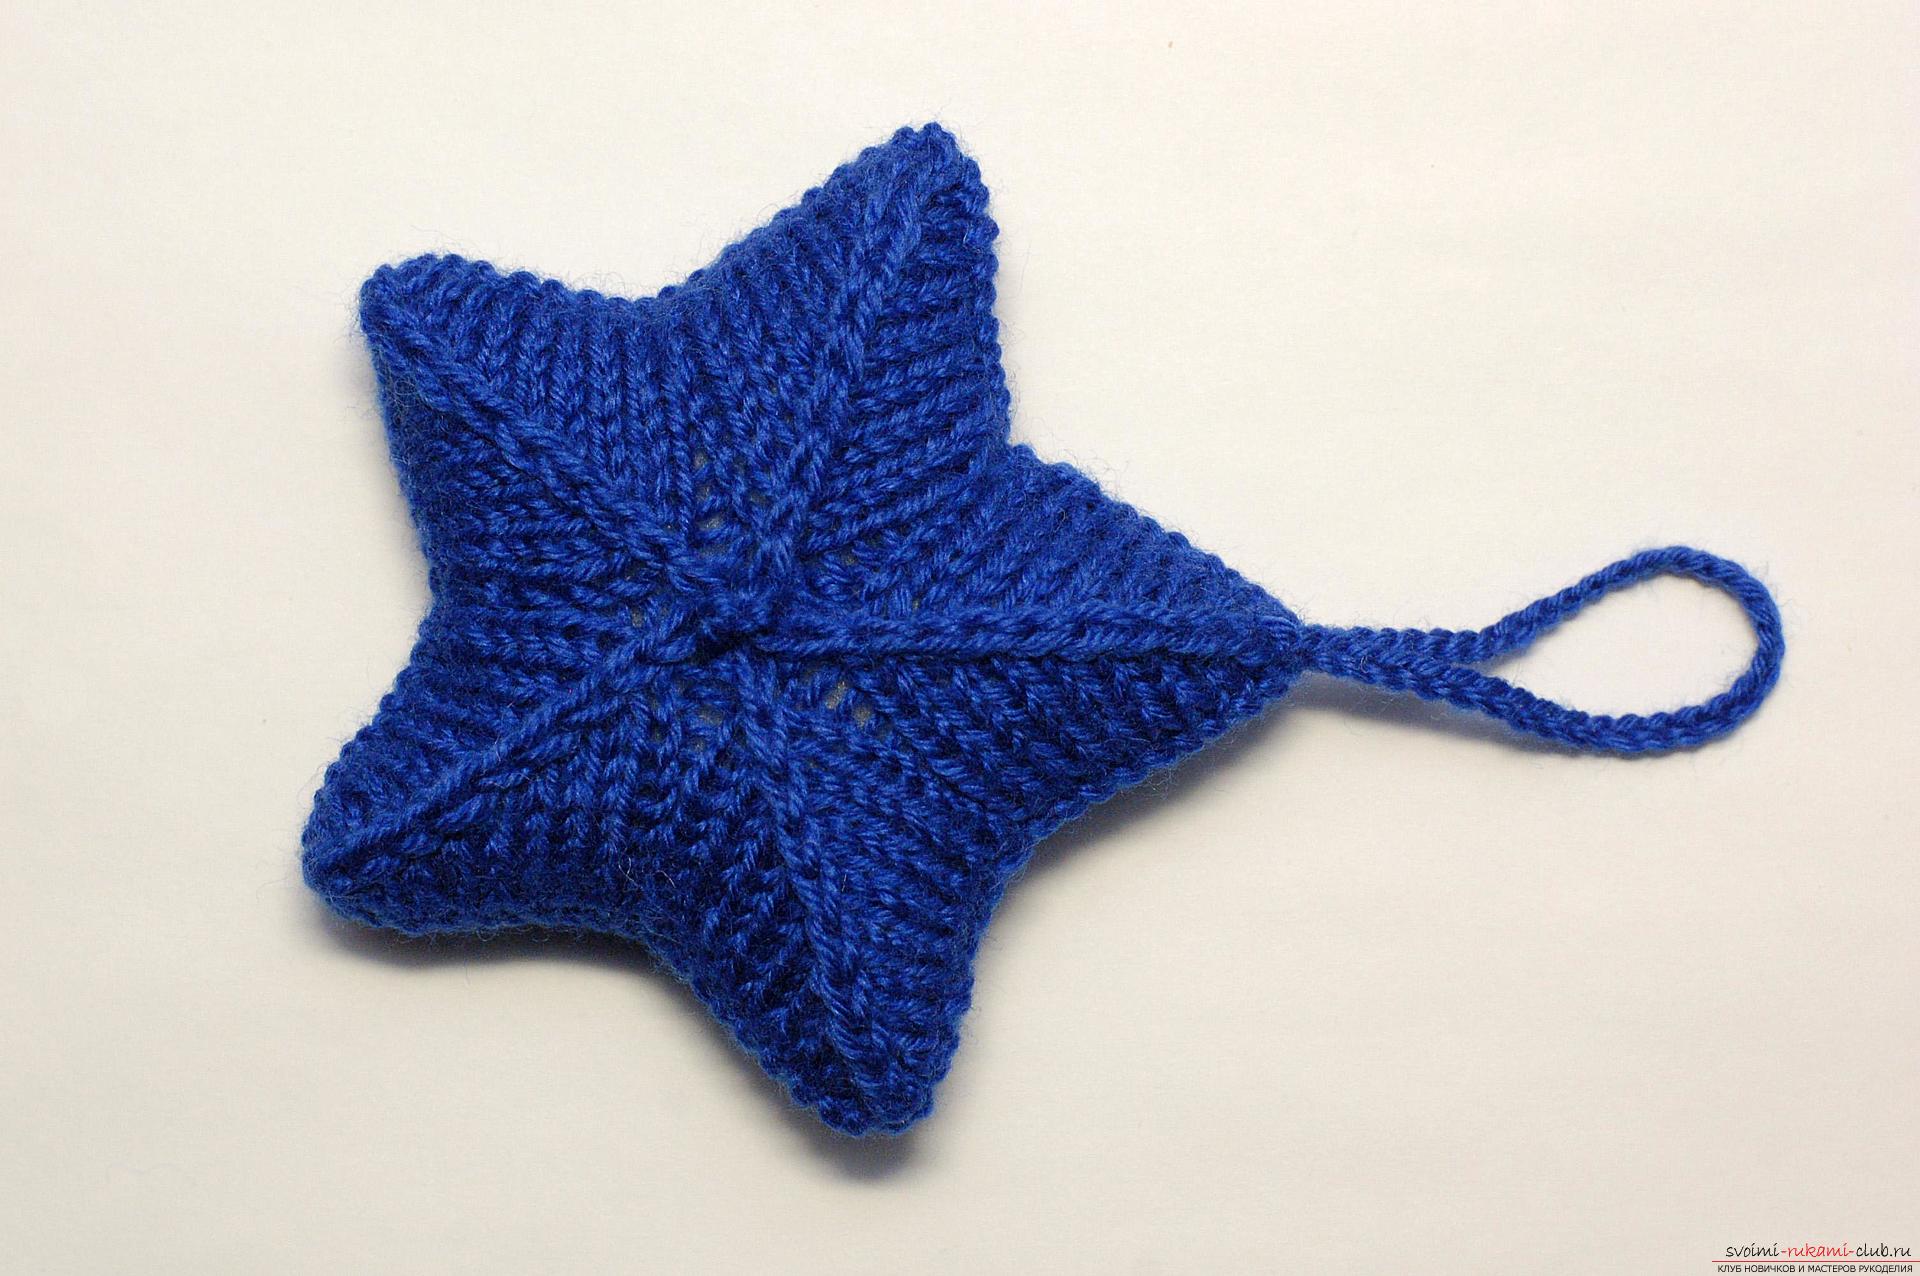 Dear masters and needlewomen, Happy New Year and Merry Christmas!
Comments
Related posts:
 This master class is intended for those who want to learn how to make a Christmas tree.
 This master class on knitting slippers will teach you how to knit warm and comfortable slippers with knitting needles.
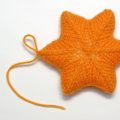 Master class of New Year's adornments will teach how to knit a knitted star on a Christmas tree
 This master class with a knitting pattern will teach you how to tie a suit for a newborn or babe with knitting needles.