
This master class will teach you how to crochet children's clothes - a shirt with a sieve net
The growth of 80-86 will require:
- hook 1.3;
- yarn: Alize "Miss", 100 grams.
Legend: vn - the air loop; CH-column with a crochet; Sbn - a column without a crochet; The main picture is a mesh net: 1СН, 2вп We will knit a shirt from below - upwards. To begin with, you need to dial a chain of 241 loops (this will be 80 cells). To have a height of 23 cm (I got 41 rows). 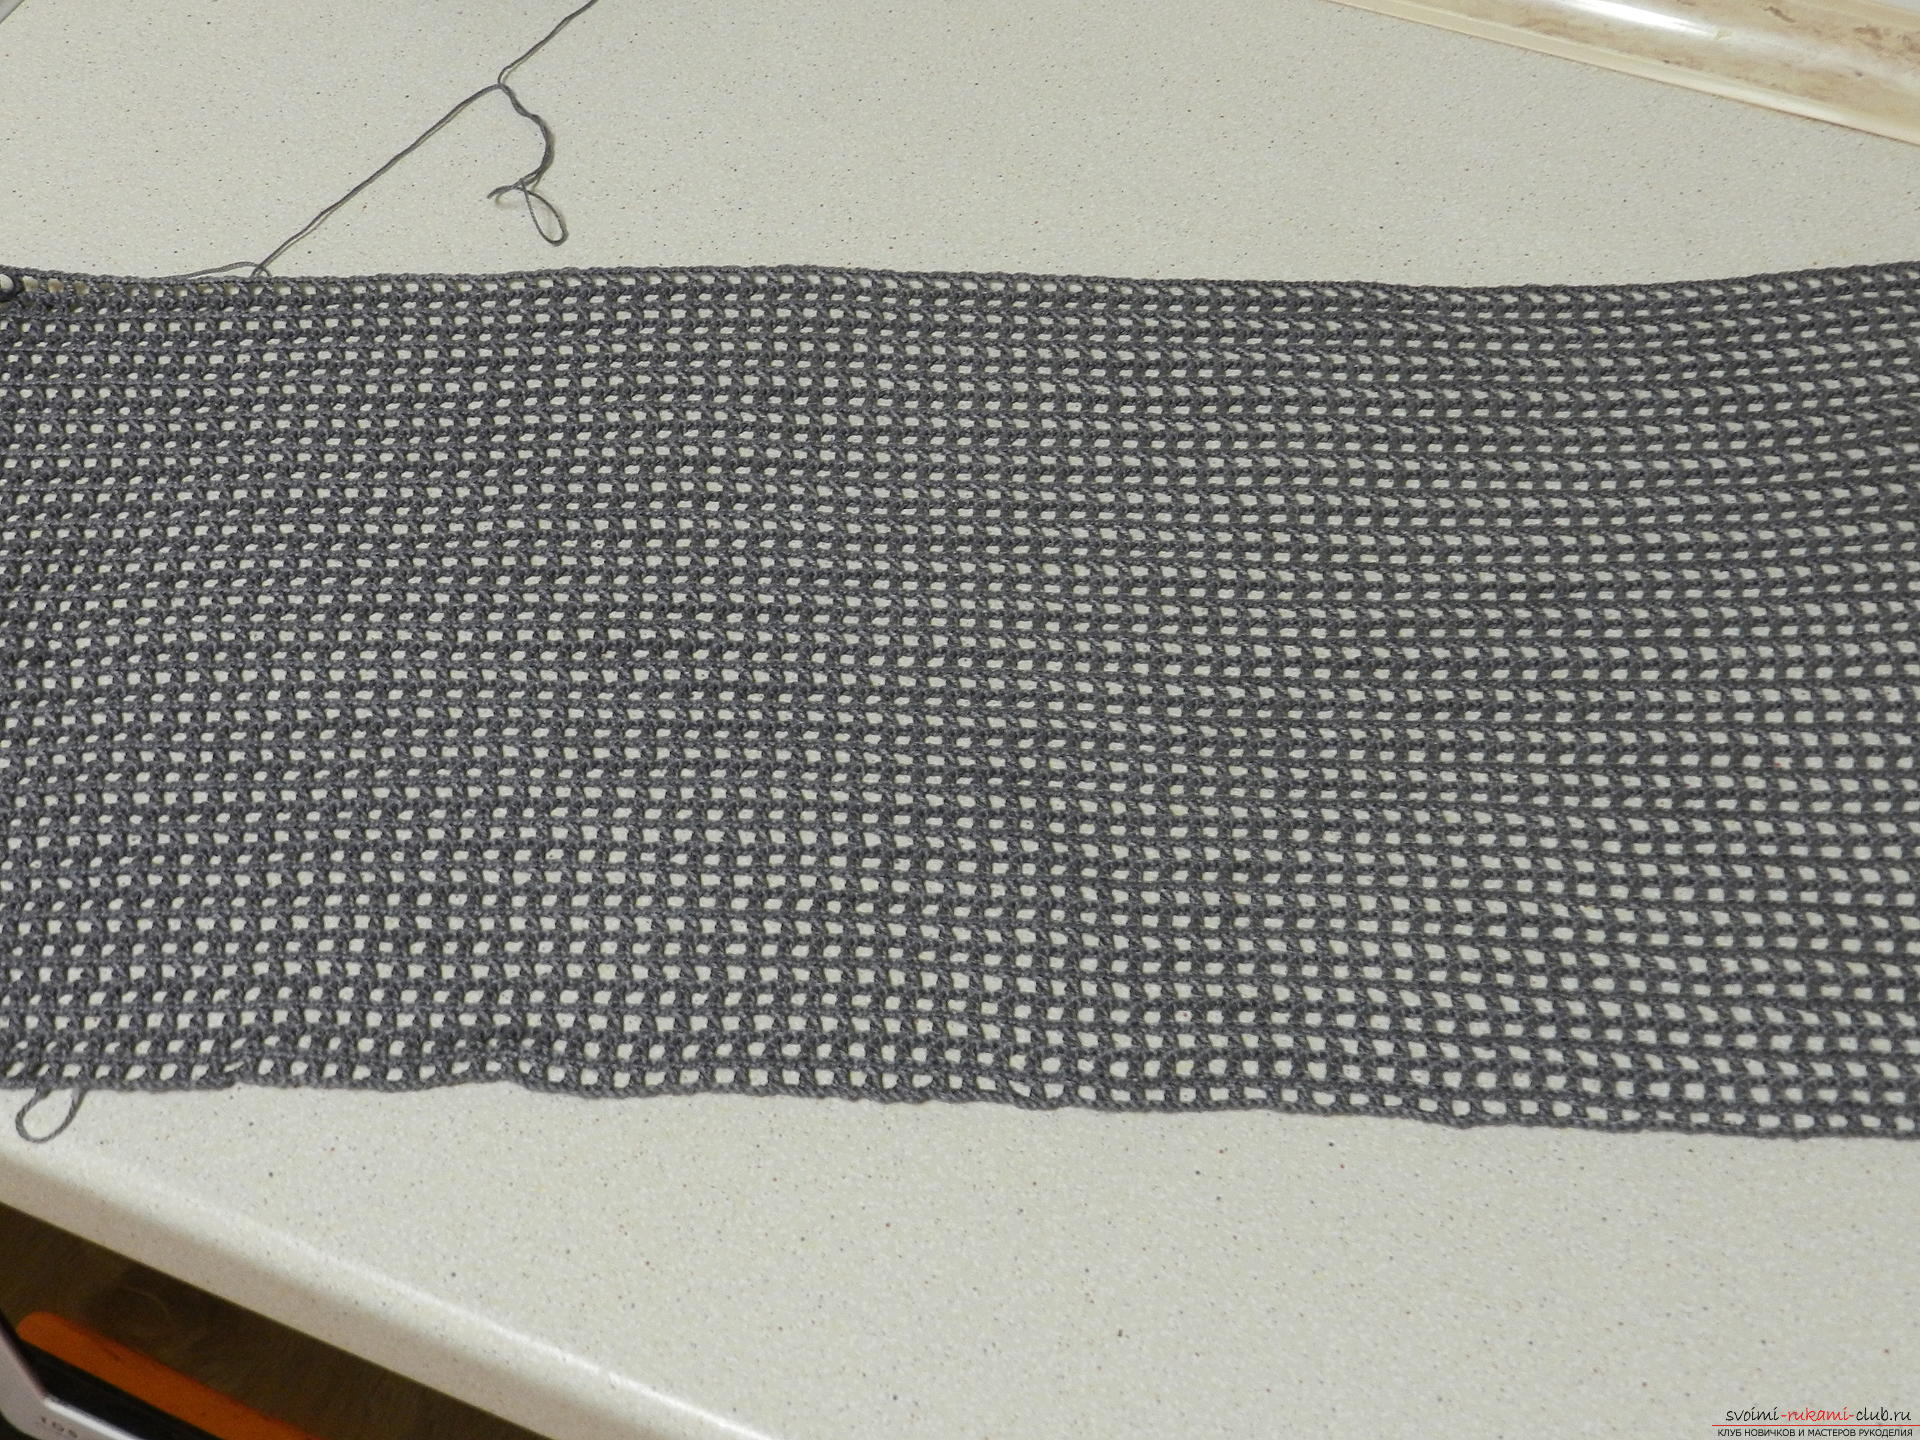 From the 42nd row we will knit the details of the gear and the backrest separately. Why do we need to share knitting:
- 16 squares - front shelves;
- 1 cell - armholes;
- 46 loops - the back.
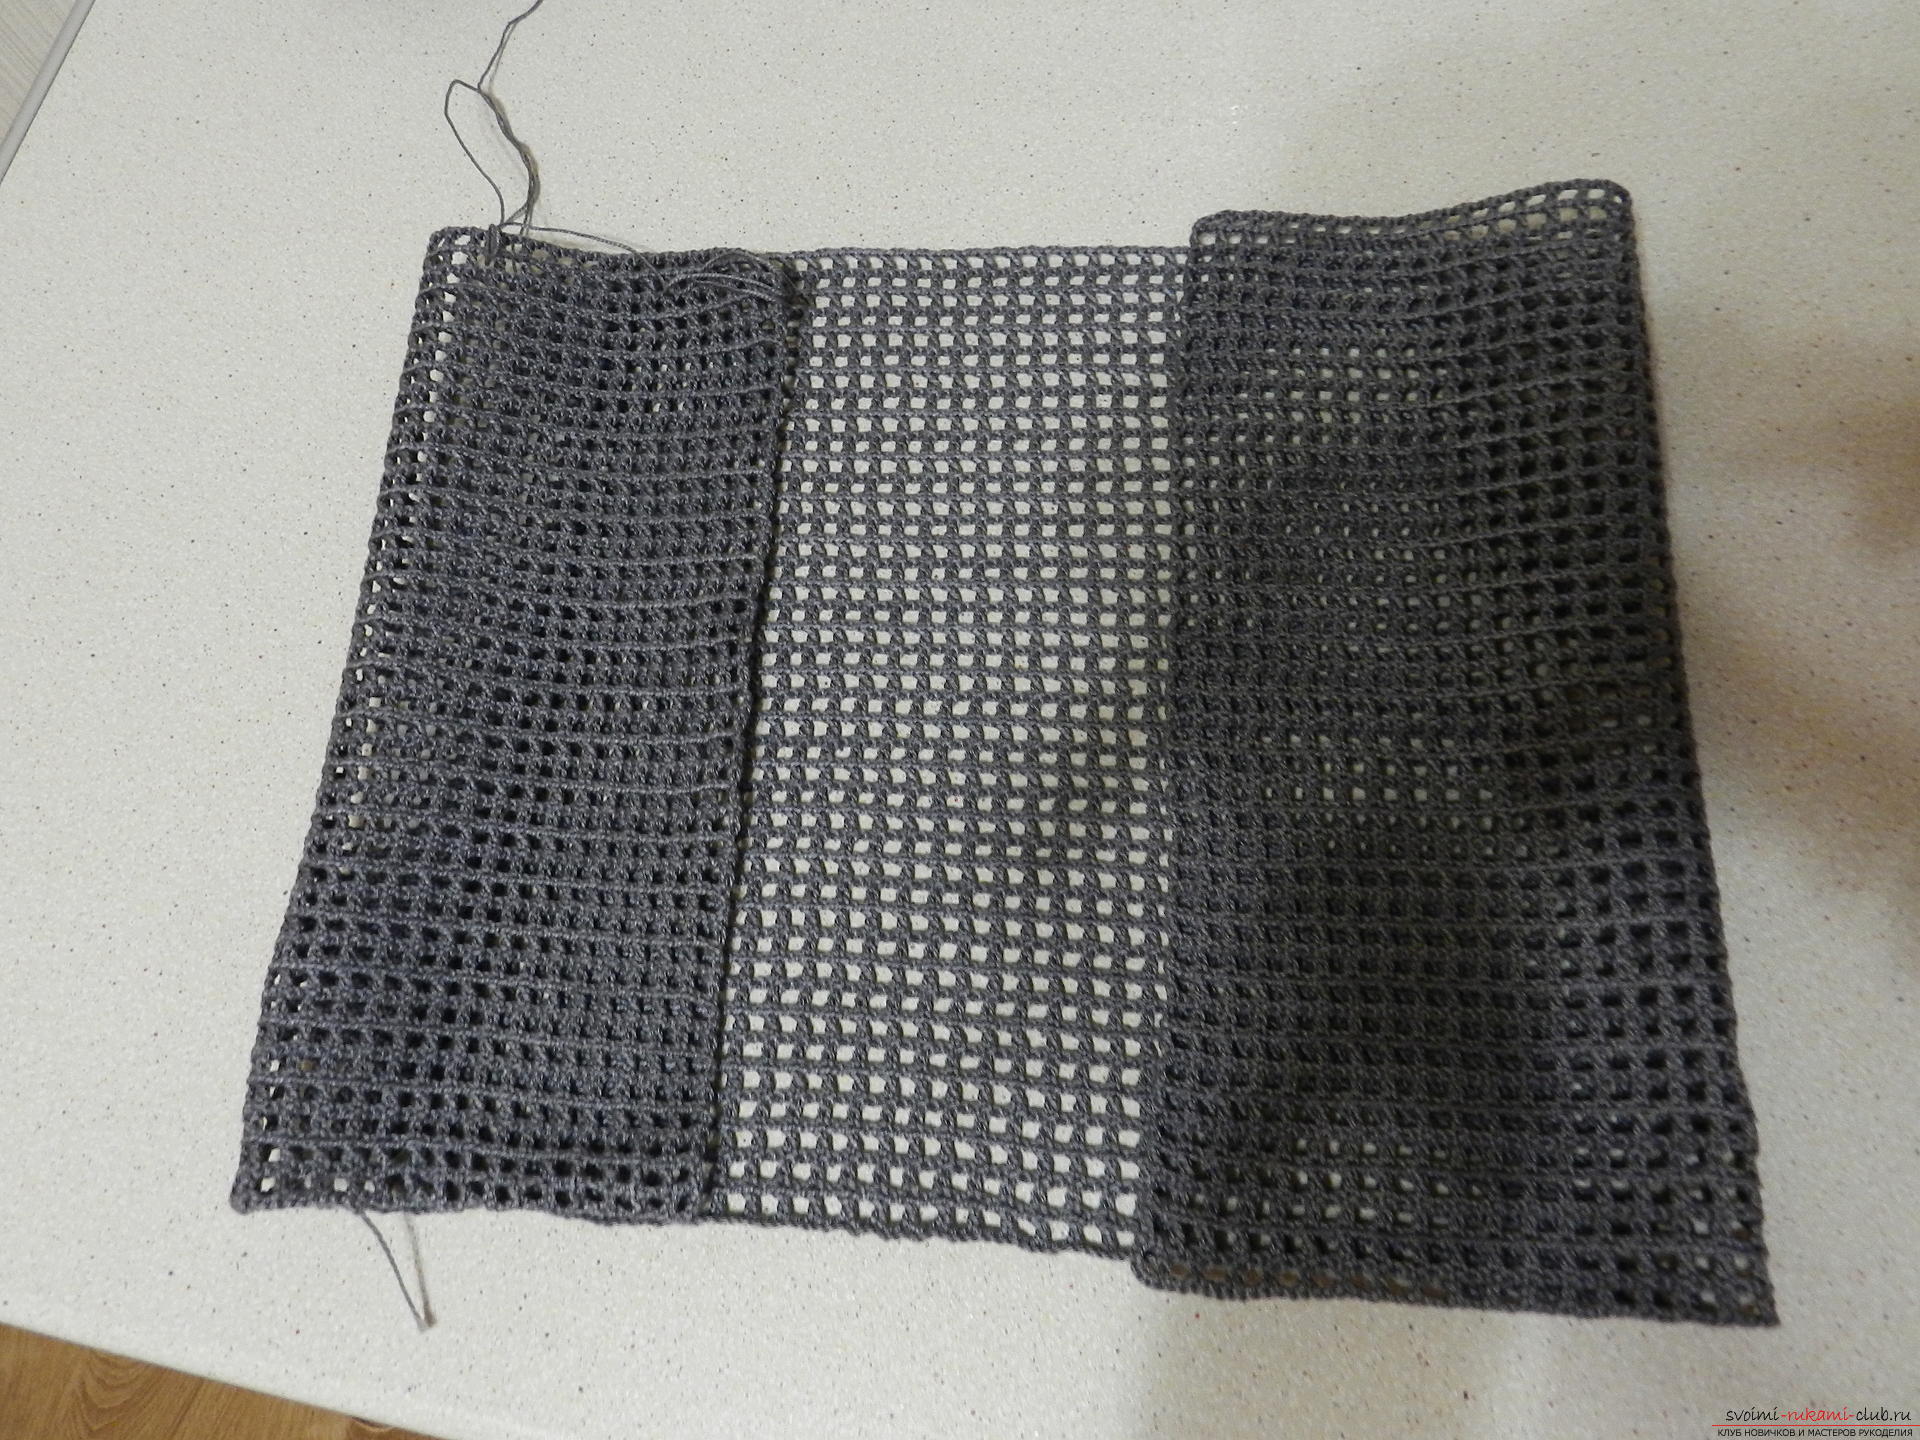 Front Shelves
  42r. - to tie up 15 cells, the 16th will be reduced (as in the diagram); 43r. - Decrease, 14 cells; 44 - 53r. - (10 rows) we knit without decrements - 14 cells; From the next row, we subtract from the other side for the neck cut: 54r. - Decrease, 13 cells; 55r. - 12 cells, decrease; 56r. - Decrease, 11 cells; 57r. - 10 cells, decreasing; 58 - 60r. - without reduction (10 cells). Strip the thread. The second shelf we knit symmetrically. Back Do not forget to retreat 1 cell from the front shelf. 42r. - Decrease, 44 cells, decrease; 43r. - Decrease, 42 cells, decrease; 44 - 58r. - (15 rows) - we knit without decrements (42 cells); Next, separate knitting: 59r. - 11 cells, decrease. Turn knitting; 60r. - Decrease, 10 cells. Strip the thread. Symmetrically on the other side of the last 2 rows.
 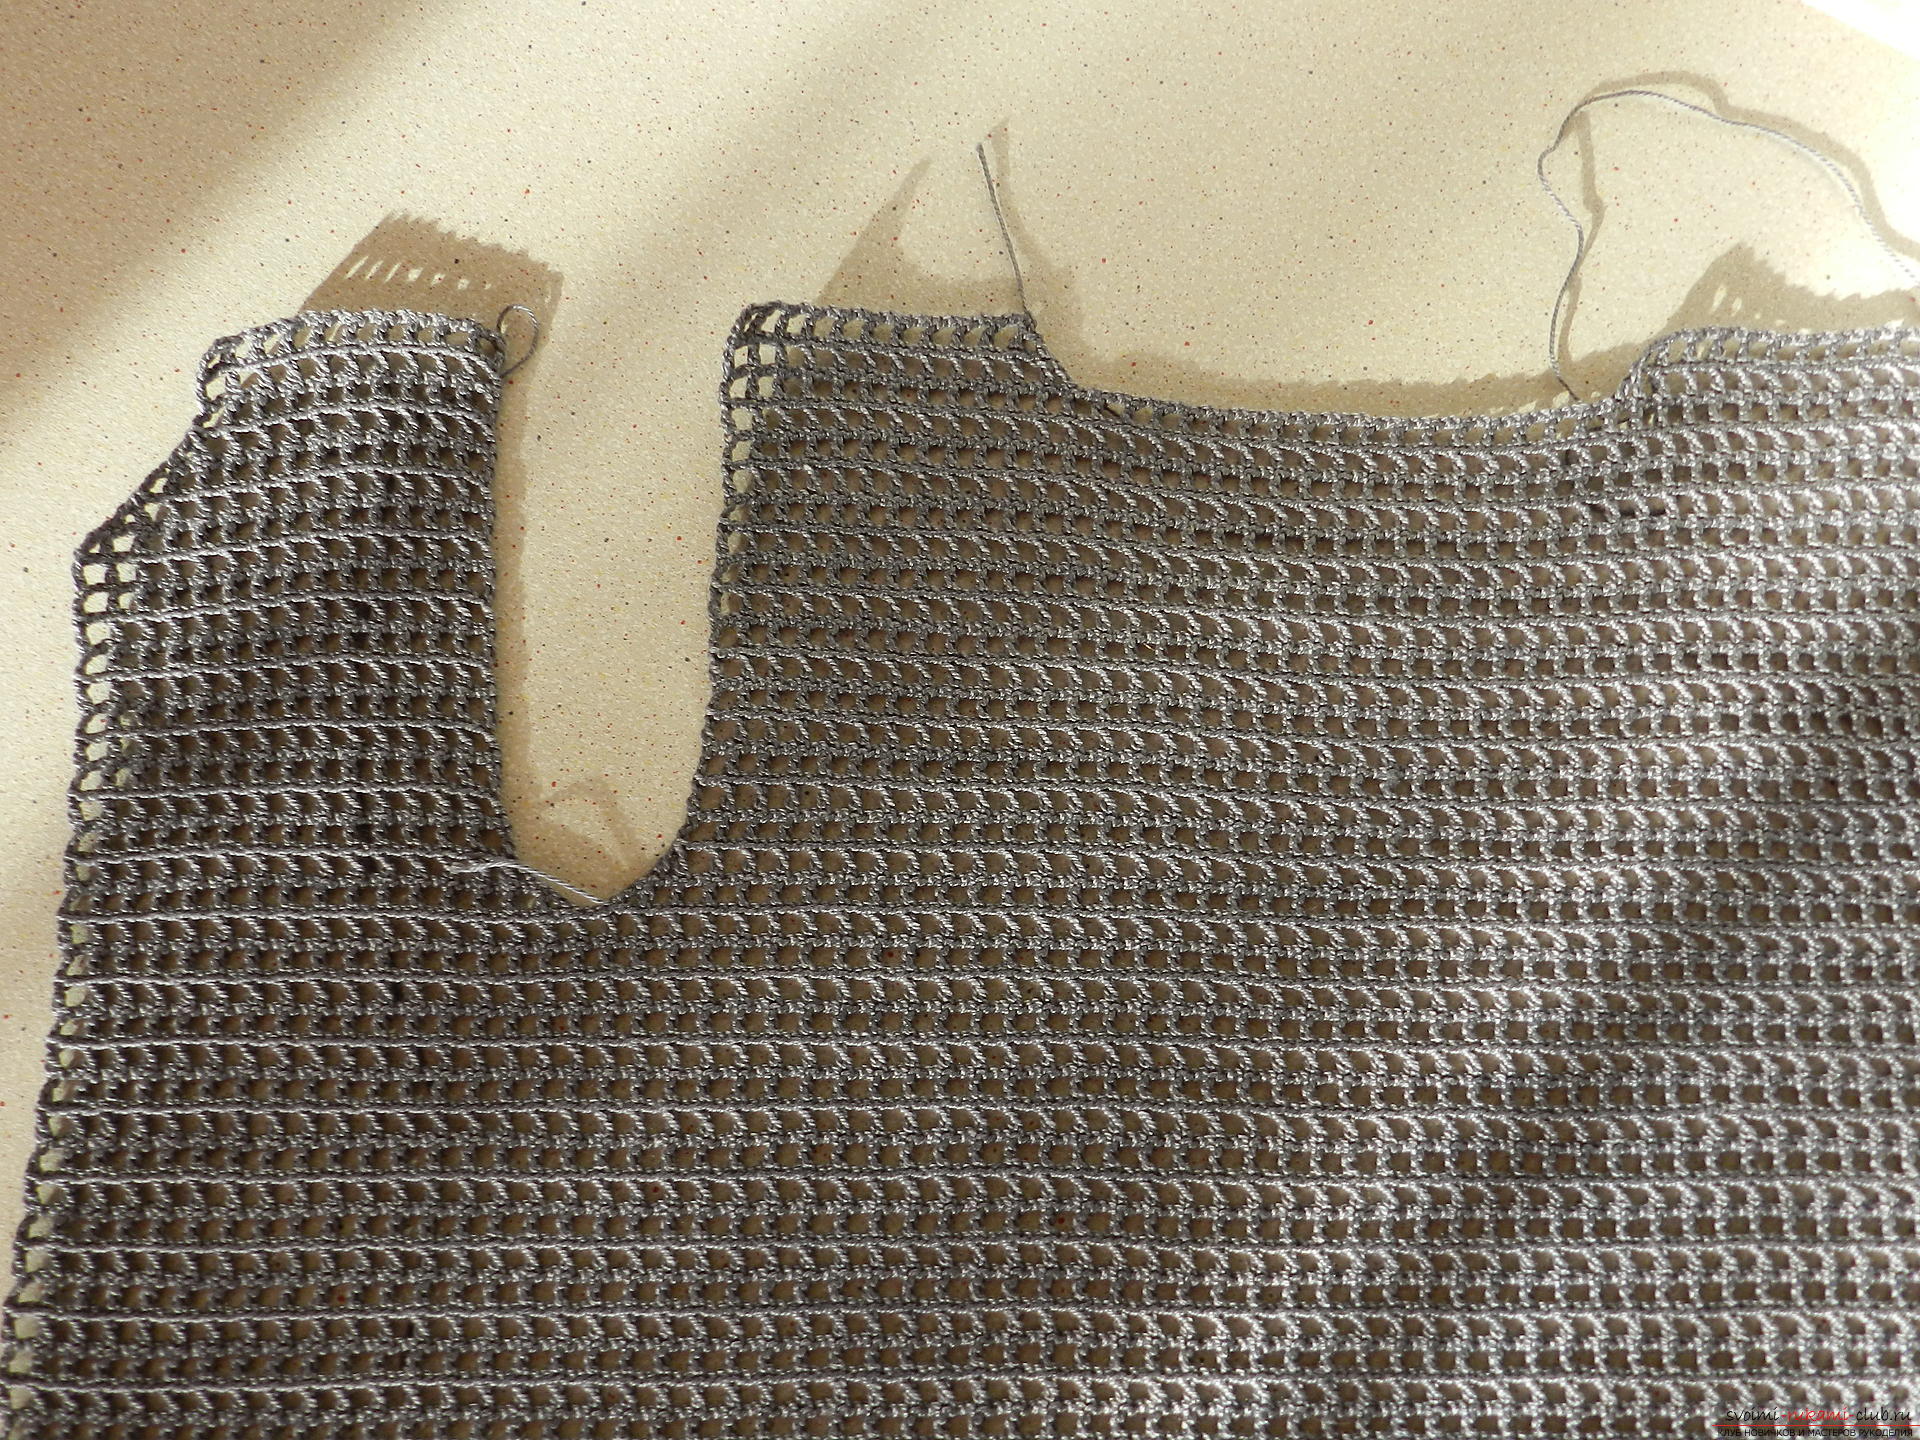 That's what happened.
 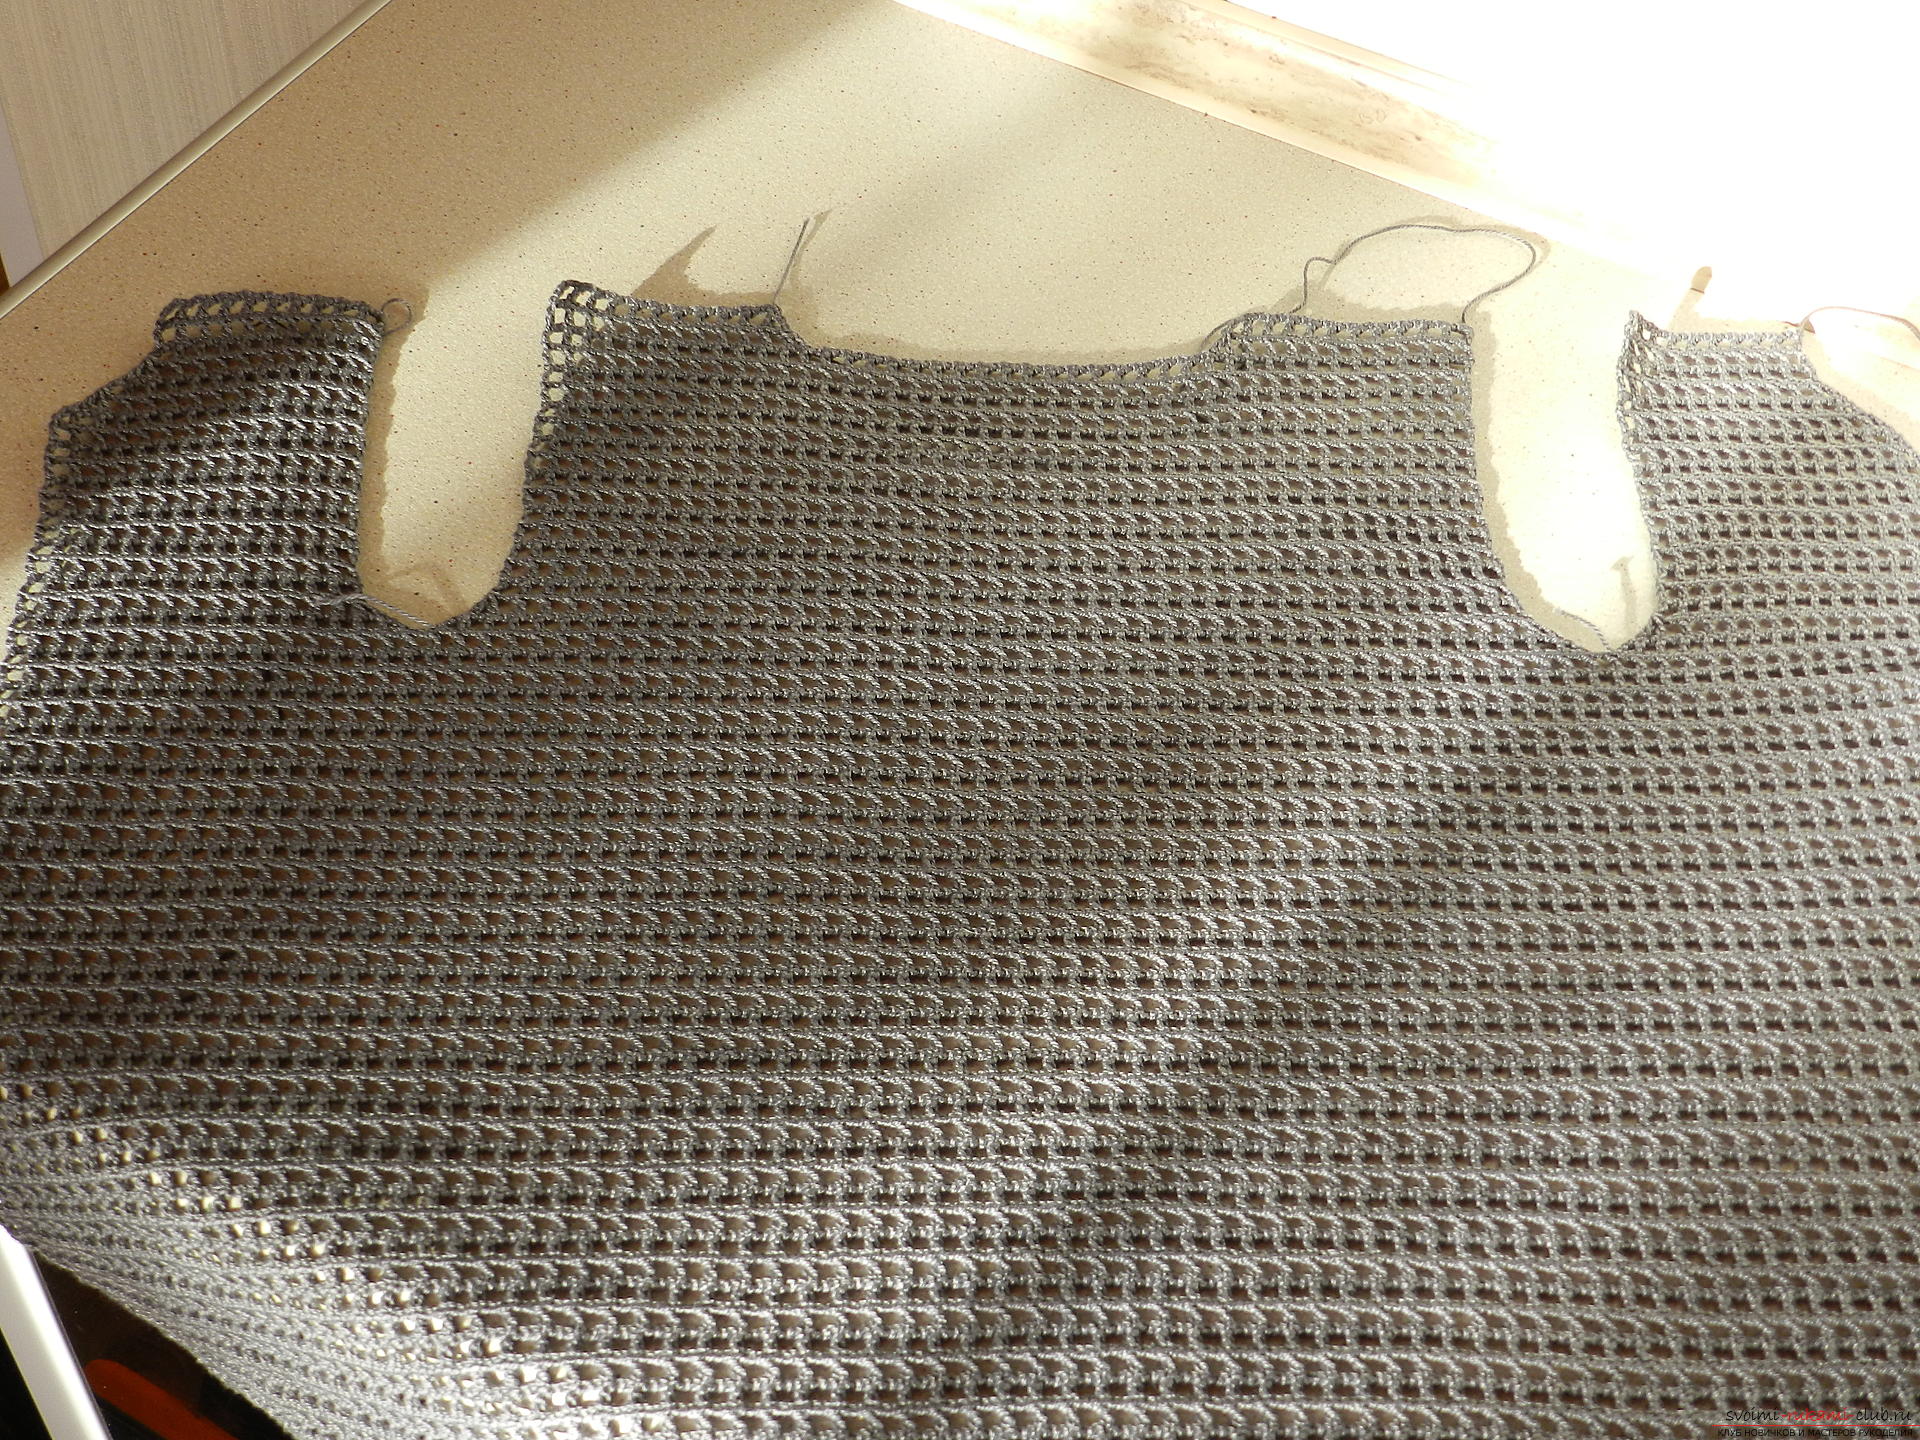 Proceed to the front. We need to add here the missing 14 cells.
 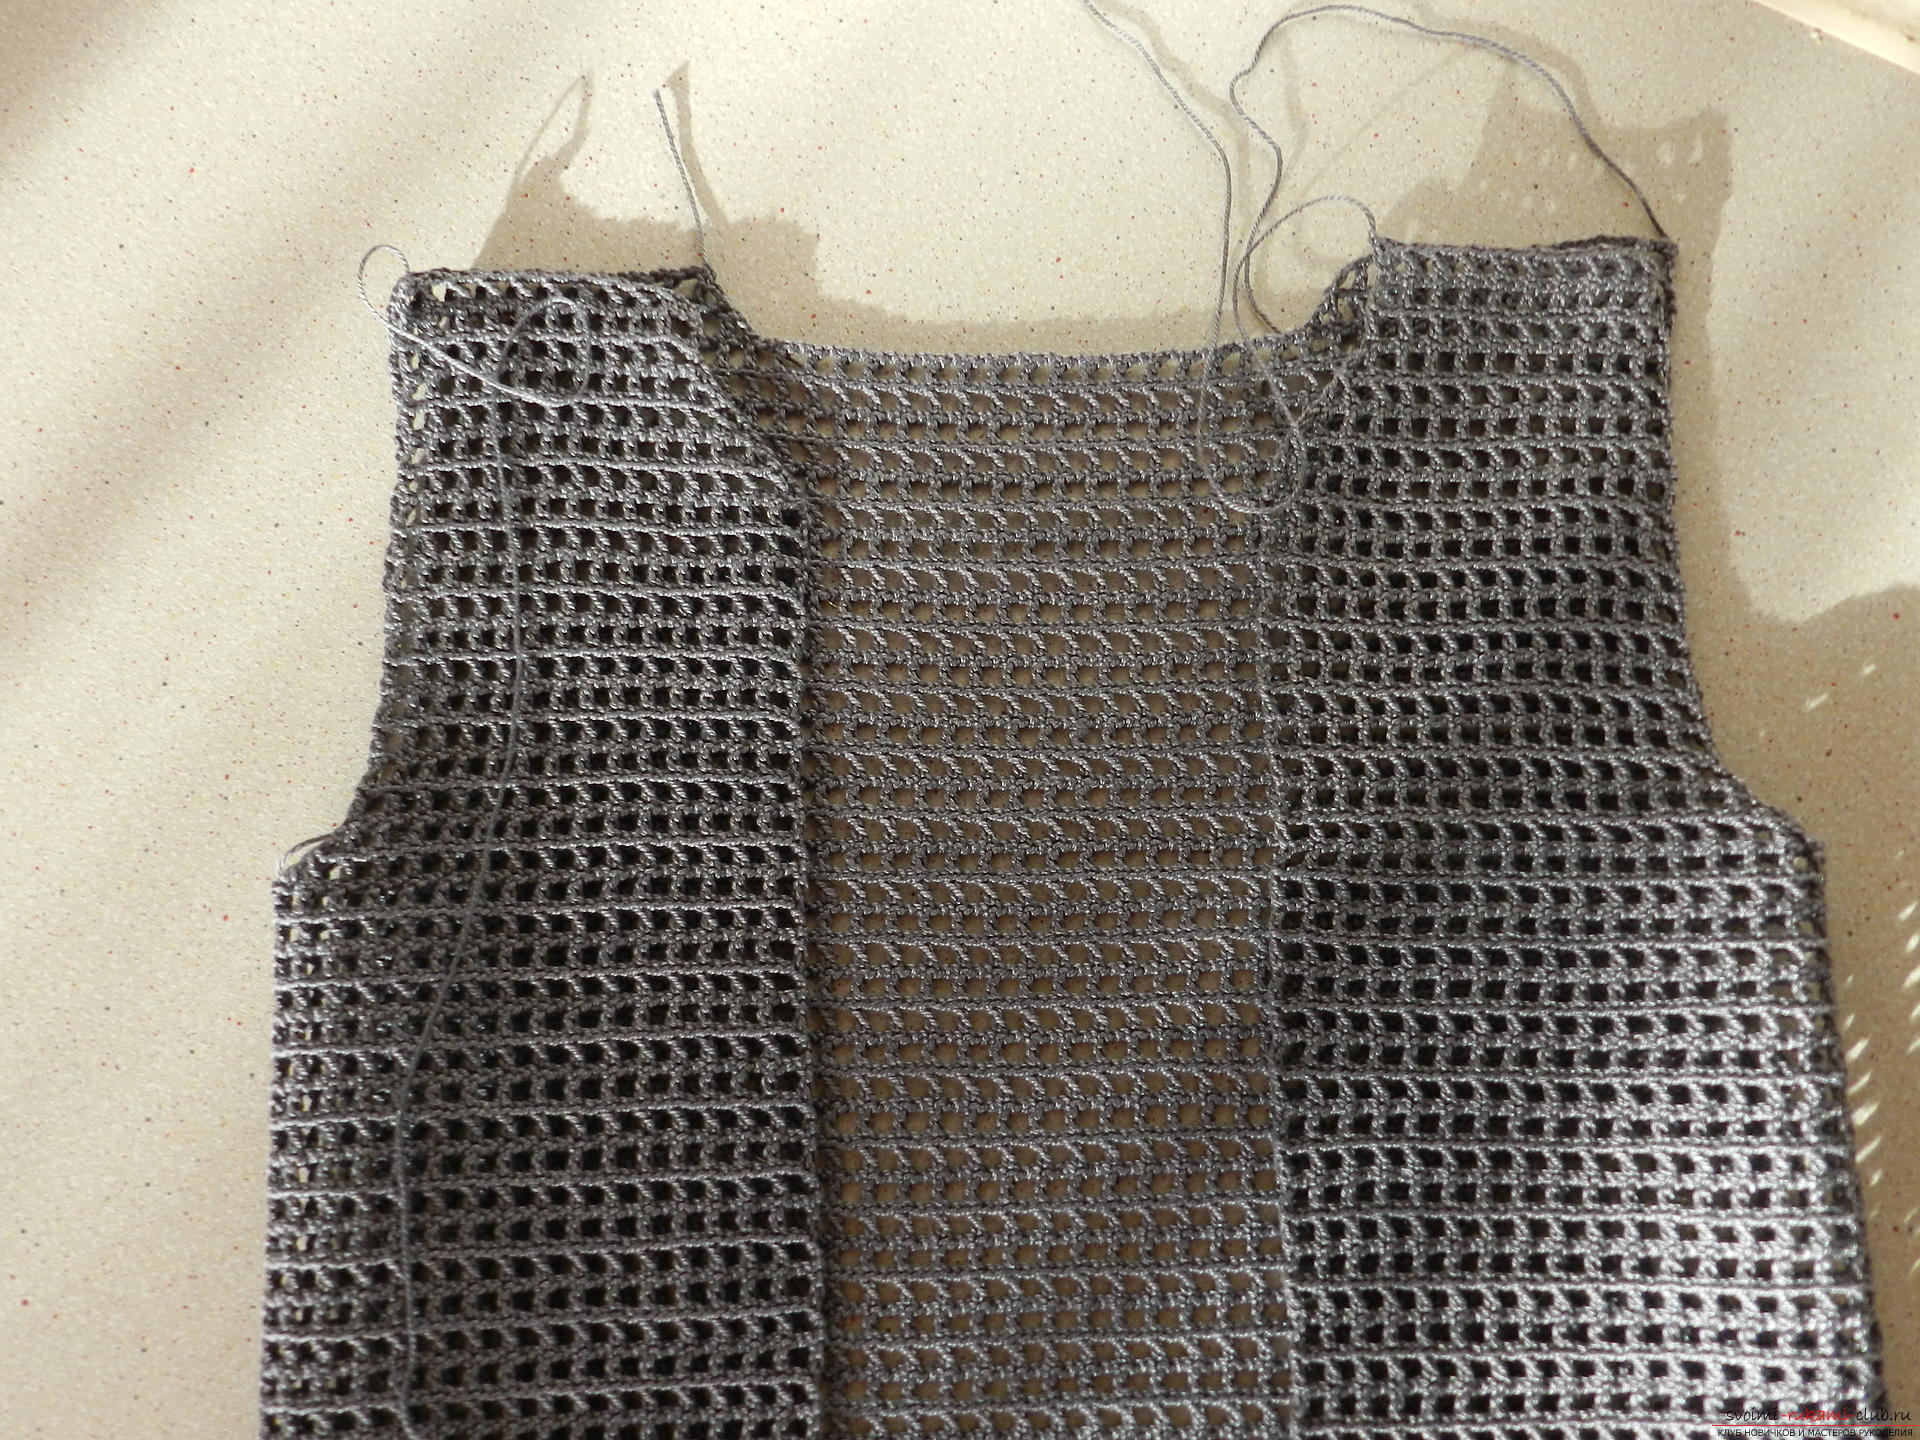 To do this, we tie the edges of the shelves: 1p - sb on the front side of the work;
 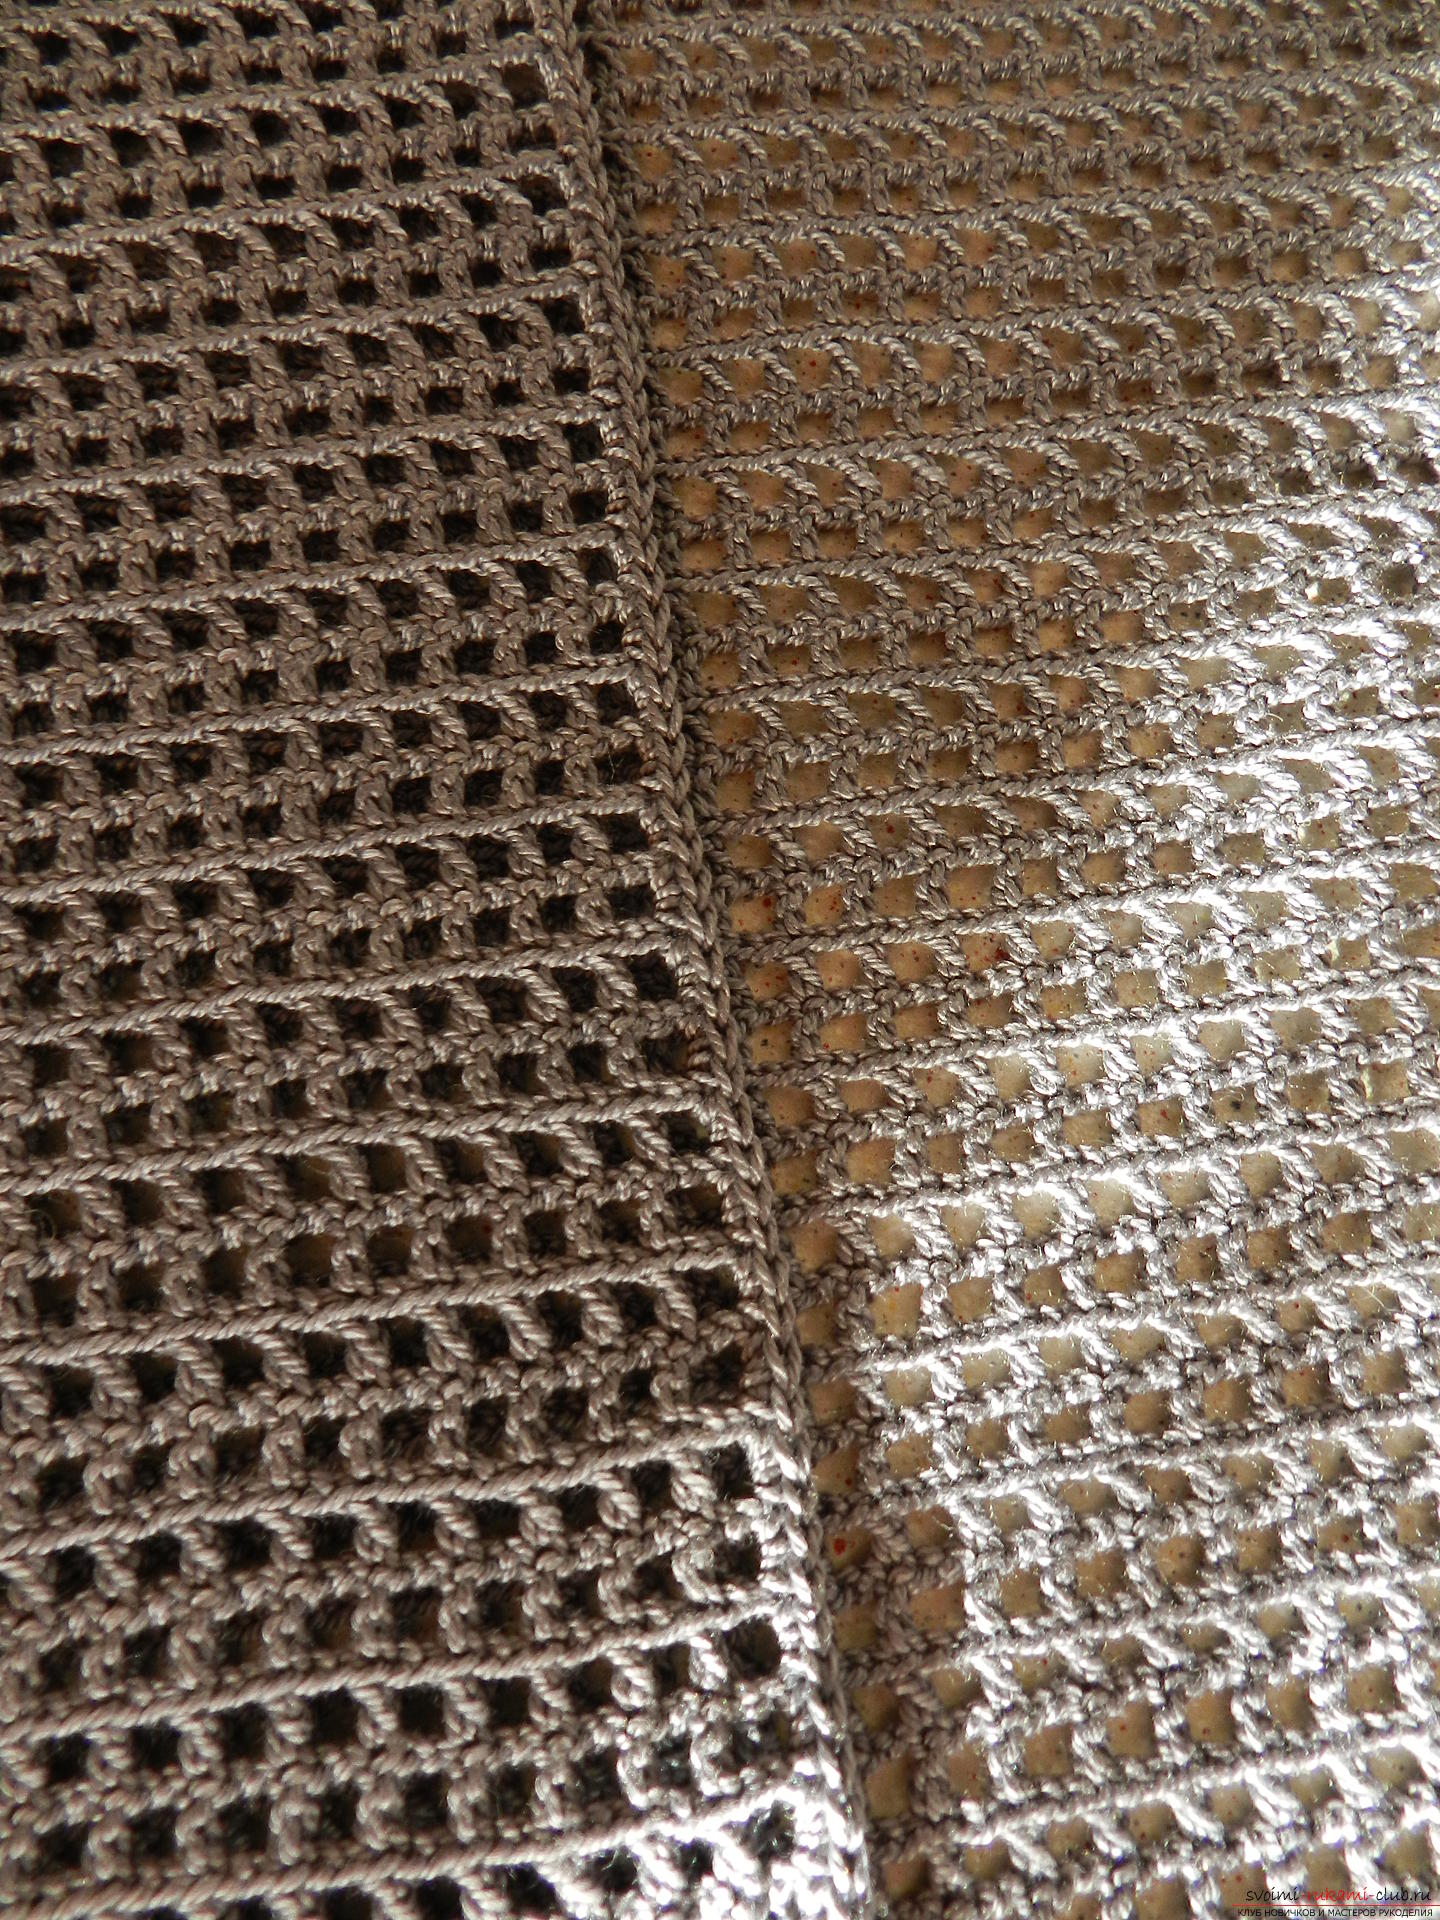 2p. - We knit a row with a relief rubber band. You can just tie a CH.
  Change the thread to a different color 3p. - Sb. 4p. - a number of embossed elastic bands; 5p. - Sb.
 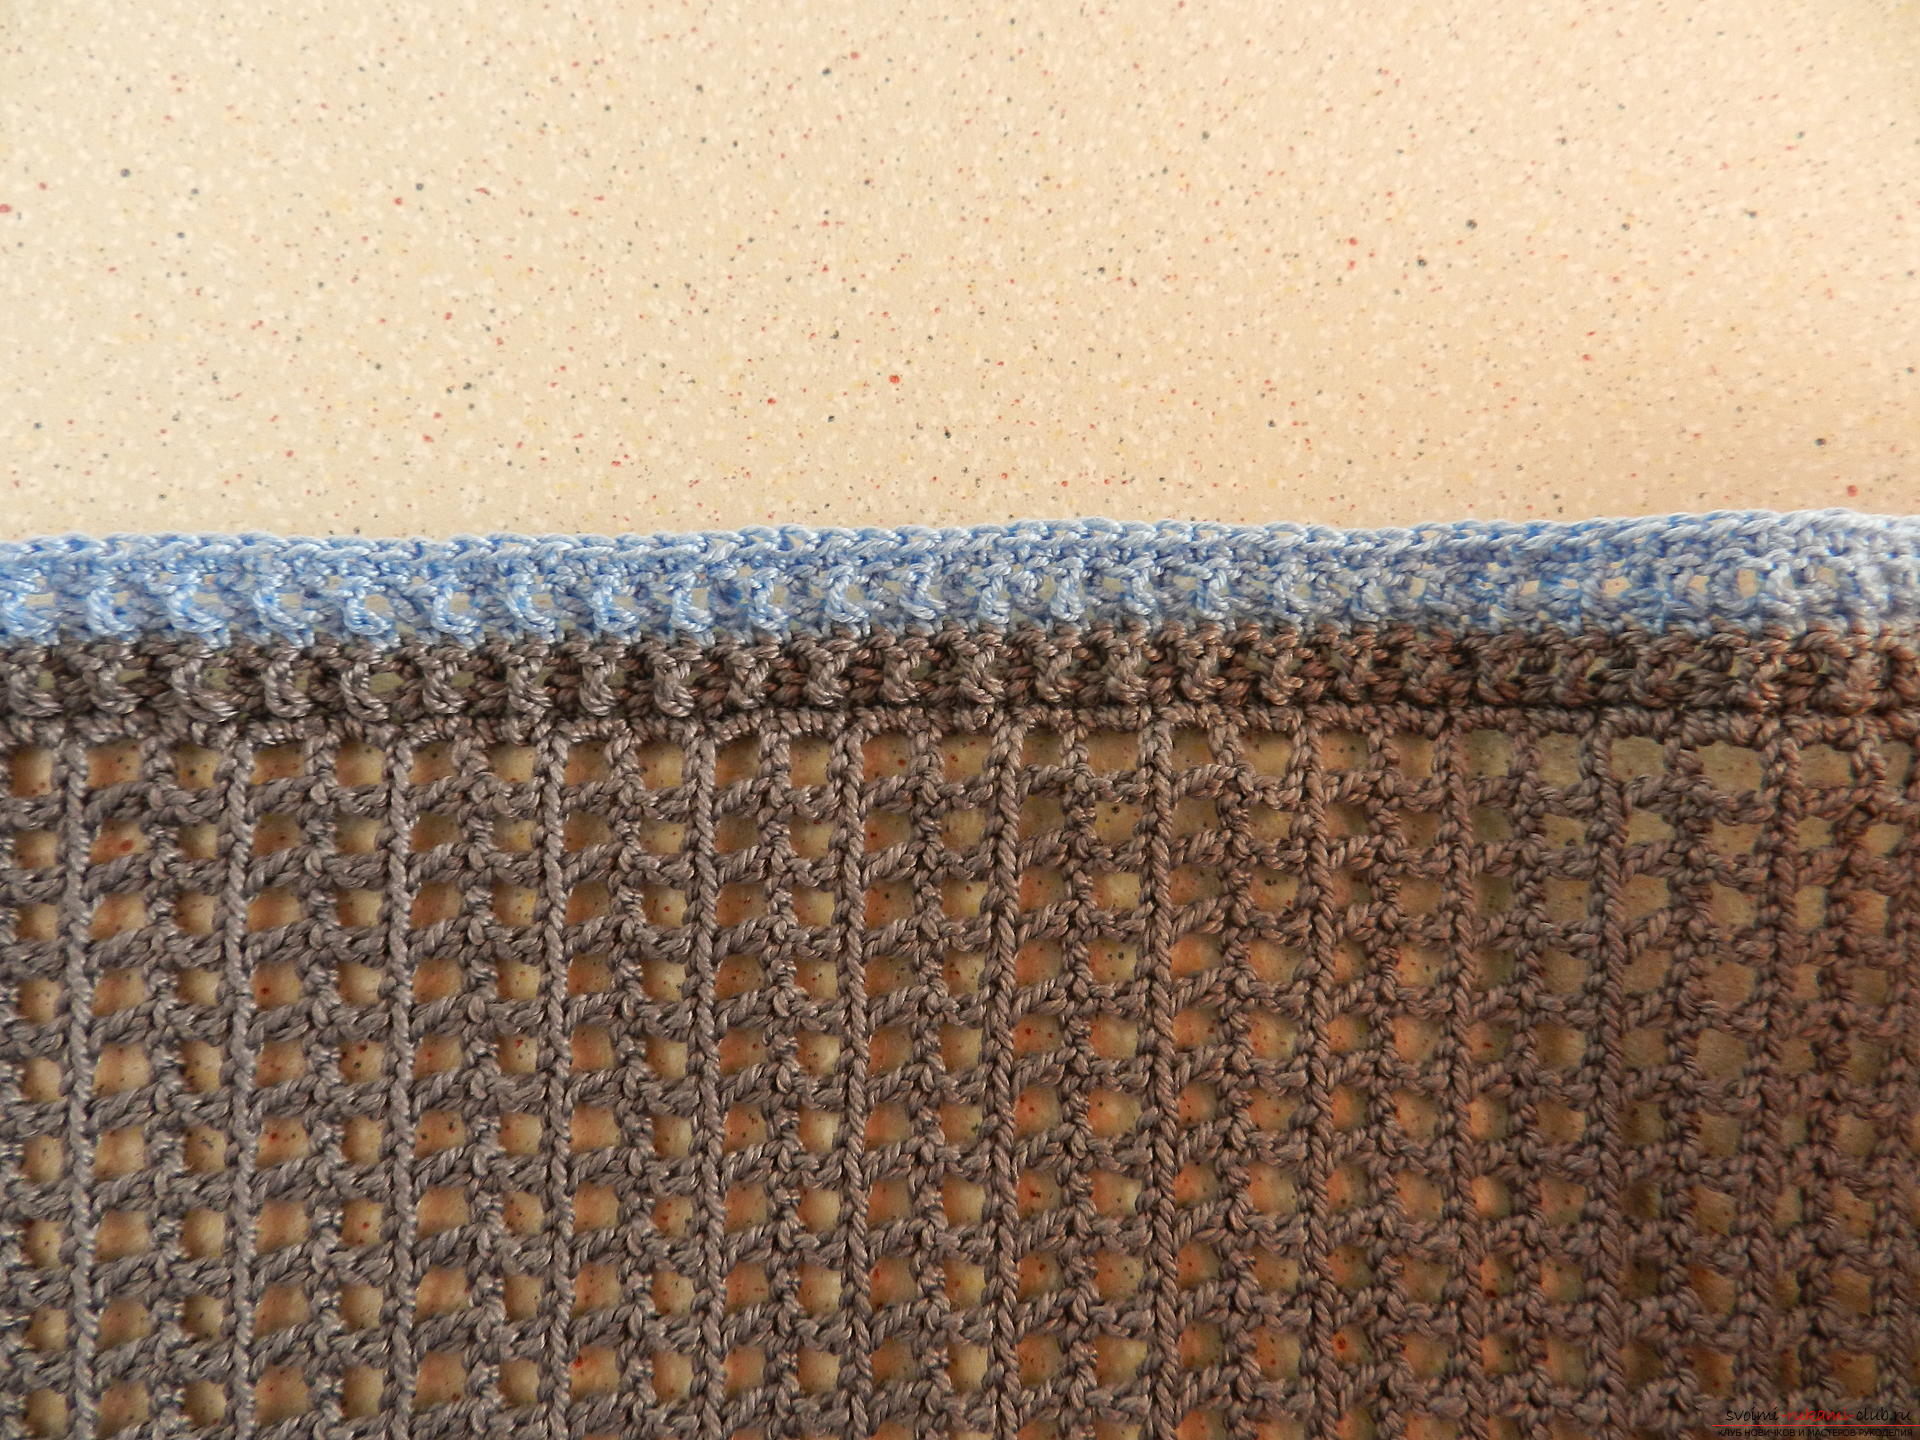 The next 4 rows we knit the main color with a sirloin grid: 1 CH, 1in.
 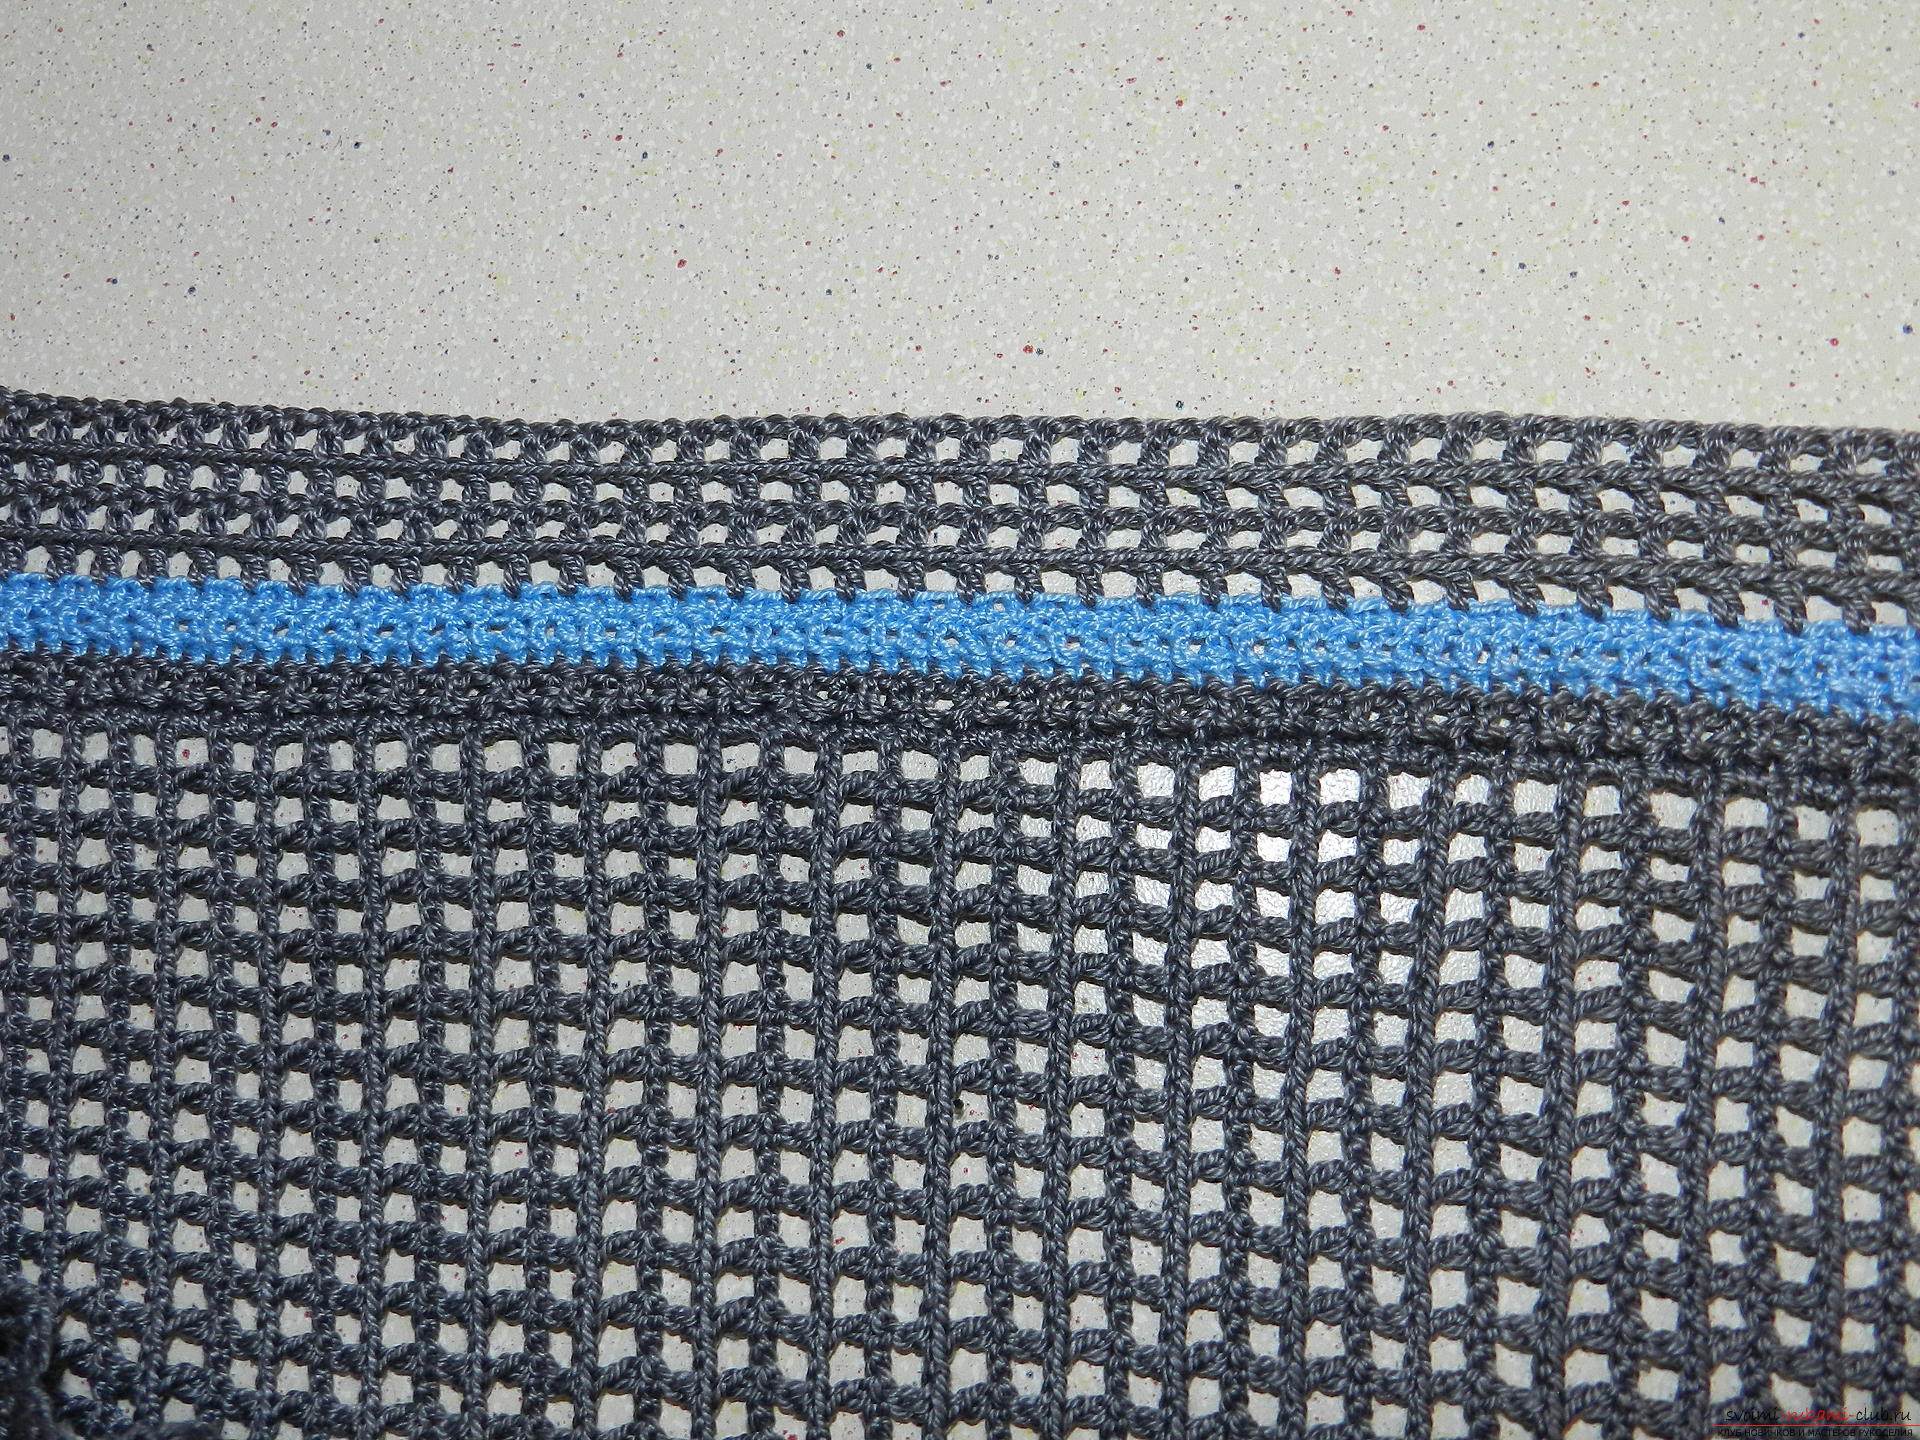 Do all the same - most on the other side. That's what should happen.
 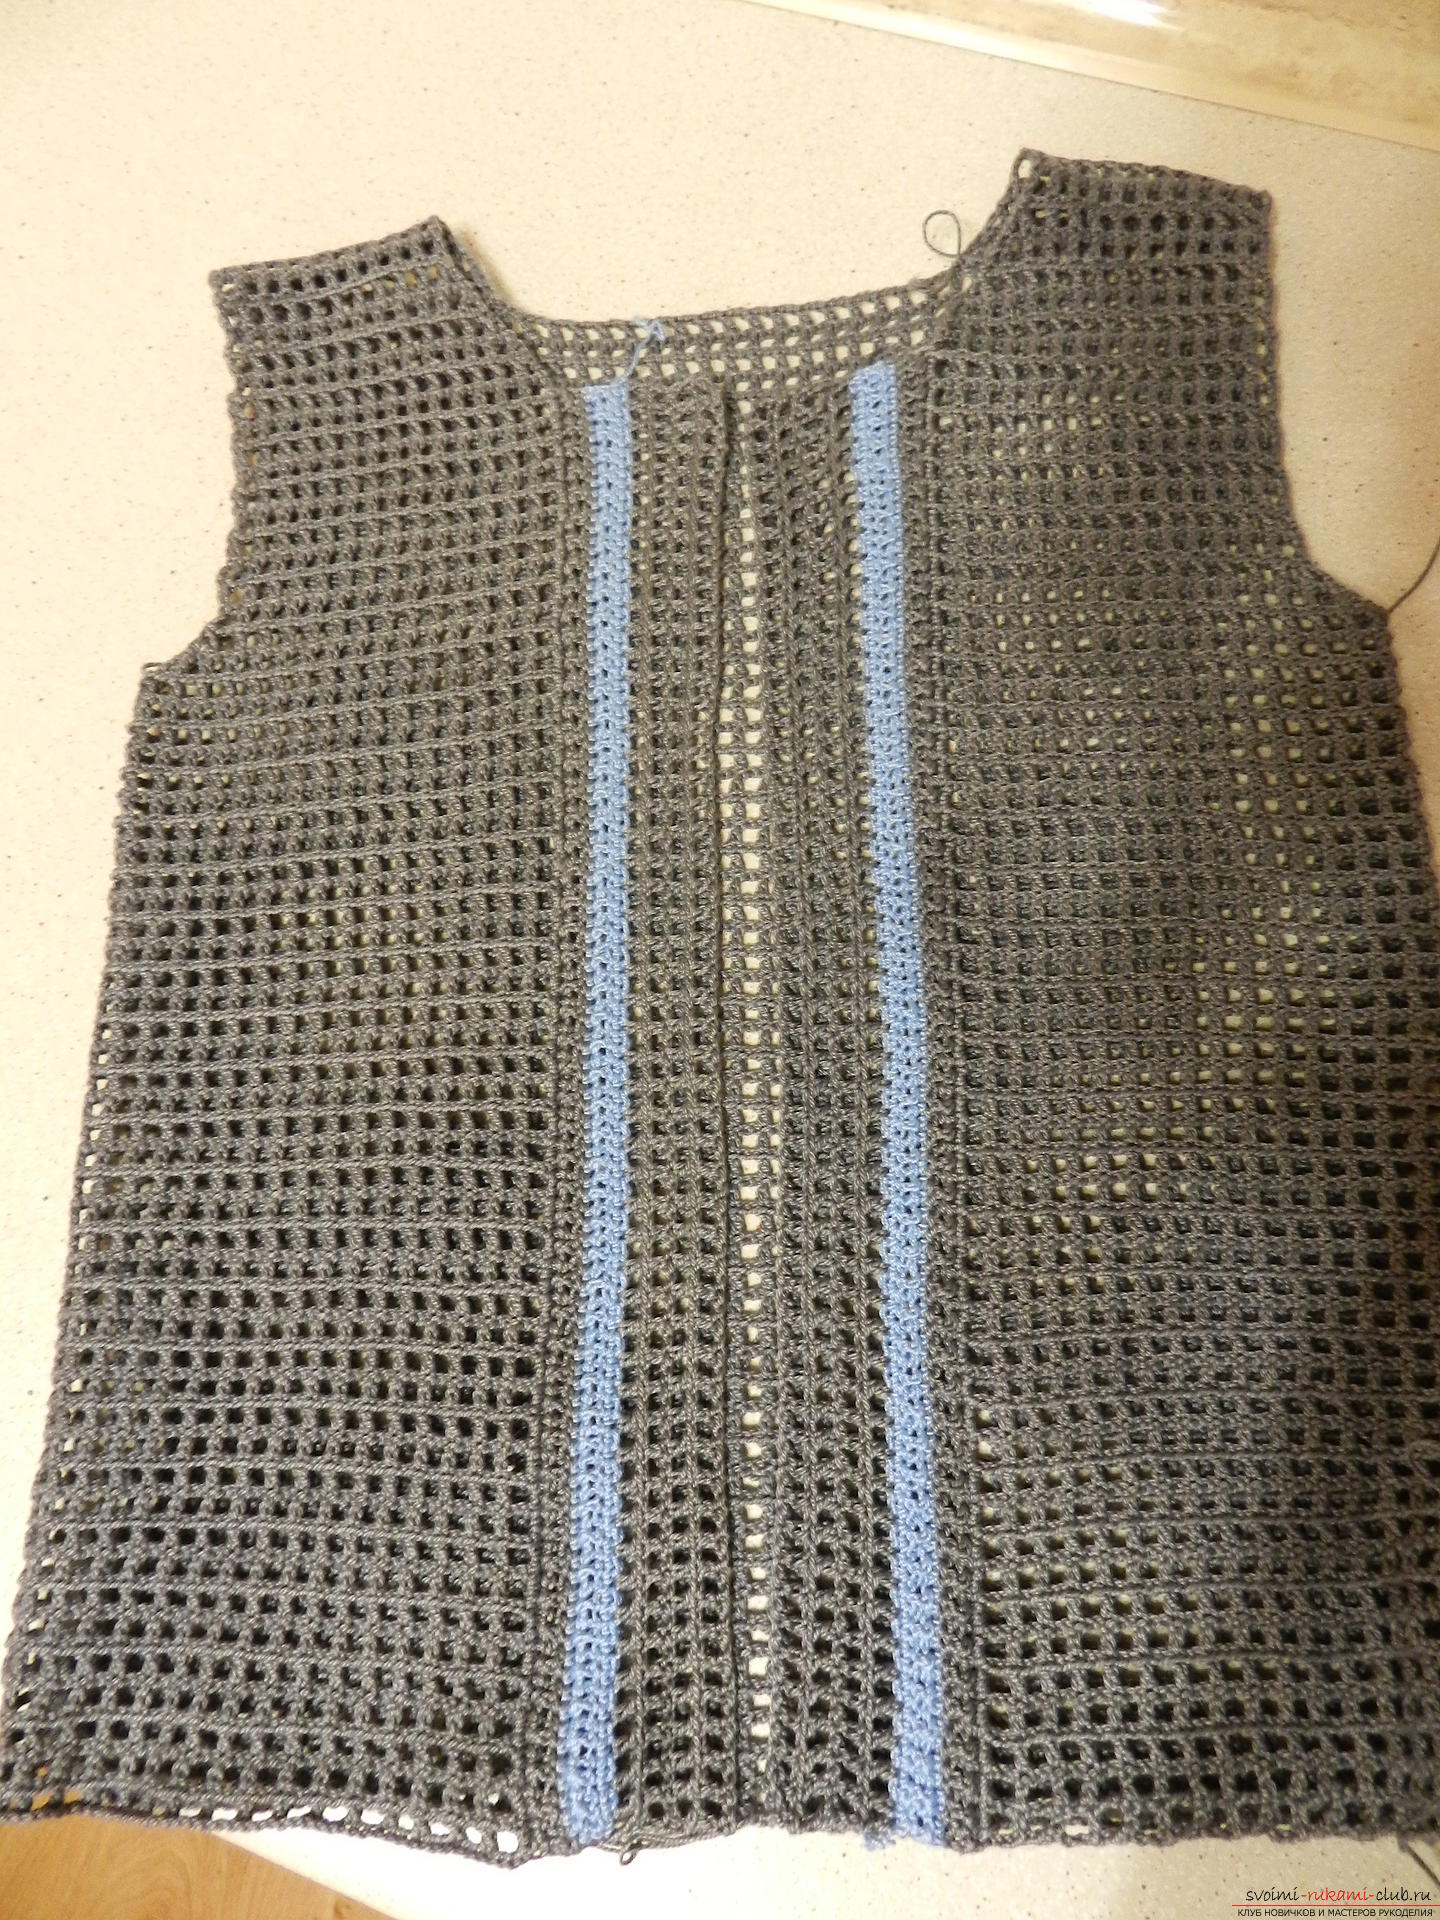 Now we need to connect the two parts together. I did this according to the following scheme:
  And that's what happened.
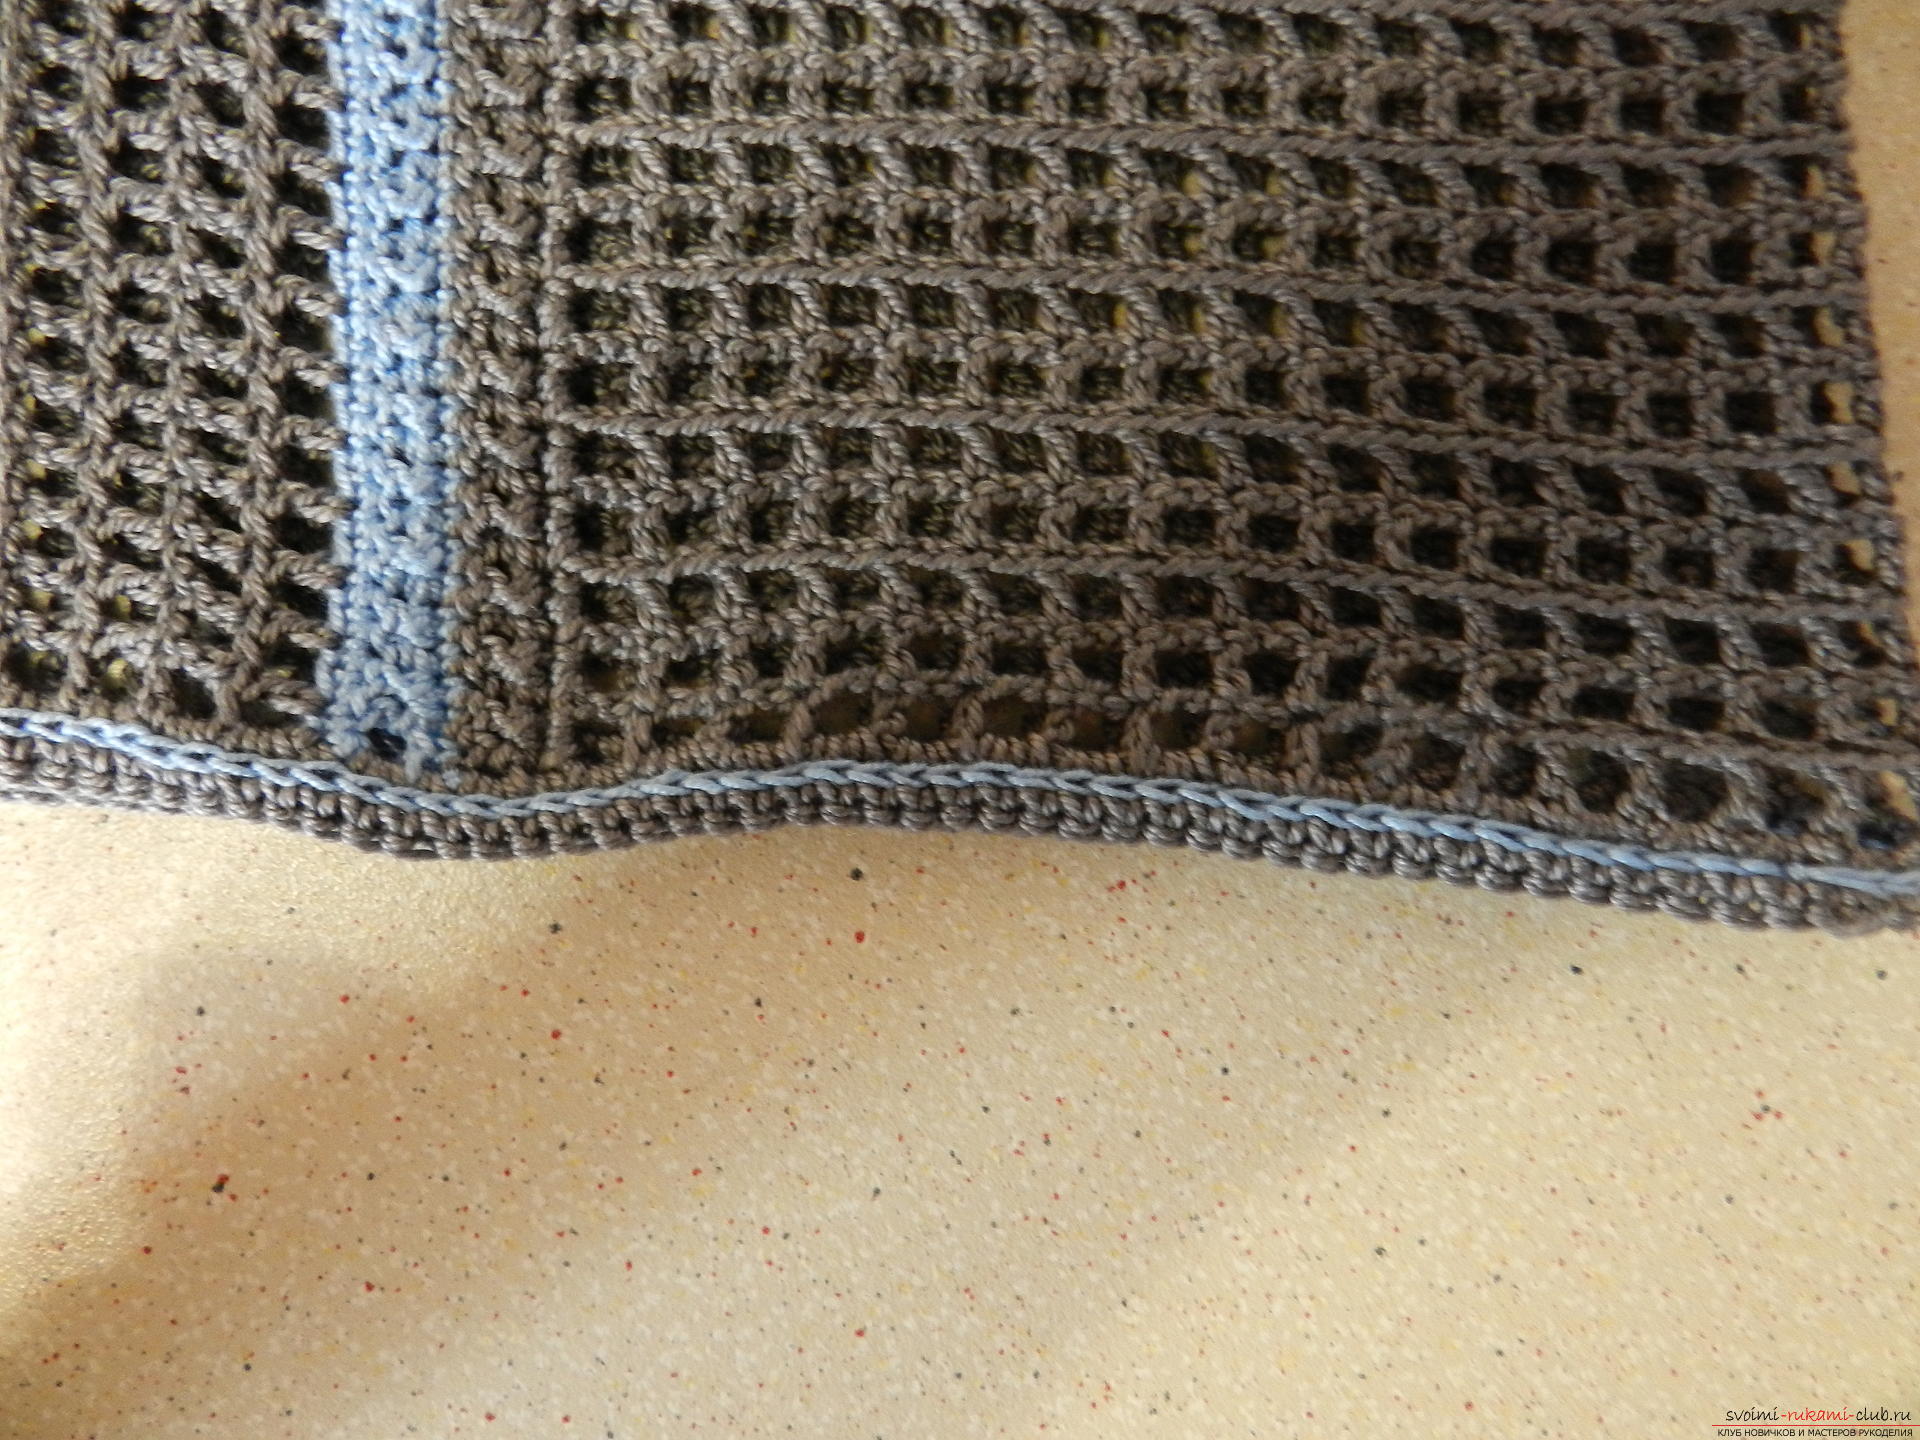
 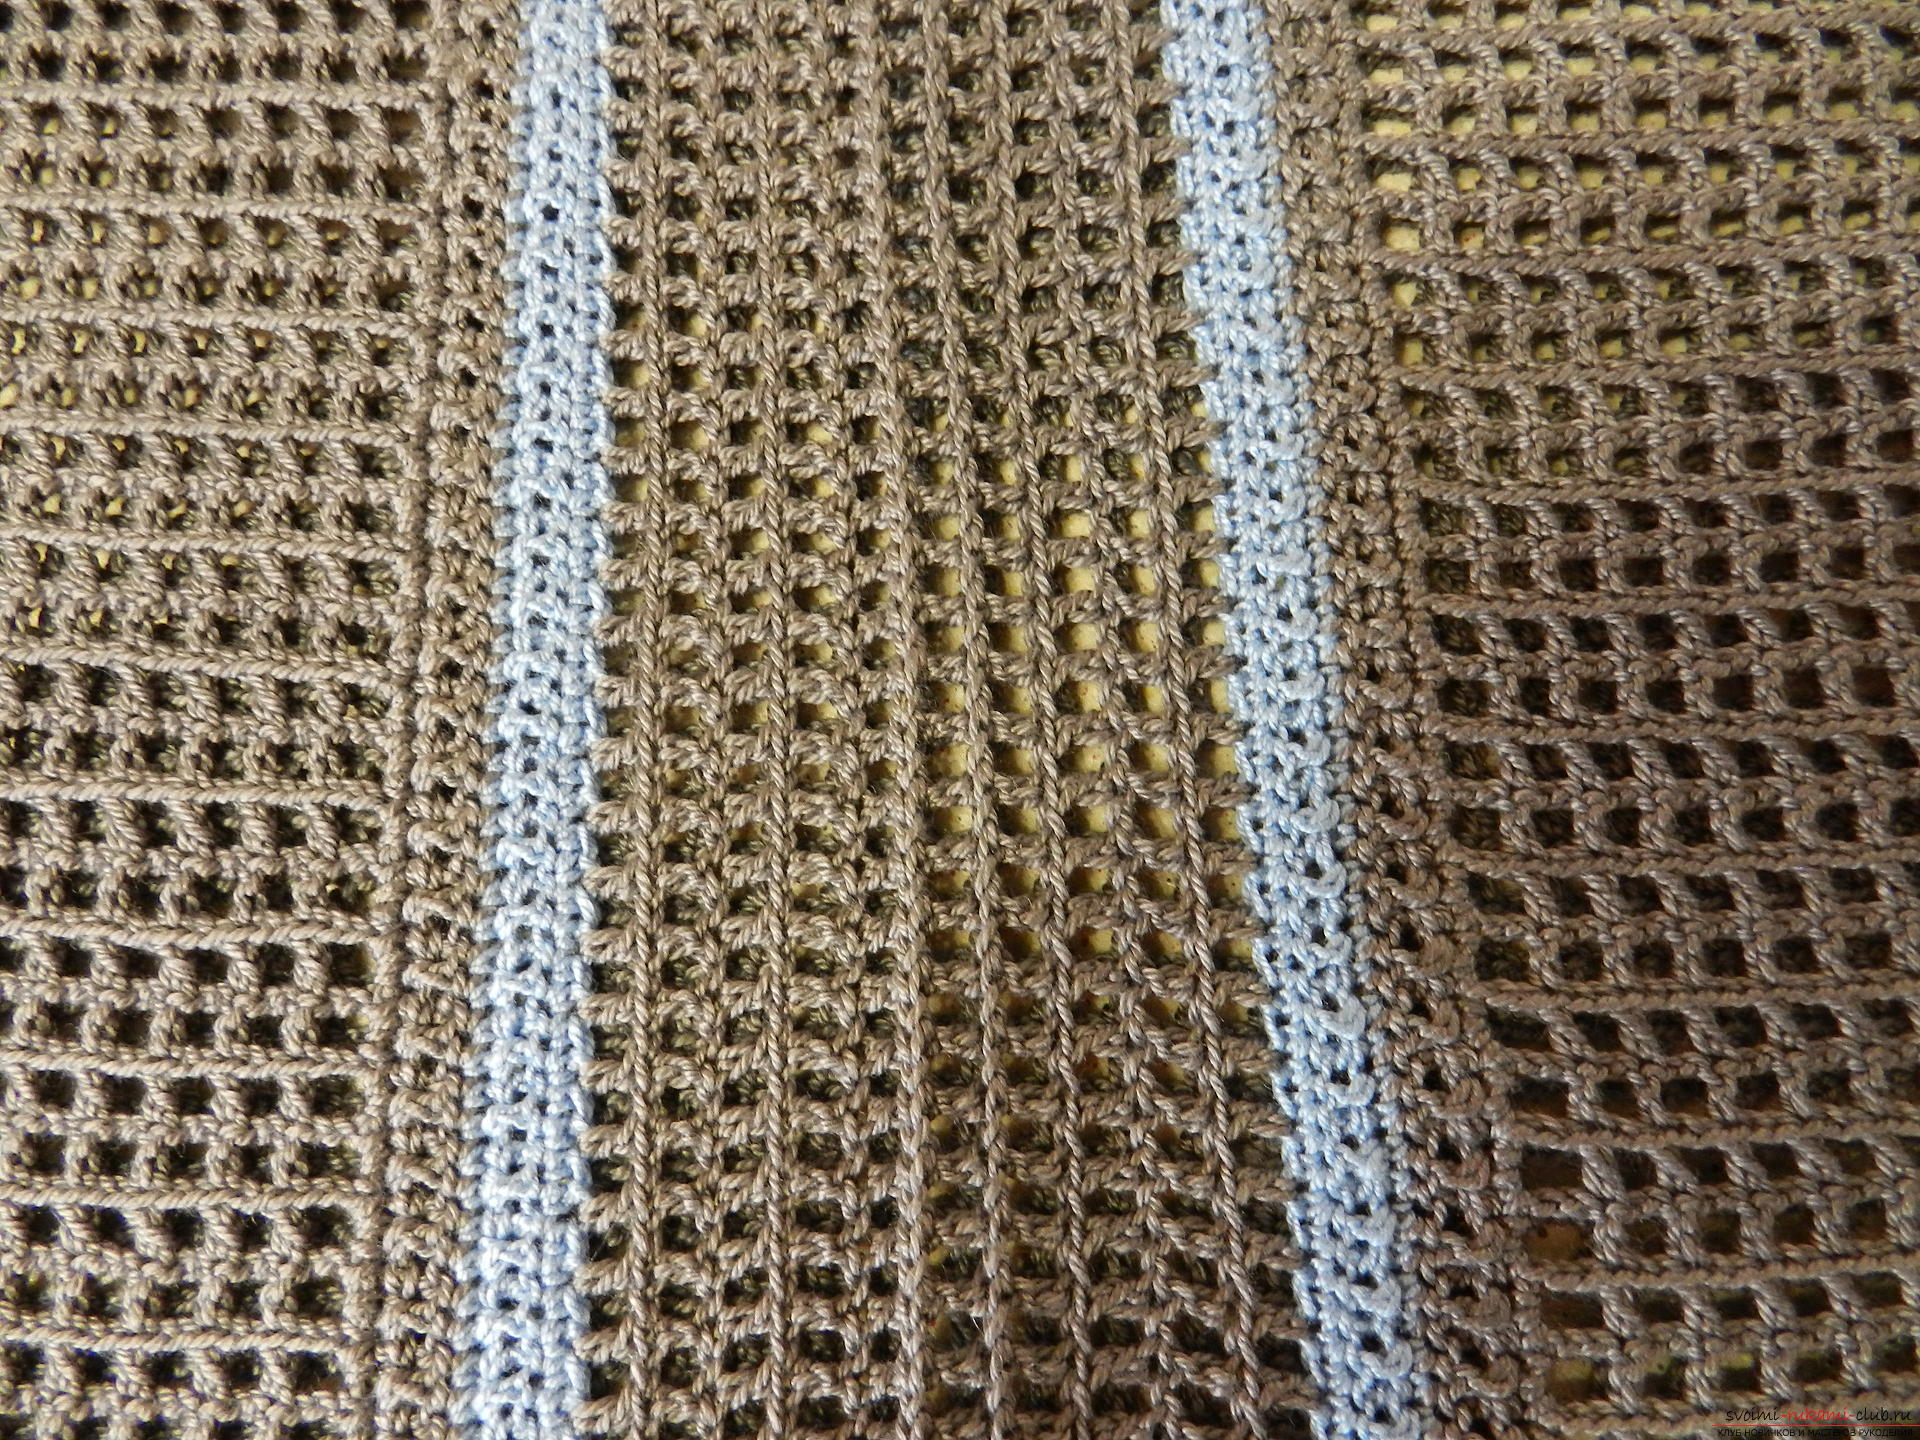 We tie the bottom of the shirt and neck with two rows of sb.
 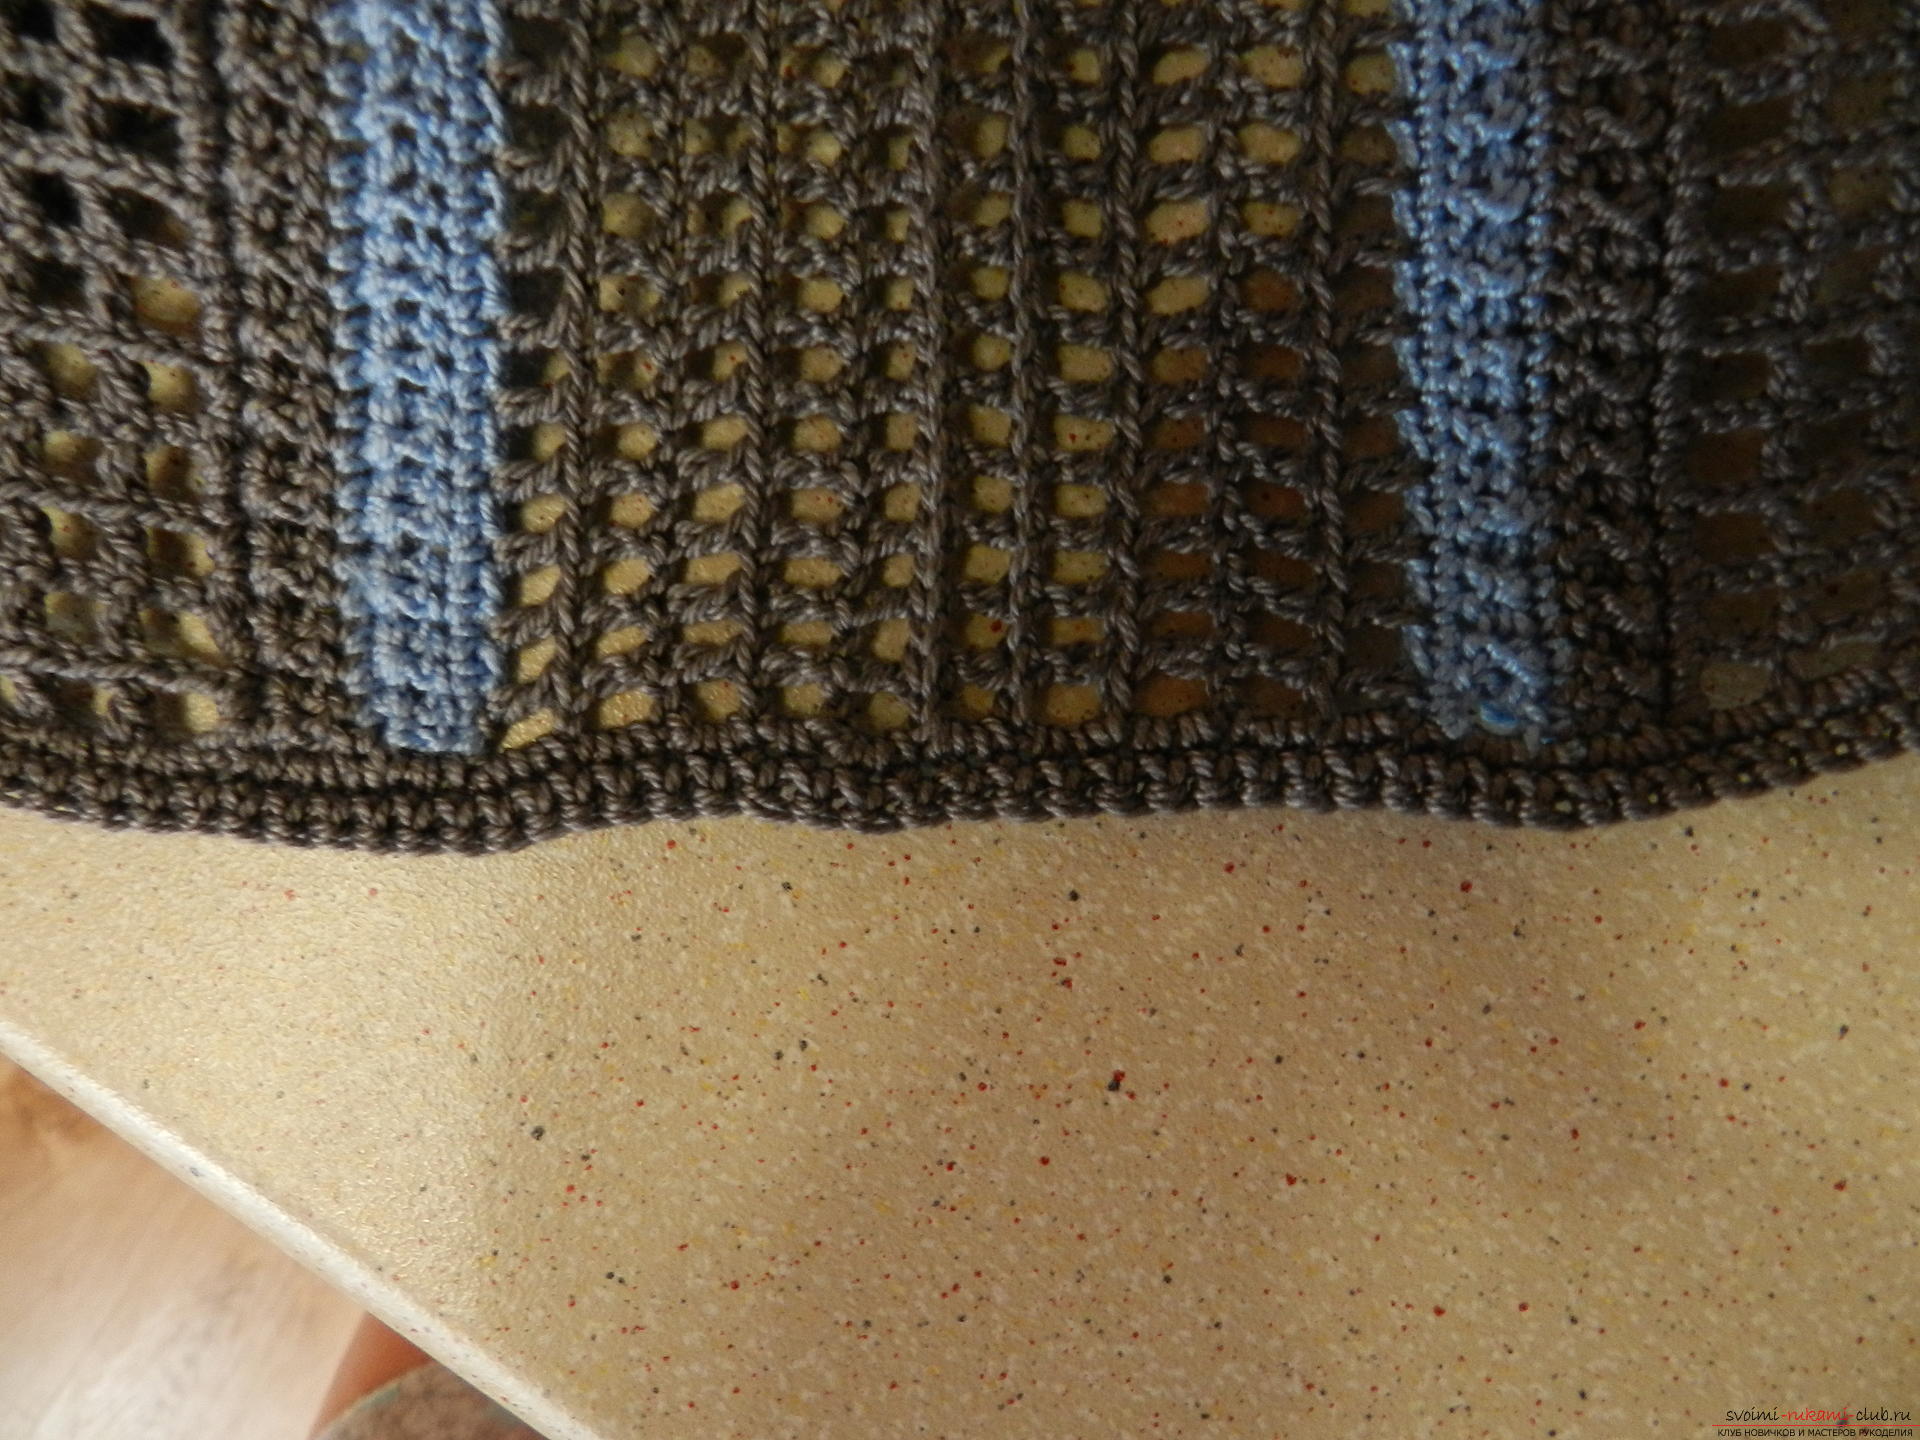 Sewing the 10 rows of the main pattern. Tie two rows of sb.
  For contrast, we make a chain stitch of a different color along the edges of the product.
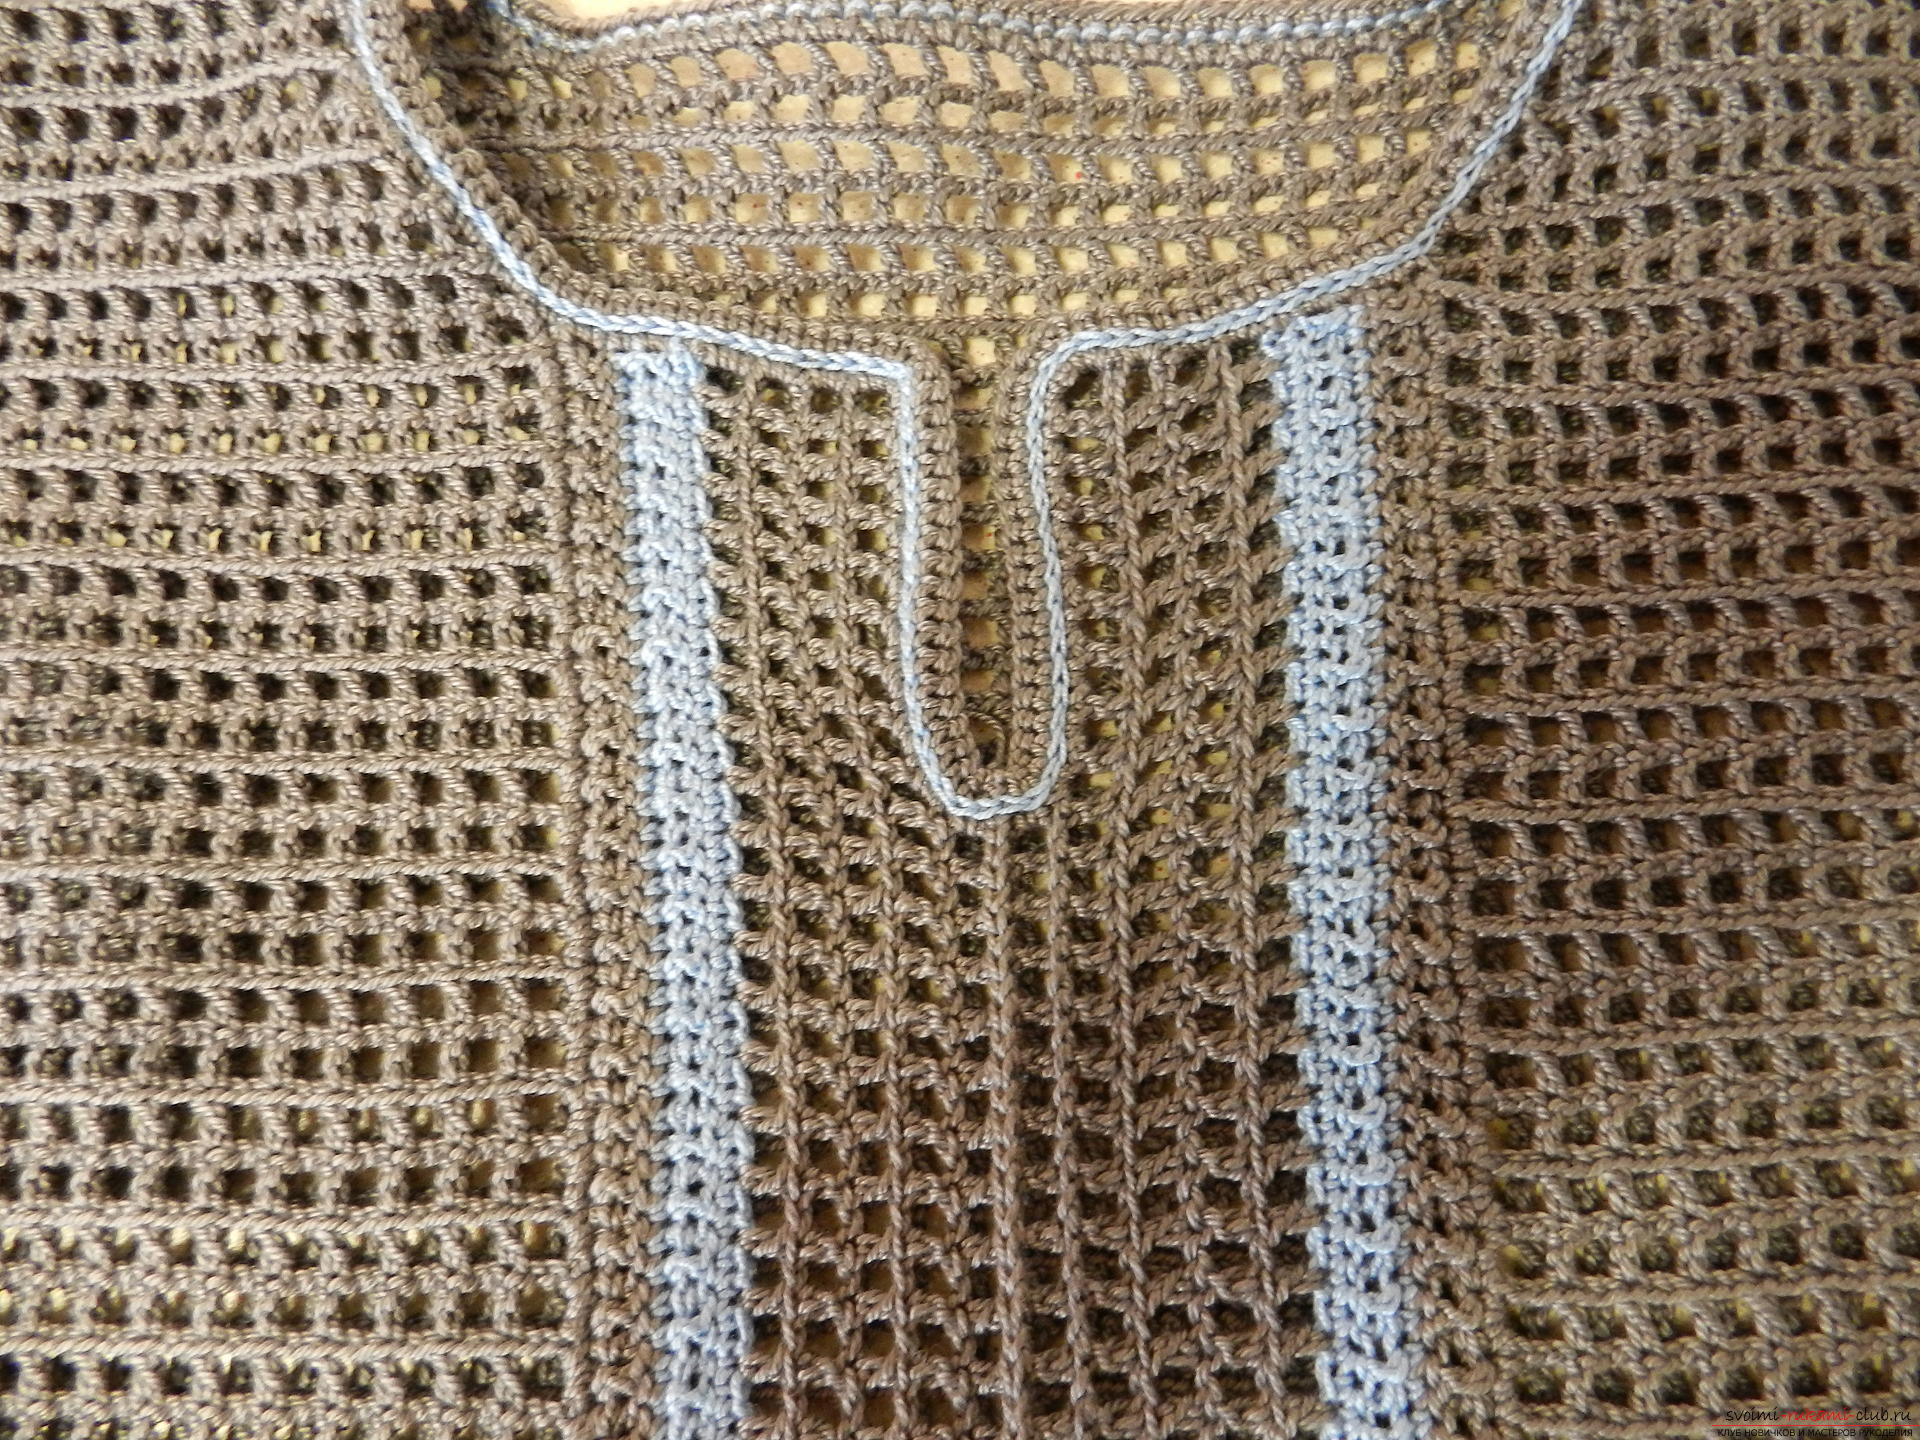
 The shirt is ready!
Comments
Related posts:
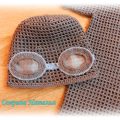 This master class will teach you how to crochet children's clothes - a cap with a sieve net
 This master class with a pattern and description of crochet will teach you how to knit lace with hearts.
 This master class crochet with a detailed description will teach you how to knit crochet flowers
 This master class with a descriptive scheme will teach how to crochet a ribbon lace.
 This master class with a description, diagram and video will teach how to knit booties crocheted.