This master class will teach you how to make a topiary with your own hands using a photo and a detailed description.
 Some specific manufacturing rulesthere is no topiary. It can consist of any improvised materials. I propose to consider one of the variants of this interior decoration. Necessary materials: - coconut shell; - branch of a tree, with a diameter of 1.5-2 cm and a height of about 30 cm; - plastic pail, with a volume of 400-500 ml (for example, a container of mayonnaise); - a piece of foam plastic (from any household appliances); - small pebbles (for example, river or sea pebbles); - a bow from organza green (5-6 m); - artificial silk flowers; - lace ribbon; - rope twine; - glue.
 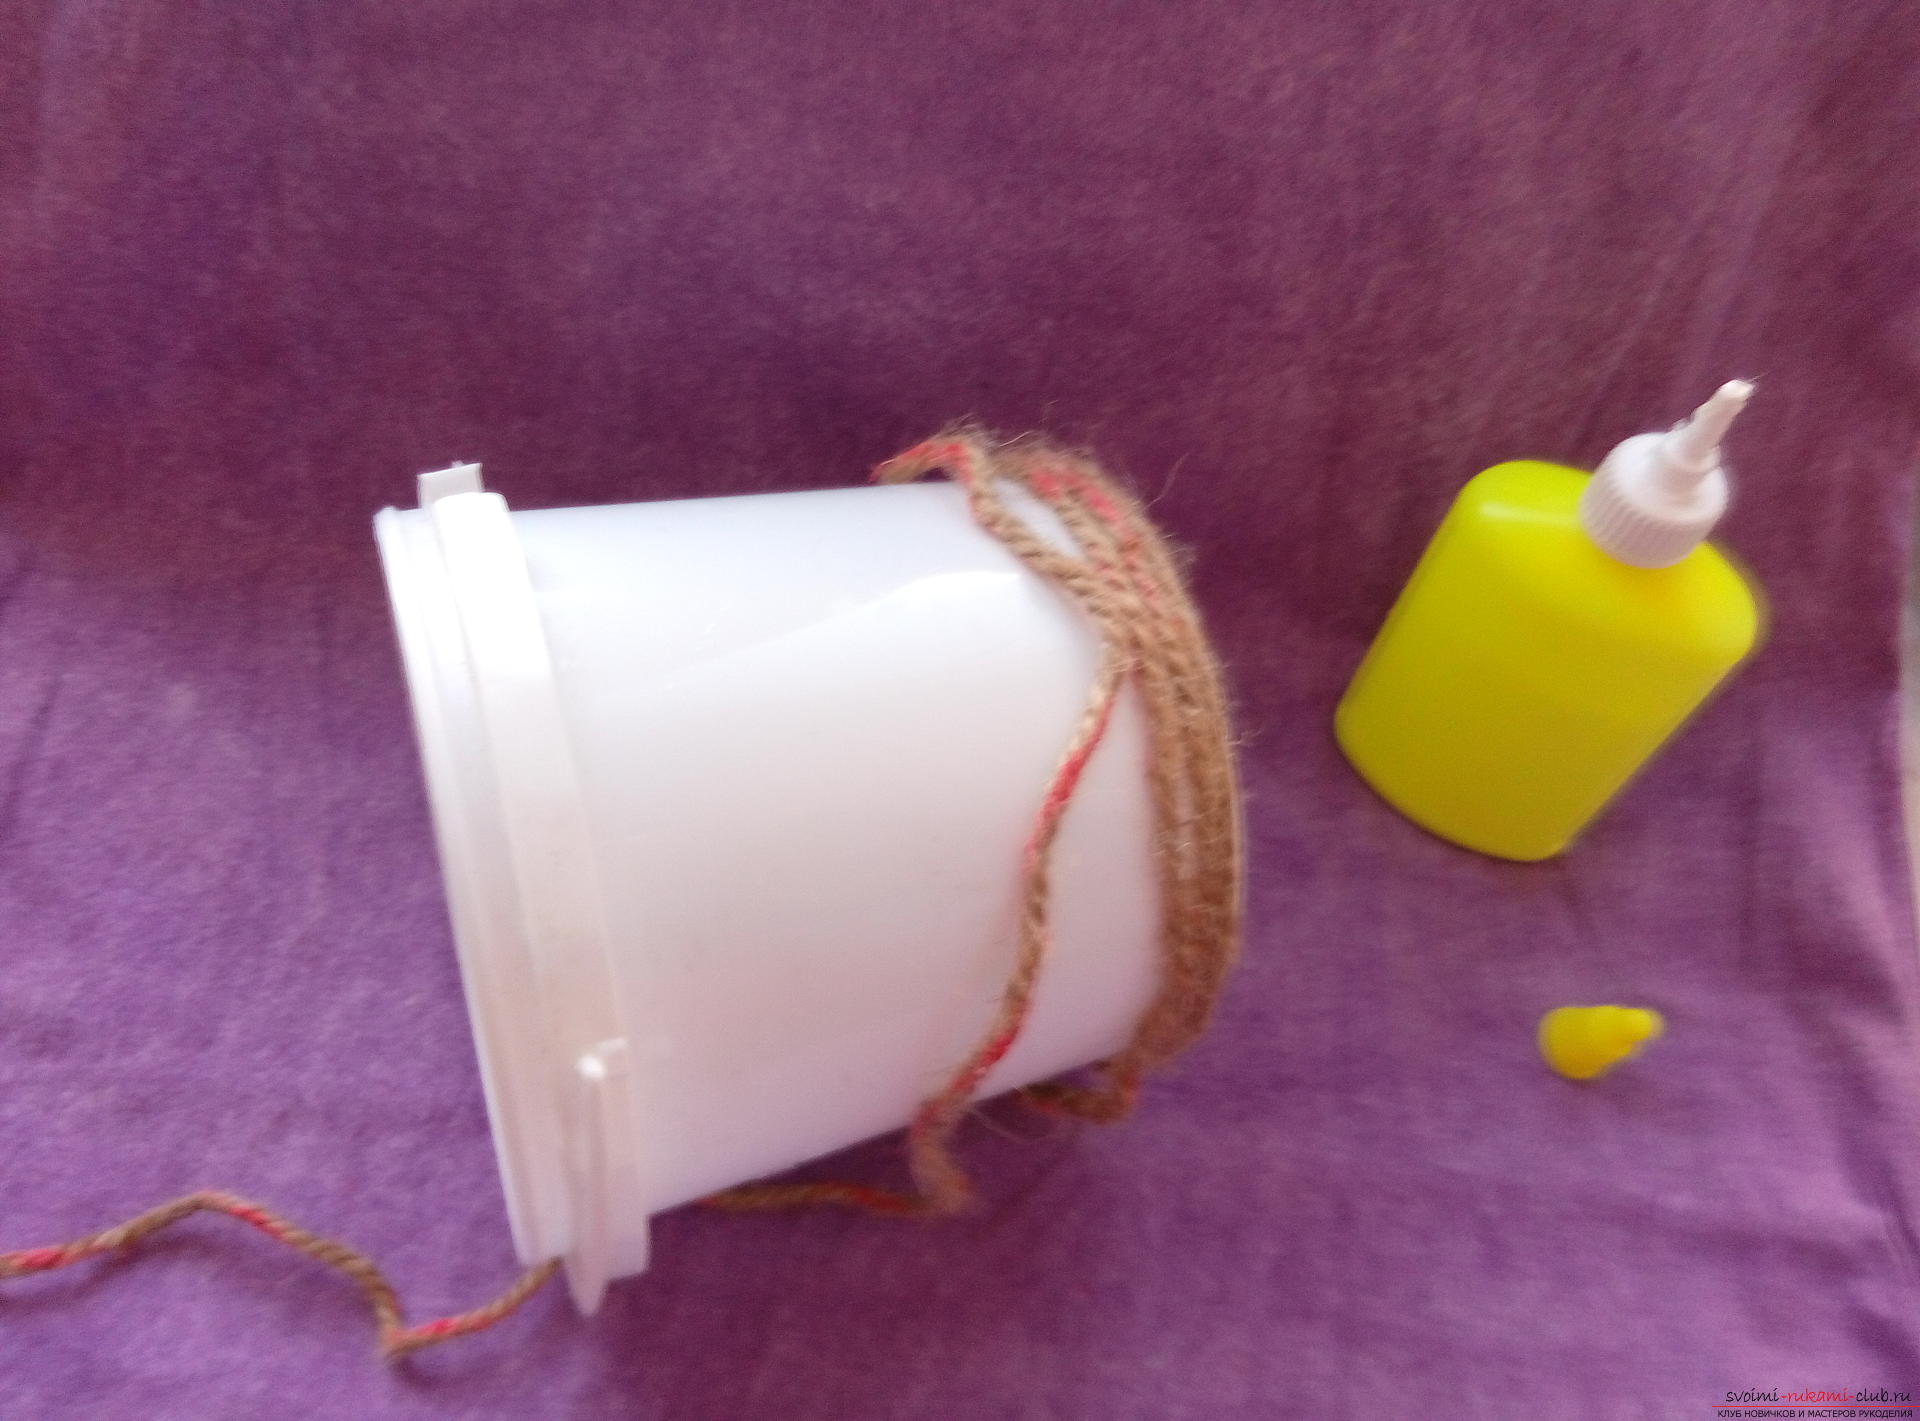 Prepare a pot of wood. First, the plastic bucket is wrapped tightly with string. We fix the ends with glue. The edge of the bucket is decorated with a lace ribbon. Then the bottom of the container is covered with a piece of foam.
 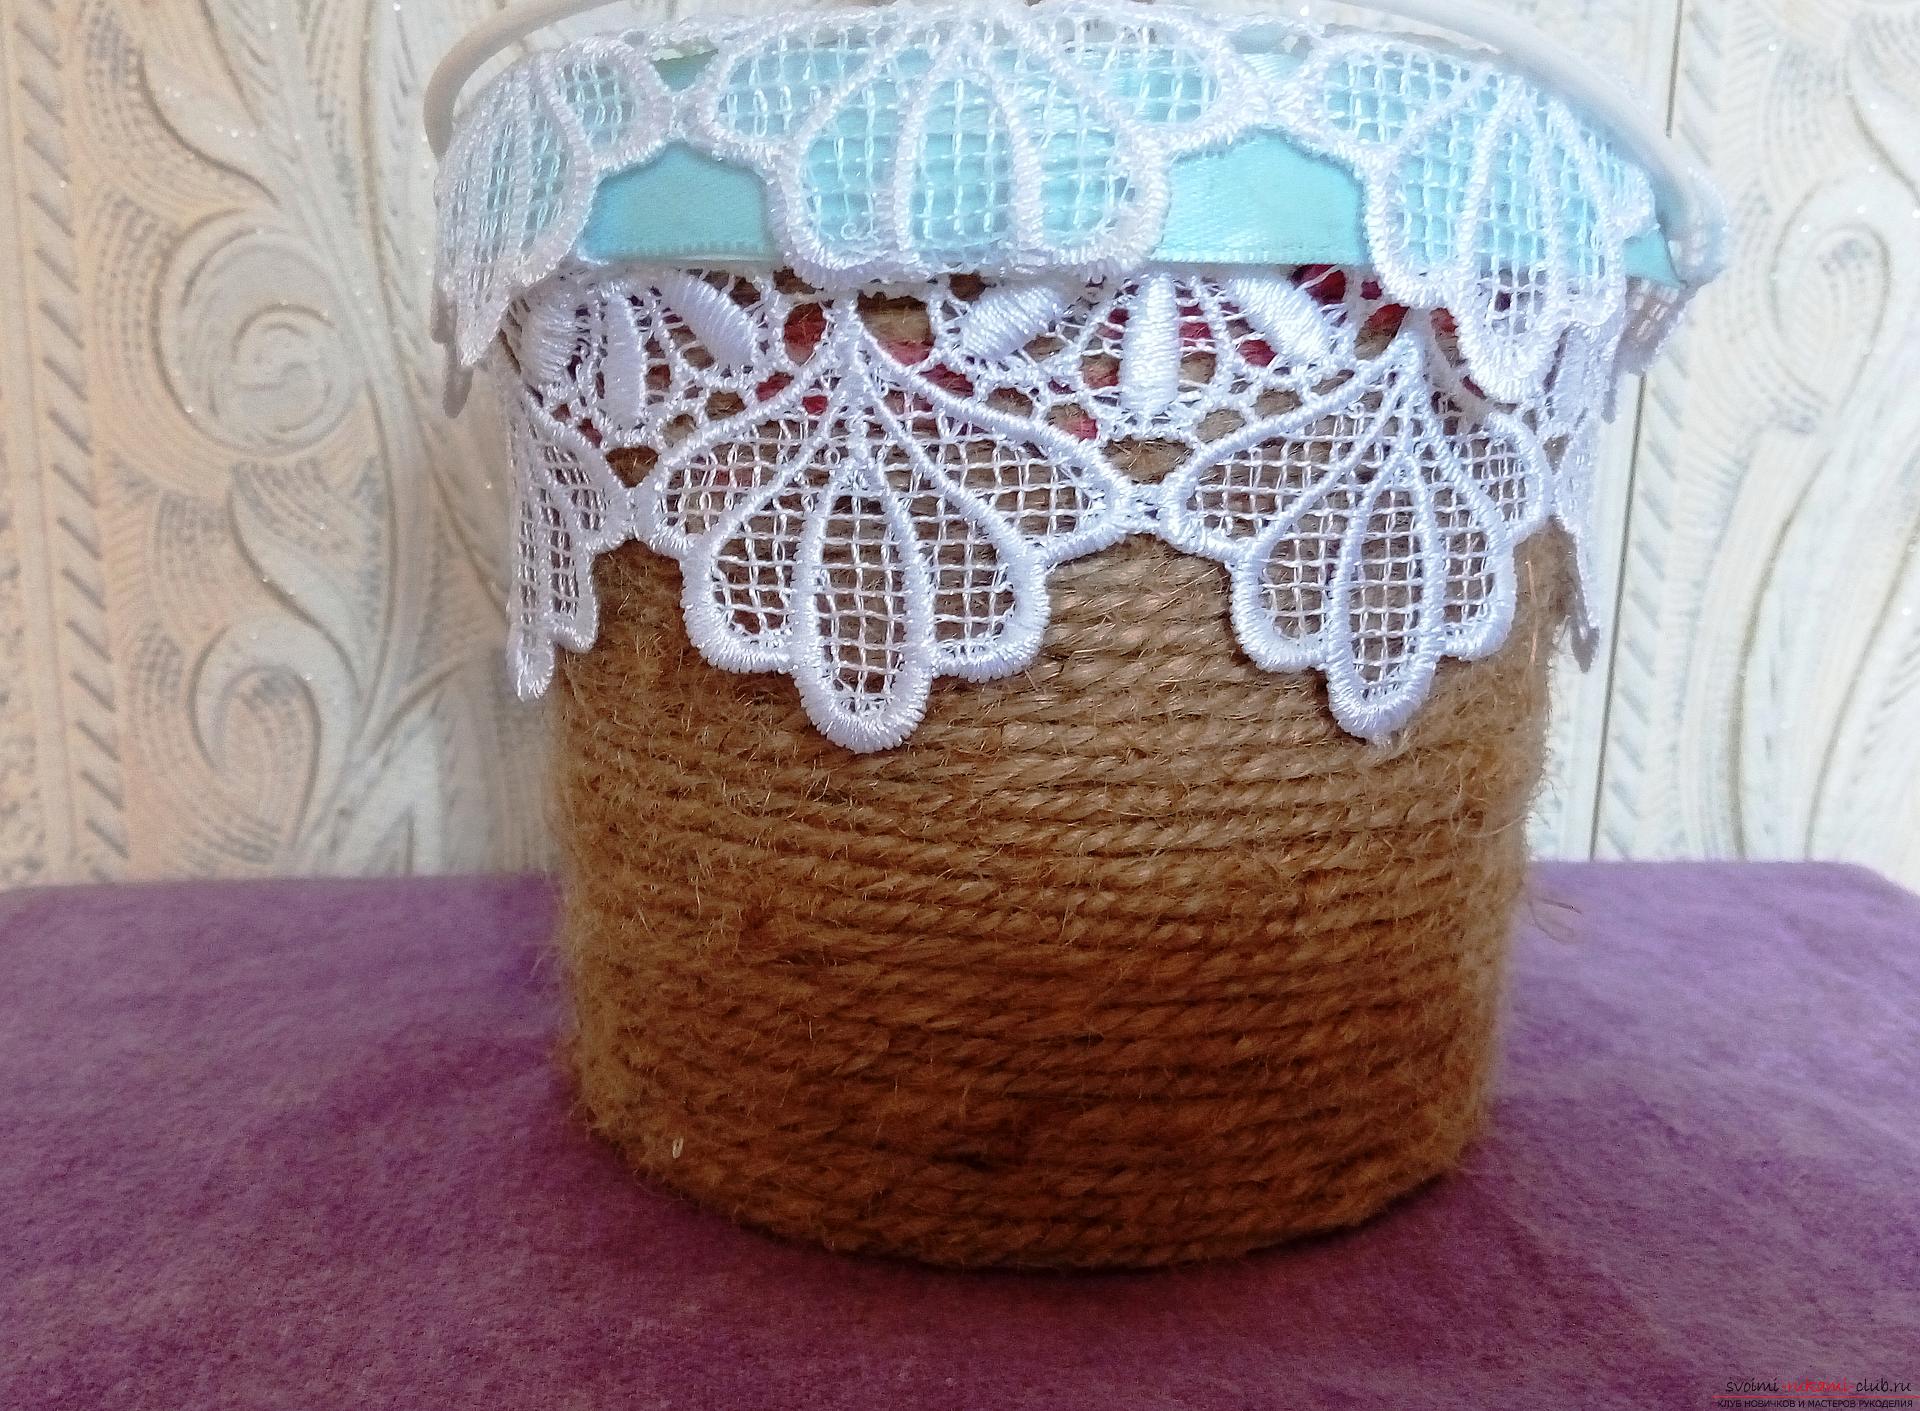 We start to make topiary with our own handswith the help of a photo. From the end of the branch, found on the street, we measure 7-10 cm. The rest is wrapped with string. The free end of the future trunk of the topiary "plant" in the center of the bucket. After that, densely we compact around it foam, broken into small pieces.
 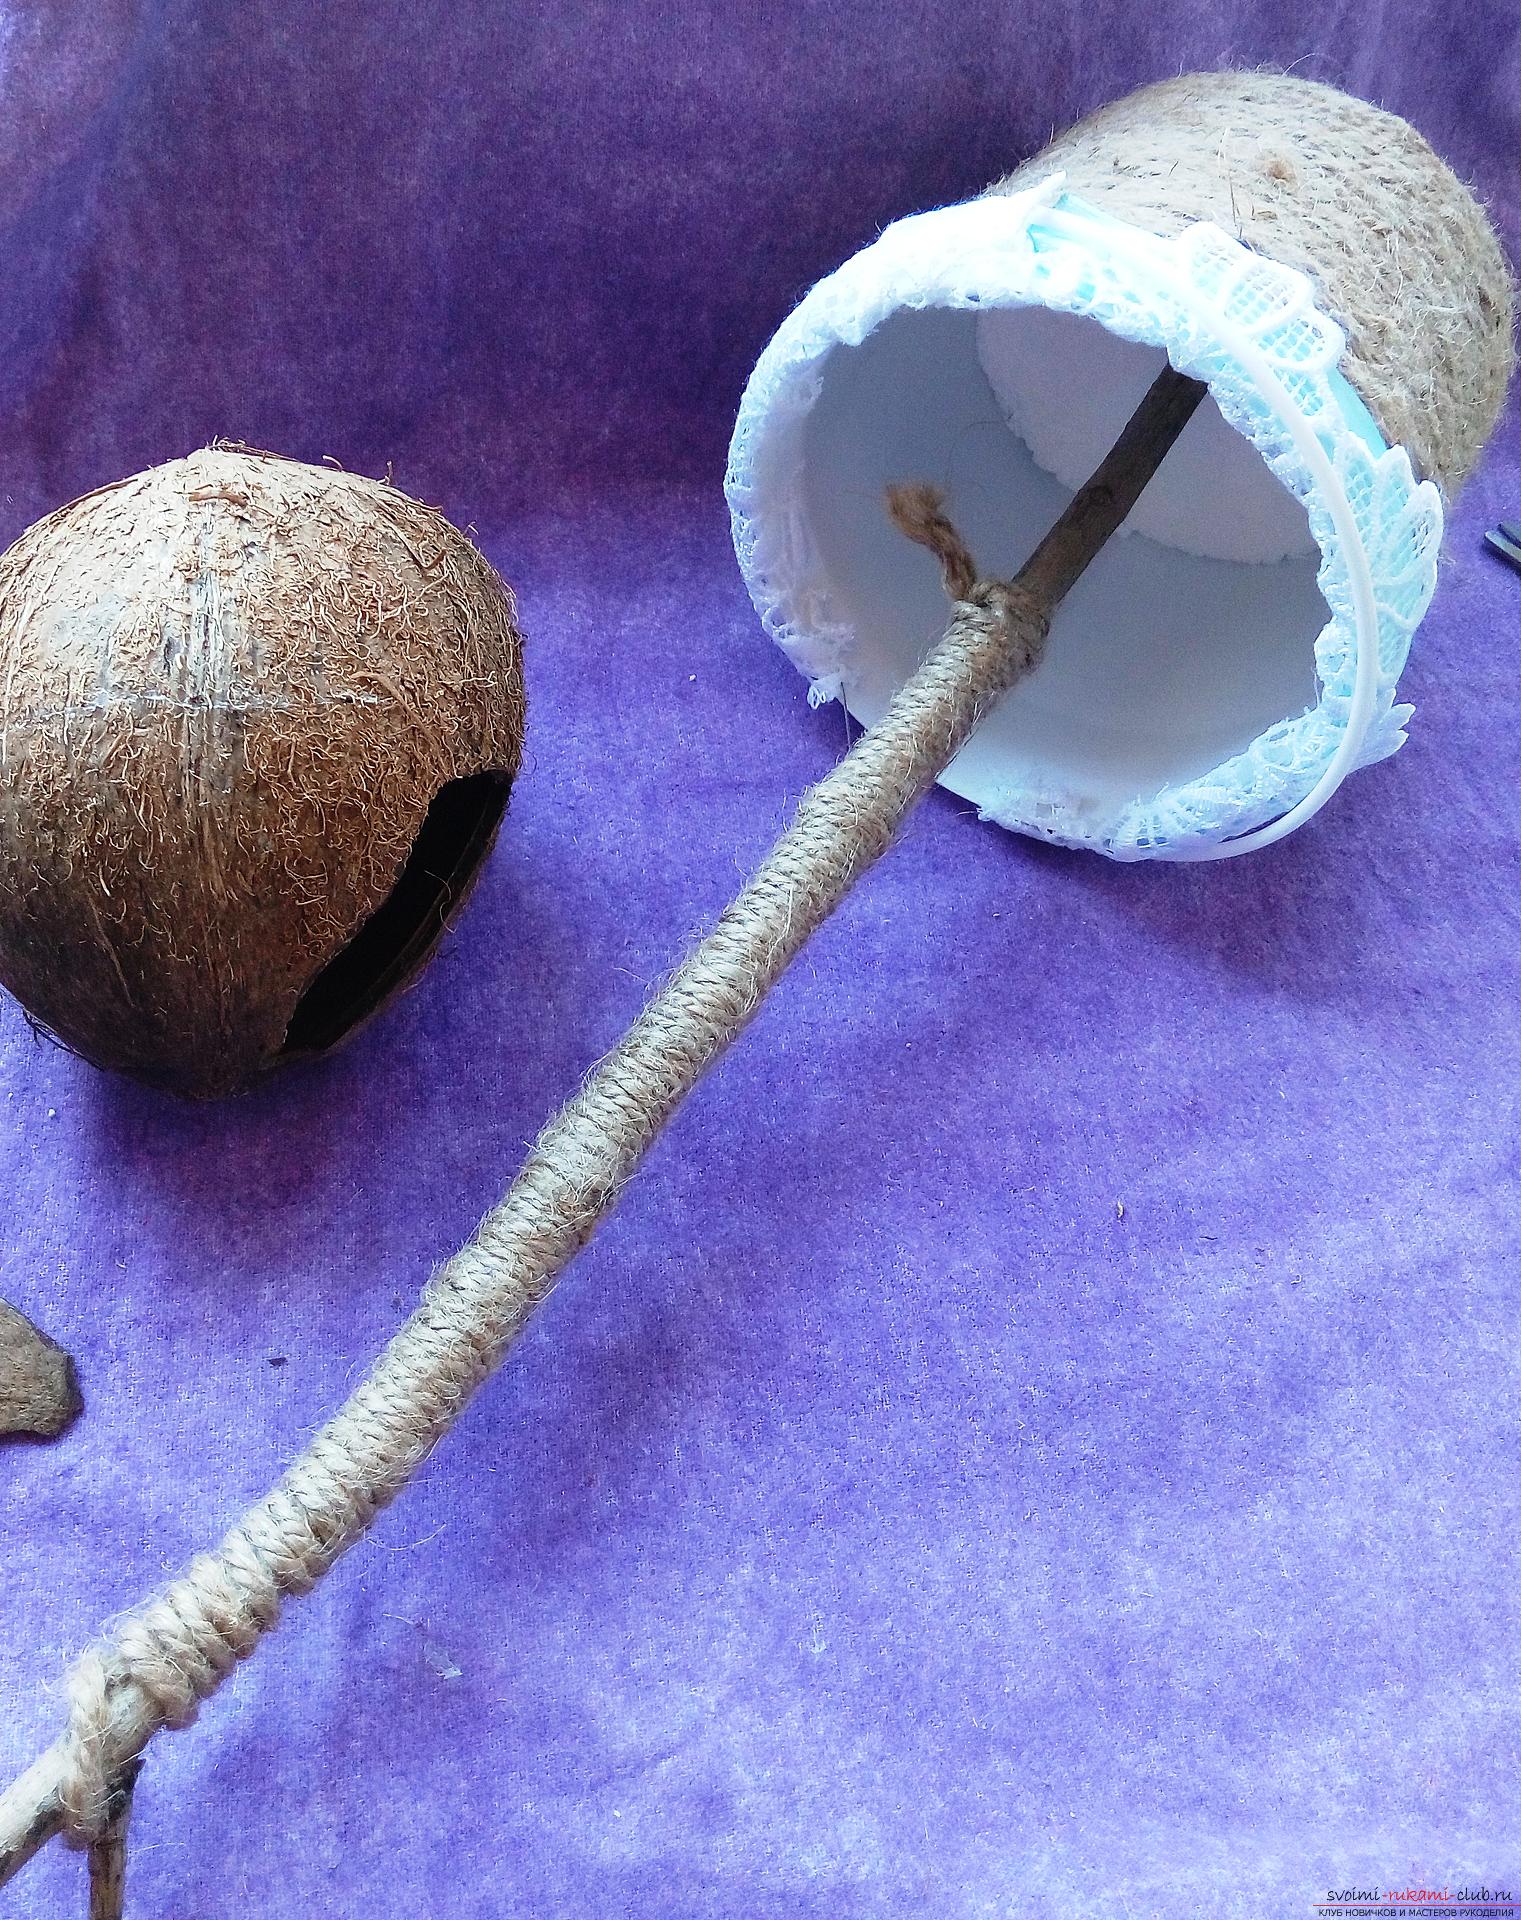 For the basis of the tree's crown we take the shellcoconut. It must be prepared in advance. First, the coconut is split so that it breaks up into as few pieces as possible. We take out the pulp, wash the shell under the tap and dry it. Then we connect the fragments in one whole with super-glue, leaving a small "window". We plant a branch on it. After that, we tighten the shell with a small cut of soft tissue and tighten it tightly with threads.
  Bant through the entire length of the center sewing thread and collect, so that turned out magnificent frills. Then evenly distribute the bow over the coconut shell and sew it to the future crown.
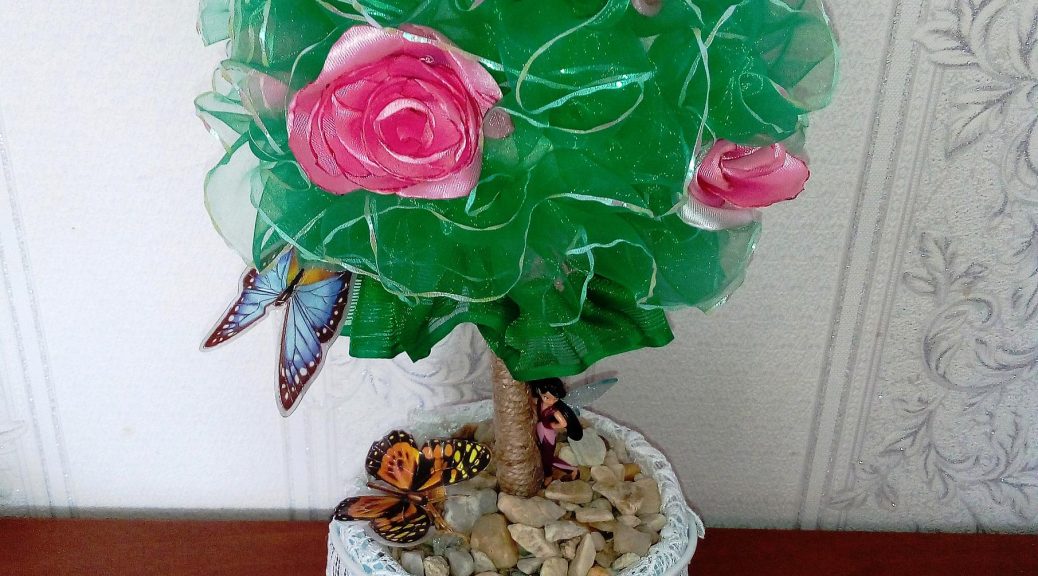
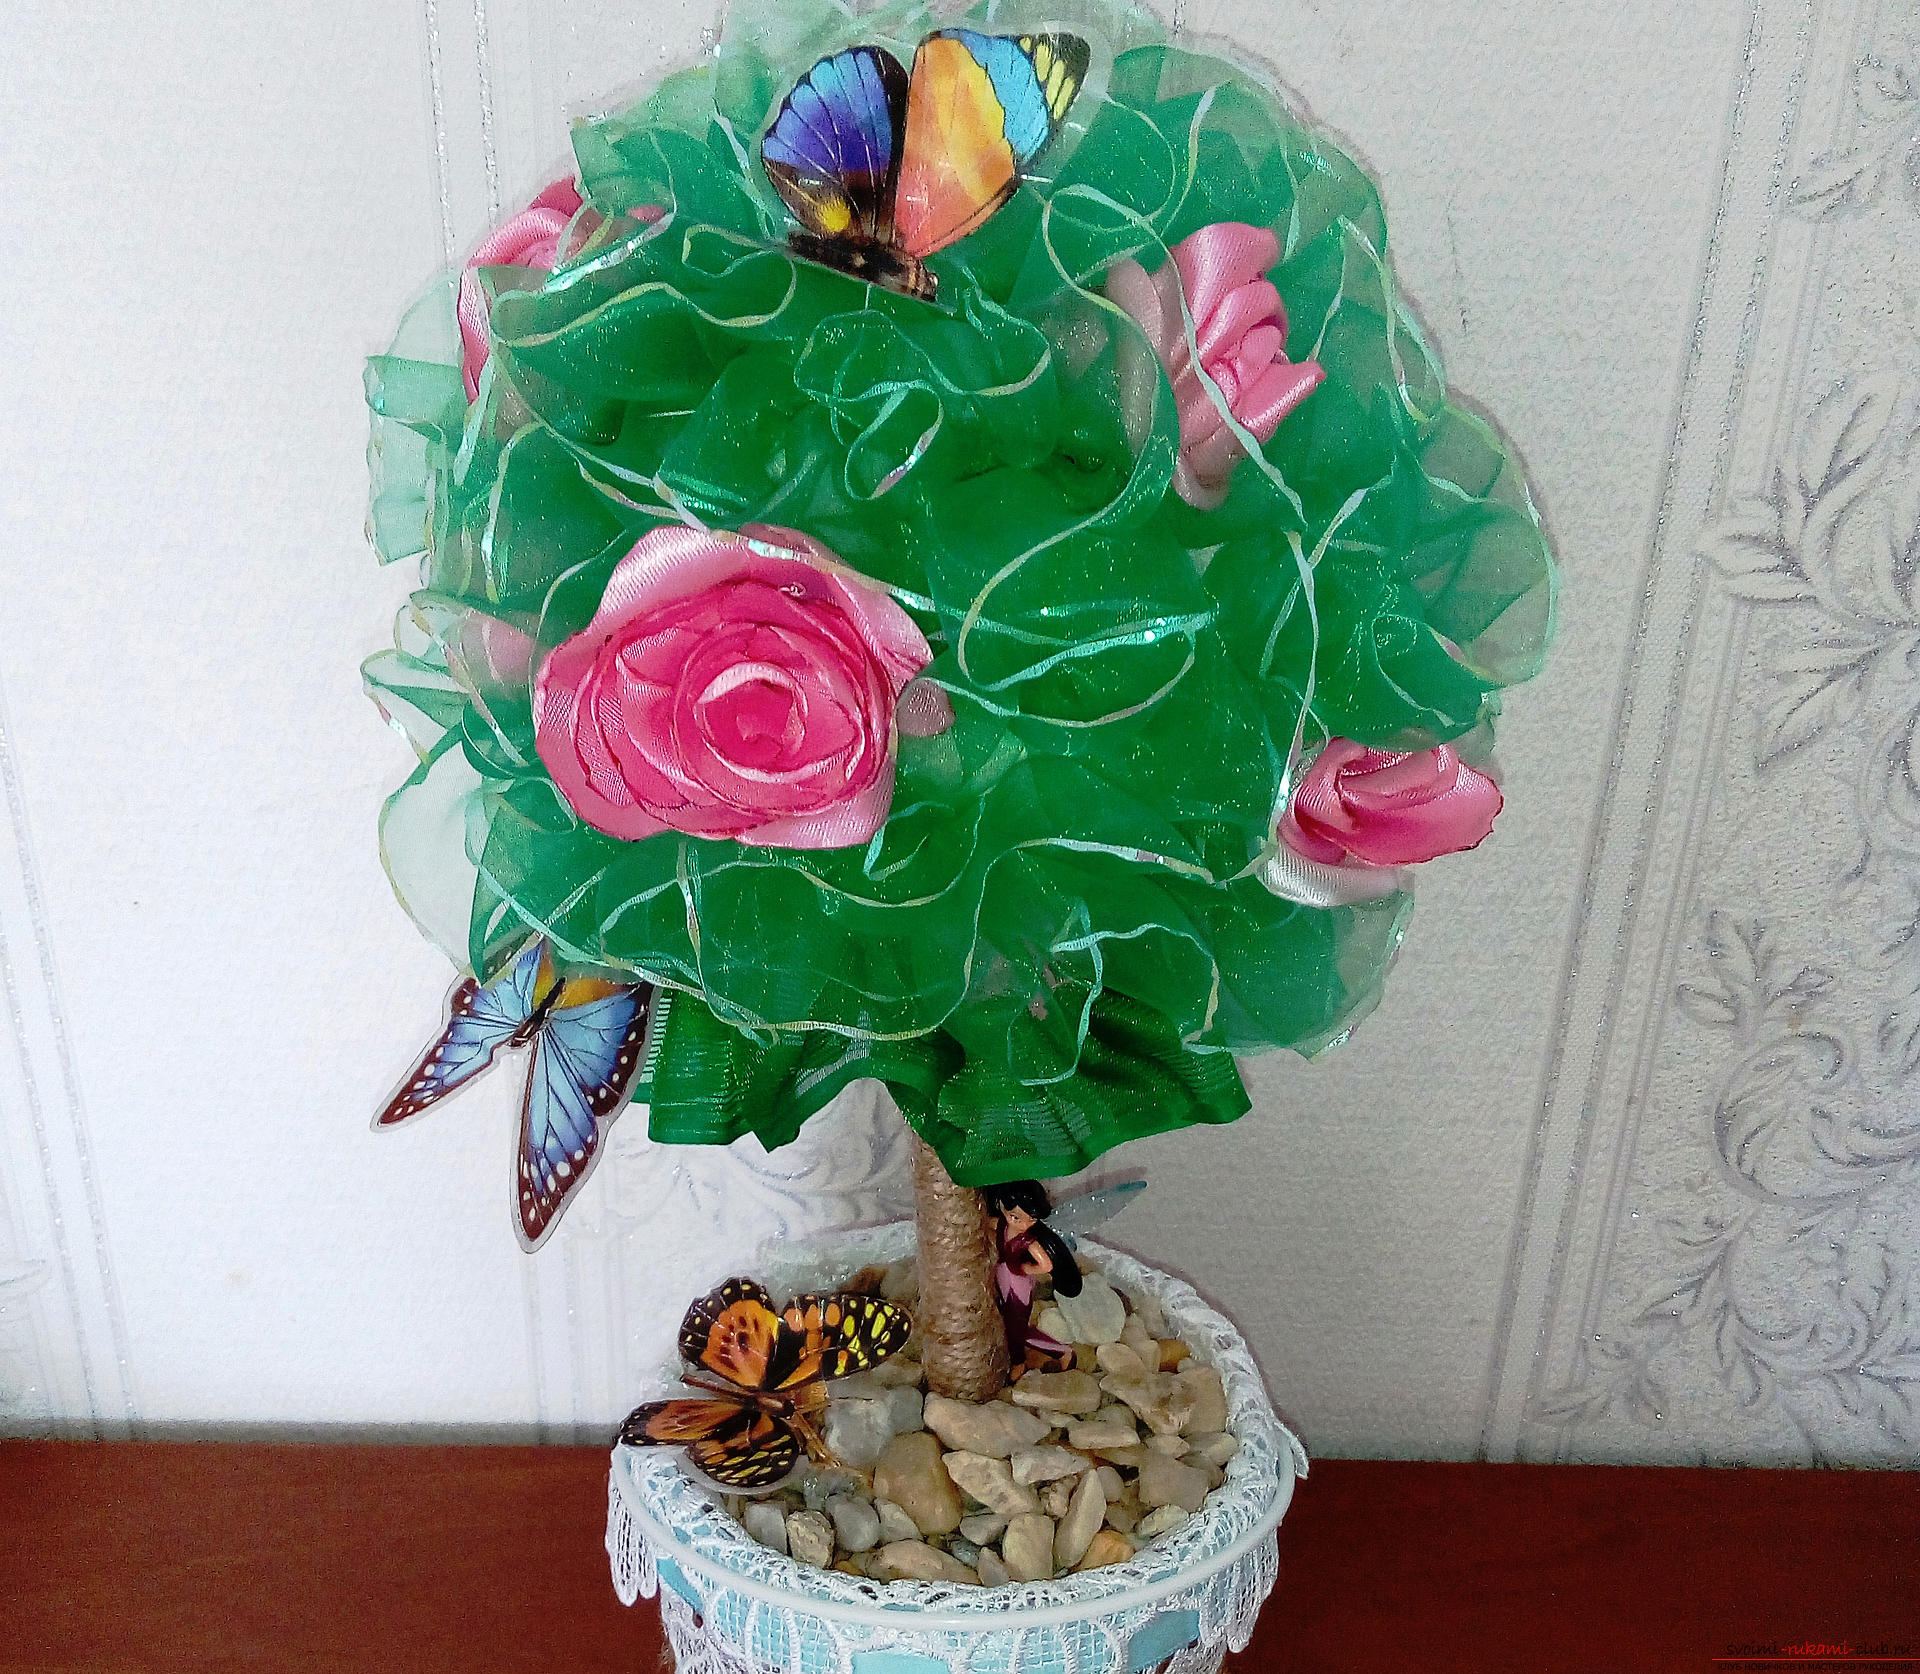
 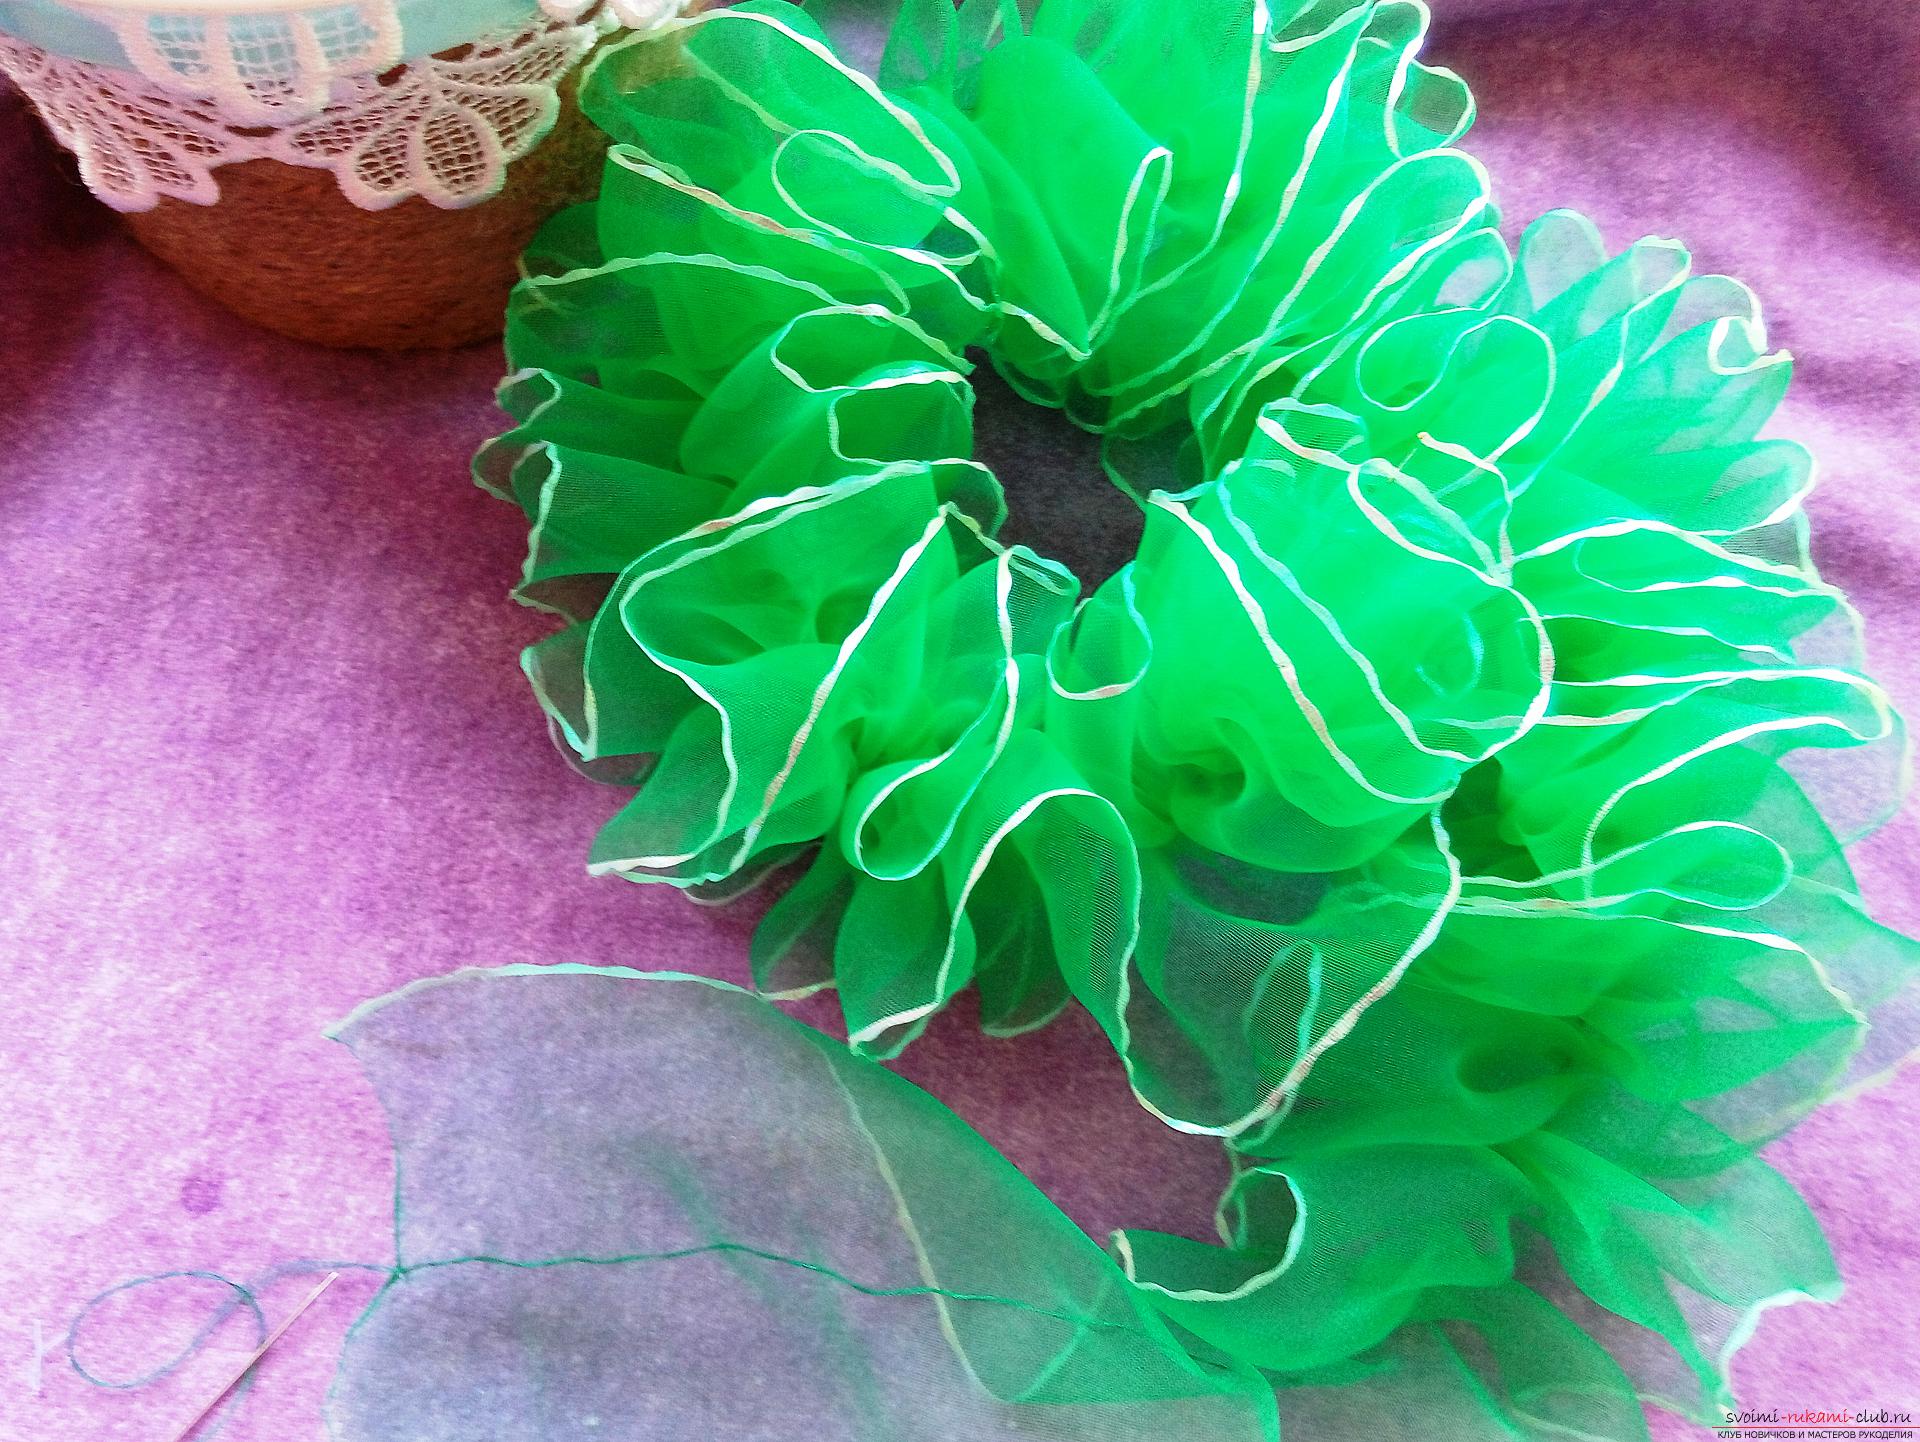 We decorate the topiary with artificial flowers and butterflies. Pour stone into the pot over the foam.
  It is believed that objects of a spherical shapeattract positive energy and positive. I can not say that a small decorative ornament will accumulate in itself a good mood, but the eye will rejoice without doubt.
Comments
Related posts:
 This detailed master-class crafts made of paper with his own hands with a photo and description will teach you how to make a daisy with wishes.
 Master-class with a photo will teach the making of a self-made toy - dolls with their own hands
 This master class with photos will teach you how to make a house of paper with your own hands.
 This master class with a description and photo will teach you how to make crafts from felt by yourself.
 This detailed master class with photos will teach you how to make your own necklace of polymer clay.