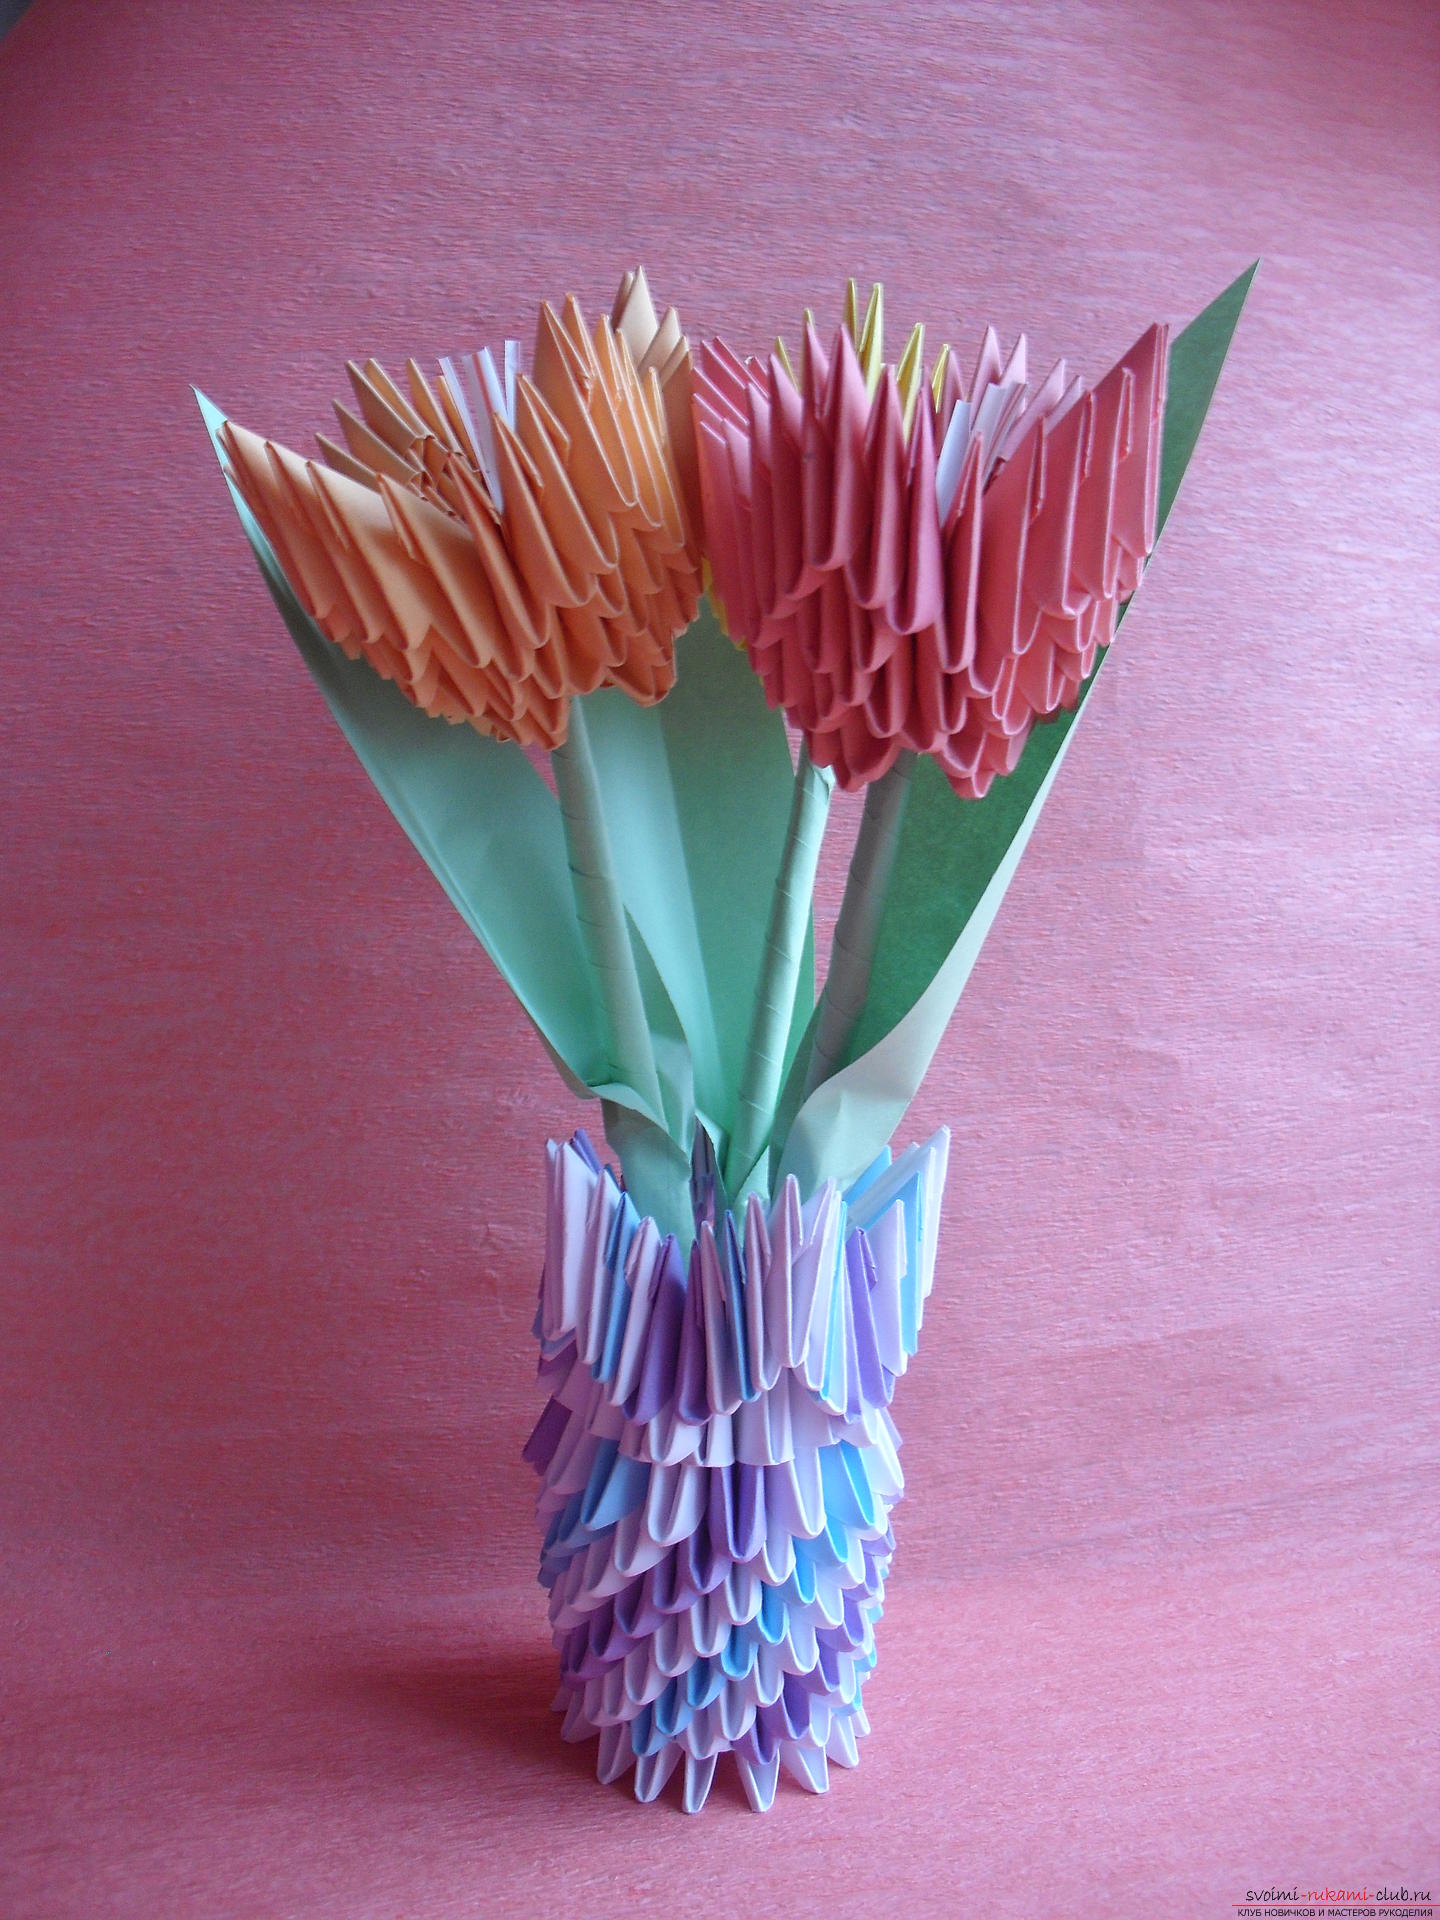
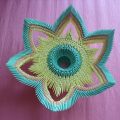
This master class will teach you how to make a vase with tulips made of paper in the modular origami technique.
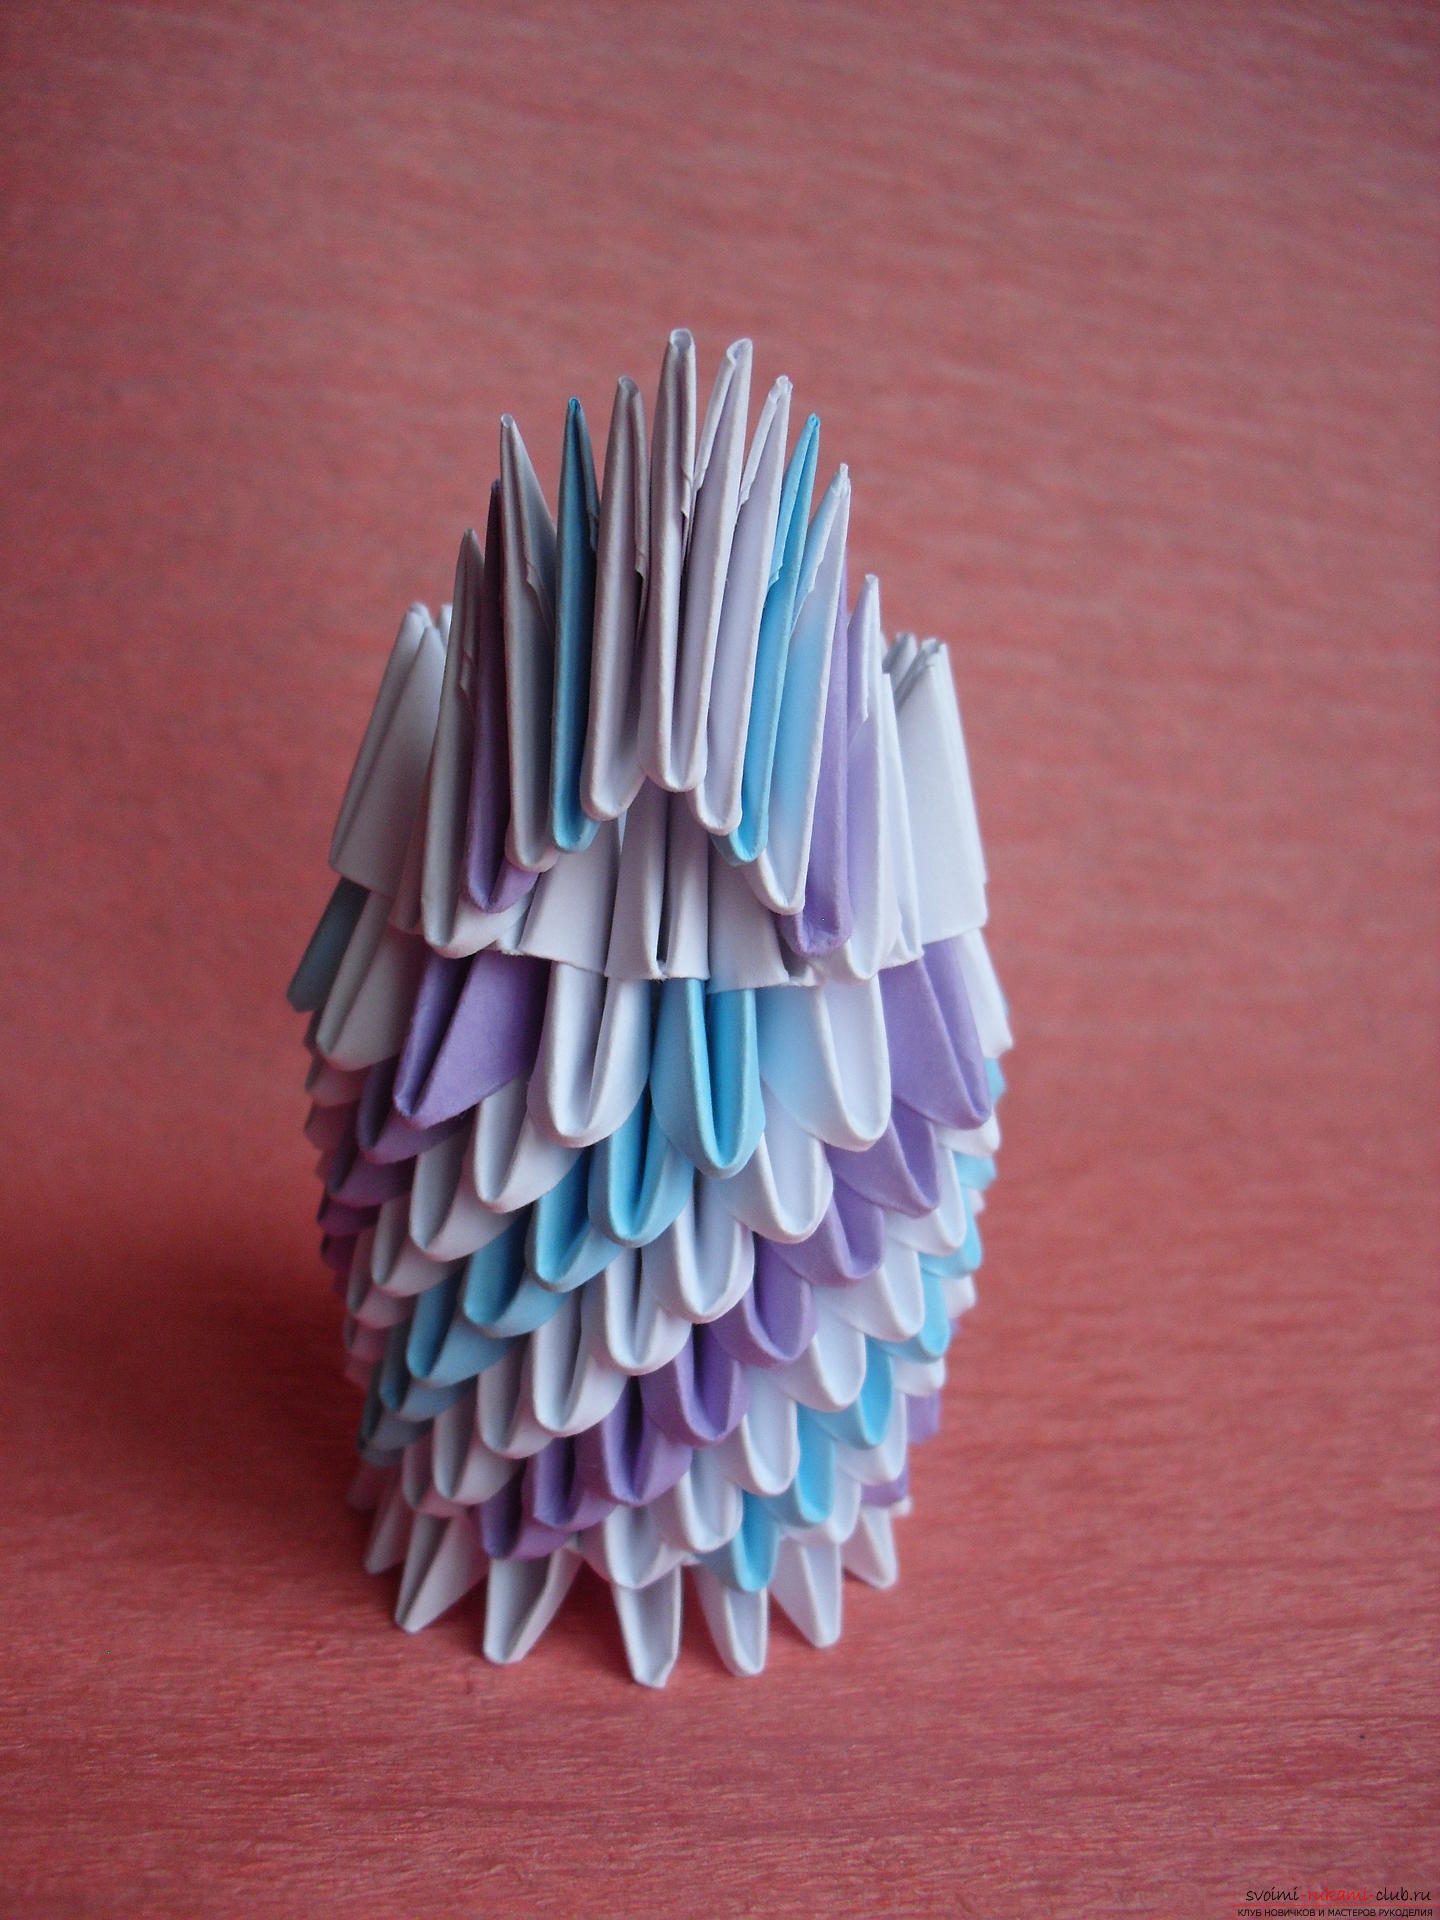
 Materials required for the manufacture of the craft: • office color paper of standard A4 format (pink, yellow, orange, purple, blue, green); • office white paper; • Straws for a cocktail (3 pieces); • glue-pencil and super-glue; • scissors. Step-by-step instruction Vase: Basis. For the base, triangular modules of the following colors are required: white (164 pcs.), Violet (43 pcs.) And blue (44 pcs.). Prepared white triangular modules are formed in triplets.
 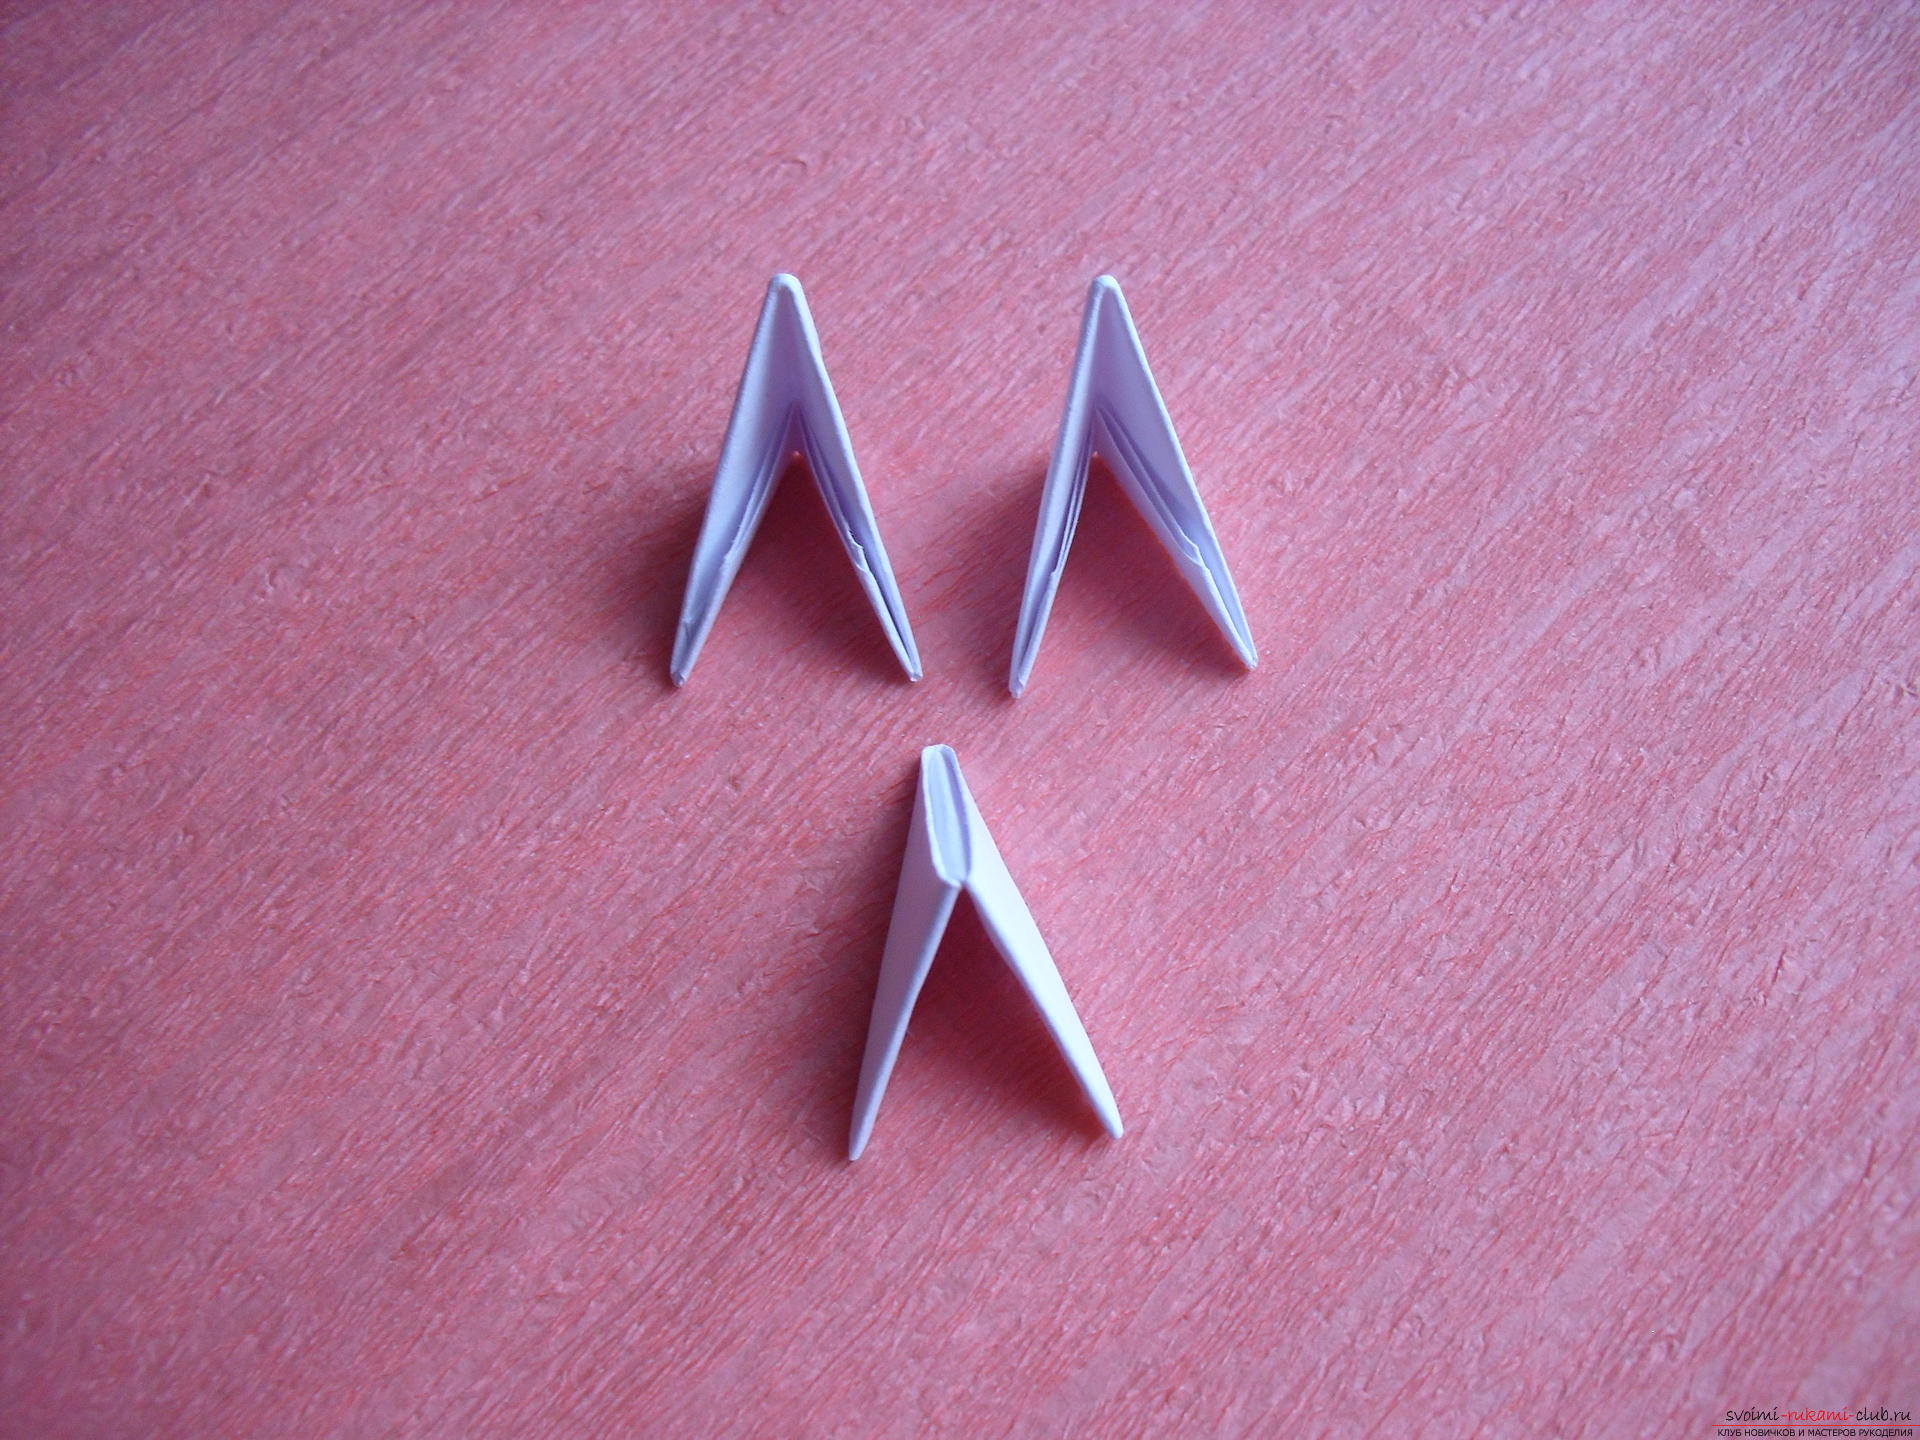 In total, they need to make 8 pieces. Next, the formed workpieces are connected to each other and closed in a circle.
 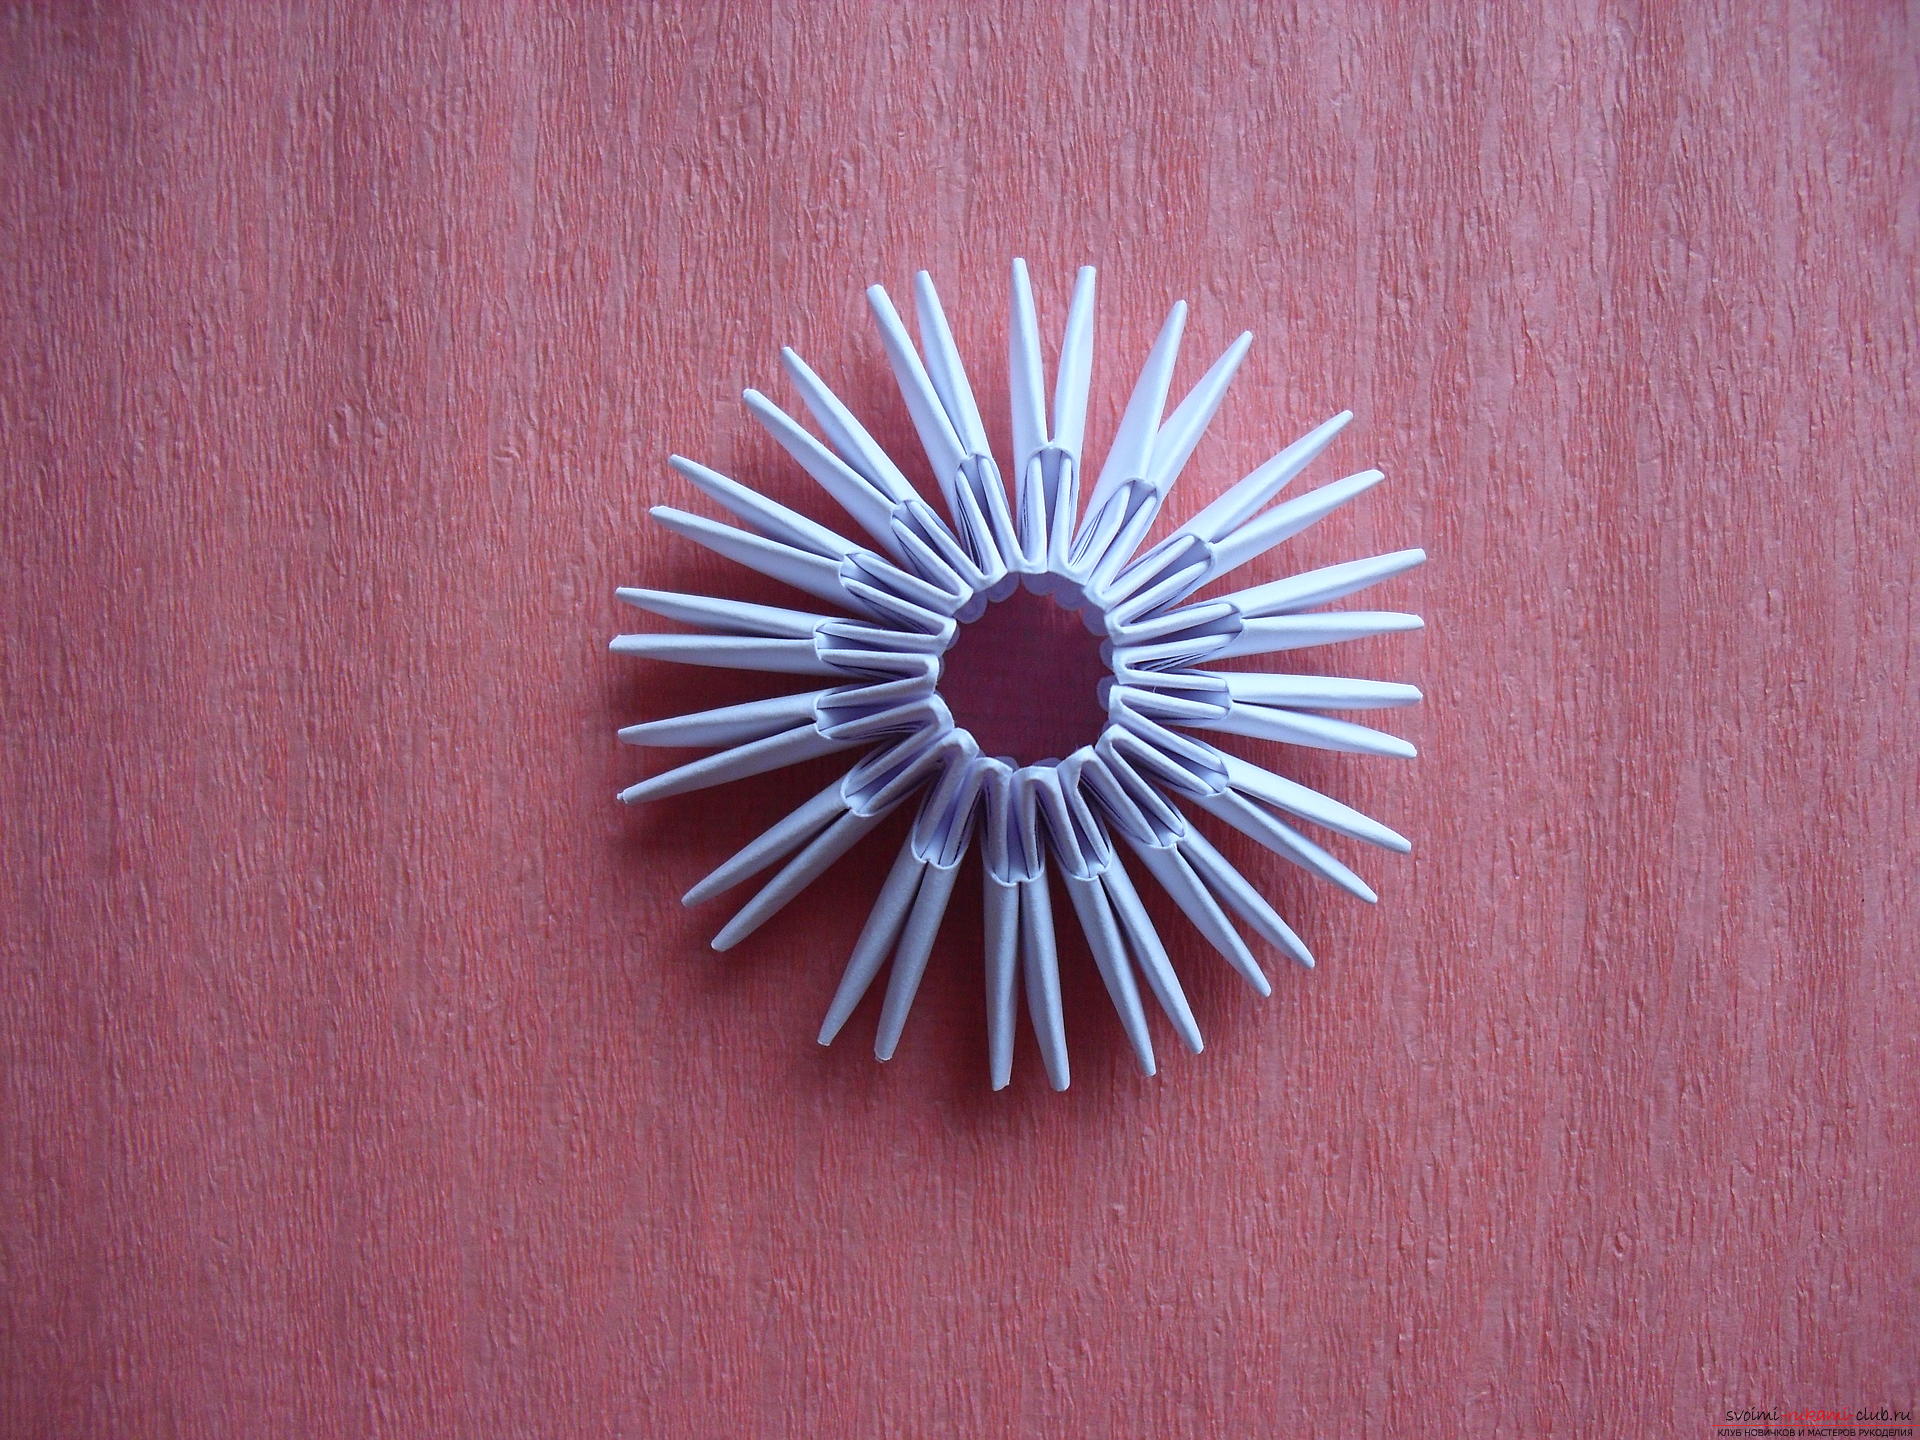 In total, in the resulting ring, 16 modules,inserted by the short side. The first two rows are ready. The third row is an alternation: 1 blue, 1 white, 1 violet, 1 white module (all the details are strung together in staggered order and long side).
 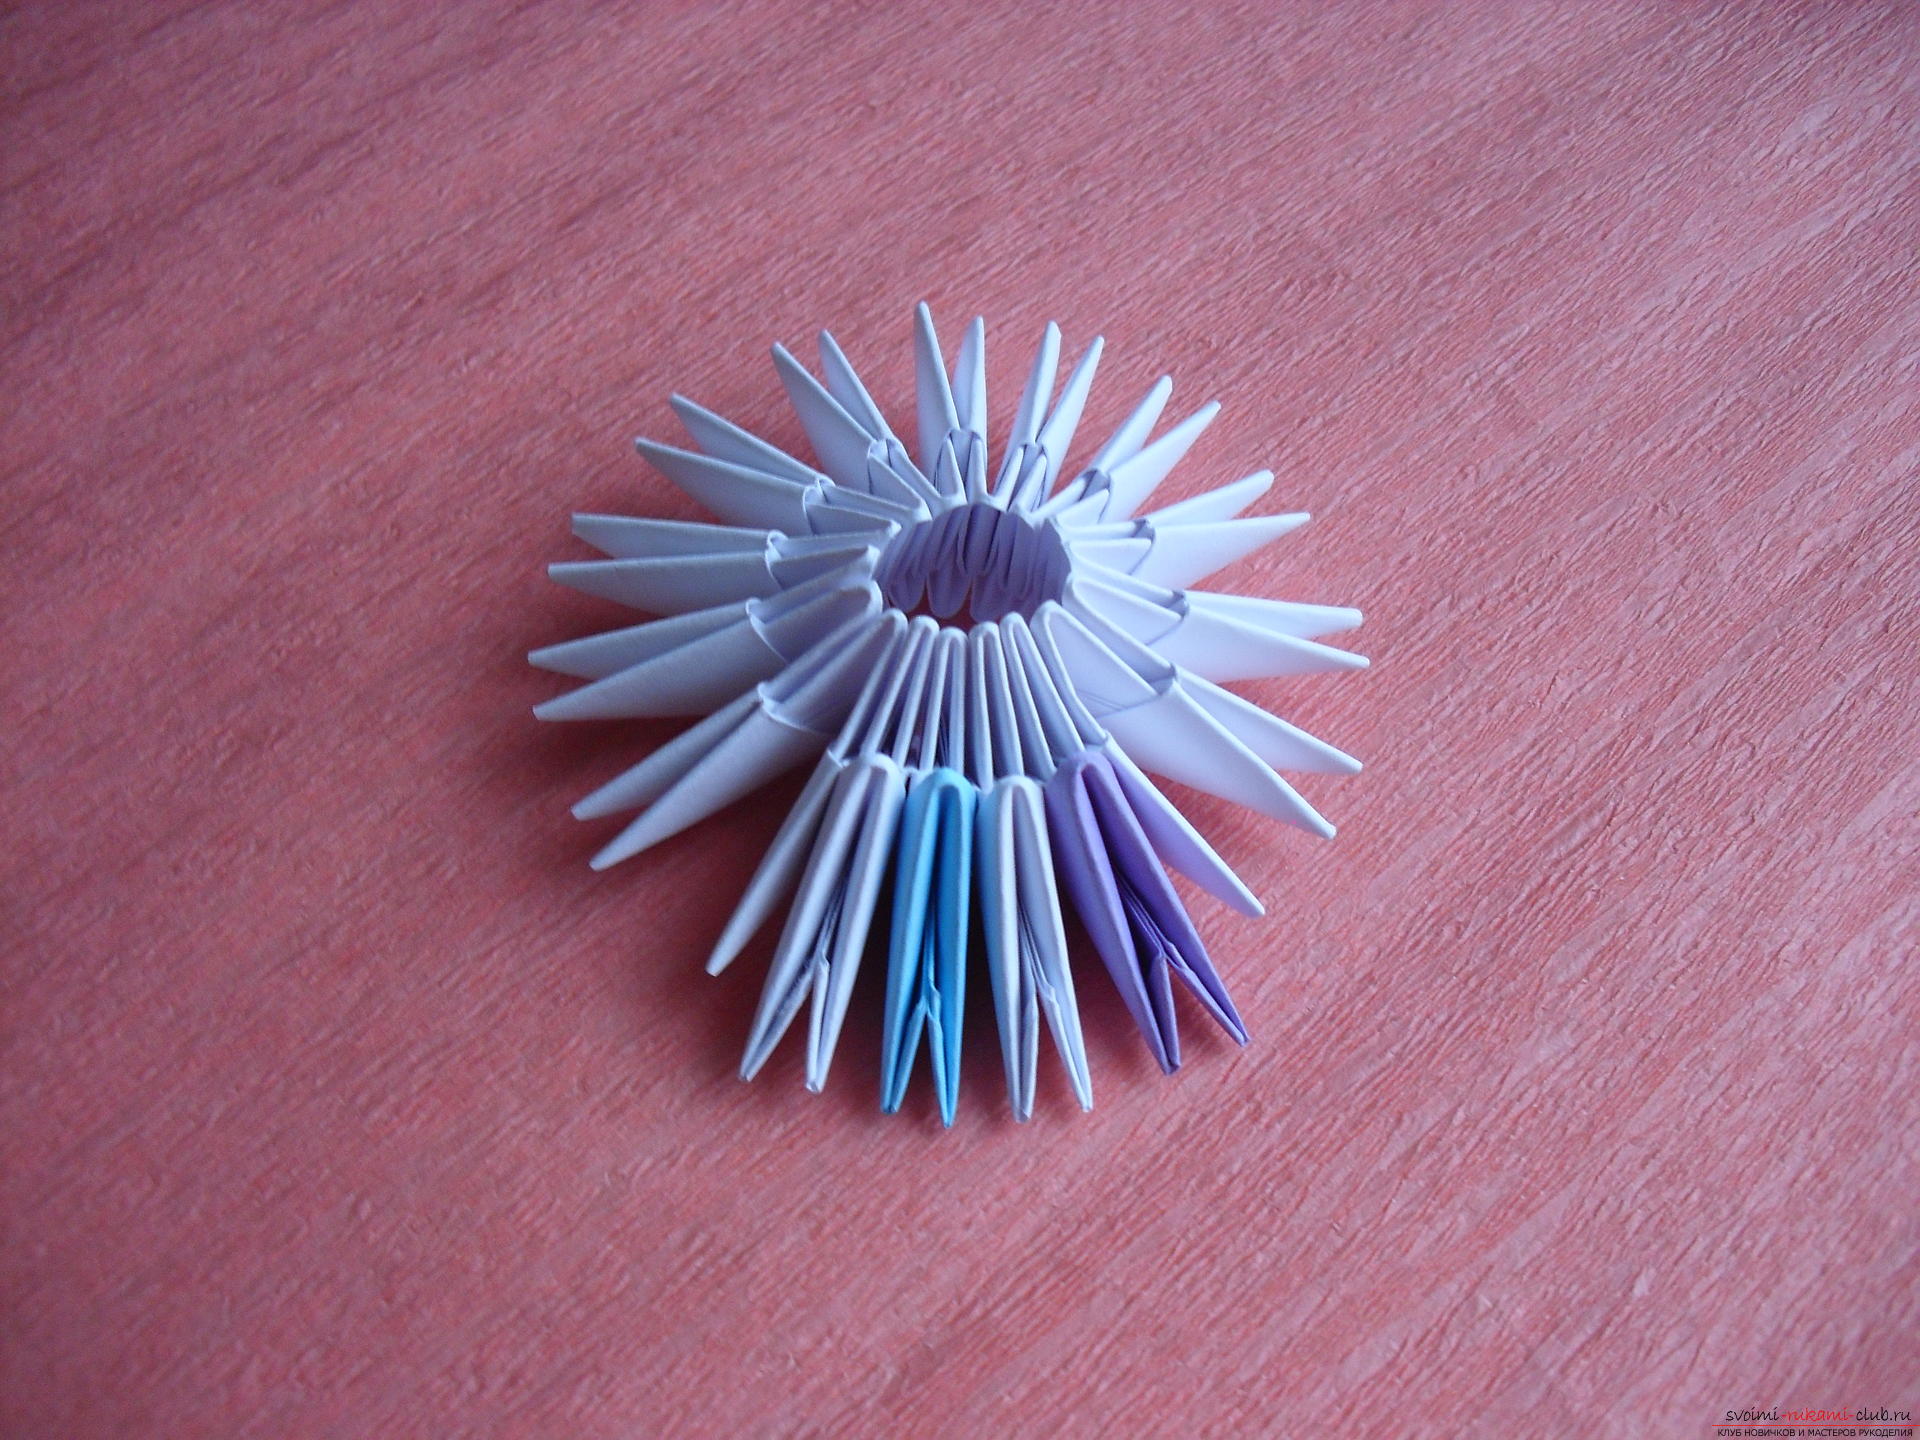 The total number of modules in a row is 16.
  Next, the product must be unscrewed. 4 row - the repetition of the previous row, with a shift of the figure to the right side.
 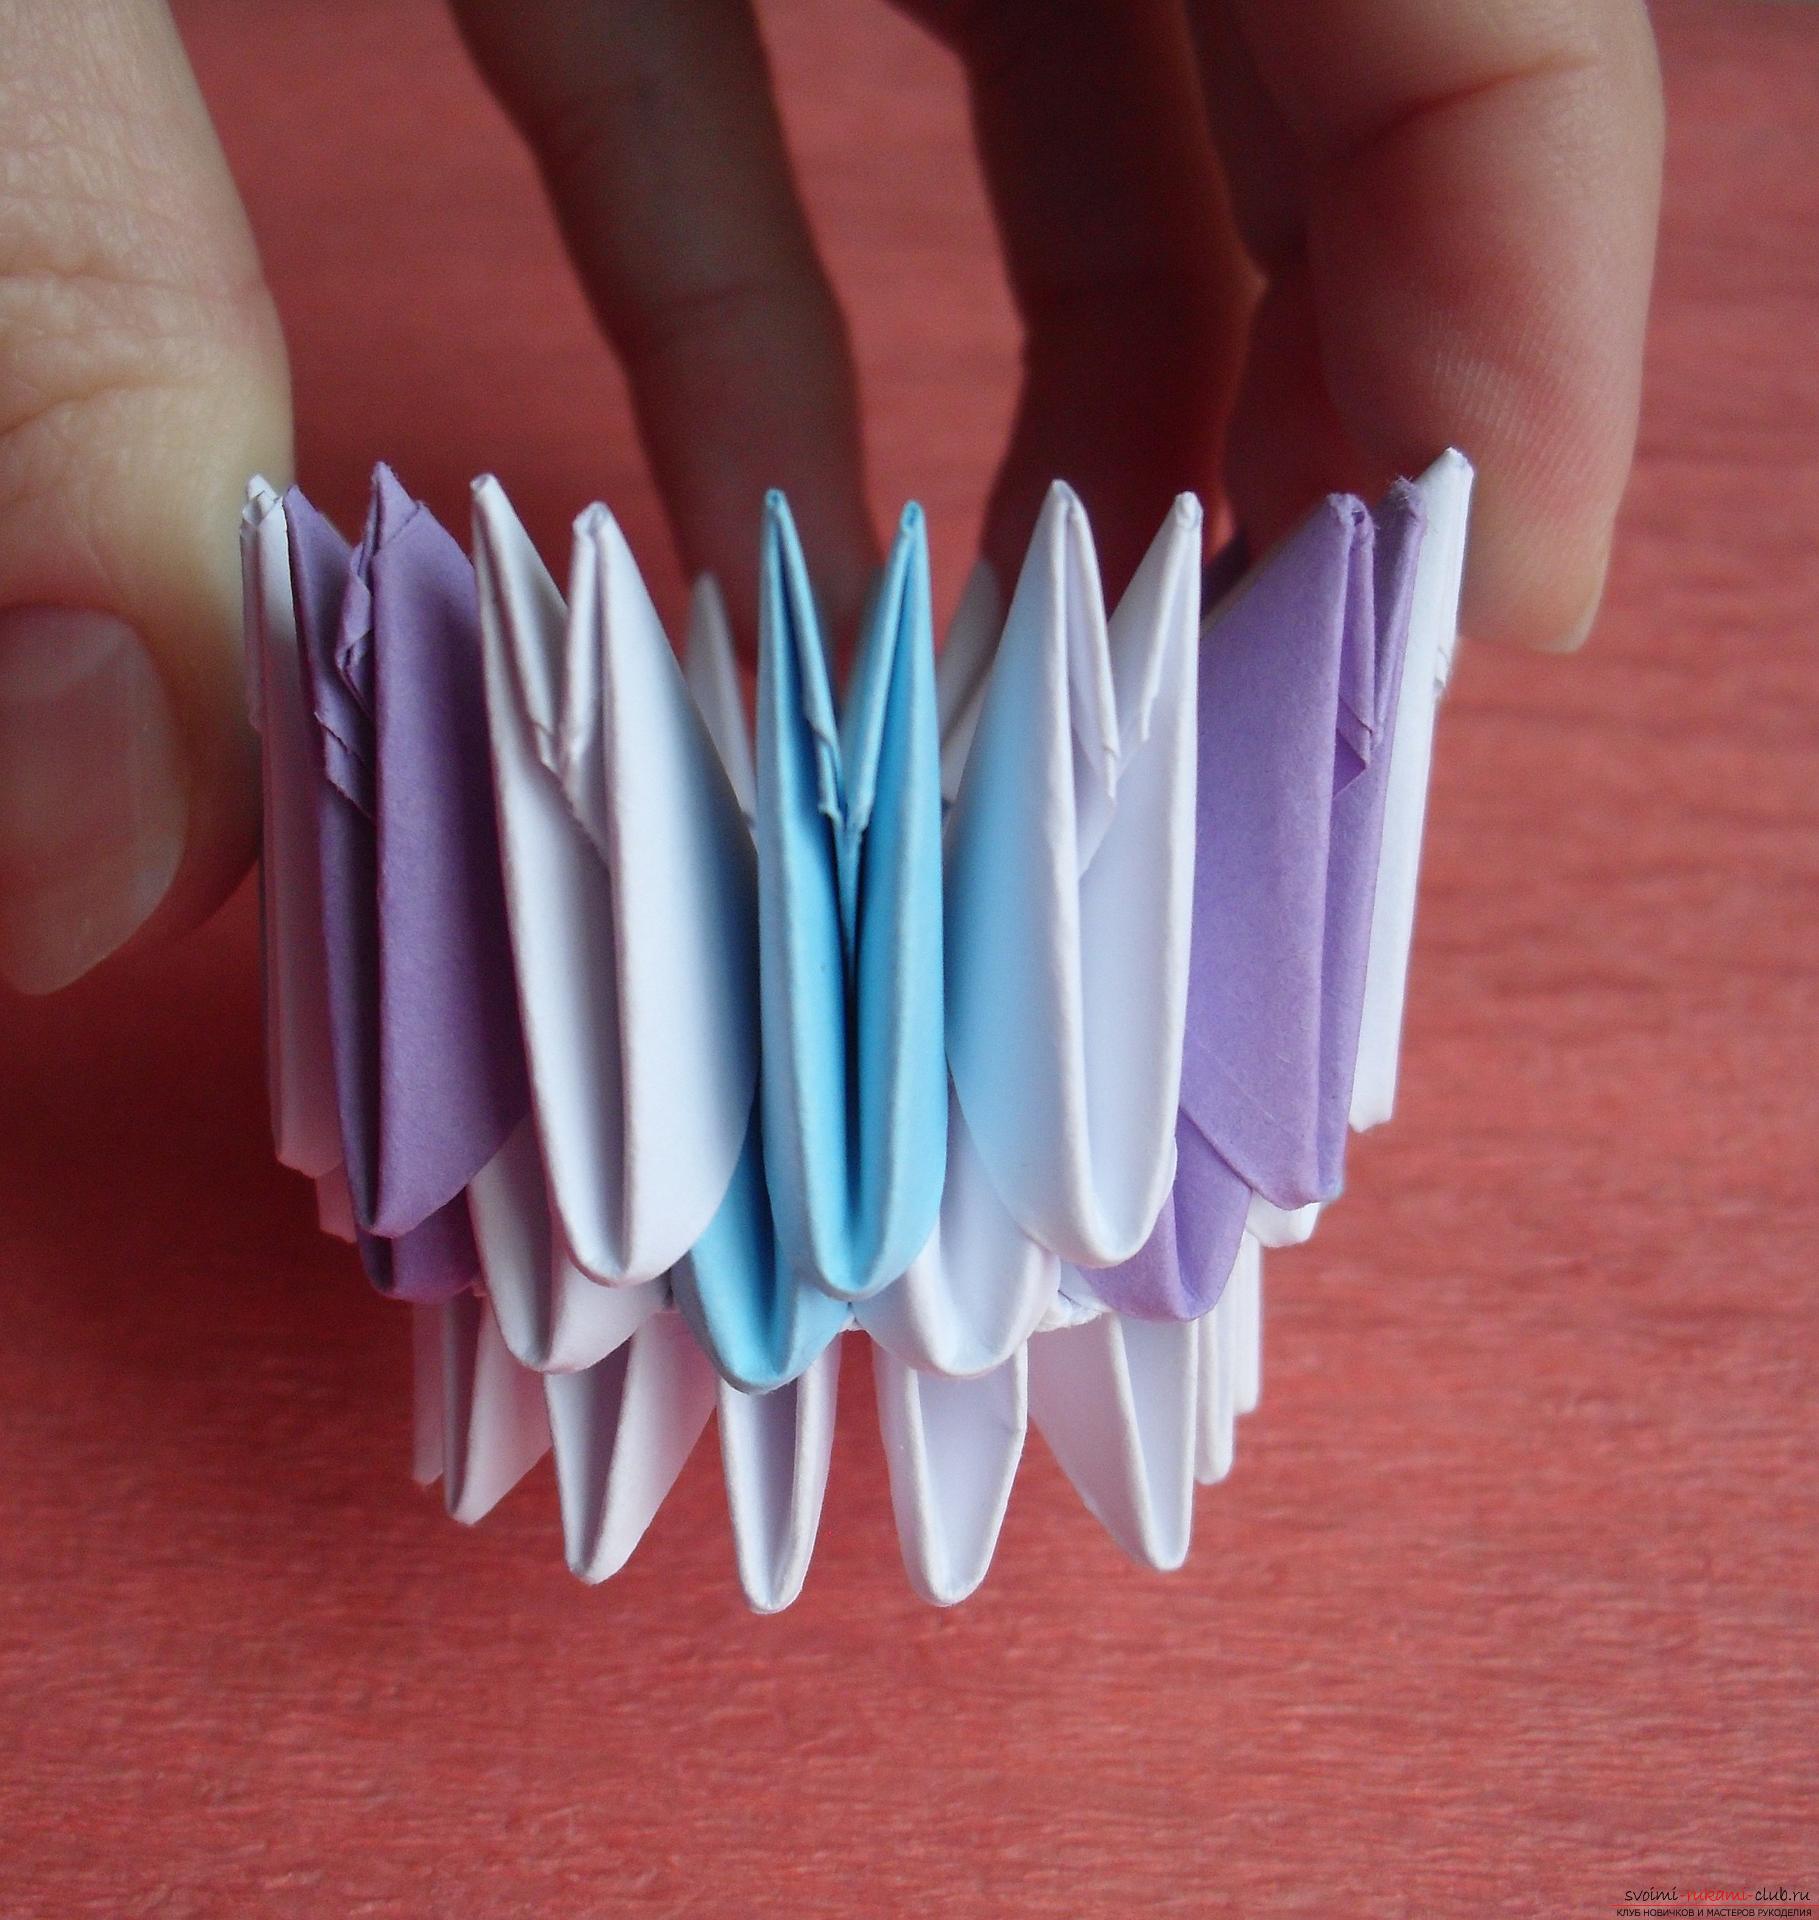 5-10 rows - the repetition of the previous series. 11 row - 16 white modules, put on the short side outward.
 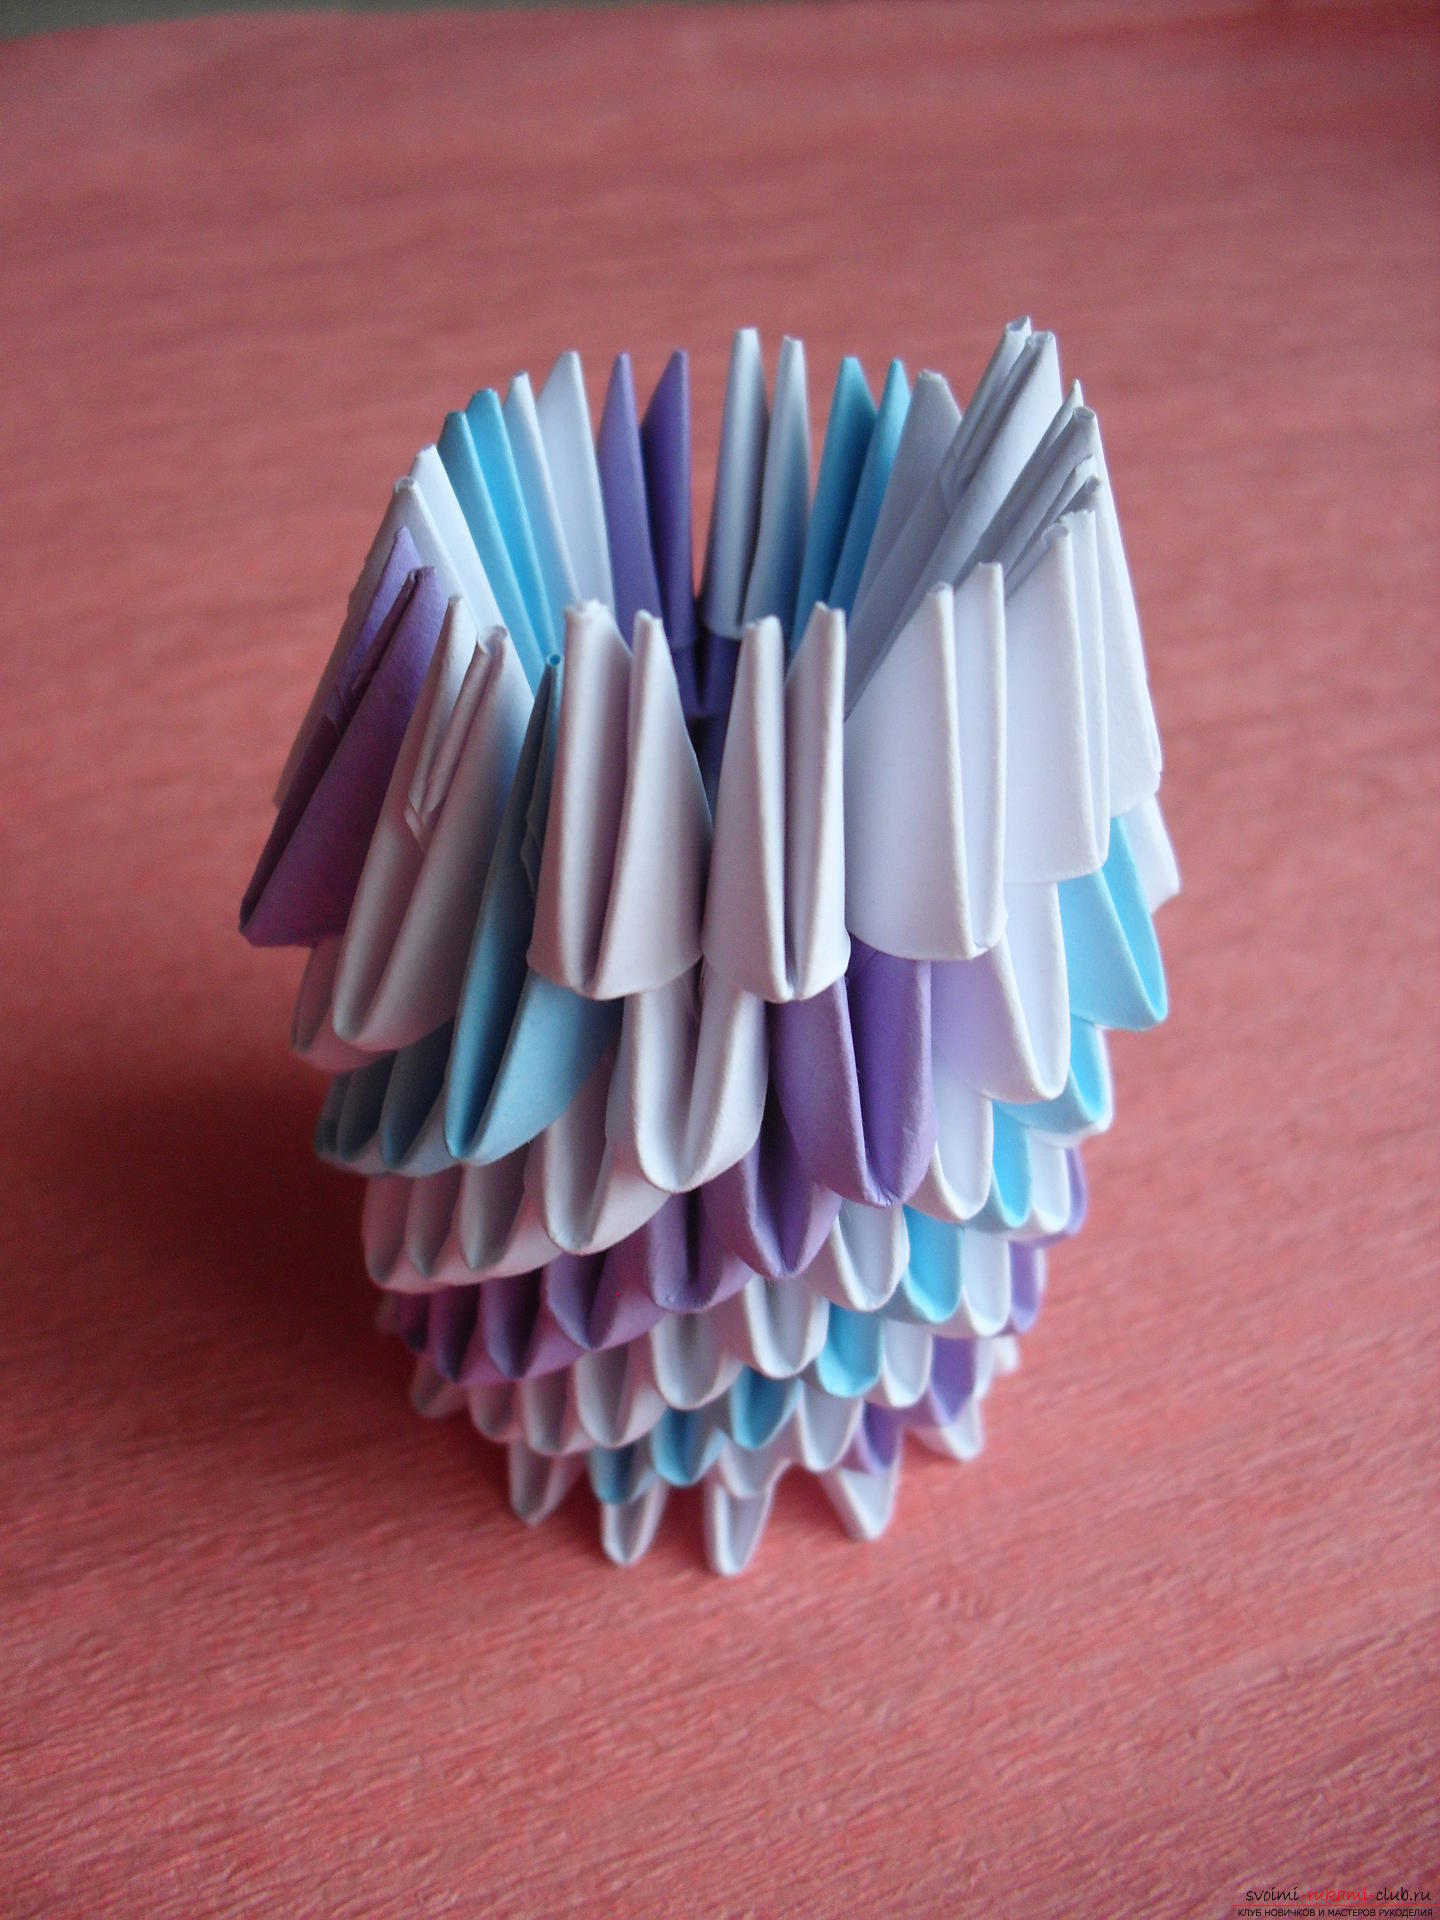 Arches Each arch consists of left and right sides. To build the left side, you need to put the modules on each other in the left pockets, and to collect the right side - in the right pockets.
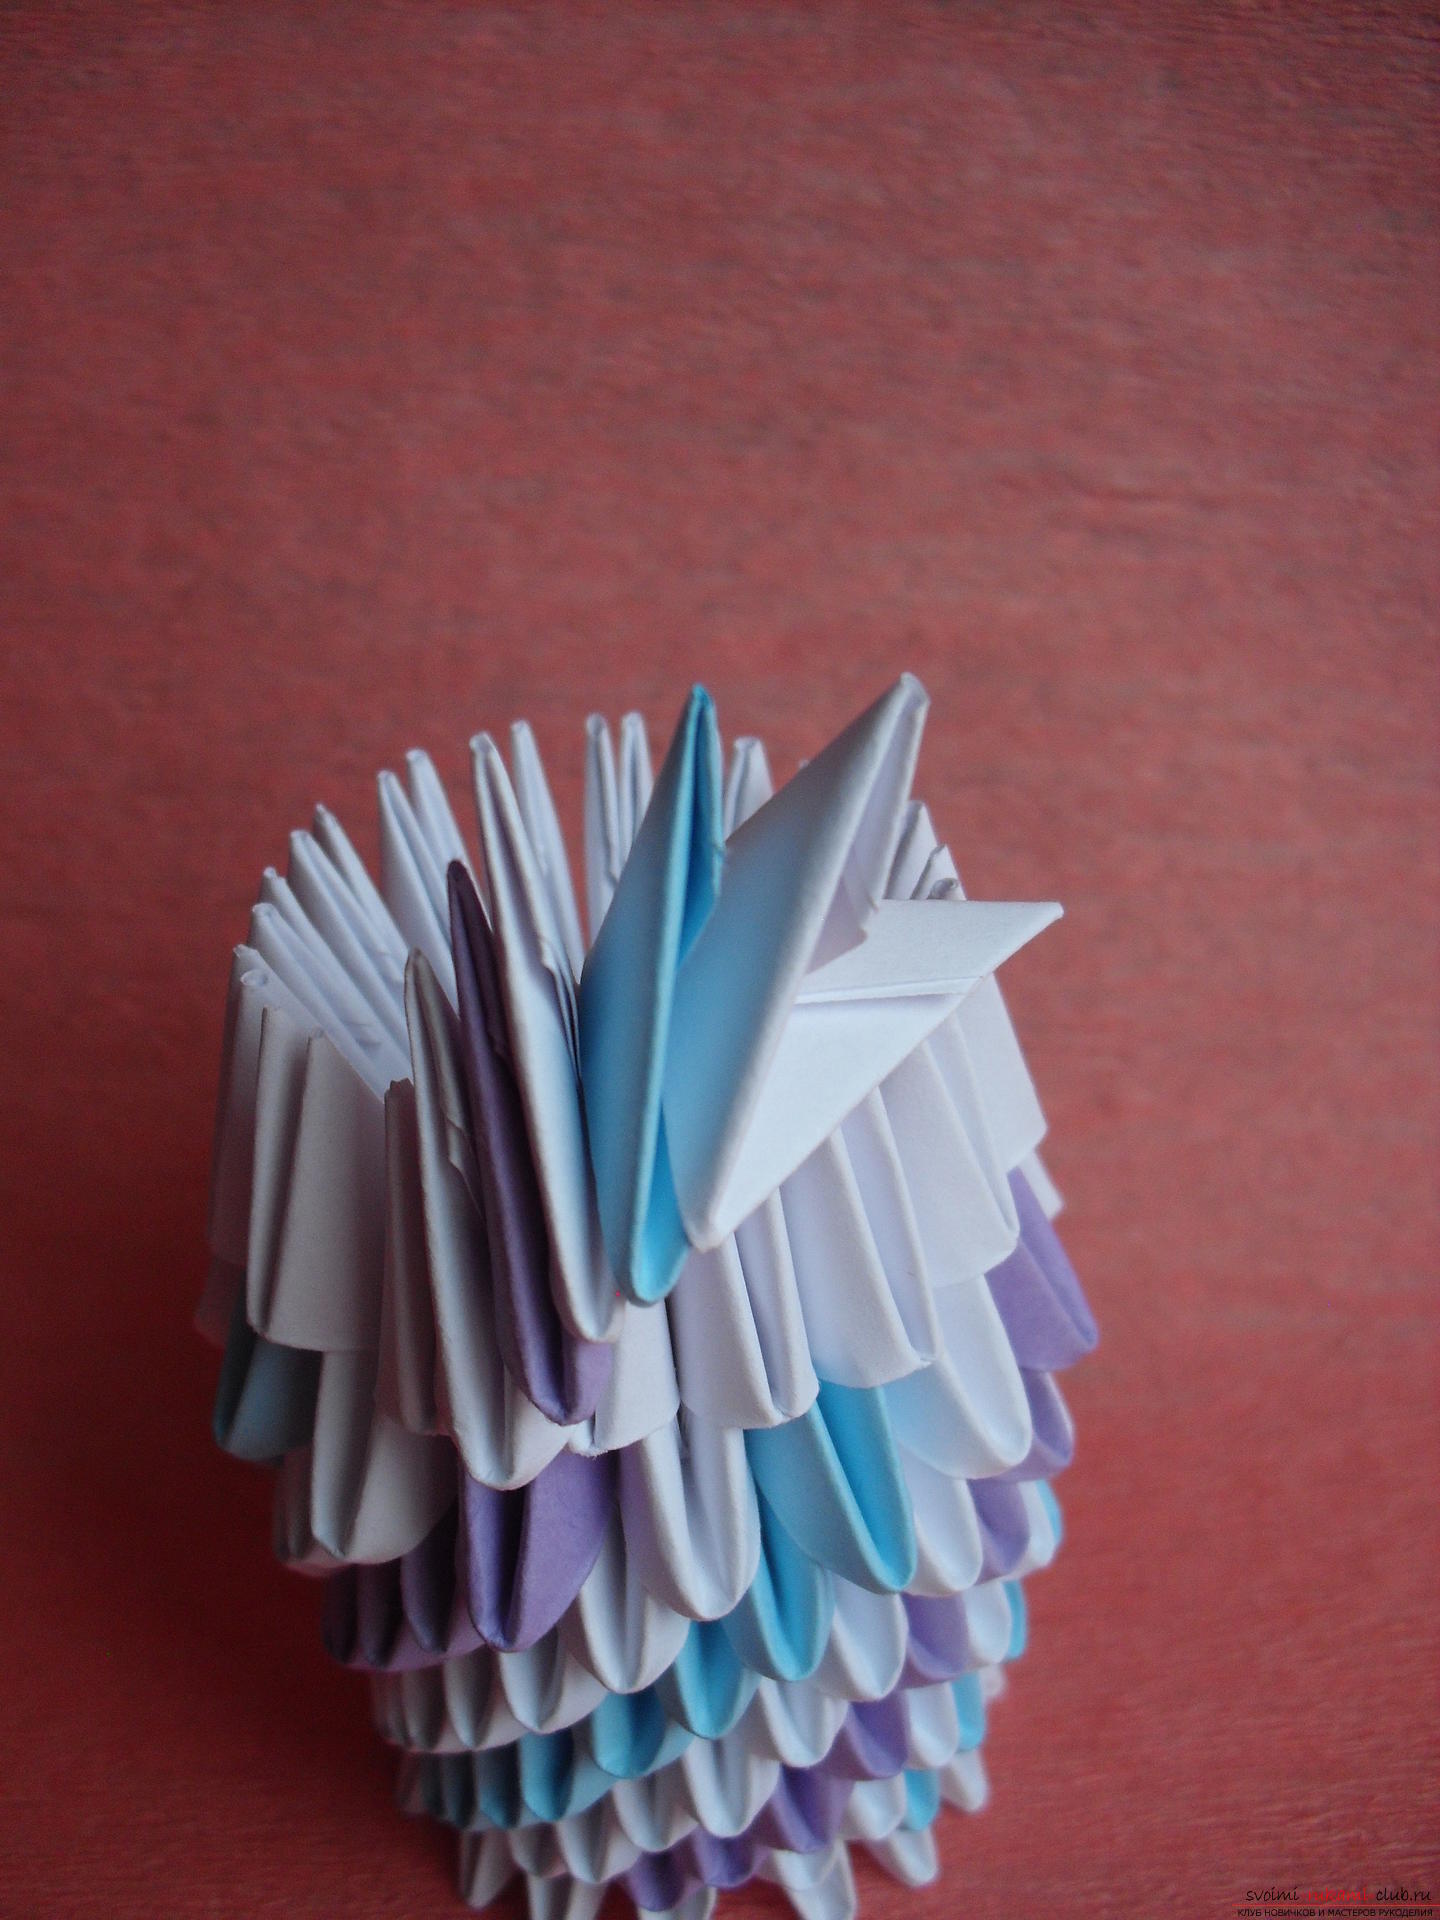
 The gap between the two parts of the arch is 2modules. When assembling the parts of the arch, the modules alternate in the following order: 1 white, 1 violet, 1 white, 1 blue, 1 white. The two parts are connected by inserting a white module. The total number of arches is 5 pieces. Between the initial and final arch there is only one module. We fill this gap with 1 white module, then we string 2 blue modules onto its ends and finish the arch with a purple module.
 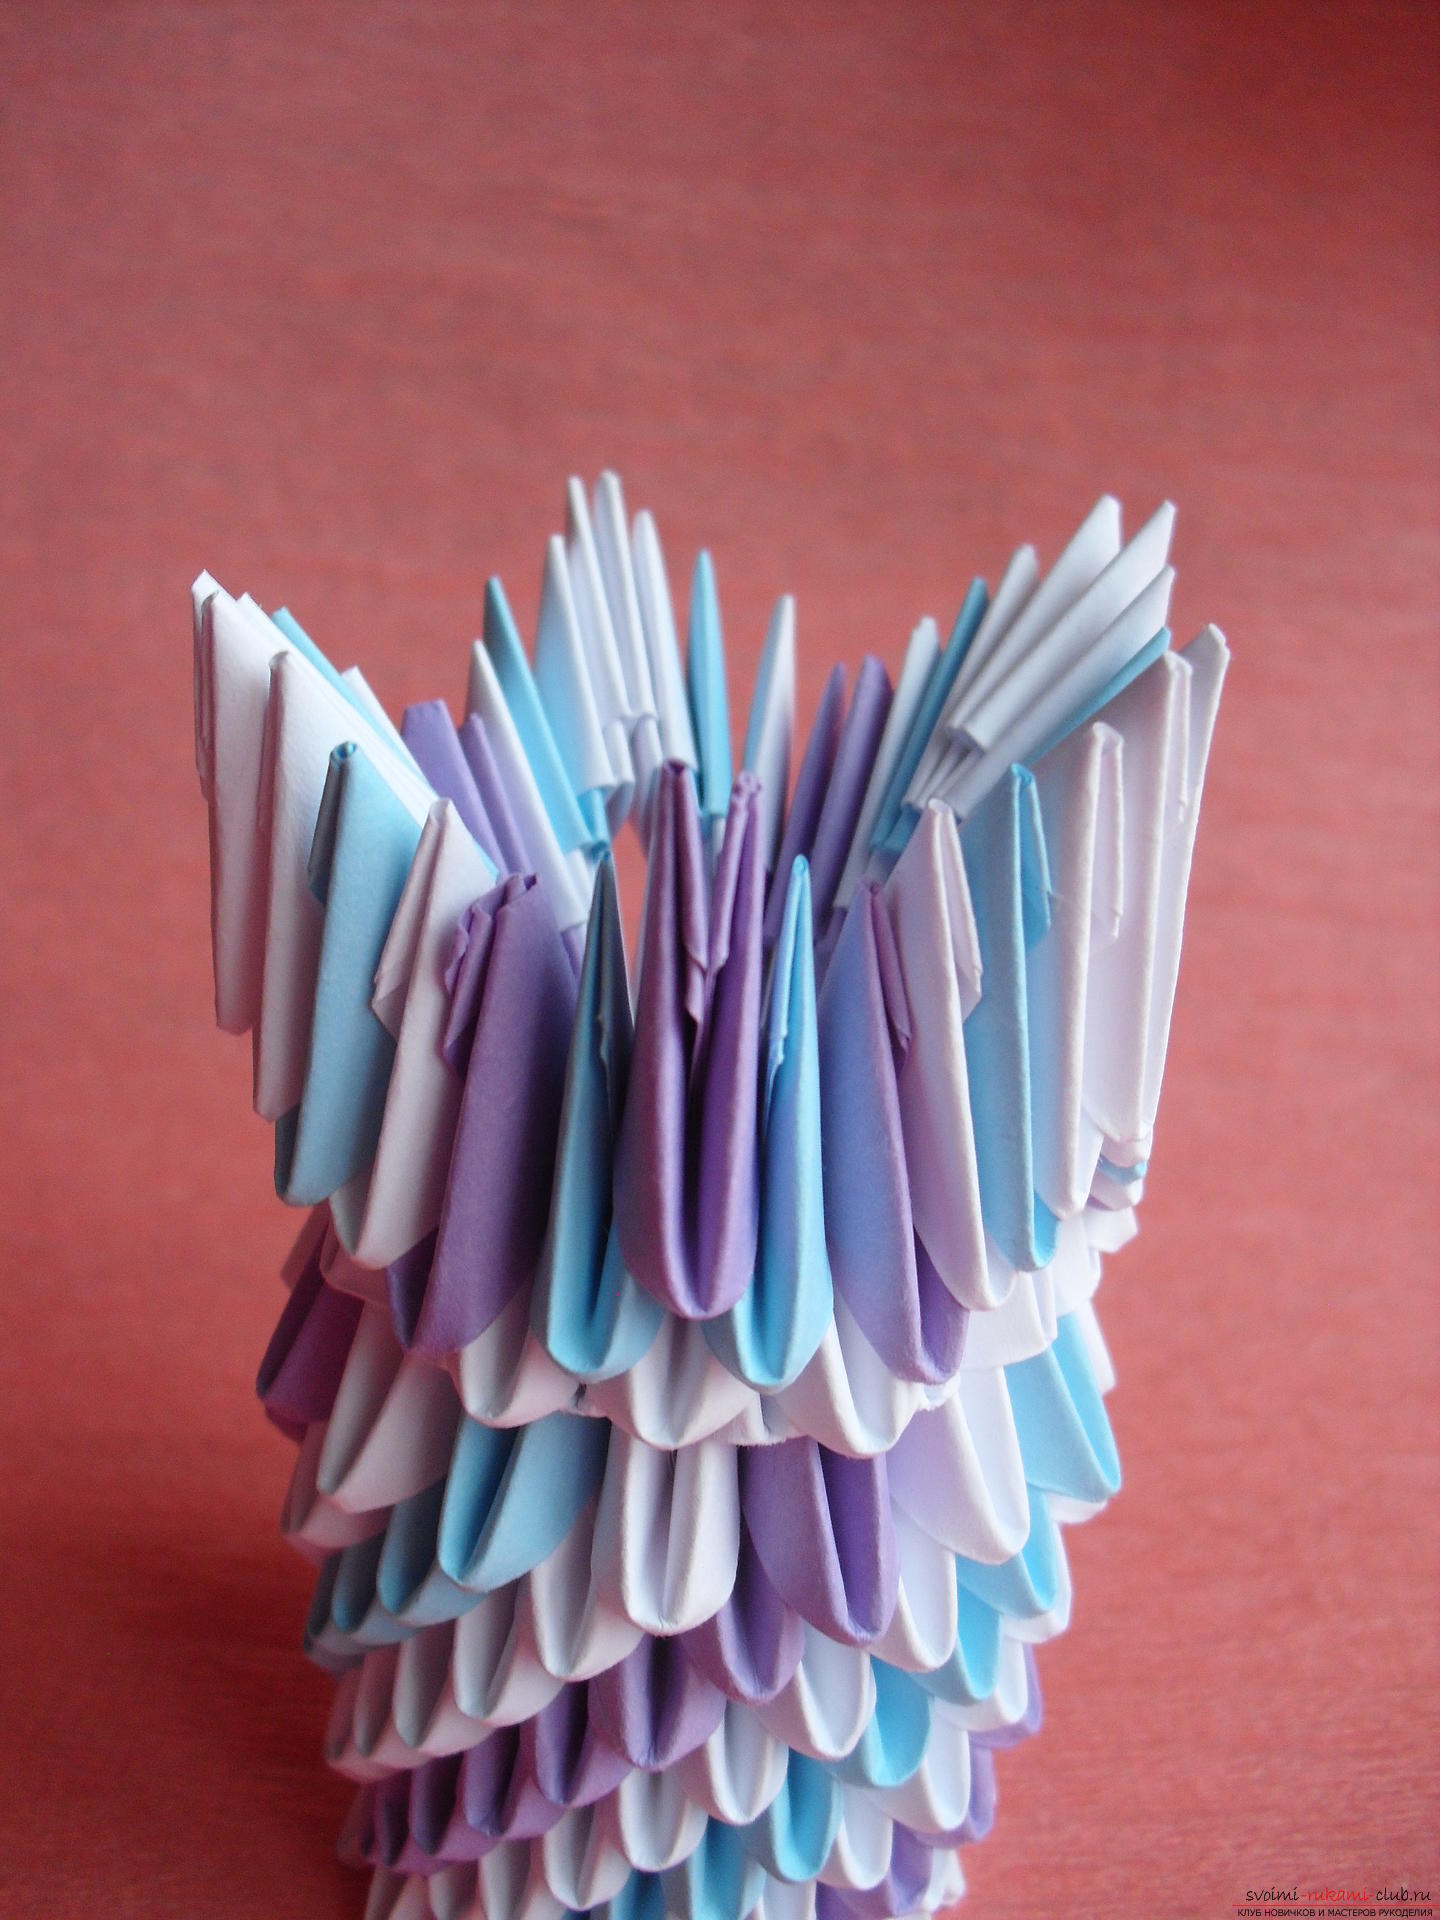 The assembly of the vase is complete!
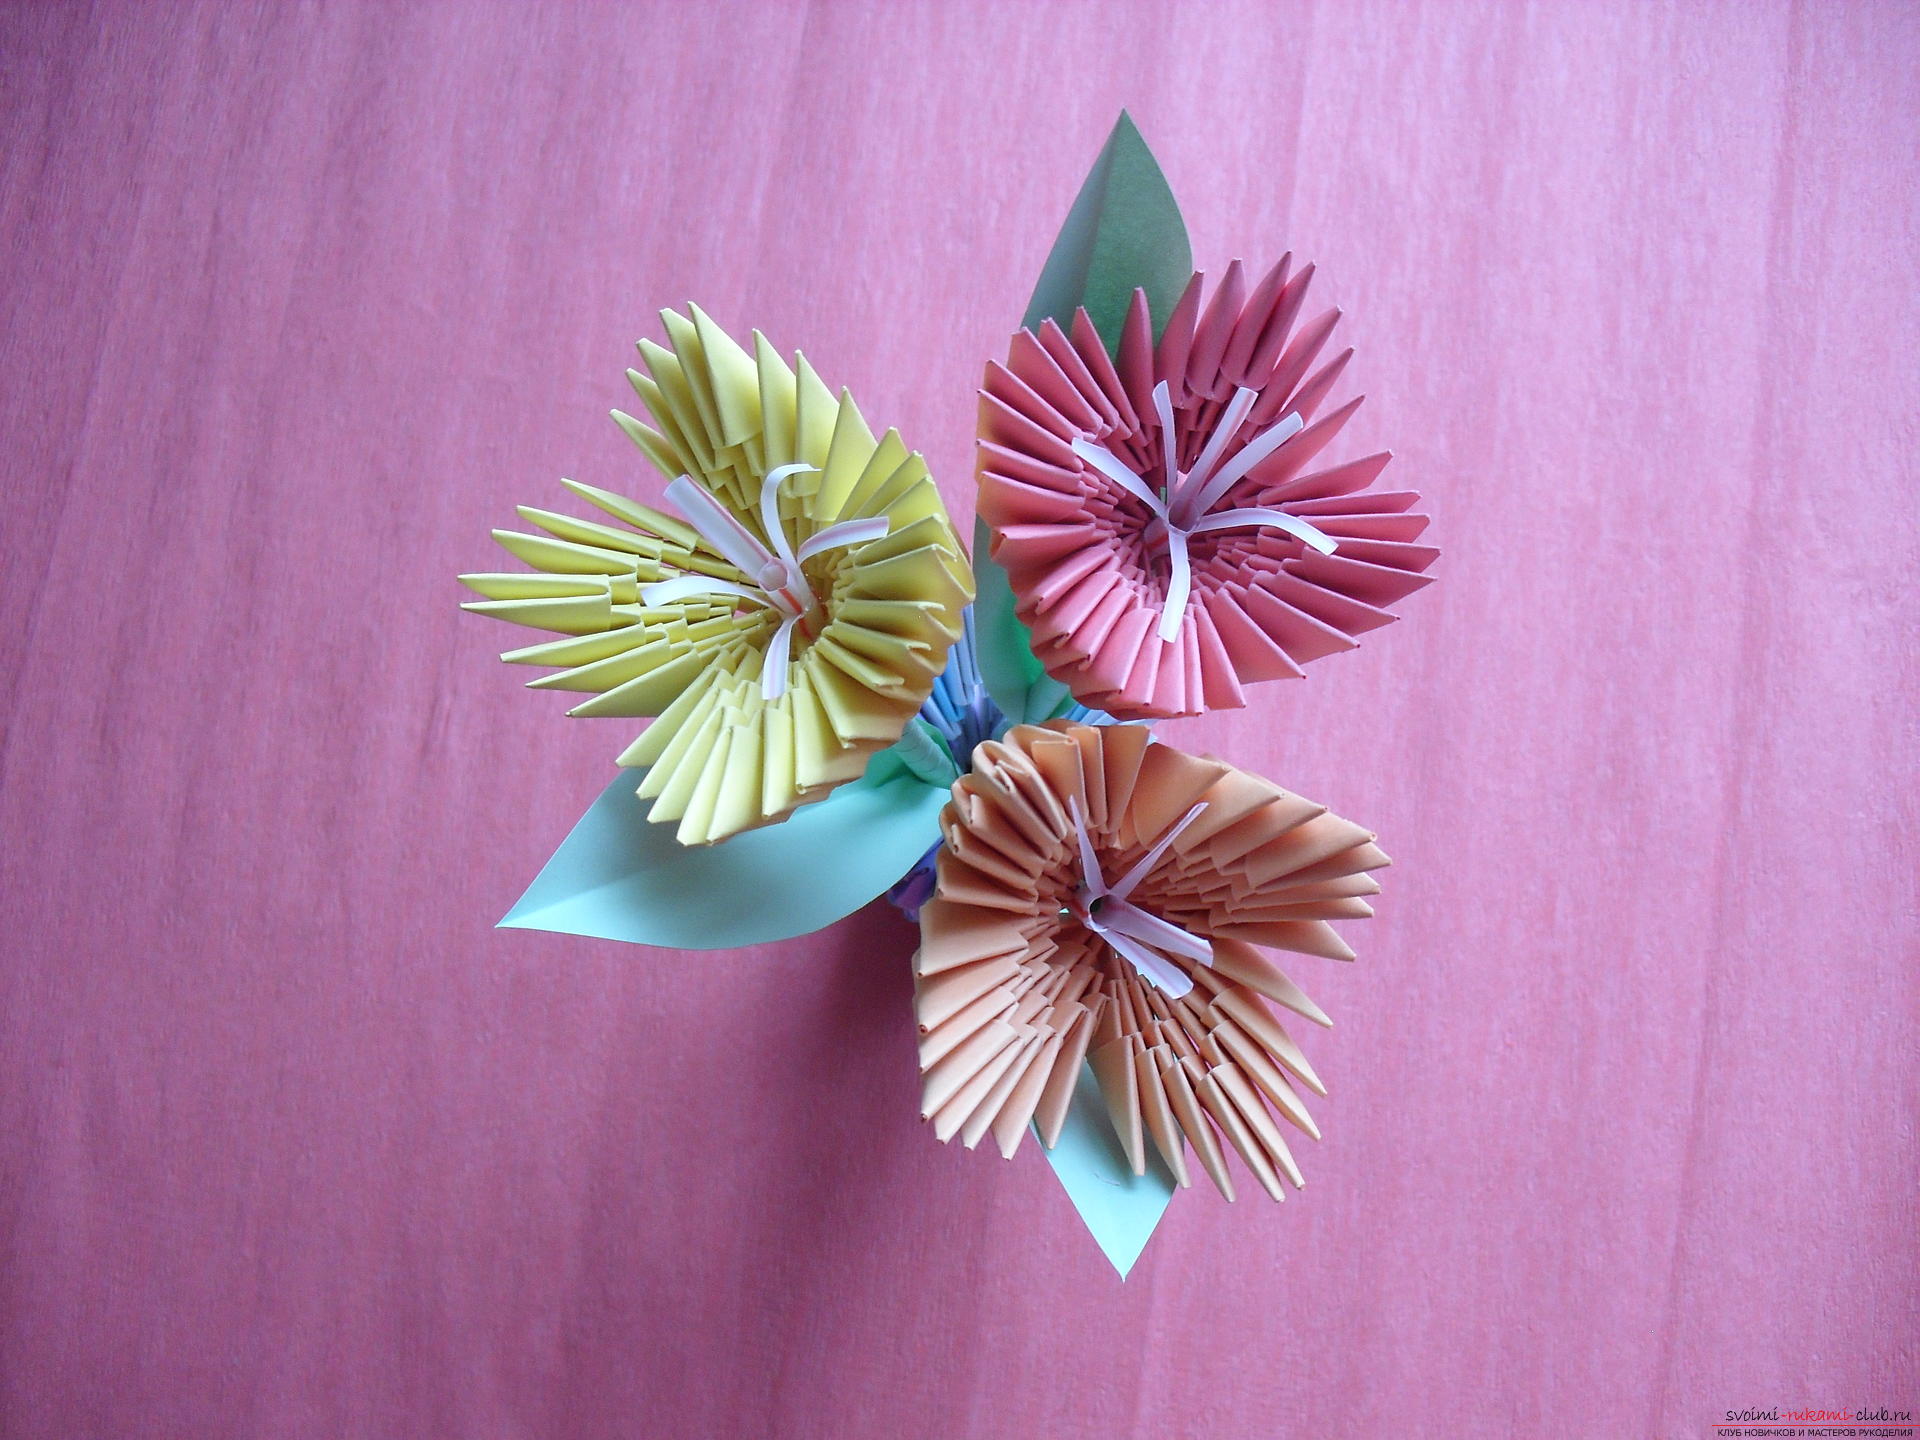
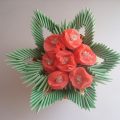
 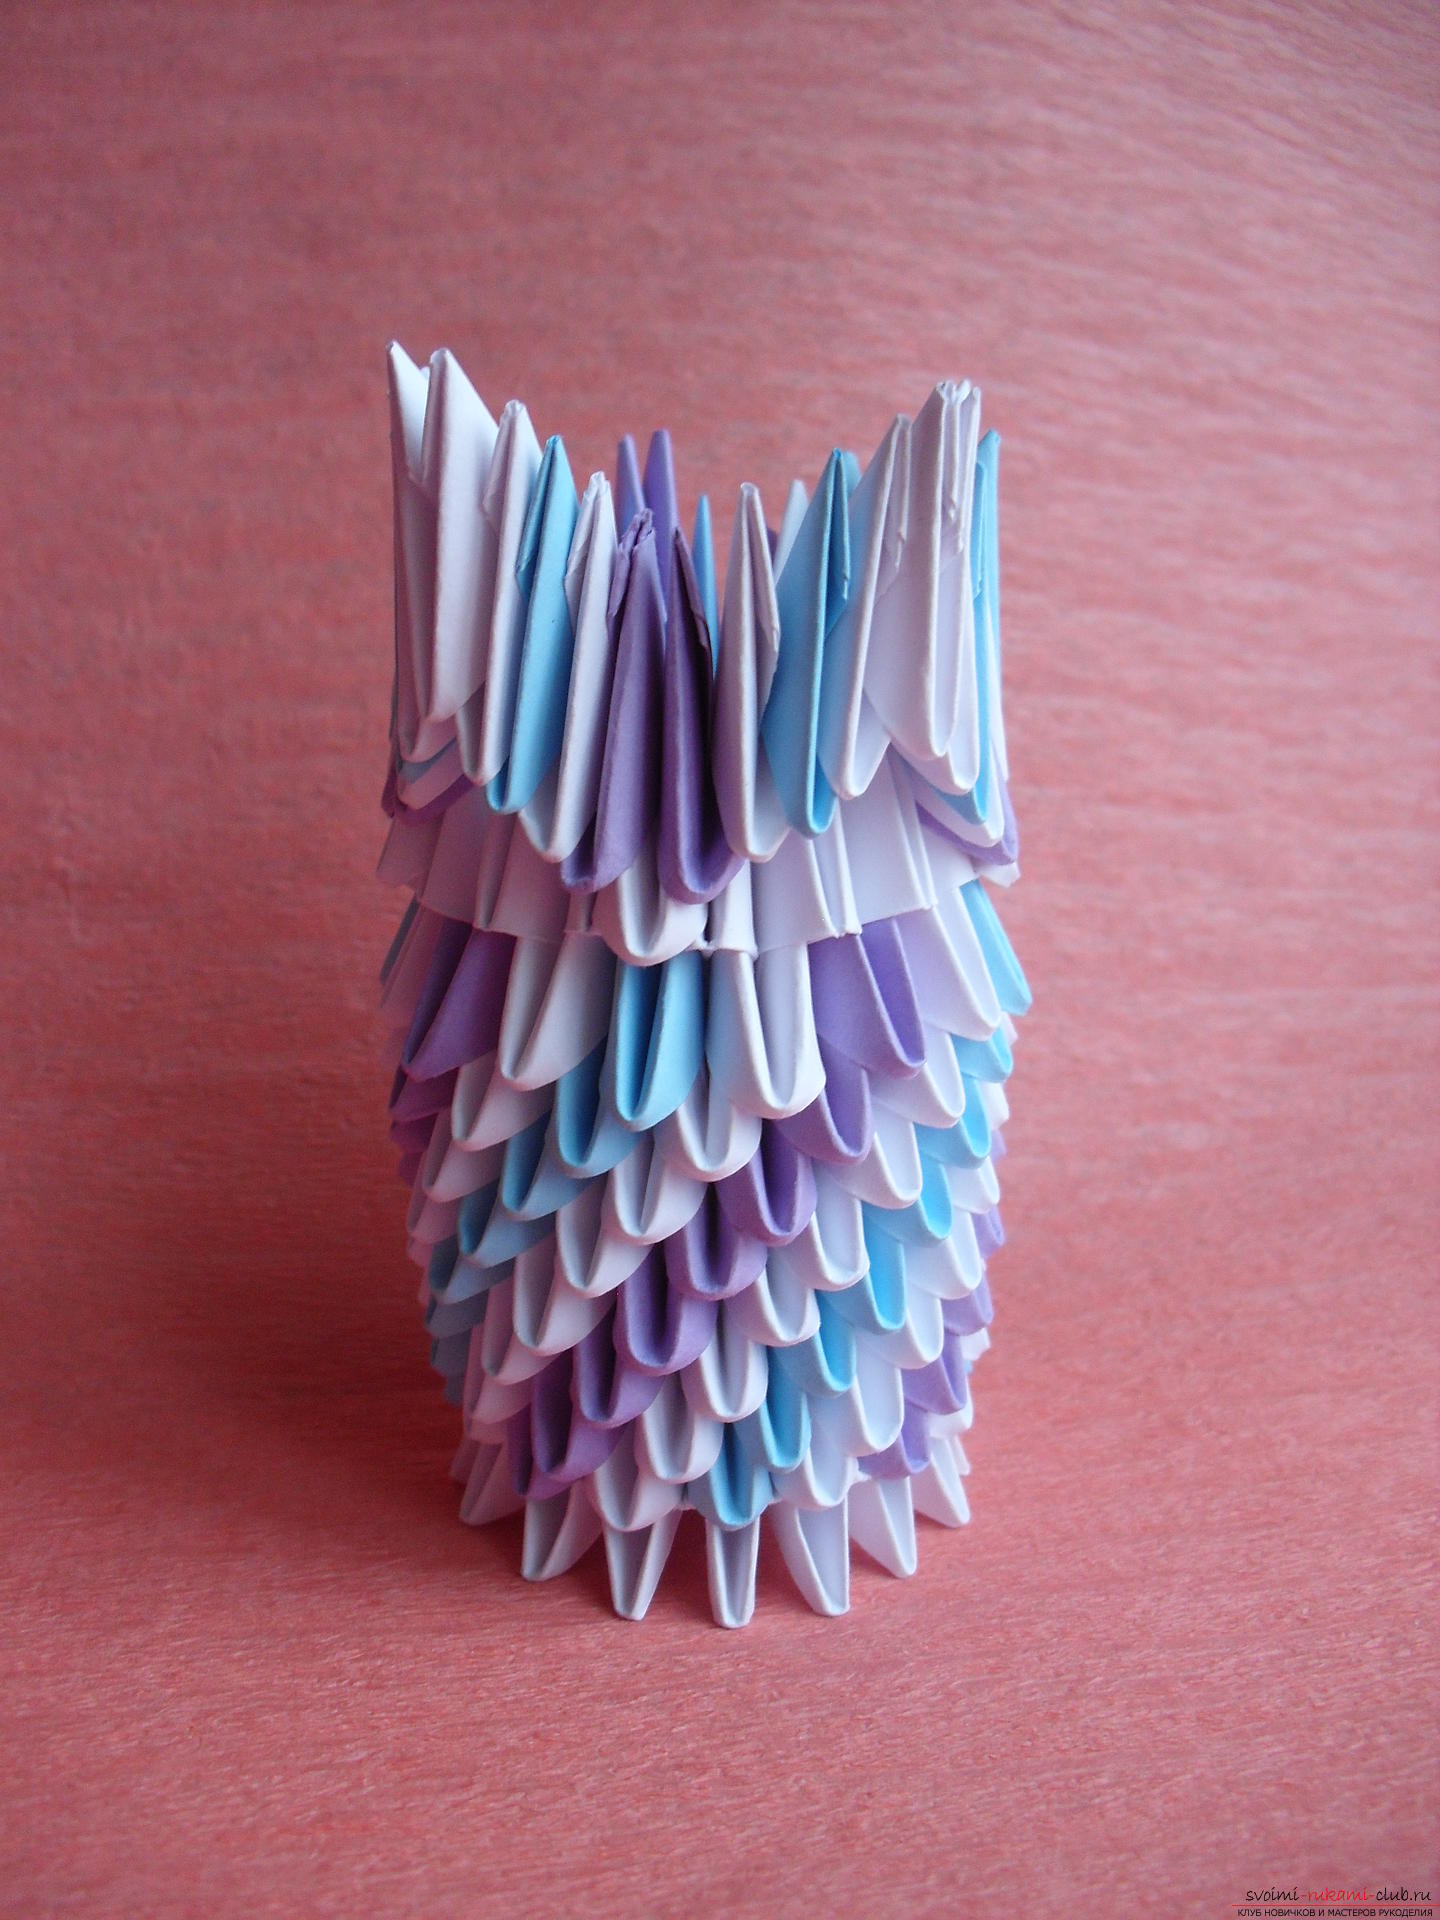 Flower of a tulip Bud For a bud of tulipsWe need triangular blanks of pink, yellow and orange colors. The total number of composite elements of each color is 80. We begin the assembly work from the formation of 4 triples.
 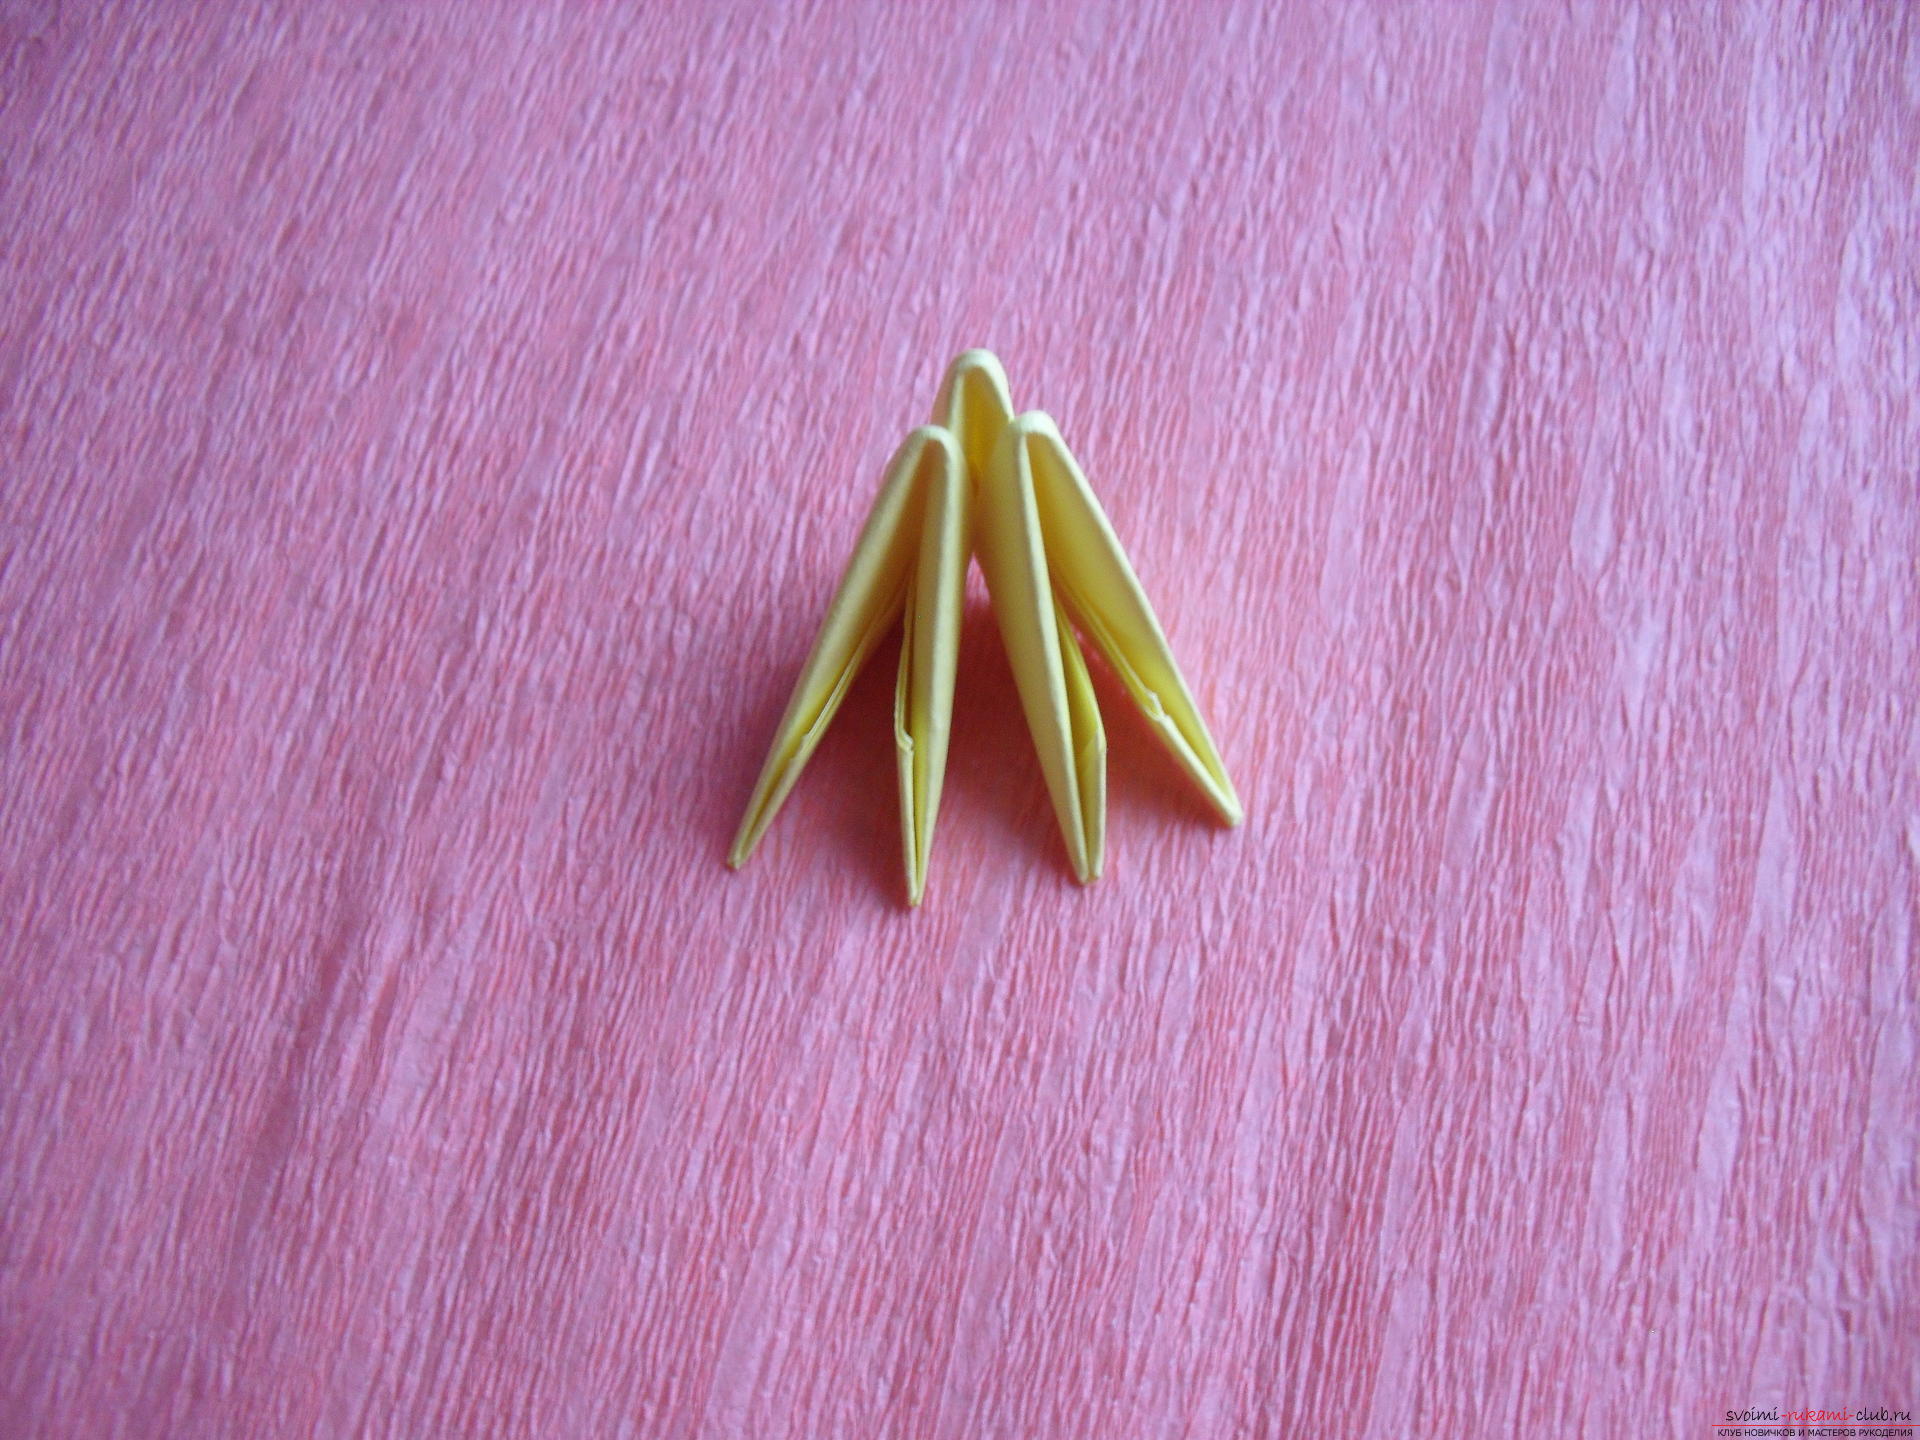 Which need to be connected with each other and closed in a ring.
 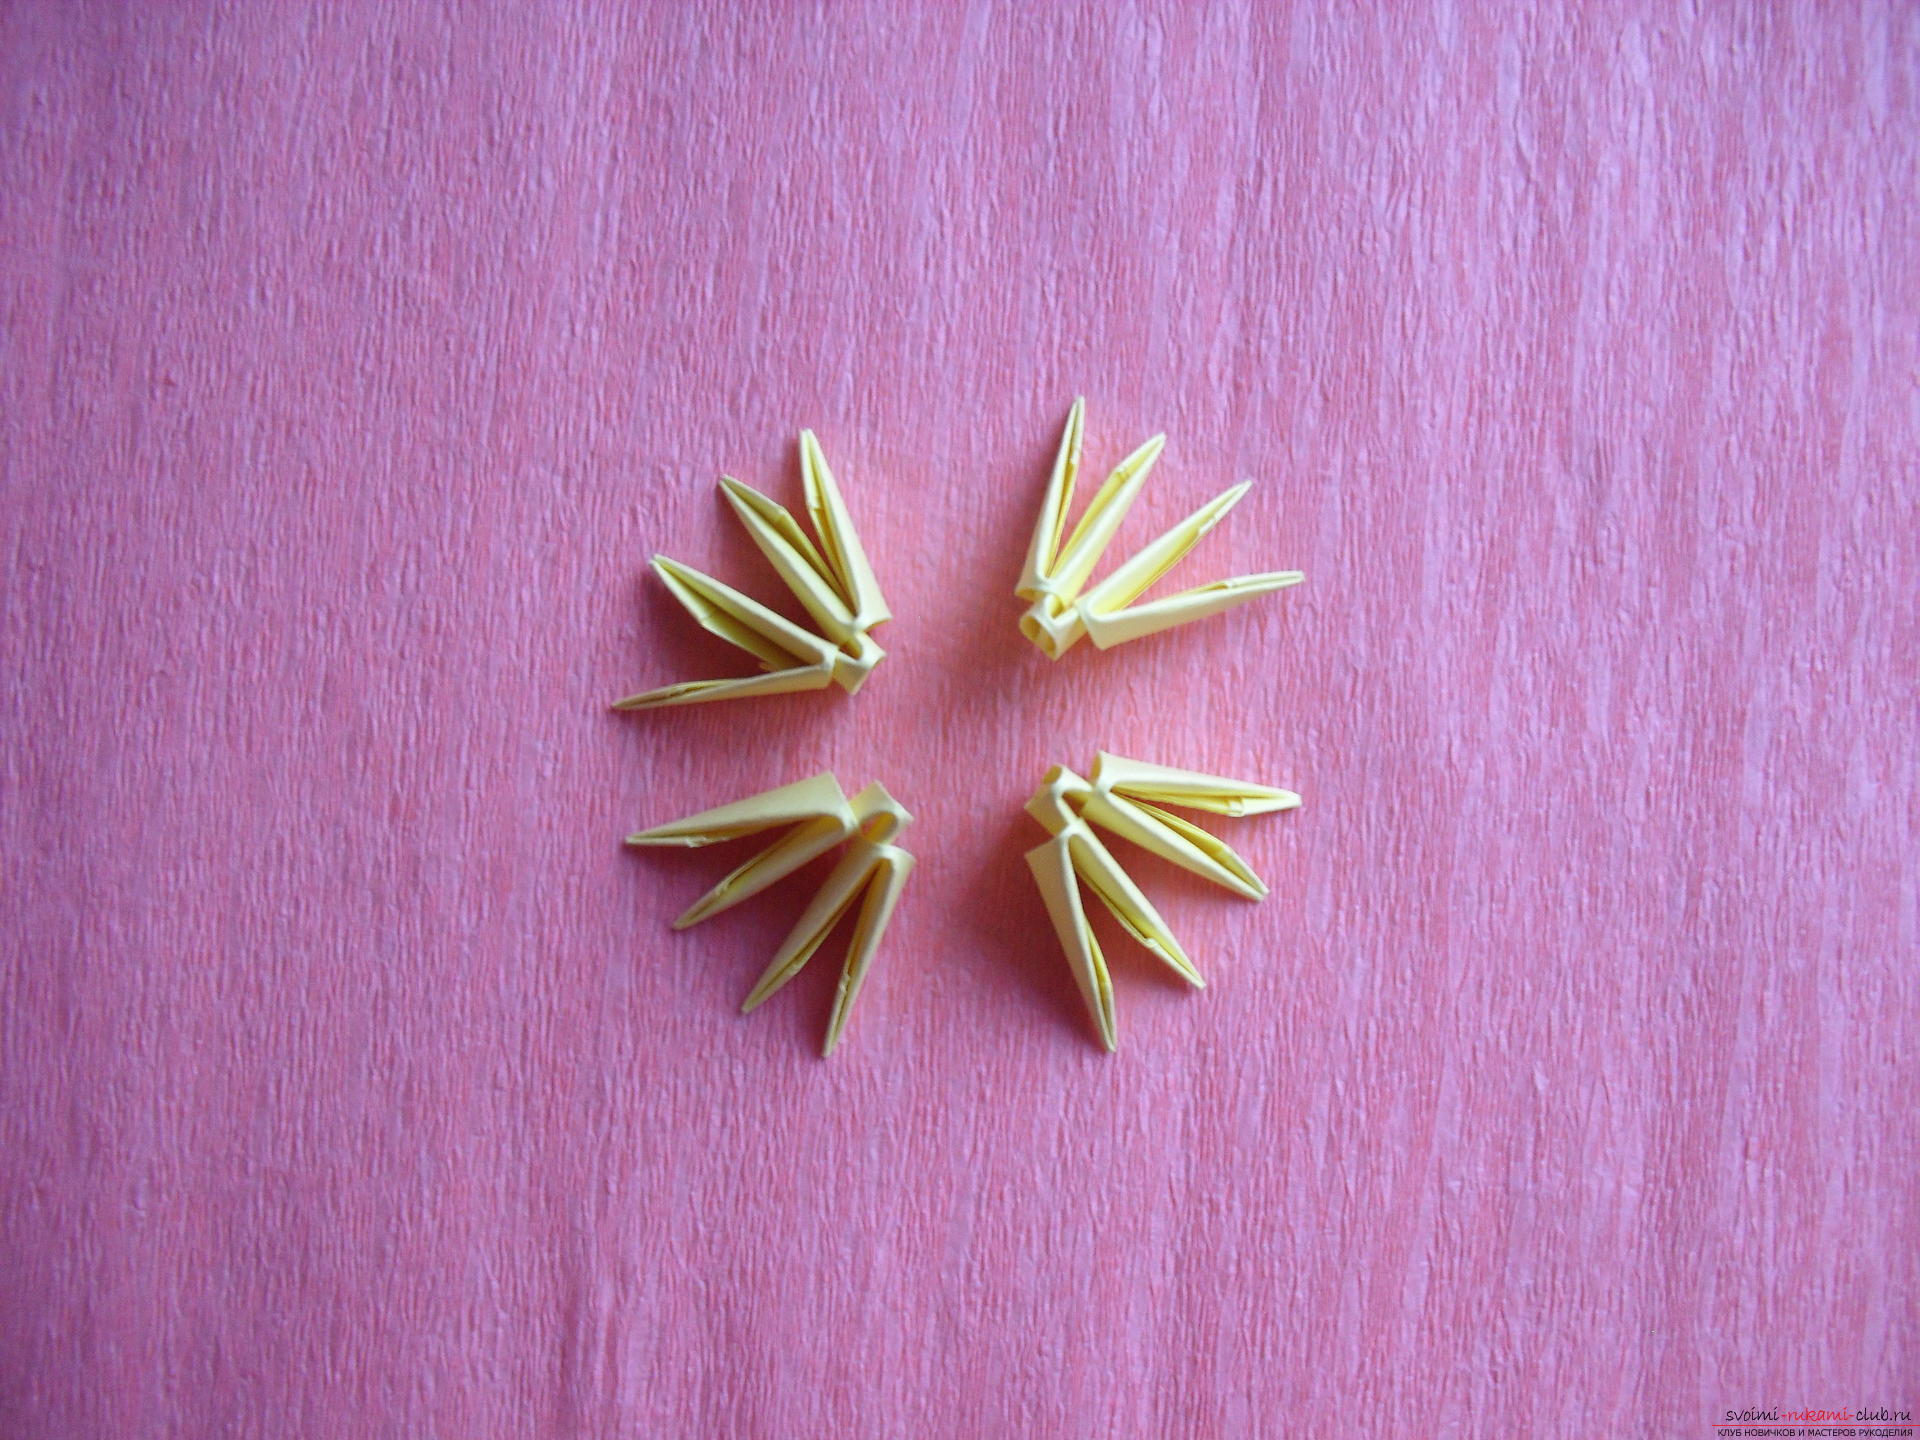 Then we collect according to the attached scheme. The bud assembly is as follows: First row - 4 triangular modules. The second row consists of 8 triangular modules. The third row consists of 8 triangular modules. The fourth row - we add the number of modules exactly 2 times, putting two modules on one module.
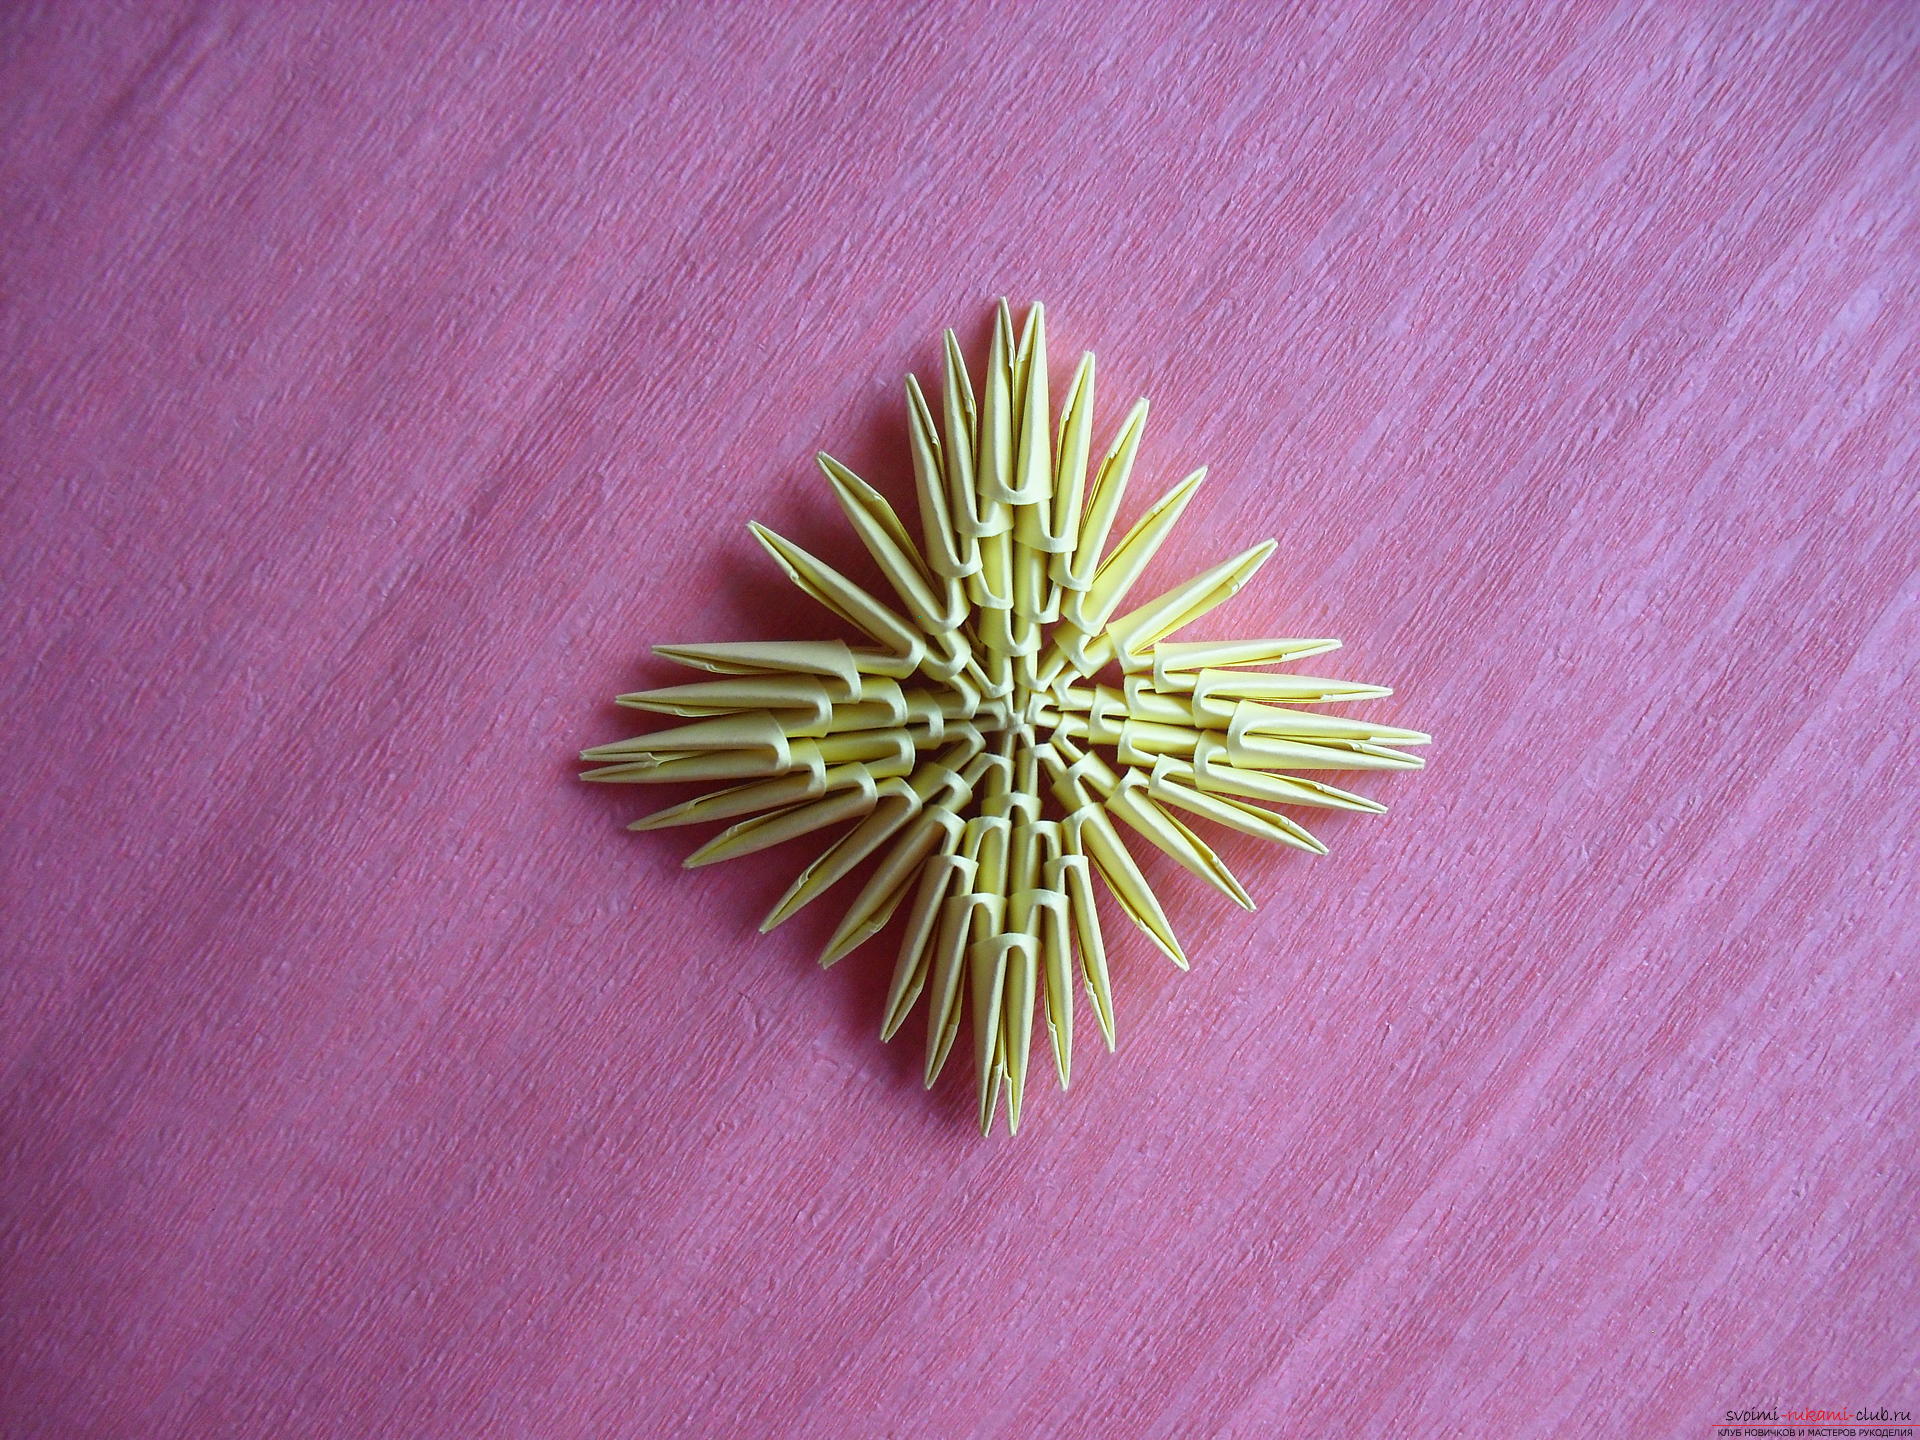
 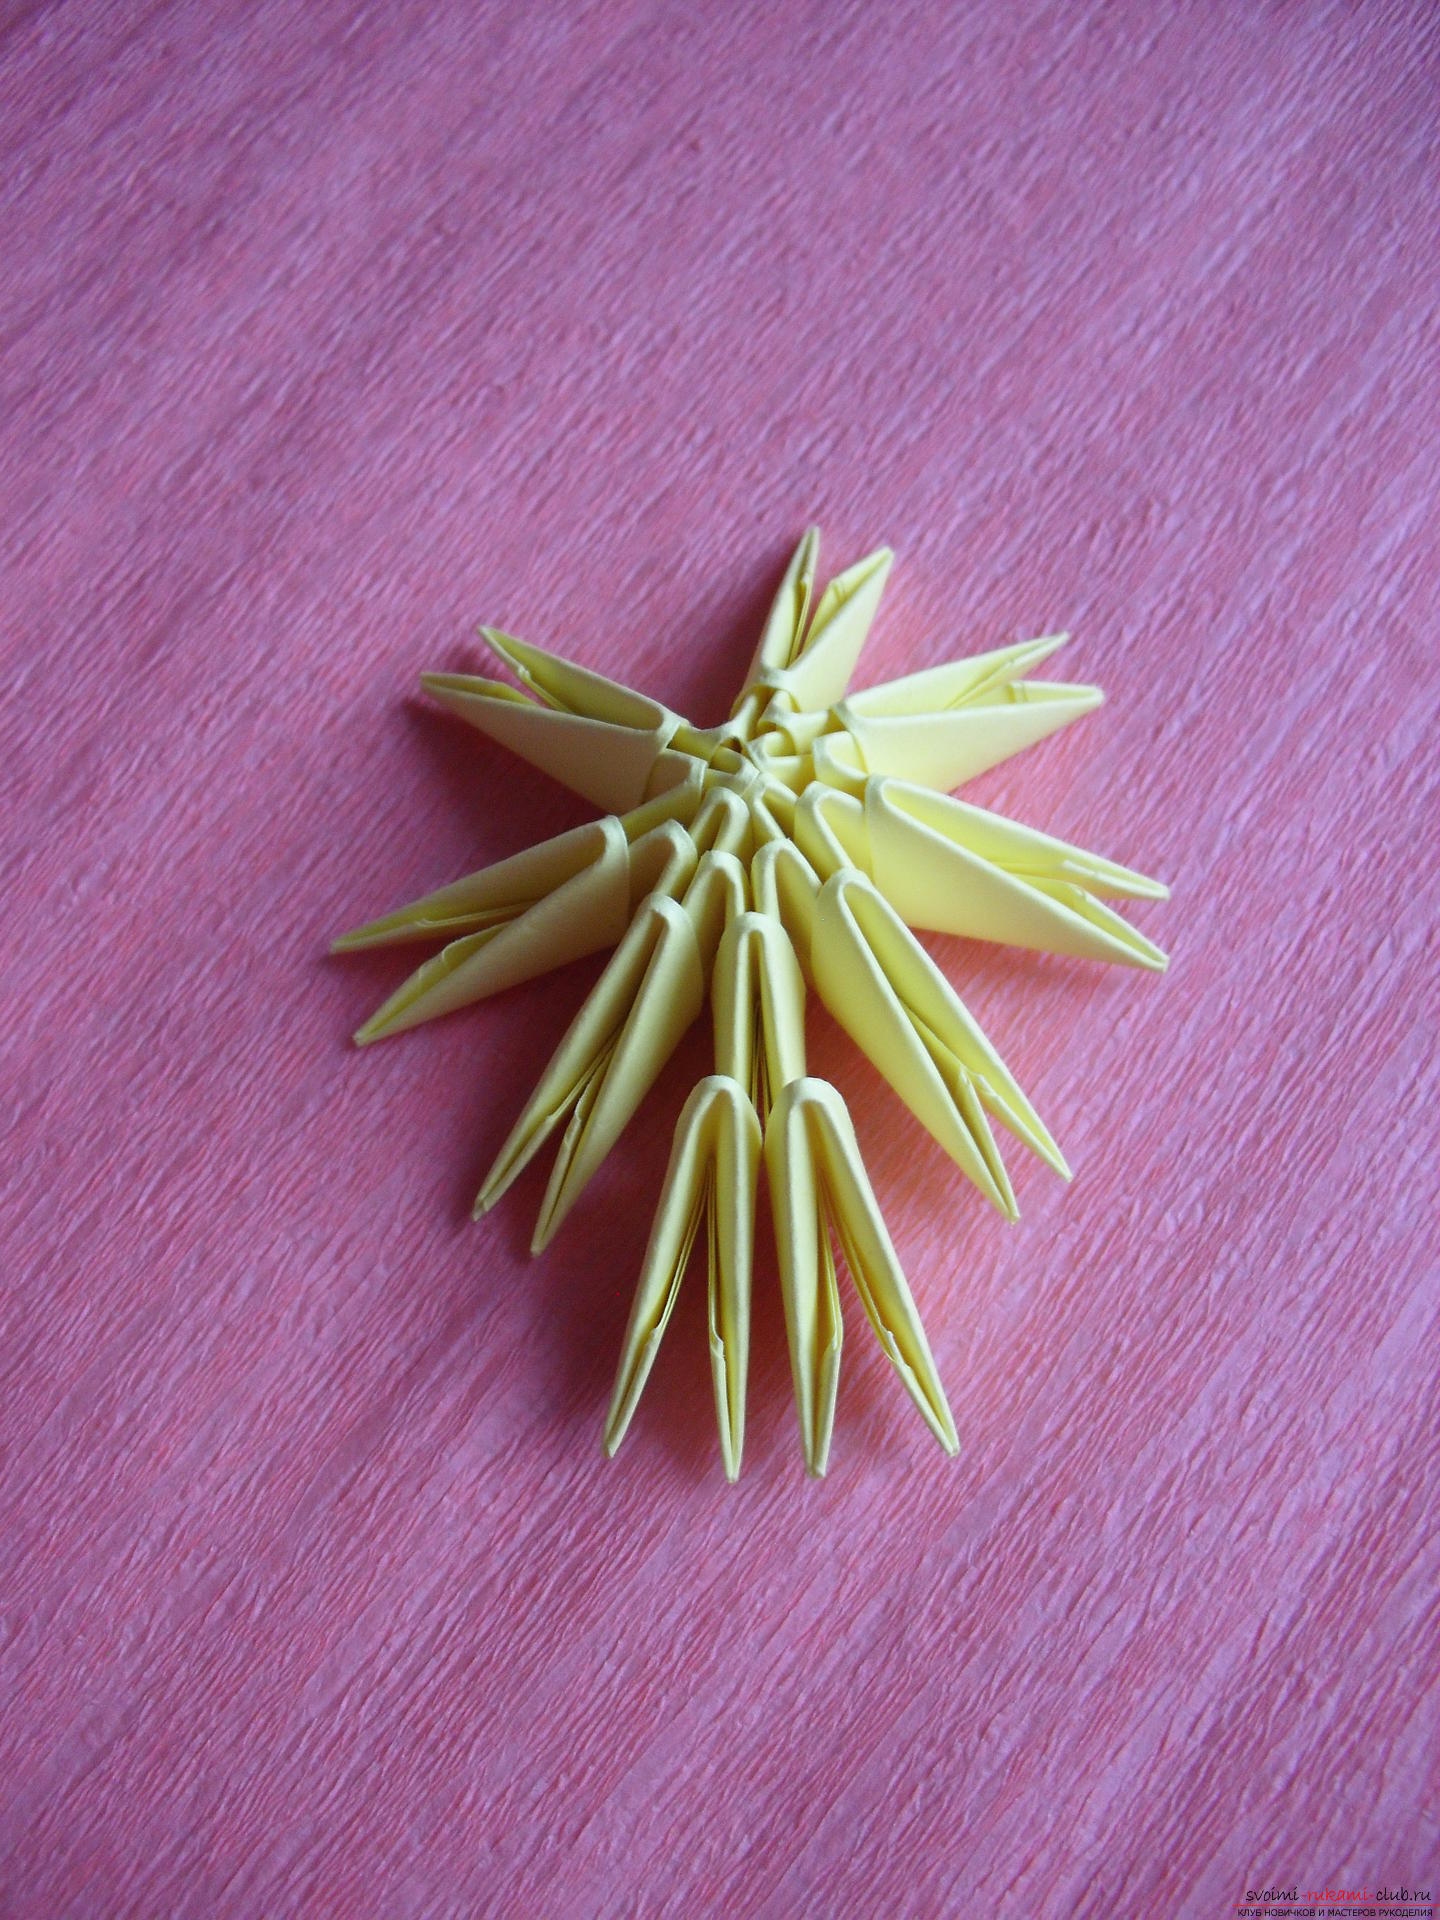 A total of 16 modules are obtained in the series. The fifth row is the petals. To do this, we have the modules in certain places, illustrated in the photo.
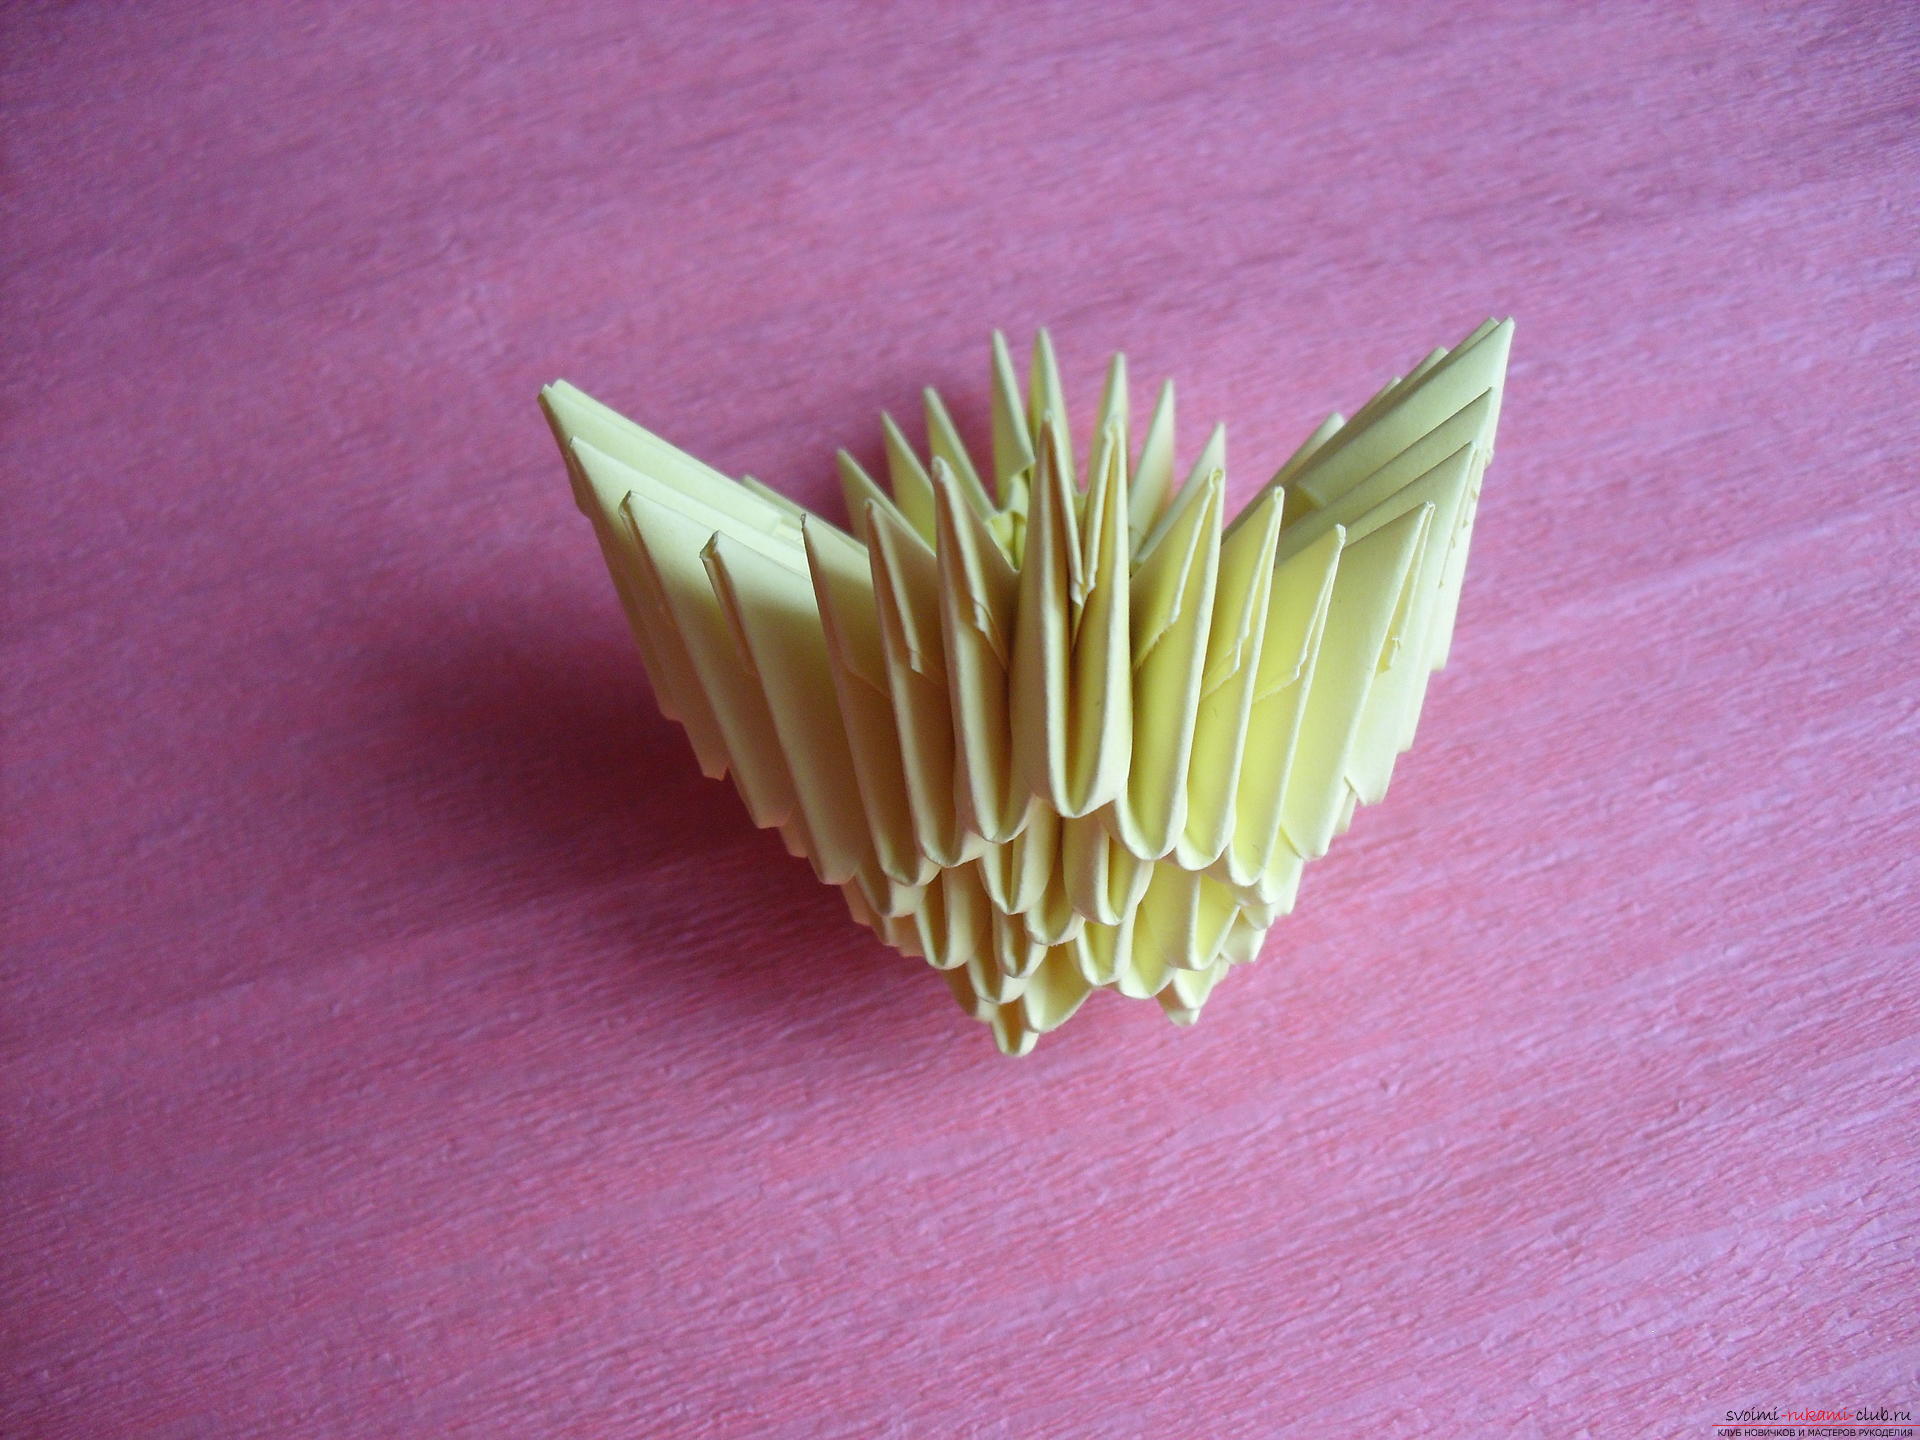
 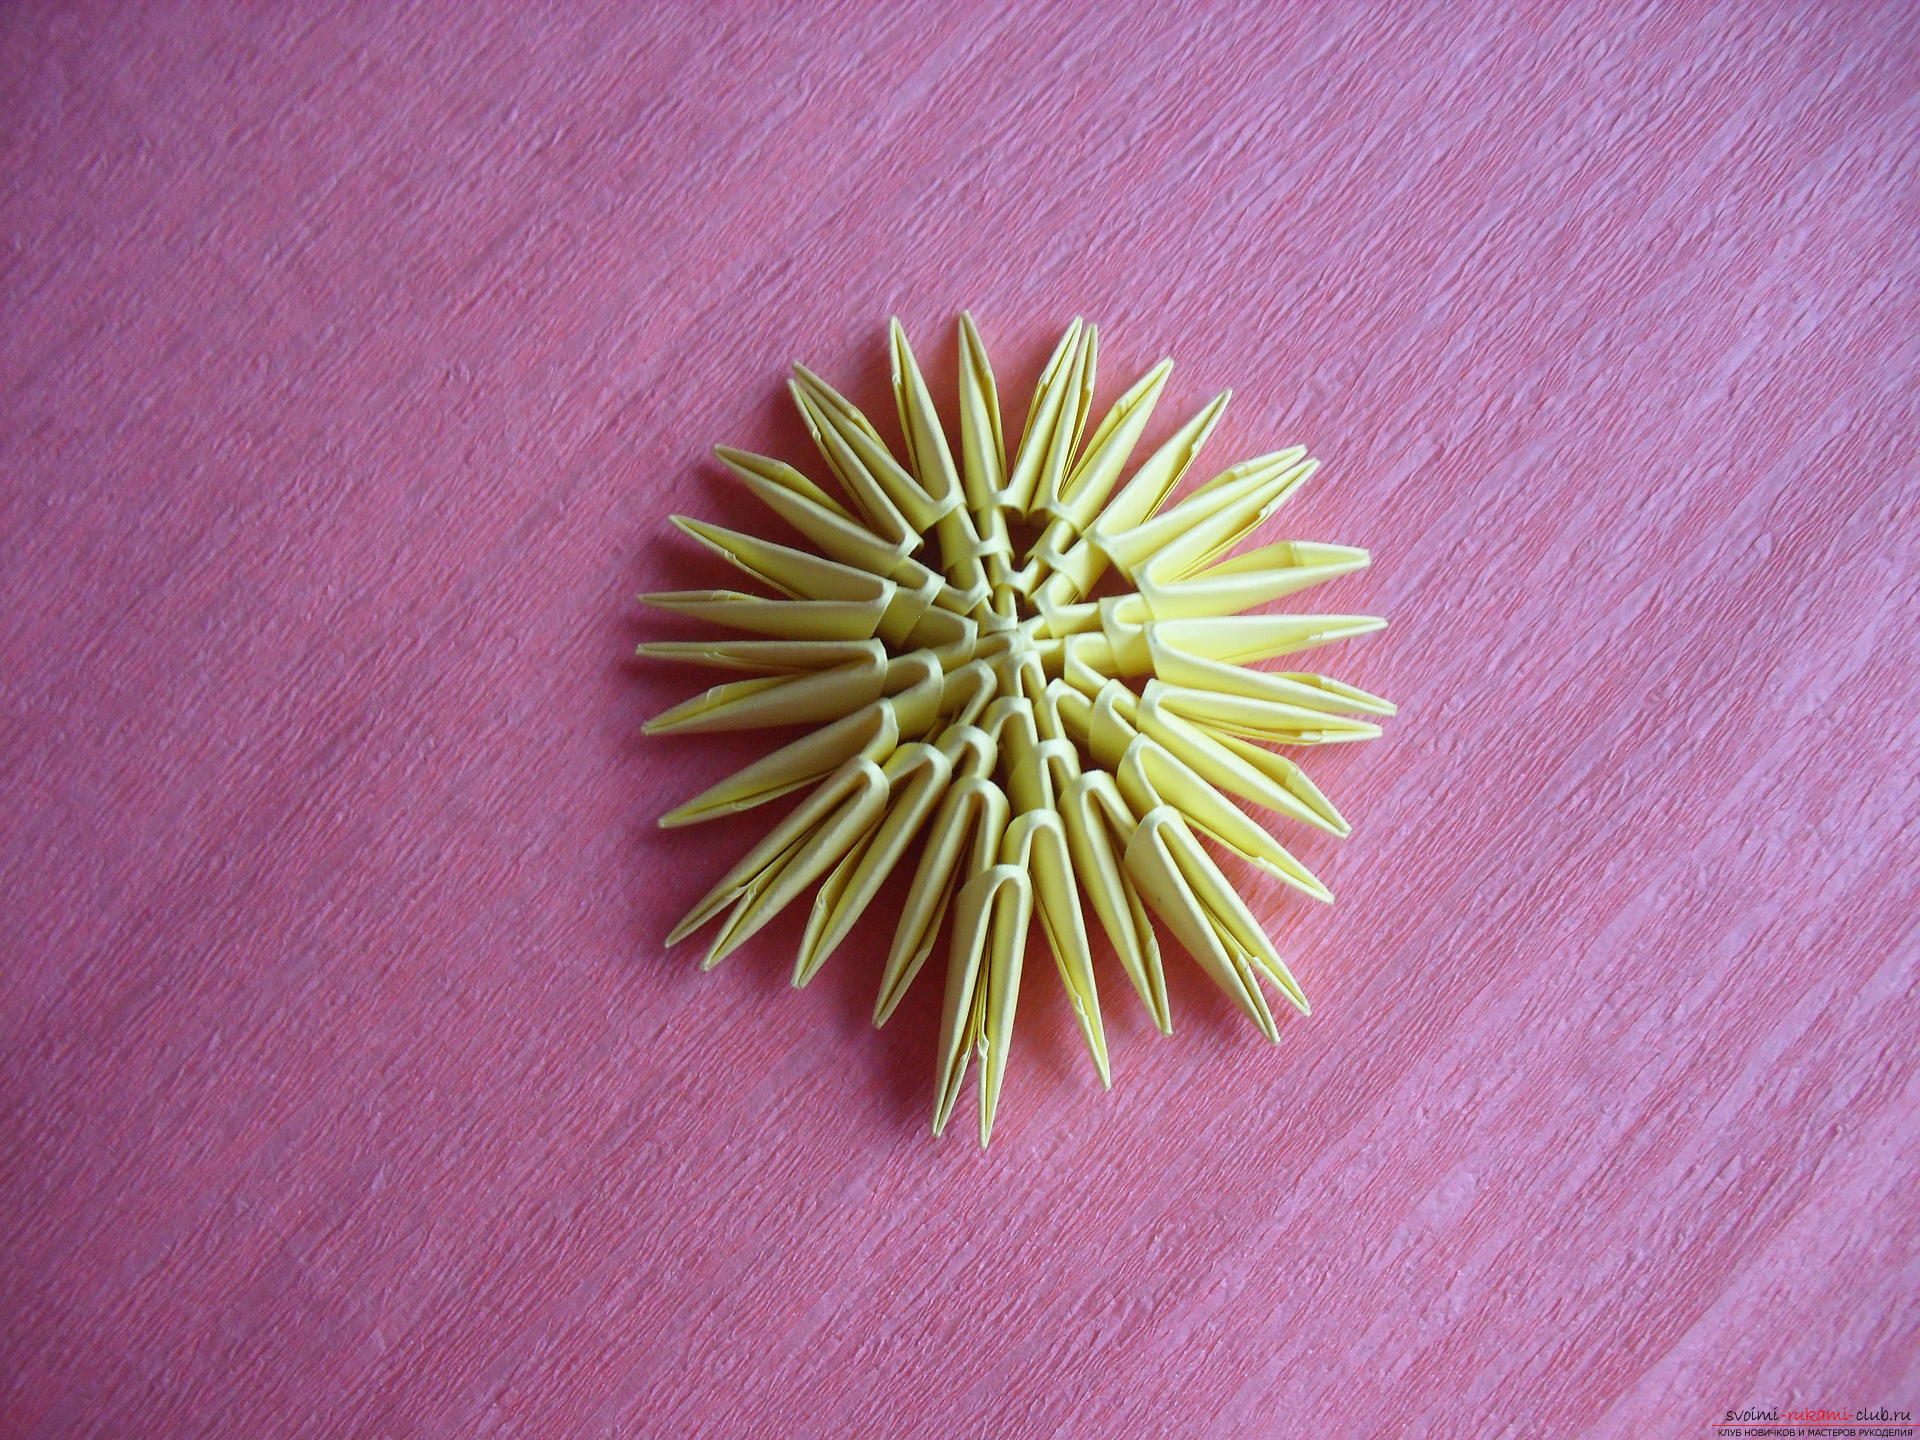 Then the product is slightly twisted. After that, the places in which the modules were added must be connected with triples.
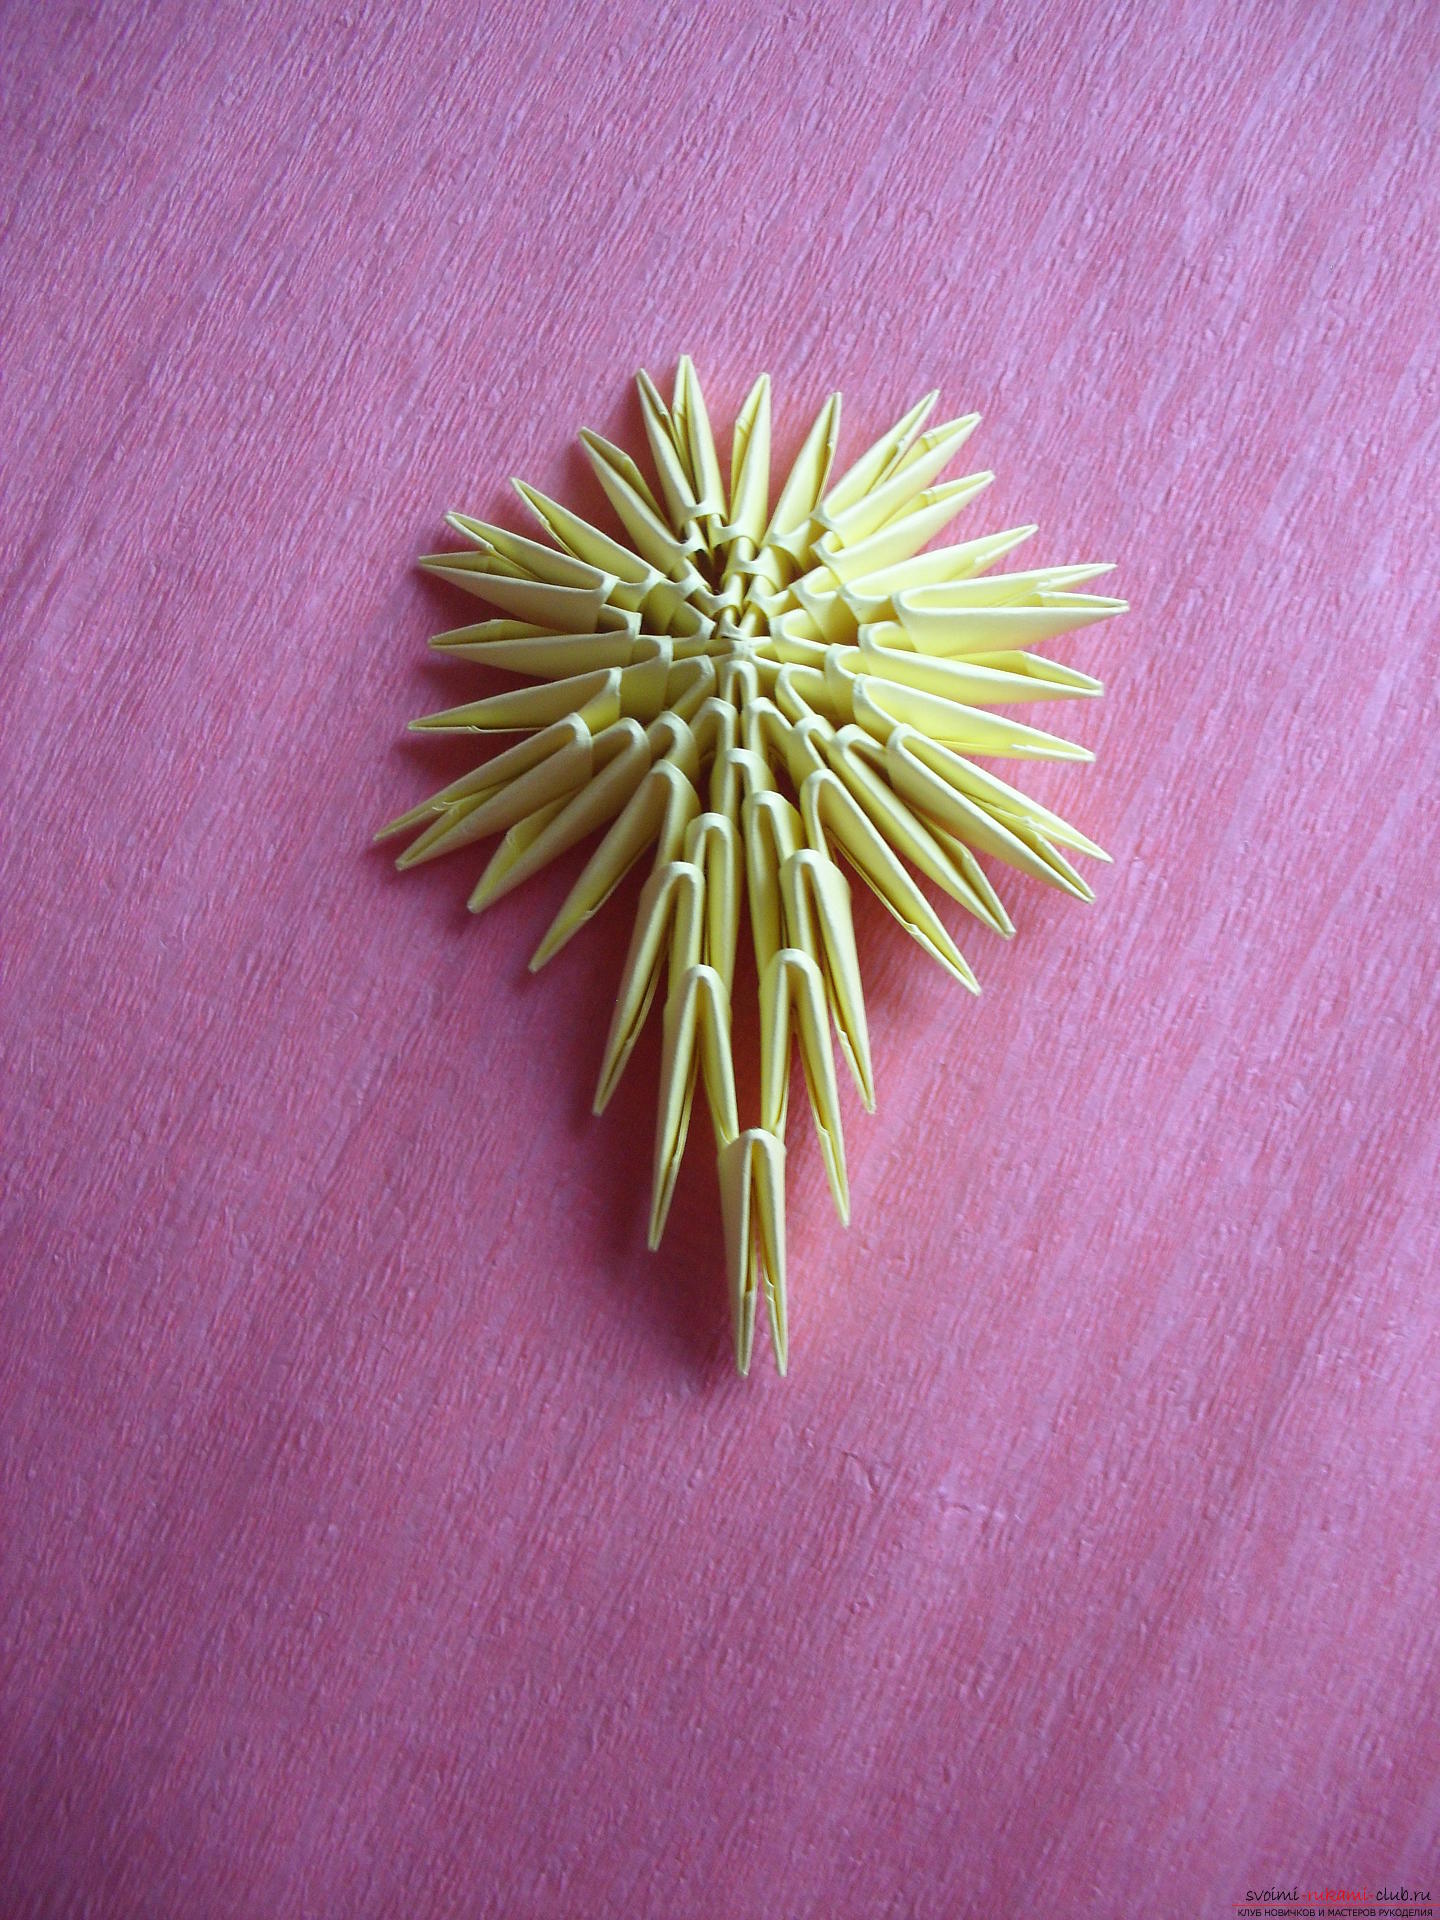
 The total number of which is eight. Next, you need to reconnect the formed parts of the petals with triples.
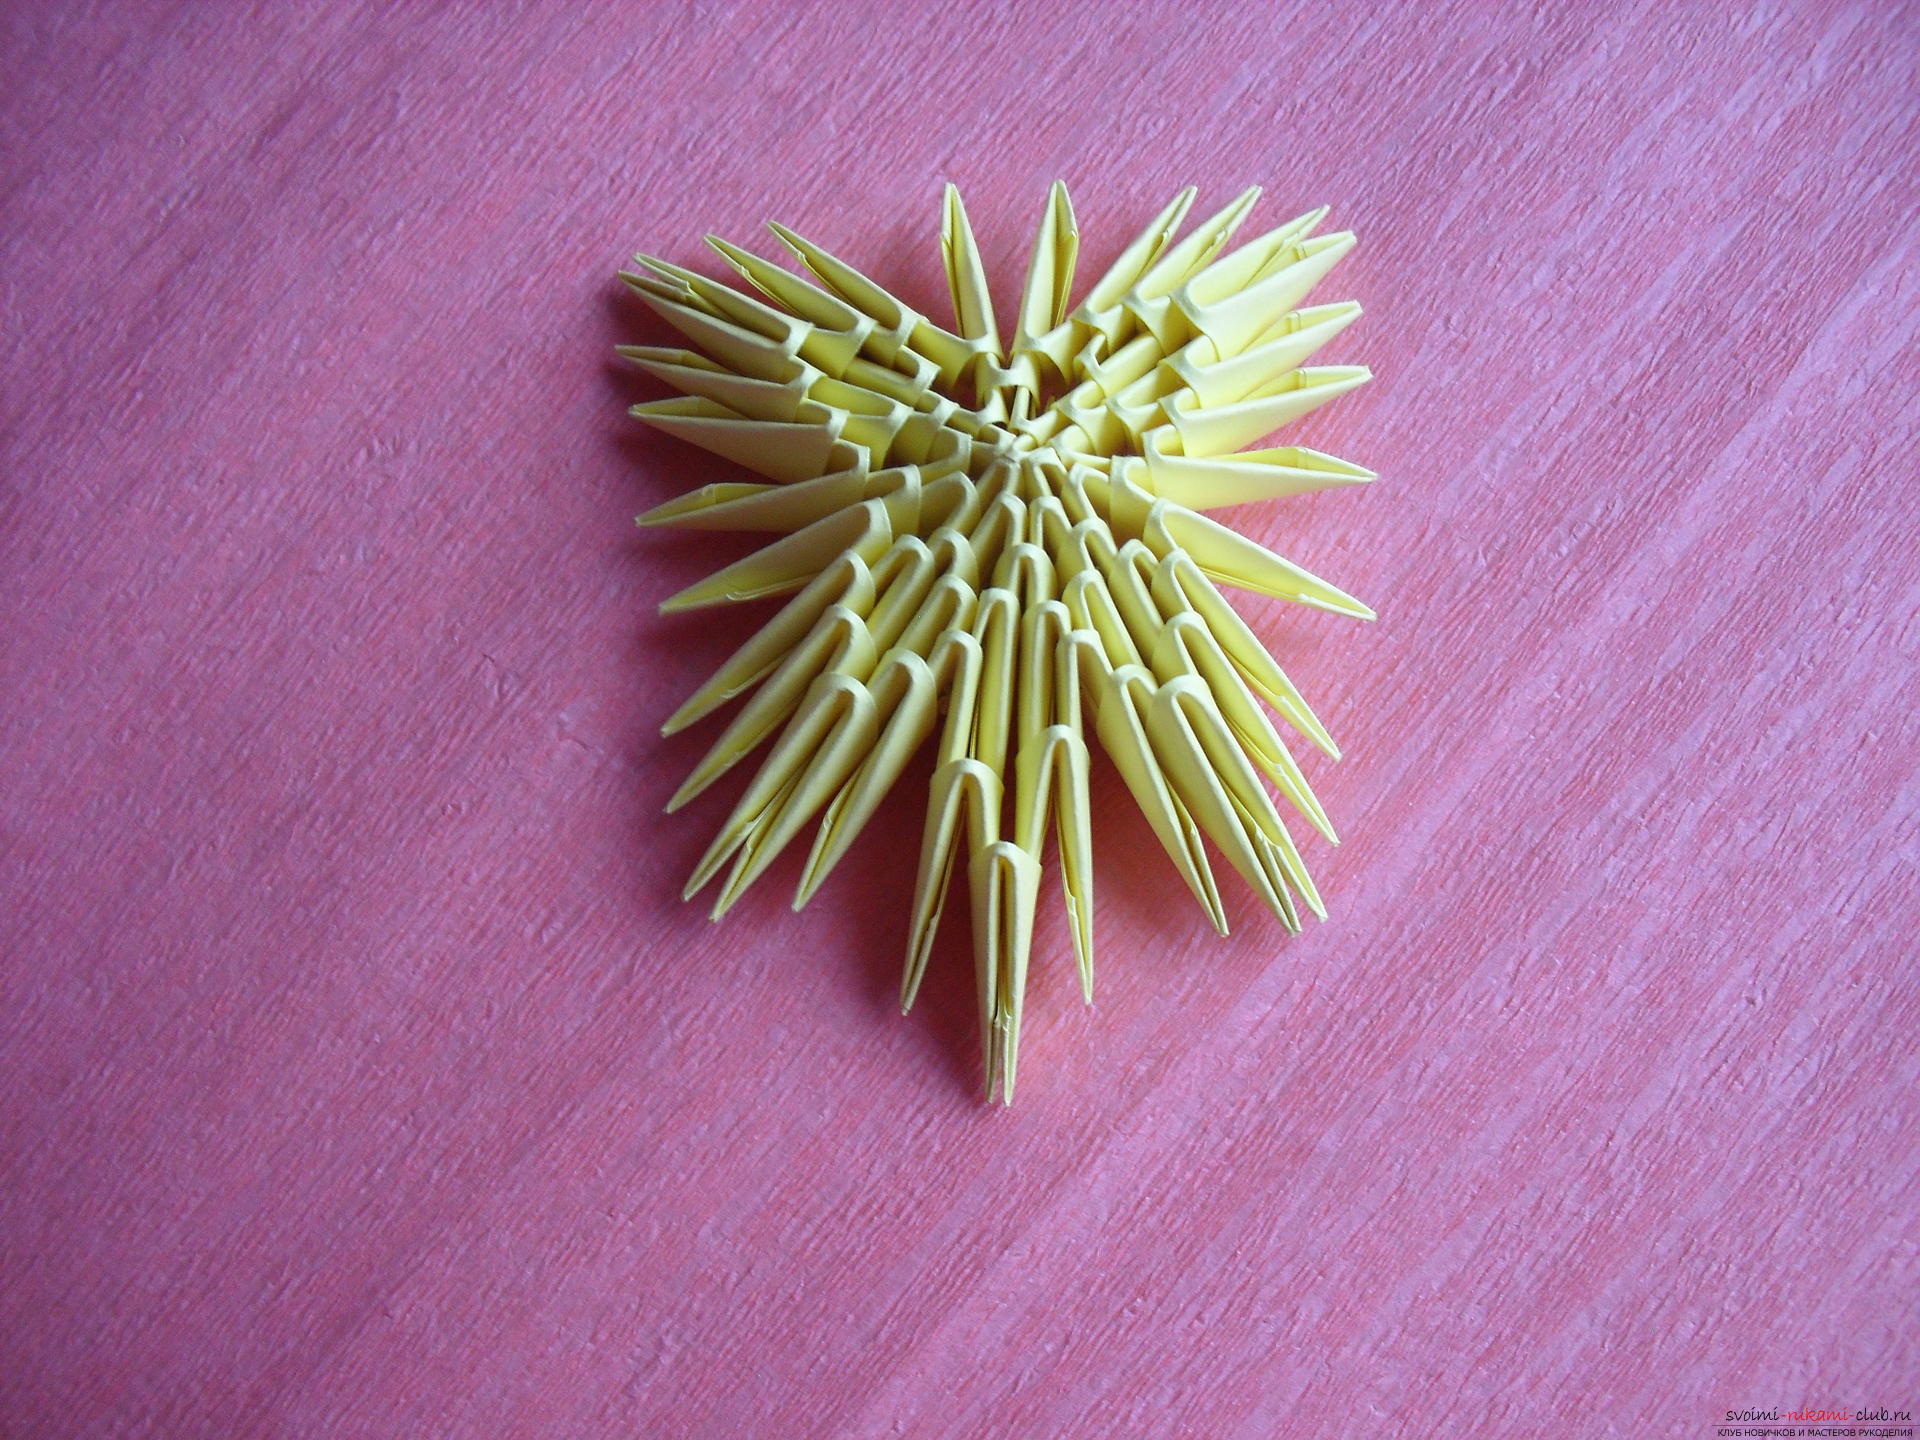
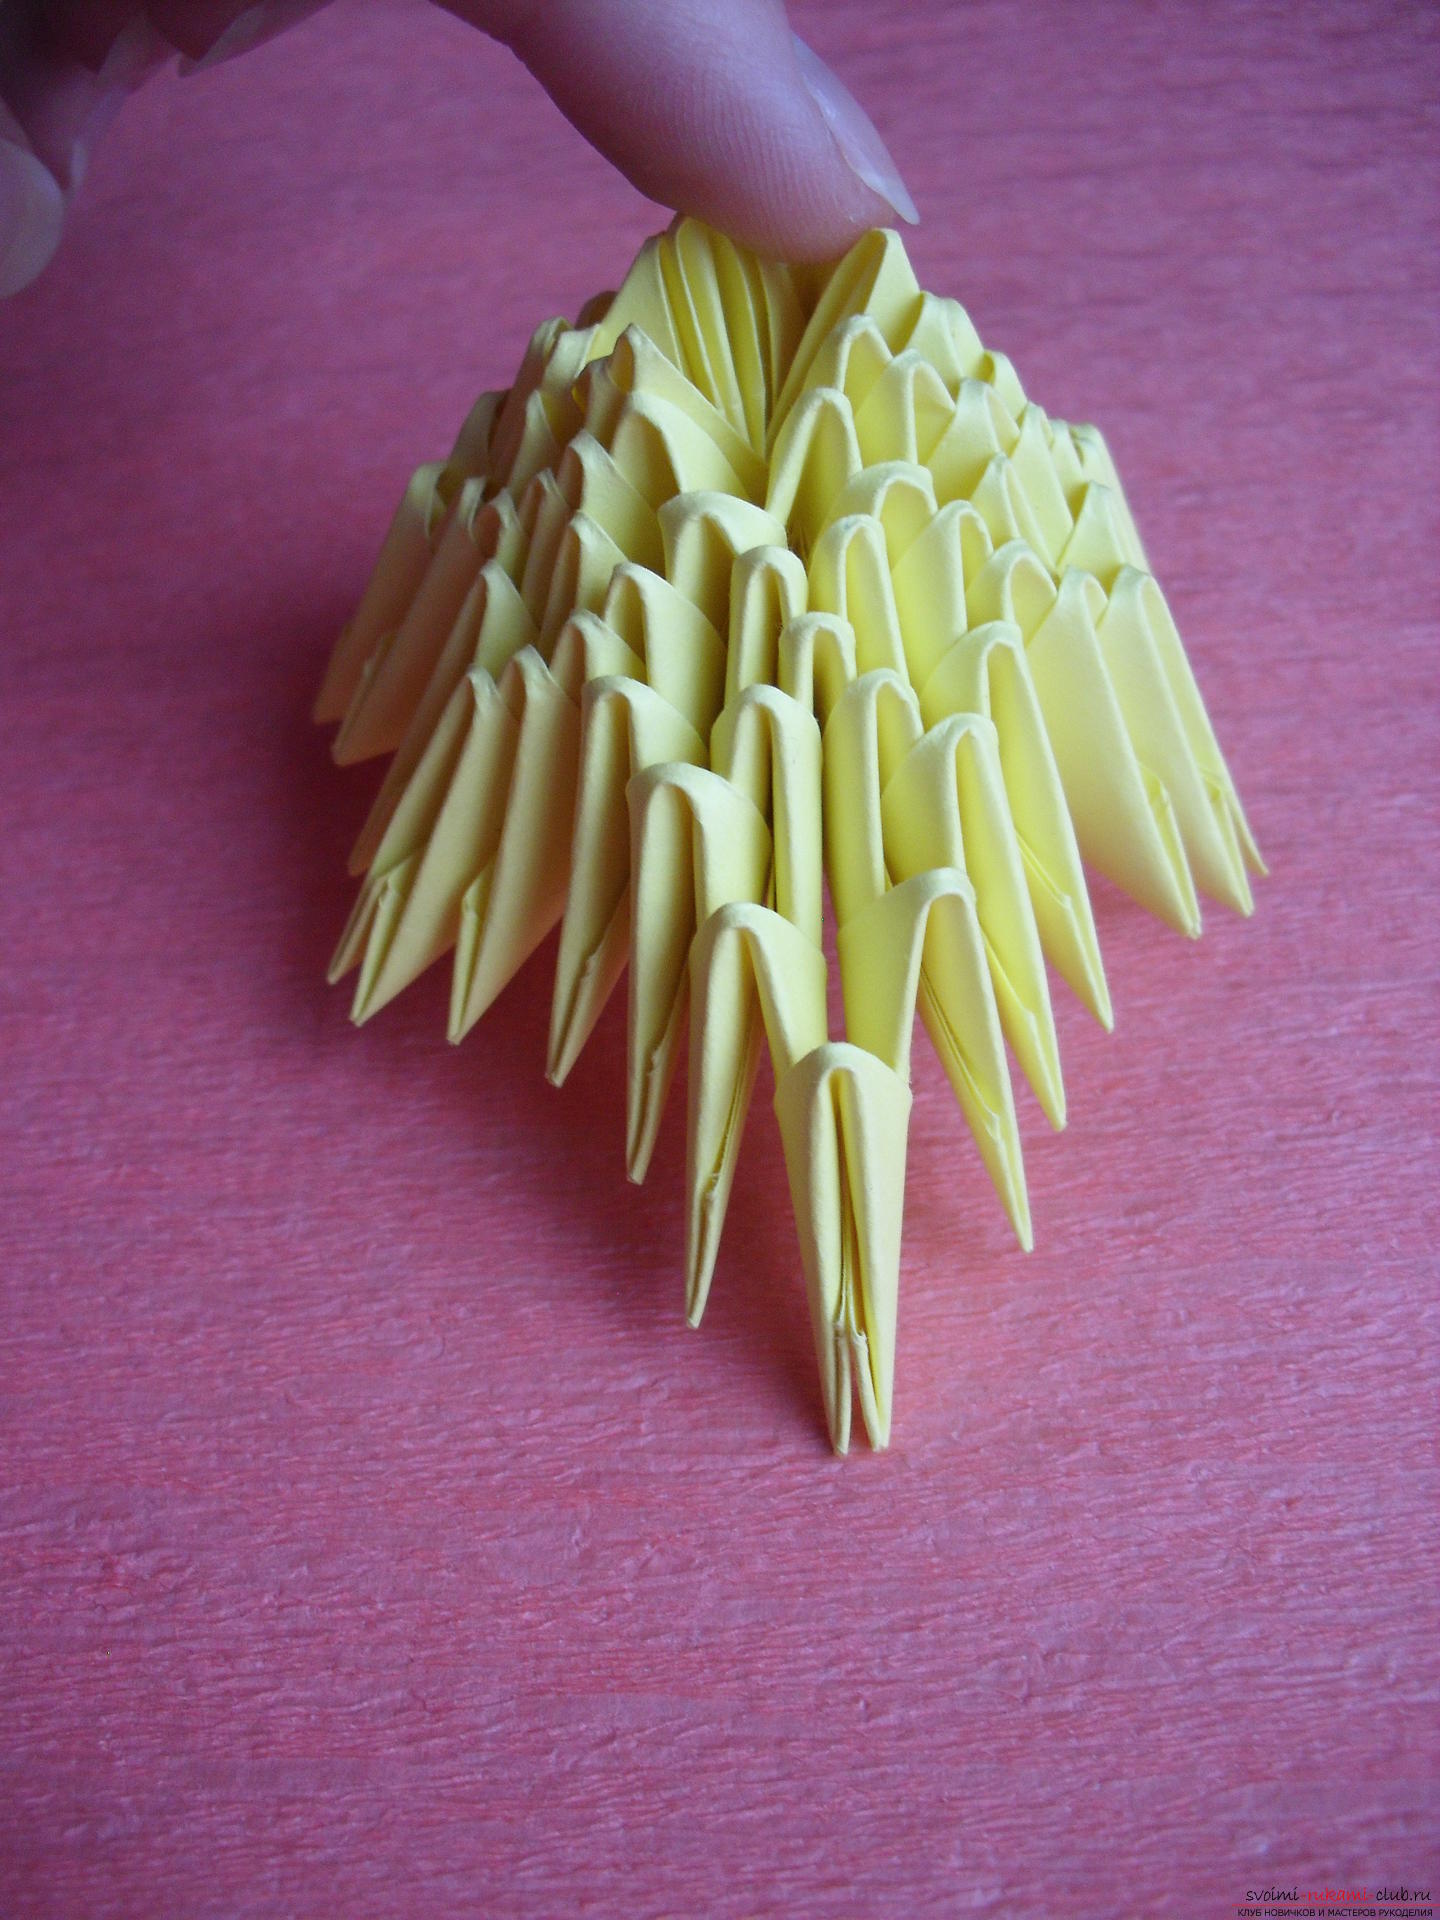 In the end, we get 4 petals. Flower bud is collected!
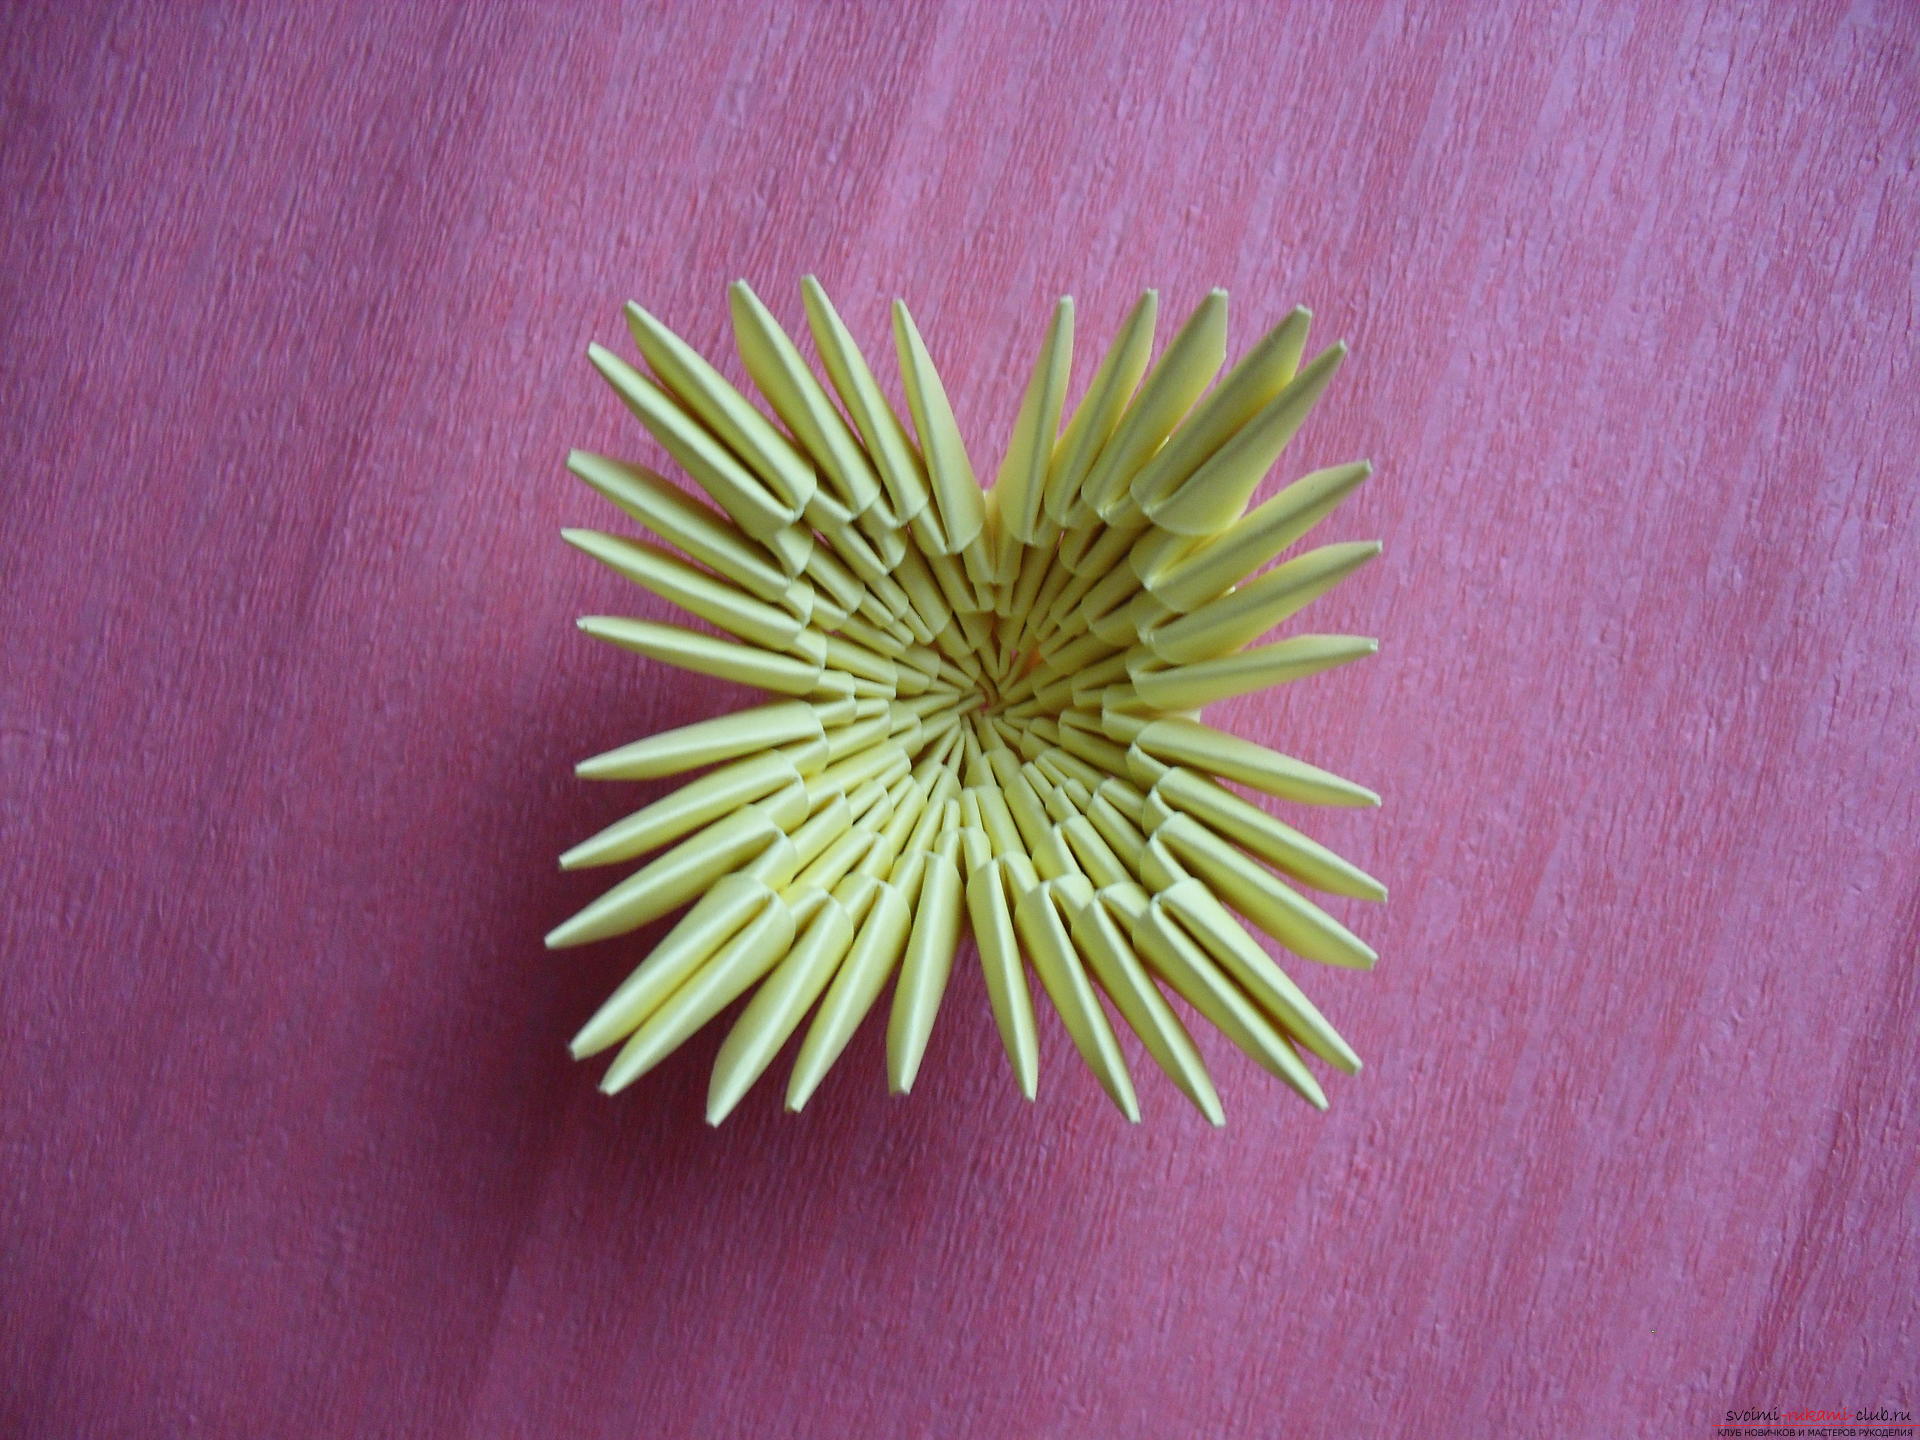
 Stalk with leaves. To assemble the stem and leaves, you will need a straw for the cocktail, glue, scissors and two-sided green paper.
 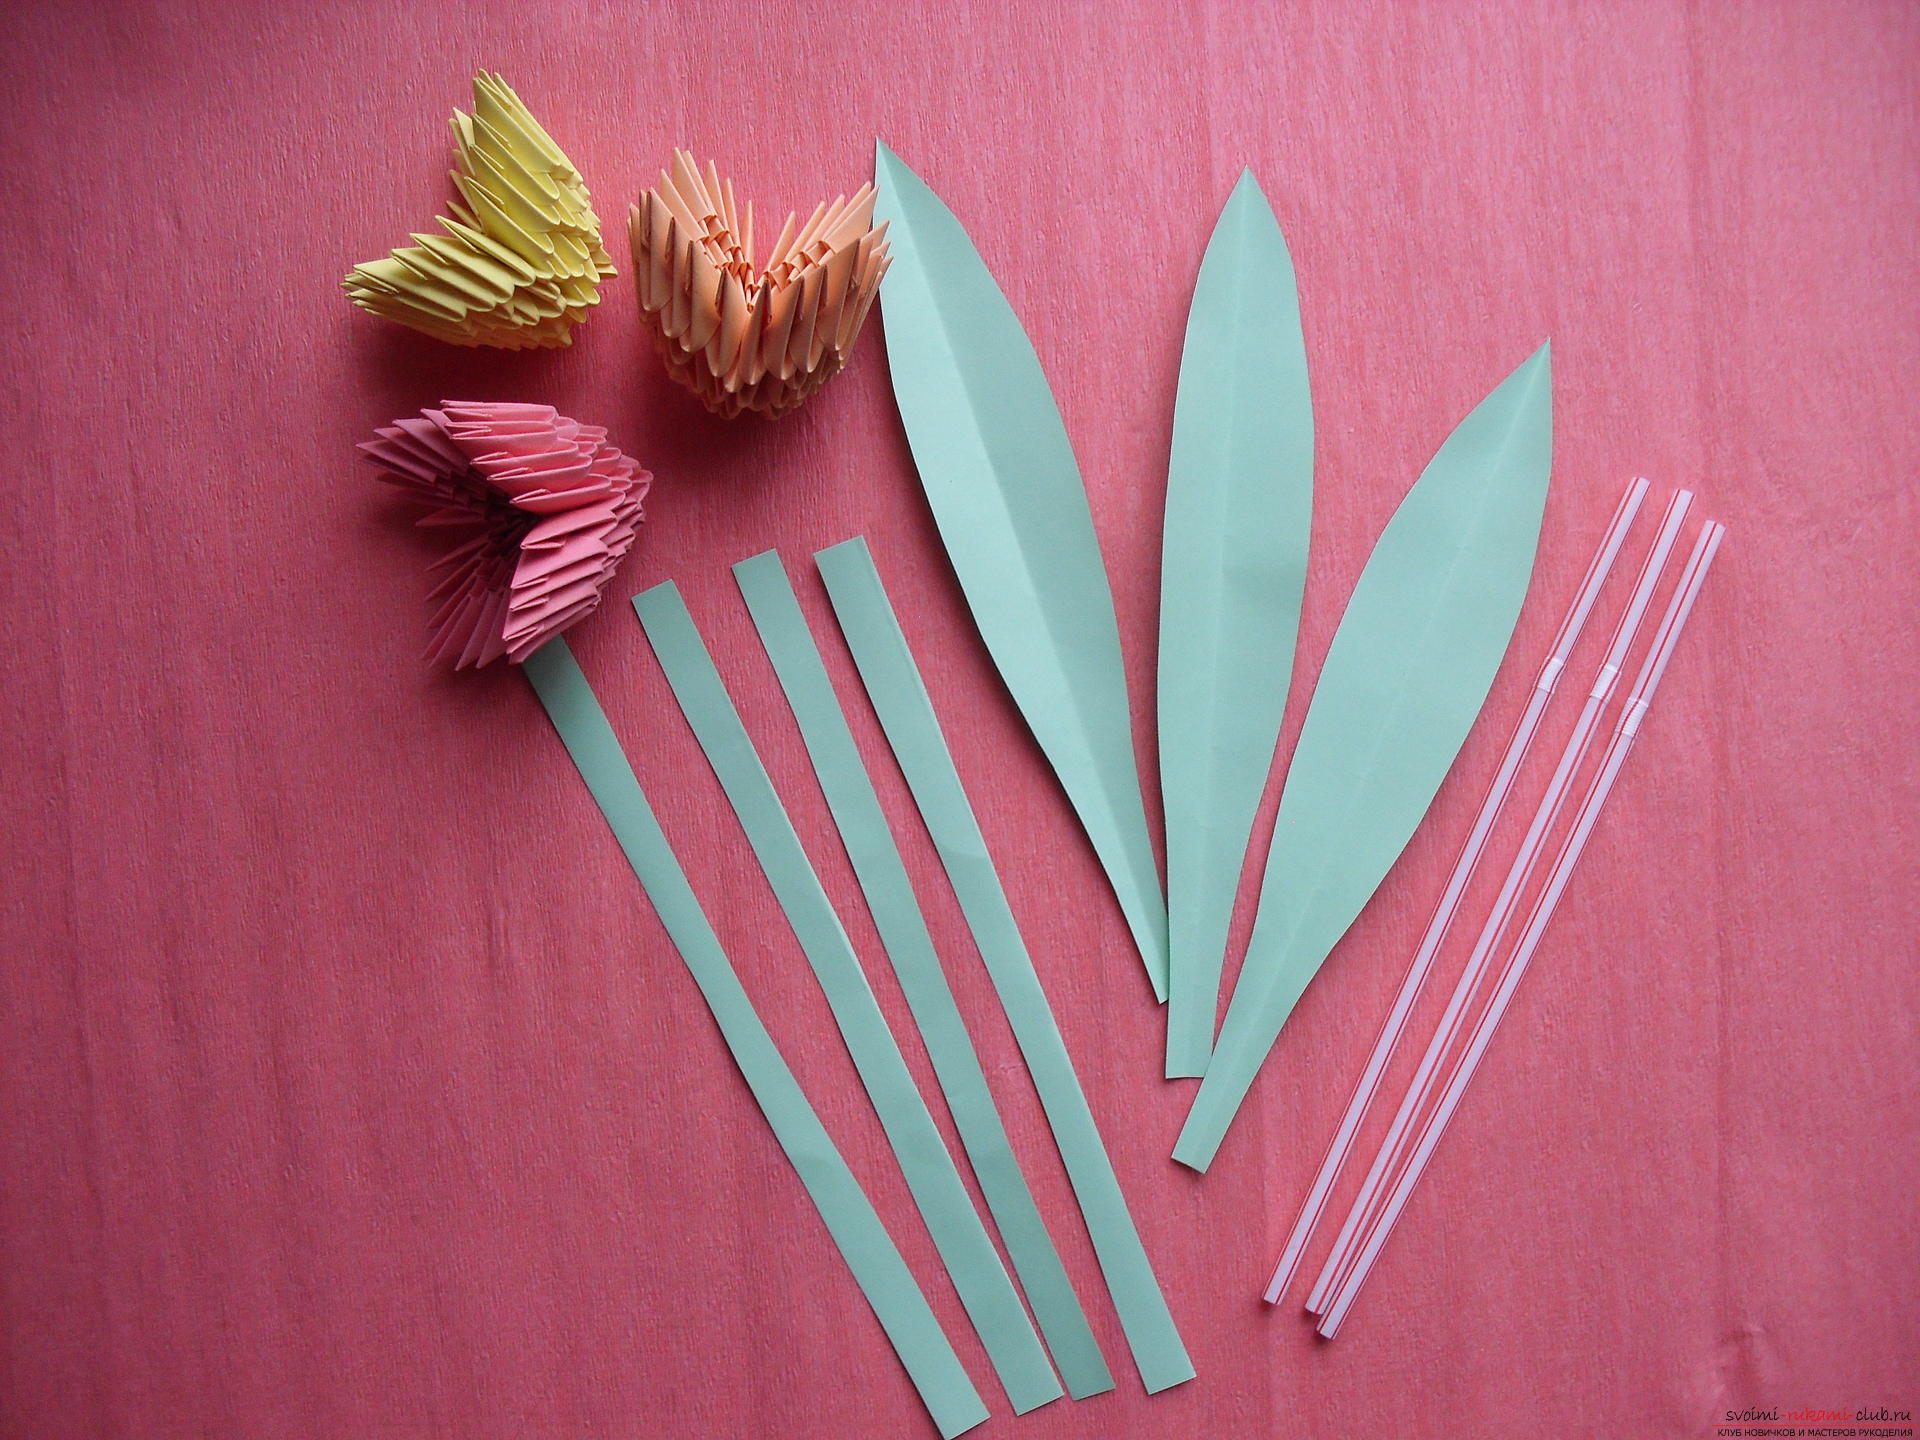 Gently cut the green paper into stripsmedium thickness and with the help of glue-pencil wrapped her straw. The resulting stem must be fixed in the bud and fixed with glue from the inside. After that, we start making leaves. Carefully cut them out of the green paper and attach it to the stem. Assembling the flower is complete!
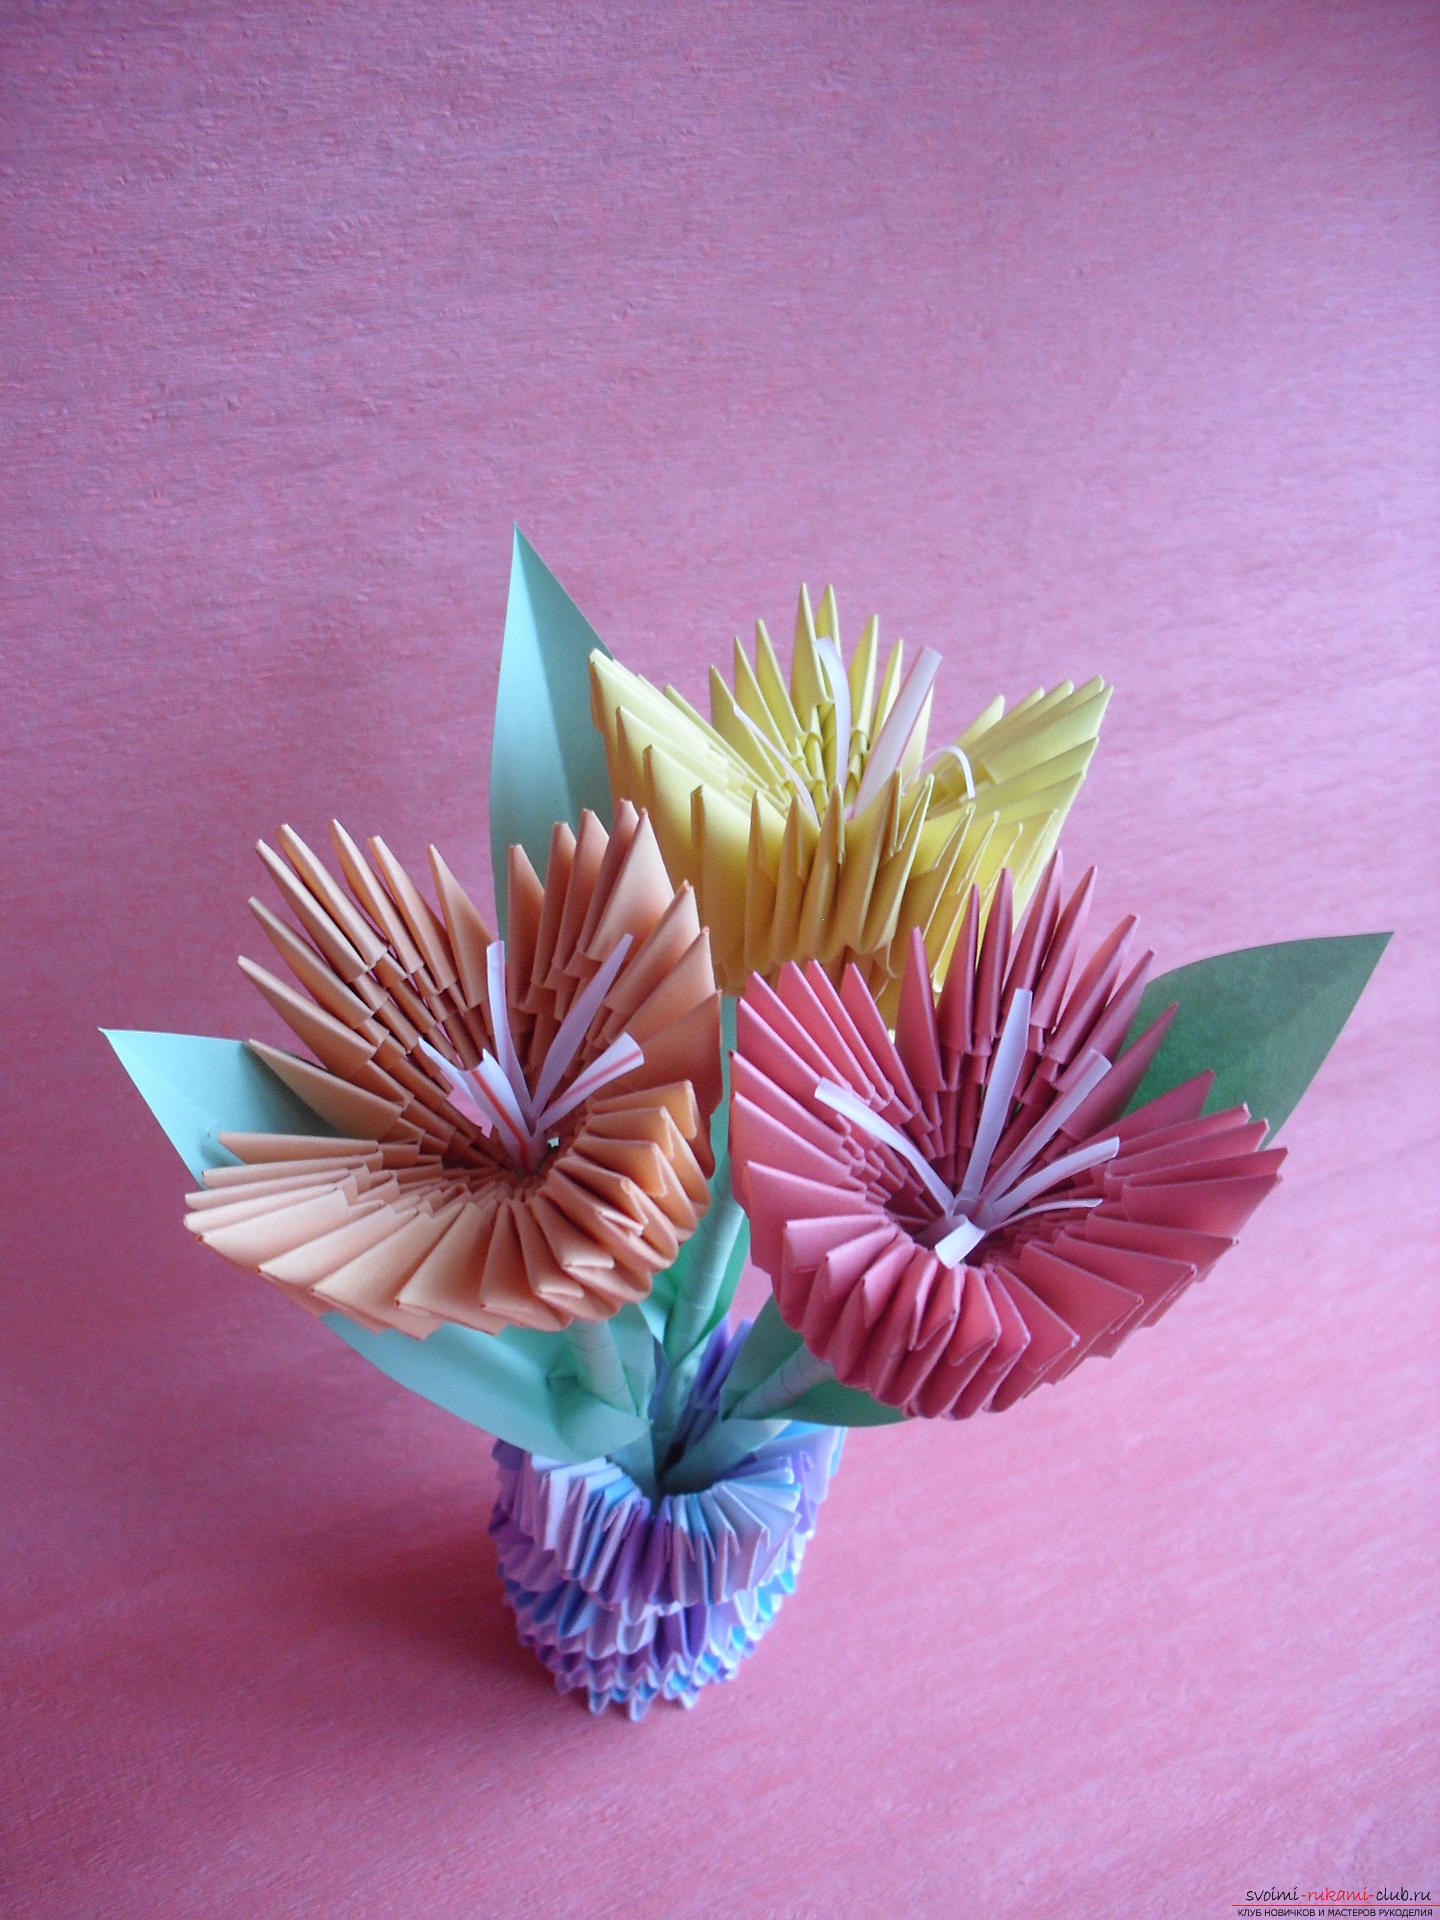
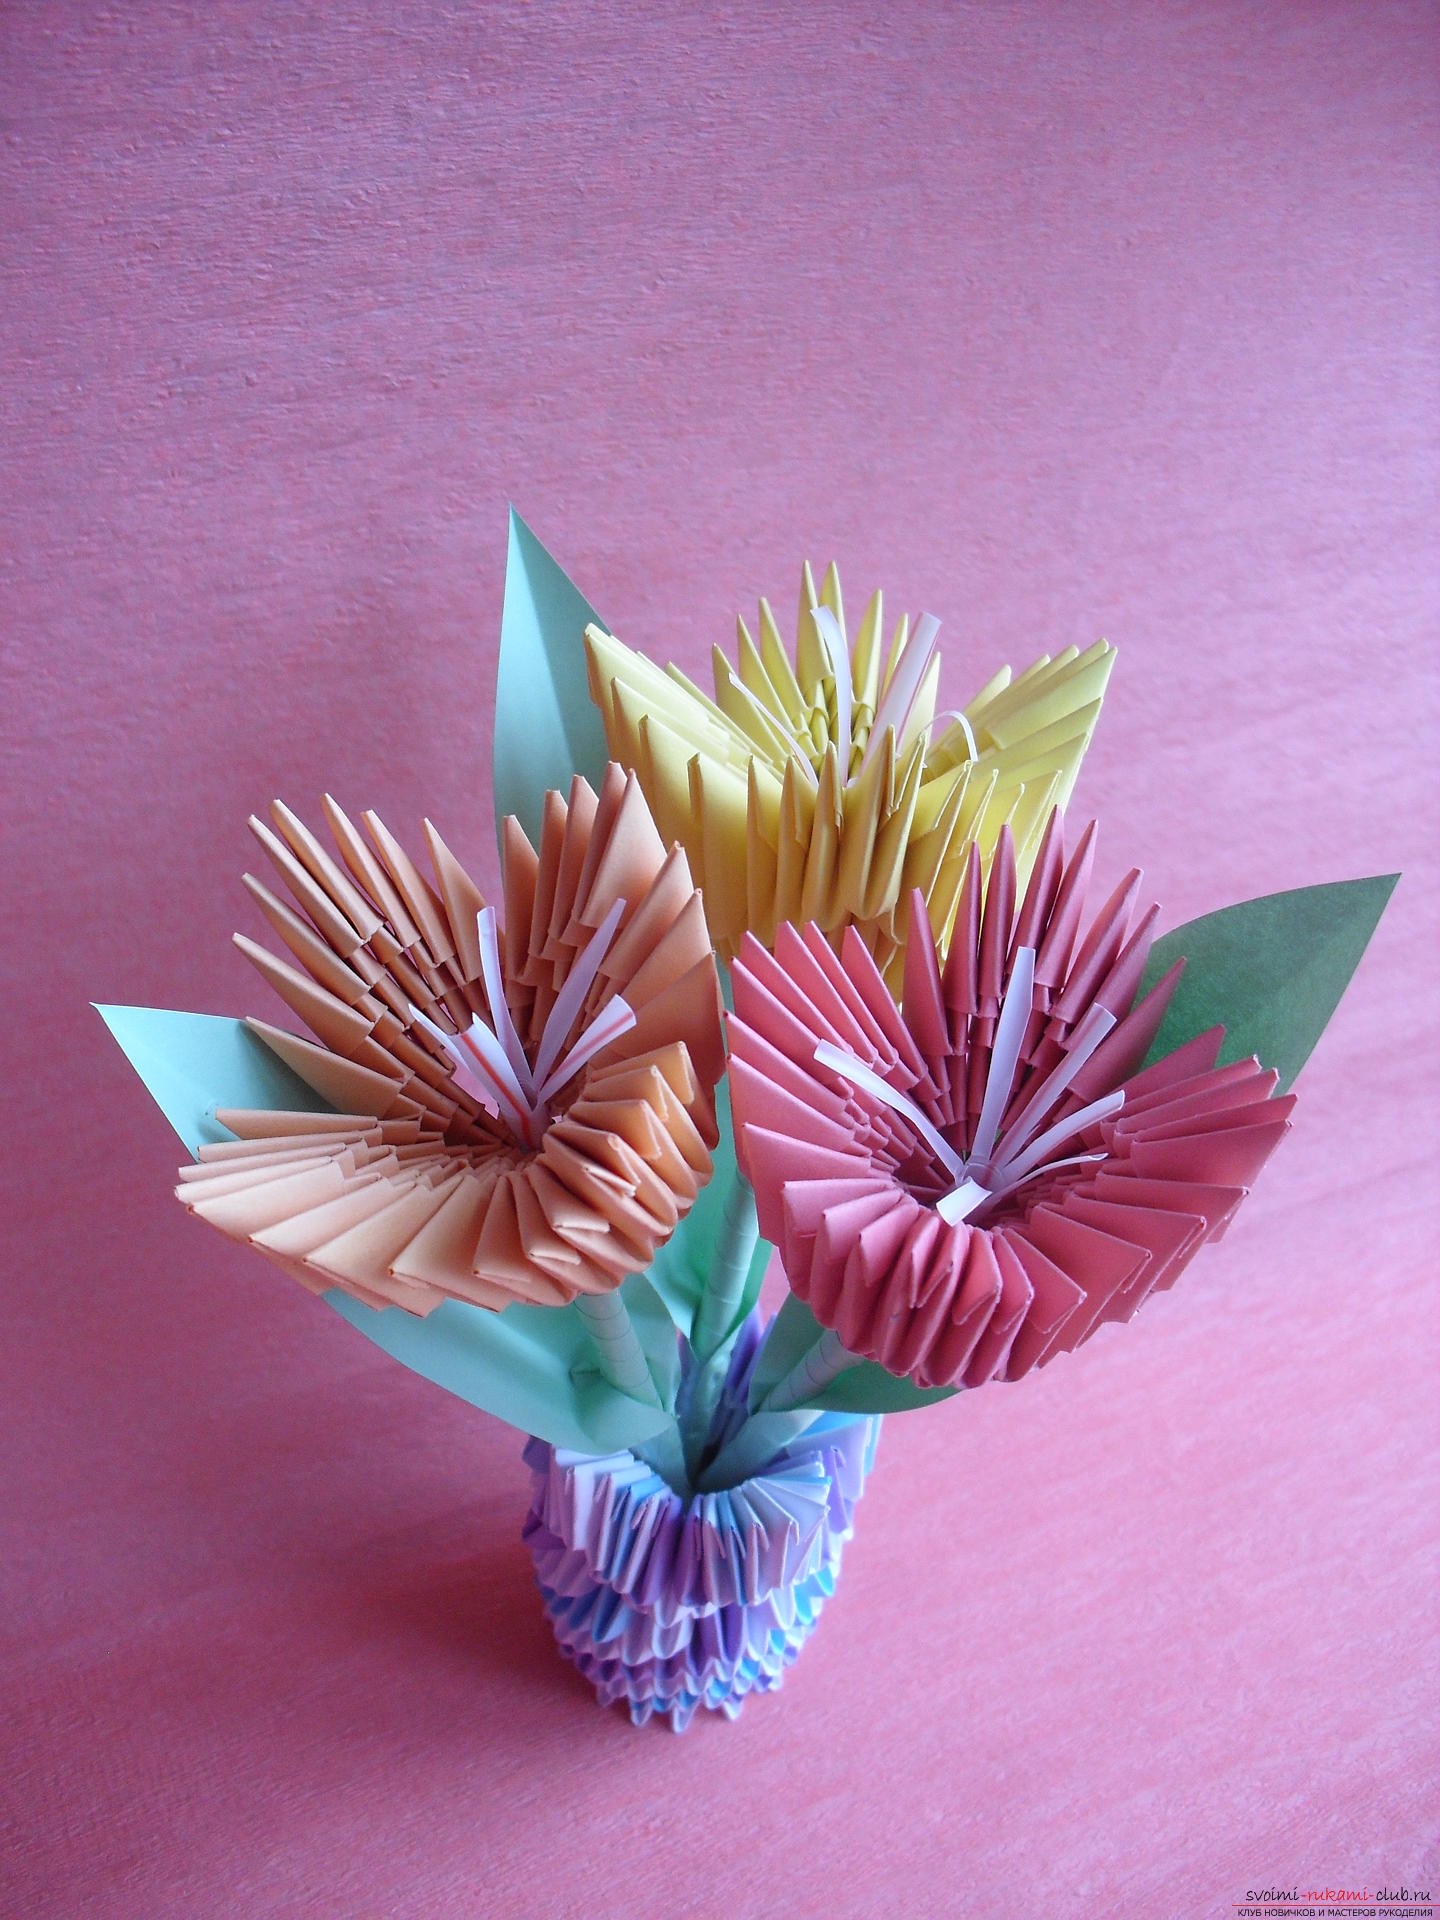
 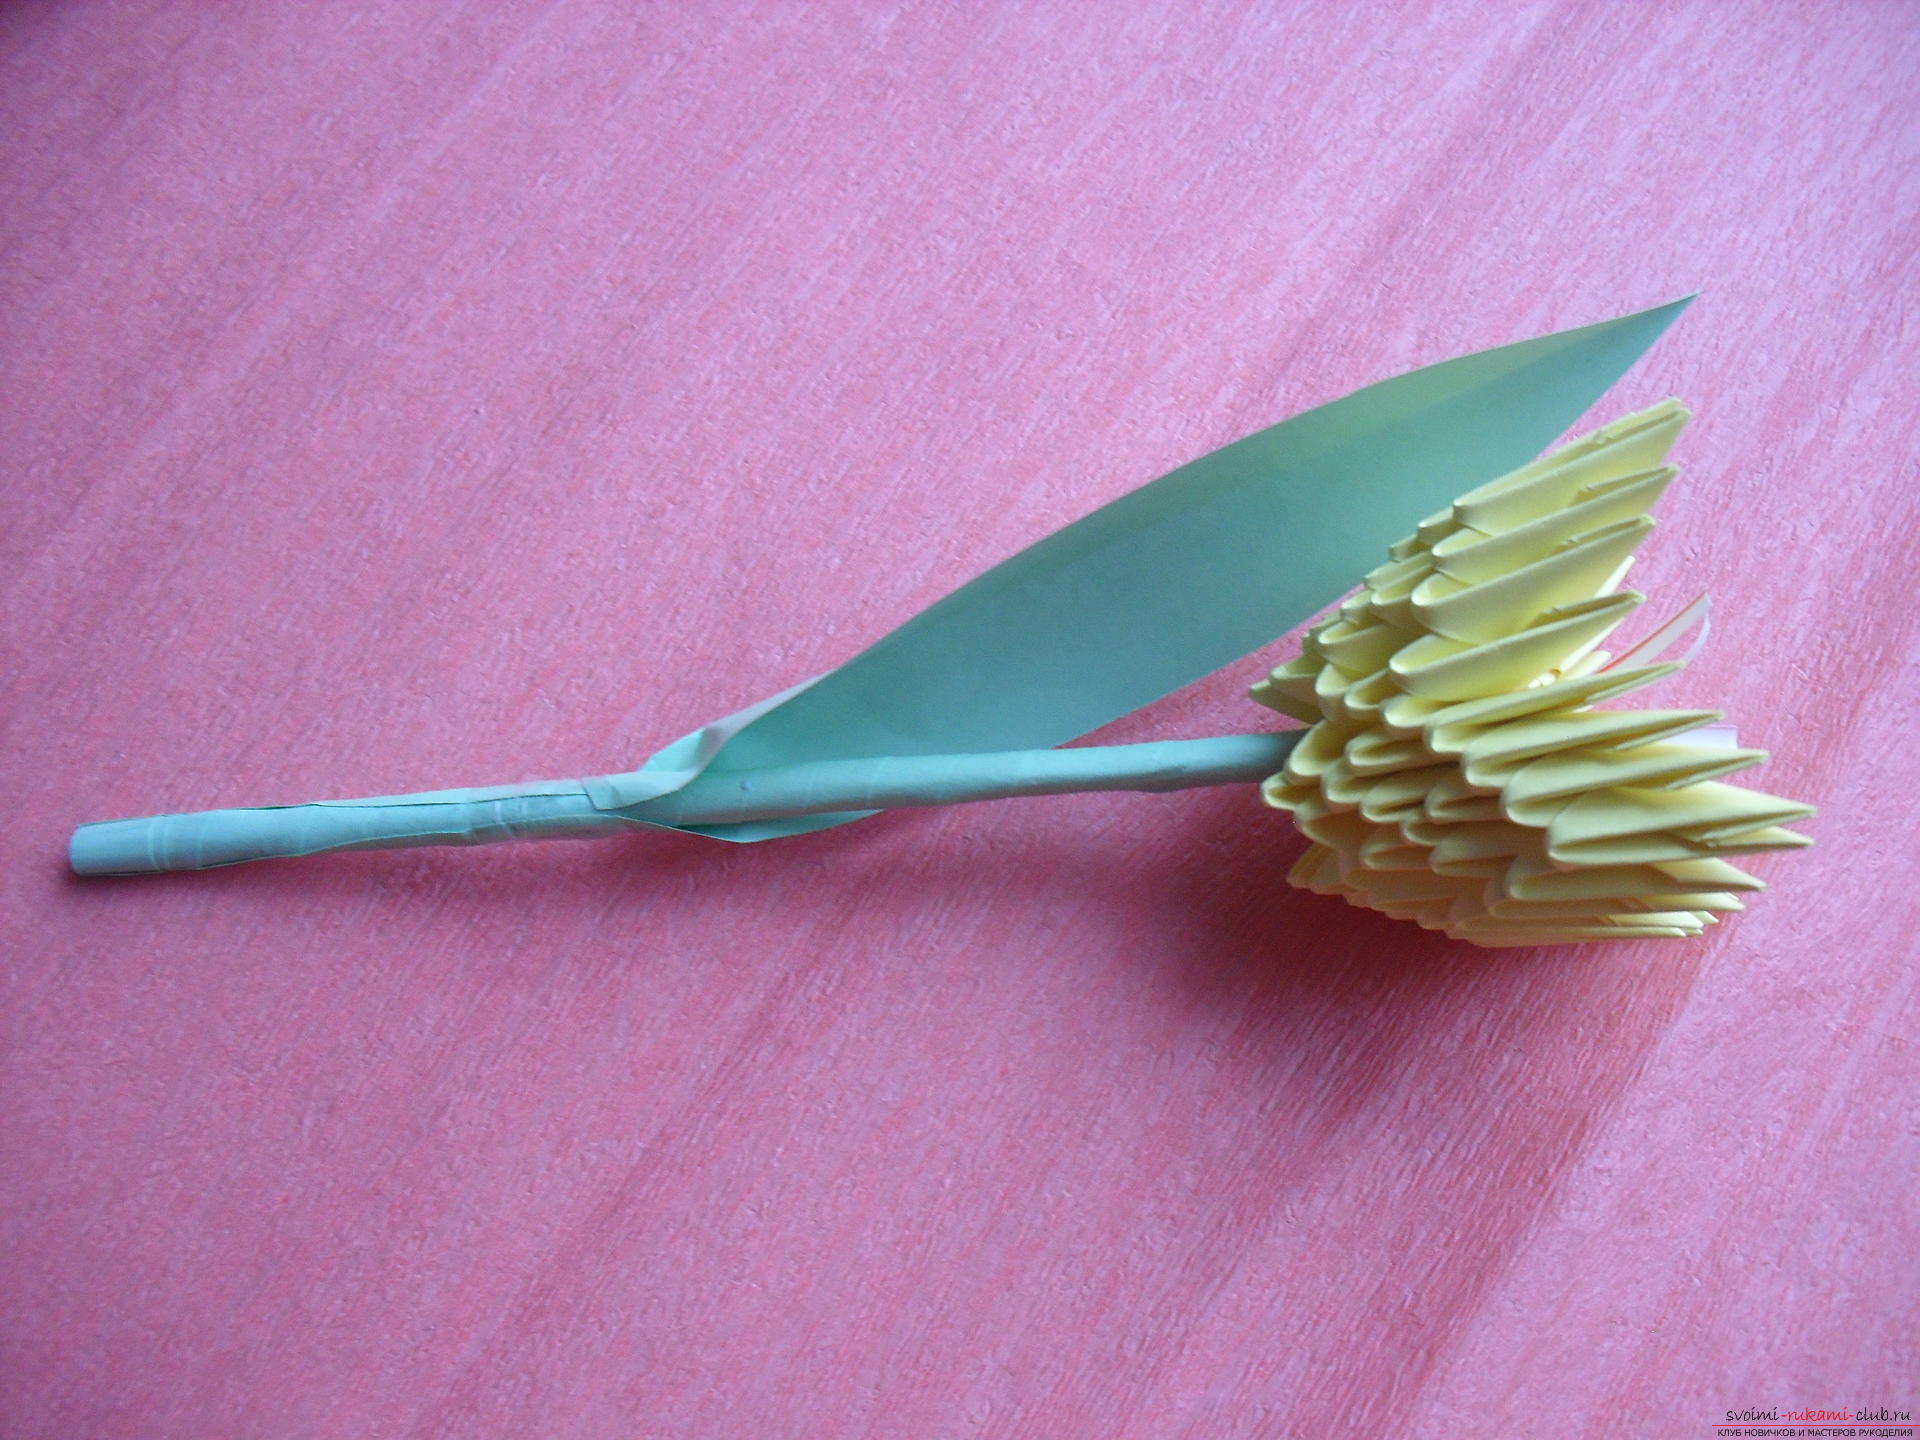 When all the flowers are made, they can be placed in the vase.
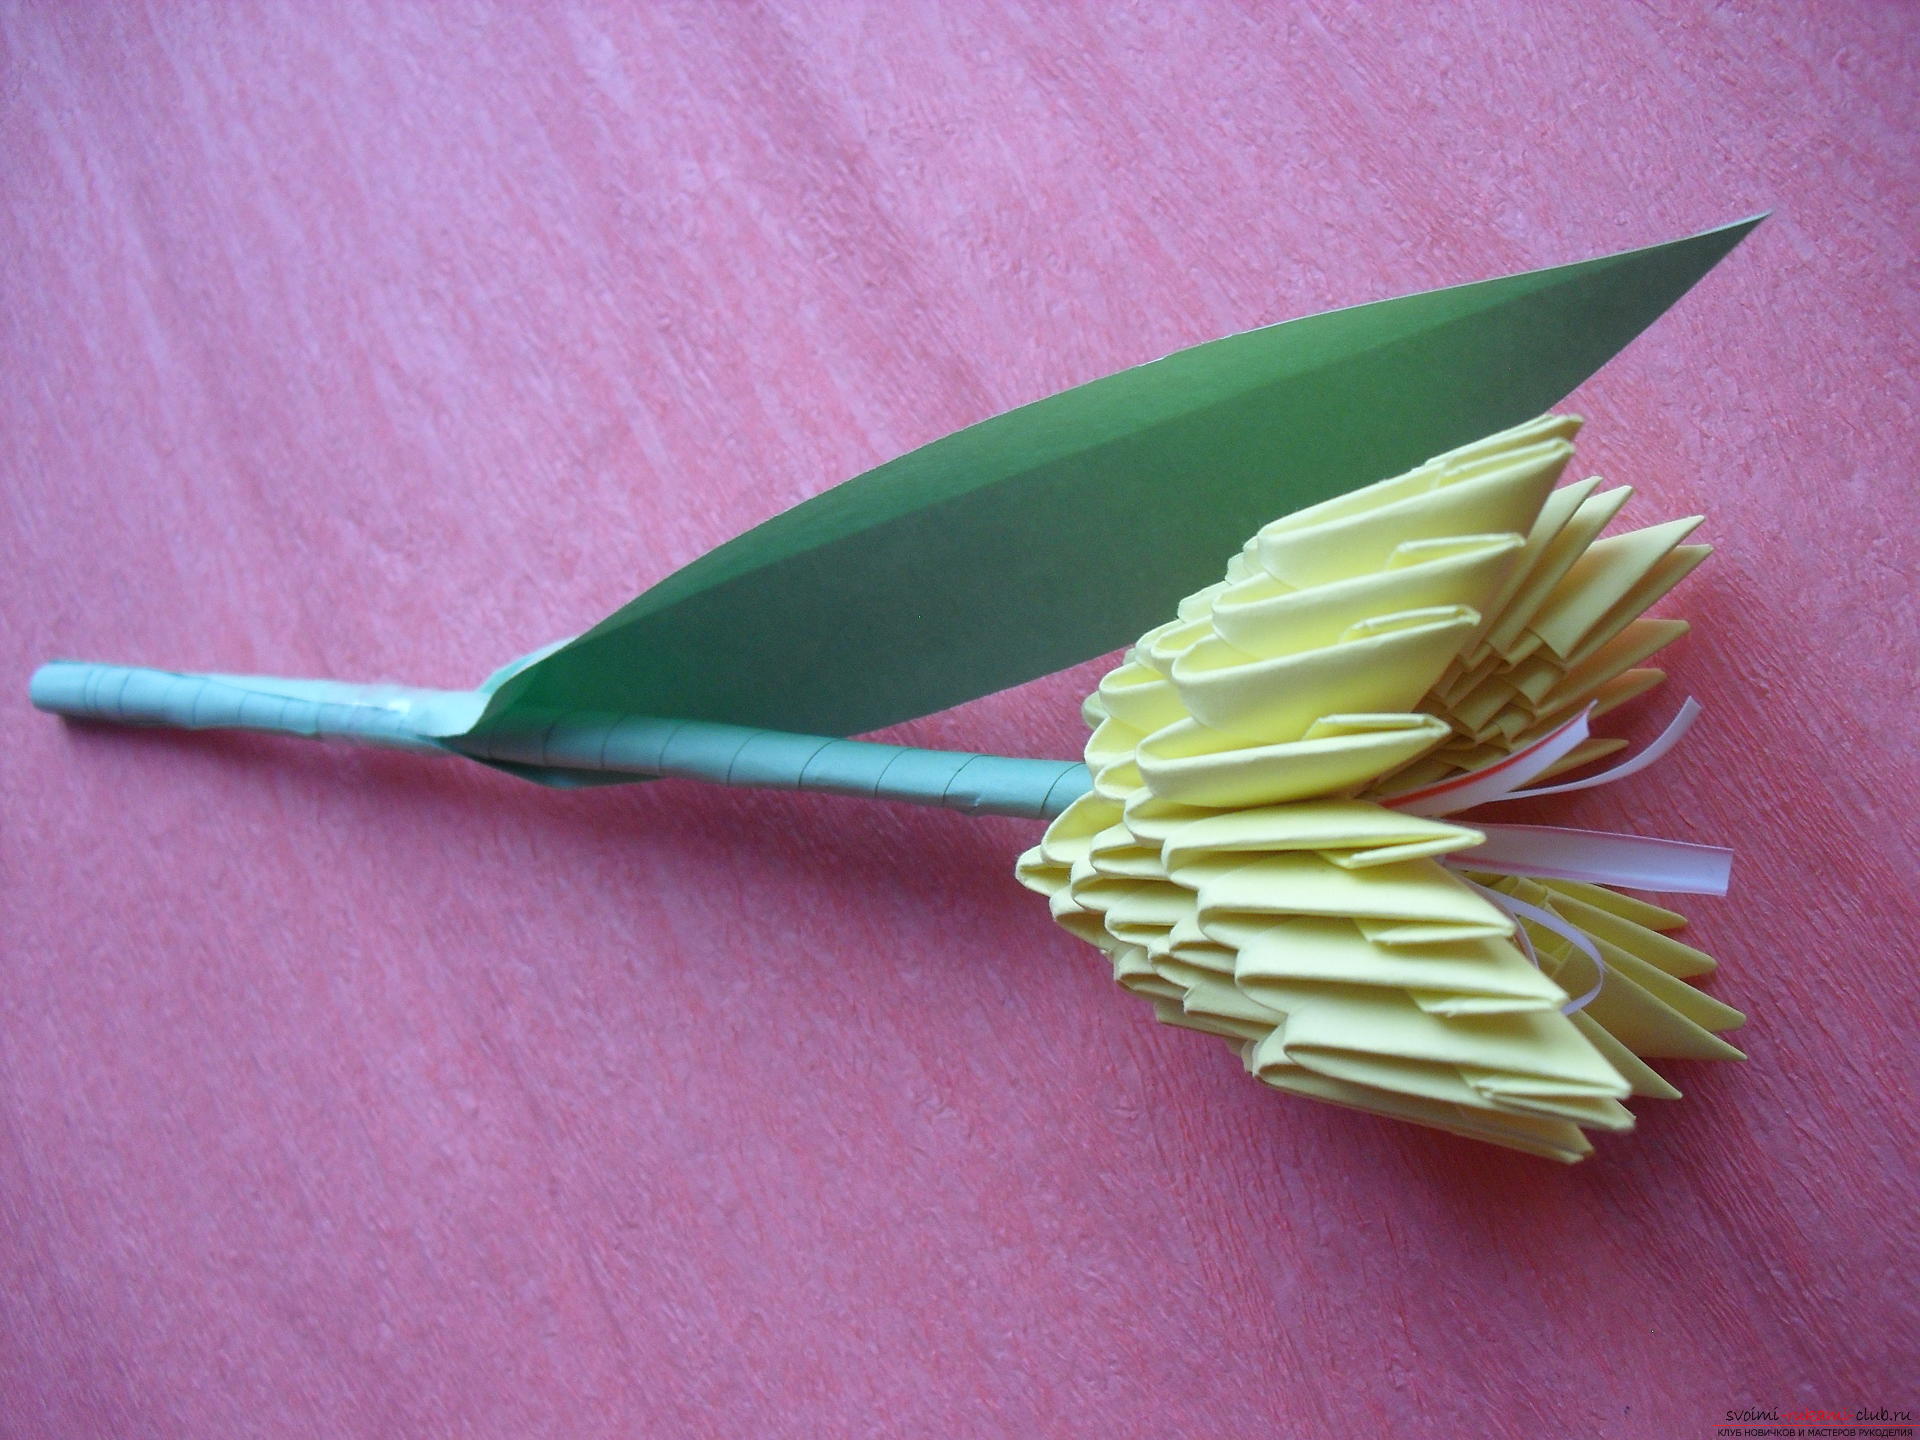
Comments
Related posts:
 This master class will teach you how to make a vase with your own hands from a modular origami.
 This master class will teach you how to make a violet in a vase in the technique of modular origami.
 This detailed workshop of origami for children of 8 years will teach how to make an origami-mushroom from paper.
 This detailed master class with a photo and description will teach you how to make origami for beginners - an origami-crown made of paper.
 This detailed master class with a photo and description will teach you how to make origami for beginners - an origami dog made of paper.
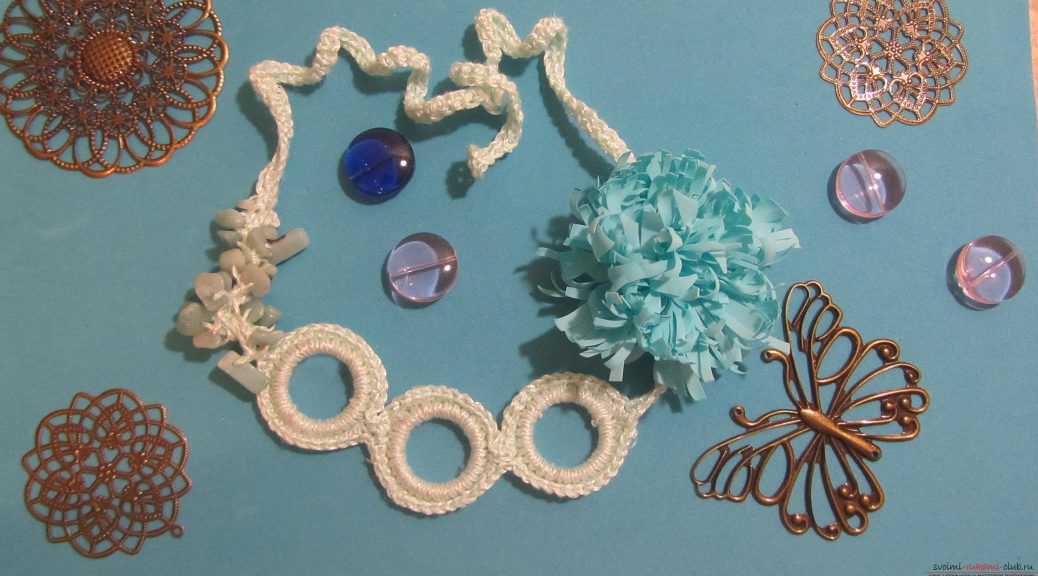
 We will begin knitting the necklace with the straps of the rings. To do this, we make one air loop. Then we begin to tie the ring with simple stitches, in which there is no crochet. But we will knit them so that the hook grabs the thread under the ring.
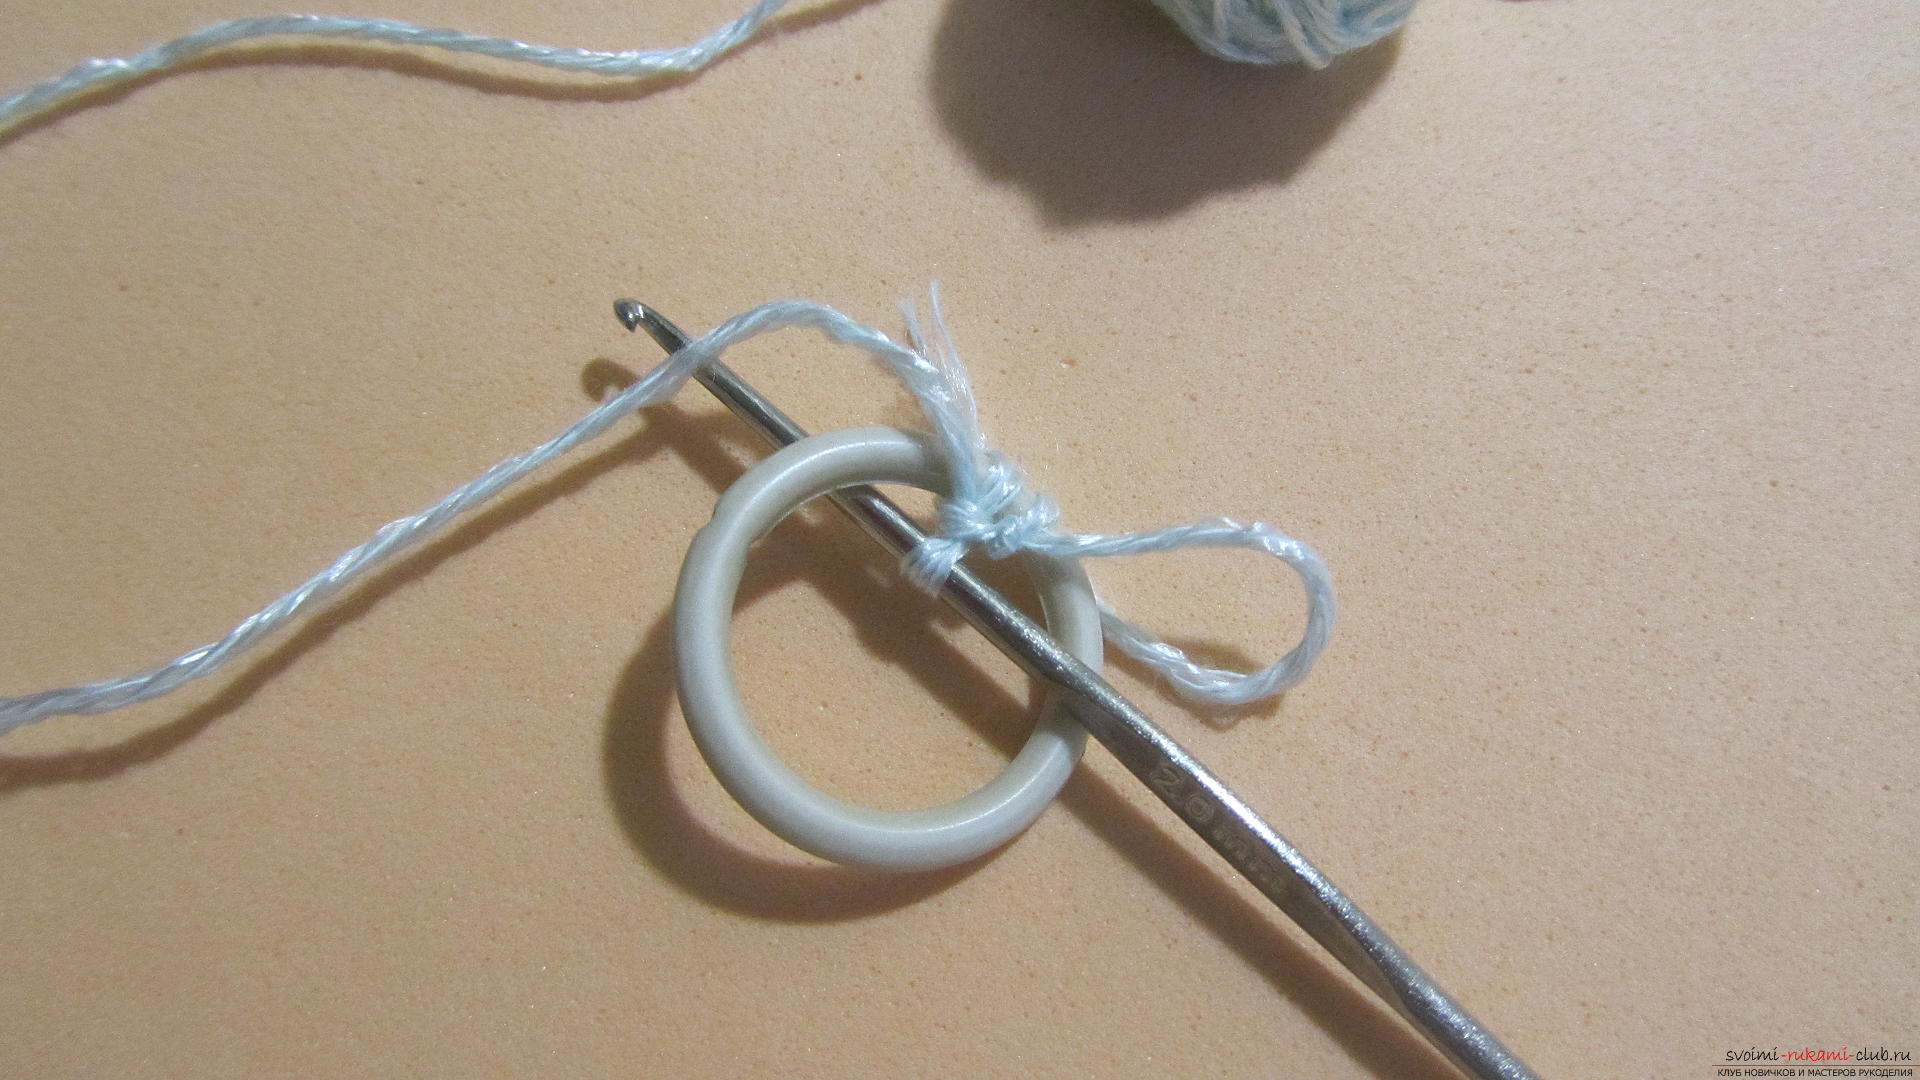
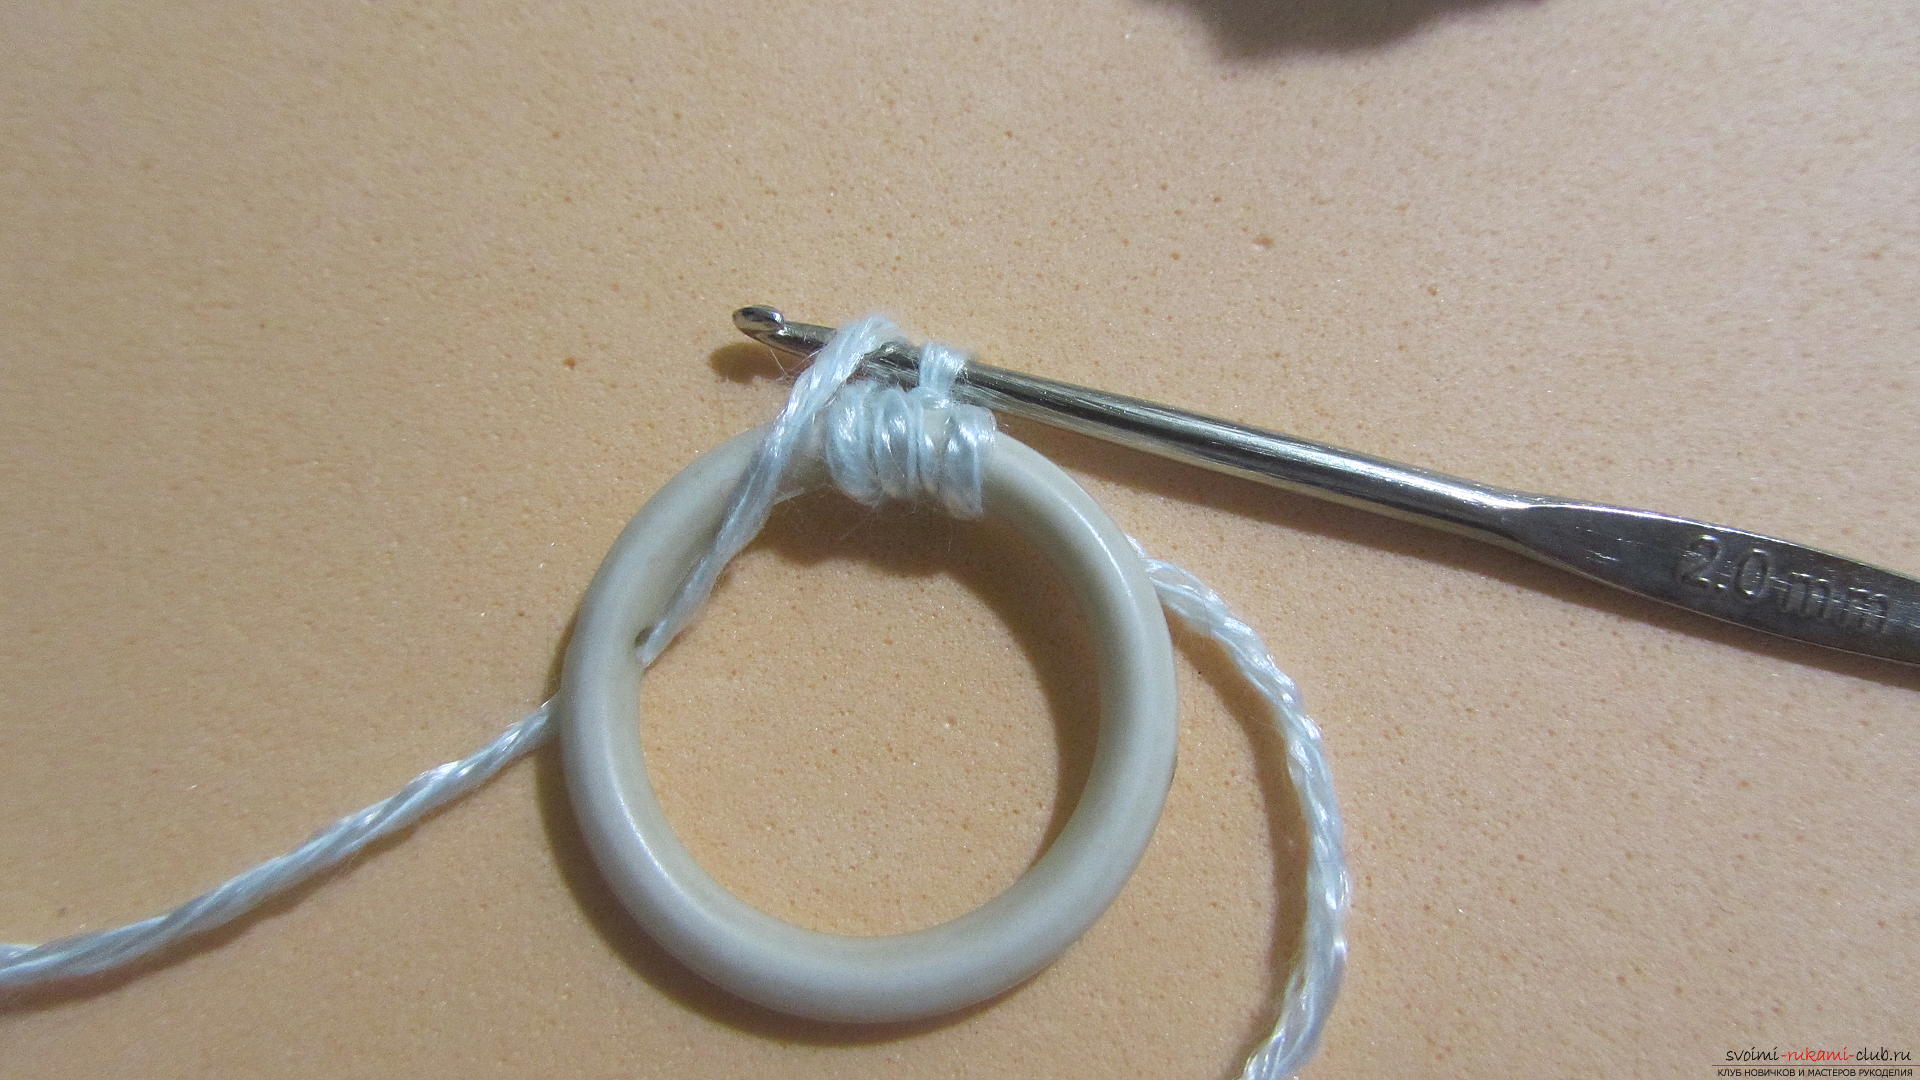 Picking up the thread under the ring, pull it up one level with knitting. And we will fasten the column to the end. Thus, the ring turns inside the column.
 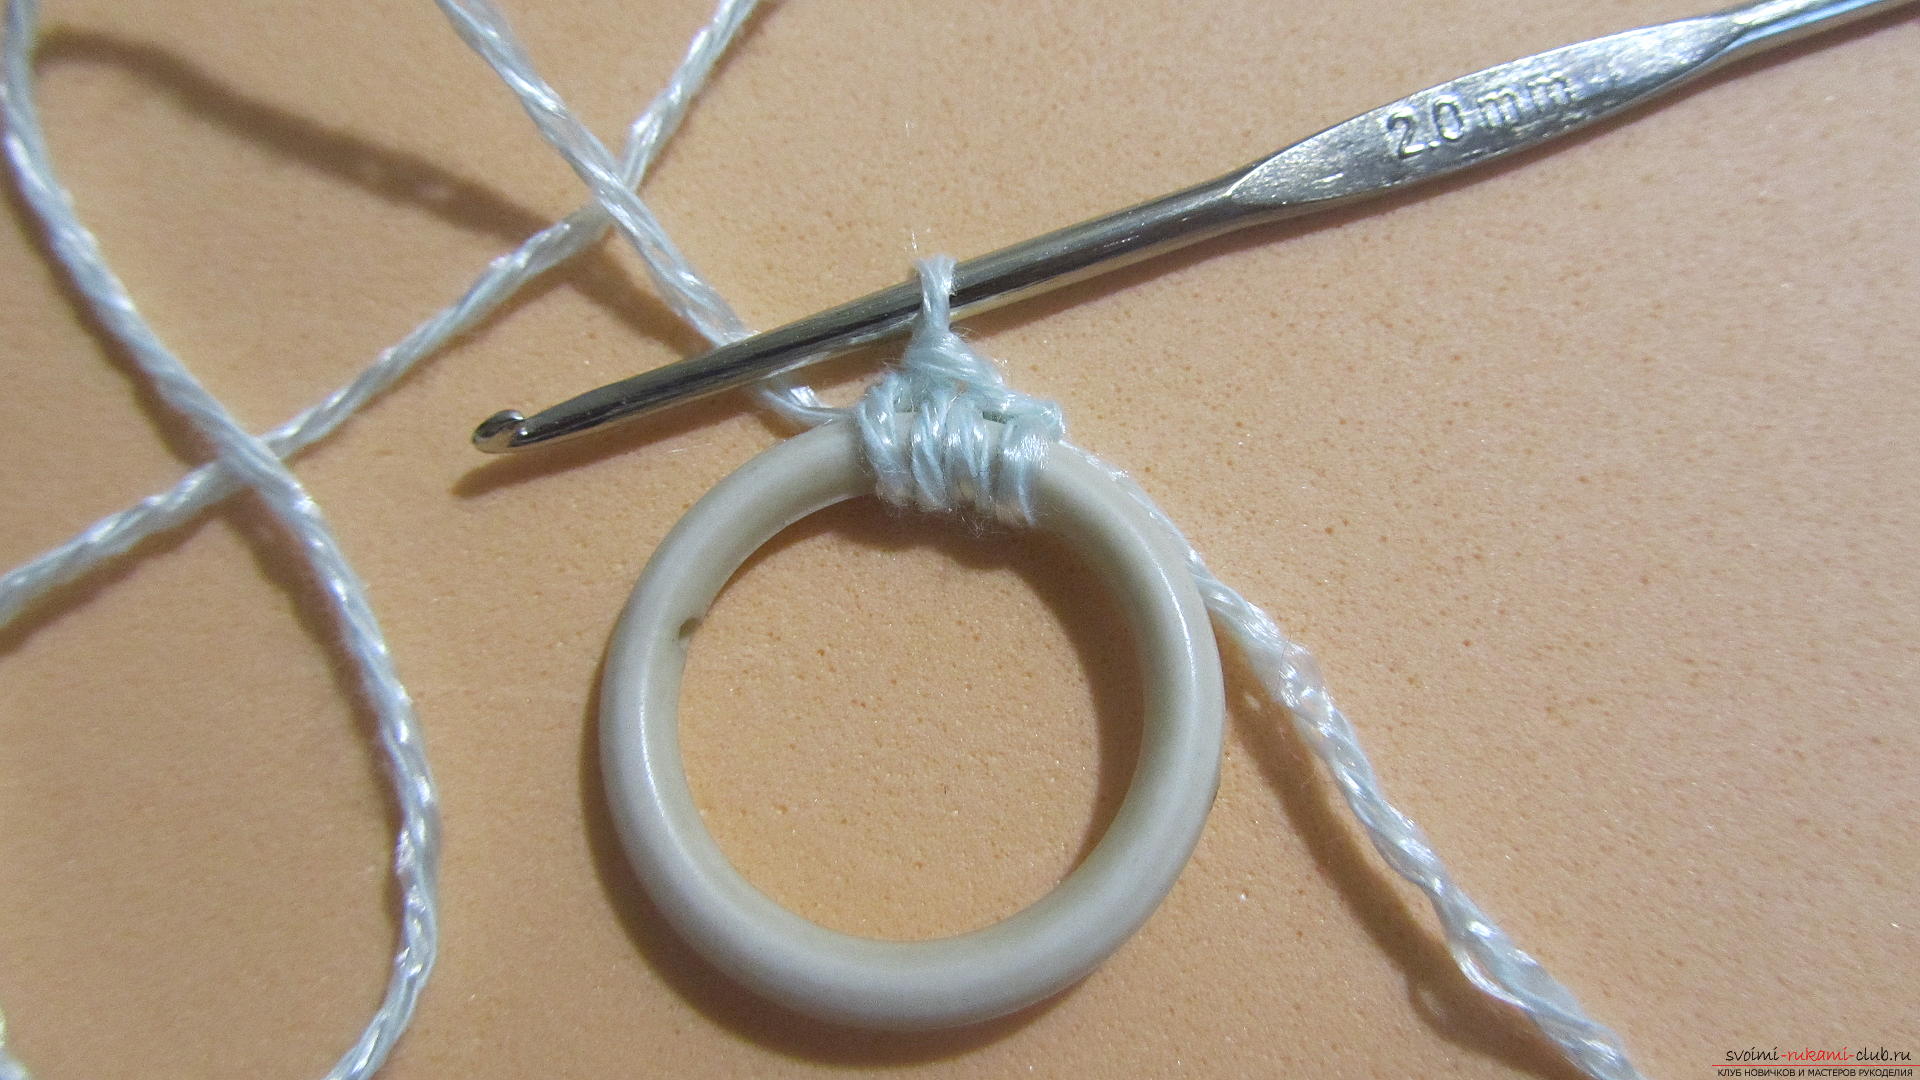 We tie all the rings like this. The total should be 30-32 bar. (depending on the thickness of the thread and the diameter of the selected rings).
 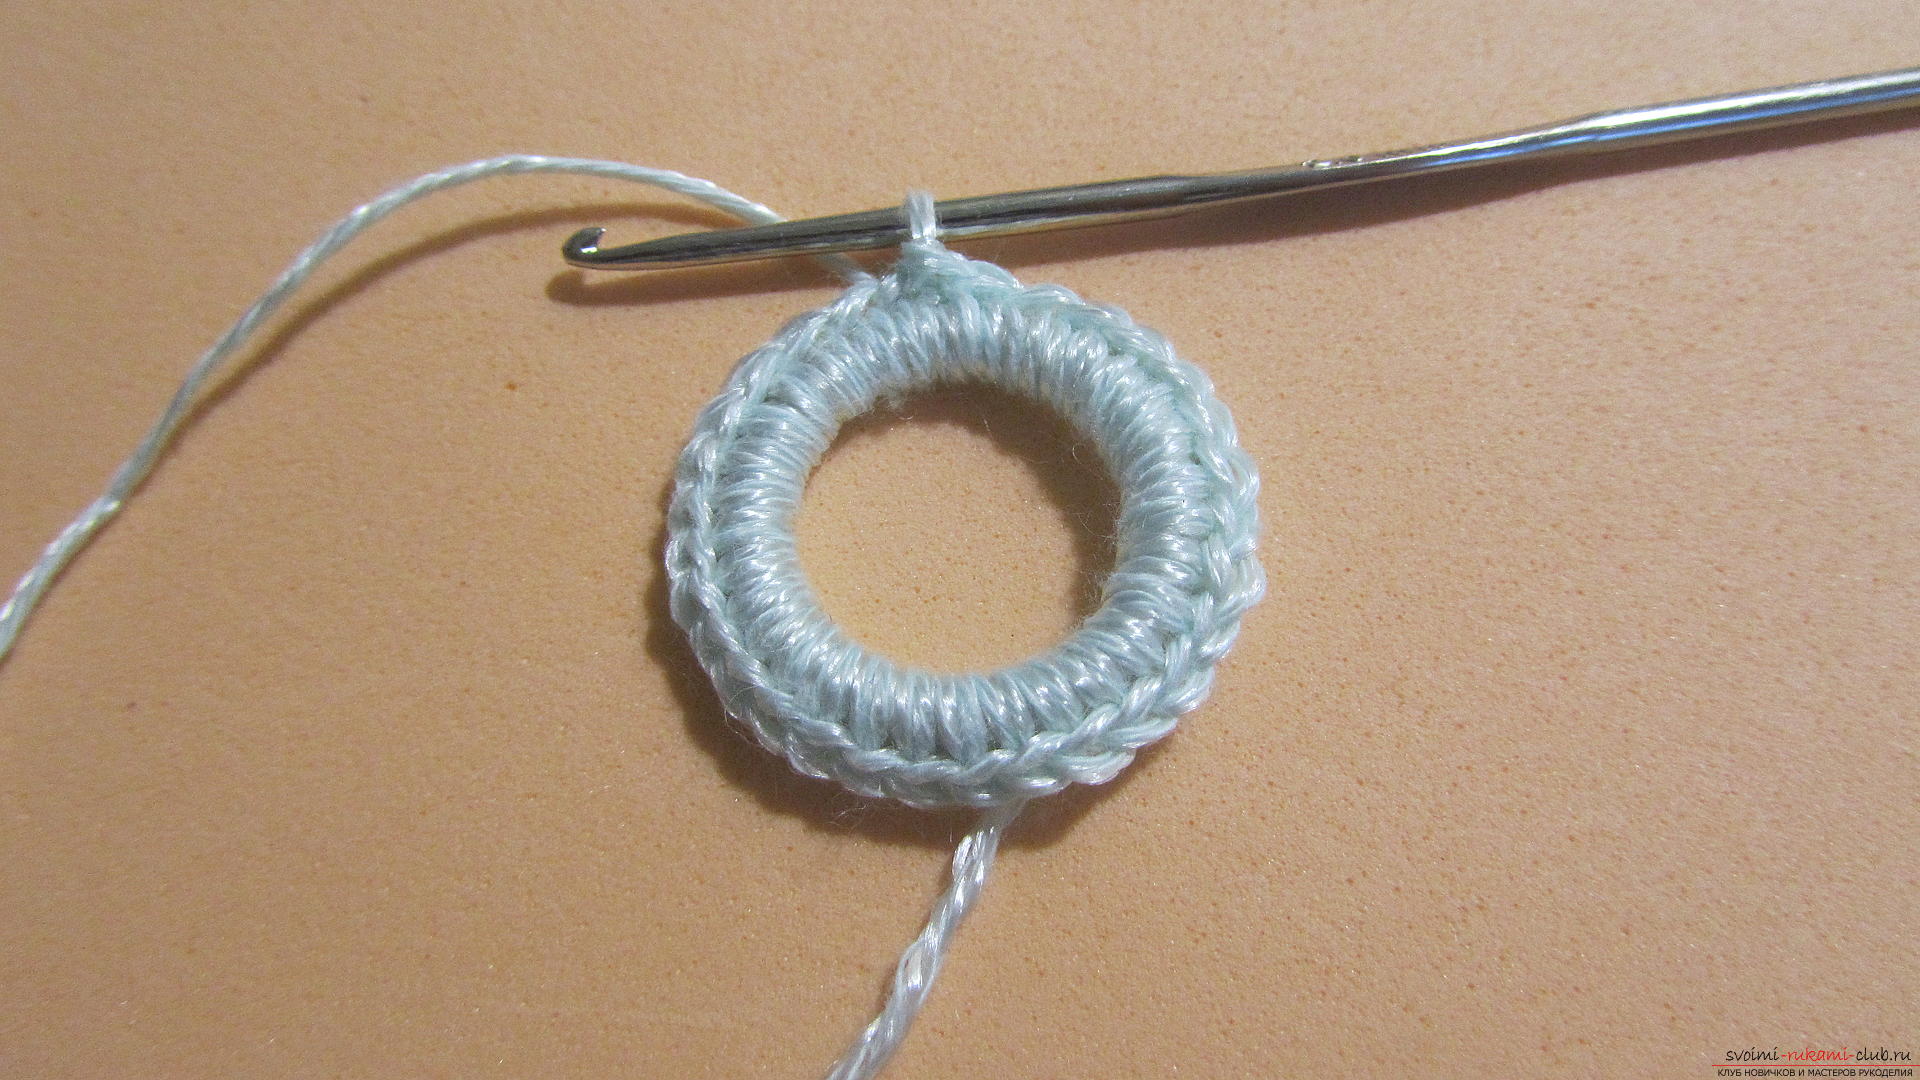 Do the same for the other two rings.
 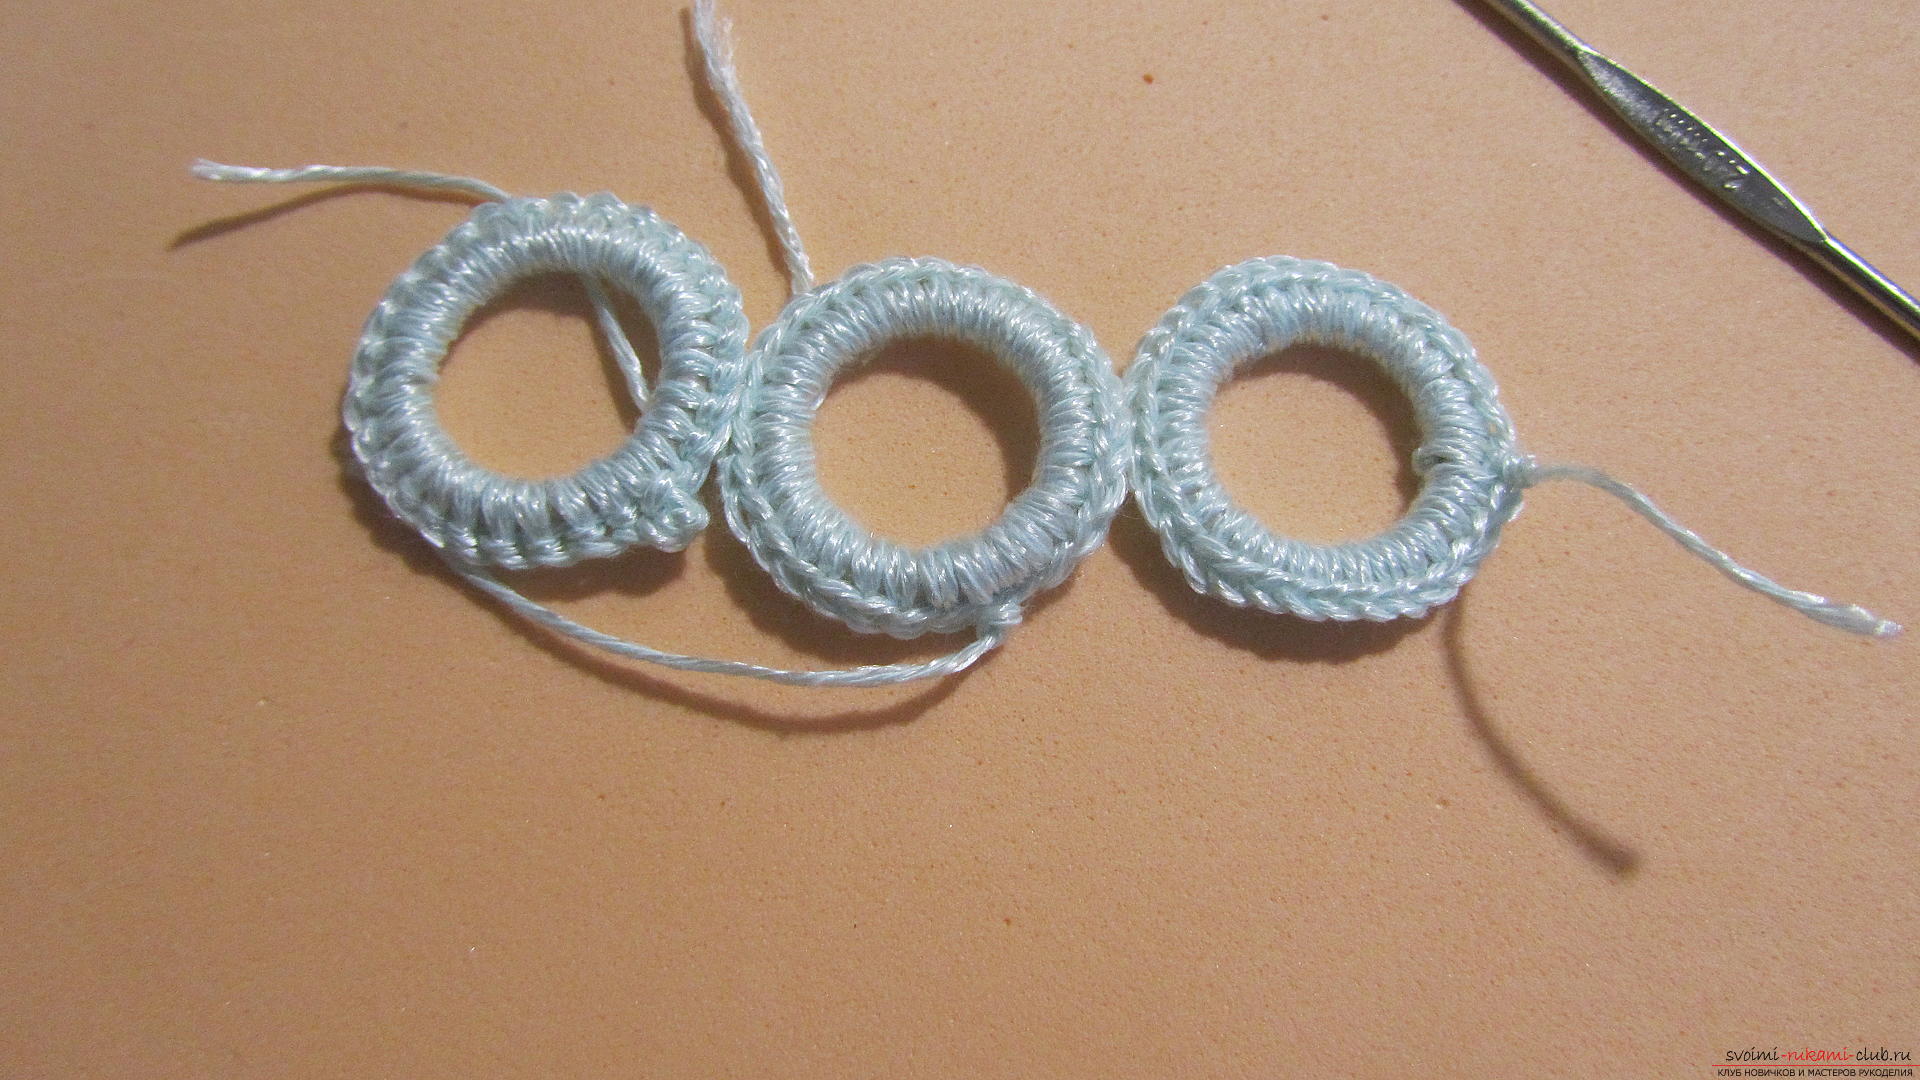 We put our strapped rings aside and tackle the other part of the necklace. We will thread the thread (directly from the coil) into the needle. Now thread on a string of stone crumbs.
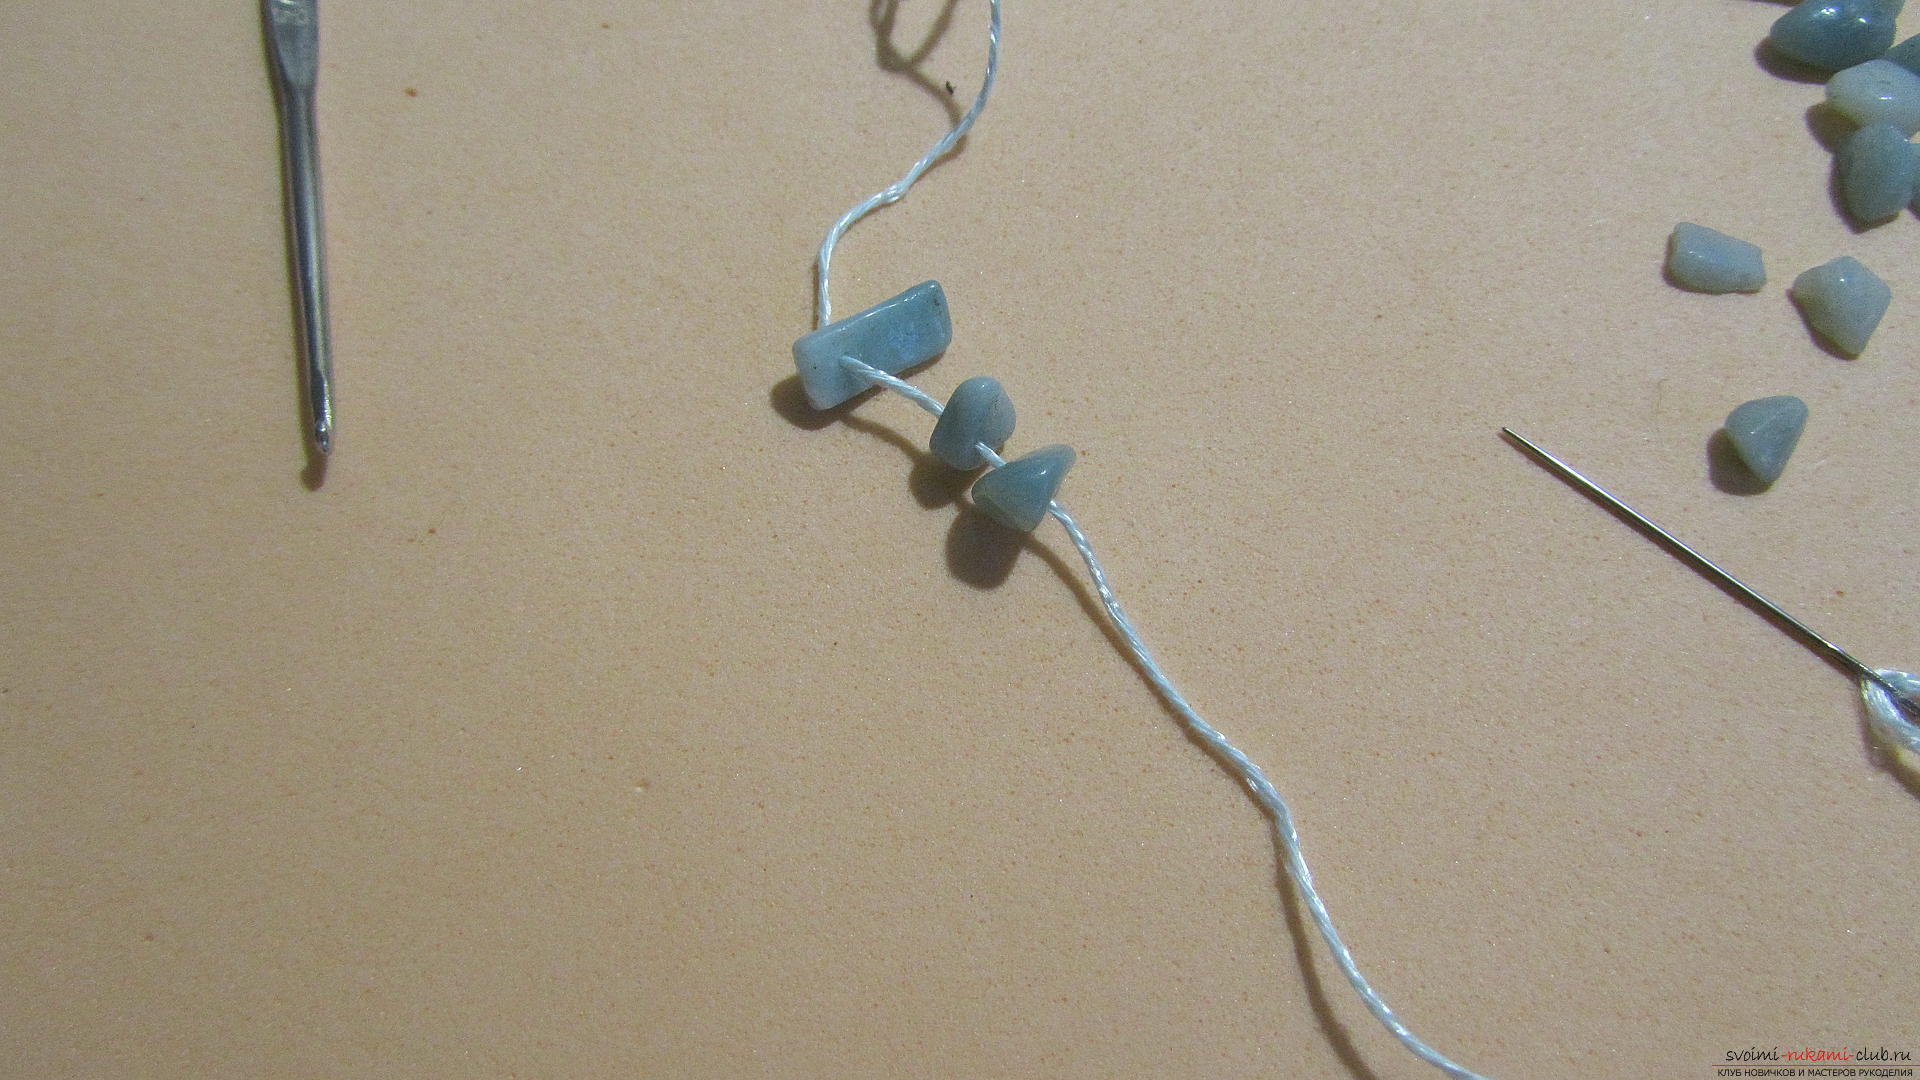
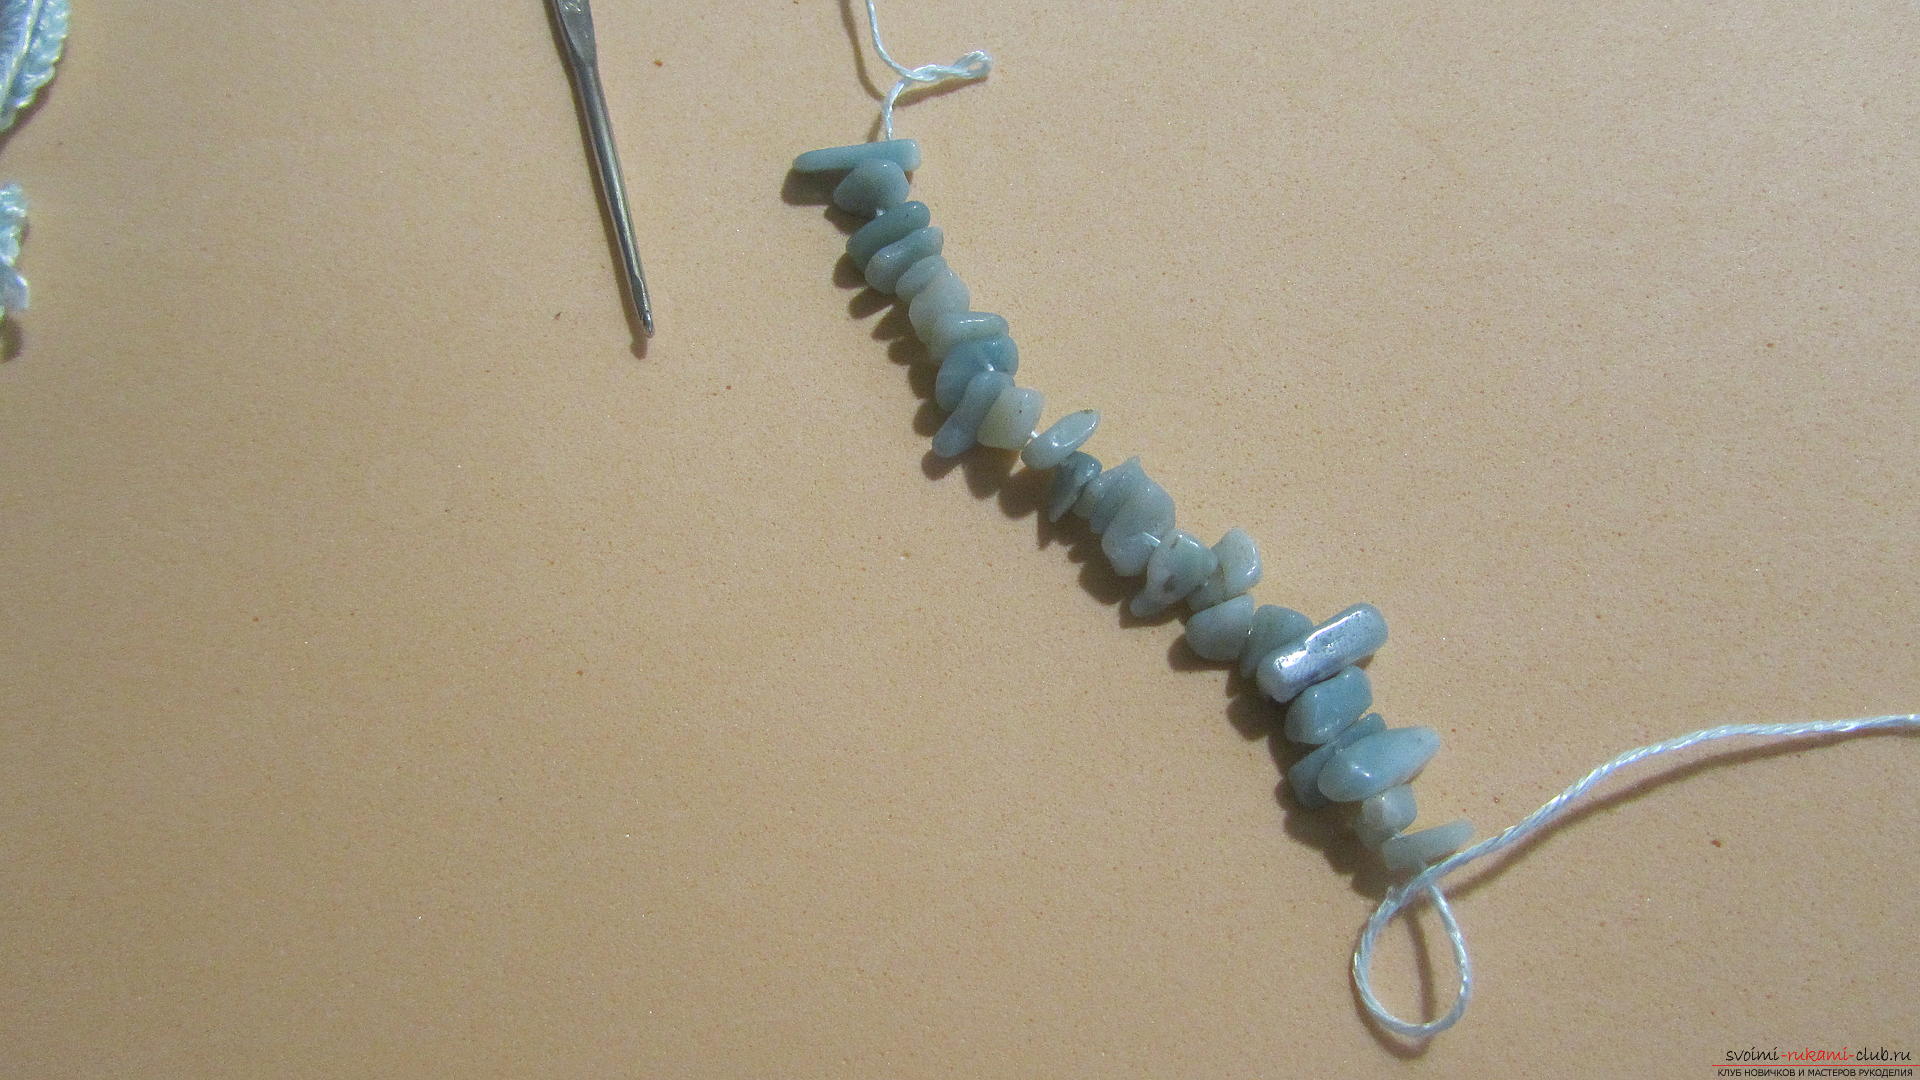 Move the crumb away and proceed to knitting.
 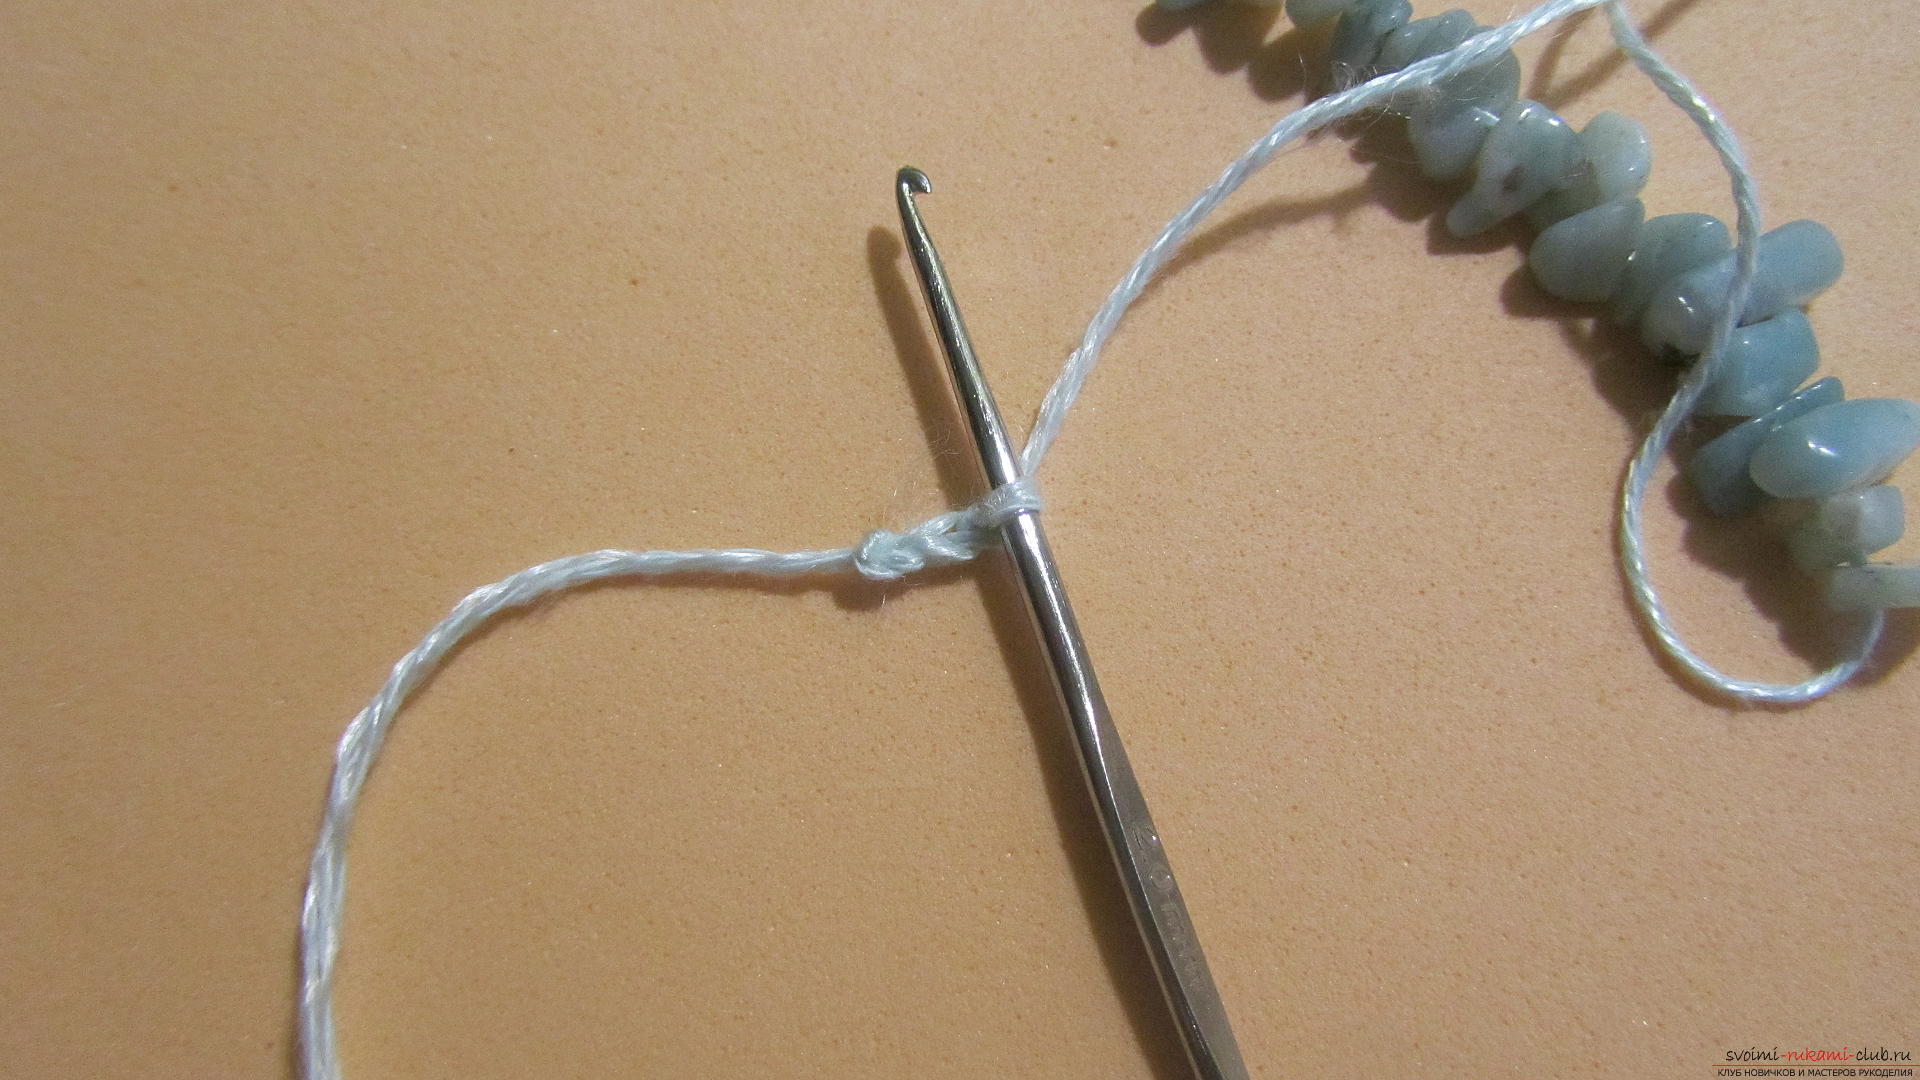 We will tie a chain of 60 loops - this will be the left part of our necklace.
 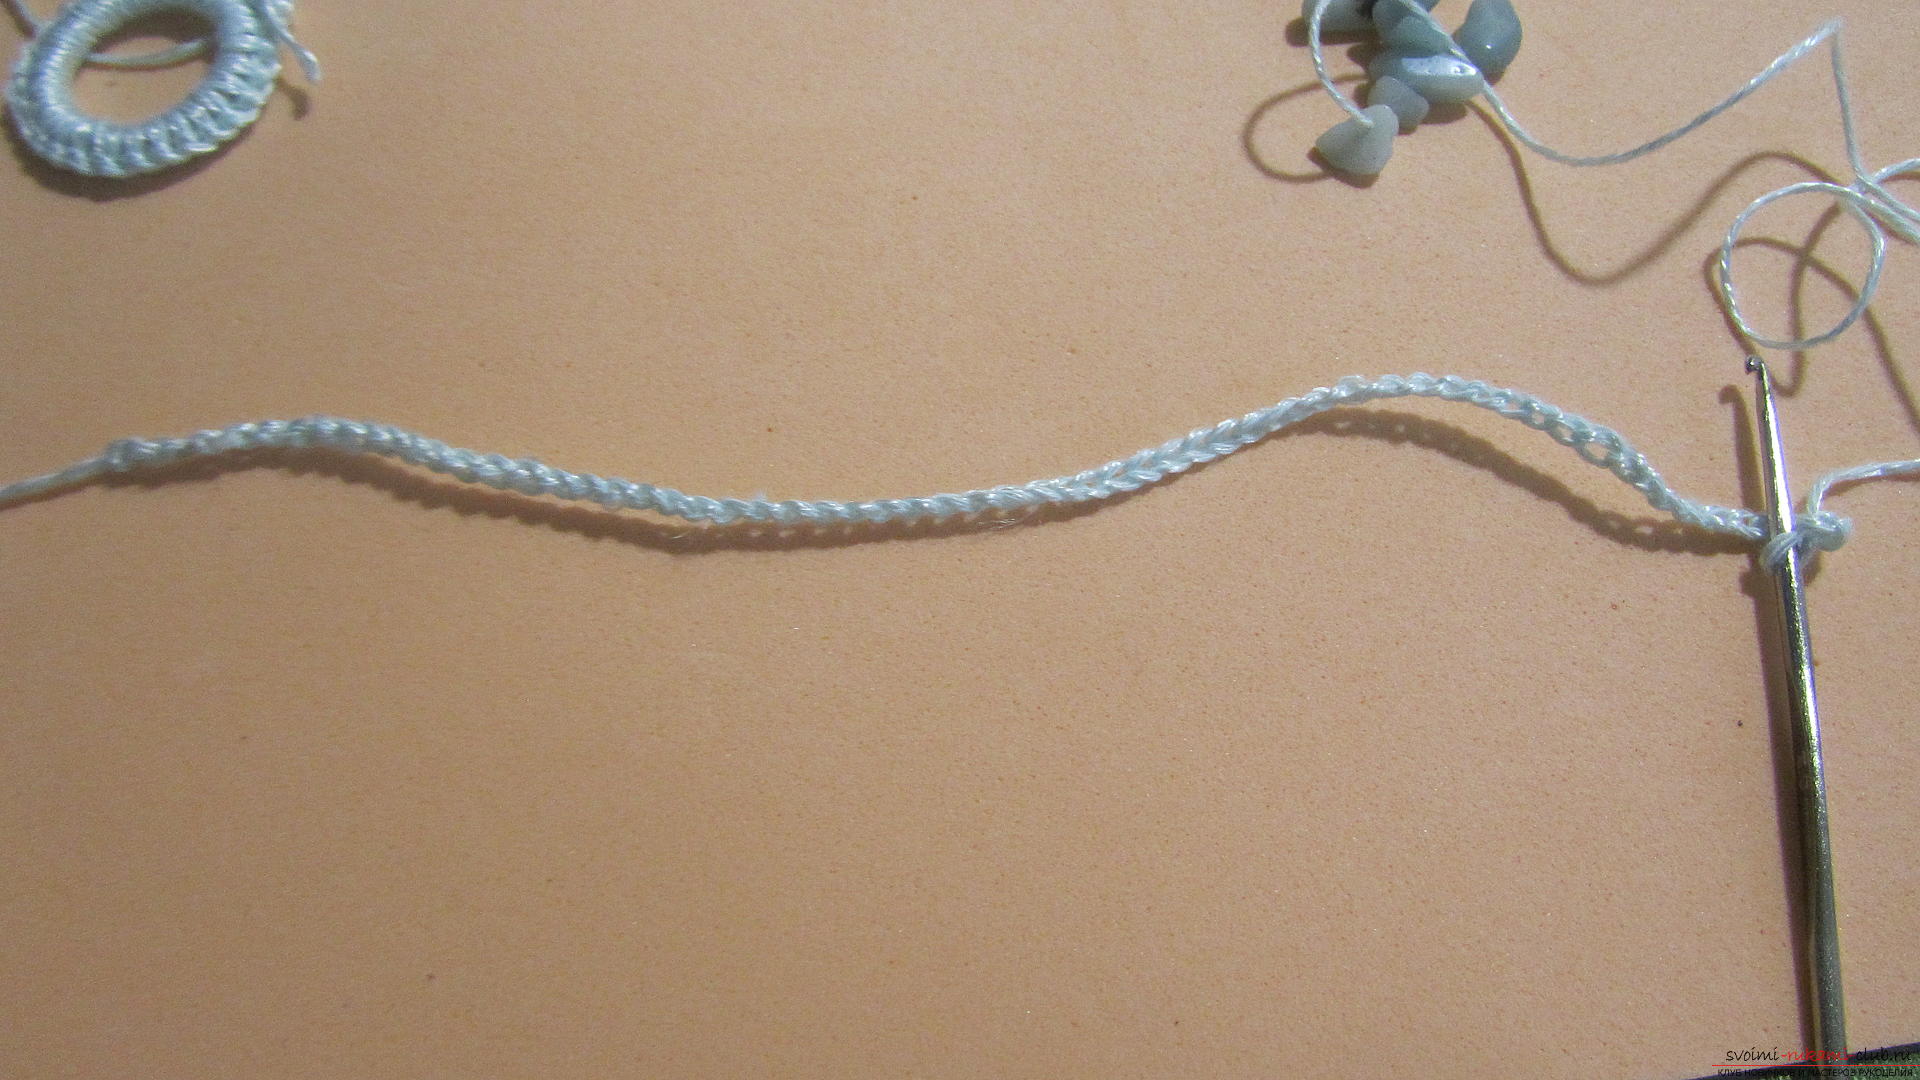 At the end of this chain, make a small loop. This loop should firmly encircle the bead, which we chose for the role of fasteners.
 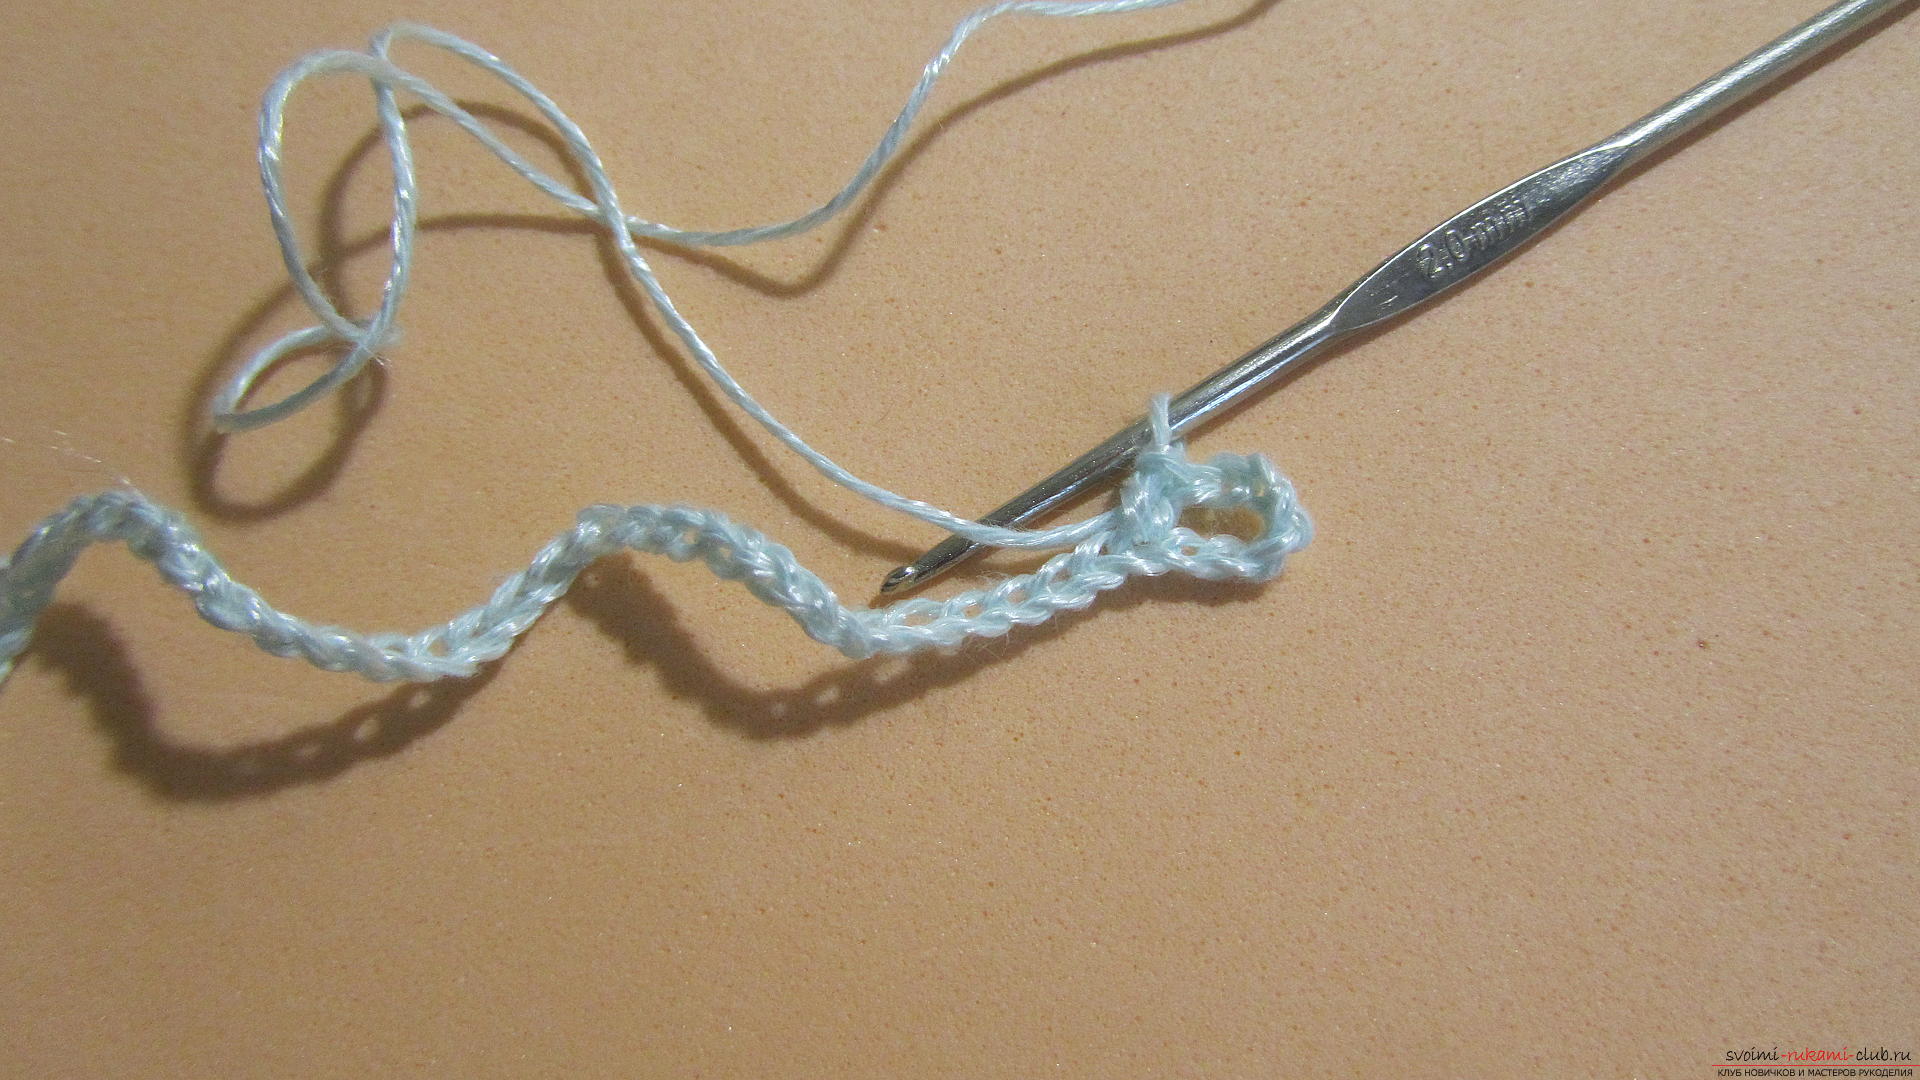 Further we will tie our chain with simple columns, in which there will be no capers.
 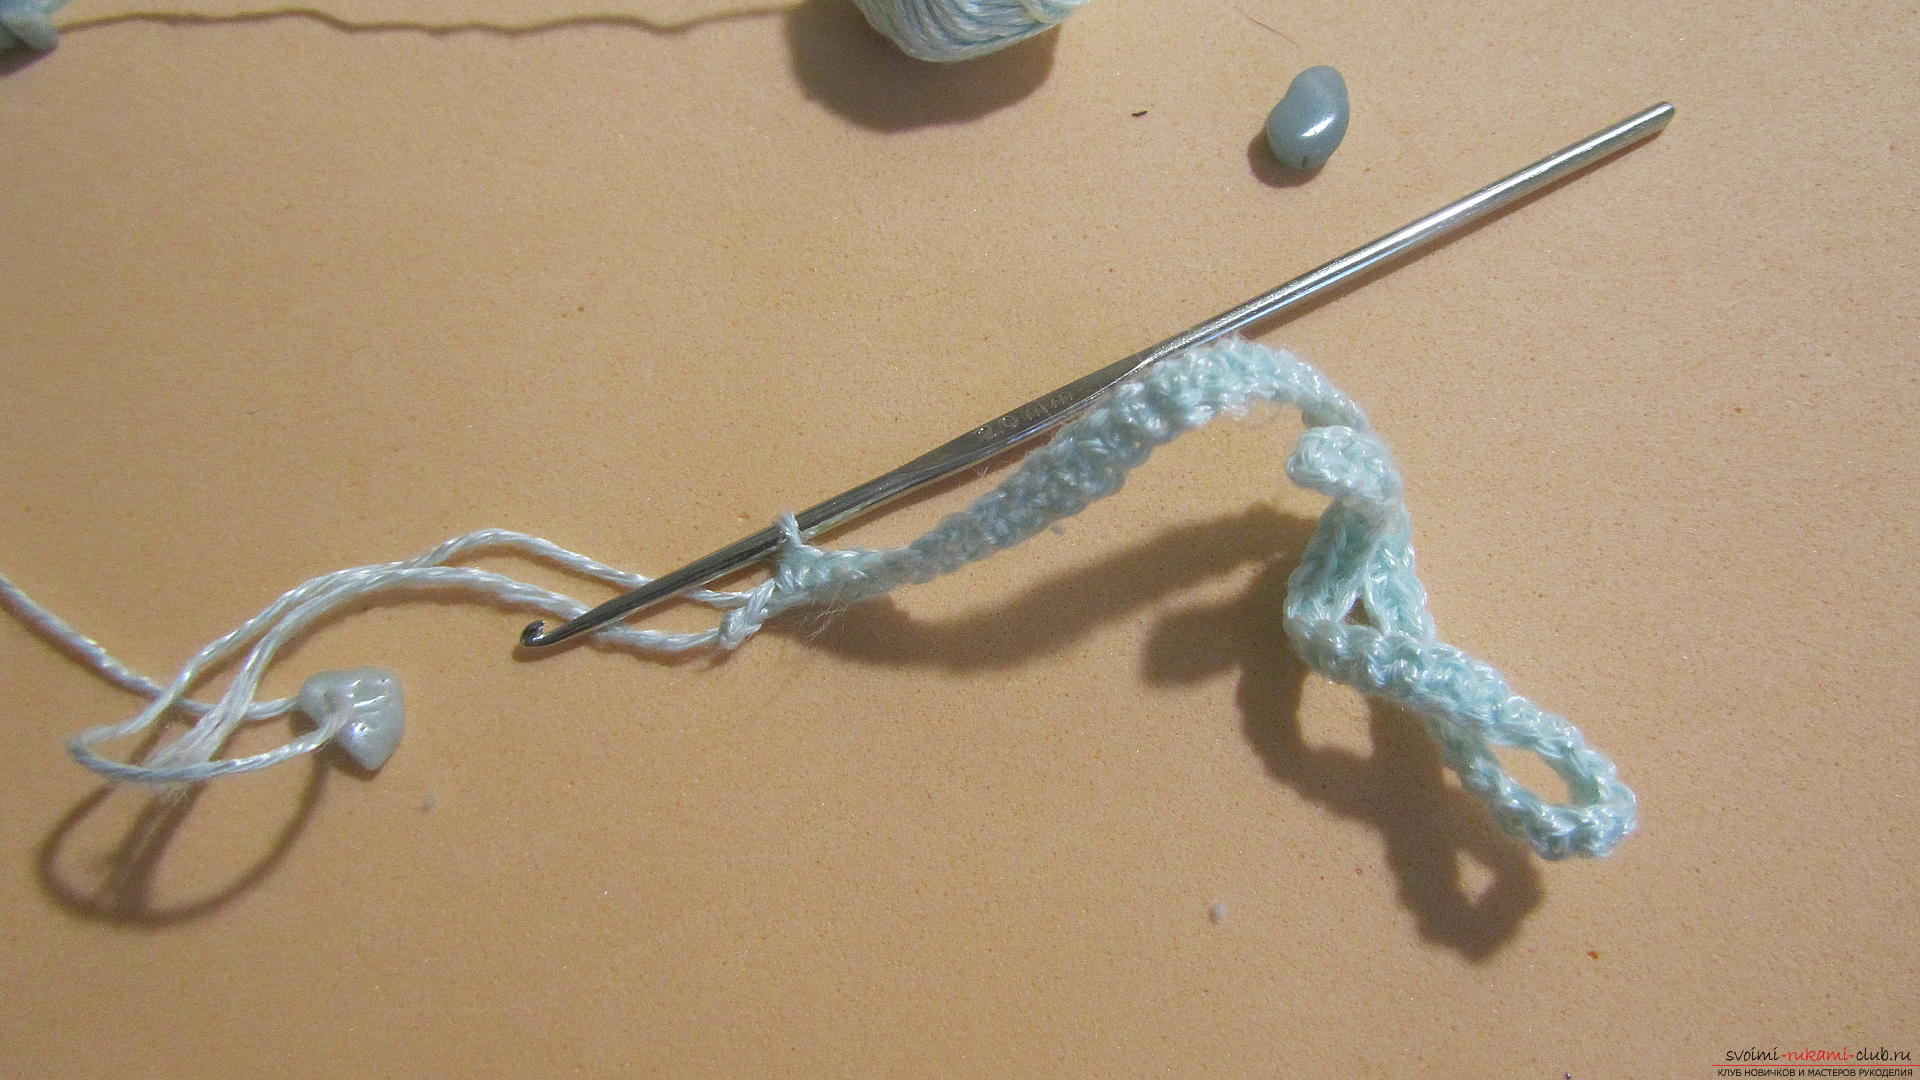 Now, without reaching a pair of loops to the end of the chain,we begin to embed our stone crumb in a necklace. To do this, move the first bead as close to the chain as possible and fasten the column, using a string behind the bead.
 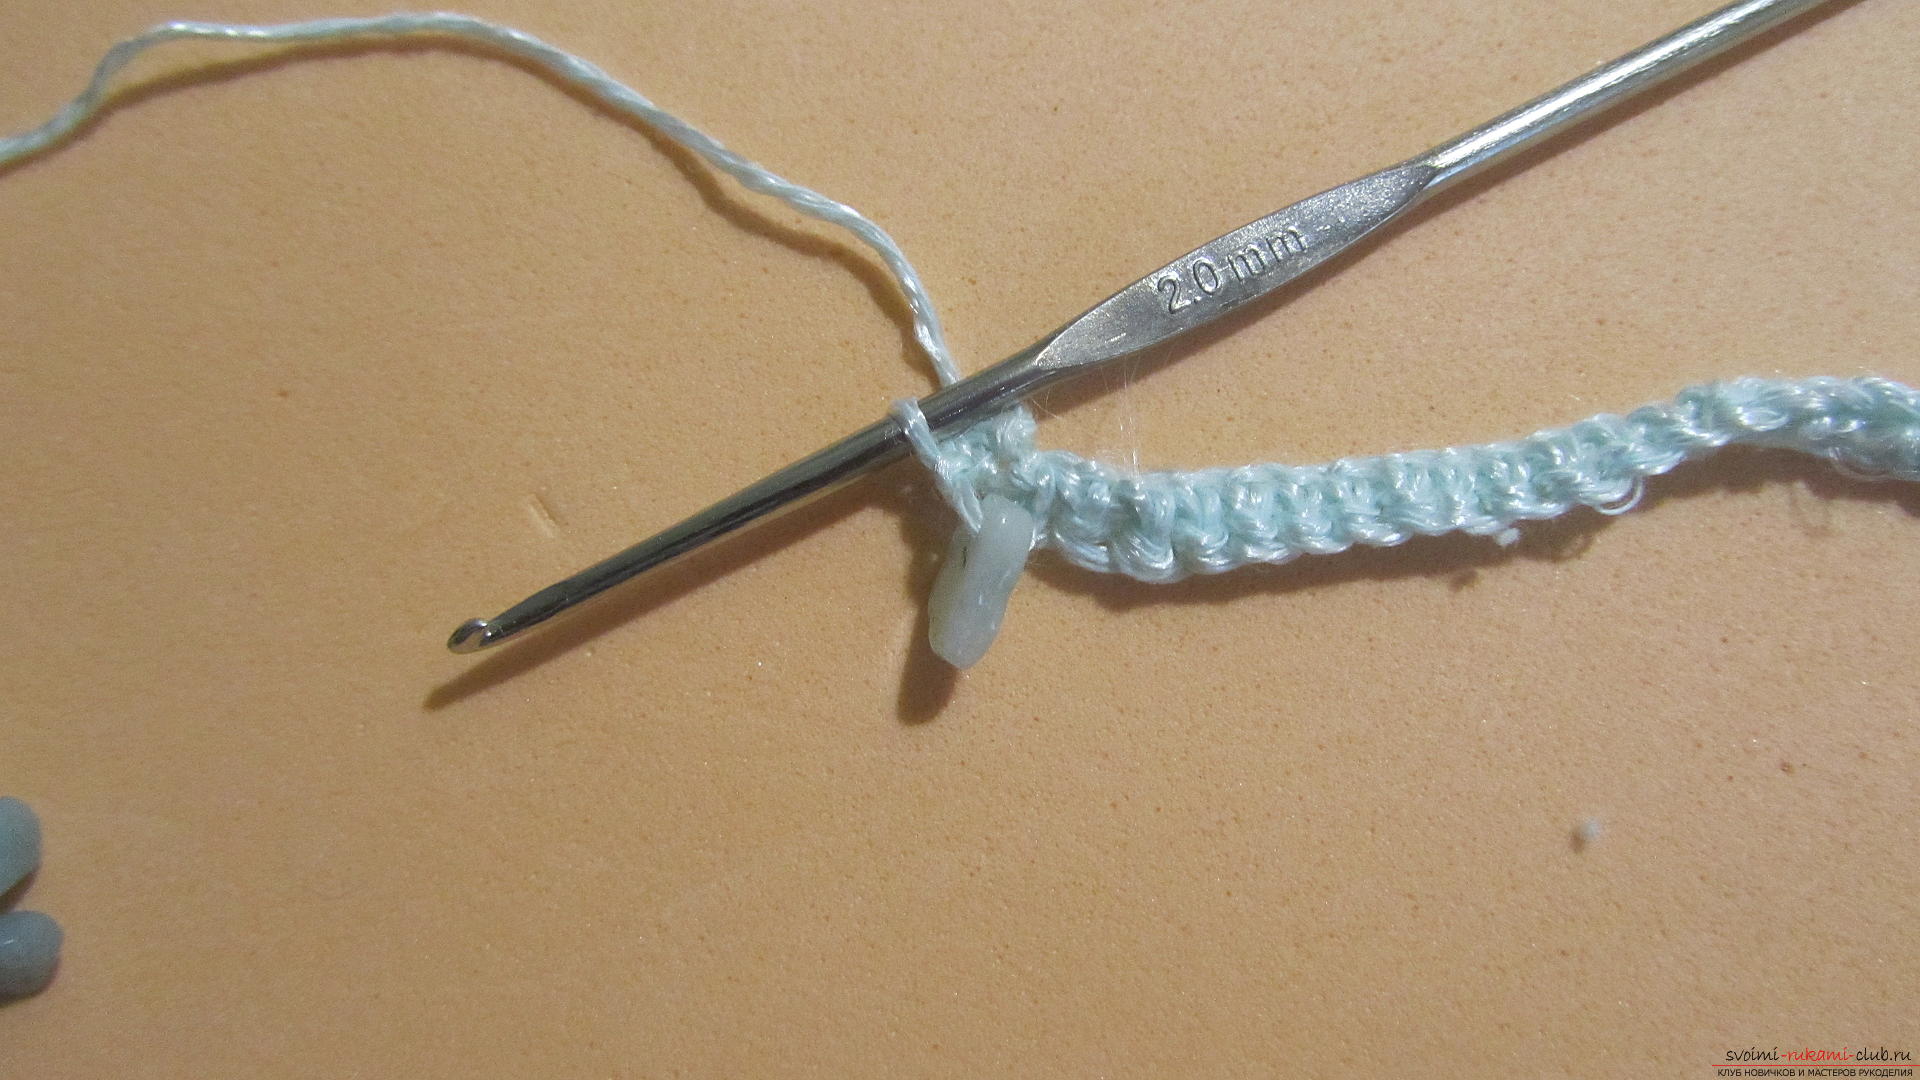 We will fasten 2 more beads.
 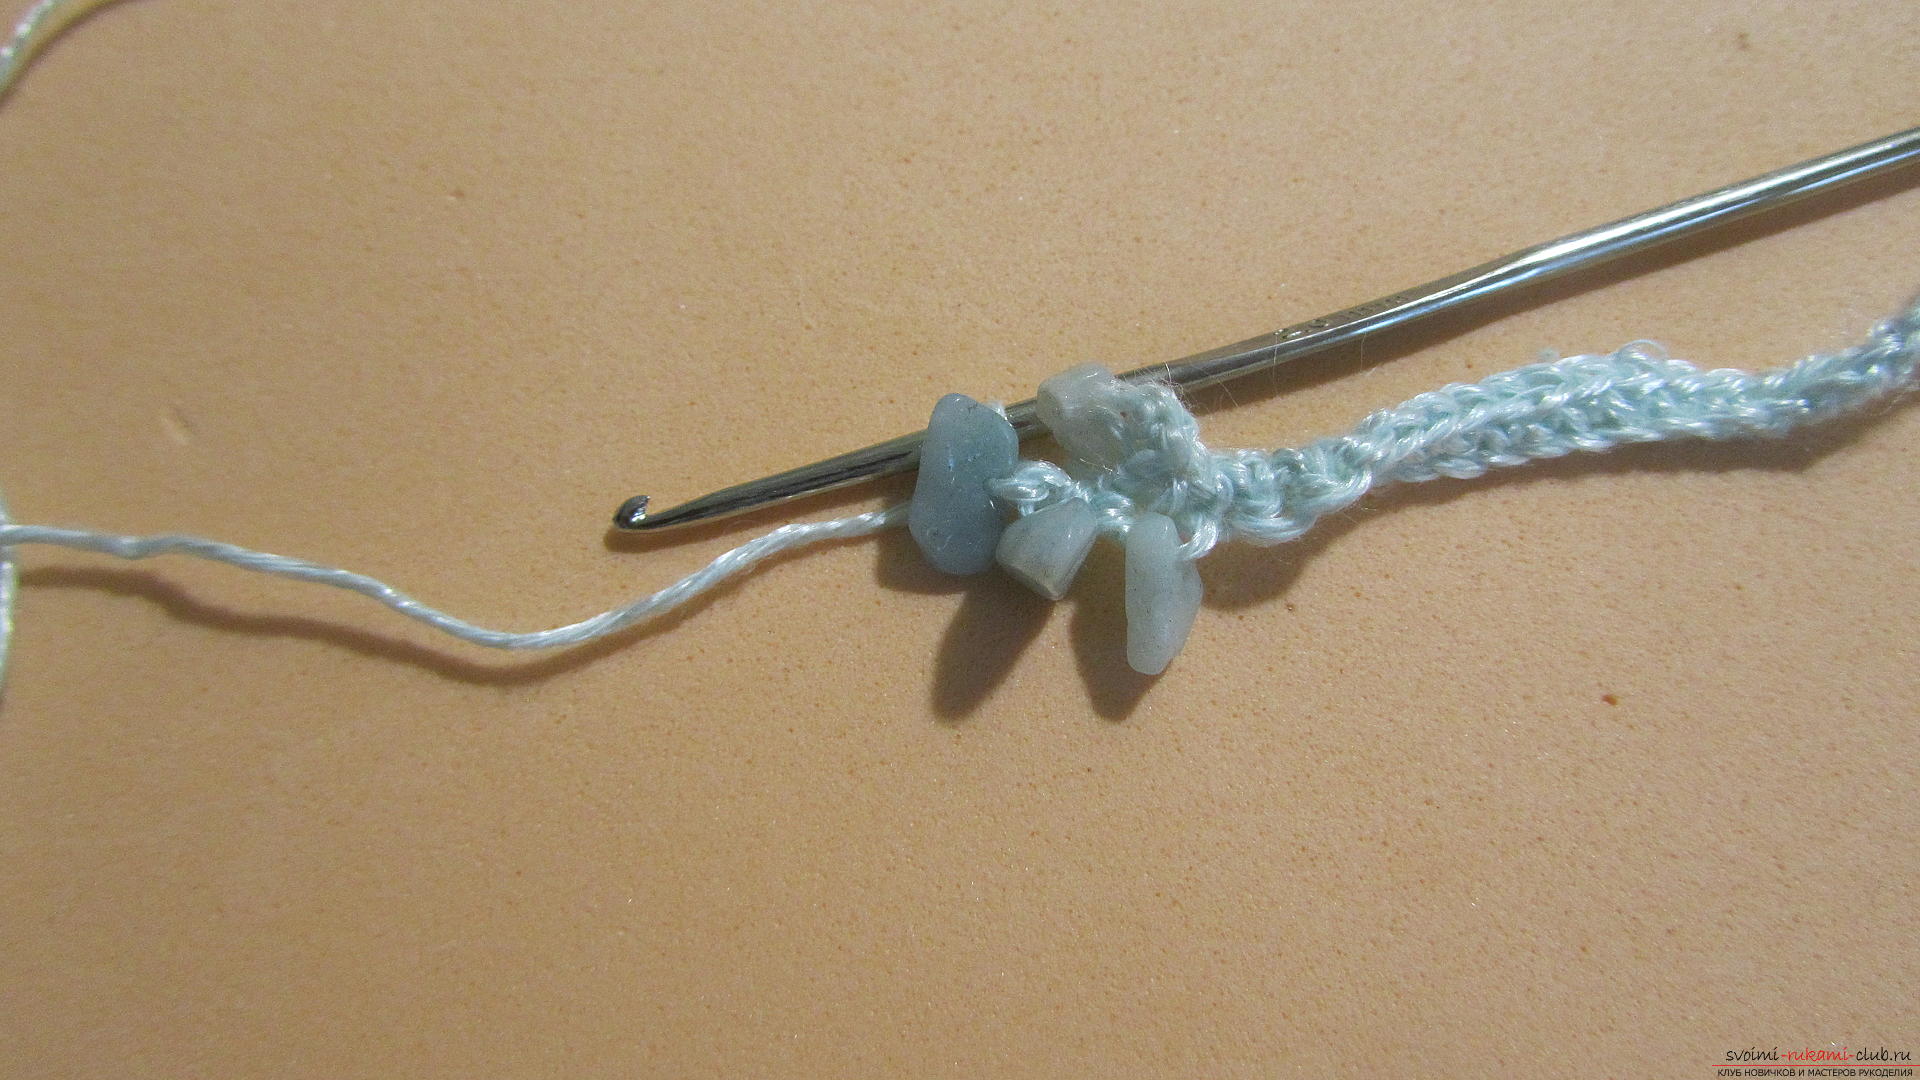 And further.
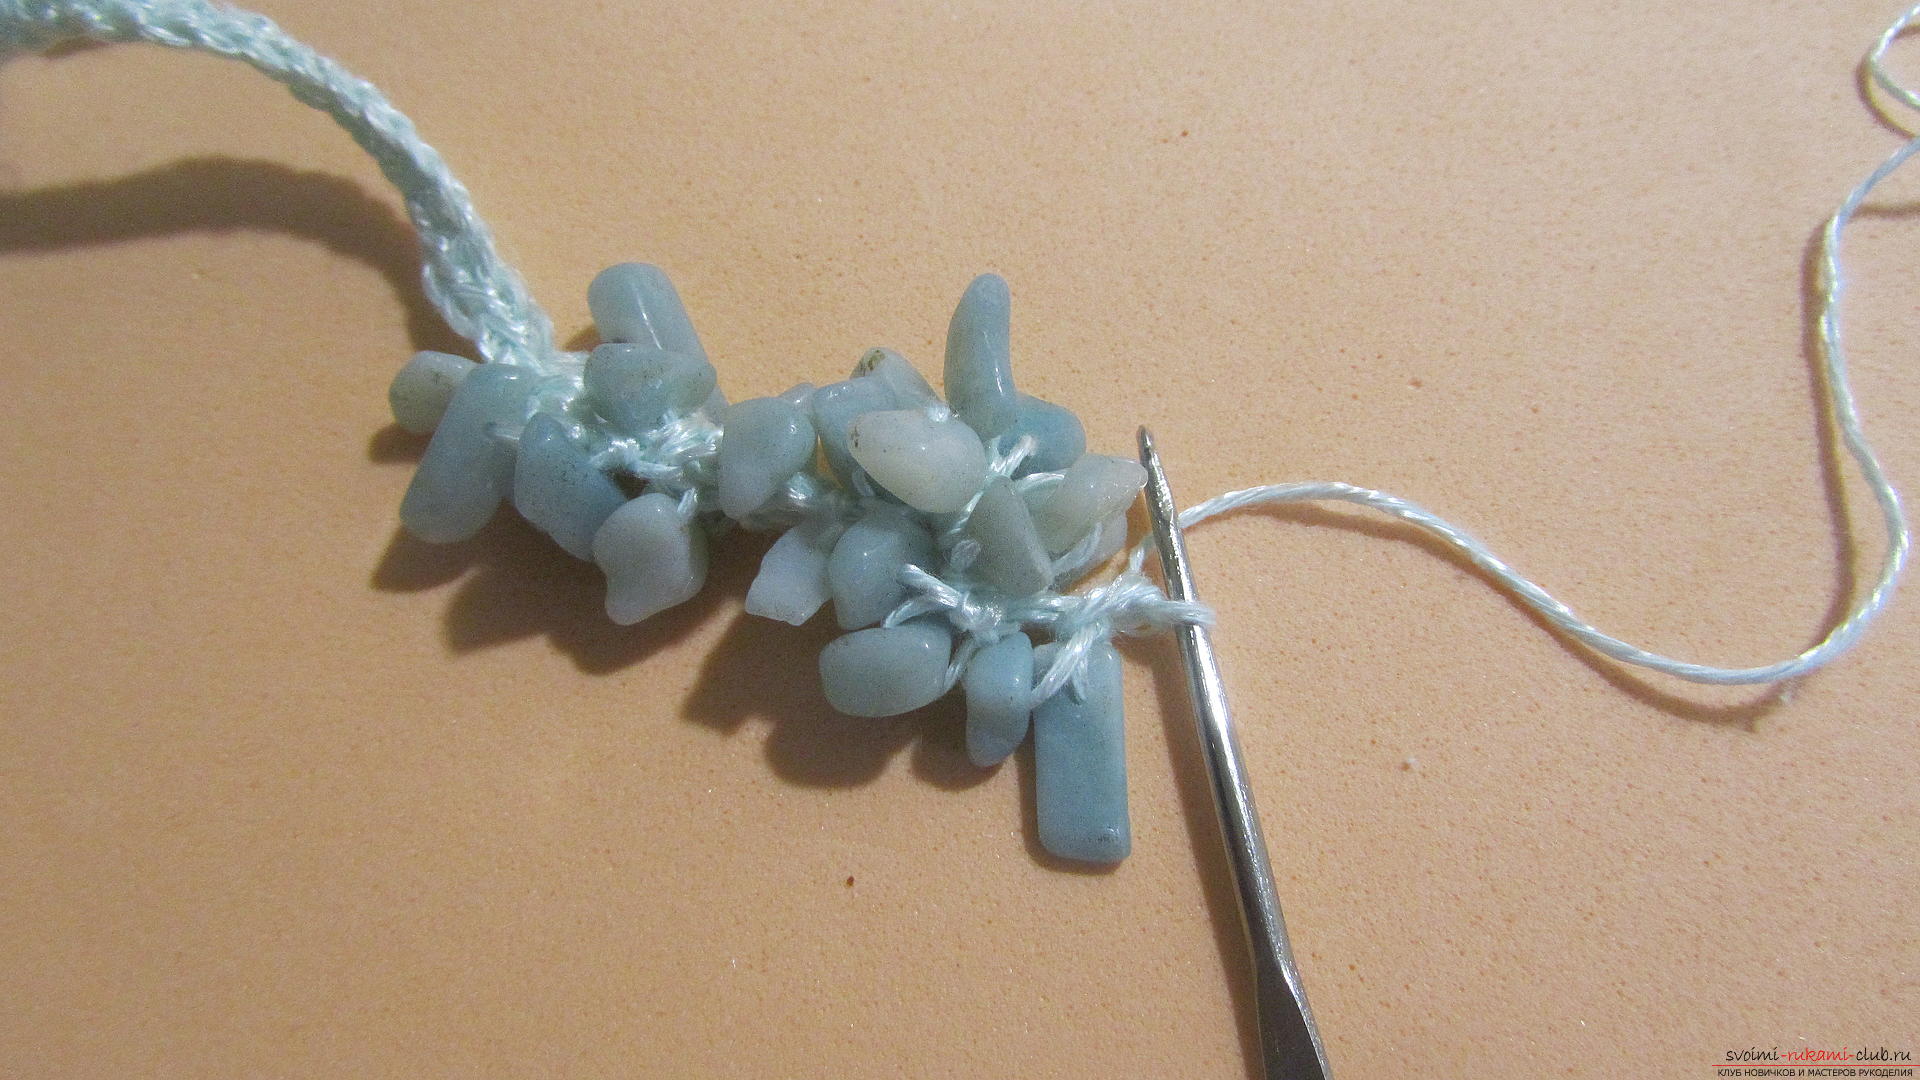
 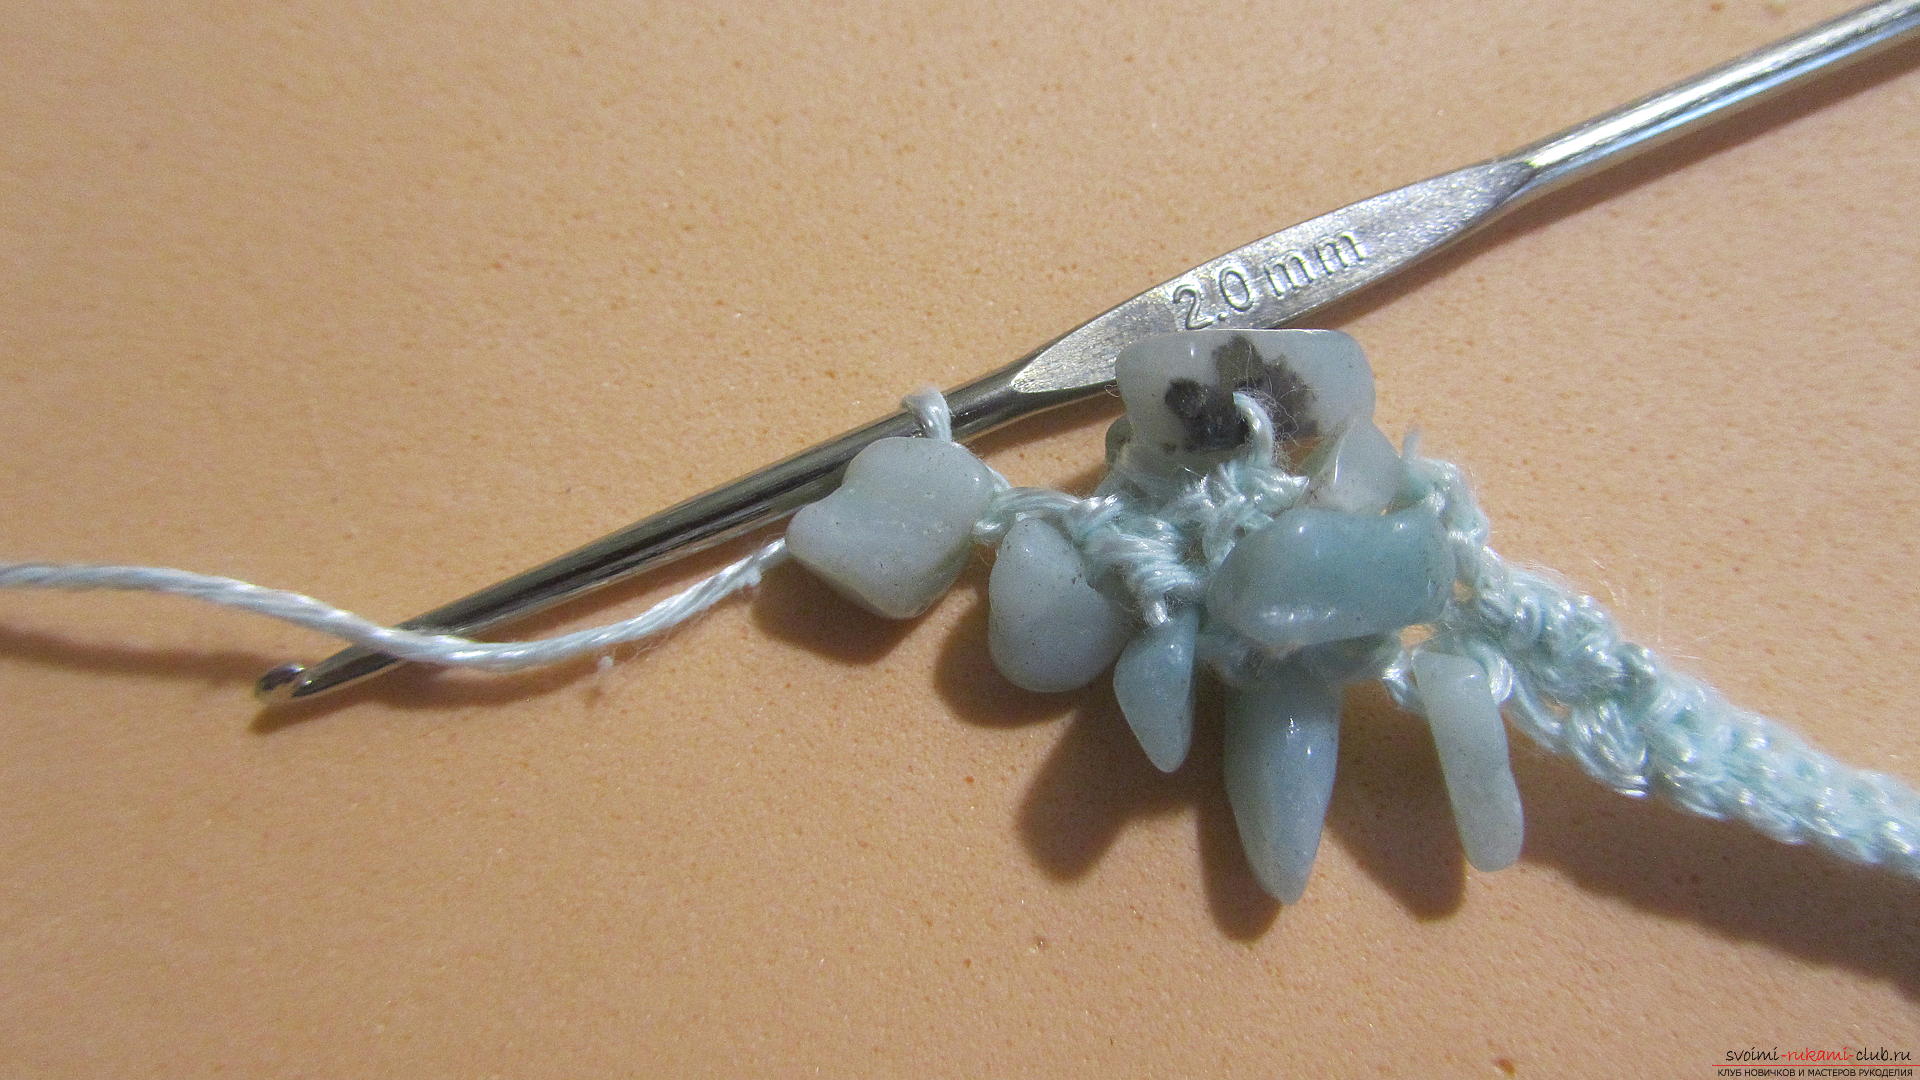 After every 3-4 beads, it is worth making a fastening column - without pushing the bead, tie the column into knitting, as if pulling all the beads. And continue knitting further.
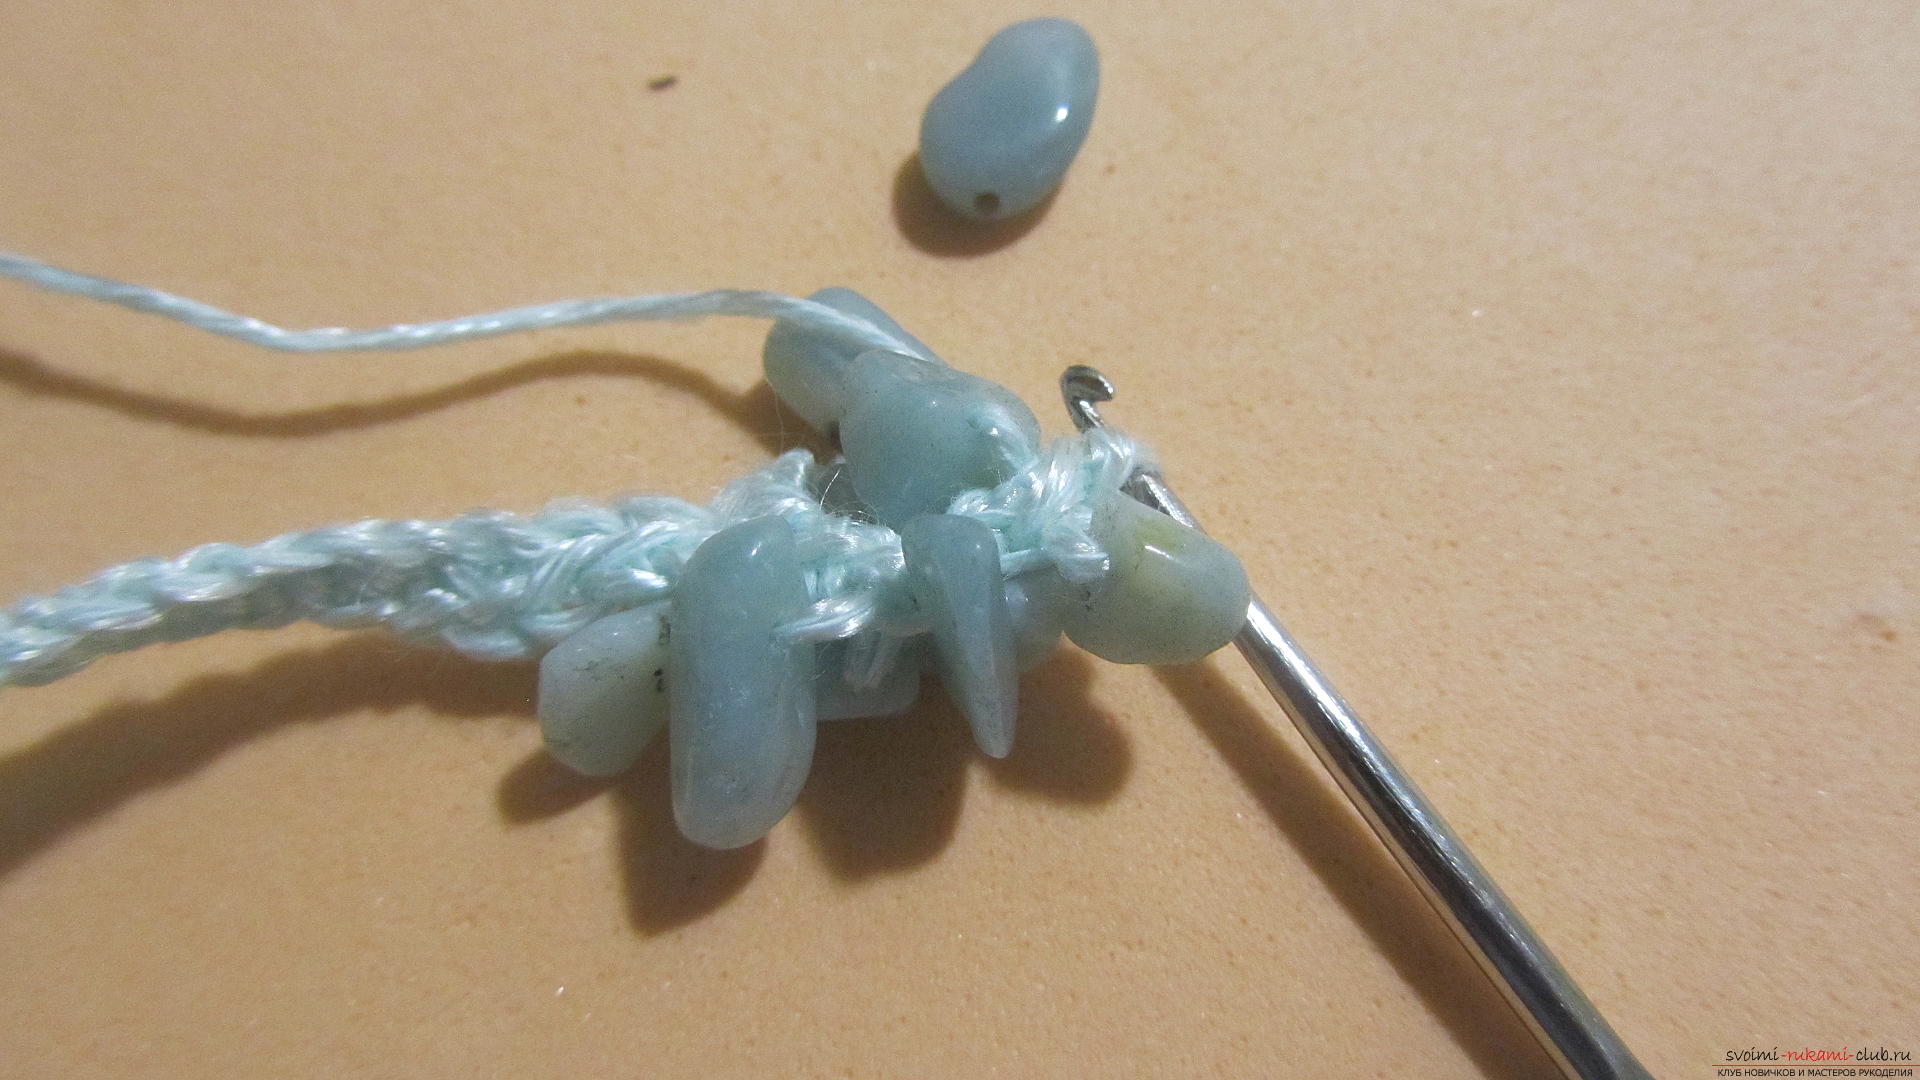
 When the beads on the thread are finished, we makethe last bar-bracing. And we begin to connect knitting with prepared rings. To do this, we make the next column together with the column from which the strapping of the ring consists.
 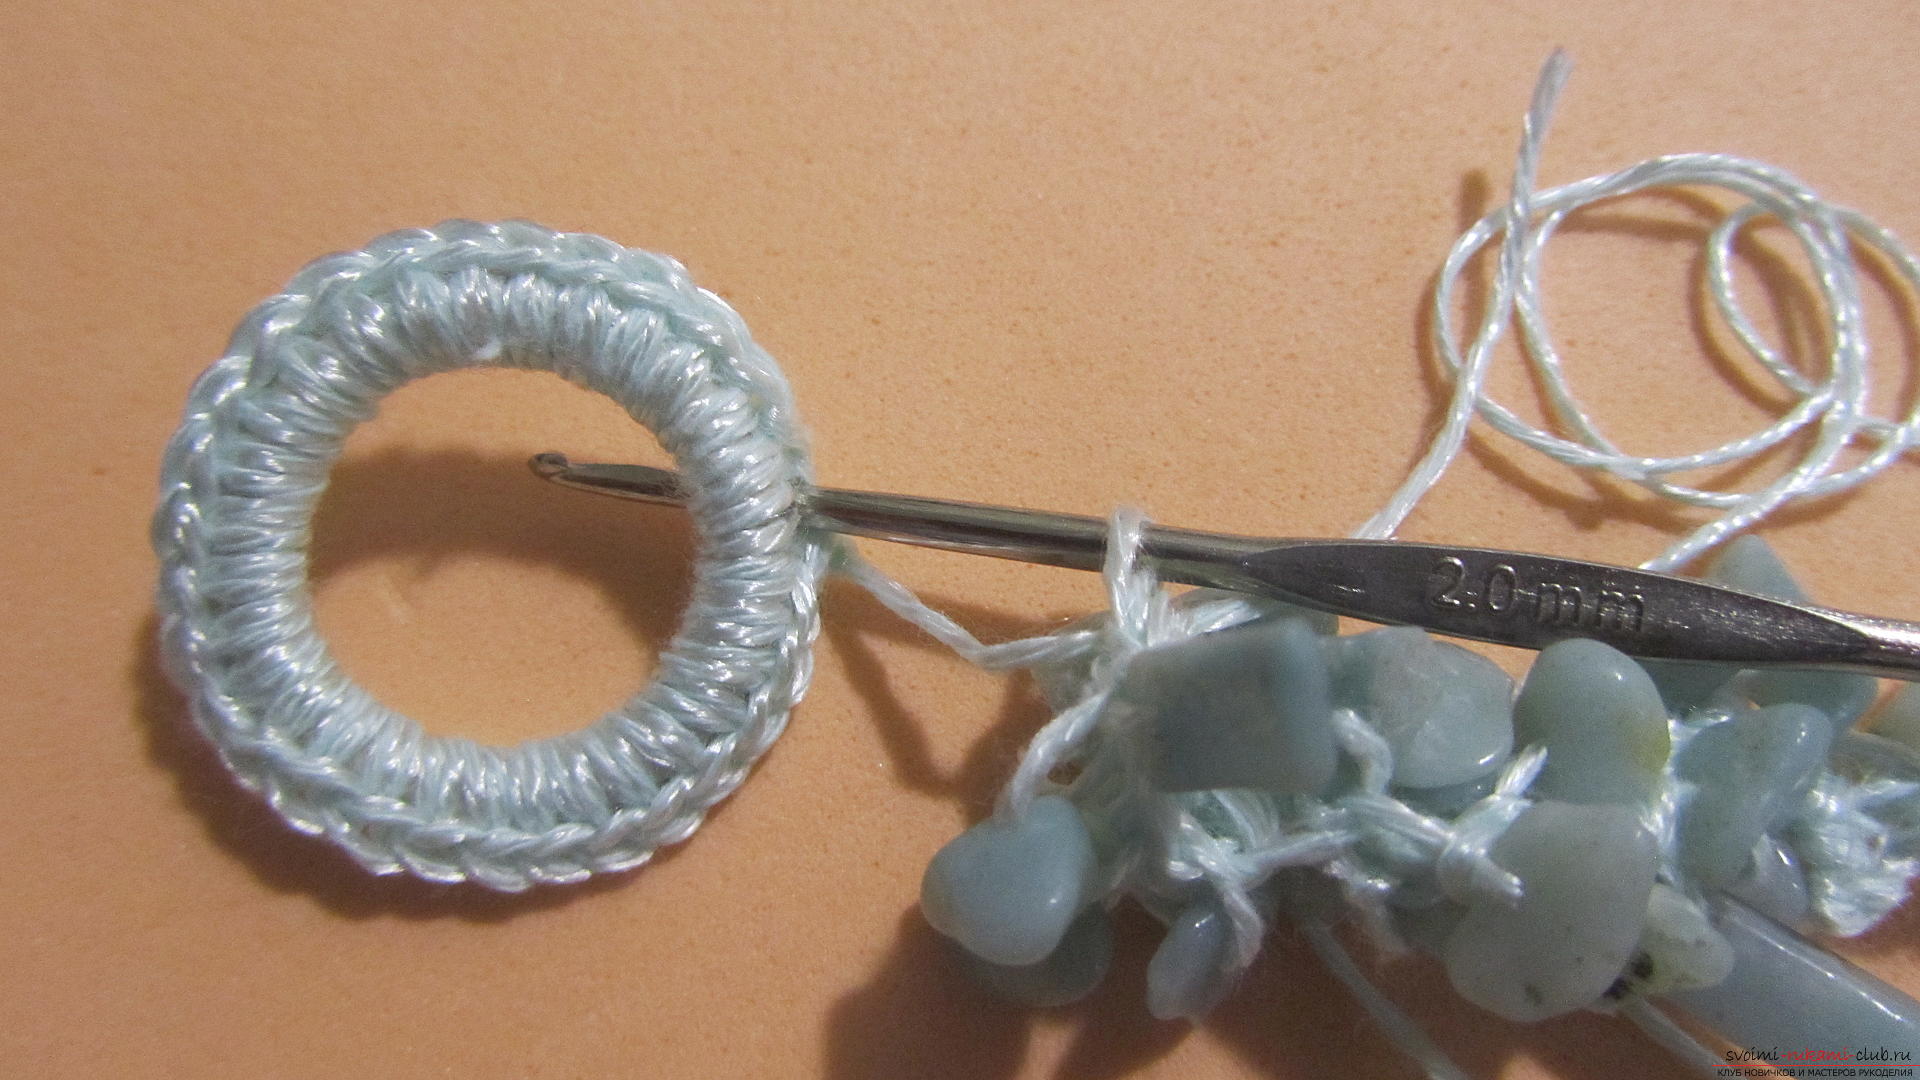 Next, we will make the second row of straps from the simple bars on the ring.
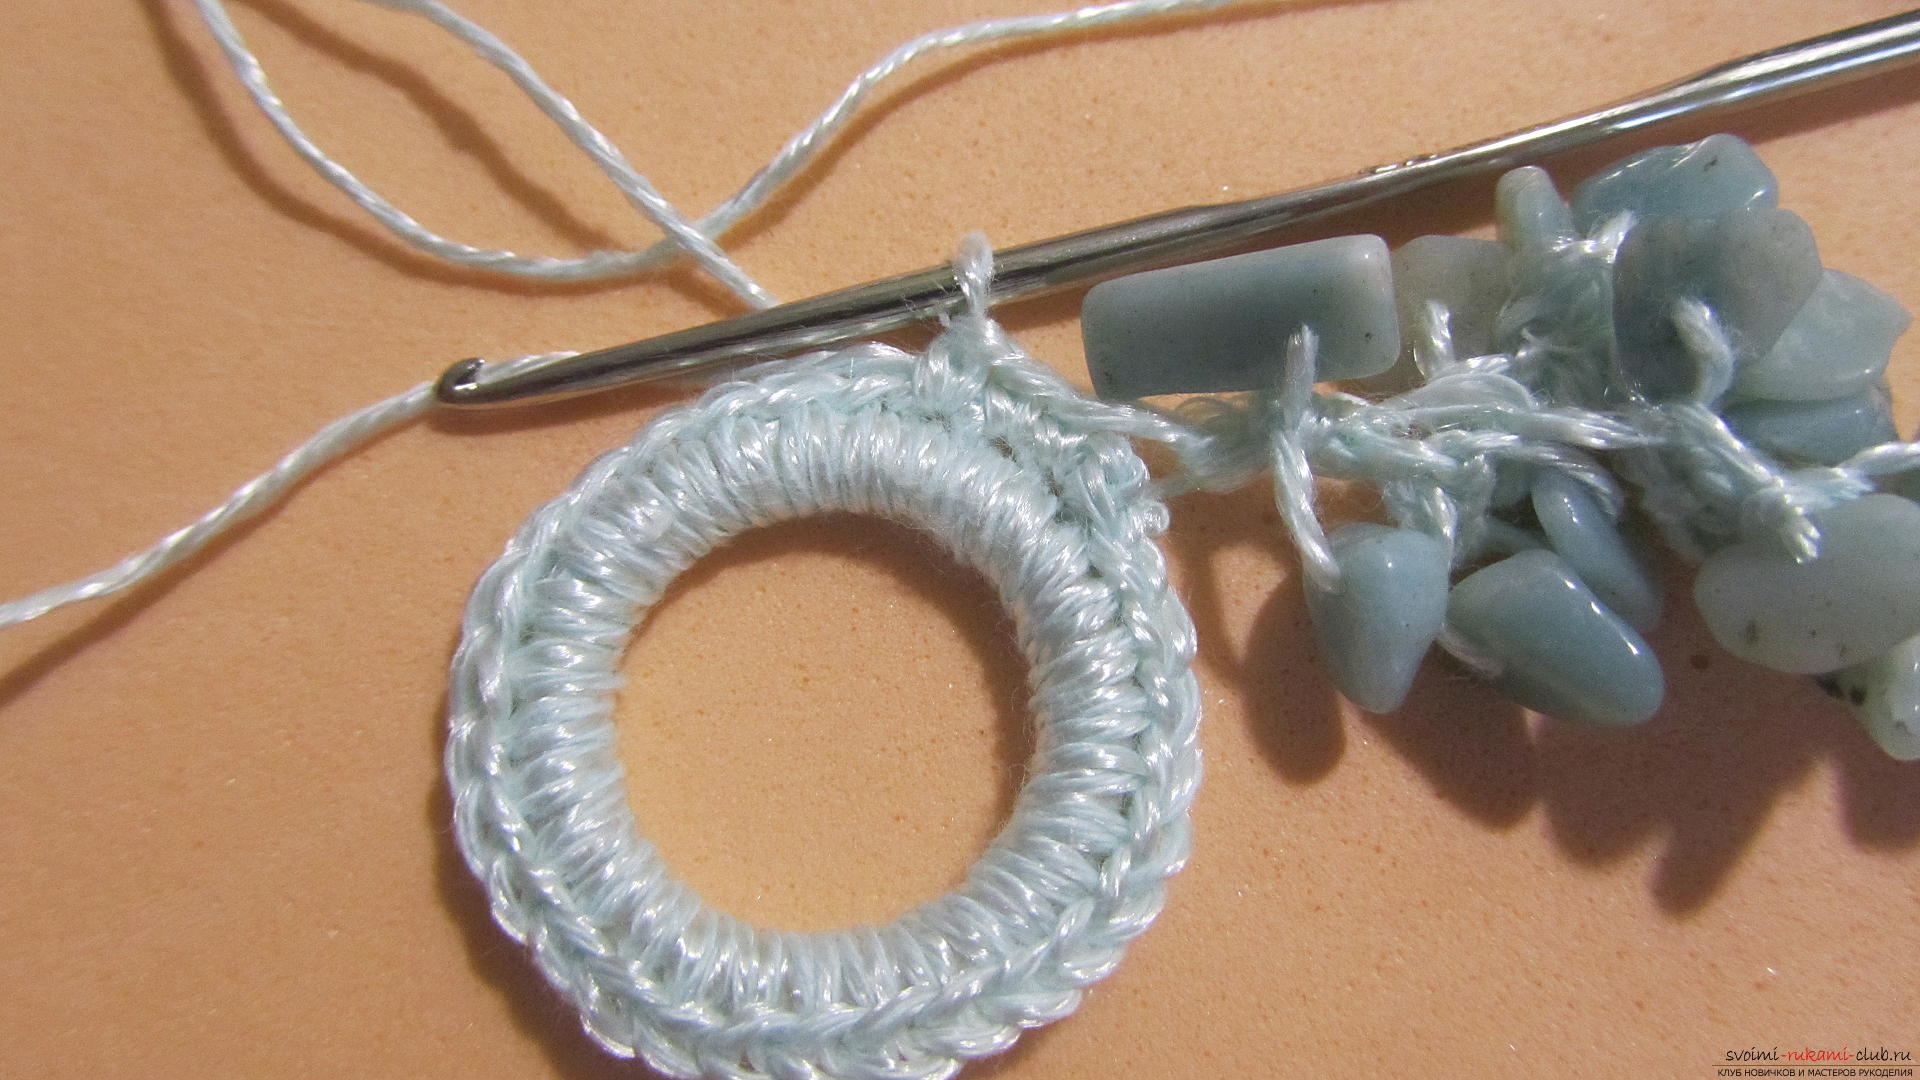
 Having tied half a ring, we will connect it with the second ring.
 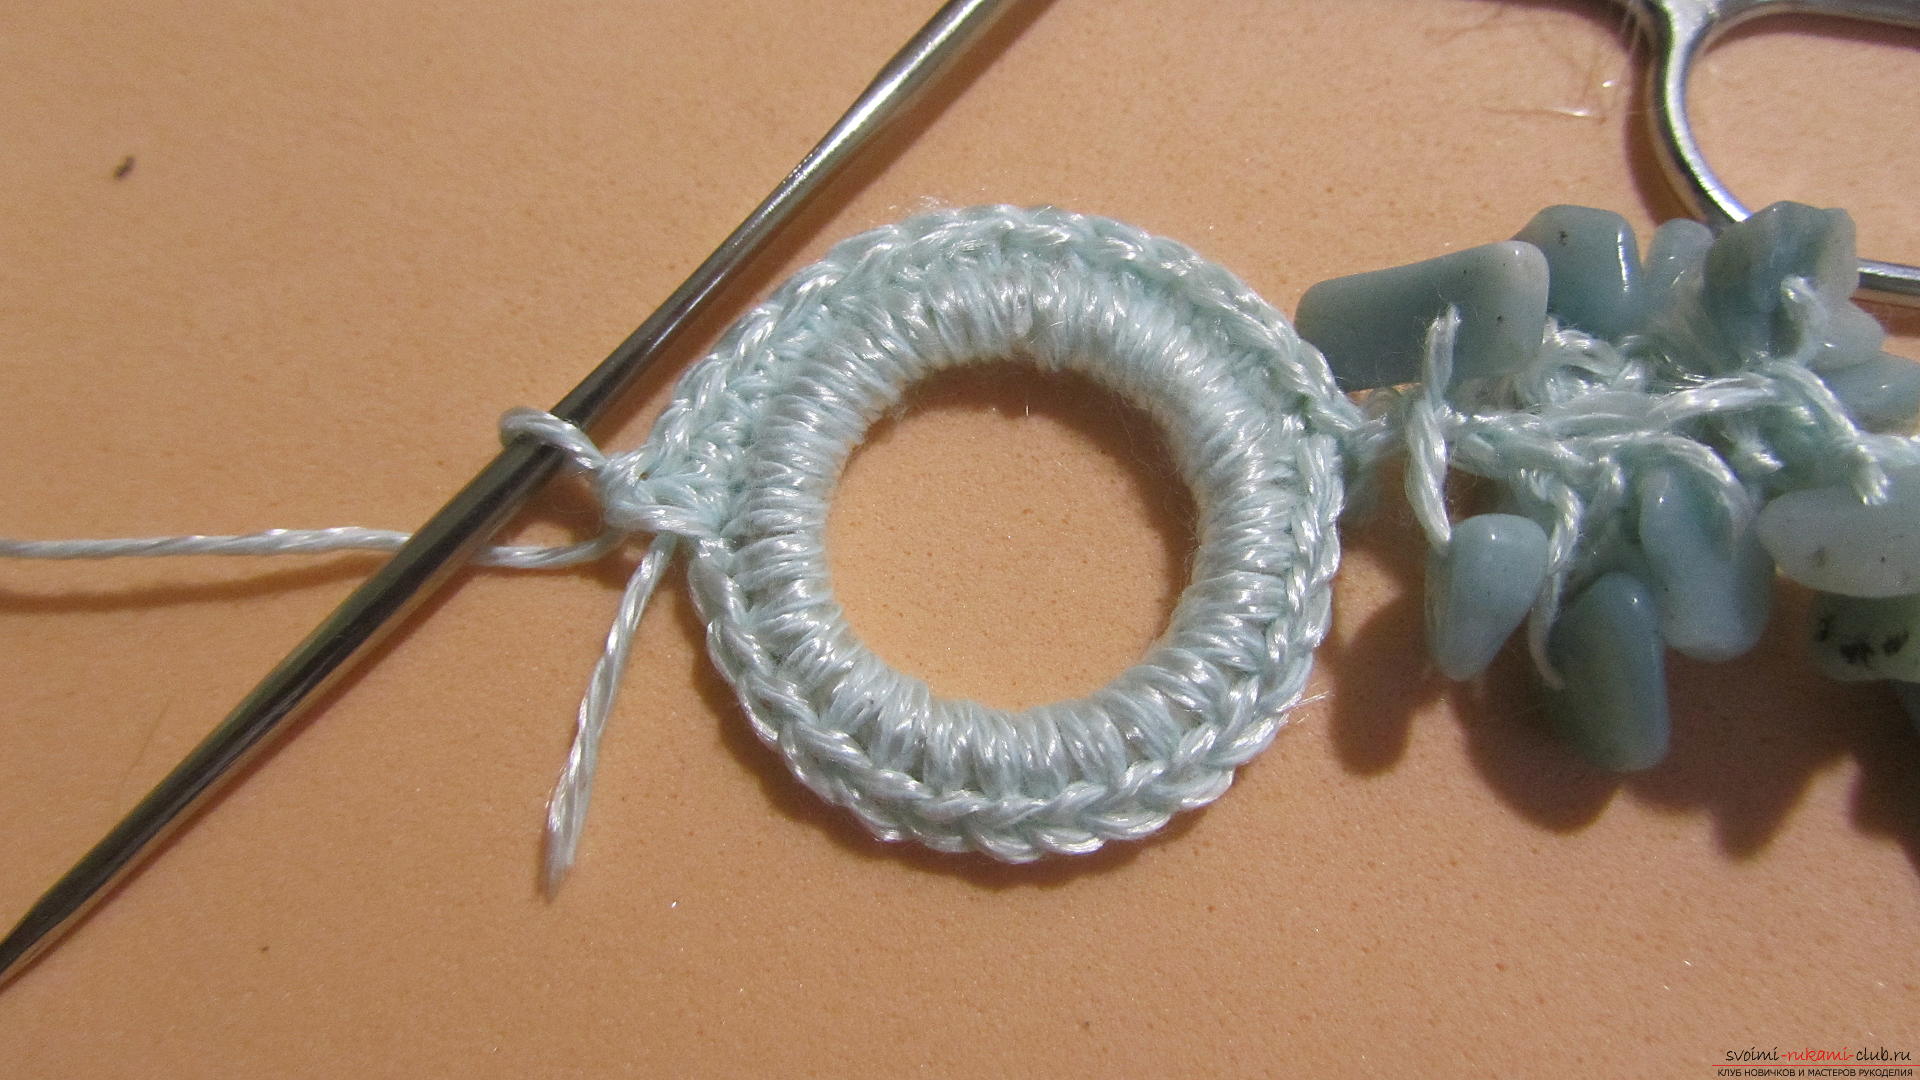 To do this, we make one joint column in the harness at both rings.
 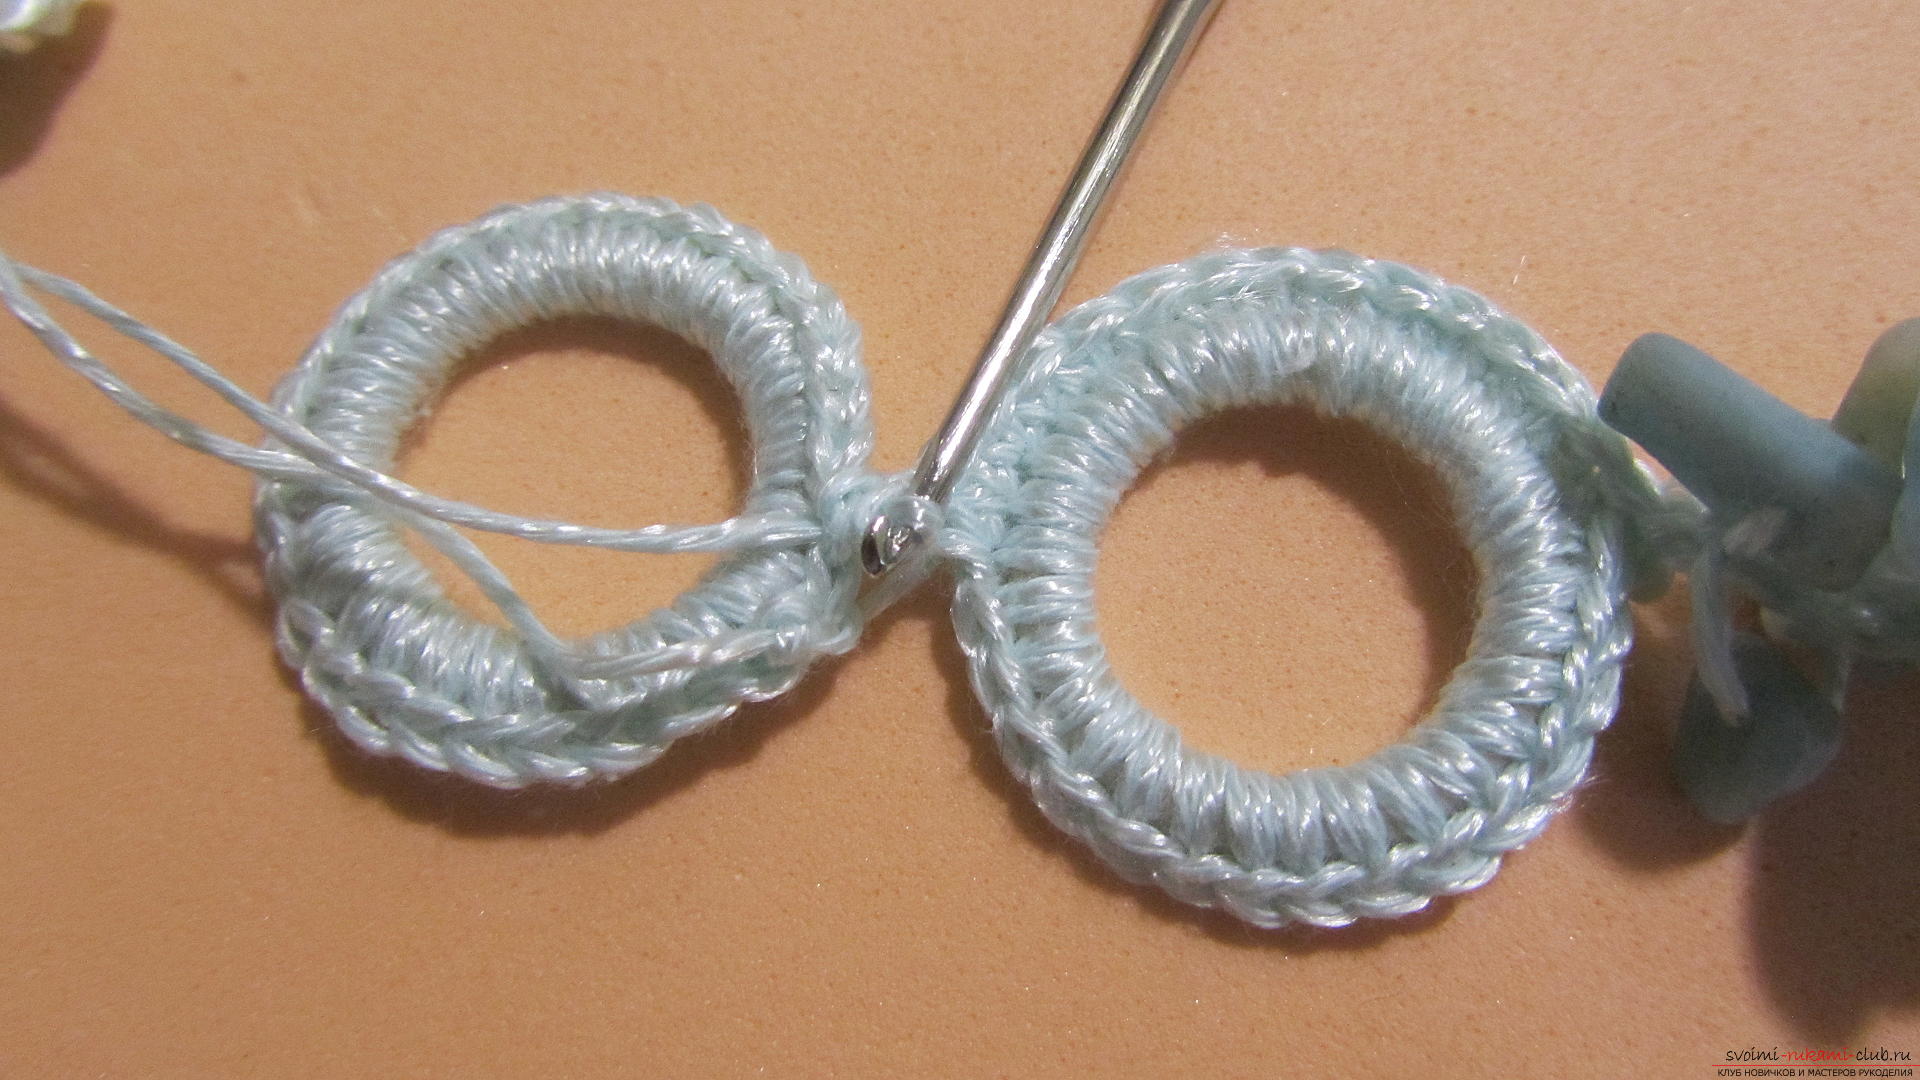 And then continue the strapping of the second ring.
 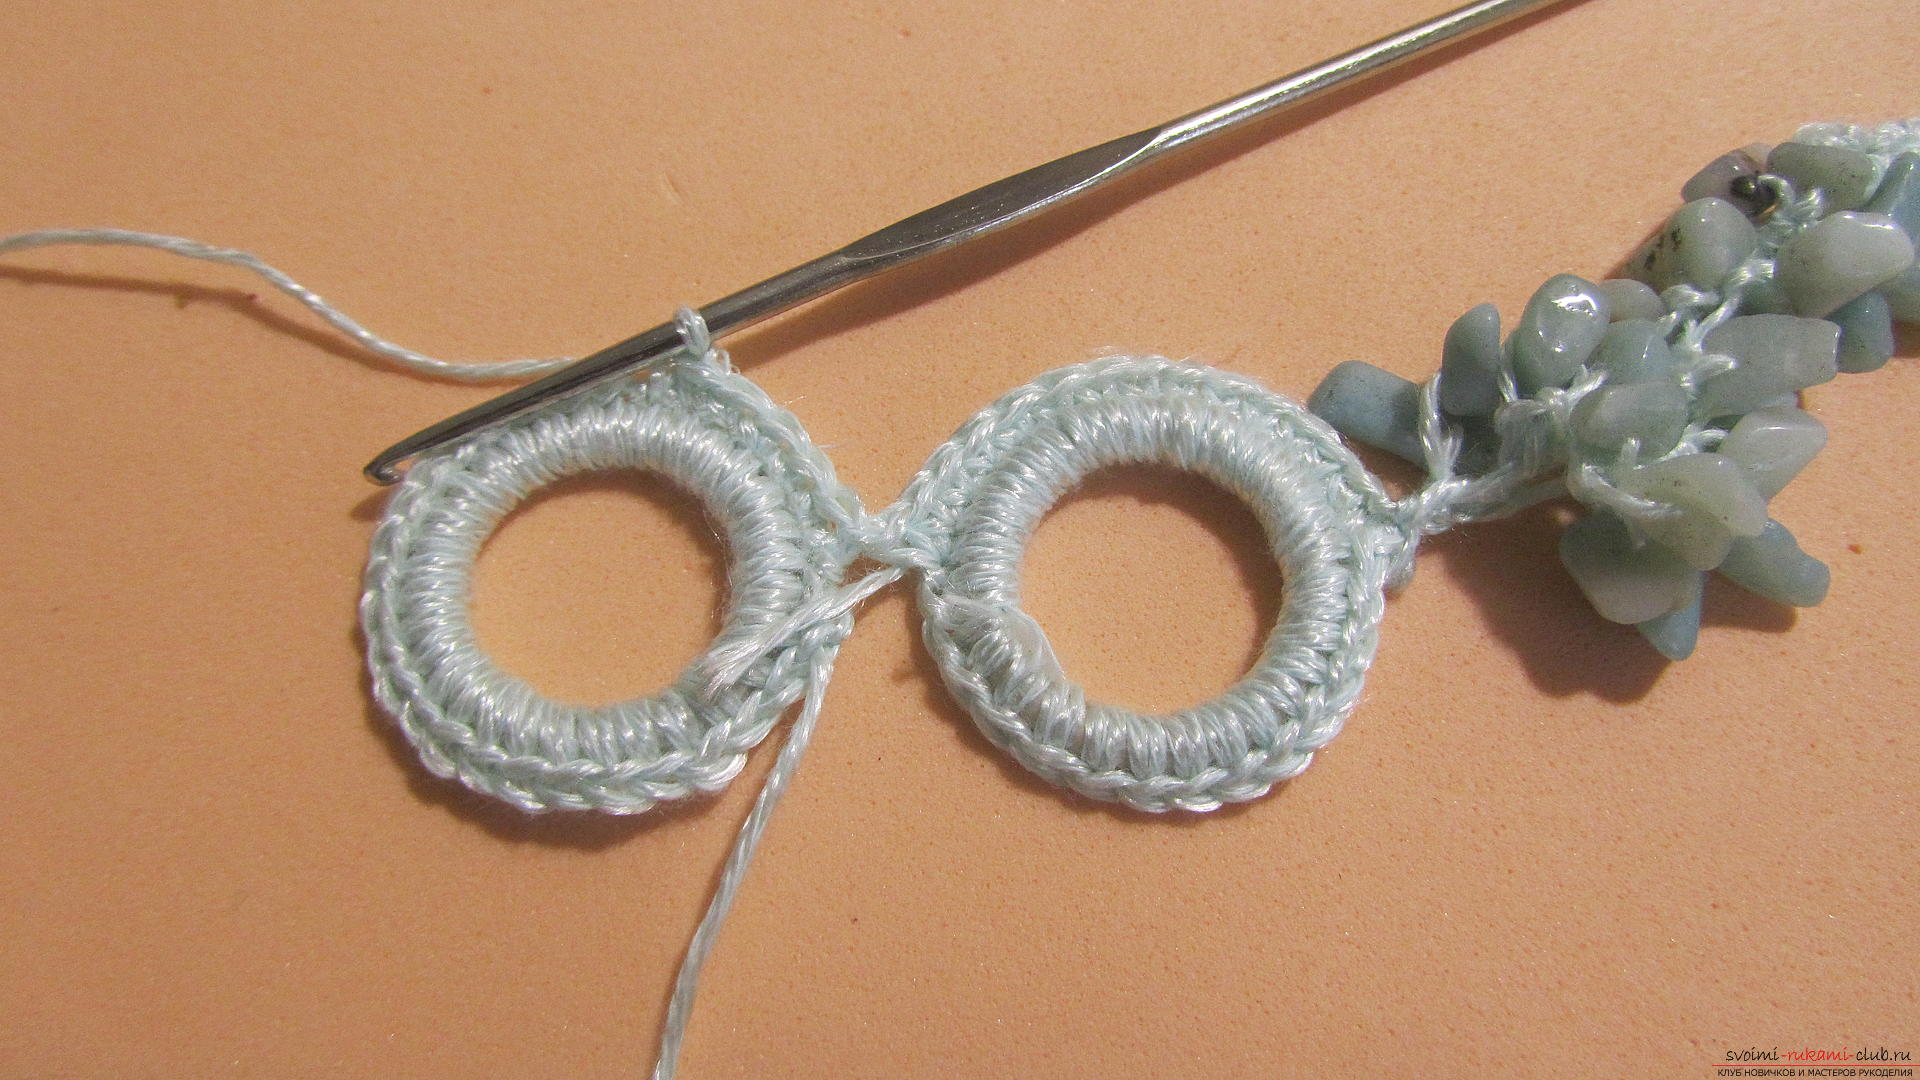 We'll make the harness to the middle of the second ring.
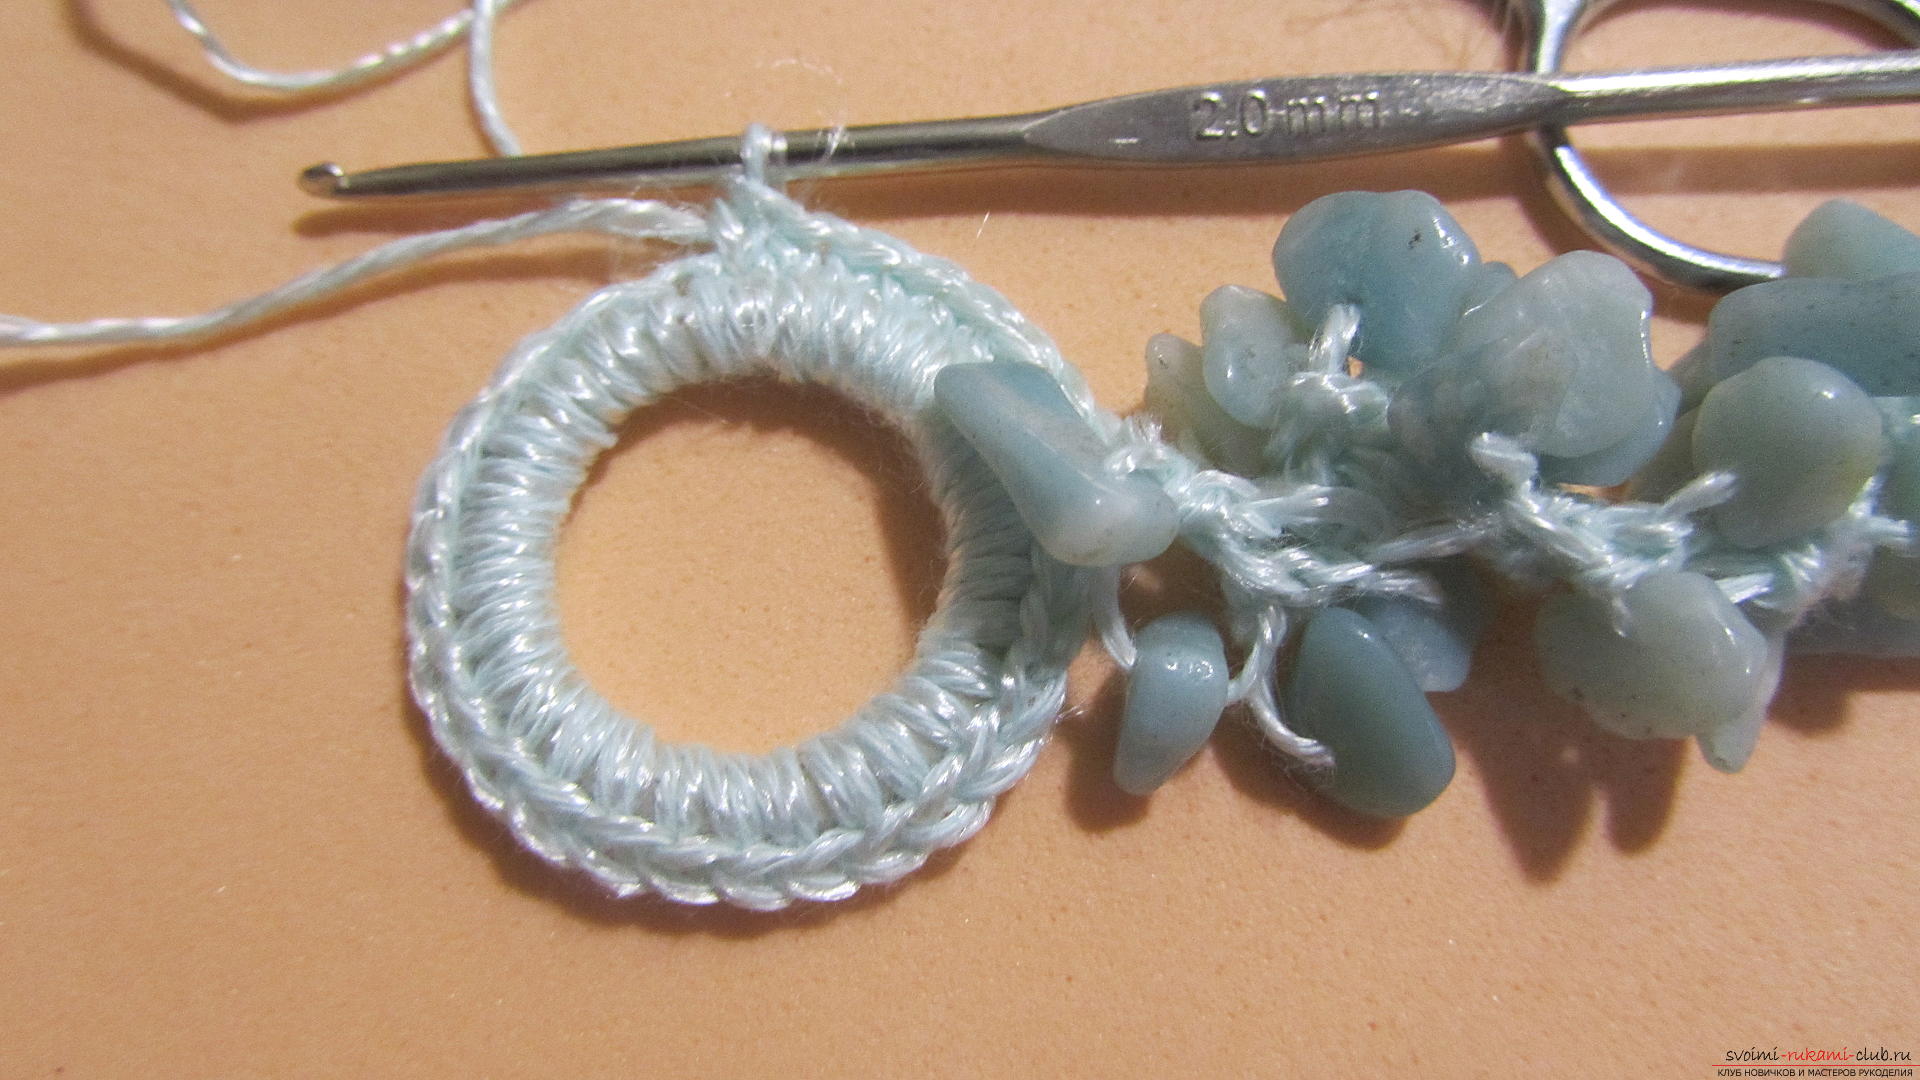
 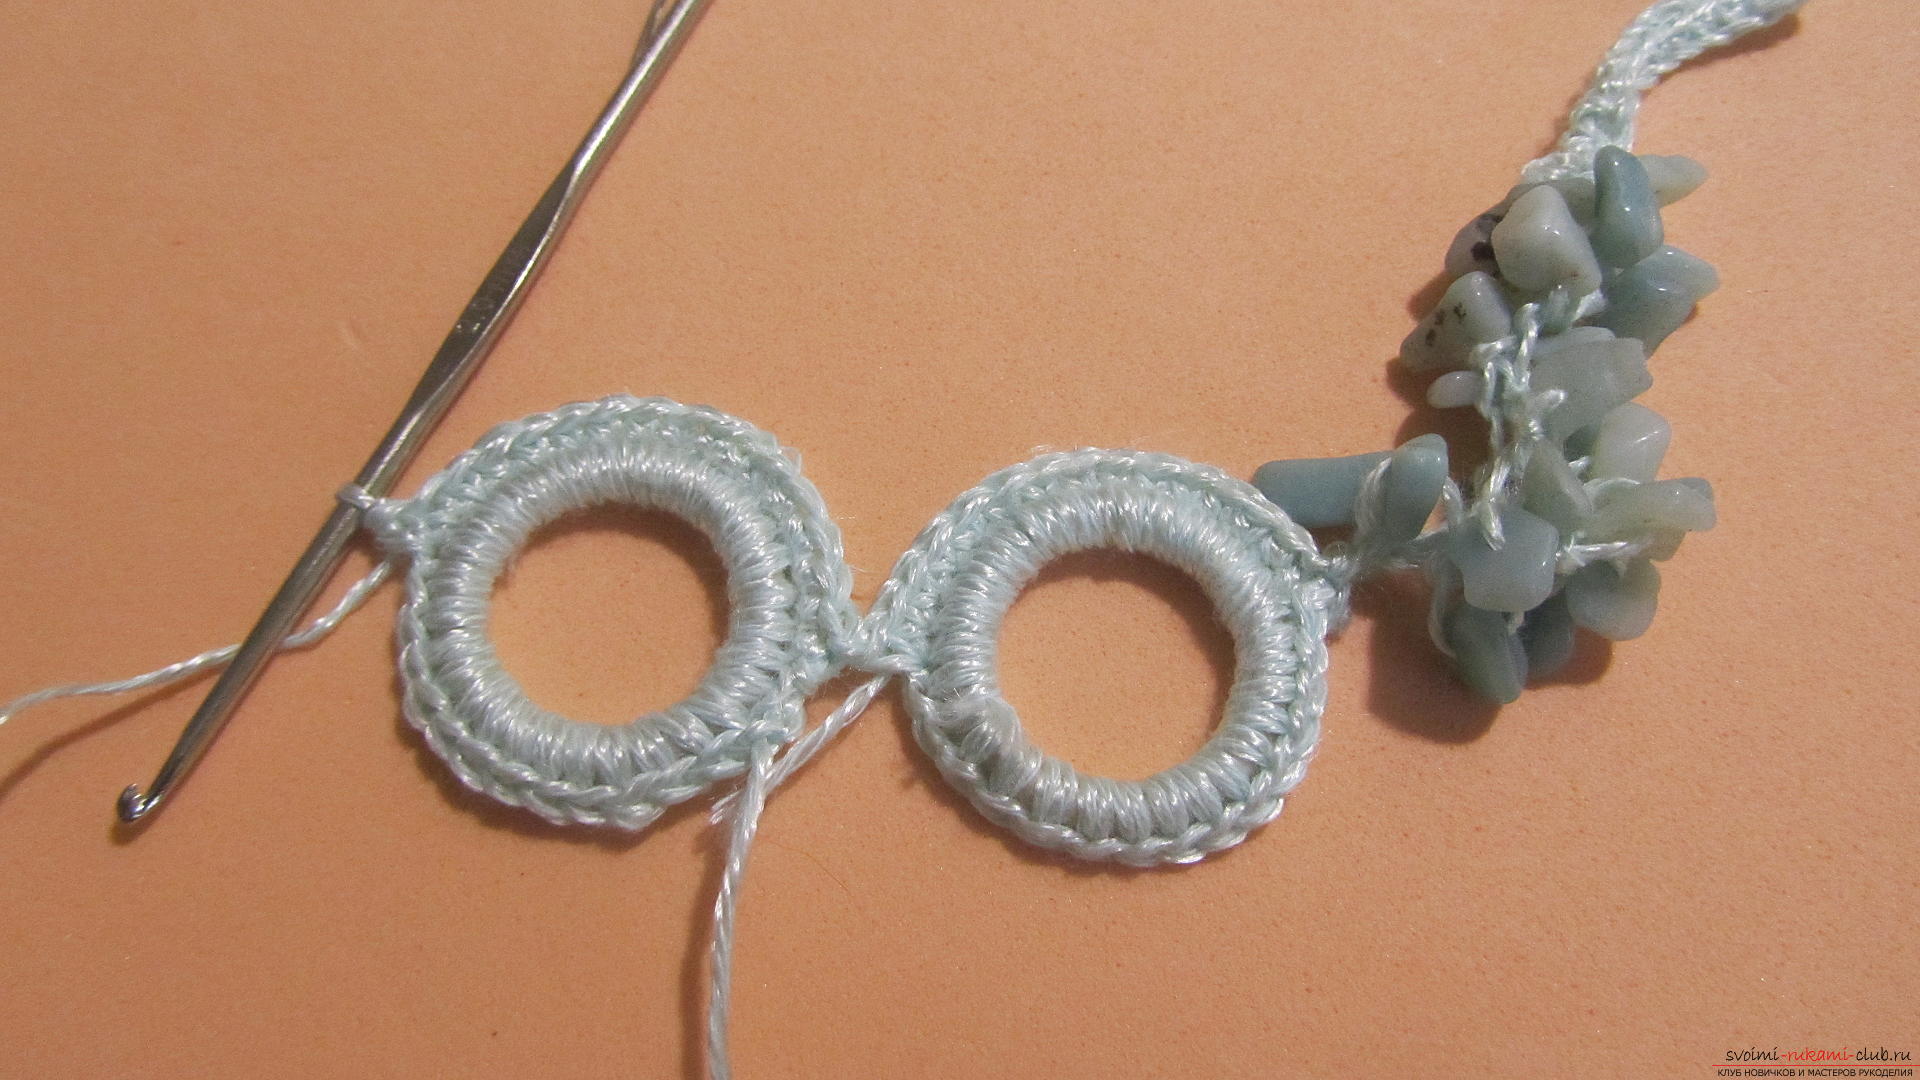 Similarly, proceed with the third ring - connect it with the second and make the second row of straps on the half of the ring.
 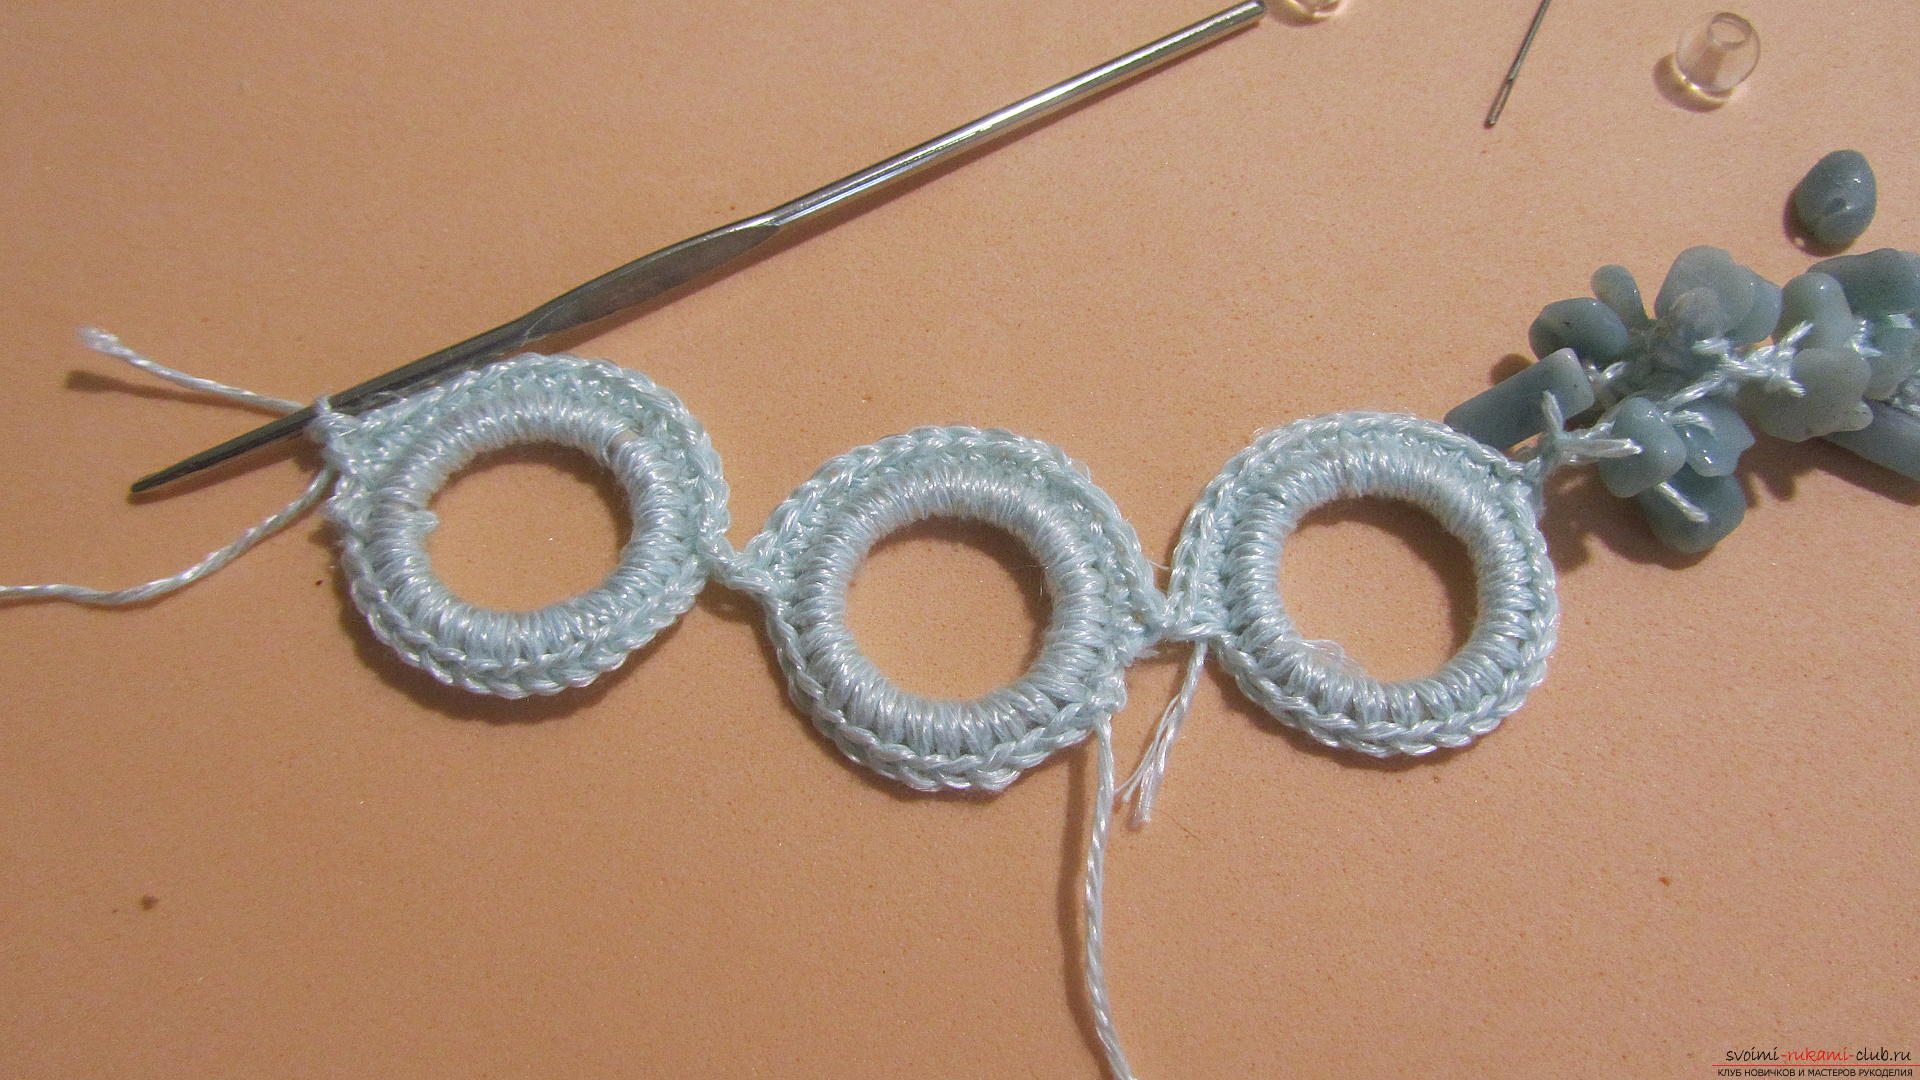 After tying the third ring to the middle, let's start knitting the right side of the necklace. To do this, we again connect the chain of the loops - only 75.
 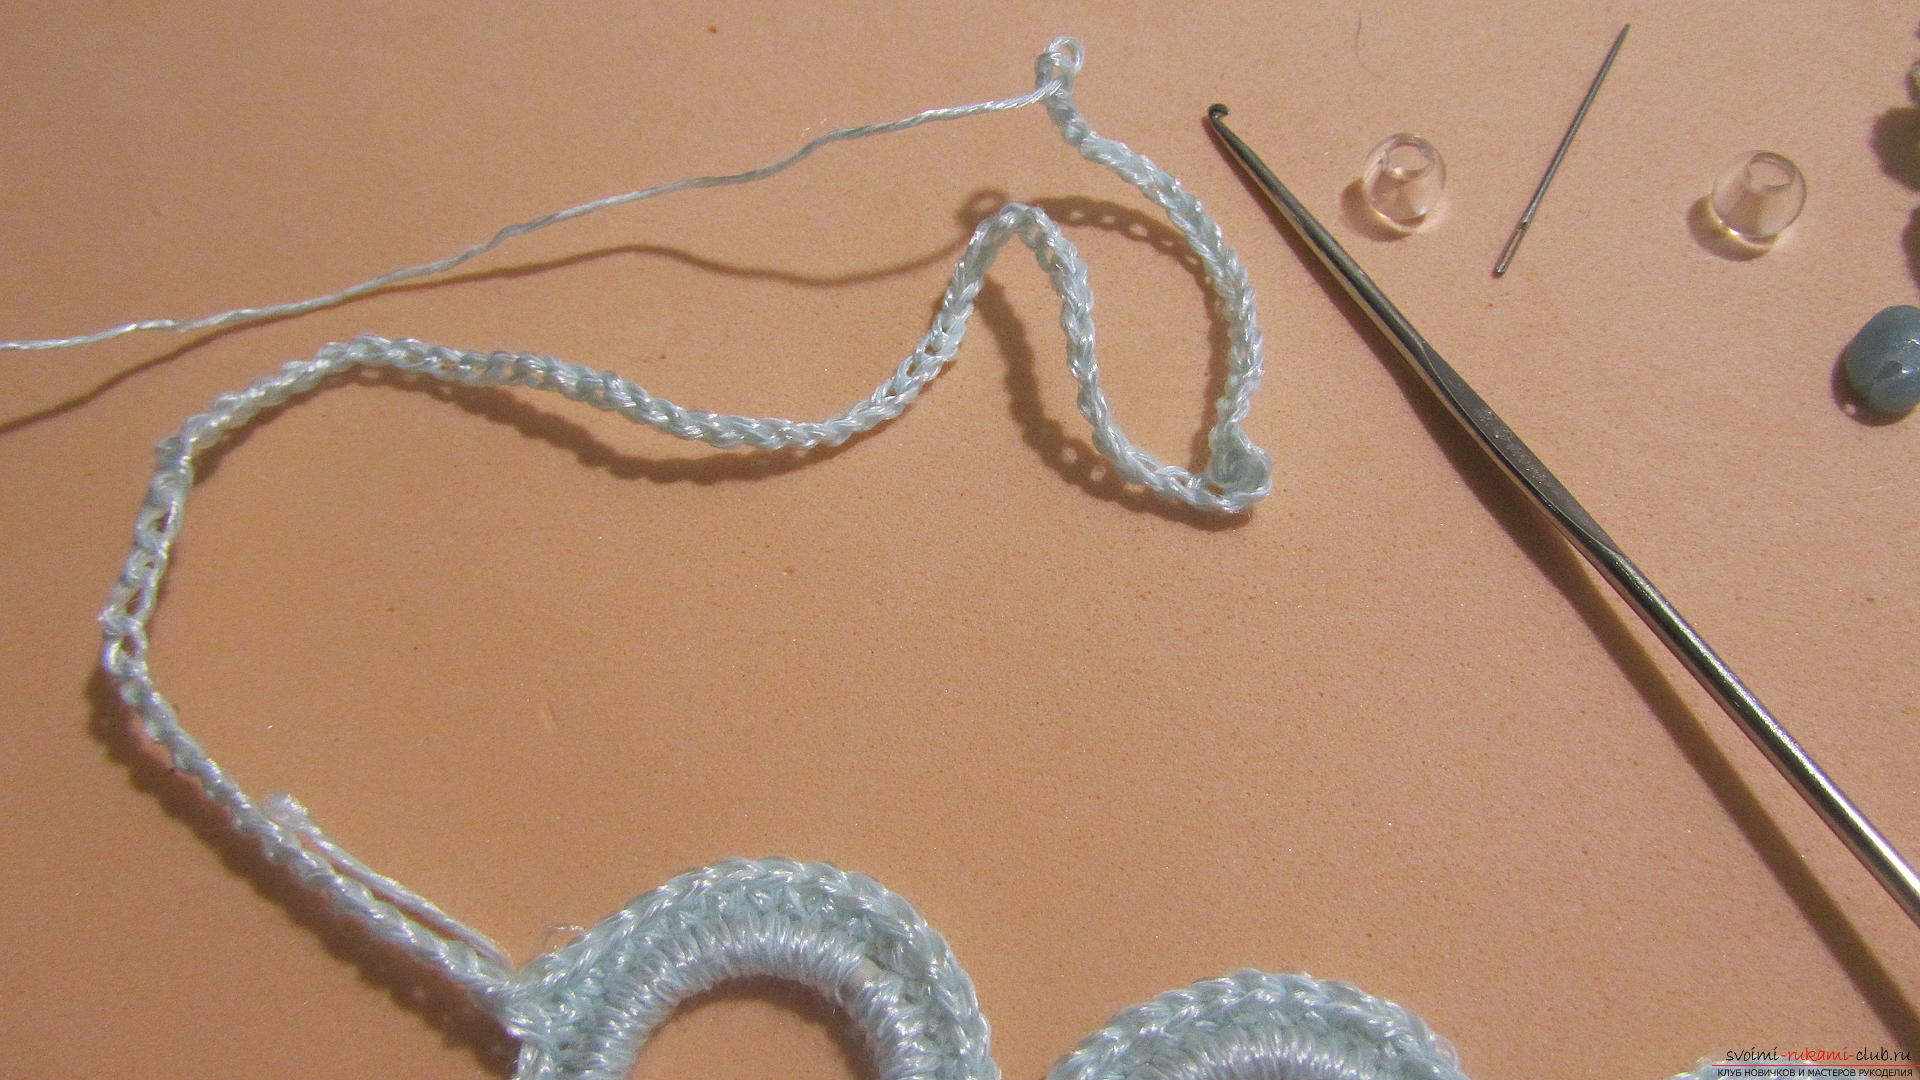 At the end of the chain we make a loop for fastening, trying it on a bead.
  In order that you can slightly change the length of our necklace, we'll make one more loop.
 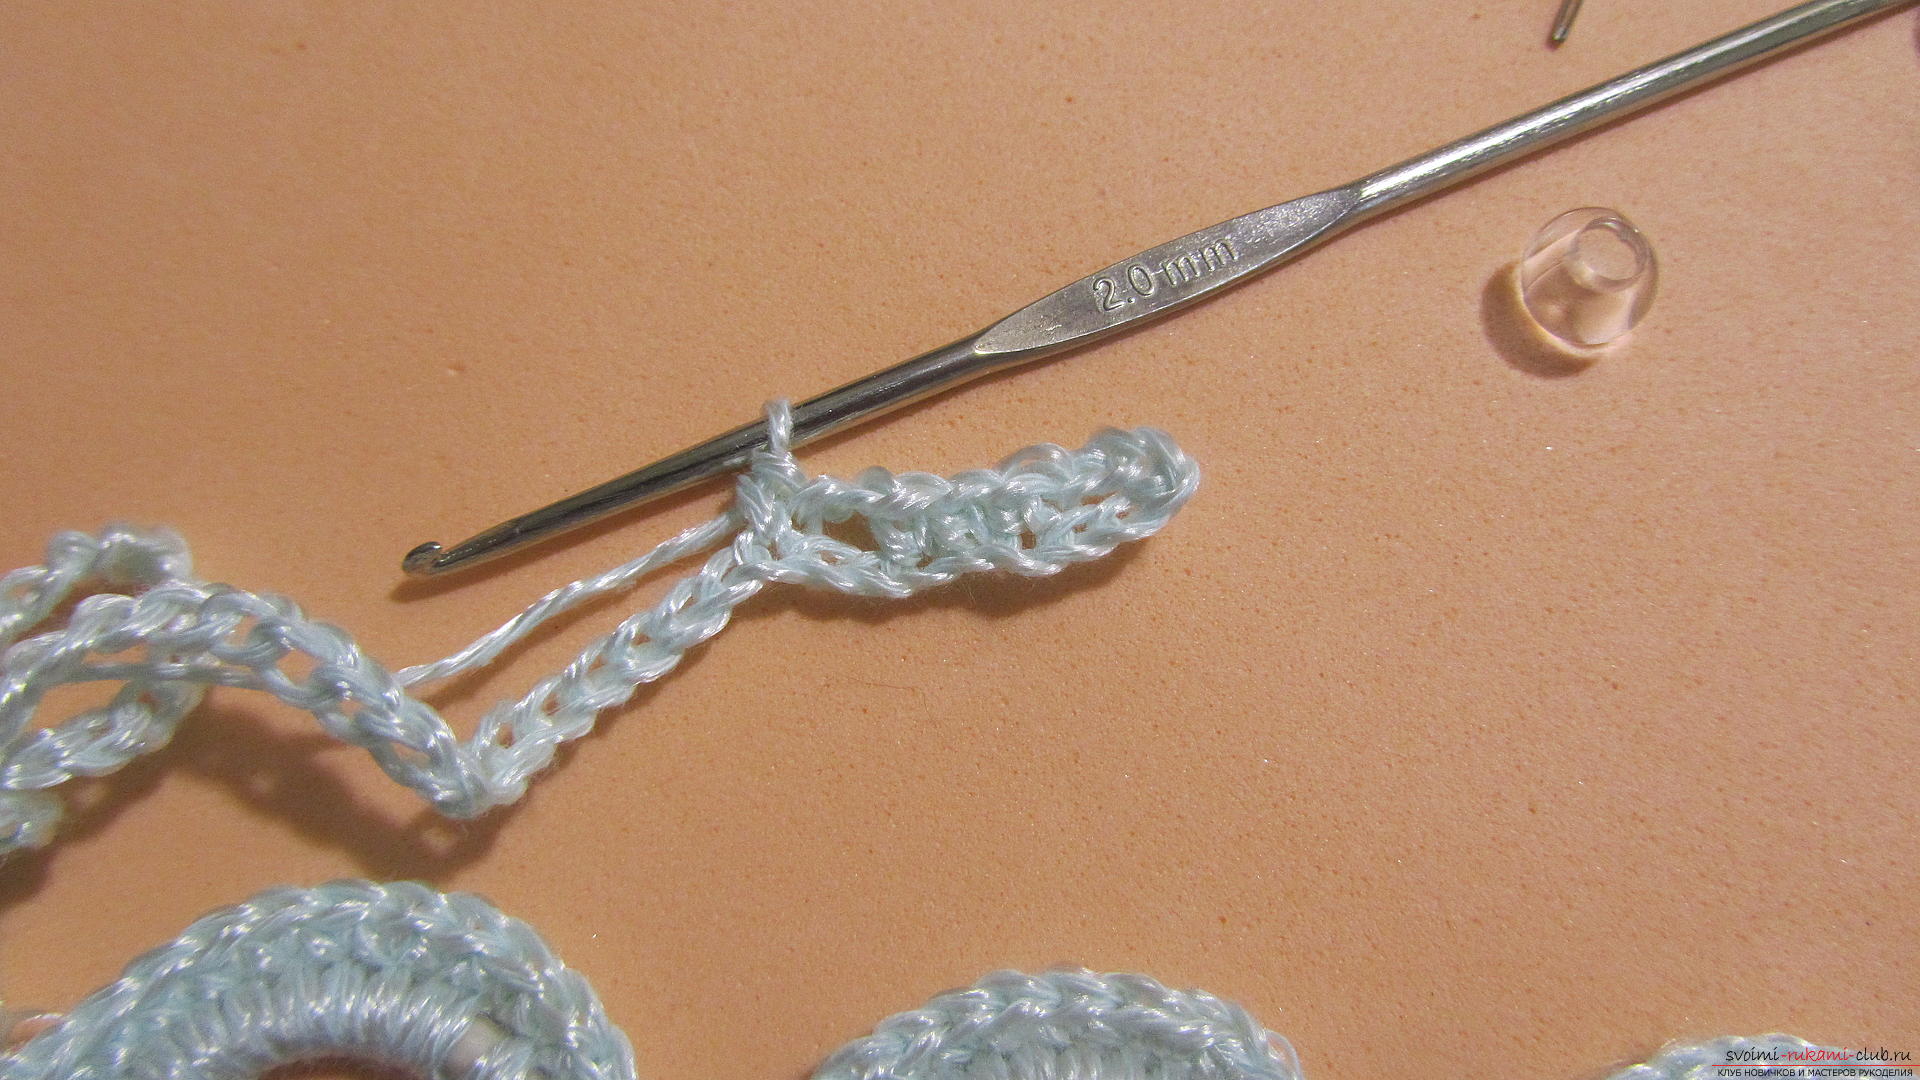 And we will continue our knitting with usual posts.
 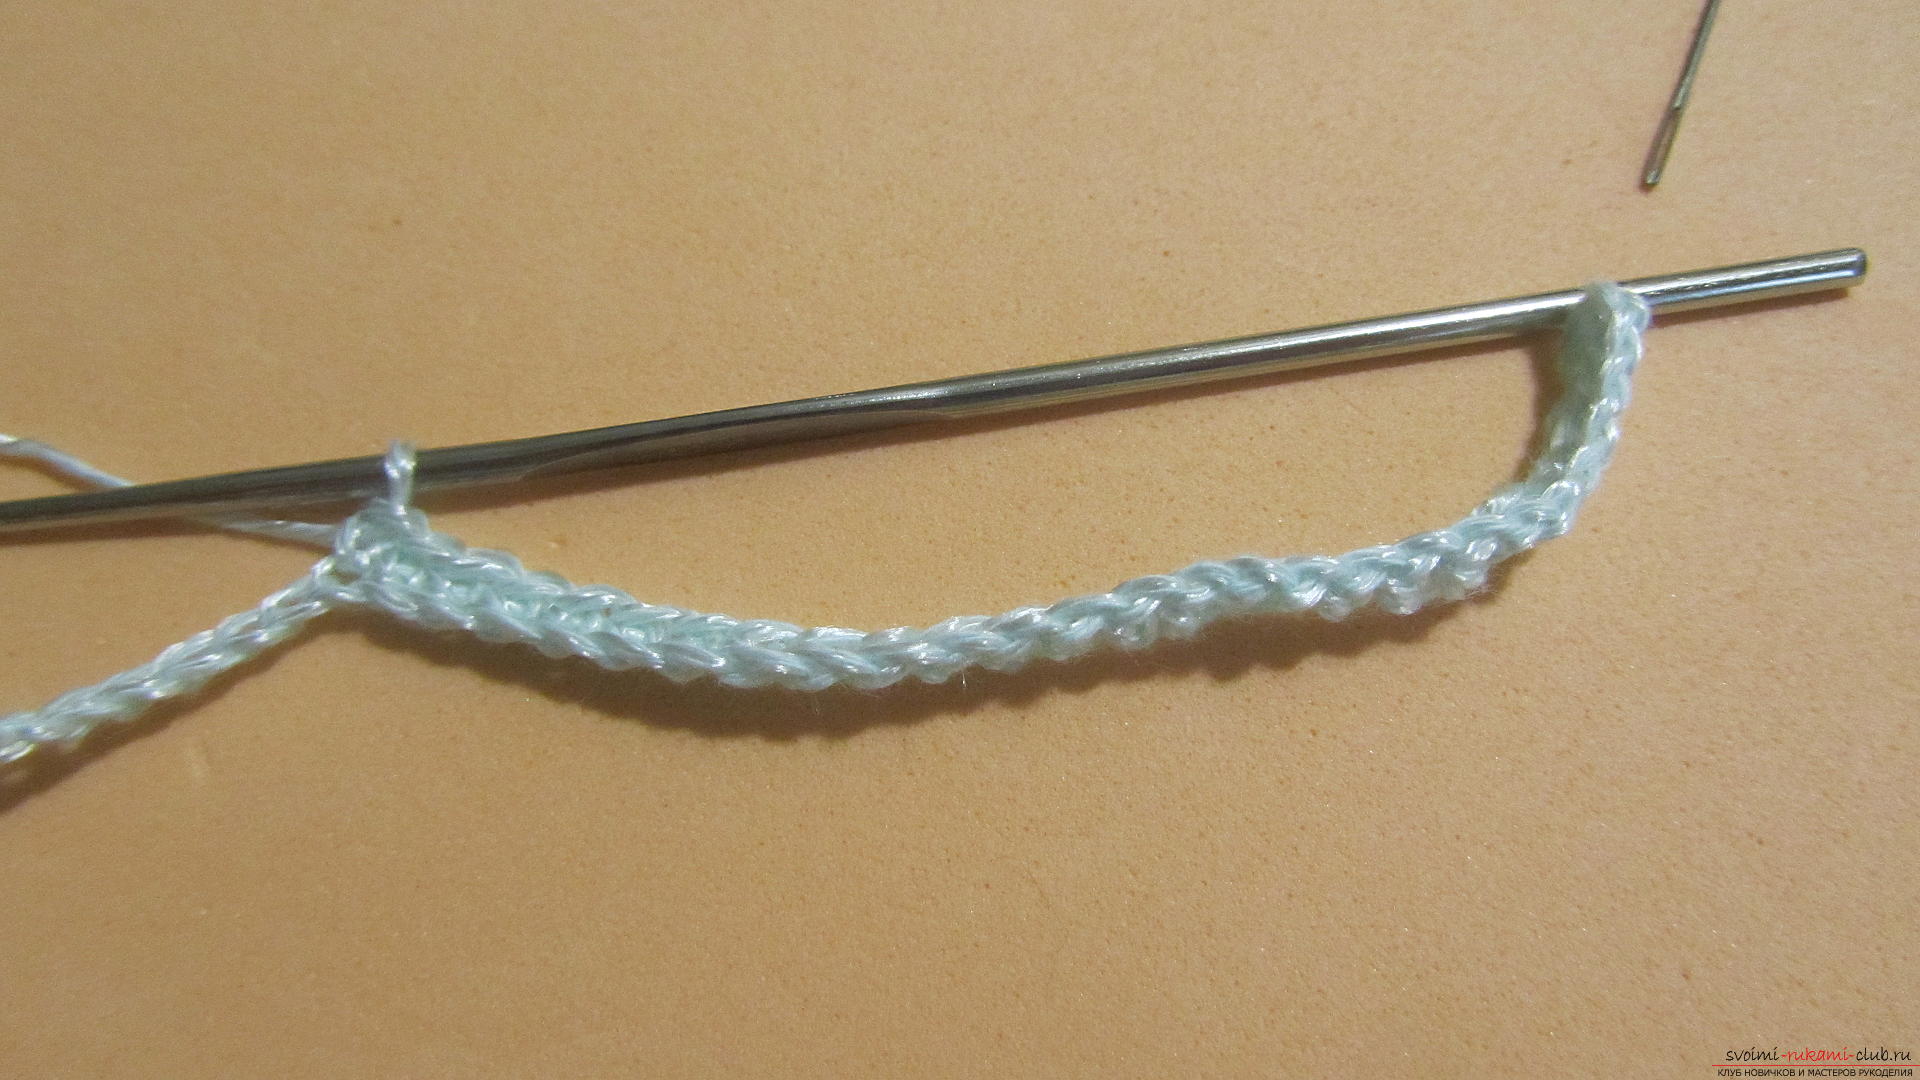 We knit so to our rings.
 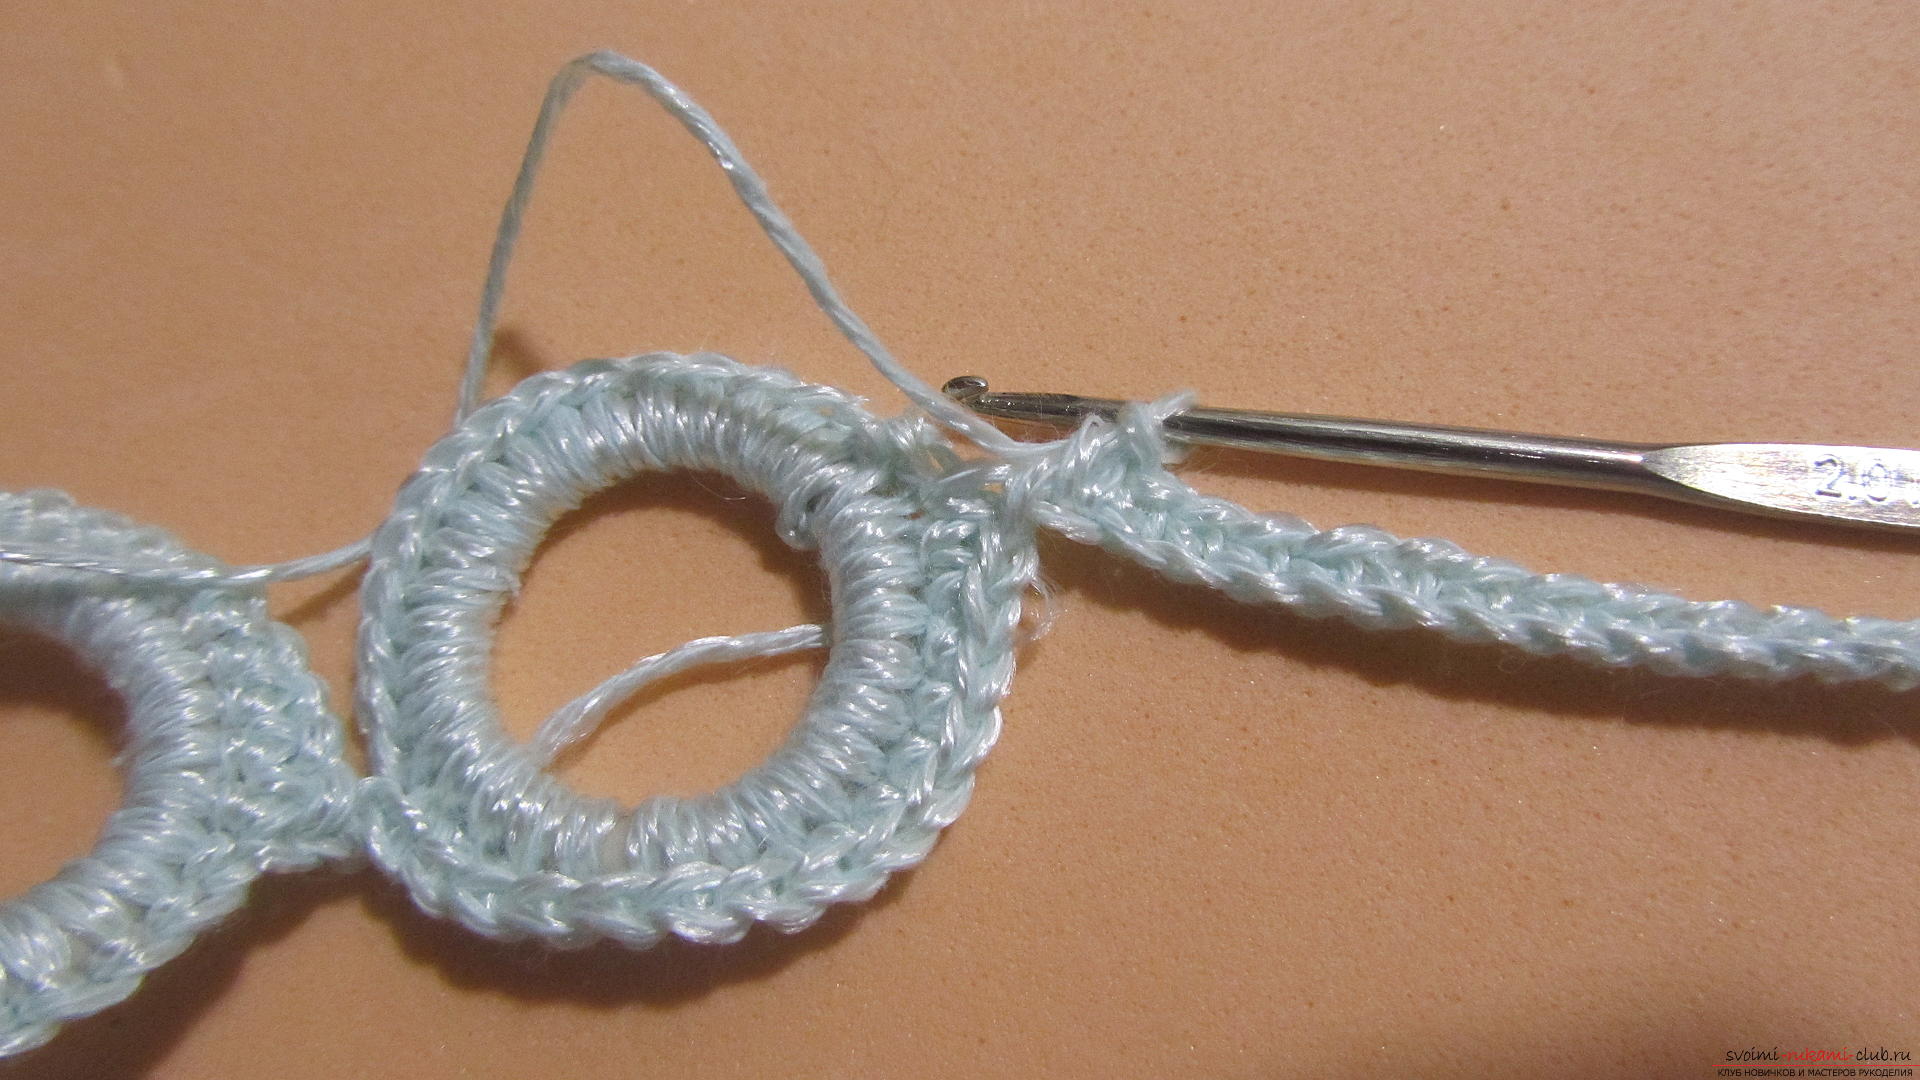 Having reached the rings, we will make the second row of their strapping from the opposite side.
 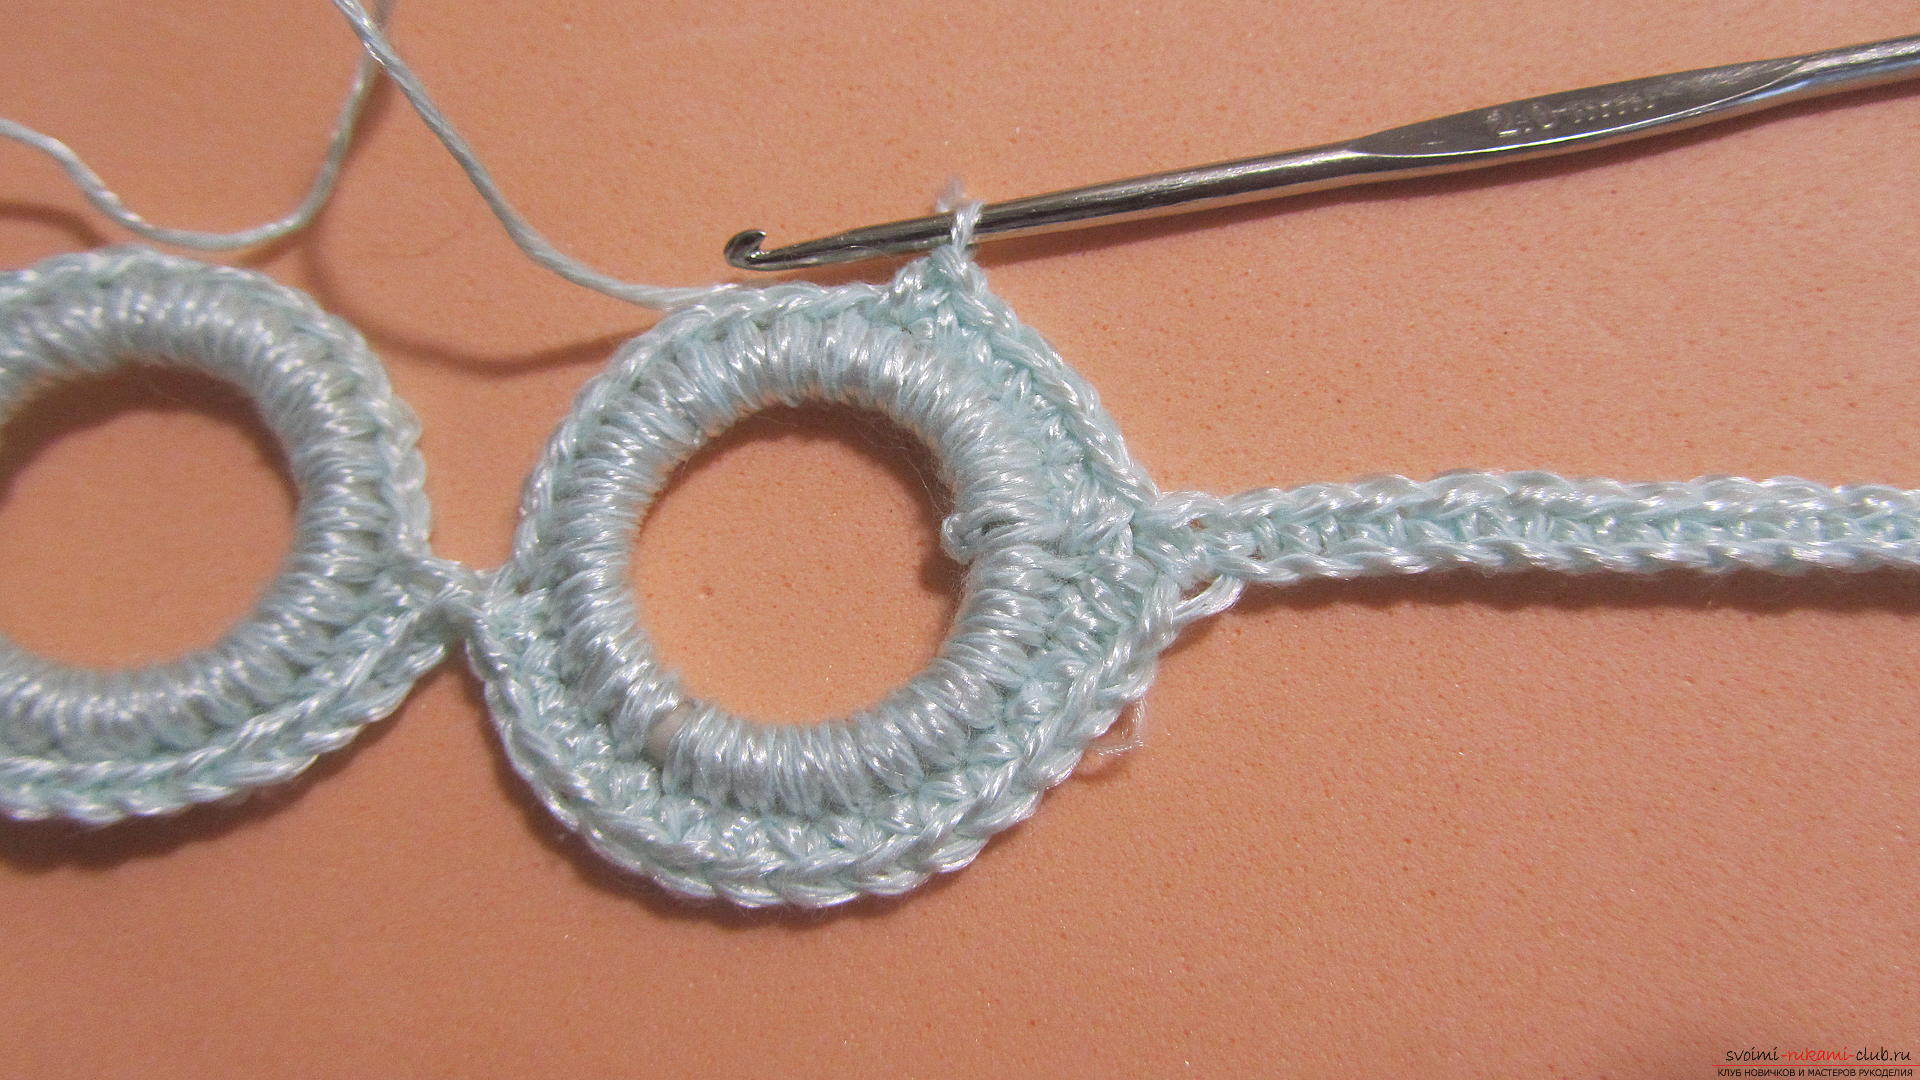 In the transition between the rings - we will tie one bar common to two neighboring ones.
 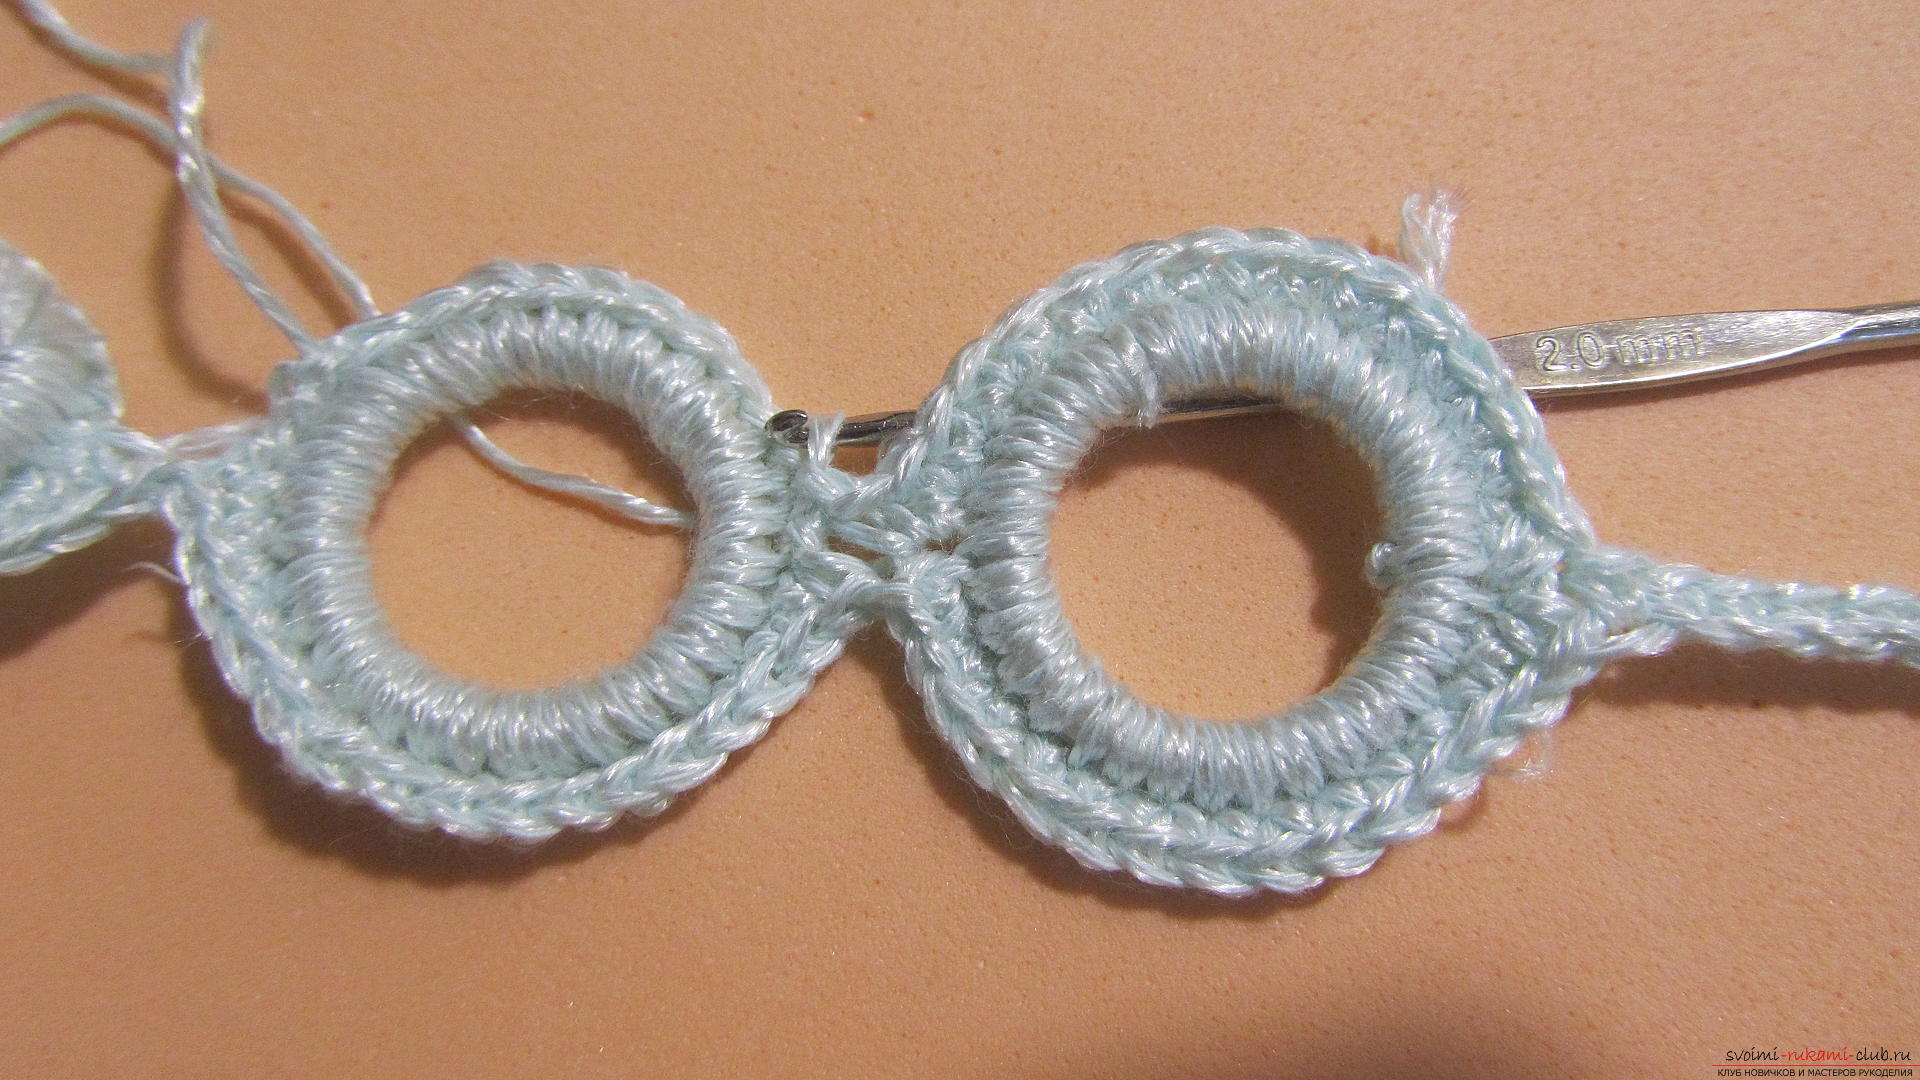 Having finished tying the last ring, we cut the thread.
 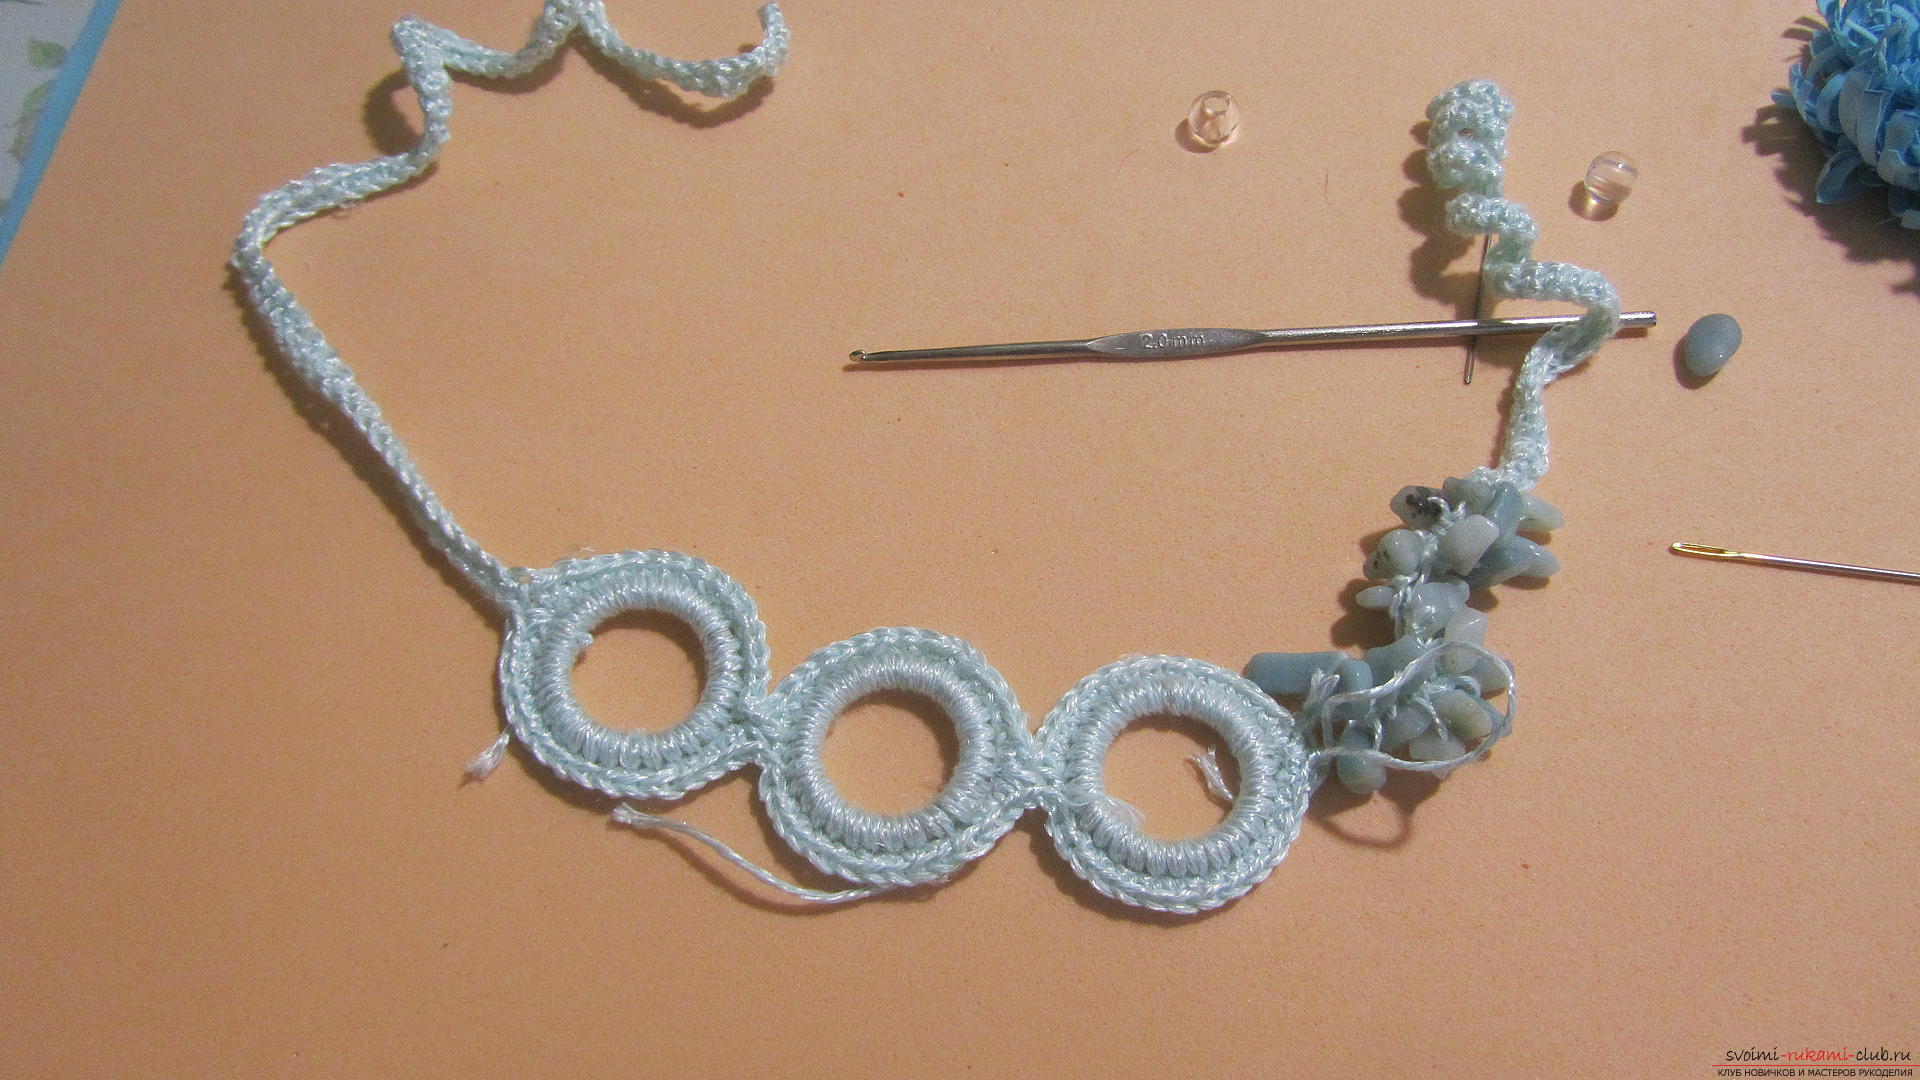 On the flower from Foamiran we will glue the bead. Do it better or super-glue, or a hot gun.
 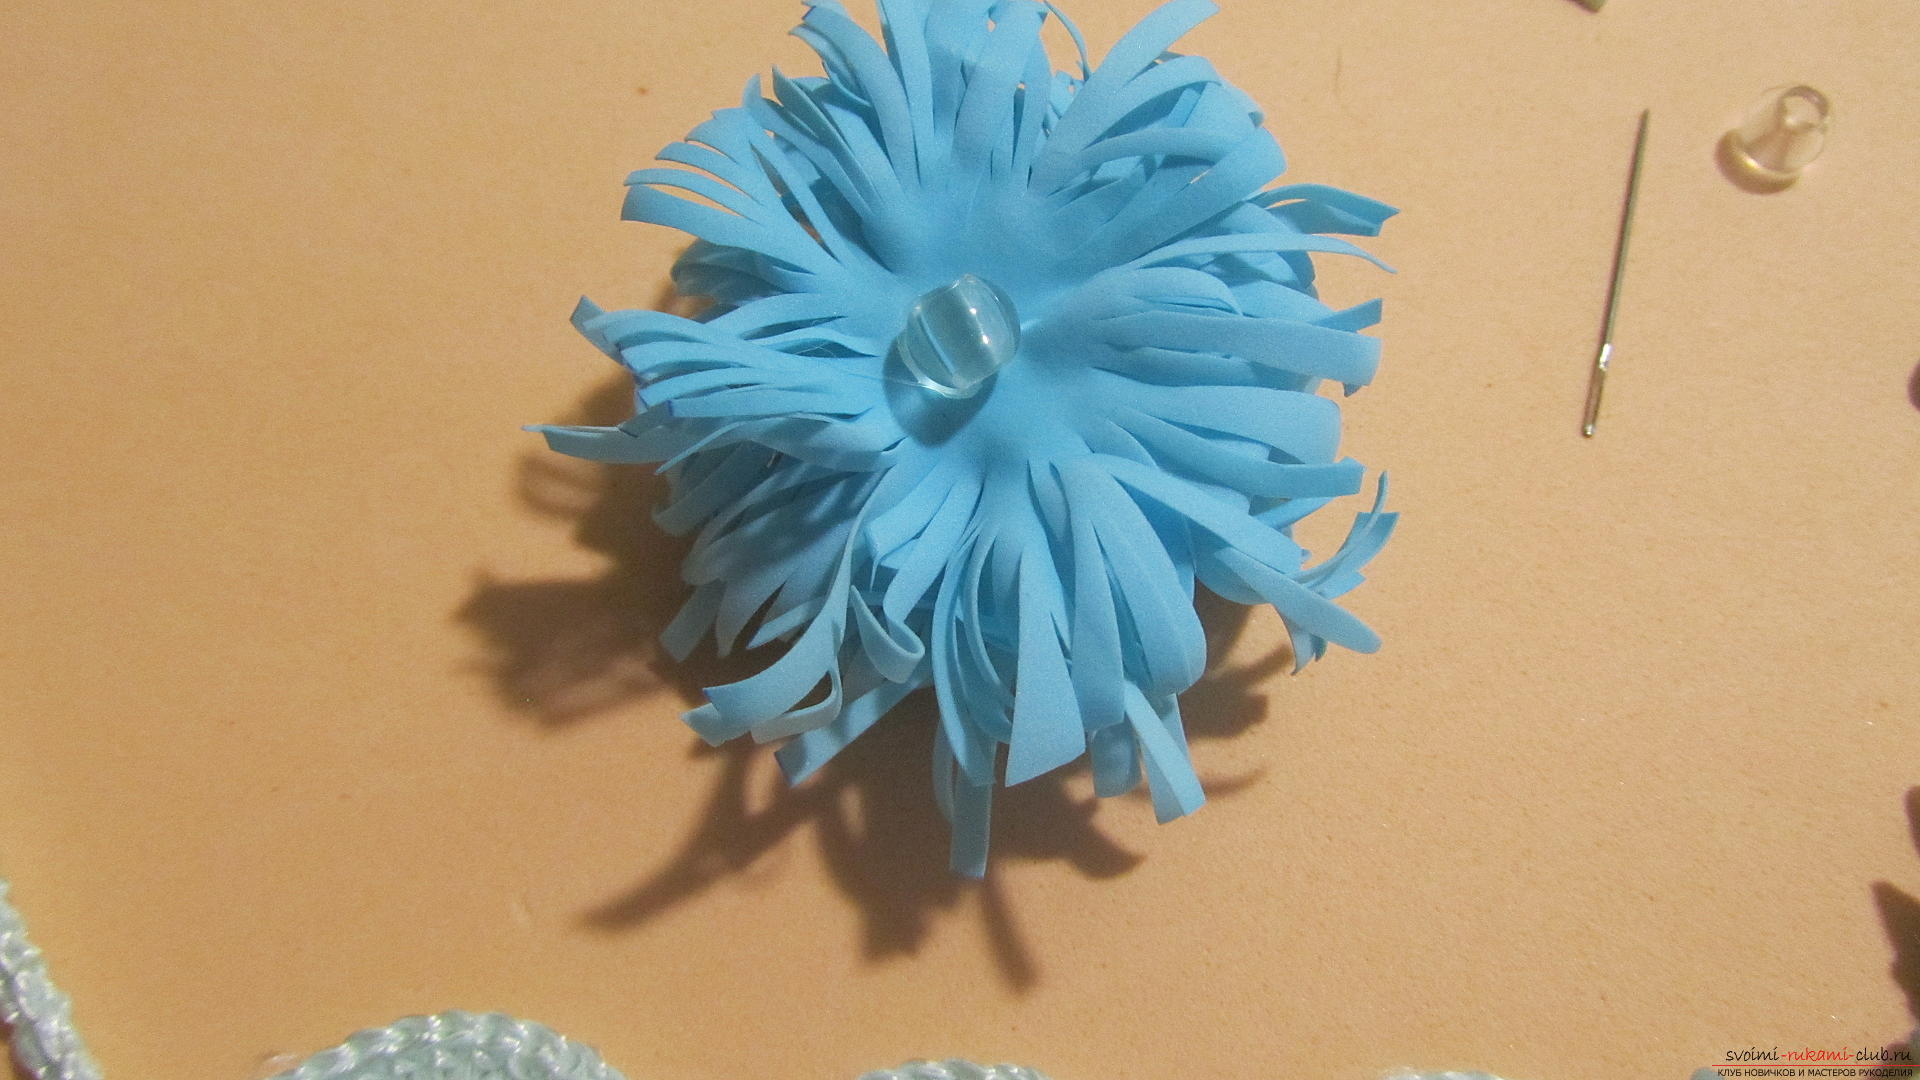 Let us estimate where the flower is best sewn.
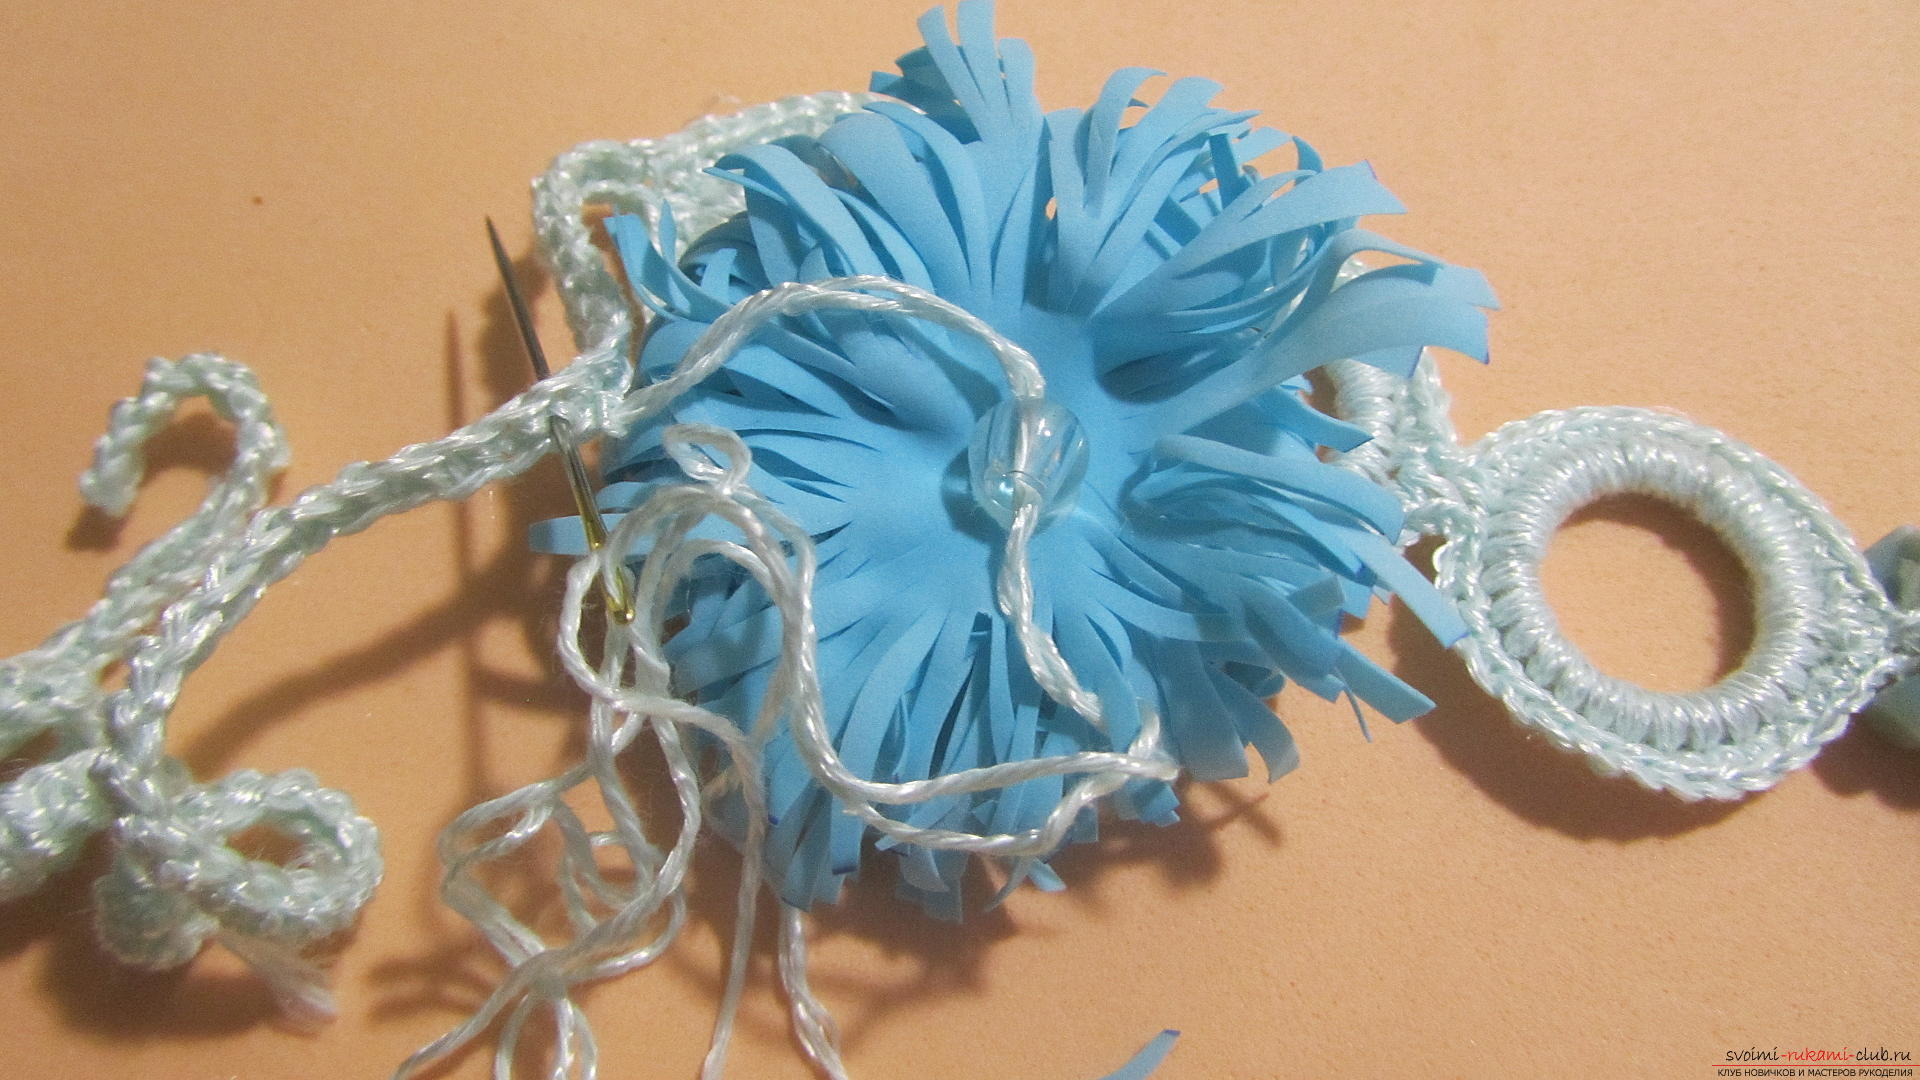
 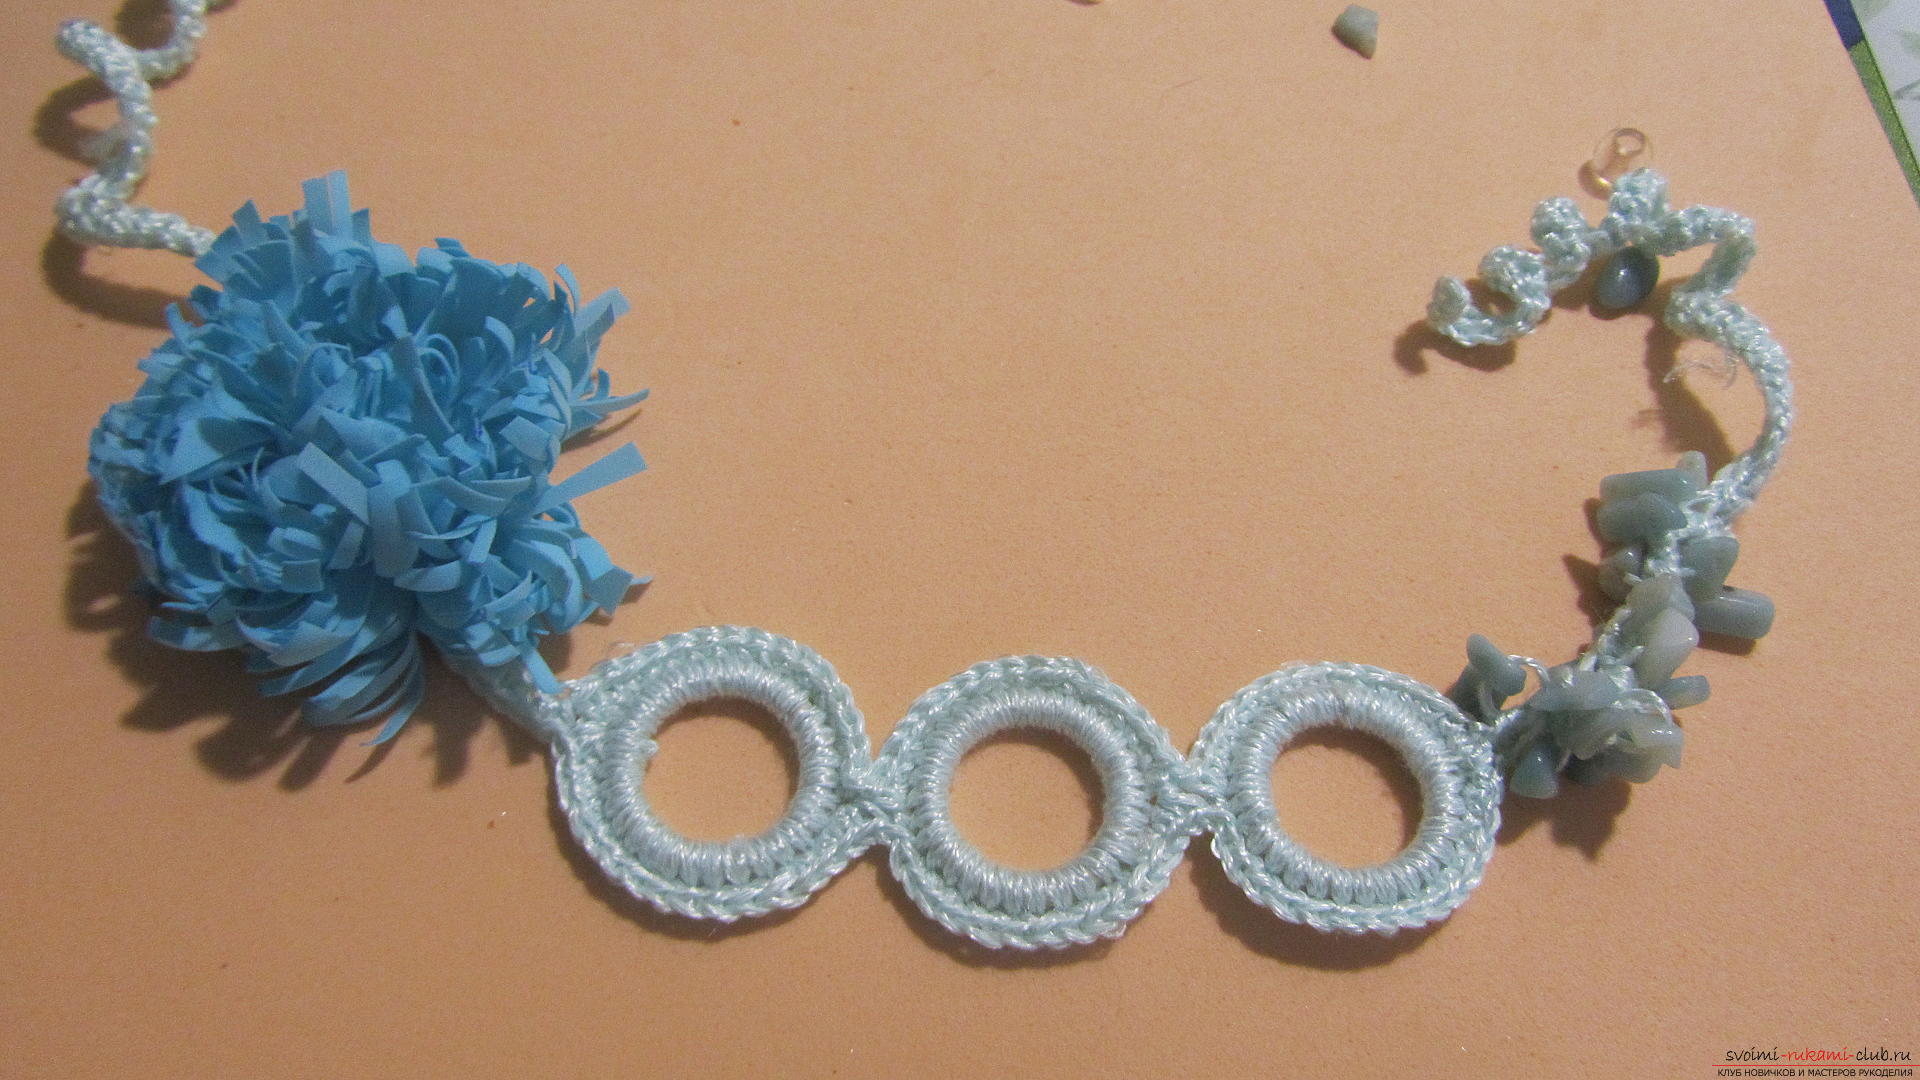 Using the same thread, which we knitted a necklace, we sew a flower for a bead.
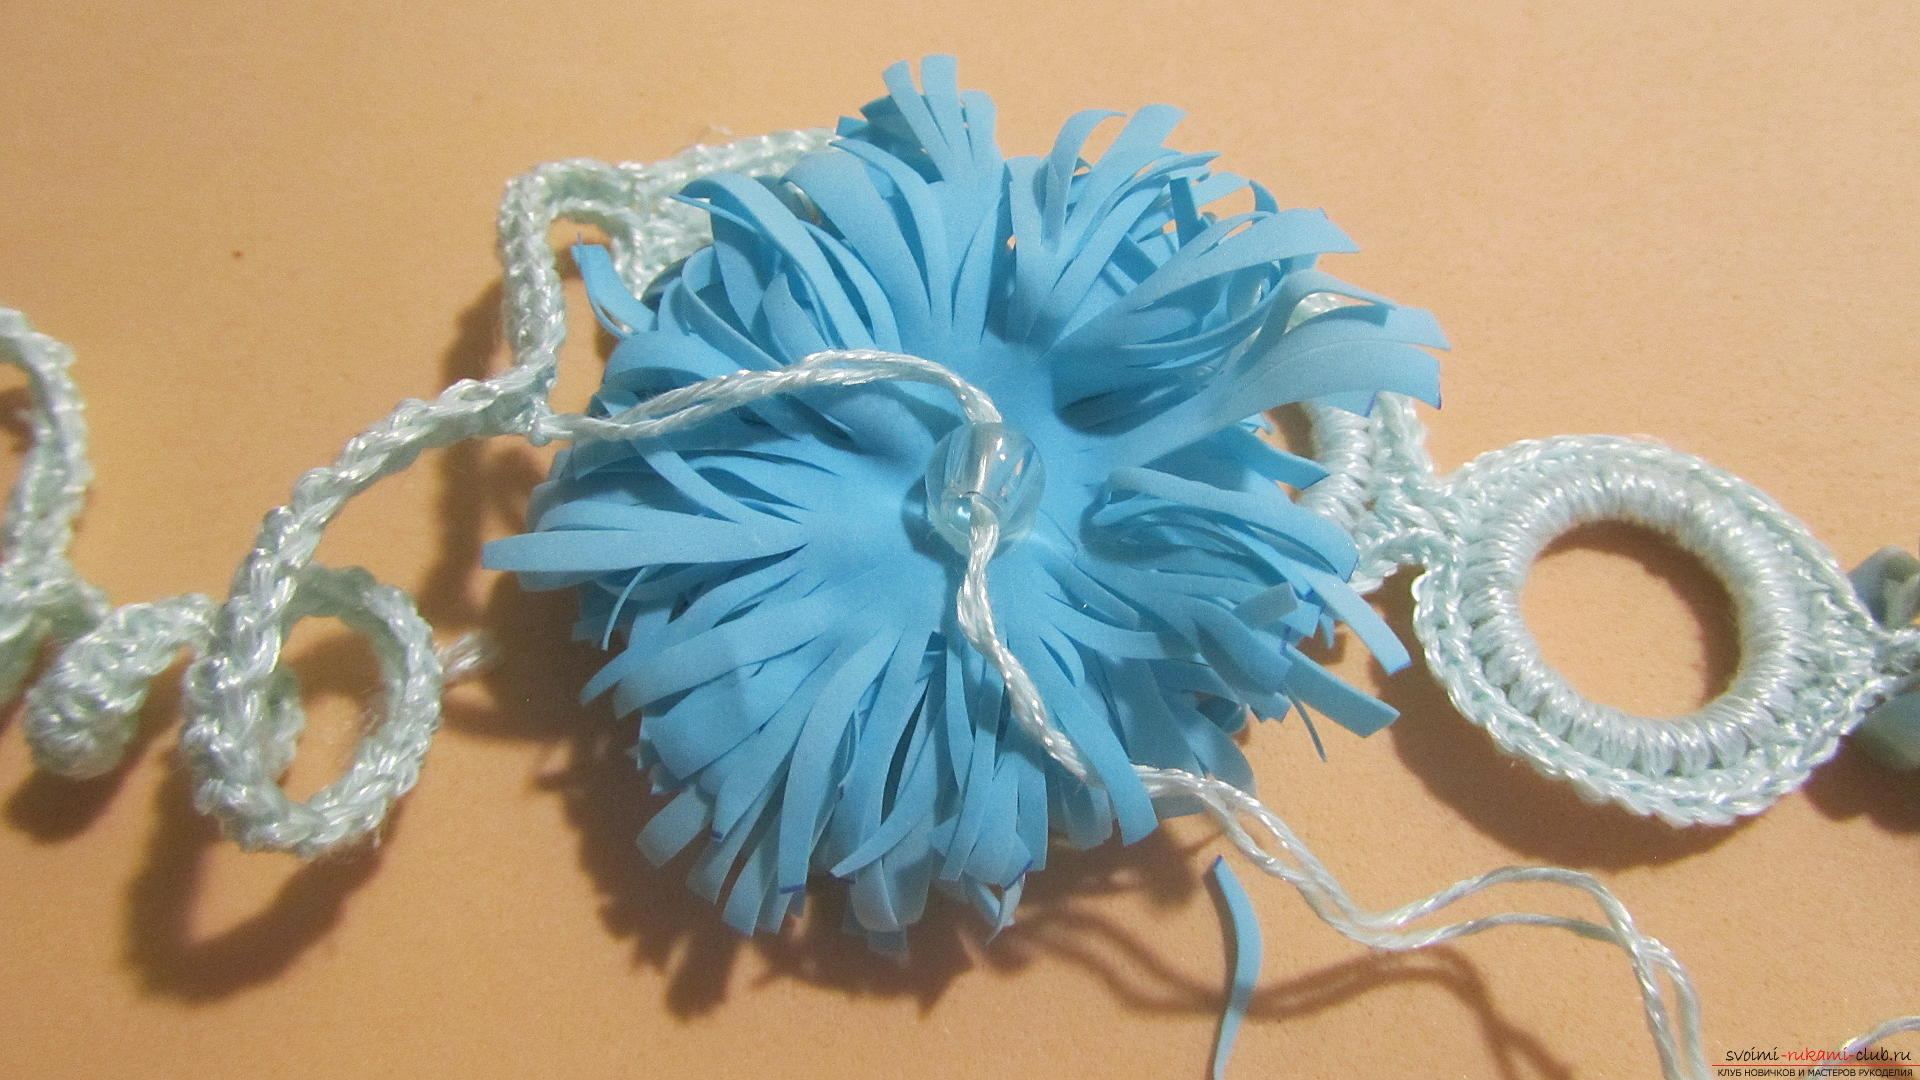
 In the loop on the left side of the necklace (the one with the crumb) we sew the bead-fastener.
 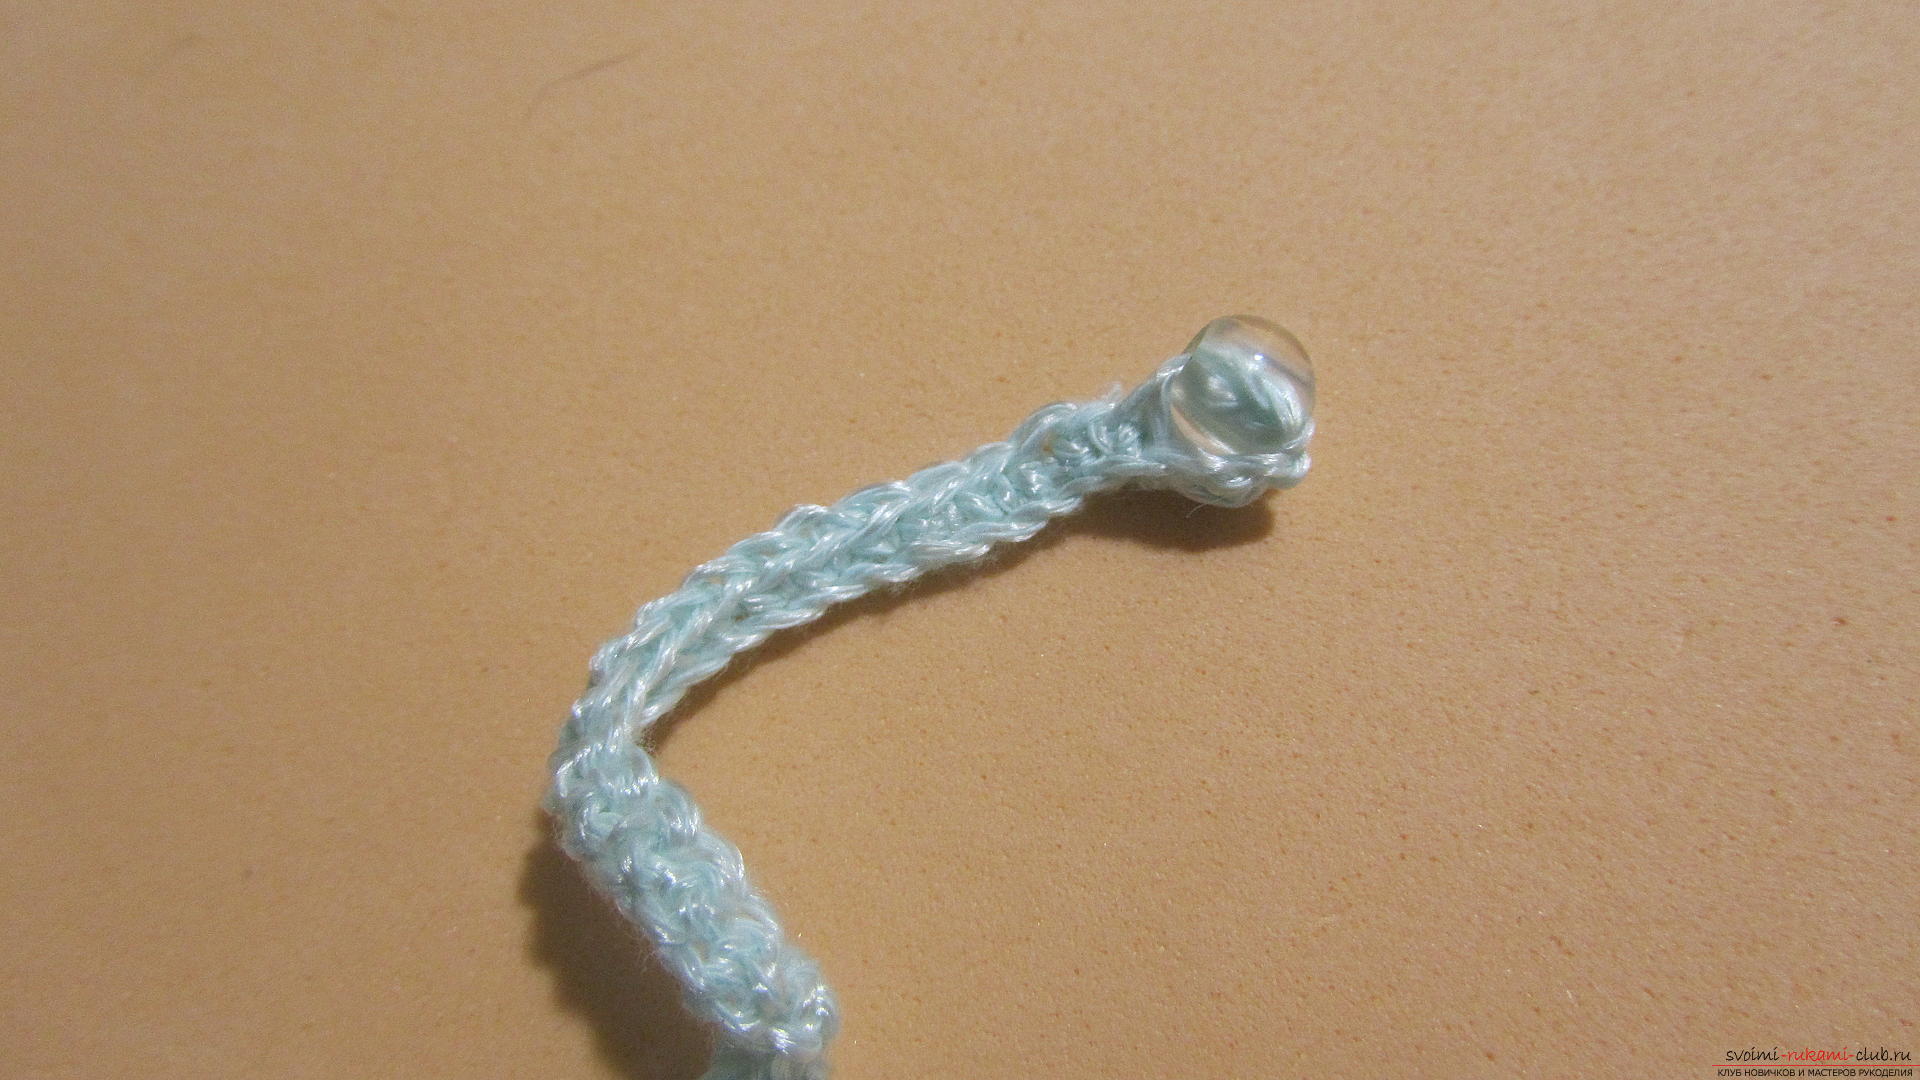 Our necklace is ready.
 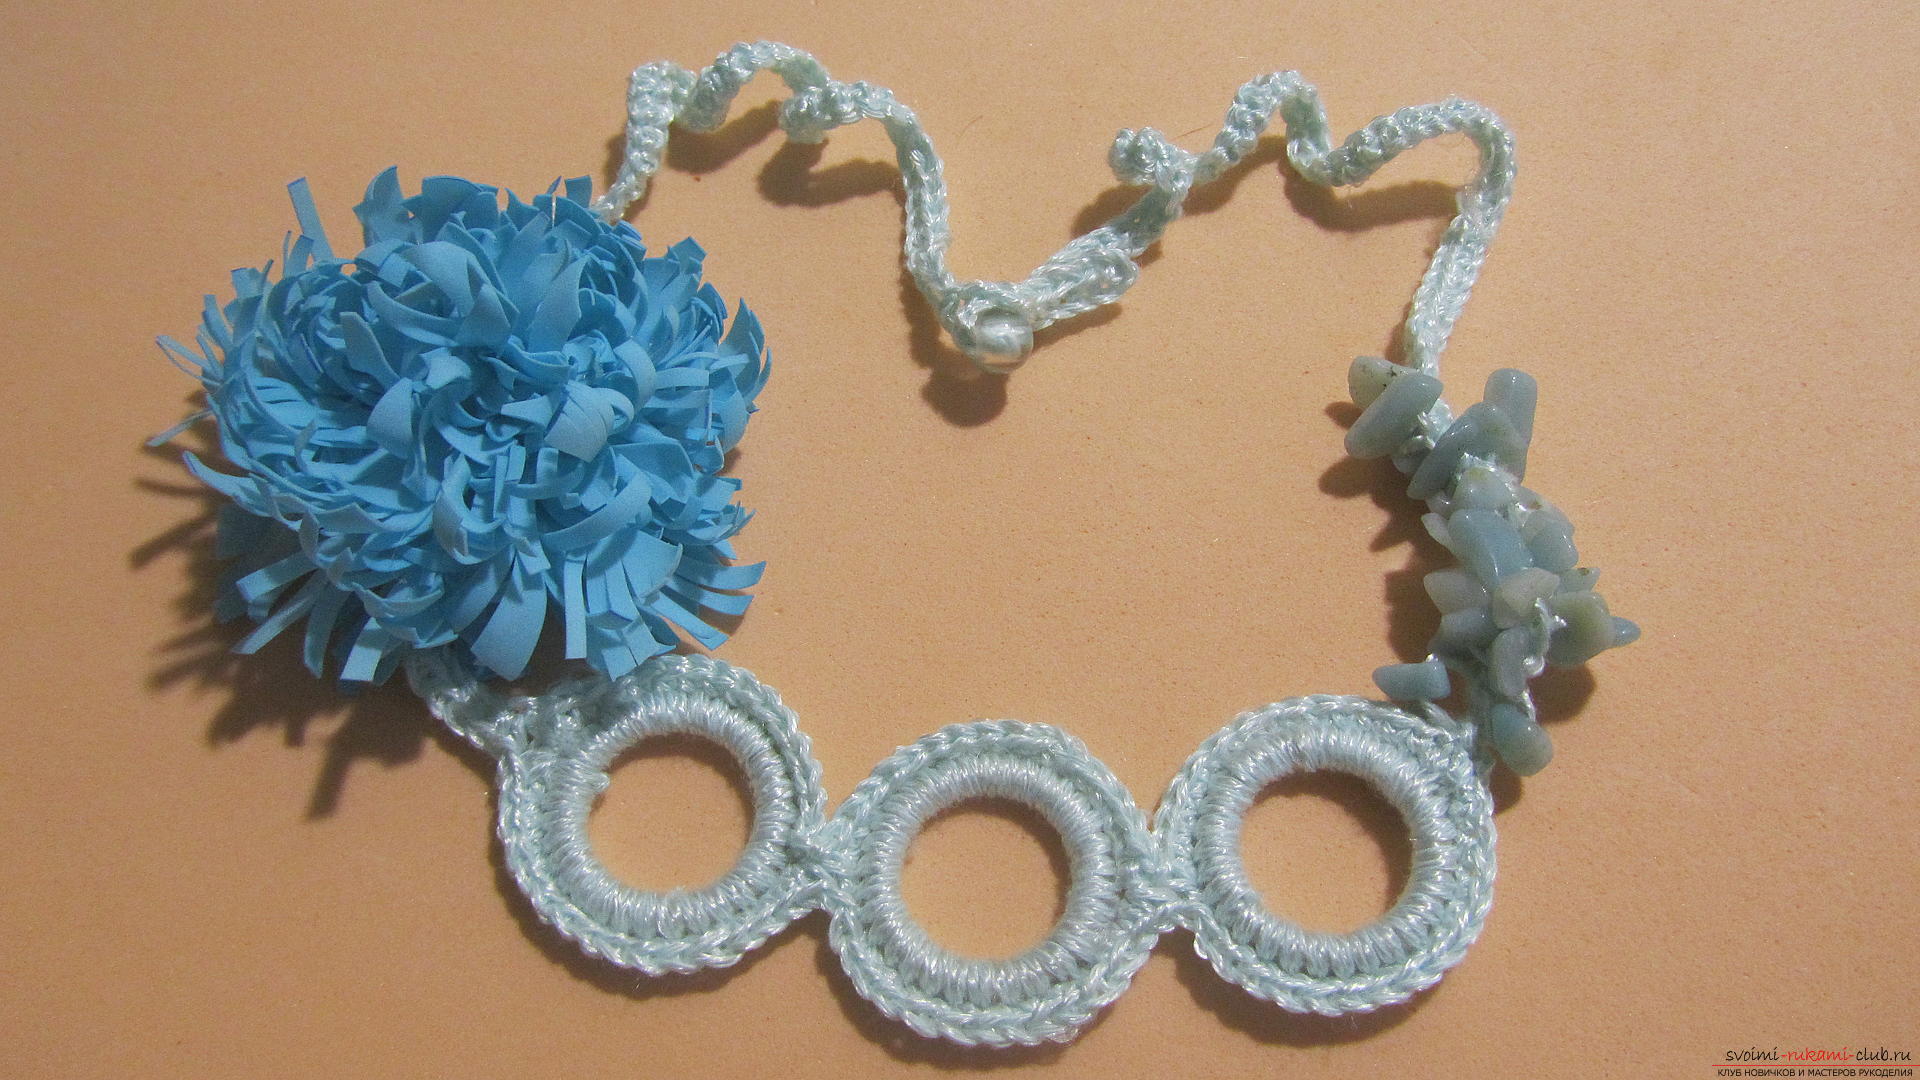 I use various threads, flowers and beads -You can make different necklaces that do not resemble each other. It is worth pofantazirovat over the order of the elements, of which there is decoration. Using woolen or thick acrylic threads - you can get an absolutely winter variant.