This master class with a diagram and a detailed description will teach you how to tie an owl with a crochet.
And in this master class, we will tie the snovel. After all, the owl today appears wherever possible. They print on postcards, mittens knit with them, make various crafts. Owls are now at the height of fashion! 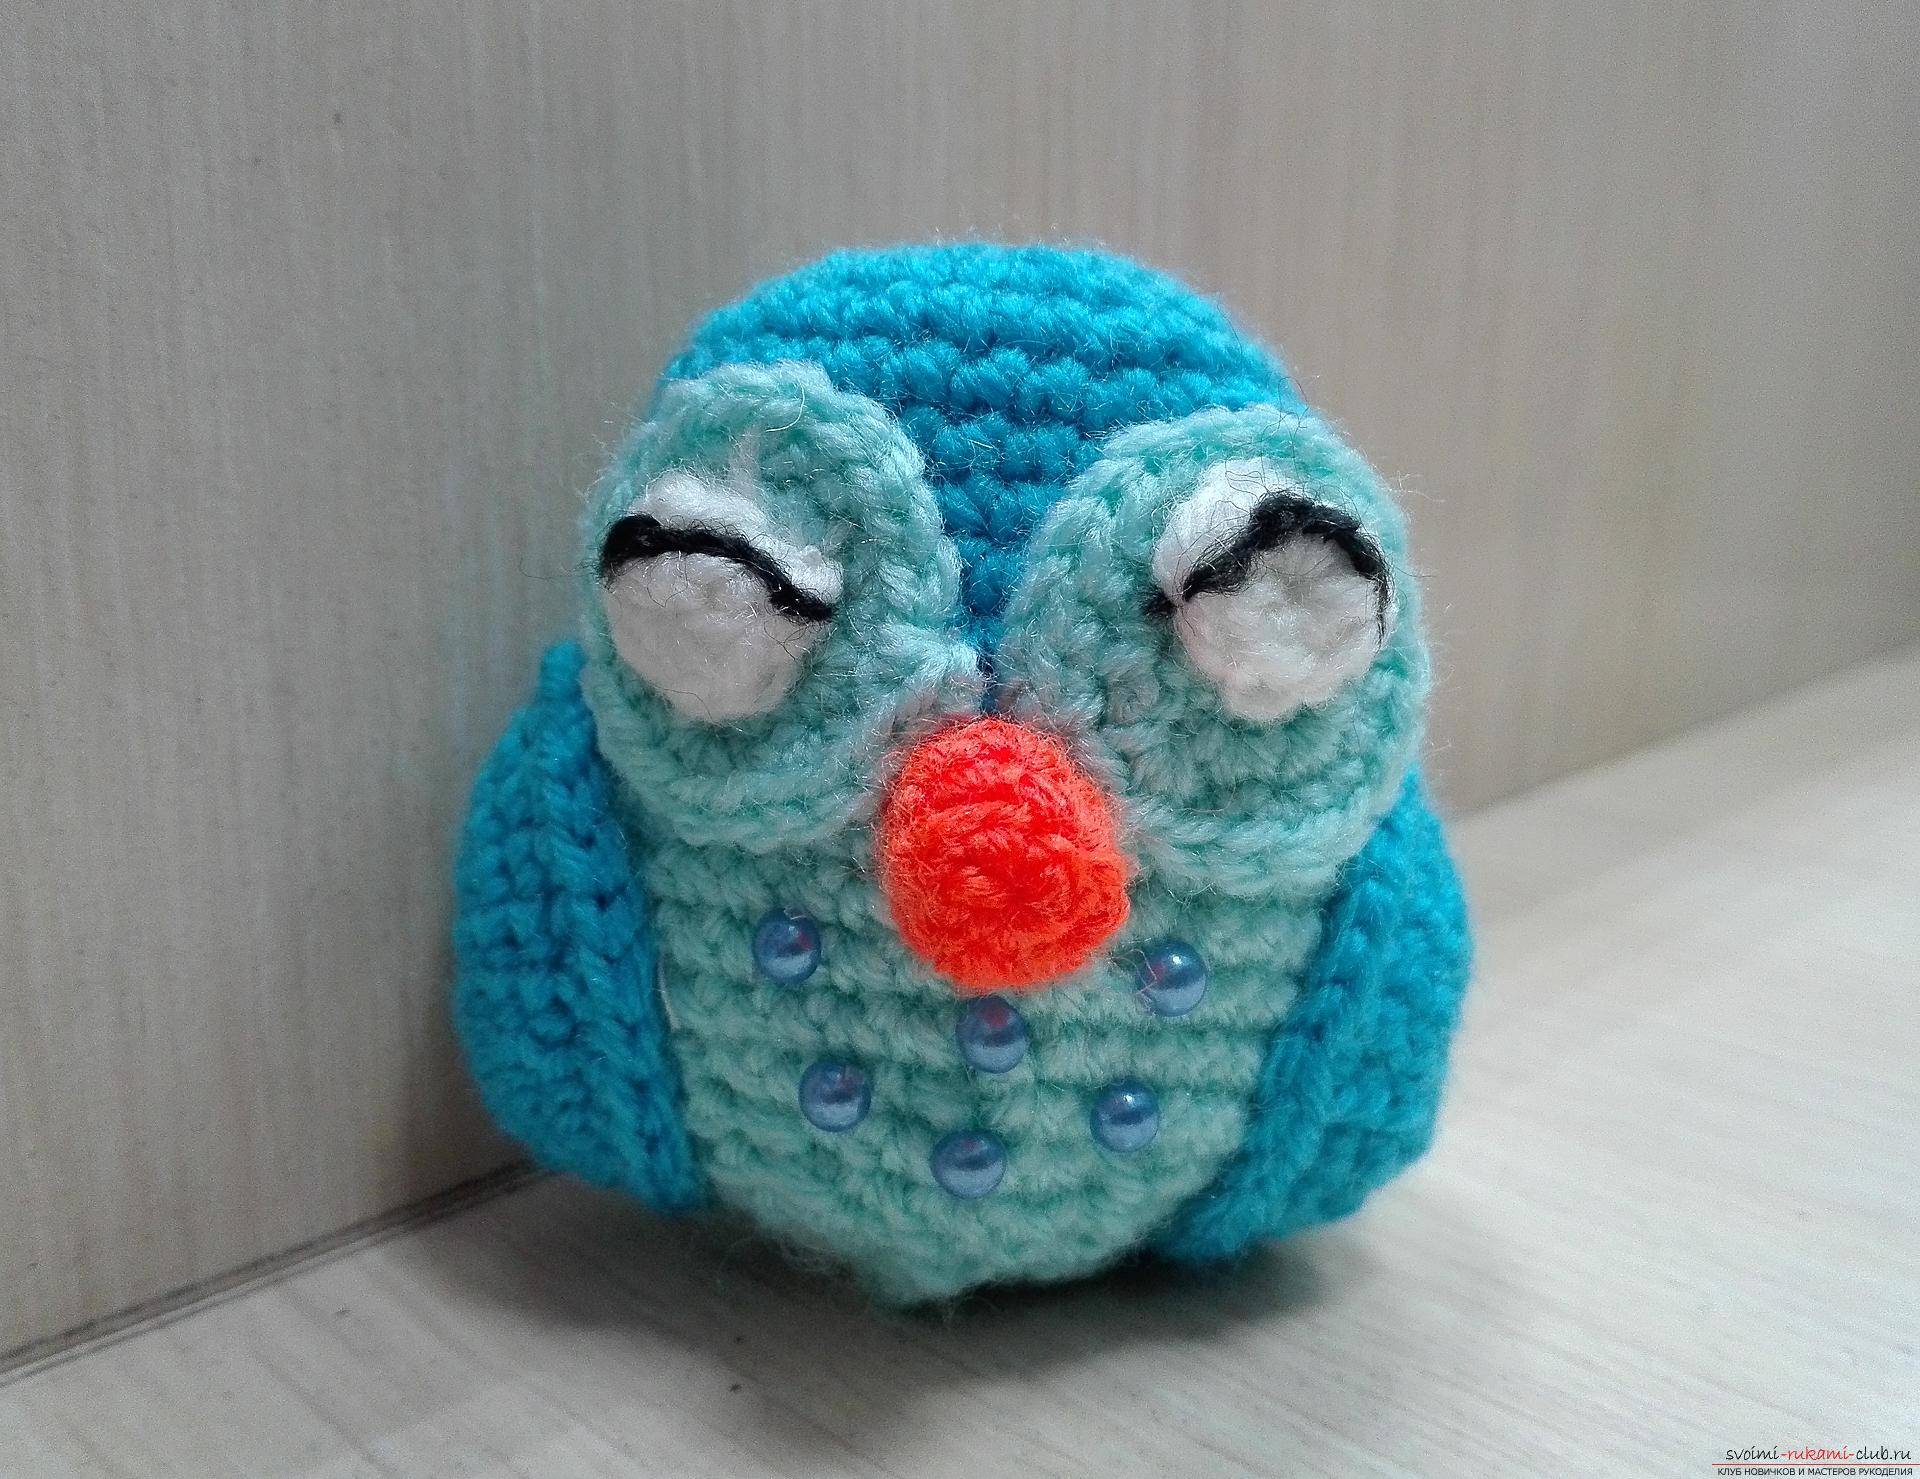 For work we will need:
- Threads of five colors: blue, blue, white, orange, black;
- Hook;
- Rhinestones;
- Thread and needle.
First we'll tie the torso for an owl. The thread is blue. Three loops and we will close them together. One lifting and knitting 6 pillars. without n-yes (short column without crochet). Next, we knit two pillars. without n-yes into each loop of the row that was previously. 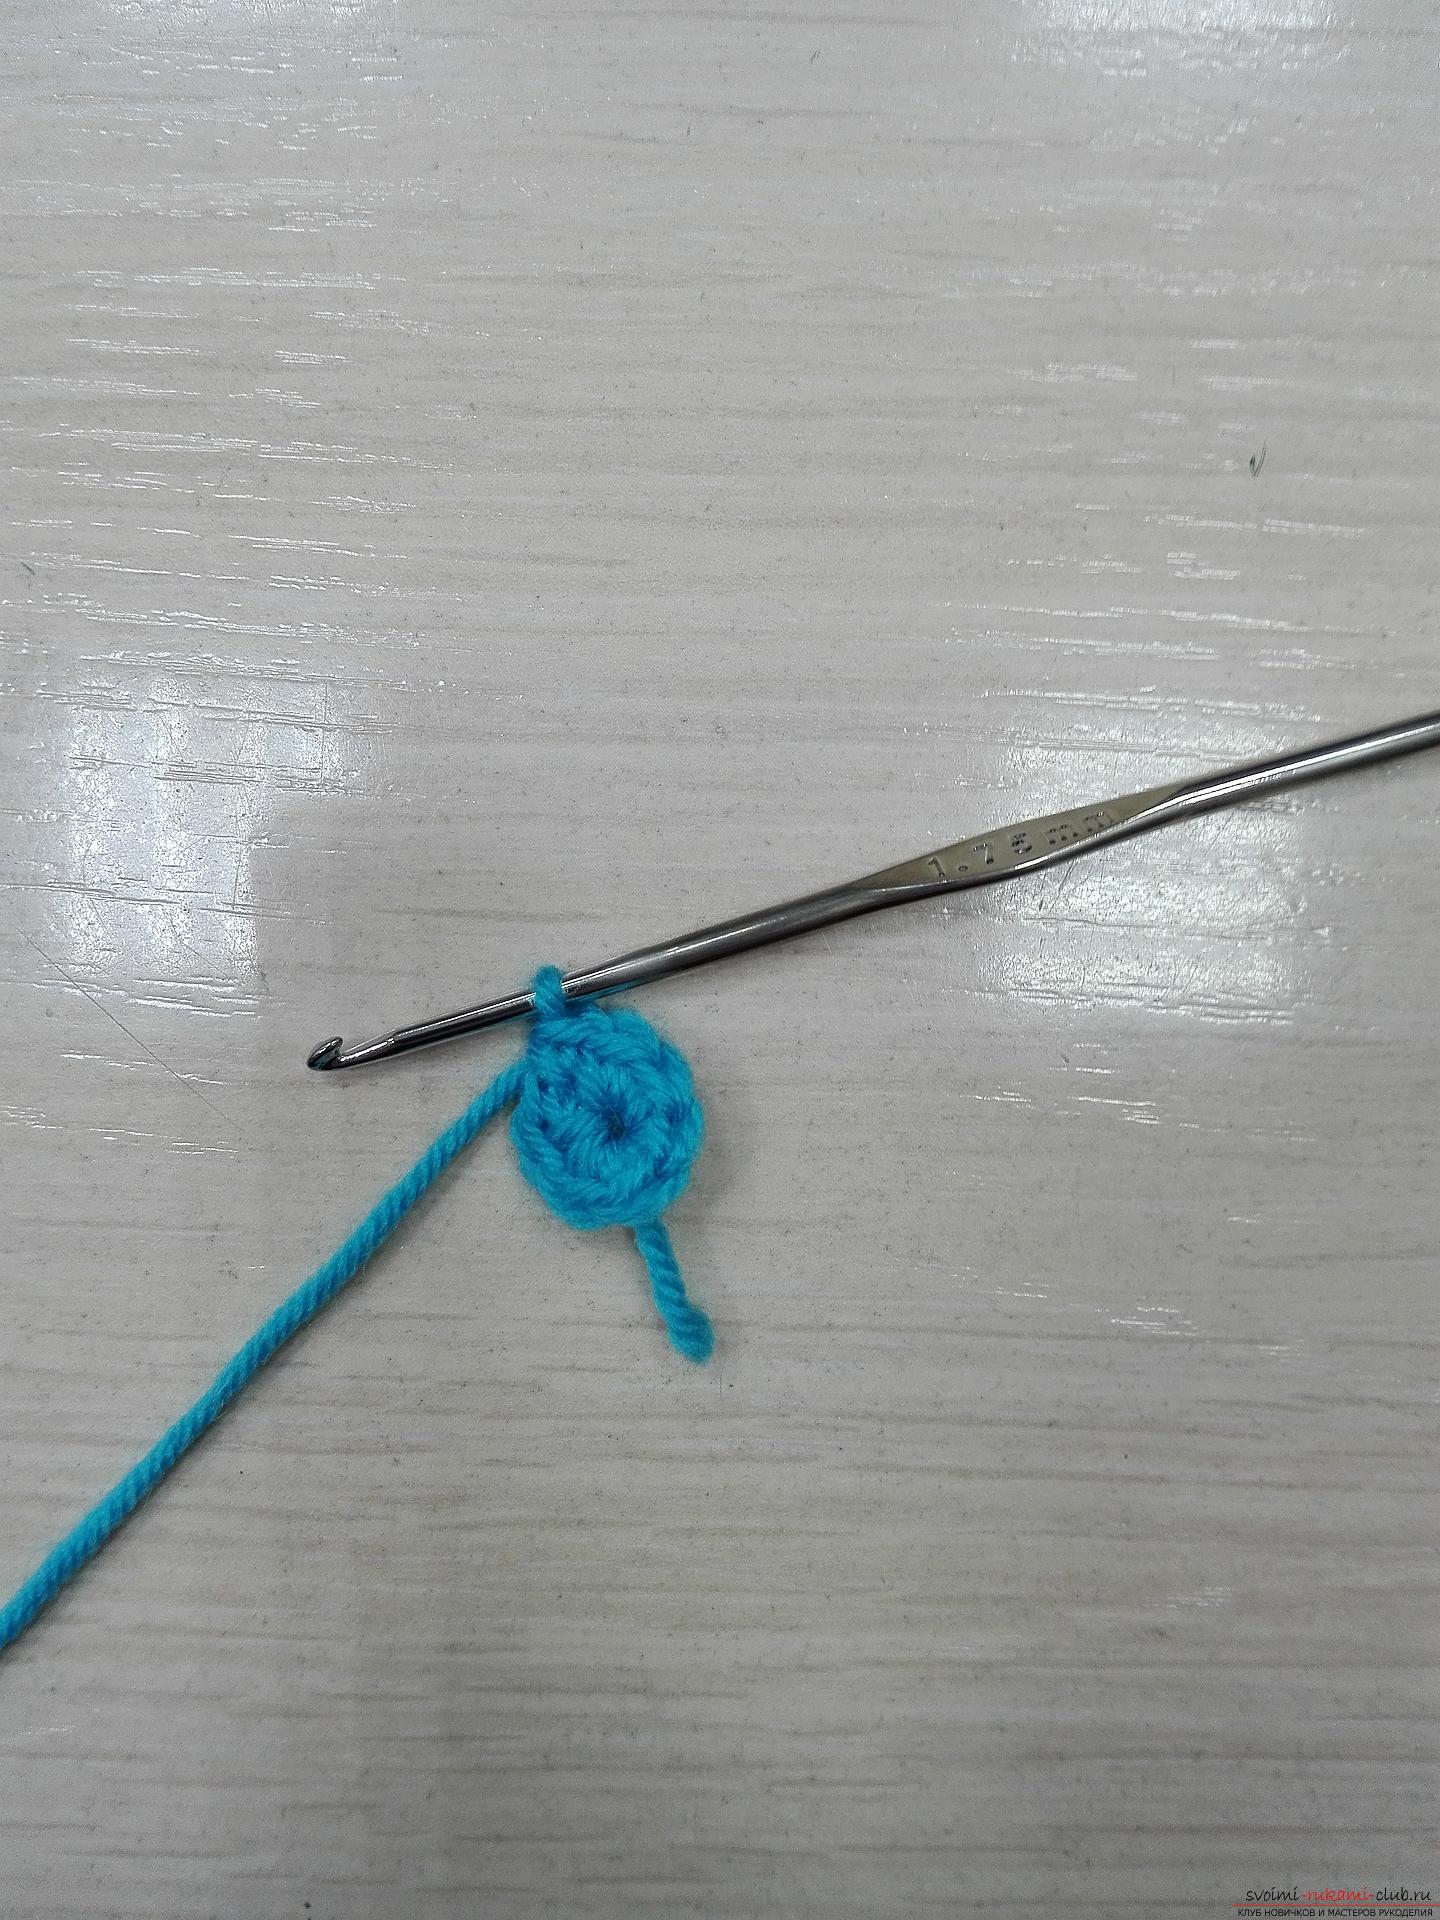 Now one pillar. without n-yes in one loop, and in the second already two columns. without n-yes, one column in a loop, then two columns in one loop. So take turns until the end of the series. This series is the reverse, first we are tying the 2 pillars. without n-yes in one loop, then one column. without n-yes into the loop, again two bars in the loop, one pole. without n-yes into the loop. Now we knit on the 1st pillar. without n-yes in one loop.
 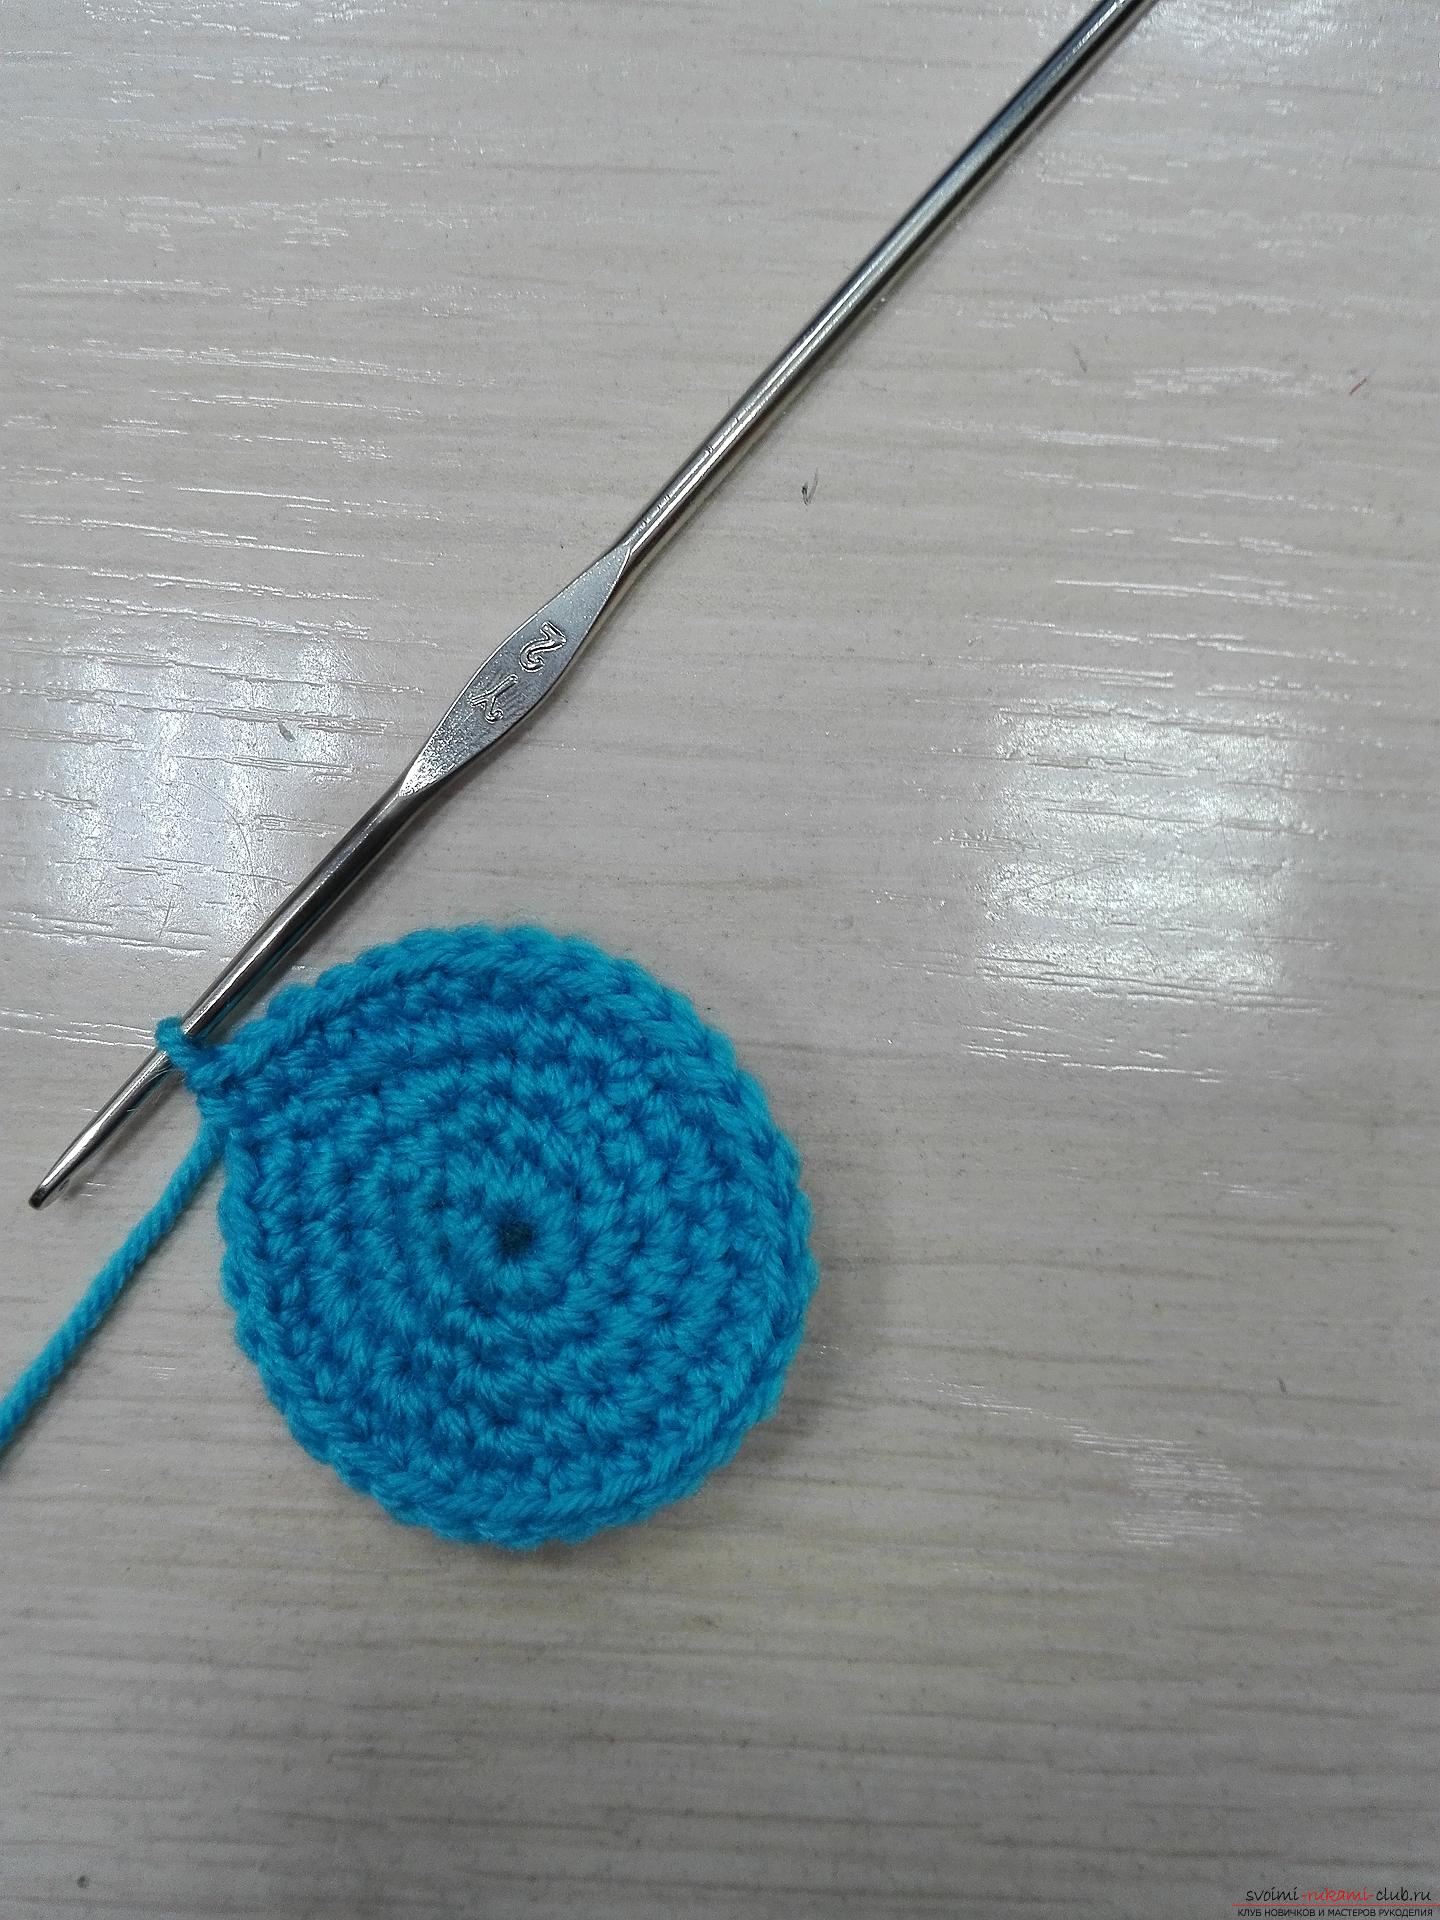 Now we work without any changes to the 7 rows, to the 1st column without the crochet in the loop.
 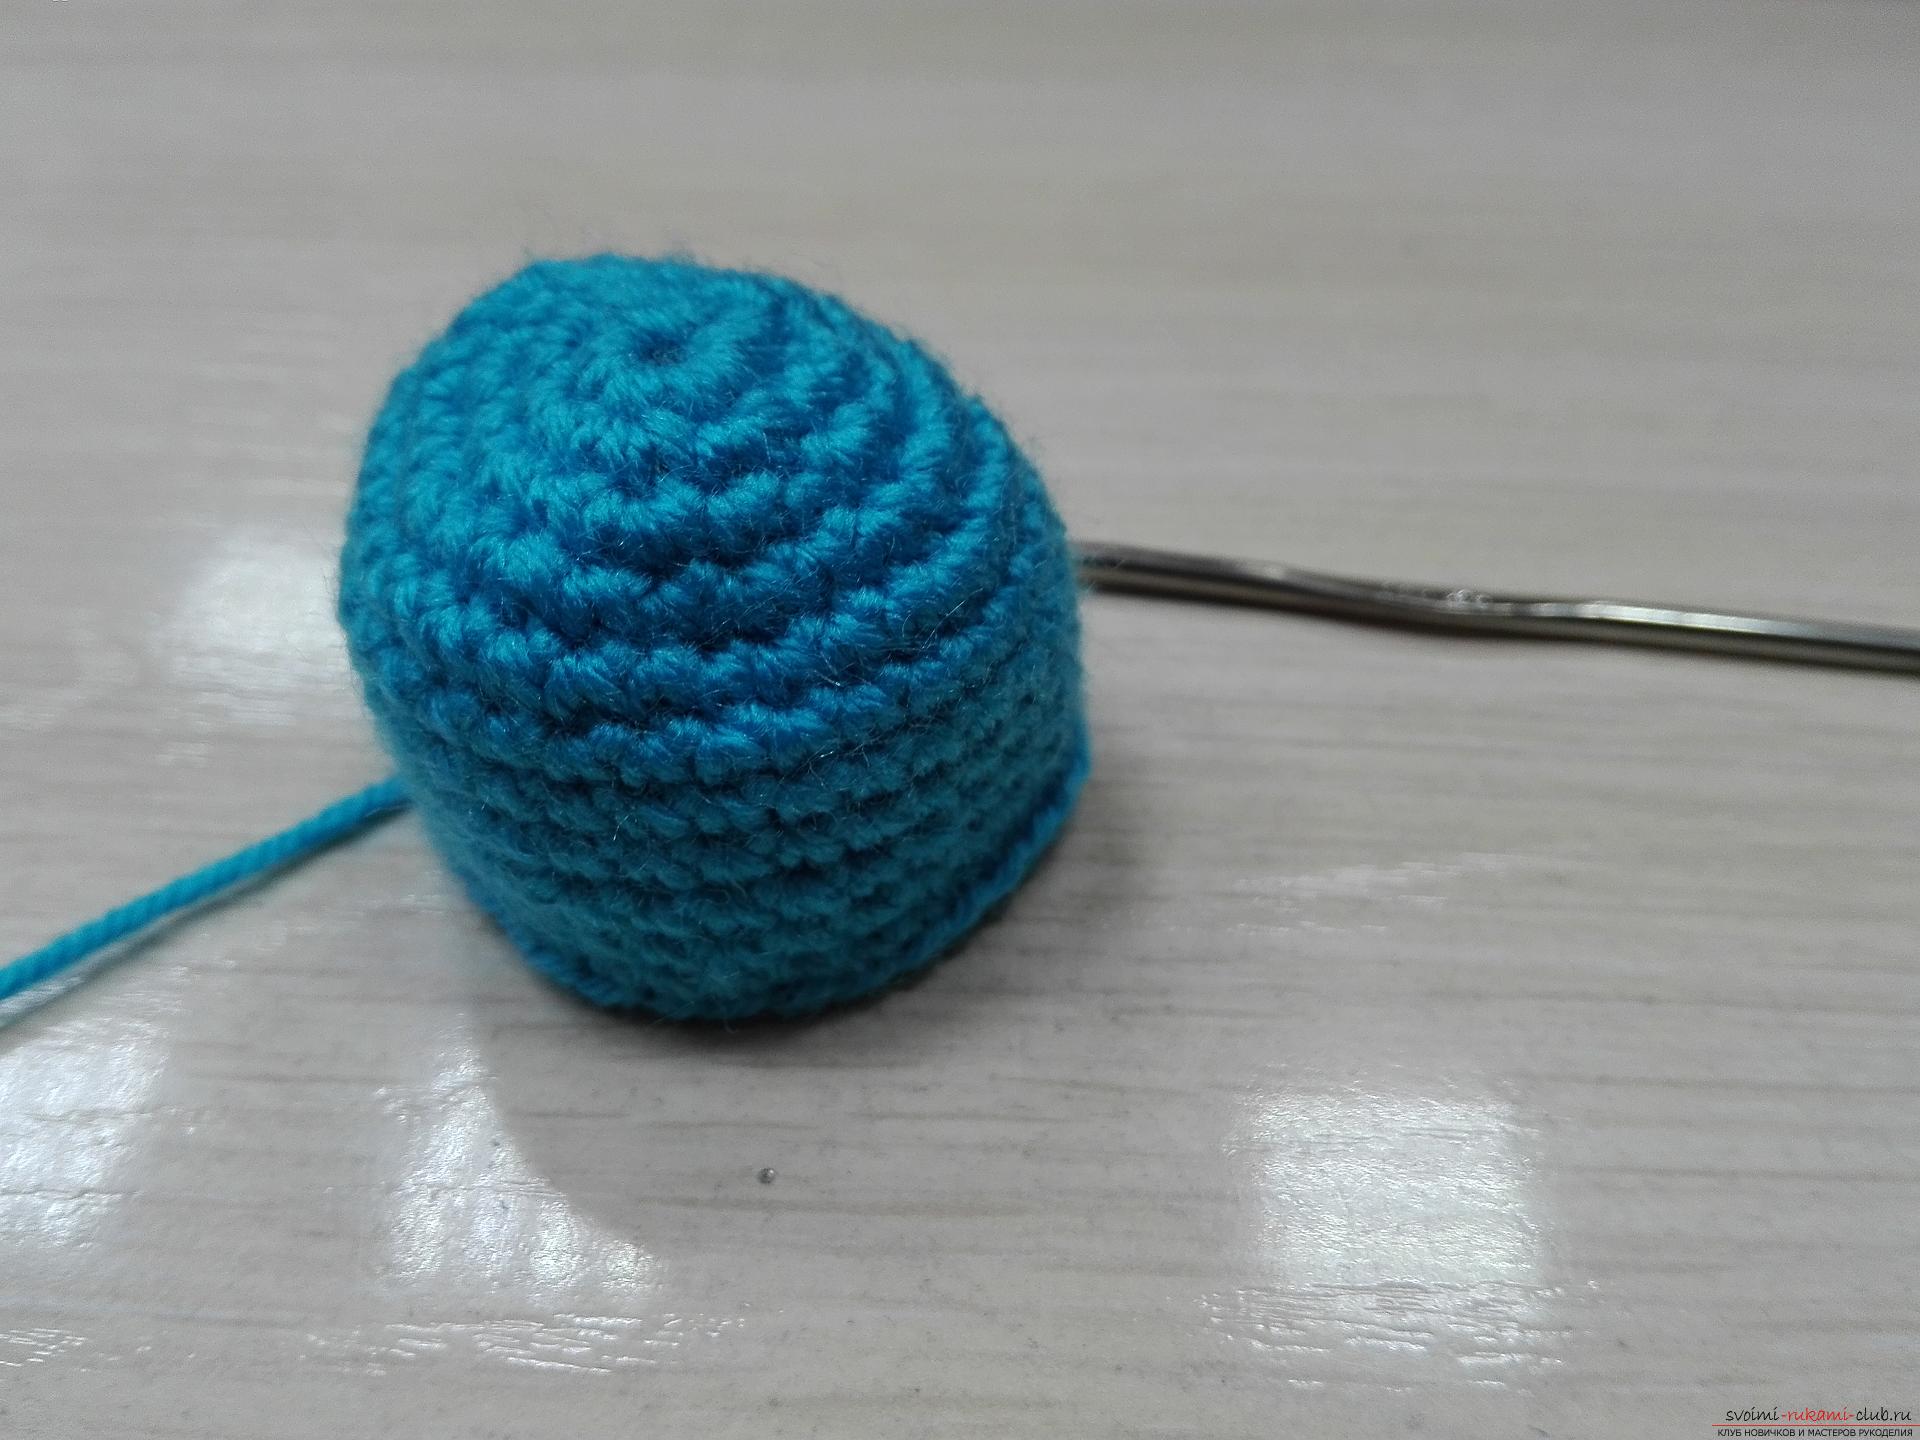 Next, take a blue thread and continue to knit three more rows without changes, that is, on the 1st pillar. without n-yes in each loop.
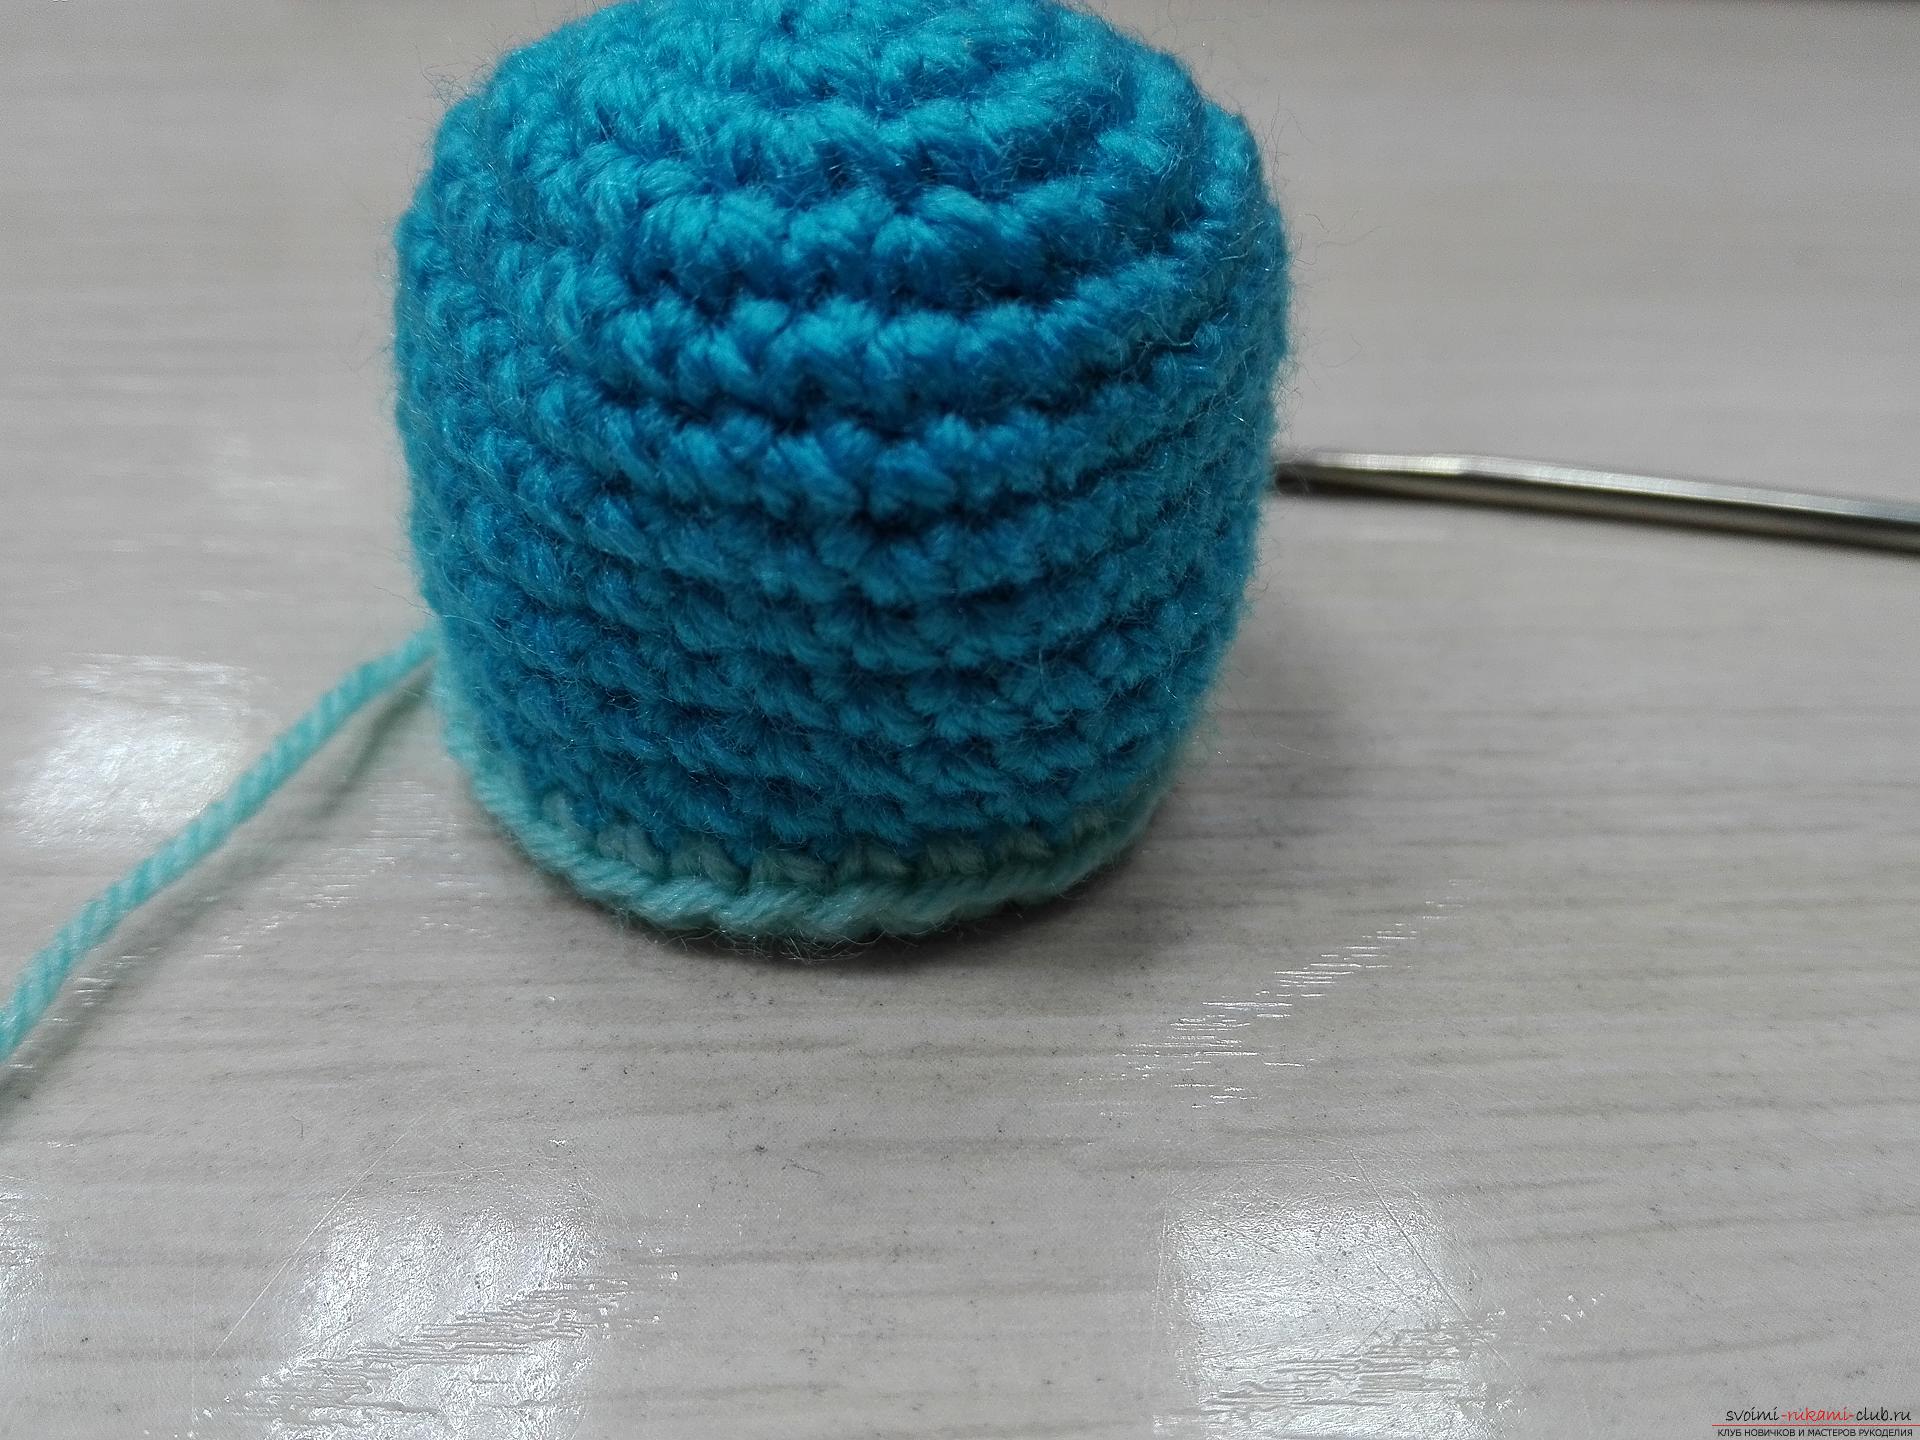
 Now we begin to make adjustments. In each row we make four adjustments. And when we have a very small hole left, fill the trunk of the owl with a sintepon.
 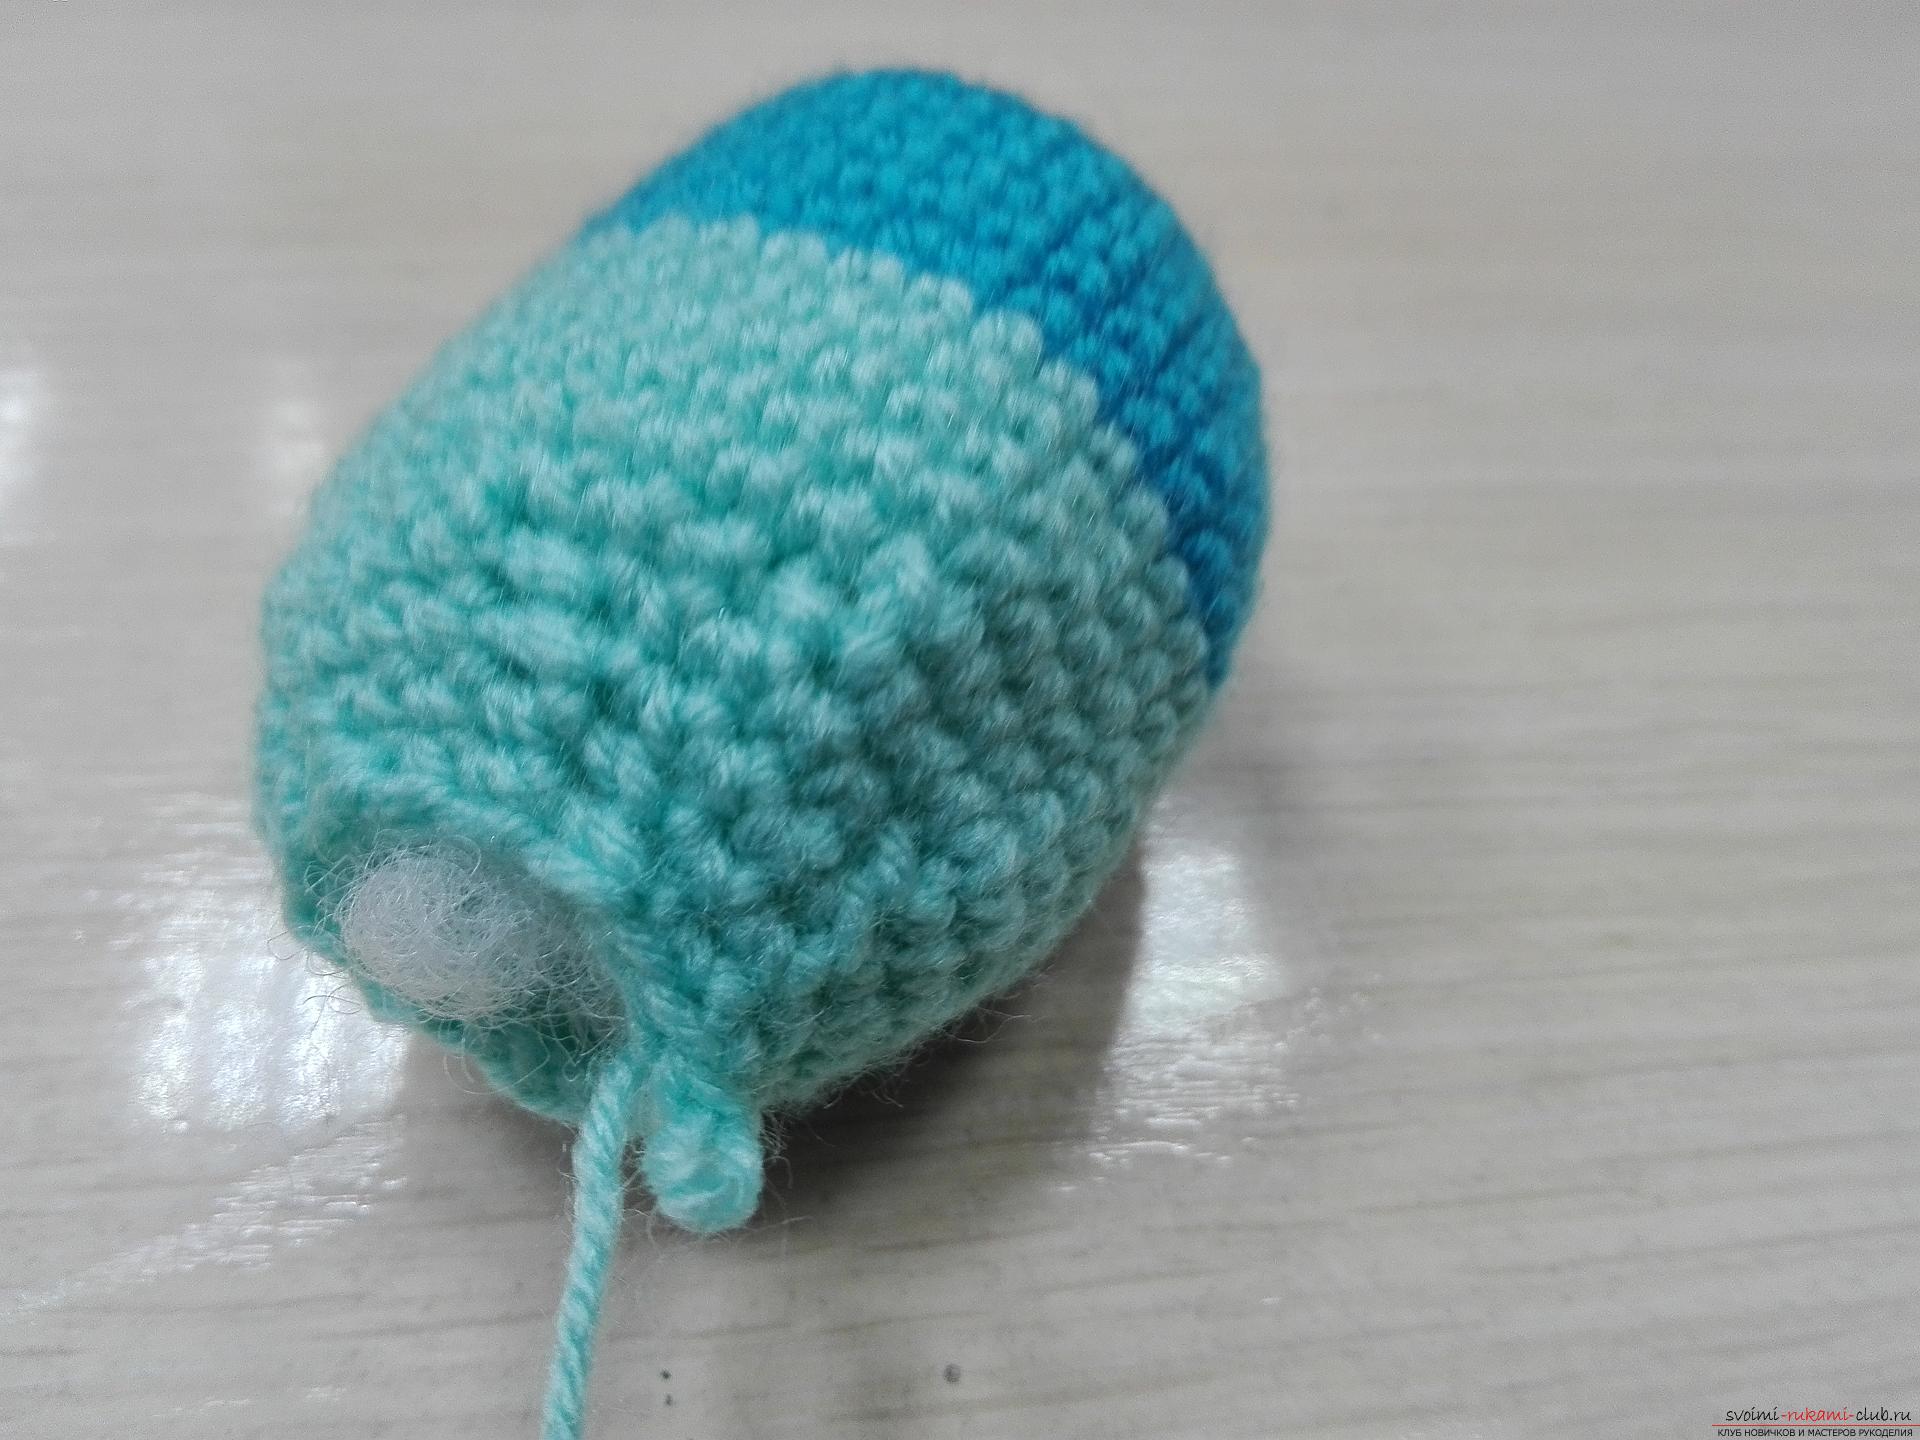 And he ends up knitting his torso.
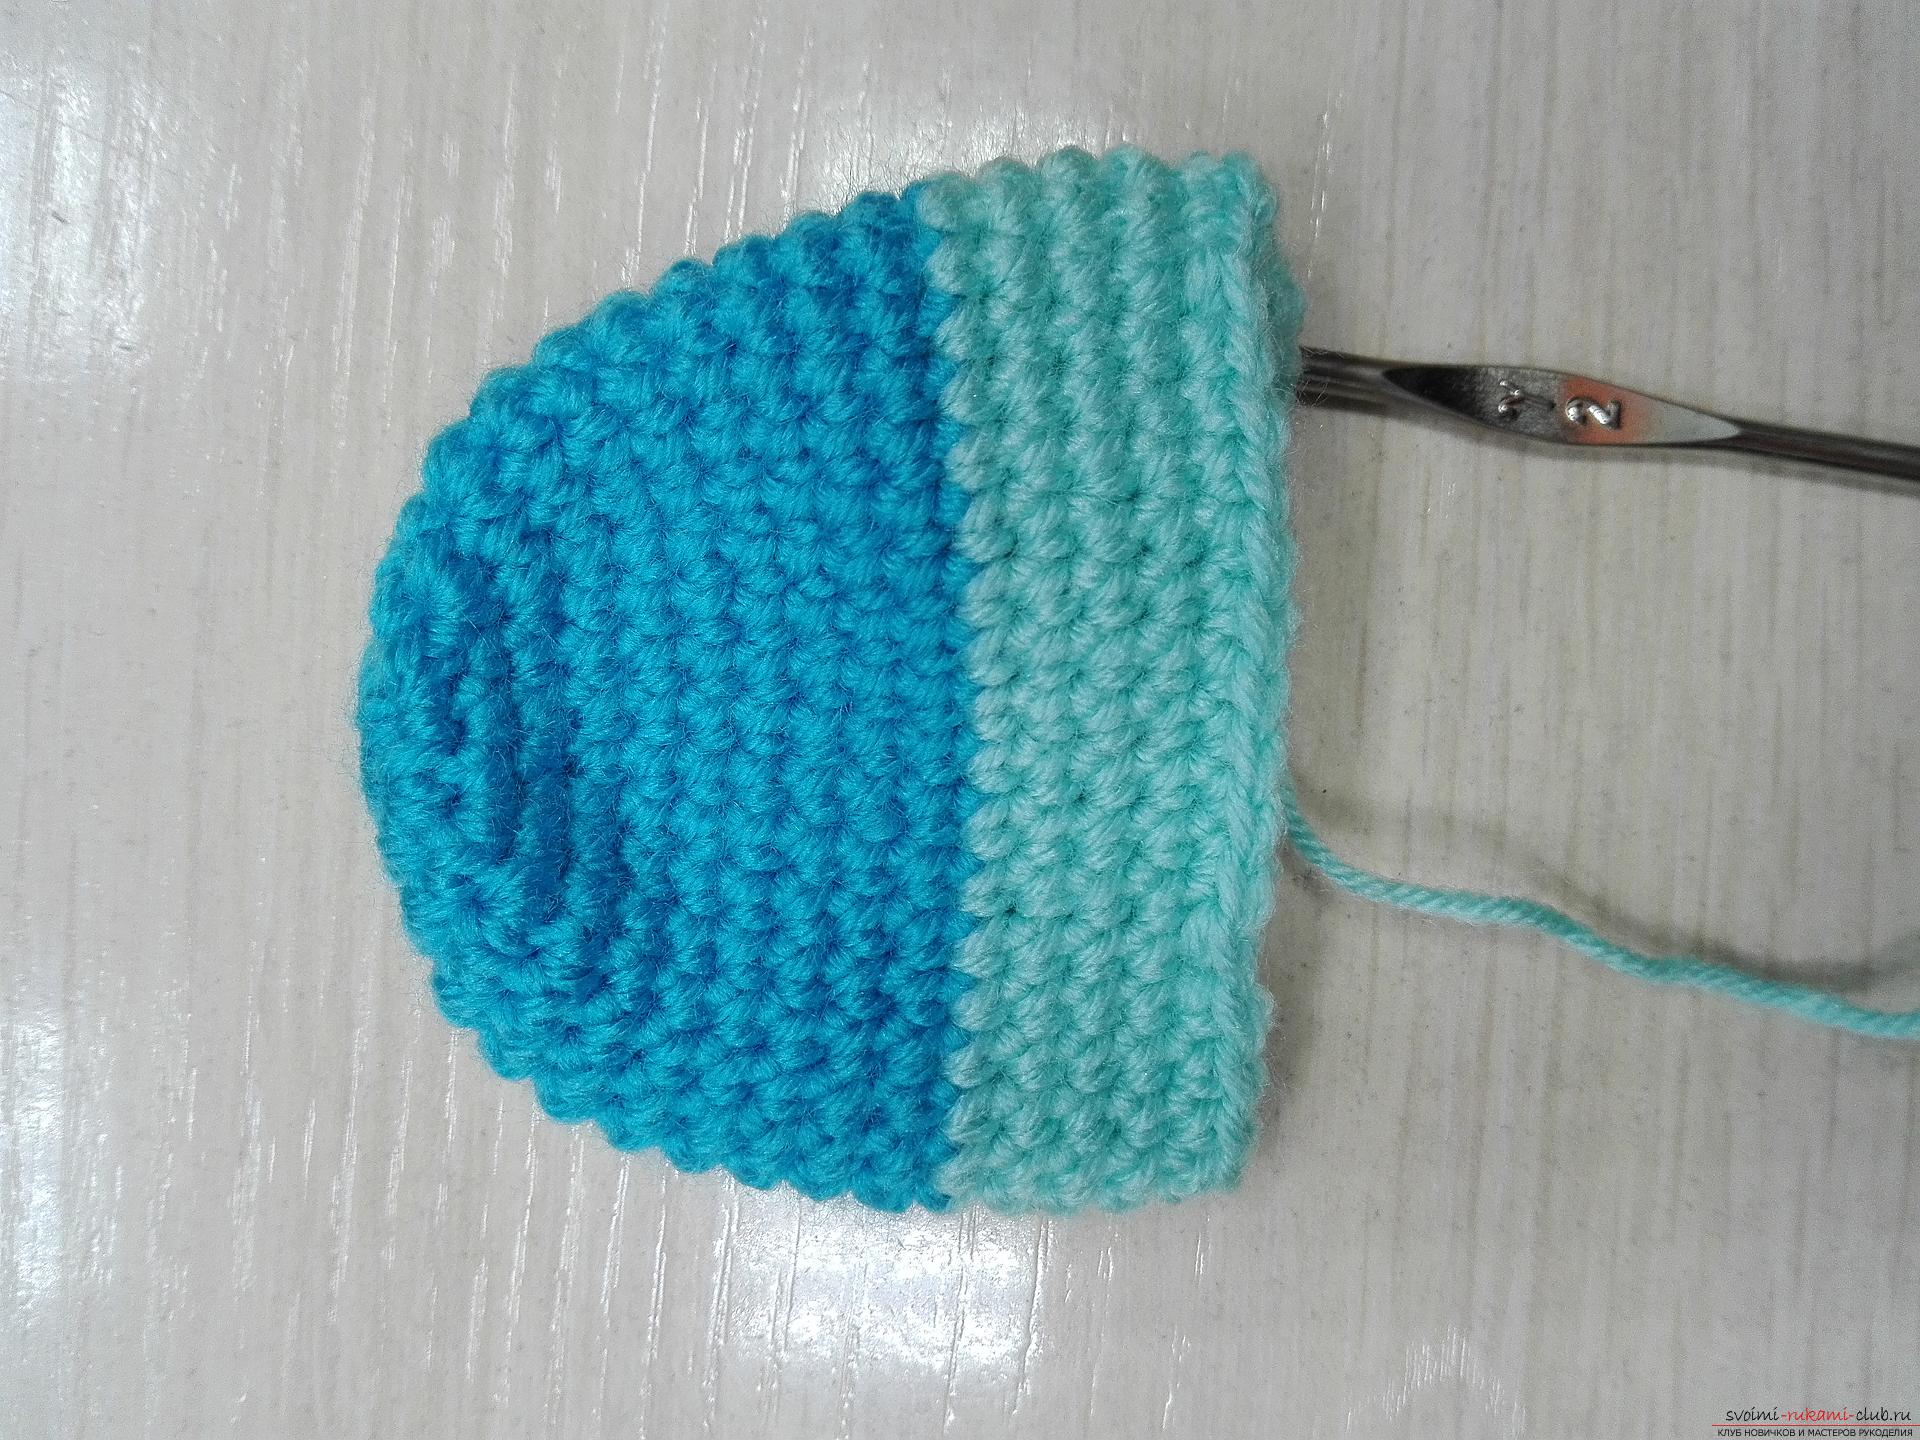
 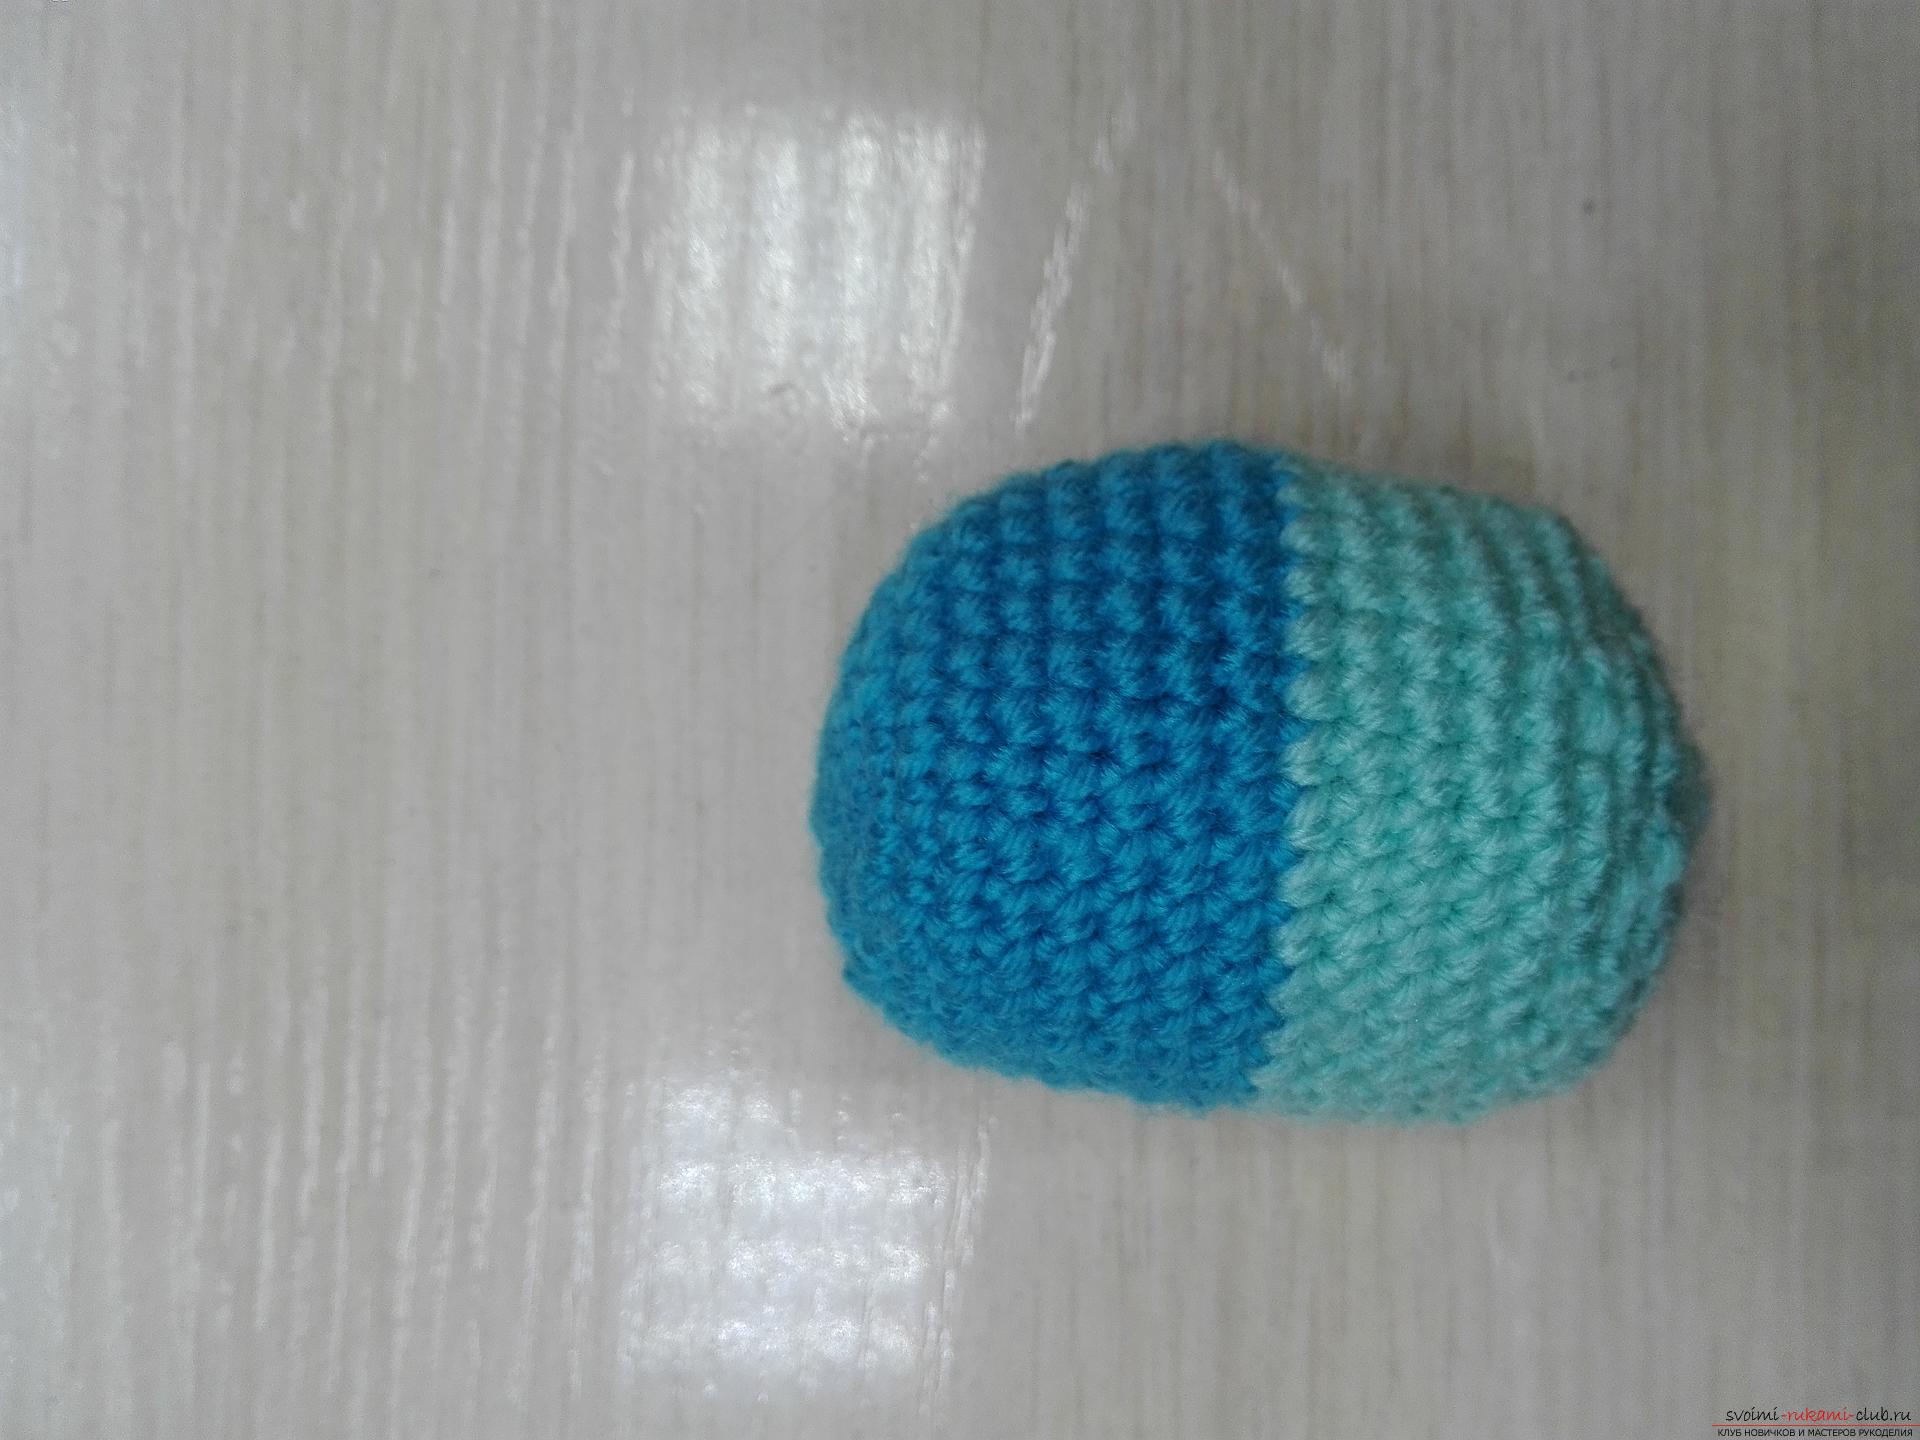 The main work is done. But we still have a lot of details for the little girl. We proceed to the implementation of the wings. We again use a blue thread. We select three loops and connect them into a ring. Lifting loop and we will fasten inside a circle six pillars. without n-yes.
 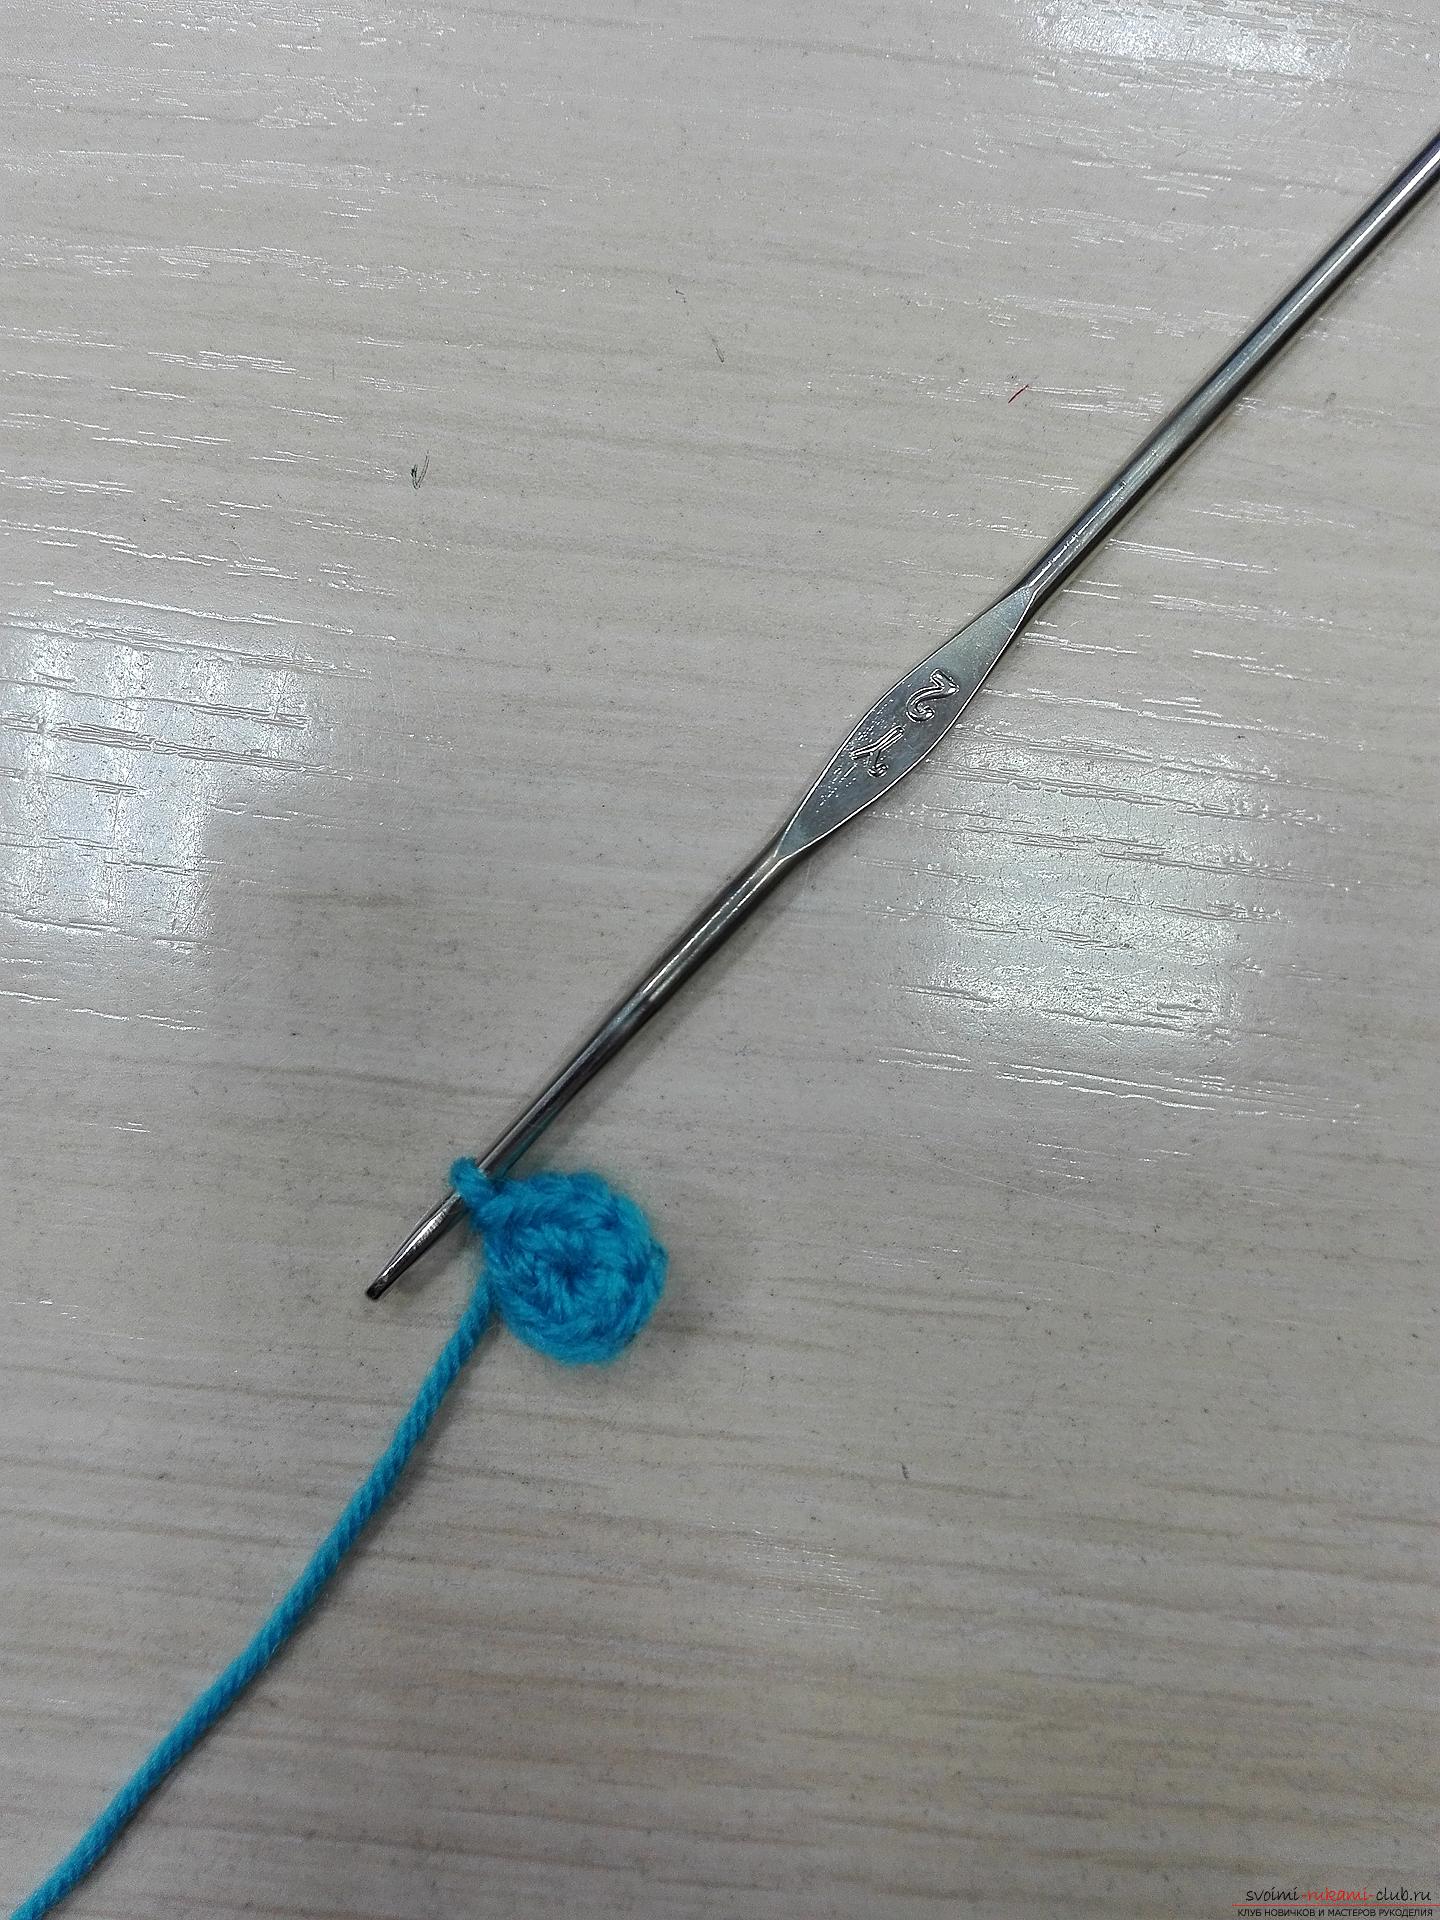 Then we knit two columns. without n-yes into each loop of the row that went before.
 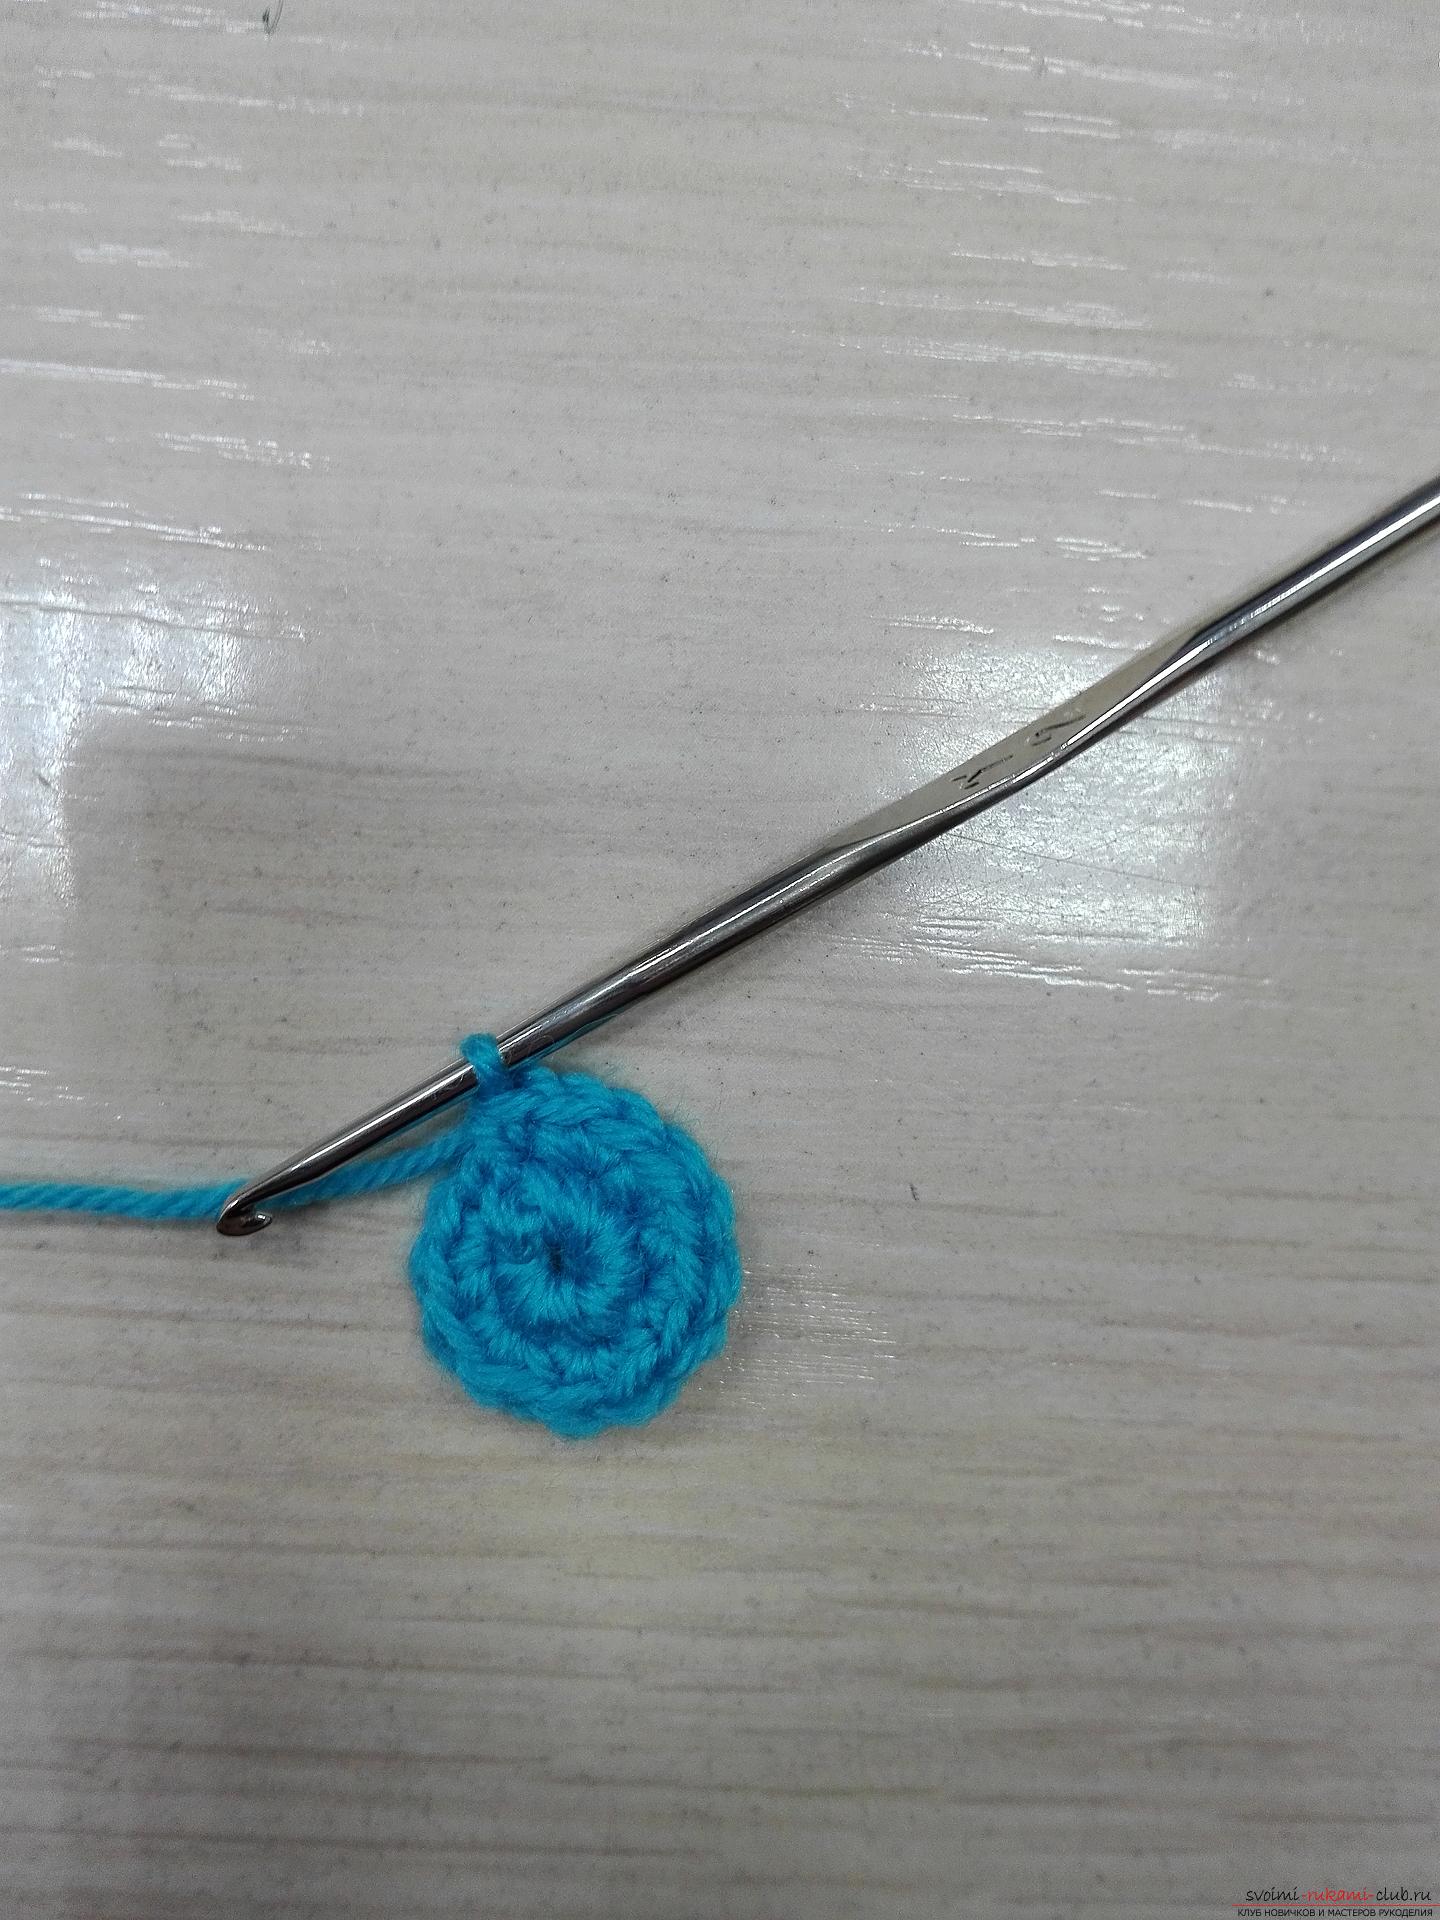 Then one pillar. without n-yes in the loop, two pillars. without n-yes in the next loop, again one column. without n-yes, two pillars. without n-yes. So we alternate.
 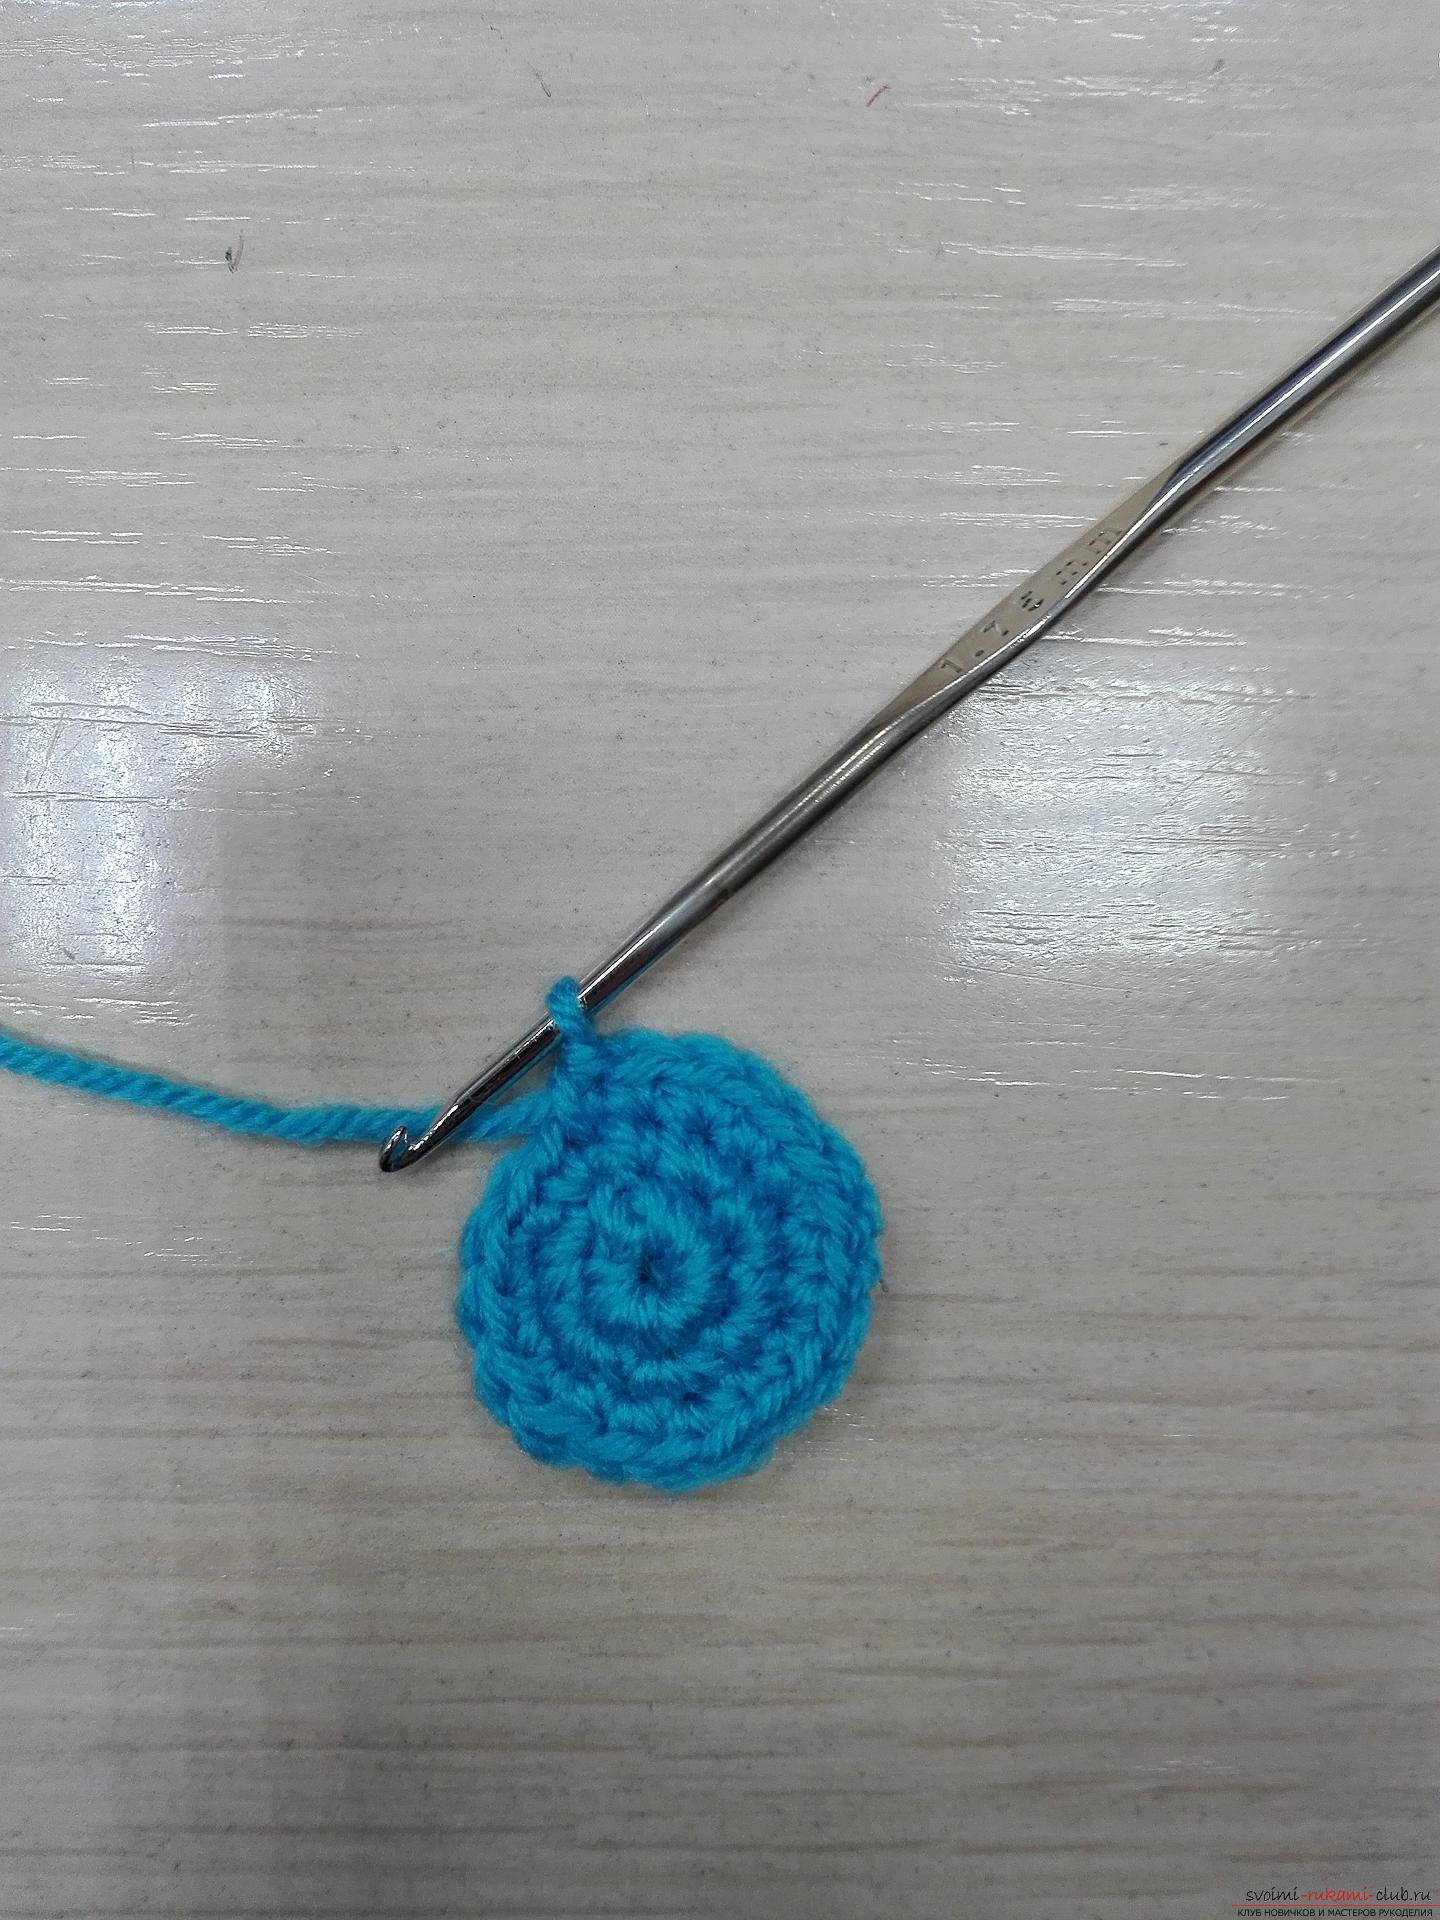 Now on the 1st pillar. without n-yes in each loop.
 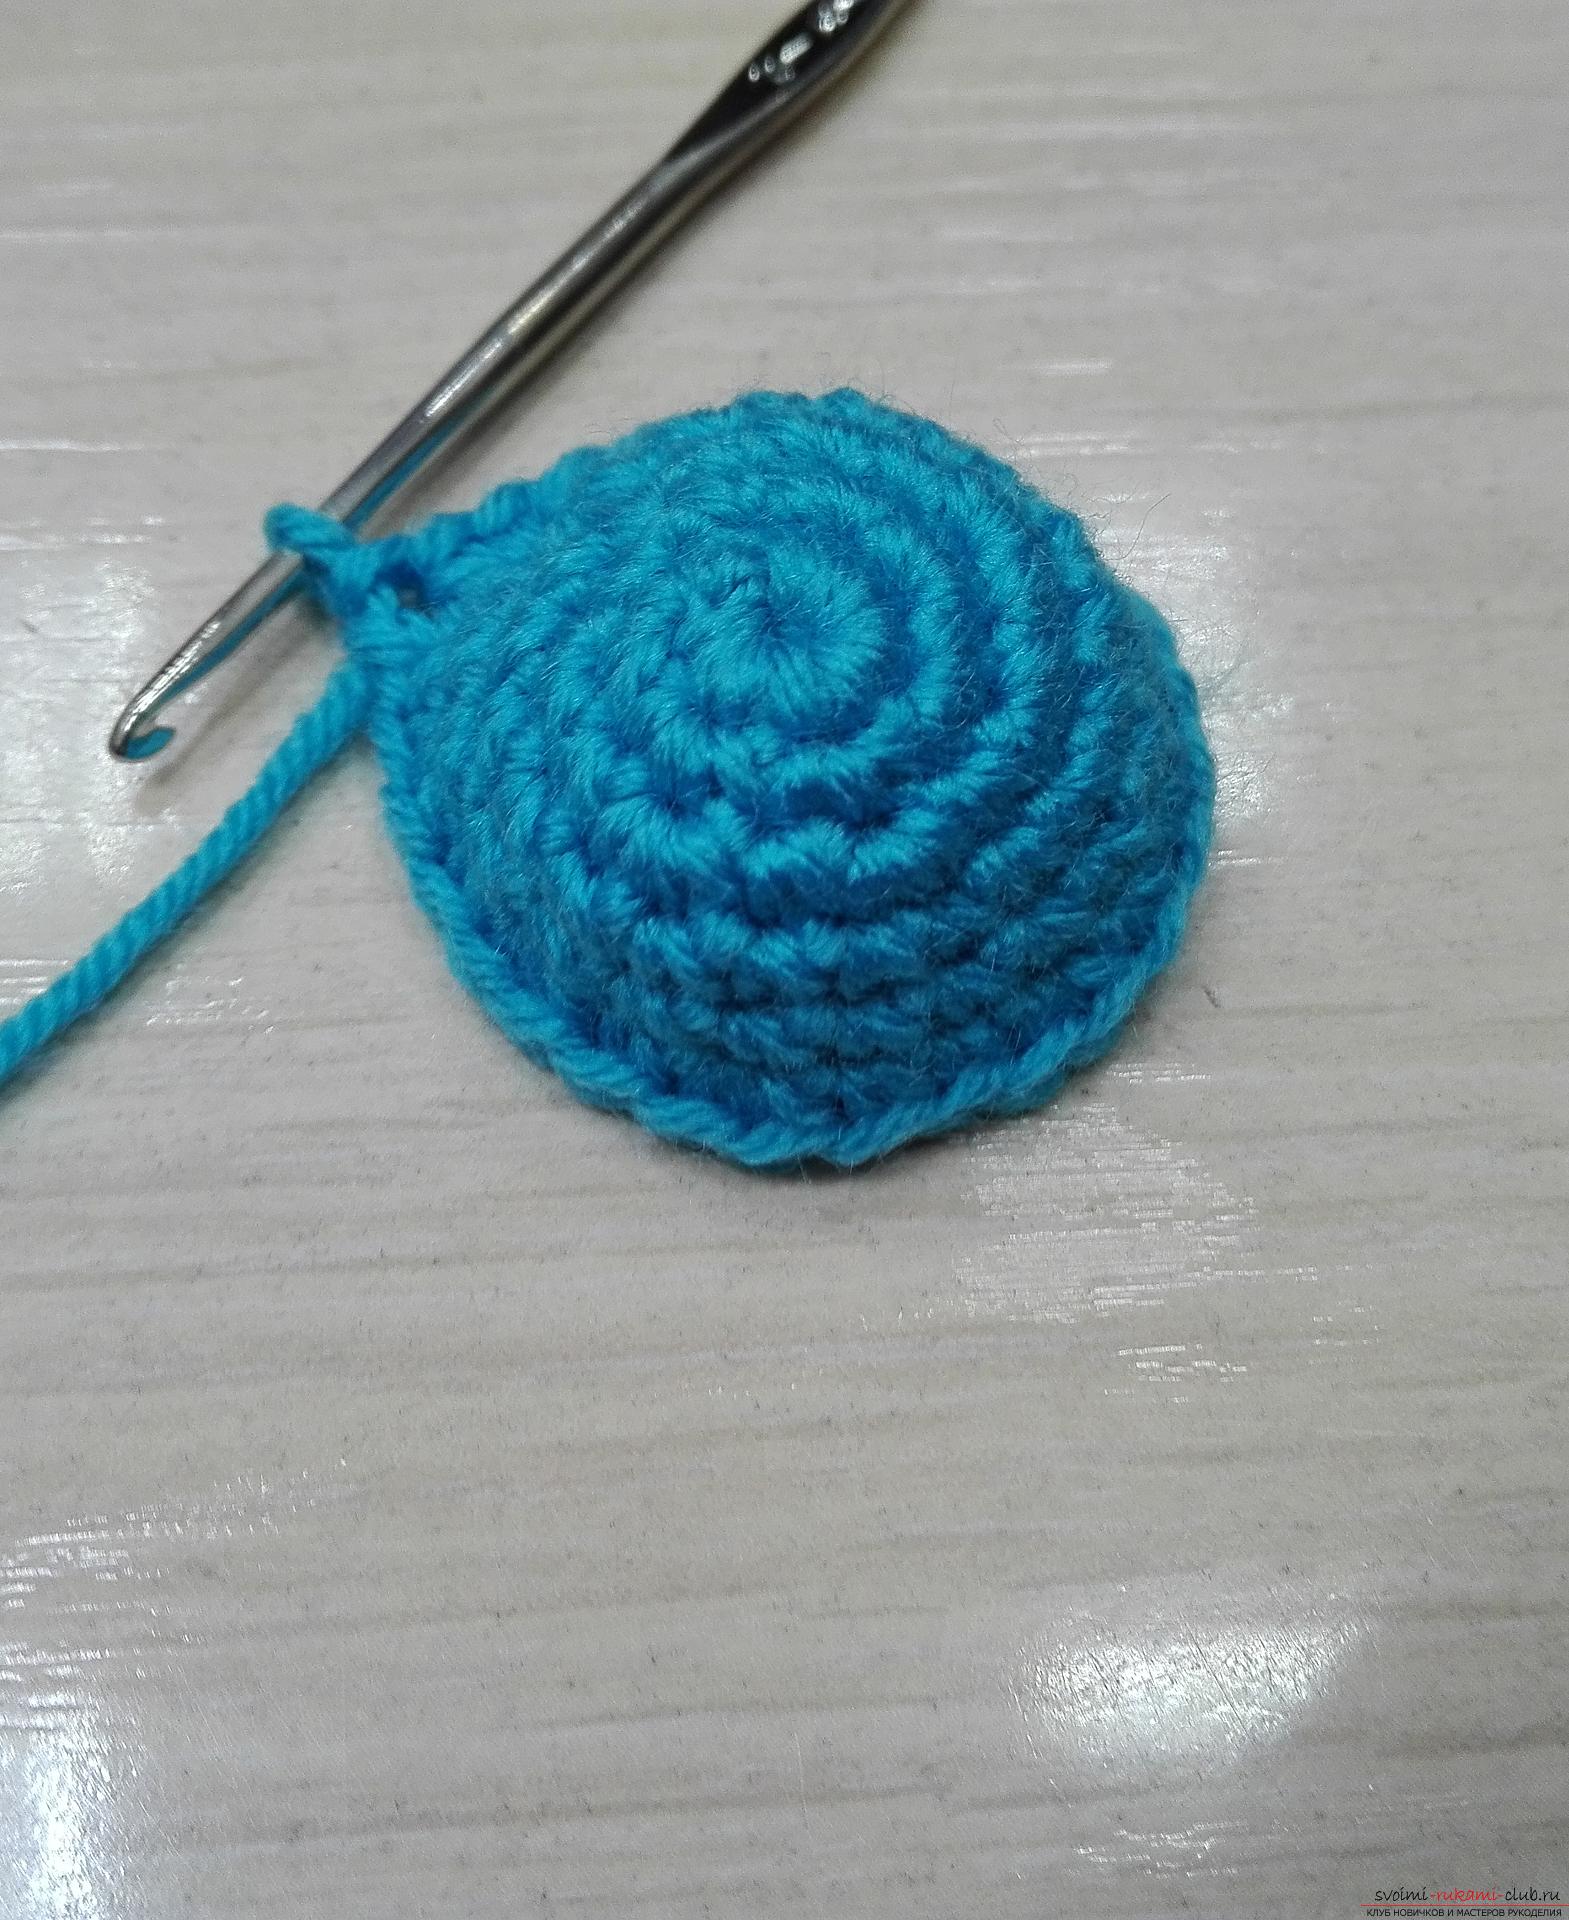 And the last row we knit so, one pillar. without n-yes into the loop, then two columns. without n-yes into the loop.
 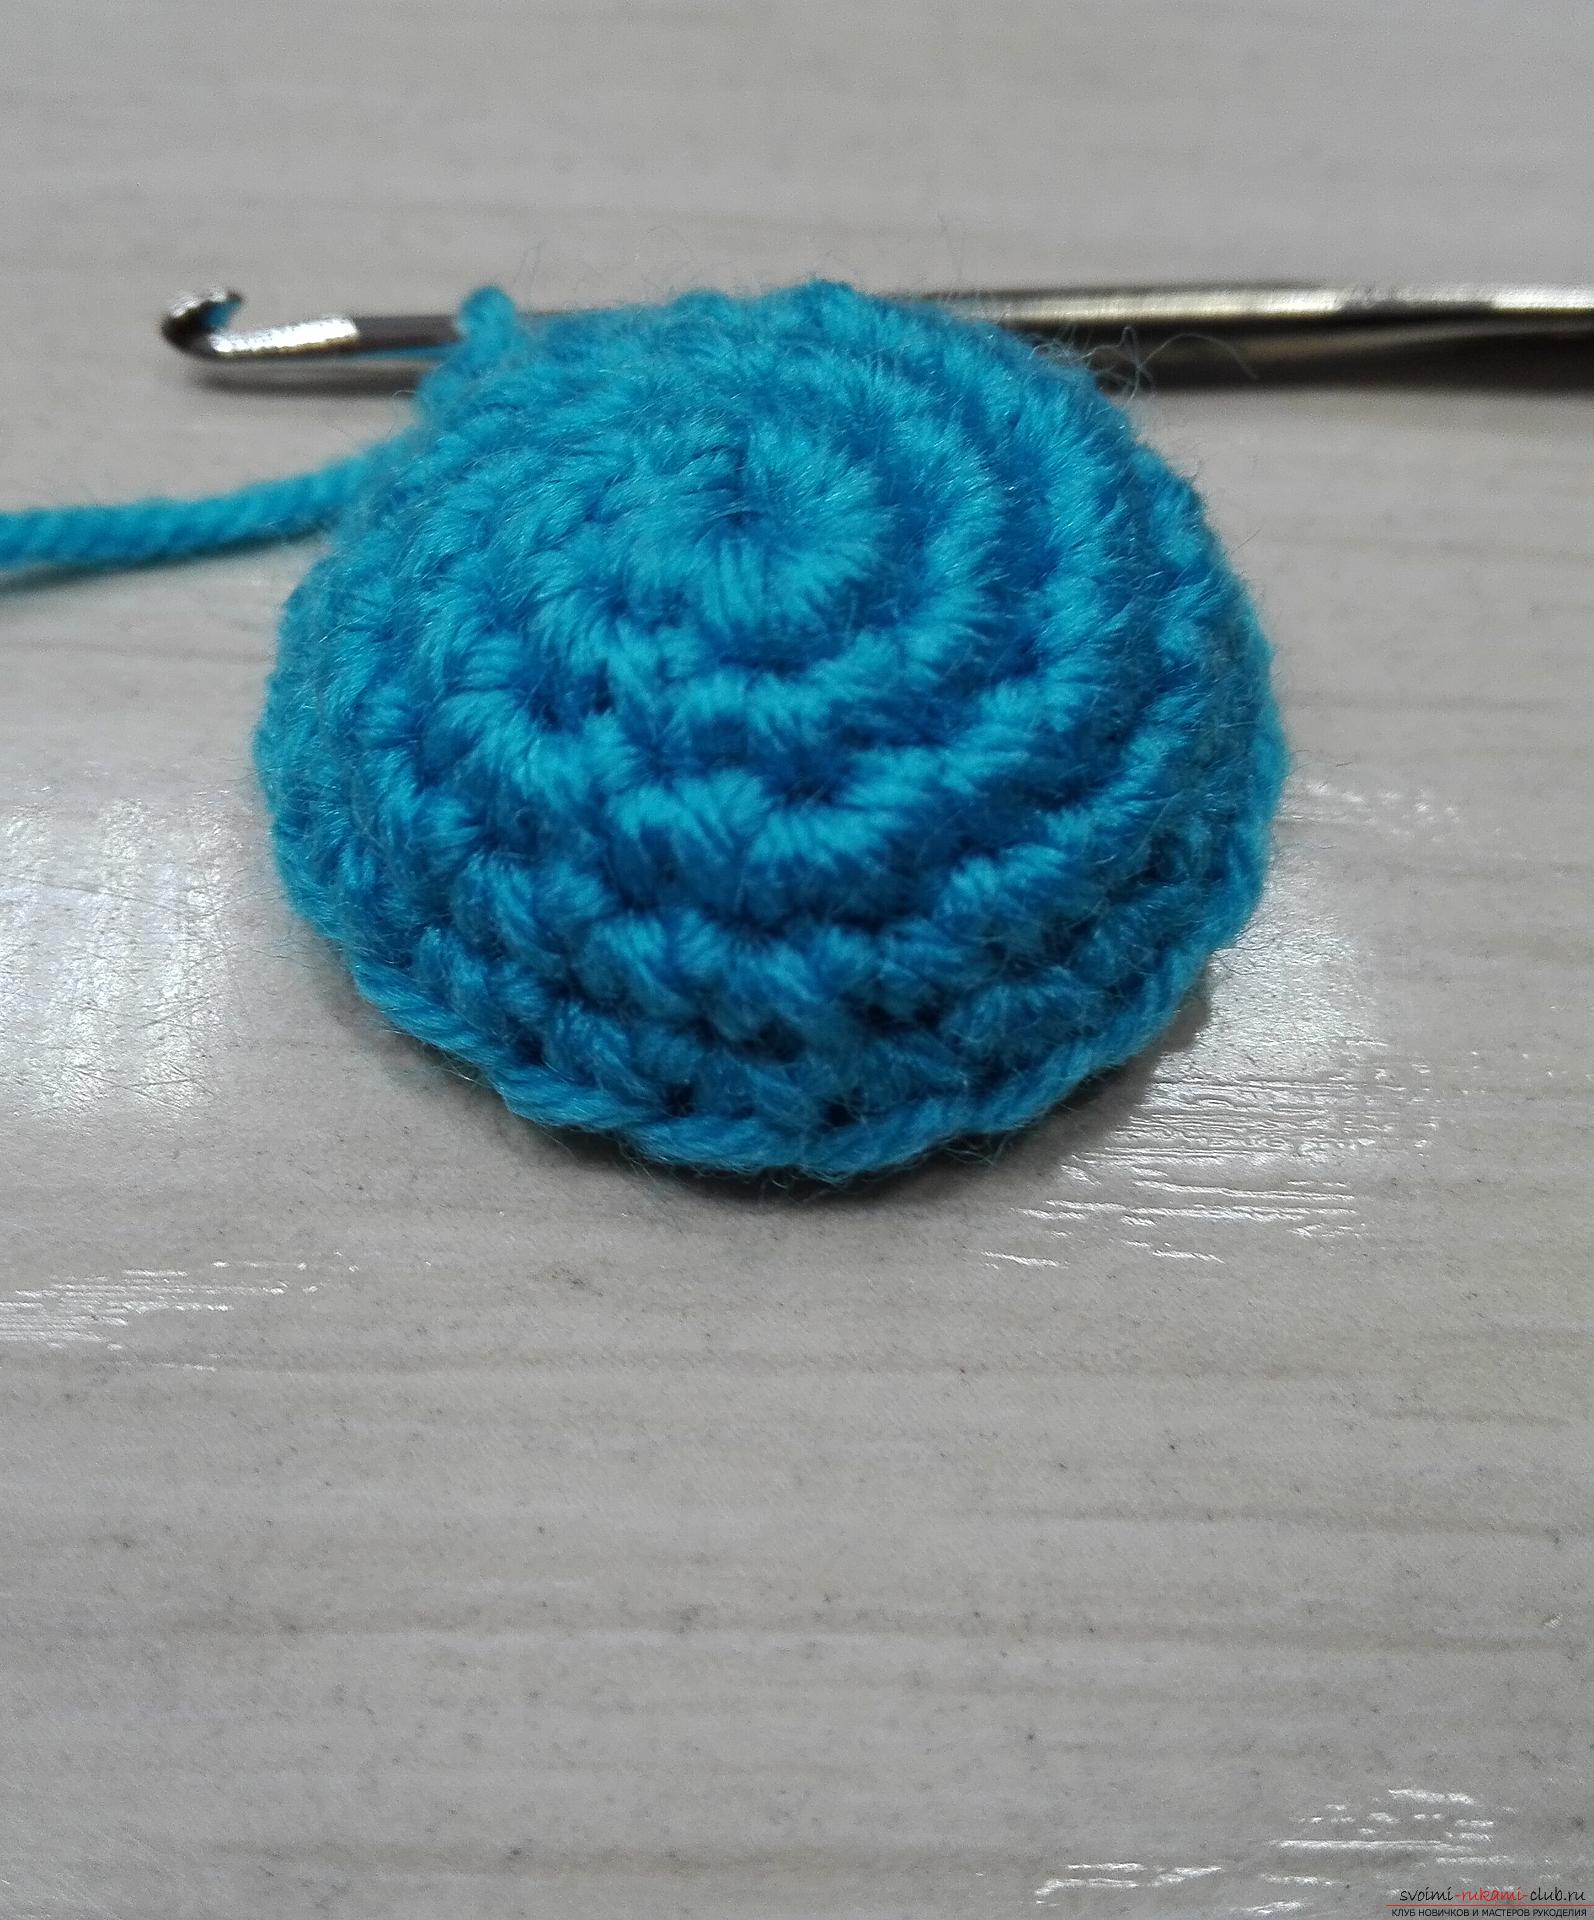 That's one wing ready. By the same principle we knit the second wing.
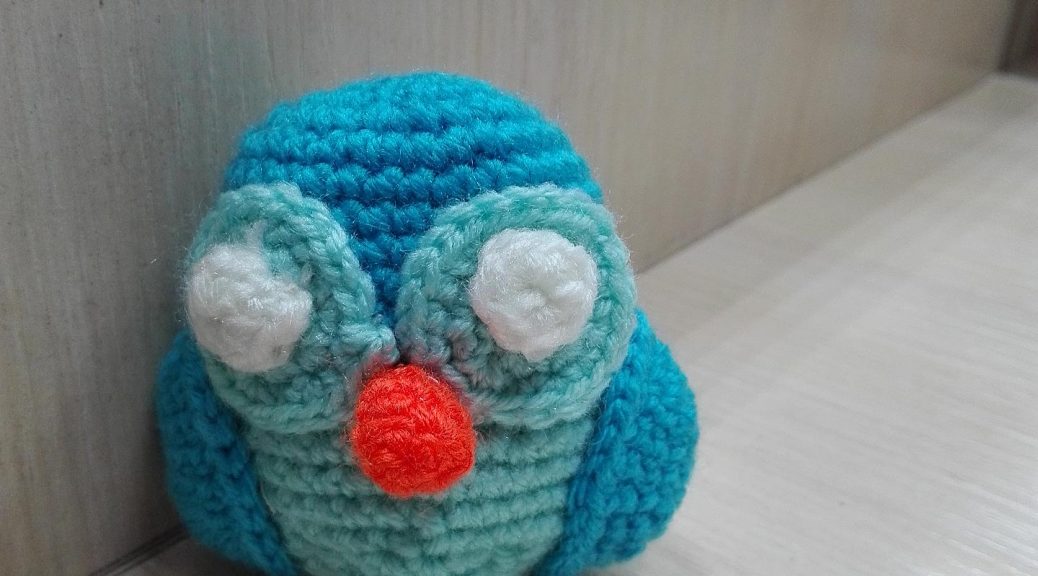
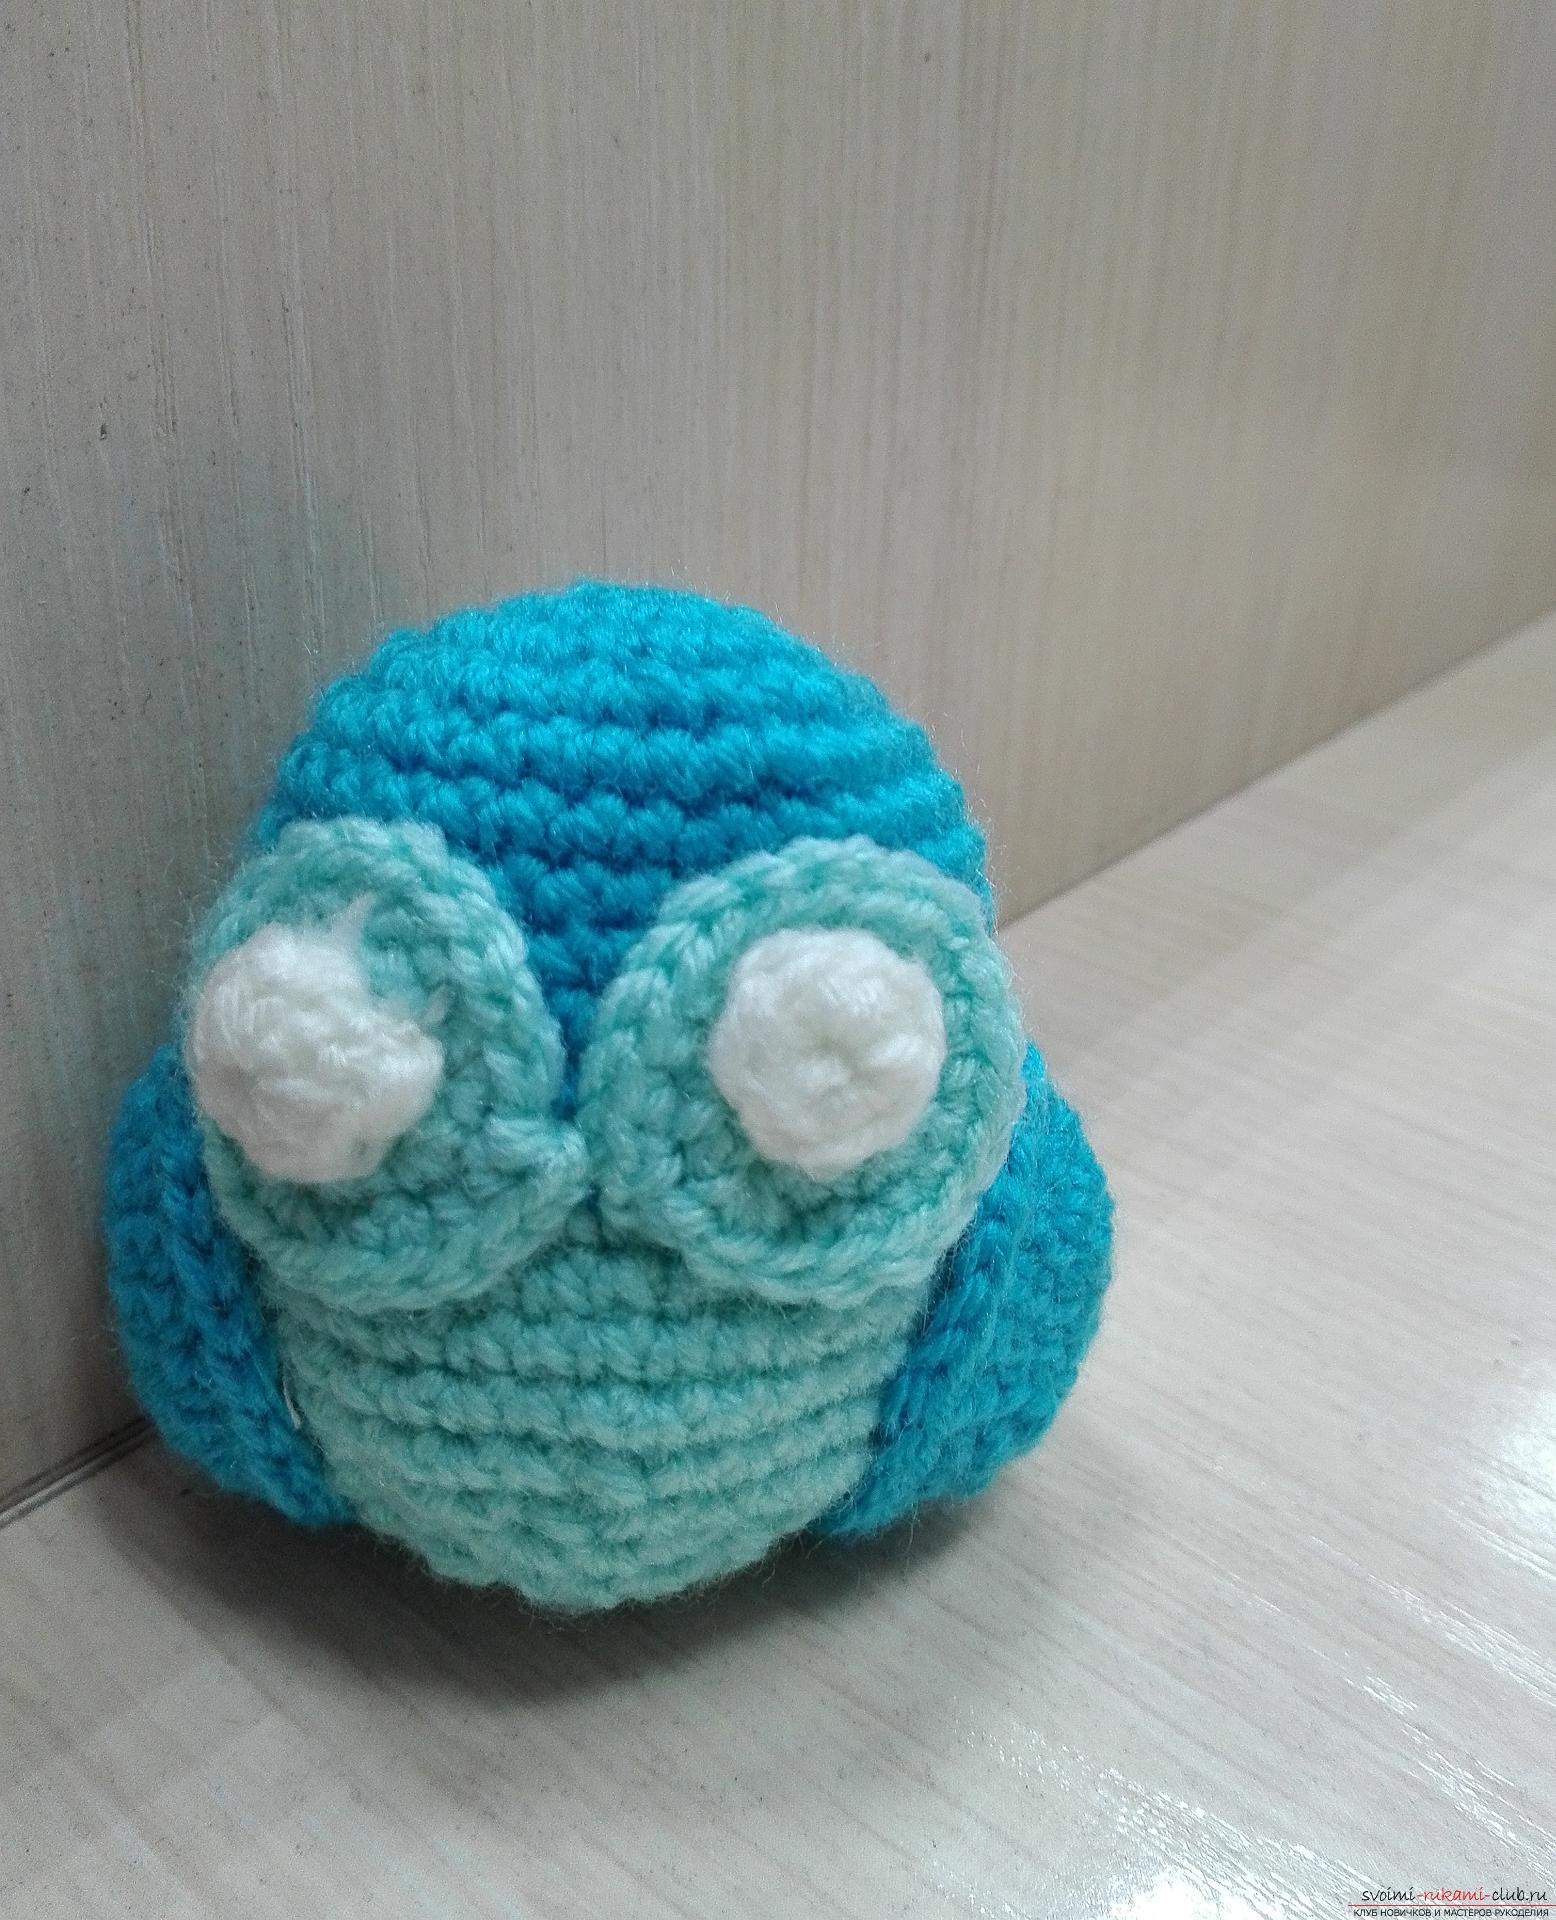
 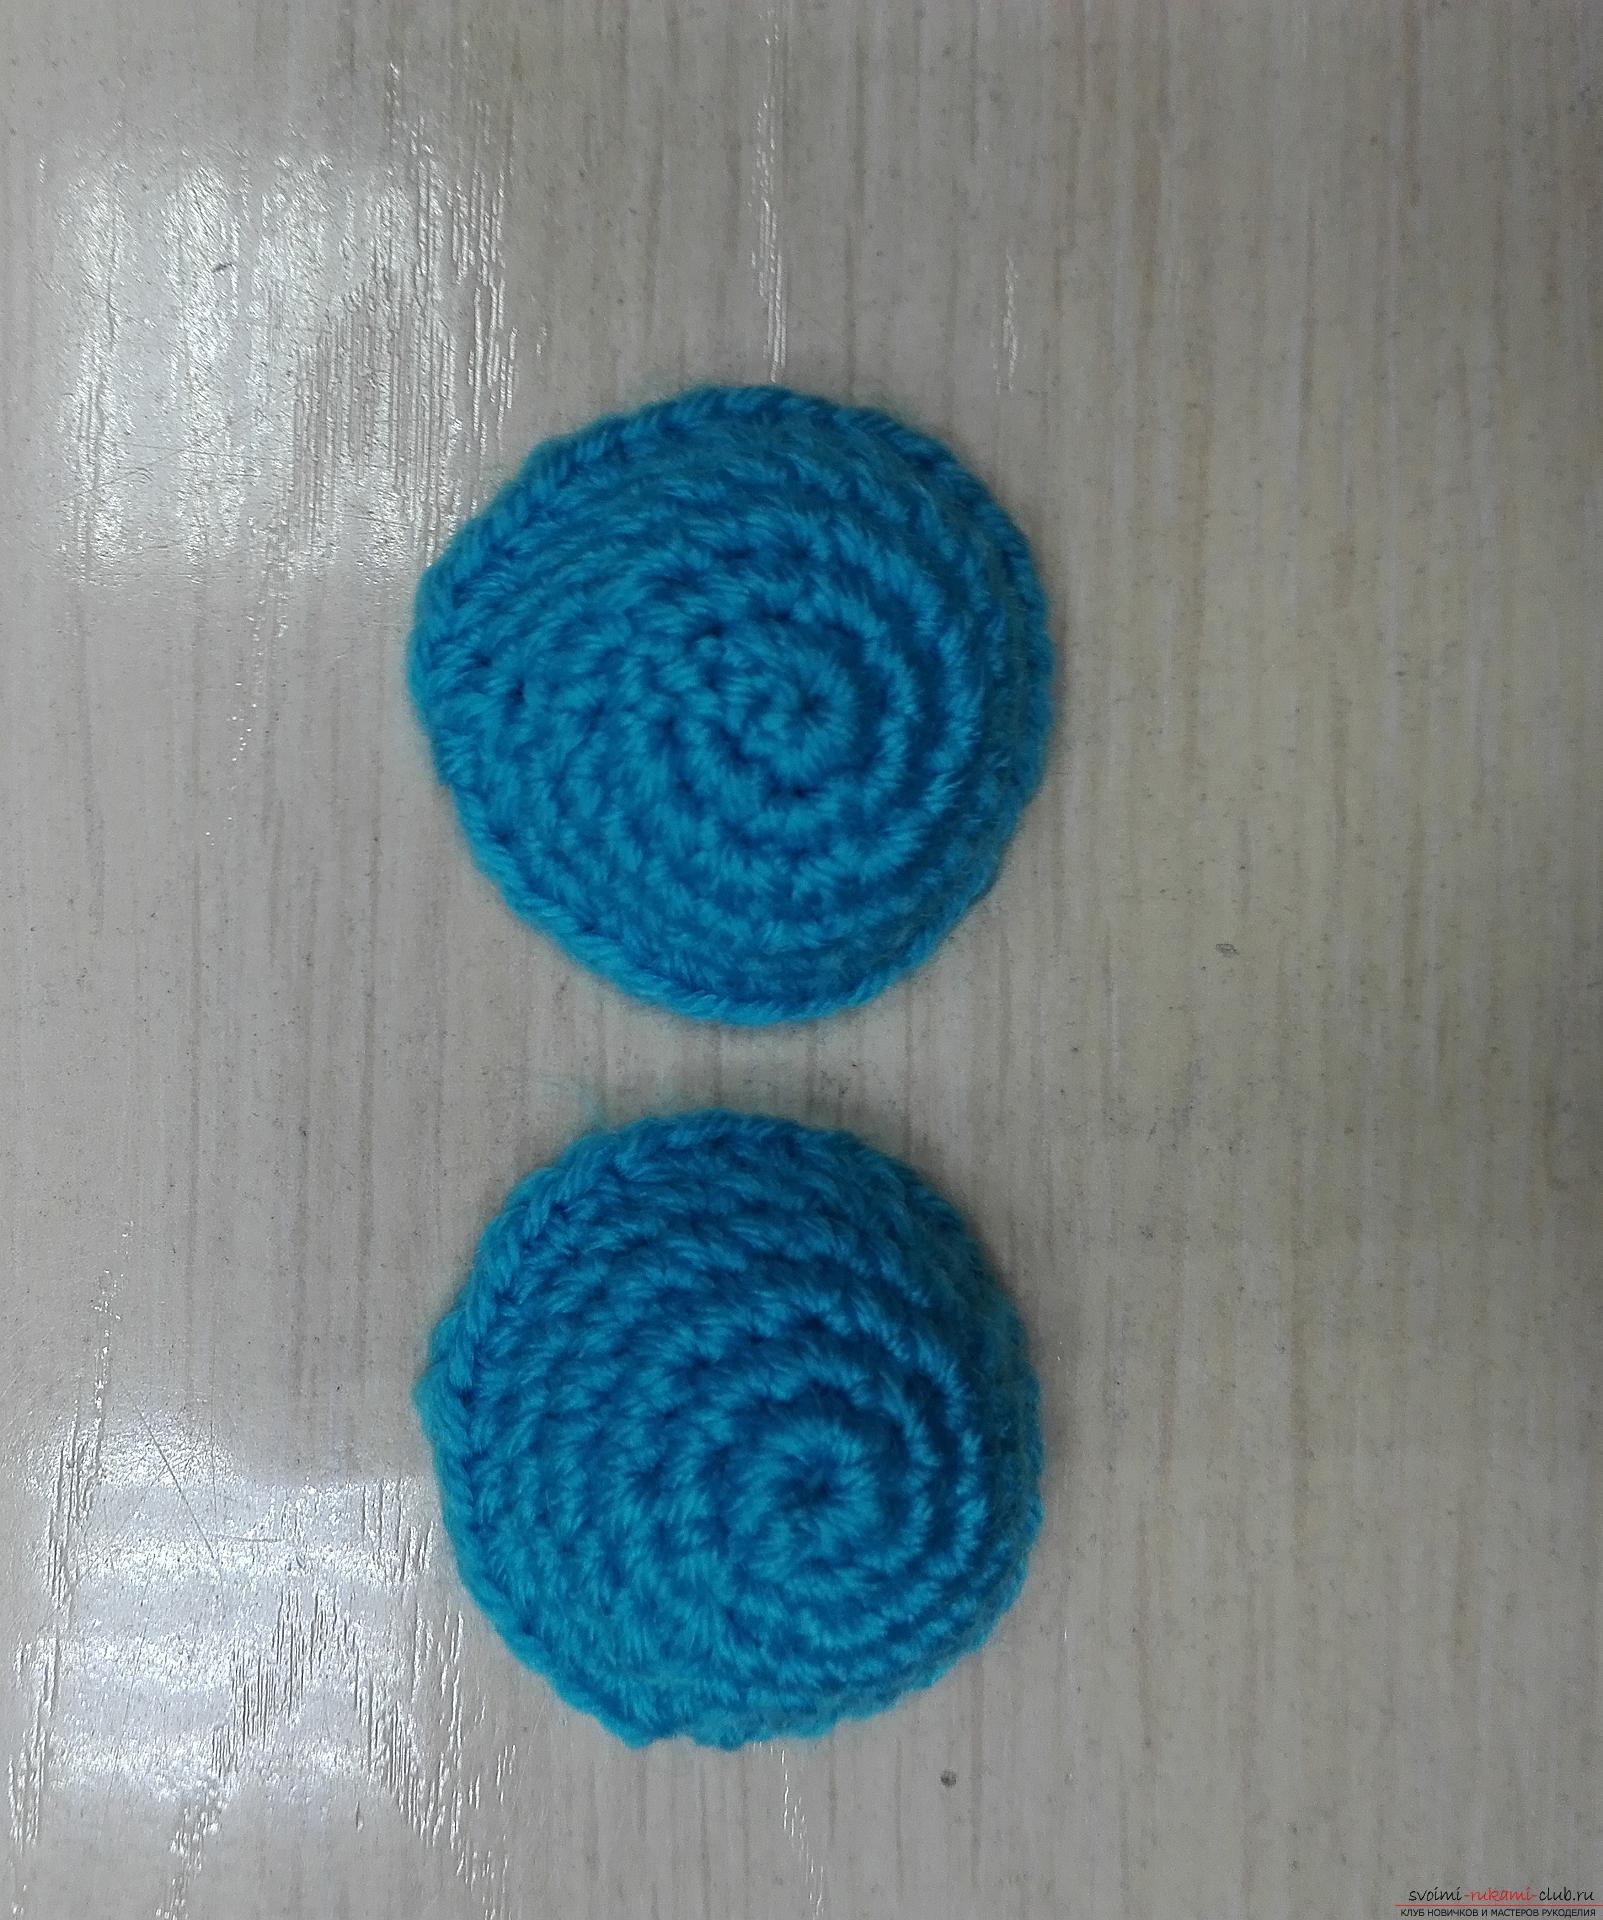 We move on to the next detail and it's eyes. We take a blue thread and we knit six posts in a loop. without n-yes. Then we knit two bars in each loop. And the last row on the 1st column without the crochet in the loop. The basis for the eye is ready. By the same scheme we will connect the basis for the second eye. We take a thread of white color and we knit six columns in a loop without a crochet. This is another detail of the eye. We will do the same for the second one. Now we need a thread and a needle for sewing. Sewing begins the basis for the eyes, which are blue.
 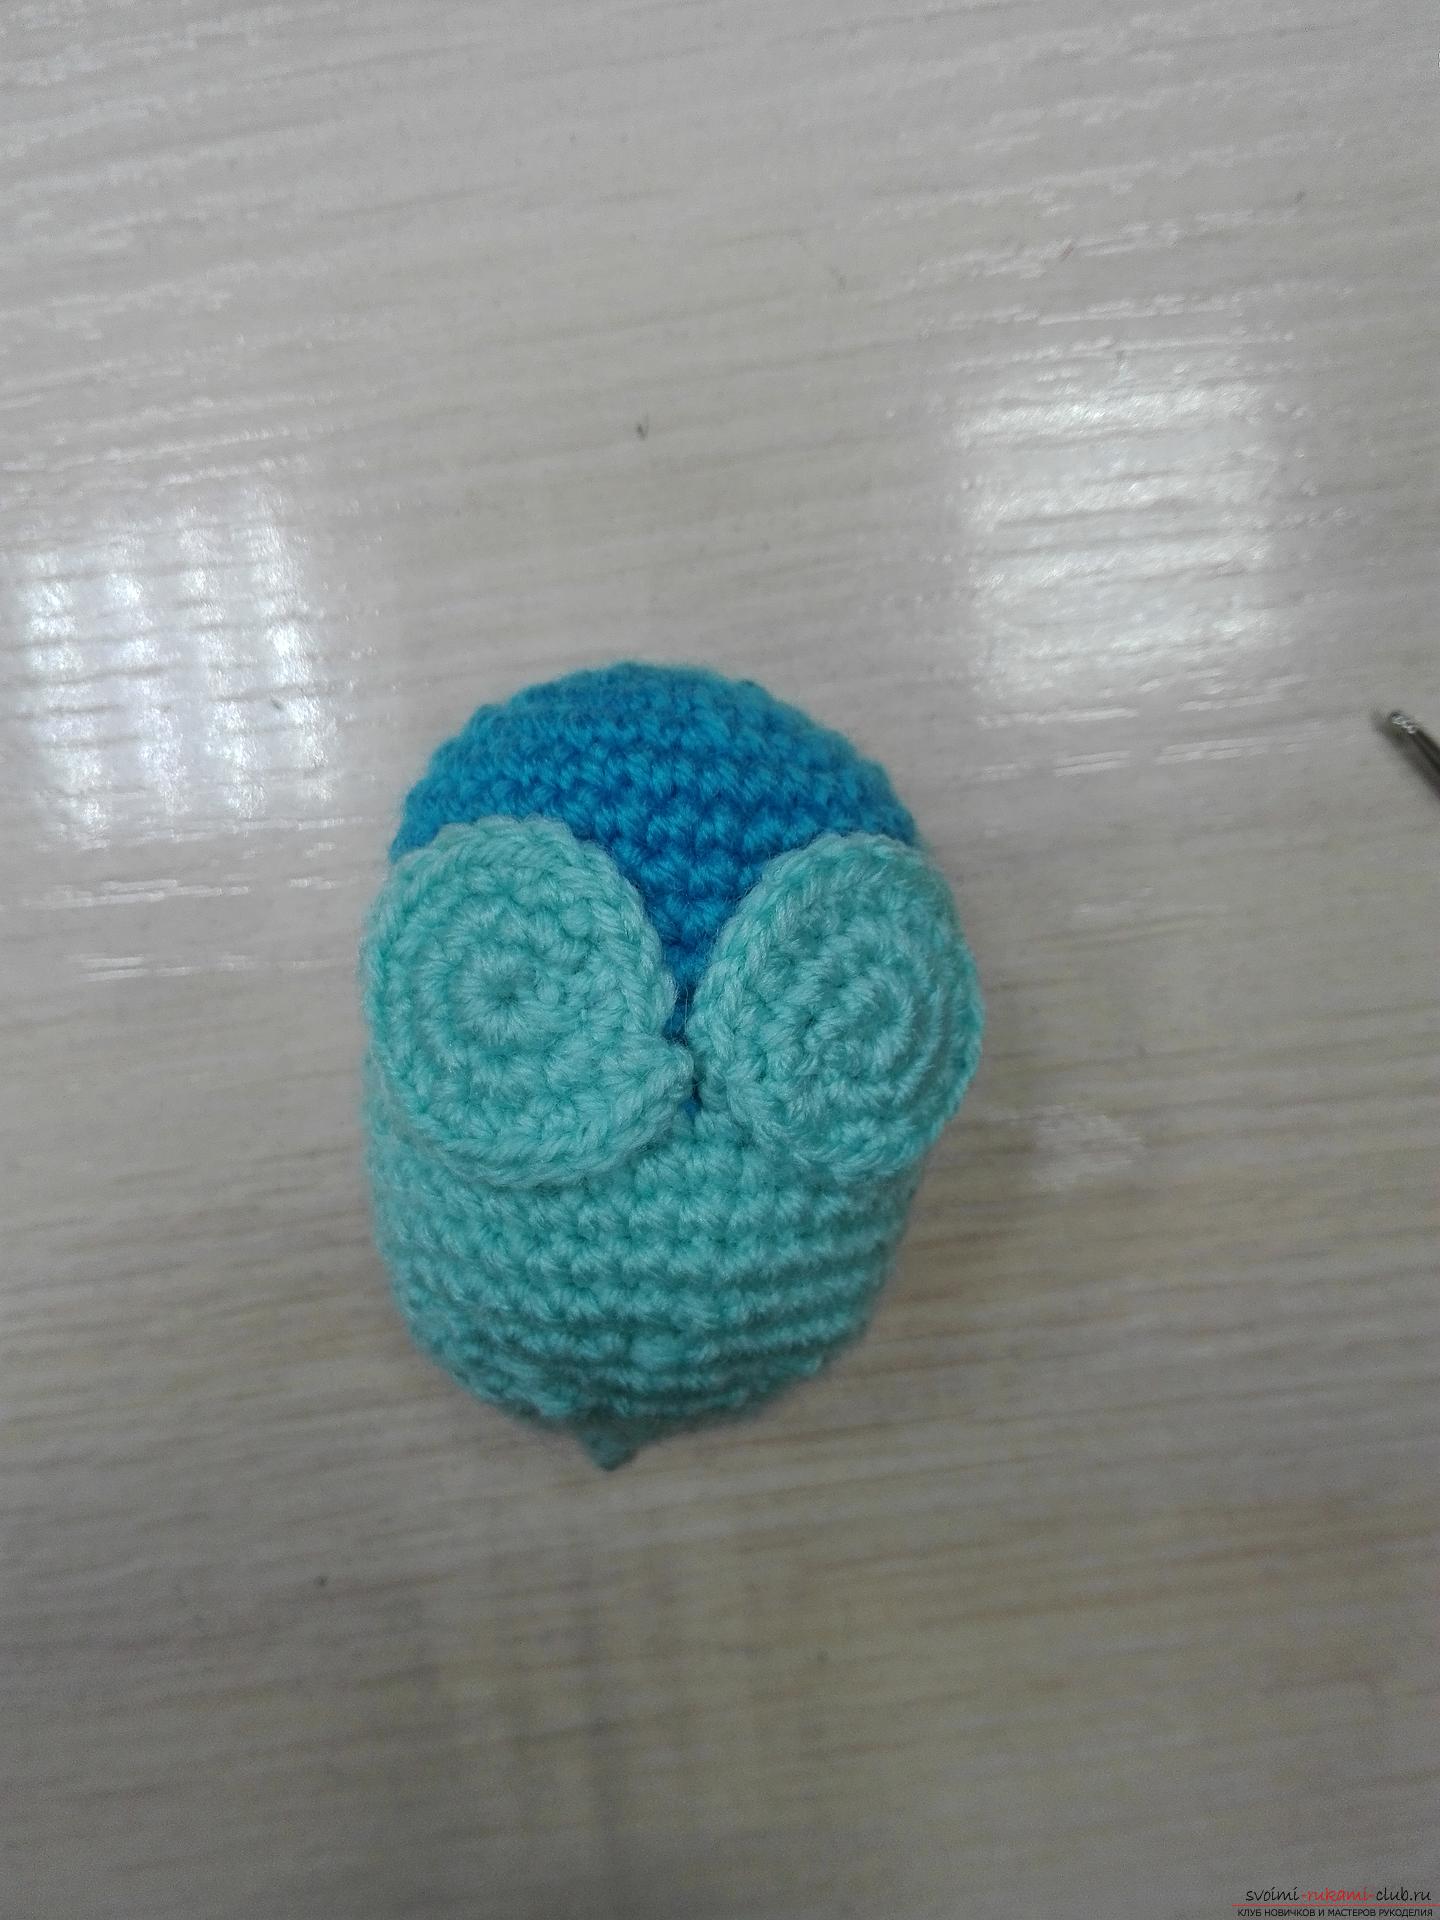 And in the middle of the base we sew white circles. On each side we sew wings.
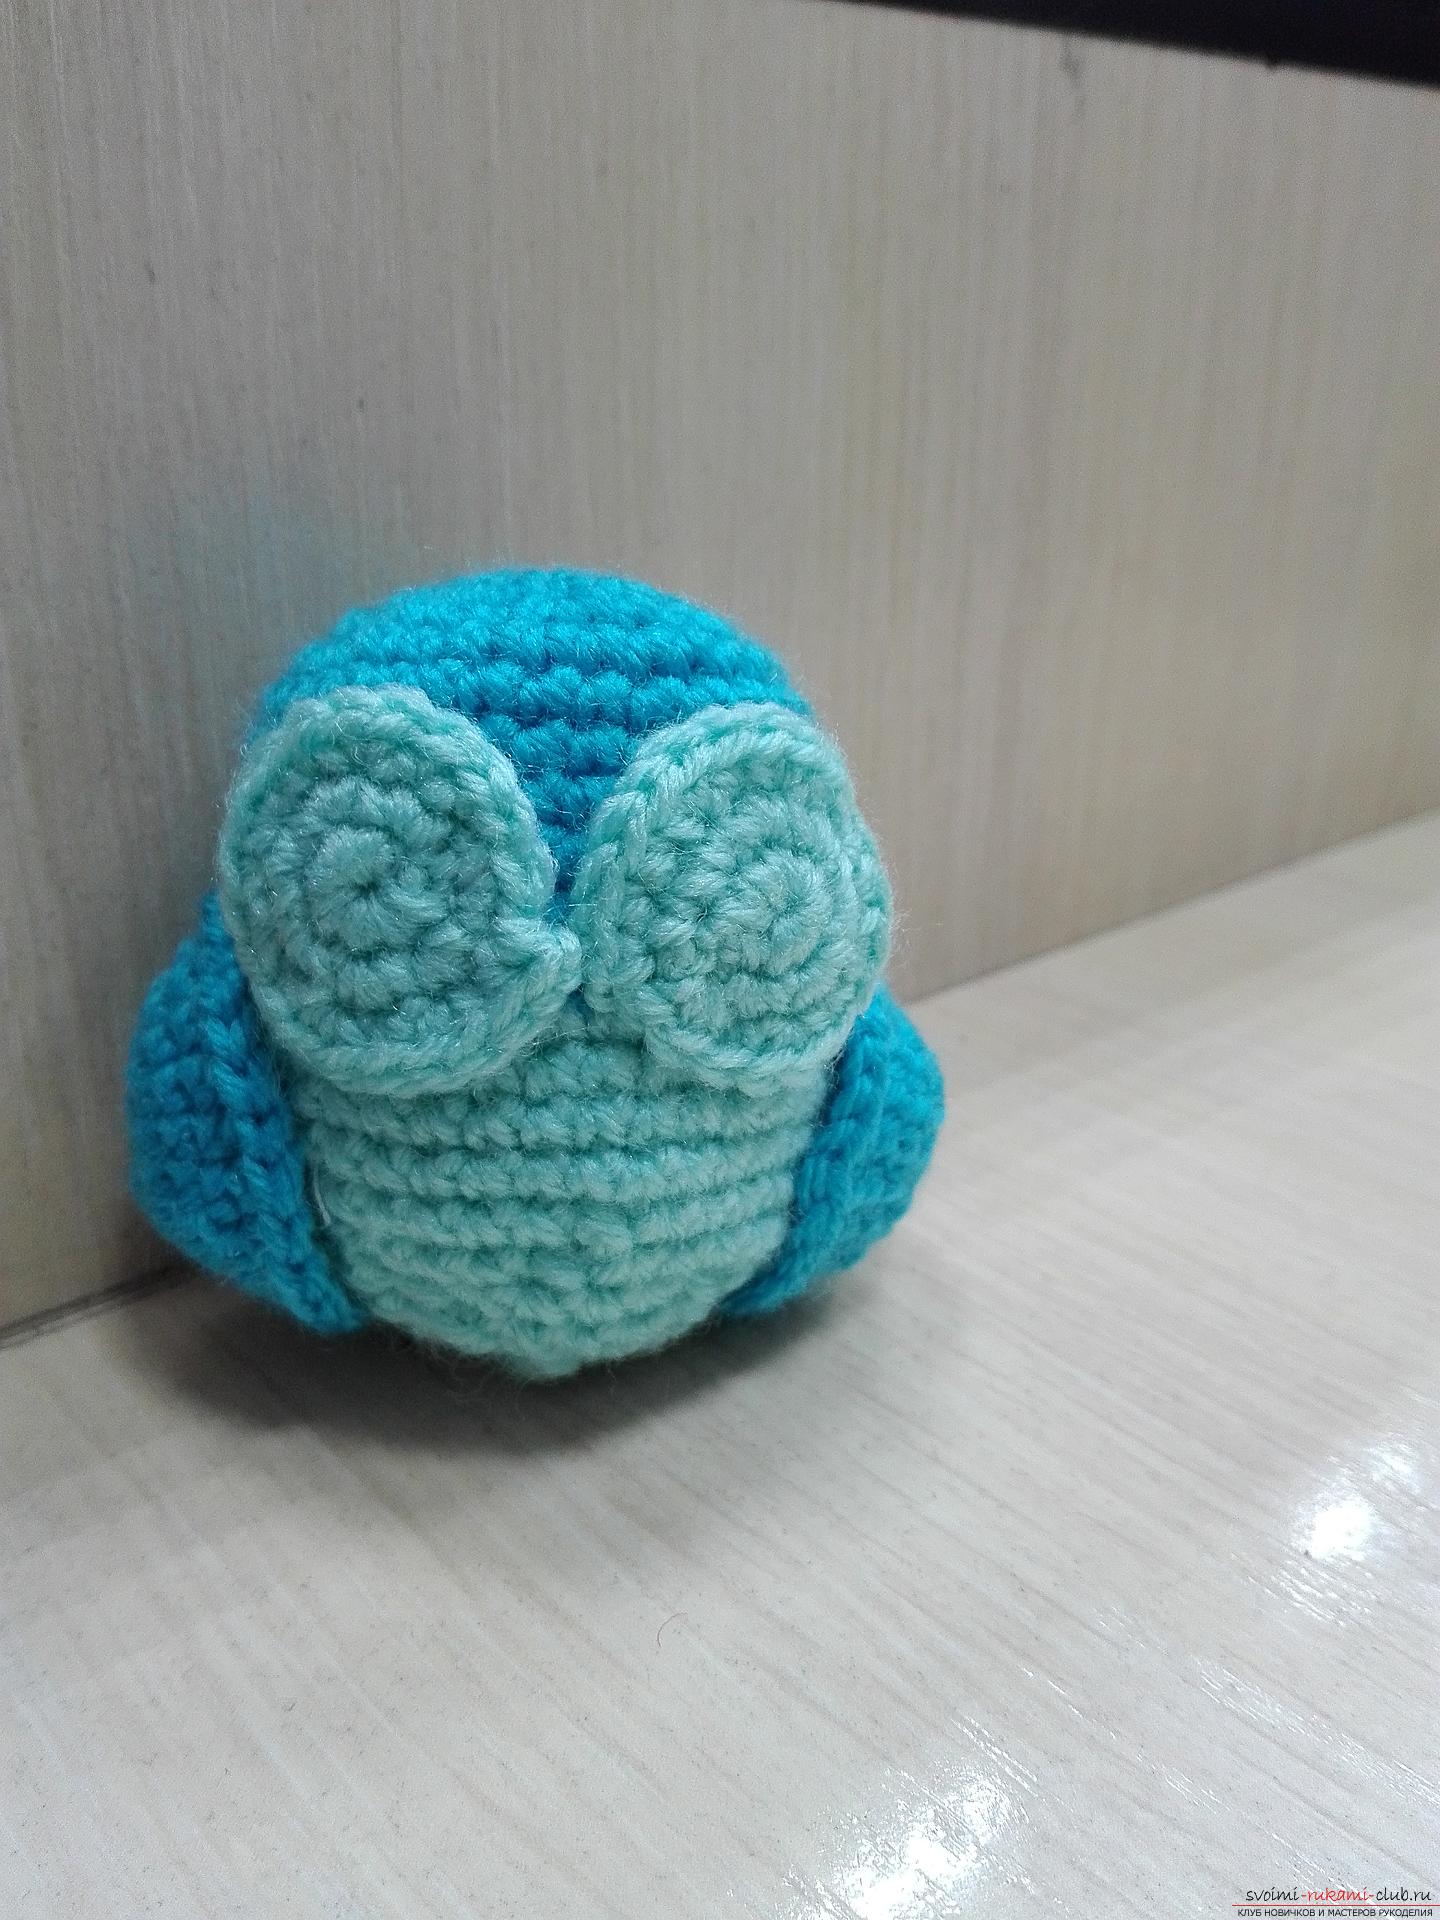
 Now we must make a nose. We take yarn of orange color and in a loop we knit four pillars. without n-yes. Then there are two columns. without n-yes in the loop. Next, we knit two rows on the 1st pillar. without n-yes into the loop.
 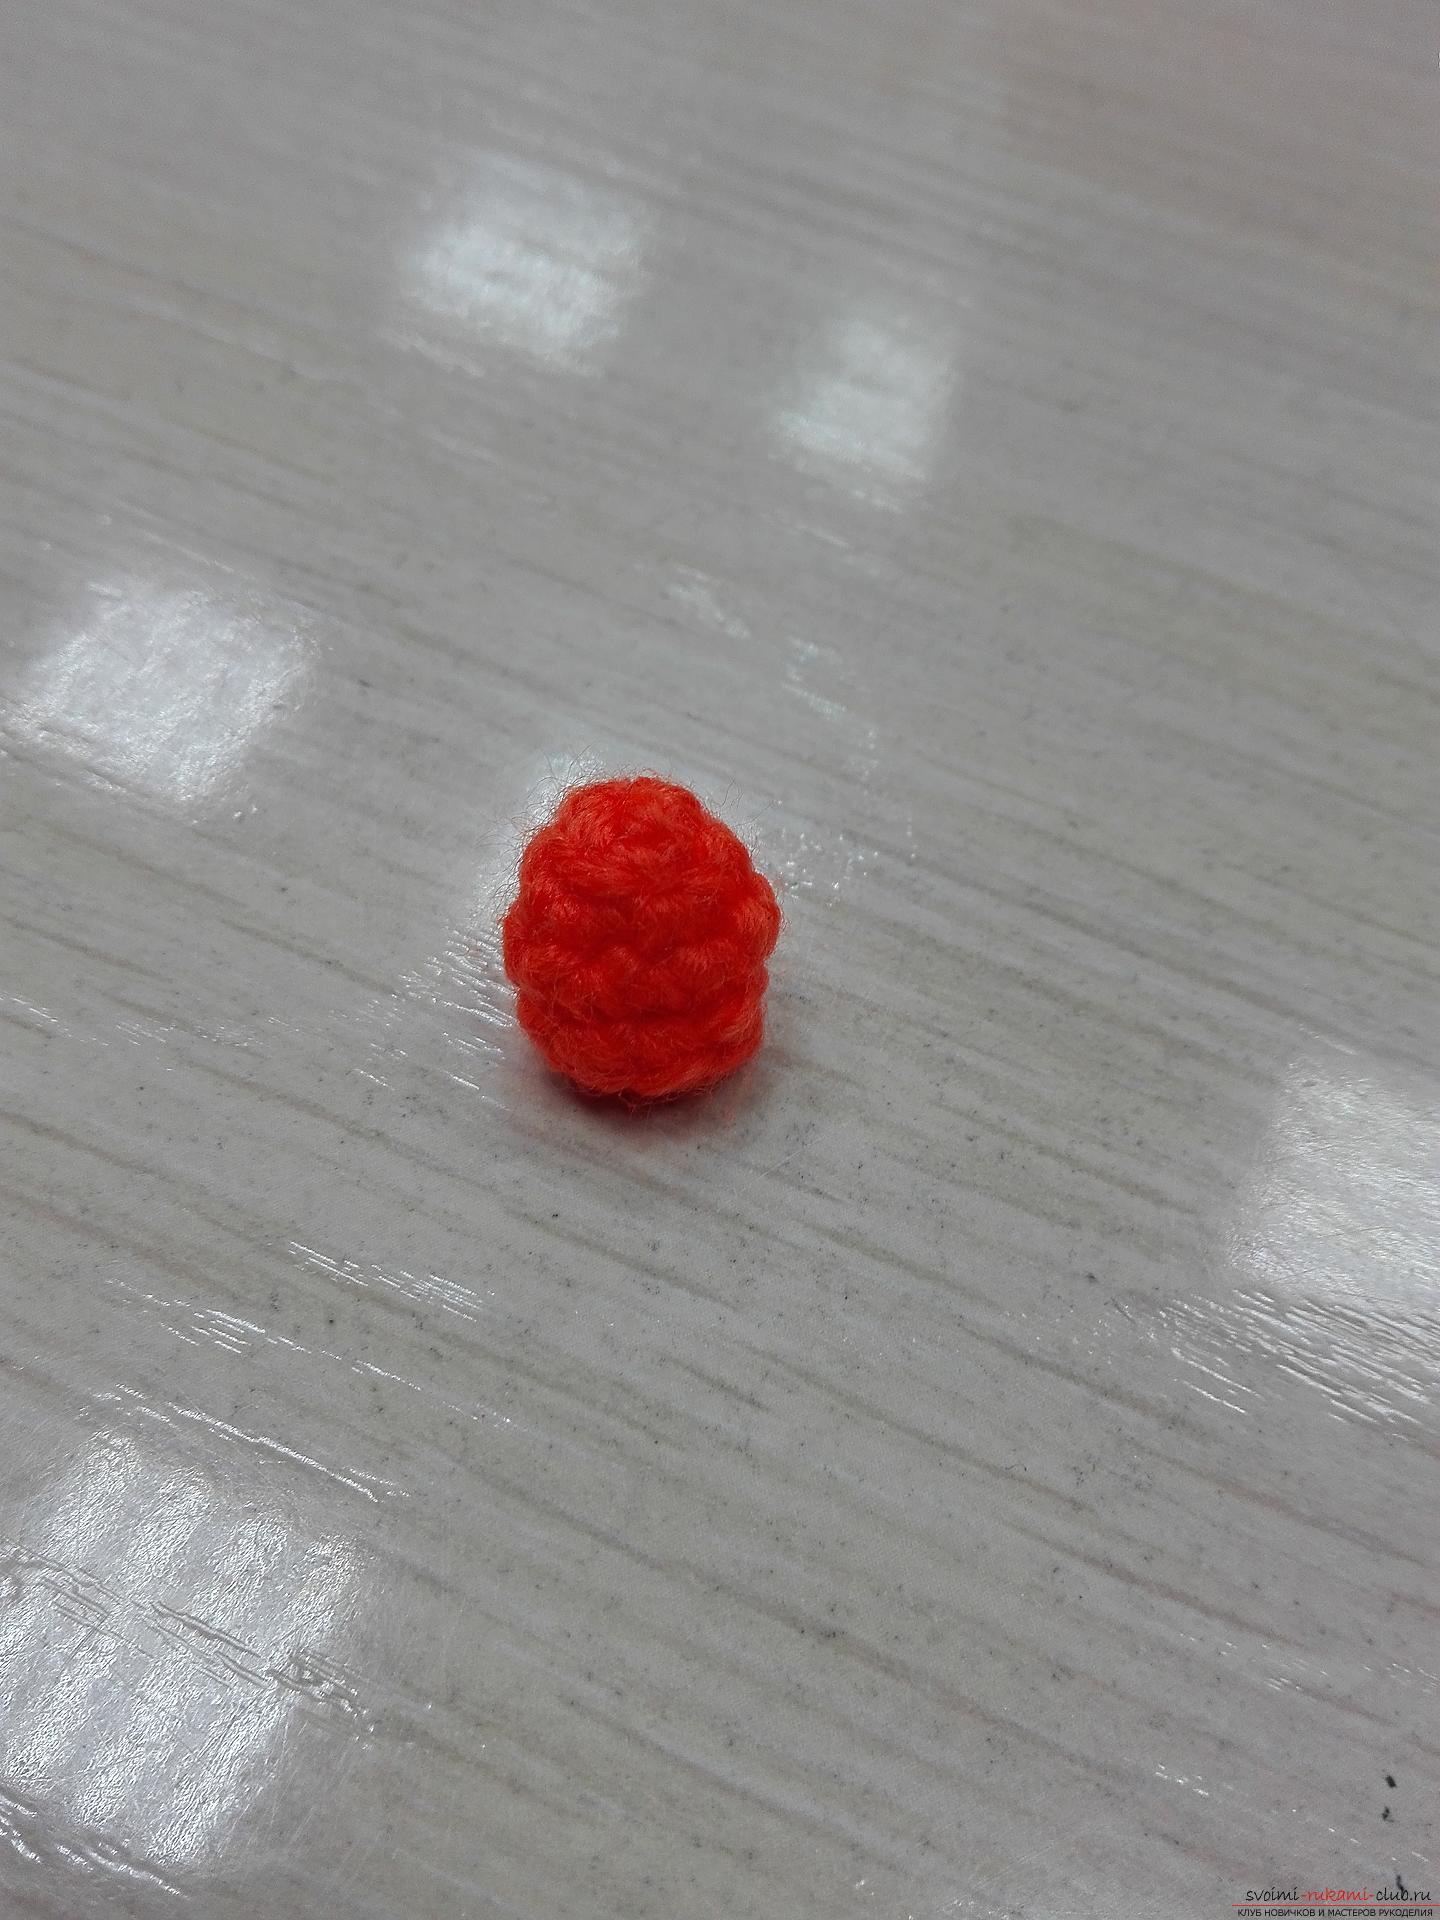 The nose for the owl is ready. And we sew it.
 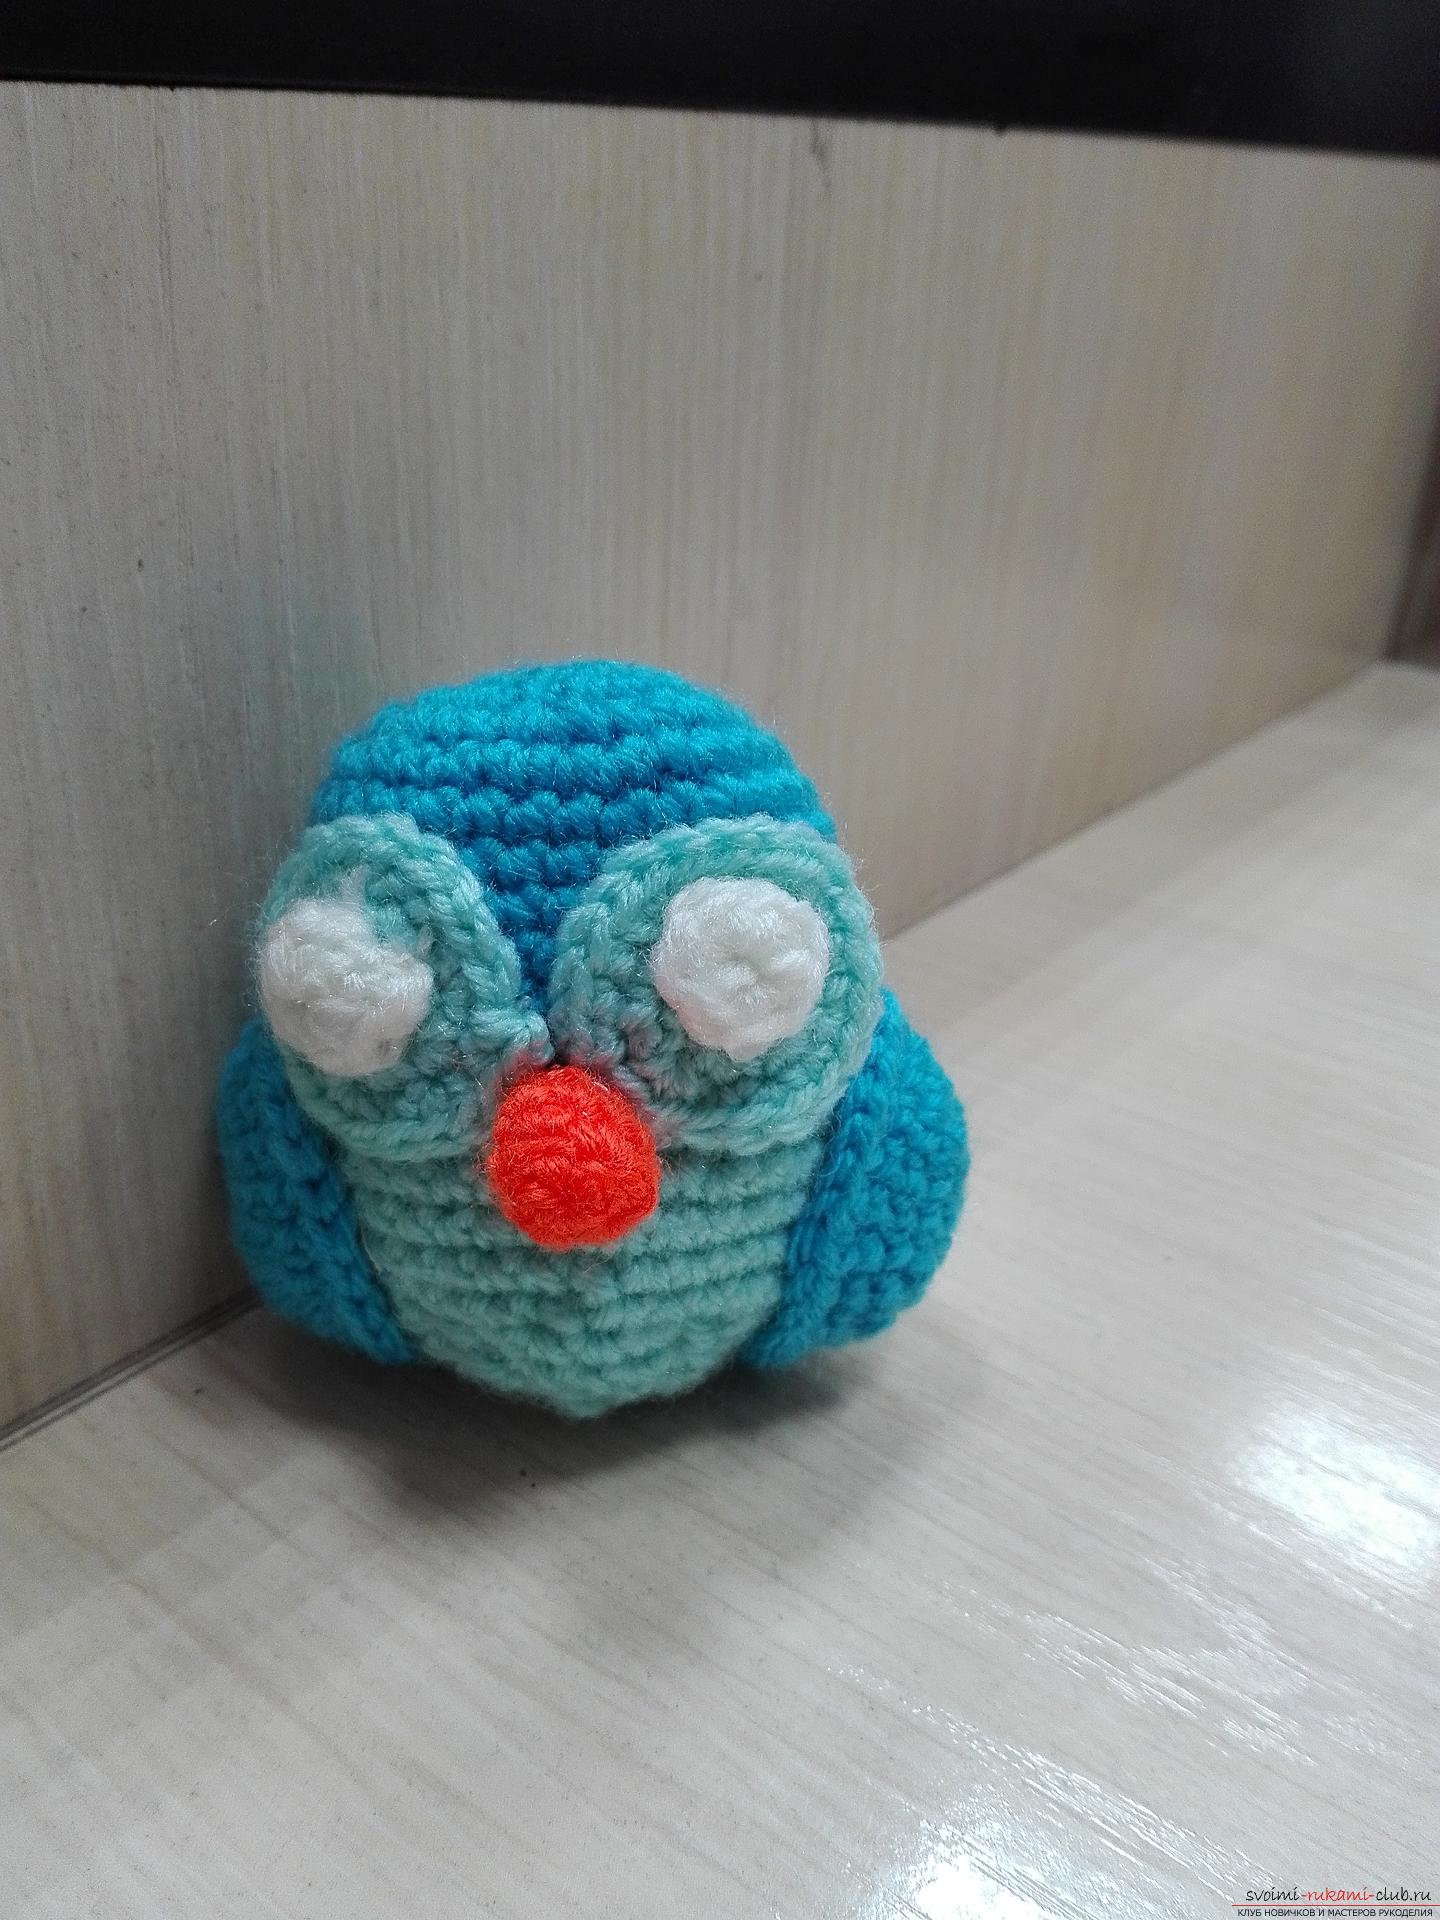 Using a needle and a black thread, we sew the eyes forowls. Well, the final touch is the rhinestones. We glue them for decoration. That's such a wonderful little girl we got. Such an original toy will please not only any child, but also an adult. In addition, you can in the same way connect the keychain with the cat. And then he will decorate, for example, keys, a handbag or a mobile phone.
Comments
Related posts:
 Our master class with a detailed description and photos will teach how to tie a toy crochet - donkey.
 This master class of crocheting with a scheme and description will teach how to tie a panama for a girl
 This master class with the description and the scheme will teach how to bind the mittens with two spokes
 This master class of crocheting with a photo and diagram will teach how to tie a beautiful cat.
 This master class crochet with a detailed description will teach you how to knit crochet flowers