
Knitted tiger cub amigurumi. Master Class! Part 2
Master class from Larissa (Rosettes) from Krasnodar. Continuation. We proceed to sewing pens. To do this, we take the orange thread, we tie a knot at its end and conduct the needle in any hole between the RLS on the back of the tiger cub, draw the needle in the place of attachment of the handle from the side. The knot is squeezed into the trunk, it will successfully catch on the fillers or the inner wall of the trunk part (if to pull without fanaticism, of course).  Now pass the needle into the handle part here in this way
  We stick the needle next to that place in the trunk,where we pulled it the first time, pierce through the trunk and pull the needle from the other side, in the place of attachment of the second handle. Thread the thread through the second part. We pull the handles slightly towards the body and repeat the maneuver in the opposite direction ... for strength, you can do the same thing, do it one more time.
  When the stitches are sewn, it is convenient to fix the thread, moving it to the center of the trunk from below, then into the nearest hole between the RLS and again return to the center, into the formed loop. We tighten and cut the thread.
  We proceed to decorate the face of a tiger cub. To do this, the previously bound flat white circle, we slip along the edge with a thin thread slightly prisapozhivaya, gradually, as far as sweeping. We need to achieve that the circle has ceased to be flat quite a bit, only to bend slightly its edge. The item should NOT decrease noticeably.
  We prick the muzzle to the head with pins,placing it in the lower part of the head in the center. When the muzzle is sewn, we knit a tiger's nose. The nose matches their same thread, from which the strips were made. Those. take a black thread and in the ring amigurumi we knit 6 RLS, we finish the SS series, we terminate the thread. The nose is ready. Sew it to the muzzle, just pre-pin with a pin.
  Embroider your mouth with the same black thread in oneAddition, which was associated with striae and nose. To do this, we make a bundle on the end of the thread, insert a needle between the stitches with which the muzzle was sewn. We pull the knot inward, just like in the case of handles and embroider the mouth, taking long stitches of the "smile" in the center with short stitches.
  We embroider a mustache. In the last stitch, the thread is removed to the center of the forehead, in order to begin embroidering strips.
  Strips can be embroidered in two strands, inIn this case, each strip is one stitch. It is possible and a single thread, then it will be necessary to sew stitches two in one place (for each strip - two stitches).
  We embroider strips on cheeks, on the tail ... as well as on pens and legs, plus claws.
  Cut out the pink felt inner part of the ears and heels for the legs. Eyes can be taken ready (as I did a clever I) or cut out of felt, as in the photo in the description ... We paste everything in its place ...
  Tiger cub amigurumi is ready!
  Blog of Larissa on. There you will find many interesting descriptions of toys and not only.
Comments
Related posts:
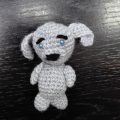 This detailed workshop will tell you how to tie a dog crochet and how to knit an amigurumi.
 This master class of soft toys will teach crochet teddy bear Amigurumi
 Master class with photo and step-by-step description will teach how to tie an amigurumi crochet toy
 Ball on the Christmas tree "Tiger". Master Class!
 Master class "Kolobok". Part 2