
A toy on a Christmas tree from plasticine with own hands - a master class modeling of fairy-tale heroes
Many of us grew up on the old Sovietcartoons, which were filled with only fairy-tale and truly magical characters. These simple and at the same time, delightful creatures who were the protagonists and still remain in our hearts and with friendly conversations are remembered between the word. It's hard to forget the plasticine crow or the heroes of the animated series "Last year's snow fell."
A toy on a Christmas tree from plasticine with own hands - a master class modeling of fairy-tale heroes
 The authors of these cartoons knew that with the help ofsuch a bright material as plasticine, you can dazzle everything that you want. Even make a Christmas tree, or prepare a snowman. In addition, this process is fast and exciting. Children and adults are united in creative tandems in order to work on such modern toys. Molding develops children's attention to detail, allows them to fantasize and undoubtedly enhances the creative qualities of any child. The New Year is another reason to do such a thing, together with the child sit down and remember the most favorite characters of the New Year. Of course, many want to dazzle Grandfather Frost or Snow Maiden before this holiday and decorate her Christmas tree with the help of hand-made articles. Sometimes, children should be encouraged to do this. But, with what to begin and how to start coveted work on future characters? Crafts from plasticine, we will divide into four particles, where we will create different characters. We're making a snowman from plasticine!
 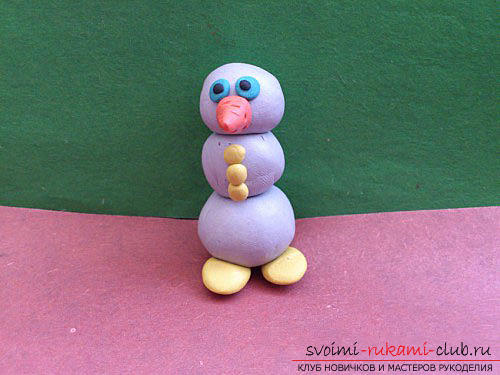 A snowman is a fairy-tale hero who isfavorite pastime of many children on the street during the fall of snow. Traditional three balls, a small nose from a carrot and, of course, an iron cap in the form of a bucket - the invariable appearance of this exemplary and beloved hero. But, if suddenly the snow did not fall out, or the child tirelessly tells you that he is going to build his snowman in the house? Of course, this is not possible. But with the help of plasticine, as the main material, any dreams can become a reality. To begin with, you need to prepare three different balls that will differ in size. Of course, the snow is white and therefore, plasticine we need the appropriate. Also, as an experiment, you can mix it with a drop of blue to get a snowy blue version. For more creative readers, you can come up with another option: mix a little red with white to make even a pink color. Making a Snowman
 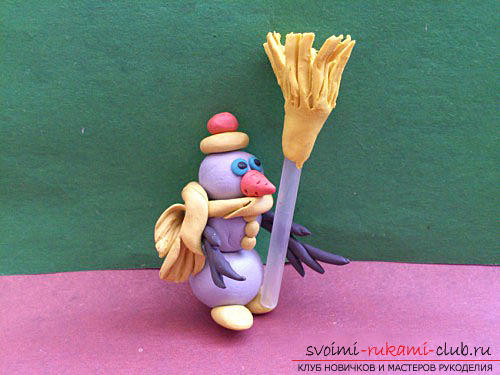 The shades of your materials should be maximized.homogeneous. It is necessary to make three different forms of the ball with the help of plasticine. Then, it is necessary to assemble the body from which our snowman will be composed. In order to keep it firmly, it will take matches to maintain equilibrium. Then, to make a famous carrot, we need to take an orange clay. Either red clay and fix it on the front of the upper ball. After, use black clay to sculpt the eyes. Prepare buttons and paws for a snowman from yellow shades of plasticine. They will be placed on the central ball. After that, you should take the wire and clothe it with a brown, black plasticine in order to form branches for the hero's hands. The hands must be fixed on the side parts. Then, decorating the hero with a multi-colored hat, we add a scarf to make it look modern. Also, using the same wire, you should make a small broom for our hero. That's all, our hero is formed and it can be used in the future composition! Christmas tree for decorating an apartment for the New Year
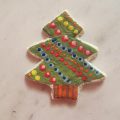
 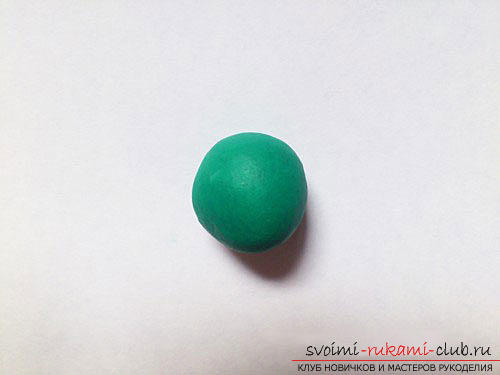 But, what a fairy-tale hero will look likemodern without her Christmas tree? Of course, even a snowman needs such an attribute of the New Year holiday. To do this, you can also use the services of plasticine and to mold your own, special form of winter wood. Prepare, in addition to green plasticine, also a spatula of the same color. At the heart of our crafts, we'll take the usual half of the standard version of a plasticine block. Then, you need to roll a small ball, which in the future must be processed to the shape of the cone.
 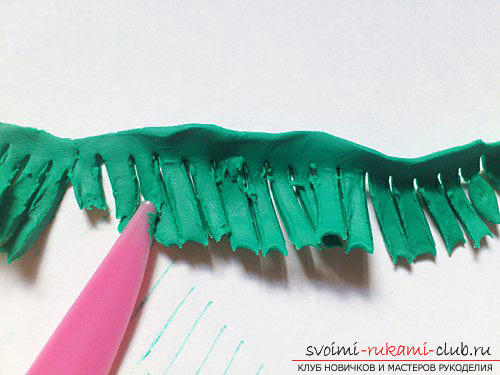 Then, the rest of the clay ishalf), it is necessary to knead well afterwards, making small strips of it. We use a spatula to make out strips that will become the future elements of our work. Then, using the spatula, we must make twigs in the form of fringe. Then, after that, we form the element of the tip.
  Here it is necessary to make a round cake, andalso form incisions on the circumference. The fringe format, which we will receive, must be put on in accordance with the perimeter of the cone of the future fir tree stock. Then, we have to decorate the Christmas tree with toys and garlands. We mix two plasticine with different color characteristics, but to such a state that they do not become homogeneous. Then, a thin thread is rolled from plasticine, and pieces of different colors are needed to form a ball. It is required to decorate the tree with the help of the ornaments received. Then, the top of the product should be decorated with a red star.
 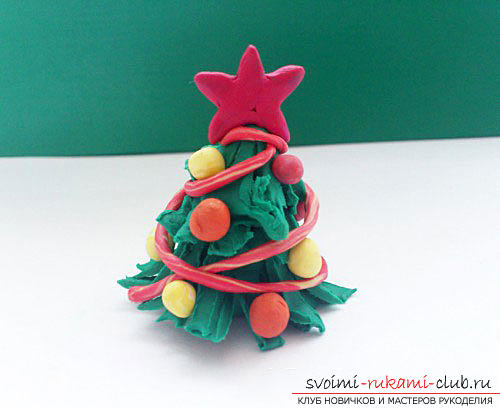 Granddaughter-snegurochka with the help of plasticine! So, we have already formed the necessary elements of the composition. The snowman stands on a stand in anticipation of snow, the Christmas tree is all lit by multicolored lights. But, how can you start a party if there is no Snow Maiden? So let's start creating this fairy-tale character
 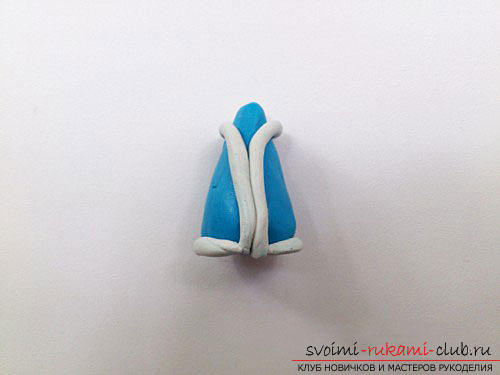 In order to make a Snow Maiden, weyou will need to take shades of blue, purple and blue. Also, shades of black and yellow clay are used. In case you do not have a blue color, just stir white and blue - get the desired option. Initially, from the blue plasticine we form a small cone. A little material should be left for the sleeves of the future Snow Maiden. Then, the fur rack for the Snow Maiden is made of white plasticine. To form sleeves, it is necessary to prepare elements of the same shape. Take a thin white strip, a cake and a blue tube. Using these blanks, we create our handles with mittens and attach them to the top of the fur coat! At the joints, press as hard as possible so that the clay does not come off.
 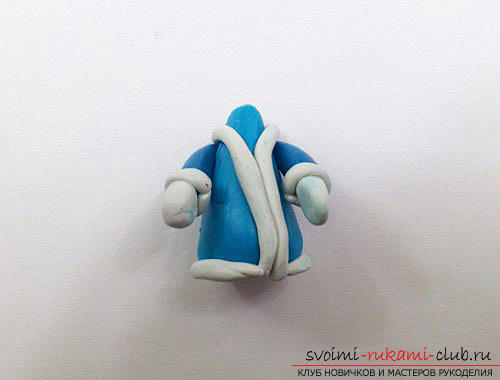 Then, we form the Snow Maiden's face, usingplasticine pink color. To make such at absence it is possible by means of mixing white and red. So, when the material is ready, make a head for the Snow Maiden and then, attach a nose to it, then eyes, and then - mouth.
 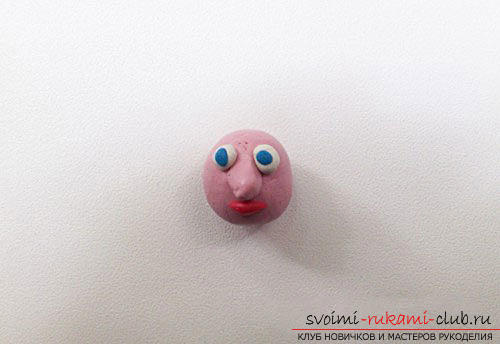 We use a match in order to fix the partstorso with head. Then, we form a cap on the head of the Snow Maiden from the blue color. To the cap we fix the hair, which can be made of yellow material in the form of sausages. Then, you need to make the legs for the Snow Maiden. Take the white color of plasticine and form the lozenges, which are fixed on the bottom of the coat. So our winter girl is ready! Grandfather frost for composition.hatch! After all, what New Year can there be without the famous Santa Claus? Let's try to make one's own to complement the beautiful New Year's composition. It will take white and red clay. To make a face, prepare a beige color, or an option of gently pink. In order to make a fur coat in the form of a cone for Santa Claus, one third of the white, red, and blue polymer clay is required. Next, you need to roll the snake element using white clay. This must be done for the fur fringing, which will be designed for the fur coat. Next, you need to form sleeves, using small pieces in the form of red plastic. We make gloves with blue color. We will also use red and blue clay in order to make sleeves, and then - mittens. Then, you need to fix the element of hands on the top of the fur coat. After, make the face of the grandfather, using a plastic beige color, fix the red red cake. Then, you need to dazzle your mustache and beard for the character. Then, you need to make a notch using a toothpick. Preparing the character - Grandfather Frost We fix on the face elements of the eyes and the red cap - to the crown of the head. Then, it is necessary to pierce a place in the neck, where there will be a connection between the head and the trunk. Then, you need to shoe Grandpa frost, using felt boots black. And, of course, to make a small, shaped bag for Grandfather, preferably red.
Comments
Related posts:
 Molding of plasticine for children from 1.5 years. The initial stages of modeling crafts from plasticine
 Types of modeling of plasticine and crafts, created by own hands, children age 5 years.
 This master class will teach you how to make your own hands a New Year greeting card.
 Step-by-step master class will teach you how to make a herringbone of salty dough with your own hands
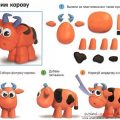 Molding of plasticine for children aged 3-4 years. An example of modeling a cow with your own hands