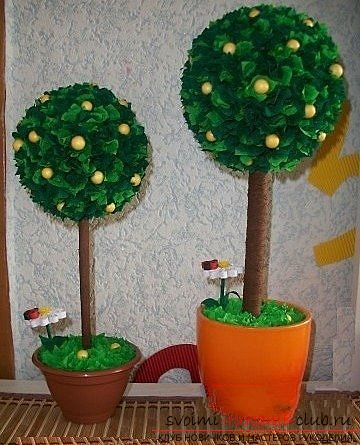
A corrugated paper tree made by own hands can decorate any interior.
A floral tree made of corrugated paper isan oddity of incredible beauty. And the ability to create such products you want to share with everyone. A master class on making a blossoming tree will show that such a topiary can in principle be made from tissue paper or napkins, or from ordinary colored paper. In general, from all that you find at home at hand. You can even connect children to the creative process. They will easily be able to cope with the flowers, from which the tree will subsequently consist. Children are very easy to cope with the task and will be delighted with the craft. After all, she really is very beautiful!  In order to make a corrugated paper tree, we will need:
- corrugated paper;
- newspapers (to create a basis of papier-mache for the crown);
- Form for papier-mâché (hollow drop-down plastic or ceramic ball, special form for baking, tennis balls for small trees or other suitable material.);
- glue;
- stationery knife and scissors;
- cardboard or thick paper for the pot;
- plasticine;
- food film;
- napkins (for winding the trunk);
- Old handle or stem for stem base;
- gouache.
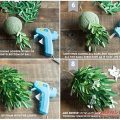
 Creating a flower tree or a tree of happiness(as it is also called) from corrugated paper begins from the starting point for making papier-mâché. Around the form-base, layers from watery and diluted scraps of newspaper are collected. But before applying the layers, the shape is better covered, wrapped with food film, so that newspapers do not stick to it. These newspapers are typed in 3-4 layers and set aside for drying on the form. The result is a ball, which must be painted with green gouache, thus imitating the color of the foliage. To make a barrel, take a rod from an old handle, a small wooden stick (toothpick) or a metal rod (depending on the size of the crown). Also for the trunk you will need a napkin. It is twisted into a bundle and wound on a rod. The ends of it are fixed with glue. The papier-mâché crown and the trunk are connected. To do this, a hole is made in the crown, into which the barrel is inserted and fixed with glue. The trunk itself is colored brown with gouache. Further, from the corrugated paper, strips with a width of 10 cm from the side are cut out, on which the fringe is cut. In addition, narrow strips of 5 cm are still cut, and left untouched. Two narrow and wide strips along the length are glued together, for which using an awl or a special quilling tool, they are twisted into a flower starting from a narrow strip. The ends are fixed with glue. Each dense roll thus obtained is neatly straightened and unfolded into a flower. For one tree, you can wind flowers of different colors (for example, white with a yellow core) or solid colors. Also for a tree you can wind "fuzzy" in the same way as the flowers themselves, but with more frequent fringe and without cores.
 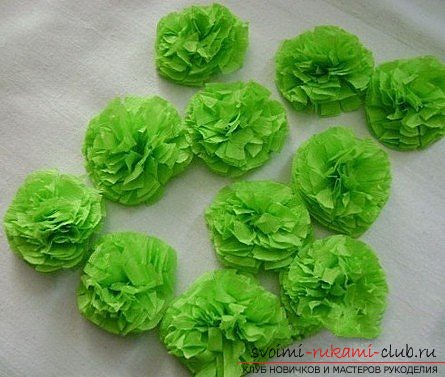 An uncompleted tree is placed vertically onplasticine, and begins to gradually "dress." With the help of glue on the basis of papier-mache are fastened the flowers from rolls and "fuzzy", which imitate foliage and flowers. They are located close to one another, so that there are no free gaps. After the crown with the trunk is ready and formed, you can start making a pot. To do this, you will need cardboard or heavy paper. A strip is cut out of them, which serves as the basis for the cylinder to be twisted. The same material cuts a circle, diameter equal to the diameter of the cylinder, and two narrow strips of 10 mm wide. These strips are glued along one edge of the cylinder in order to create a visual thickness. The bottom is glued. Next, the clay is removed from the tree, wrapped in a film (so that it does not leave ugly fatty marks on the pot), and again the trunk is inserted. The tree is placed in a pot and properly compacted. To fix the trunk, you can use a circle of cardboard, cut out according to the example of the bottom and with a hole in the middle. To make ornamental grass corrugated paper of green color is cut into squares with sides of 15 mm. And then using the method of cutting using a rod from the handle, the grass is fixed and "planted" on the sealing ring with the help of glue. The grass is given the right shape. Actually, it can be created in the form of hotel diy from napkins. The pot can be slightly aged with gouache, andalso paint make the grass more juicy, putting in some places expressive strokes. You can decorate the finished tree with a butterfly in the style of quilling.
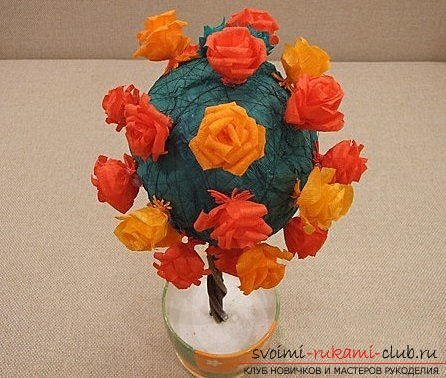
Comments
Related posts:
 How to make flowers from corrugated paper? - An article with a step-by-step solution for creating colors from corrugated paper.
 Flowers with their own hands, how to make a flower from paper with their own hands, flowers from corrugated paper, tips, recommendations, step by step execution instruction.
 Basket with flowers from corrugated paper, hand-made articles made from paper
 New Year's hand-made fir-tree made of corrugated paper for the 2015 Competition, hand-made articles of paper by the hands of the new year
 How to create a beautiful tree of coins thereby decorate the interior