
Try to tie a sweater for your child. Our master class contains a simple scheme that will be useful for beginners.
Knitting sweaters is a very fascinating activity,and, in my opinion, knitting helps to combine business with pleasure. For example, every evening we spend at least 2 hours at the TV. I think this time wasted. And if you watch the same series and at the same time something to knit-make, you can rest and do something useful. I got a sweater like this for my beloved son, who is simply obsessed with technology. So, I bring to your attention my master class on knitting a sweater with a sleeveless-raglan for a boy of 5 years! 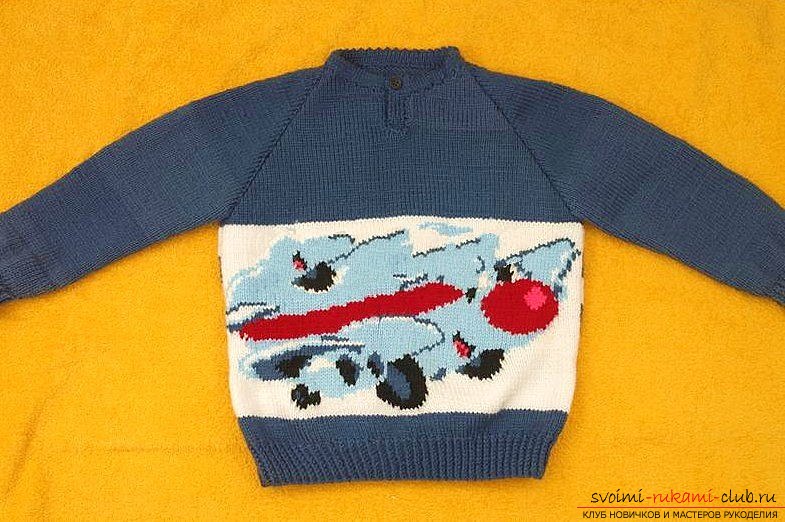 As a basis, I took a diagram of the picture with a cheerfulairplane. For the convenience of work, I printed it at work. Color printer in our office, unfortunately, not, but on a black and white print, too, everything was very clear.
 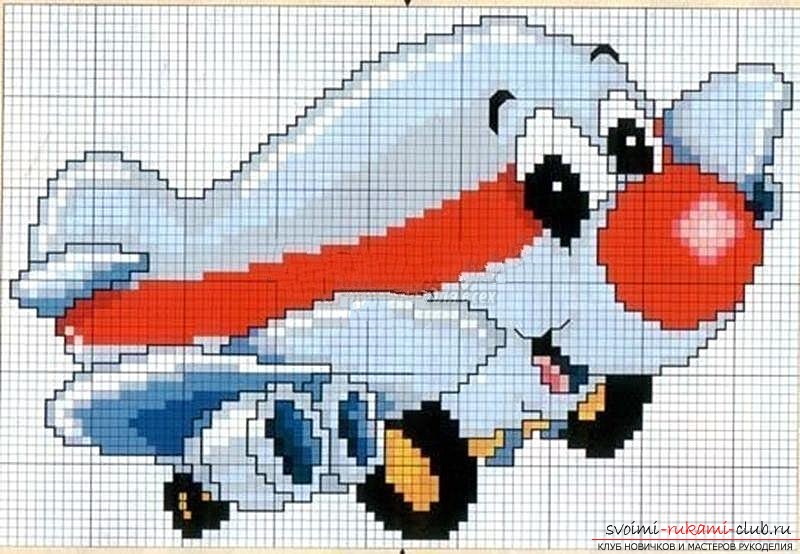 So, I tell you how I knit, and what isknitting sweater with knitting needles. For work used acrylic yarn (it does not prick), with a thread length of 350 meters in a skein. The thread is thin, knitting in two pieces. Someone will say that you could save by buying a little yarn thicker. I answer - it is impossible. Even thicker yarn with knitting gives a thin cloth, and its consumption goes about the same. I chose the colors that are on the chart, but for the main one I took dark blue (and not marco, and elegantly). Shelf Dial 70 loops (thread in two pieces) on the spokes, garnish with an elastic band 5 centimeters, then add 20 loops in the last row of the rubber band. A total of 90 knitting needles are produced on the spokes, of which 86 will be involved in the etching of the pattern. Another 10 centimeters knit blue yarn with viscous viscous (facial rows - facial loops, purl rows - purl loops). Then the next 60 rows knitted strictly according to the pattern. To ensure that the threads do not pull together the whole fabric at the work, it is necessary to stretch it slightly during work and to twist threads as often as possible. This will make the canvas and denser, and will prevent its contraction. After you untying the picture, you can relax, all the most difficult is left behind. Return to the blue color of the yarn, we sew 2 rows, and then in each subsequent row after the edge loop and before the edge loop in the front row we sew two loops together. This will allow to evenly prepare the armhole for raglan.
 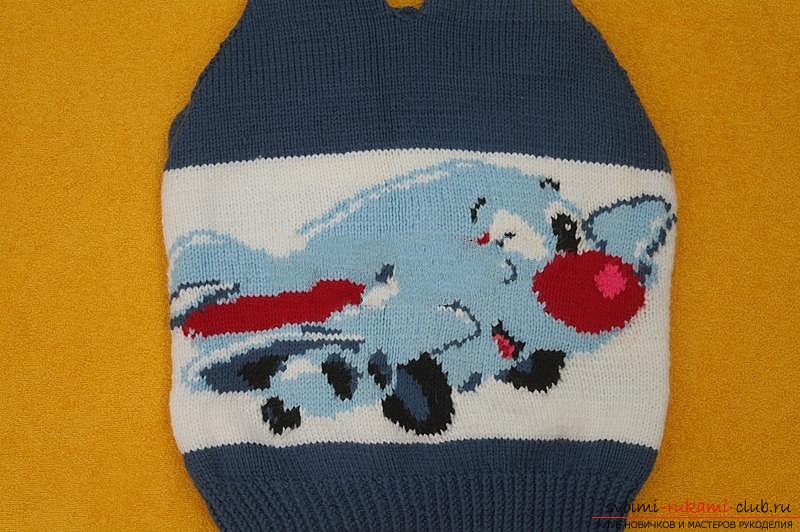 Do not forget about the neck. The fact is that the main "not love" for children to wear homemade sweaters is that the head in the throat passes very tightly. So I decided to make a sweater on the sweater. For this, I closed the average 8 loops, and finished the hangers separately.
 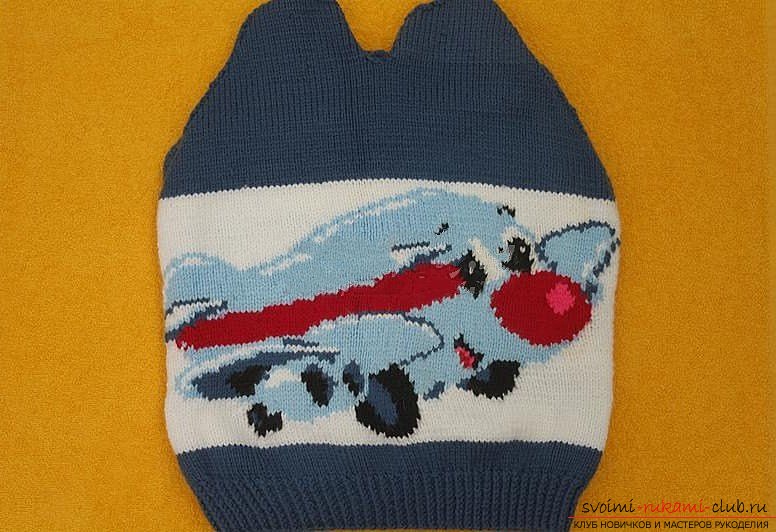 Back on the spokes, dial 70 loops (thread also intwo additions), we sew a rubber band 5 centimeters, but in the last row of the rubber band we add evenly 20 loops and 10 loops. We do this so that both the back and the shelf are of equal width. The shelf at the expense of drawing will not be stretched on width that you will not tell about a back. 10 centimeters knit blue yarn with viscous viscous (facial rows - facial loops, purl rows - purl loops). After that, alternate white and blue strips of 9 rows in each strip. Proymu design as well as on the shelf.
 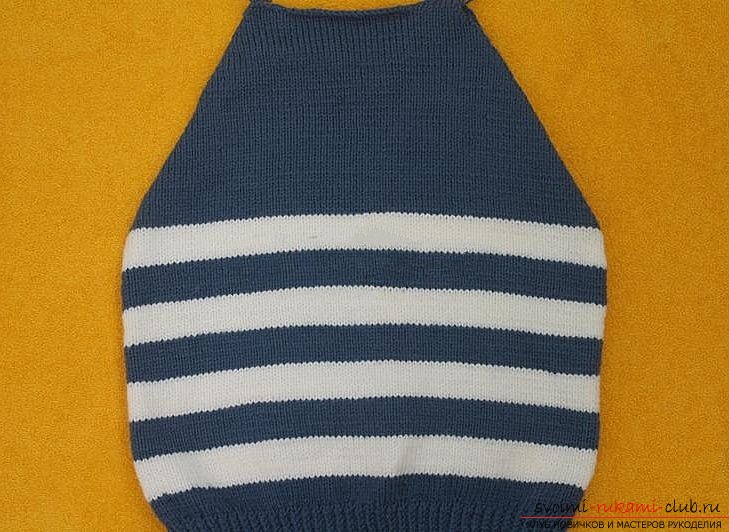 Sew the side seams of the back and the shelf. Shoulders are chipped.
 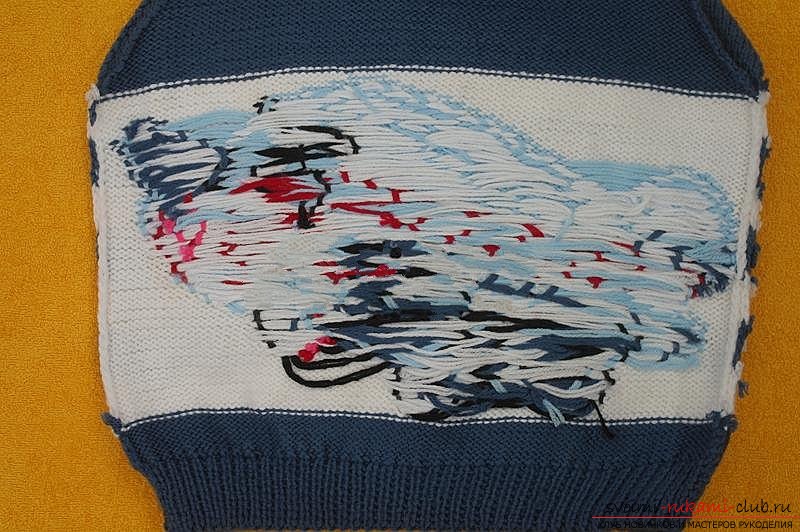 Knitting of a child's sweater continuesknit, and proceed to the sleeves. The sleeves are best knit both at the same time, from different coats. On the needles, we collect 40 loops for each sleeve. For 5 centimeters we knit an elastic band. In the last row we evenly add 10 loops. Next, knitting goes hosiery, in every 10 row behind the edge loop at the beginning of the row and before the edge loop at the end of the row we make an increase in 1 loop.
  Having knitted sleeves to the armhole line (width 64loops in my case), as well as on the back with the shelf, we start to loosen the loops before and after the edge loop along the 2 loops together. And so we knit until the very end, until all the loops are closed.
 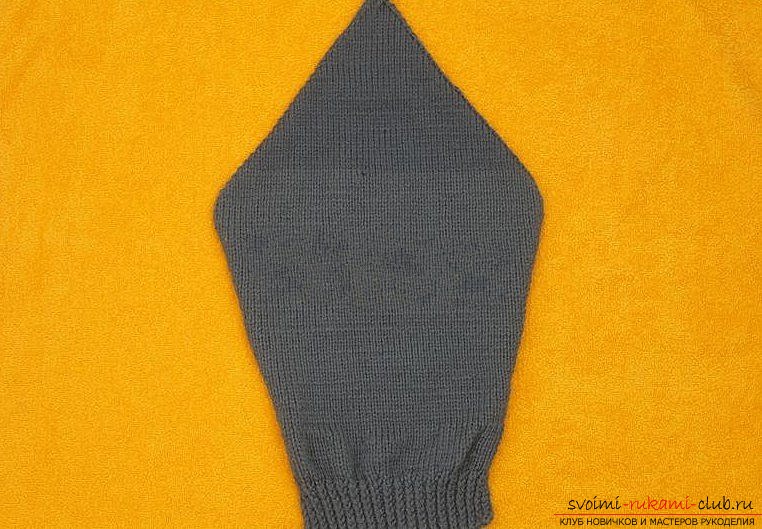 Sewing the sleeves into the armhole. At the very top of the shoulder pad, carefully trim all three parts and sew.
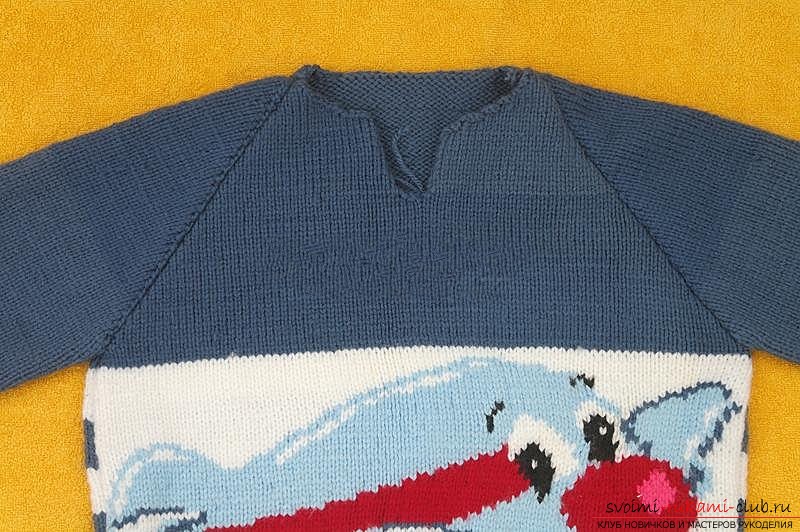
 For the strip we knit two rectangles of 9 loops wide. The length of the rectangle is equal to the depth of the bar.
 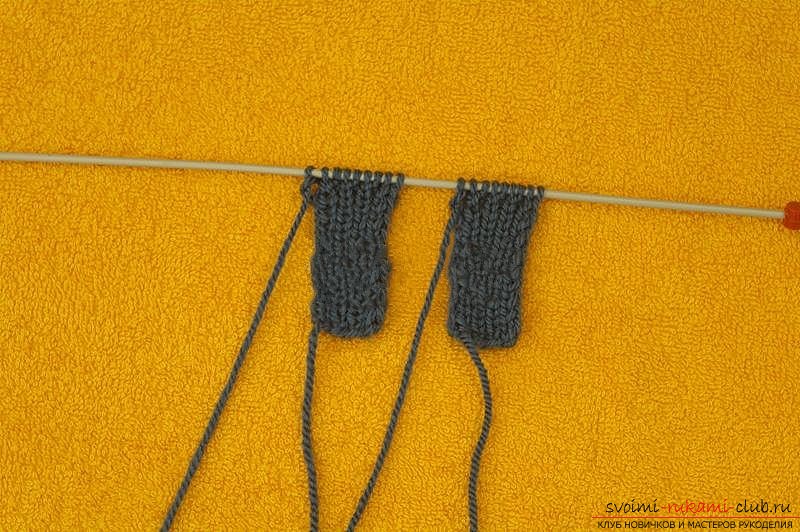 Rectangles are stitched into the neck one on top of the other. Each sewn to the side seam of the neck.
 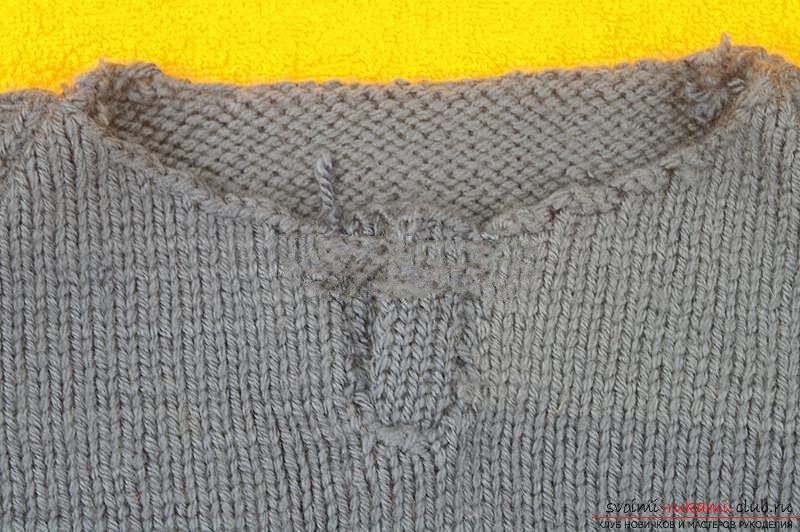 At the edge of the neck we type 90 loops;do on circular knitting needles or knitting needles. We tie the neck with the bend (nakid, two facial loops together). On one of the edges of the neck you should make a buttonhole.
 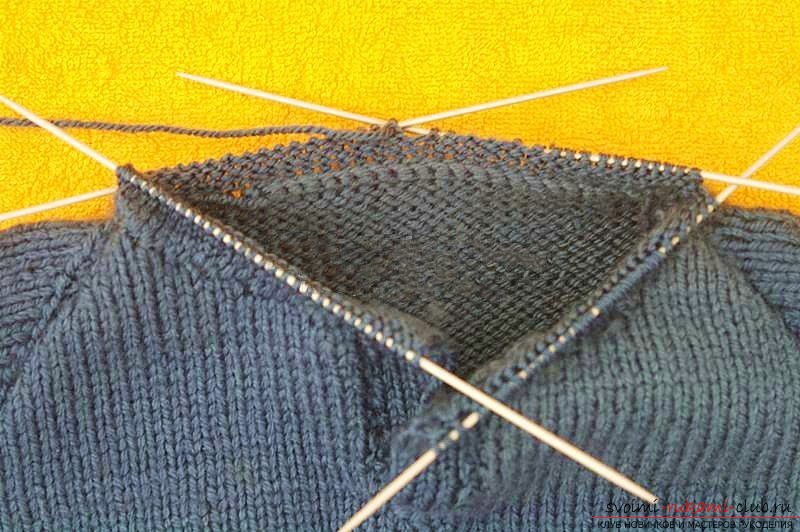 That's all, it remains to sew a button.
 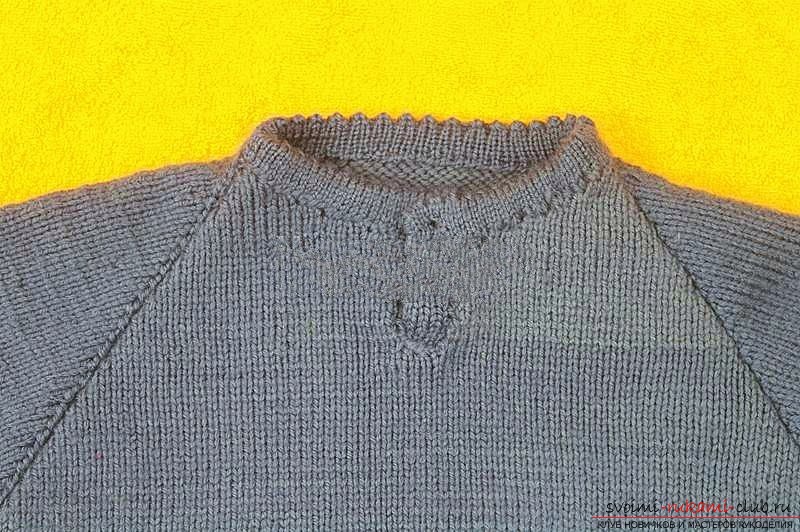 Here is a sweater turned out. Drawing, you can use whatever you like, and the rest of the knitting pattern of the sweater for everyone will be the same.
Comments
Related posts:
 This master class contains a crochet pattern for children of summer beret.
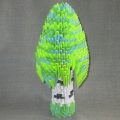 This detailed master-class modular origami with step-by-step photos contains a scheme for assembling birch from paper.
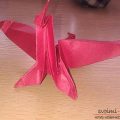 This detailed master class contains an origami-dragon scheme from paper, which you can make with your own hands.
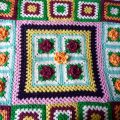 This crochet master class contains a crochet pattern for a plaid.
 This master class of crochet crochet contains a rose scheme and a description of knitting.