Cabochon braiding with beads (photos and video)
Content
- Cabochon braiding with snake chain
- Photo masterclass of braiding cabochon beads
- We trim the cabochon with beads
- Beaded braided beads
- Video: Learn how to braid cabochons and beads with beads
Fond of beadwork,With a desire to create a unique ornament using not only beads, but also a beautiful cabochon, they are faced with the problem of how to make it braided. This is quite simple and, as always when working with beads, it is very pleasant. Cabochon is a stone with a smoothly polished surface, its shape can be different. This master class will tell you in detail how cabochon braiding is done and also will consider such an interesting variant of beadwork as bead from beads. Having mastered the methods of braiding, you can make brooches, earrings, necklaces, hairpins and much more. The Internet has a variety of photos of such products. Made-for-yourself jewelry will be exclusive and will certainly draw your attention.
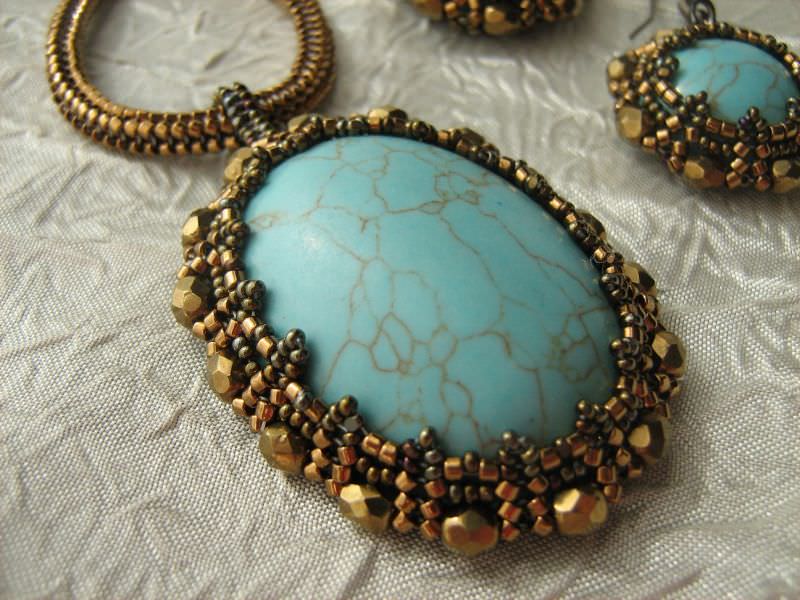

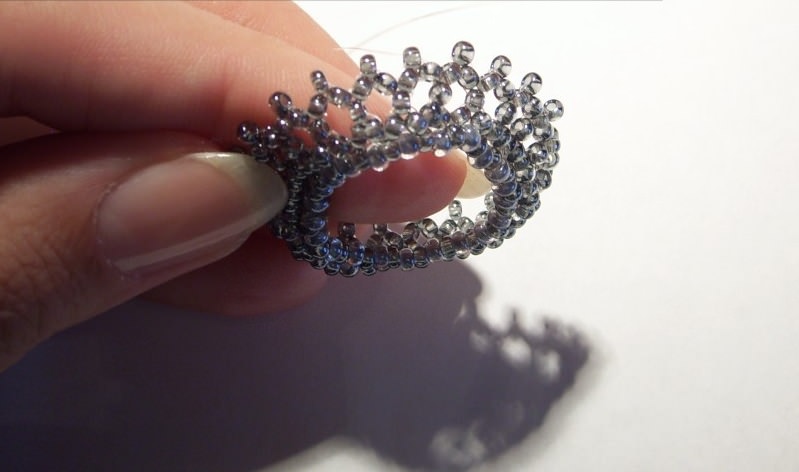
Cabochon braiding with snake chain
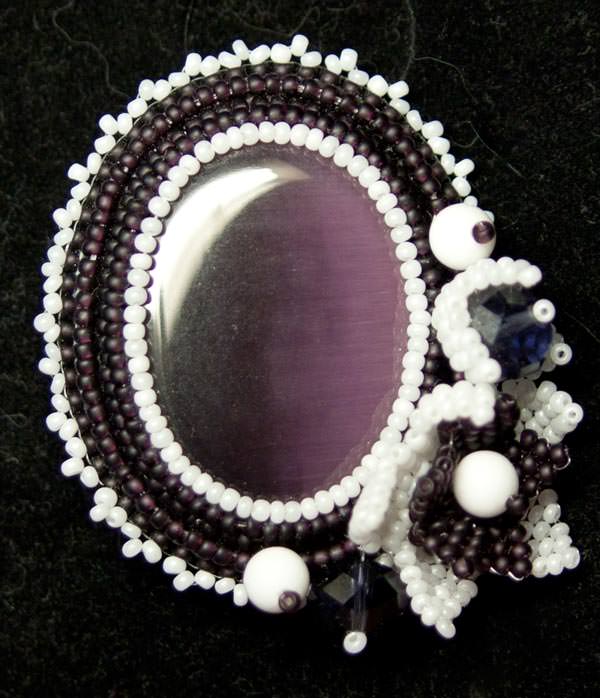
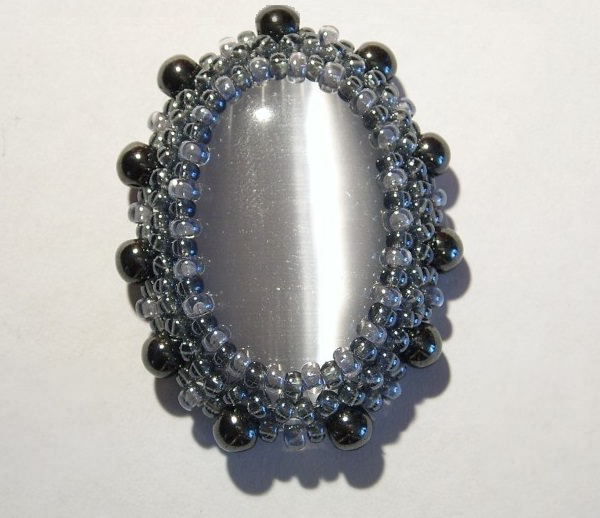
There are a variety of manufacturing methodsBeaded rim for cabochon. In this training material we will consider the method of the most simple and at the same time very effective. The braiding with a chain-snake is suitable for cabochons of various shapes and will look good in any decoration. After you master this technique, you will probably want to polish with beads yet another beautiful polished stone. To see this, look at the photo of this product.
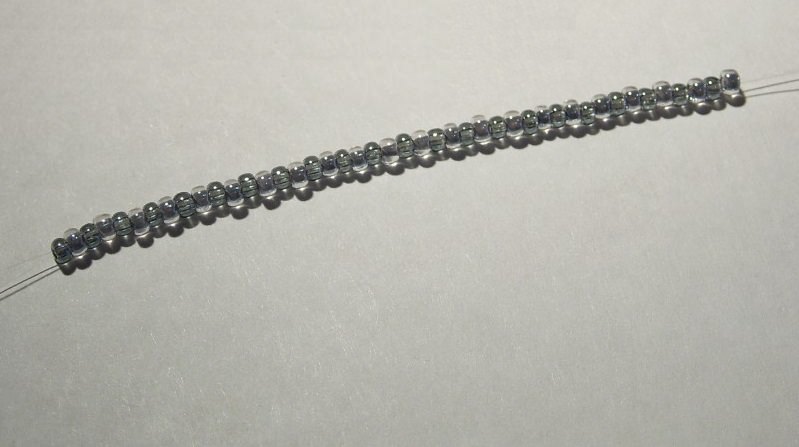
To master this technique you will needThe following materials: beads of two matching colors and suitable for cabochon, beads (can be replaced by large beads), monofilament, bead needle and cabochon itself.
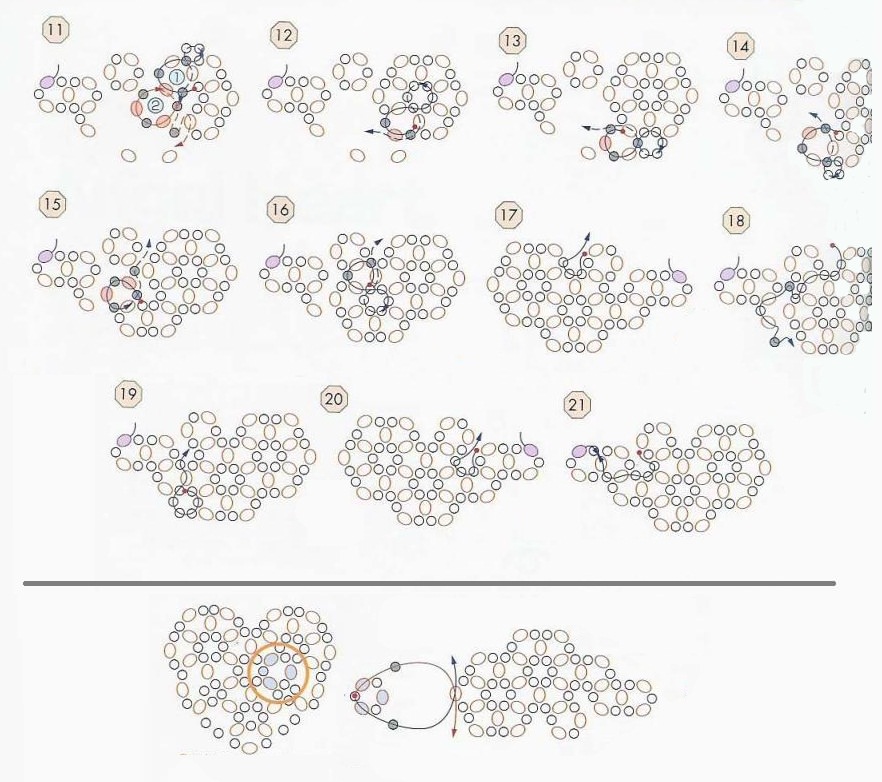
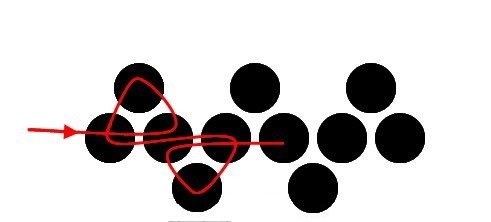
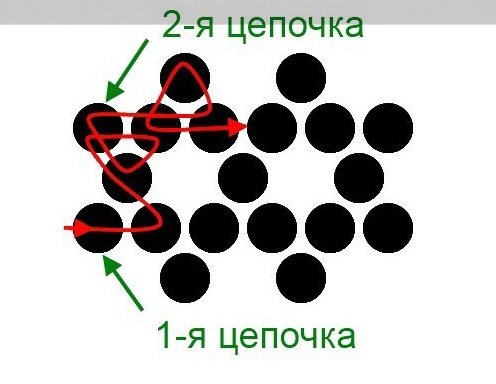
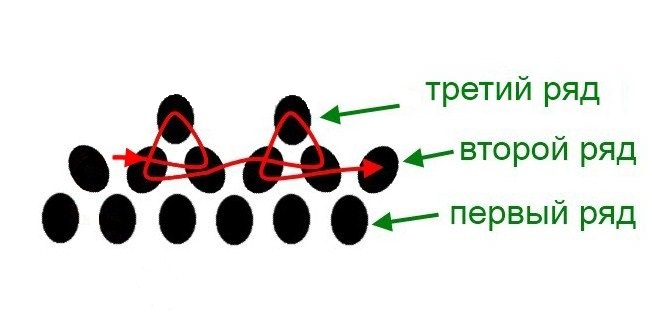
Begin braiding follows the weave firstRow of the chain. To do this, leaving a free 90 cm monofilament, weave the chain according to this principle: stranding three beads, we draw the thread through the first two so that we get a triangle of three beads. After stringing two more beads and threading through the near bead of the first triangle and the free bead that follows it. As a result, you get two looking in different directions of the triangle. According to this principle, the entire chain is woven, which along the length should be equal to the circumference of the cabochon. The diagram clearly shows how to do this. Also on the diagram it is shown how to connect a chain into a circle.
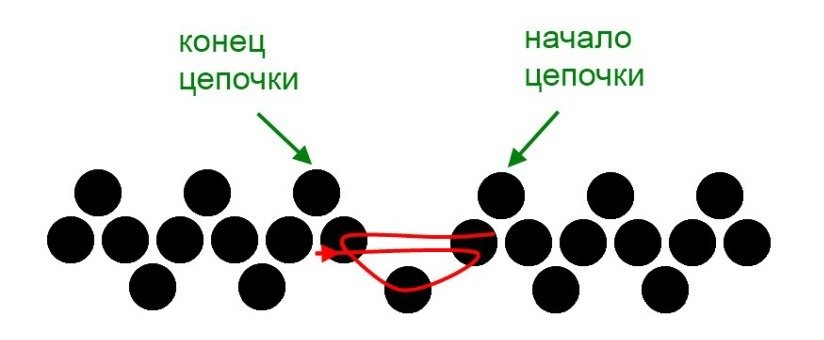
It is important to remember that if usedBeads for decor, then triangles should be an even number. When the main chain is ready and connected in a circle, you will need to attach another one to it. Attach it to the top edge of the chain. It is quite difficult to describe this, and therefore you'd better turn to the scheme at once.
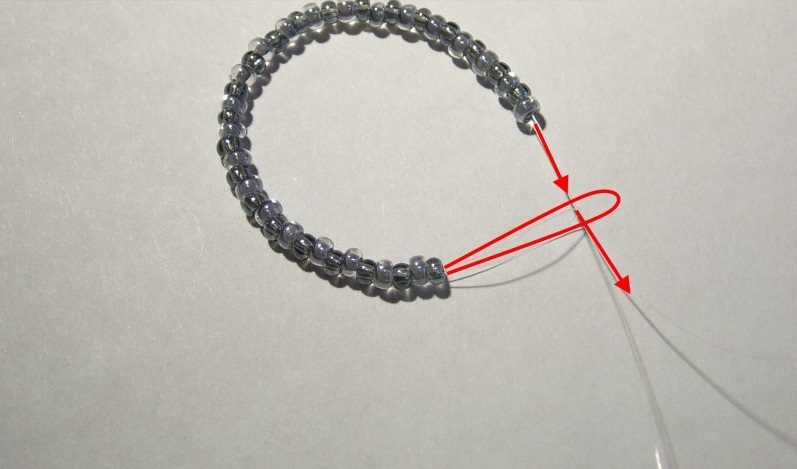
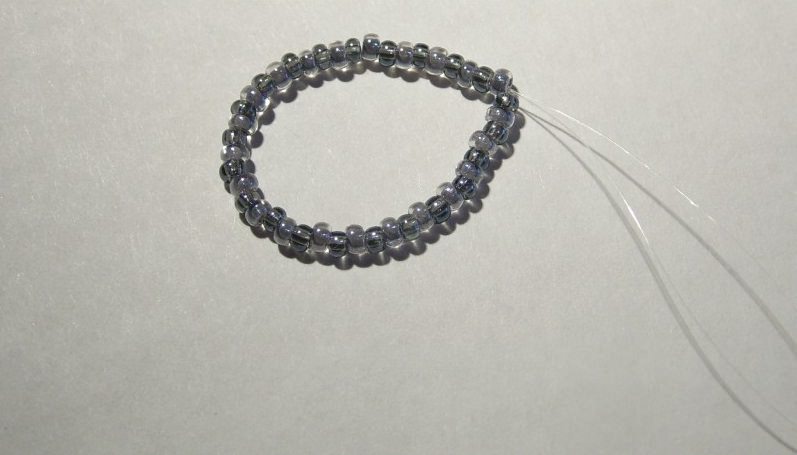
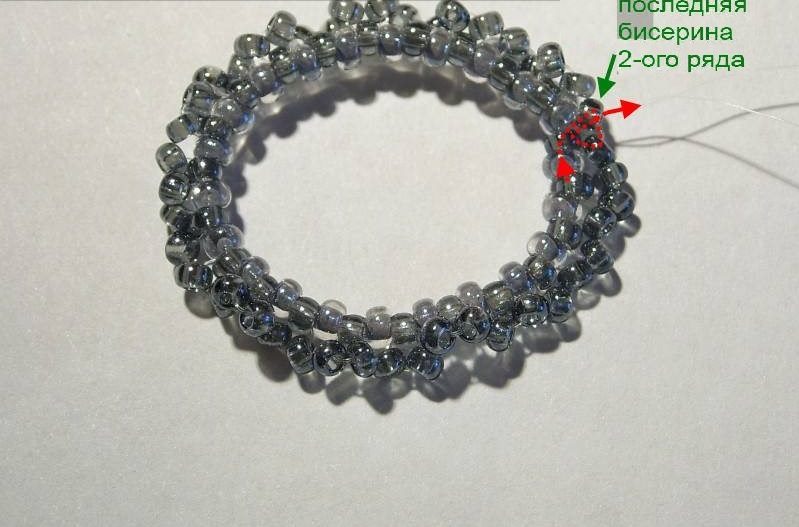
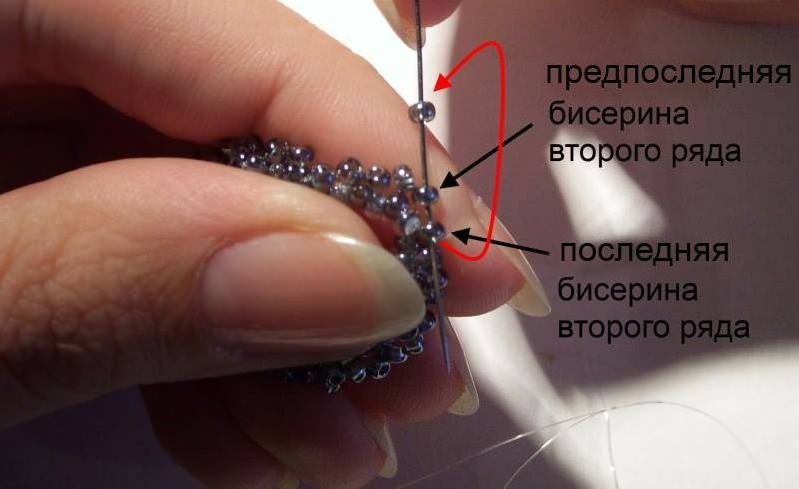
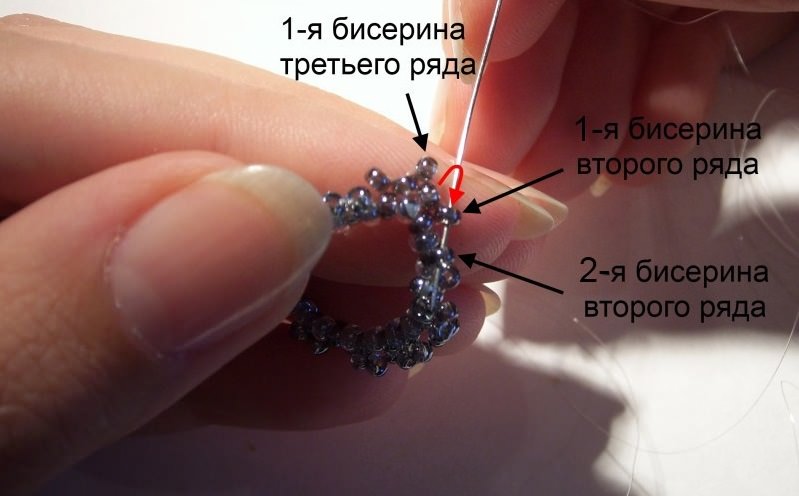
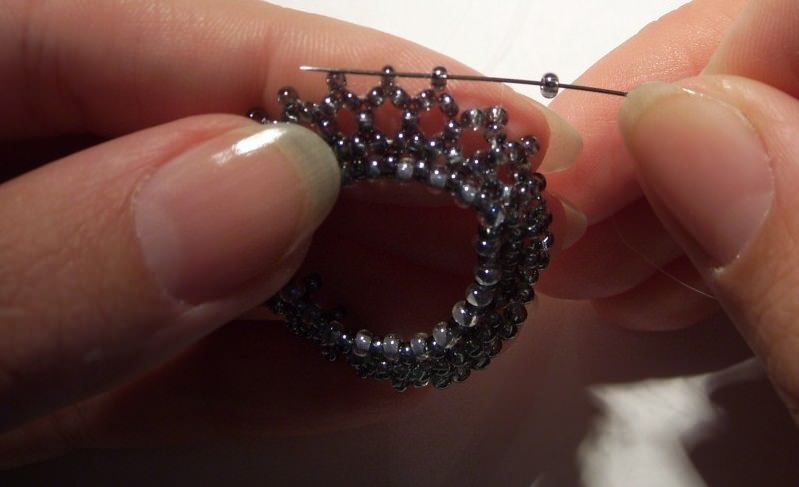
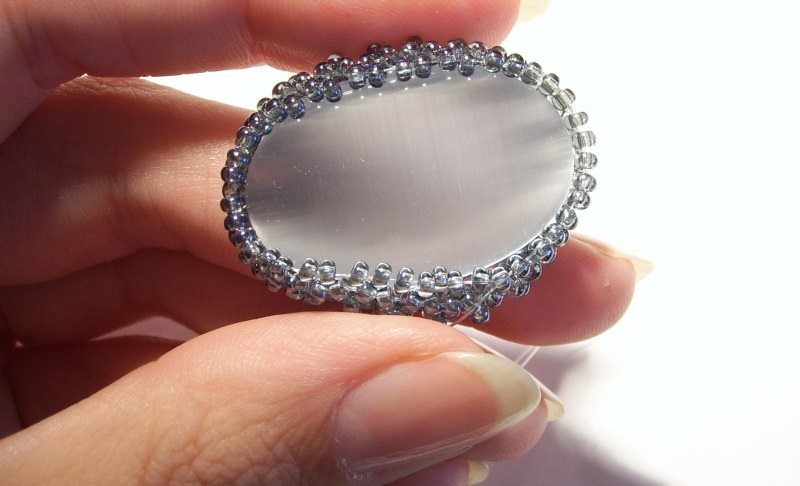
When the second chain is ready, you need to add the beadsAnother color that must be attached between the upper beads. After this, you need to pull off the edge of the rim. For the best effect, you should walk a monofilament 2-3 times. Having received this preparation of the frame, you must place the cabochon in it so that its convex side looks at the screed.
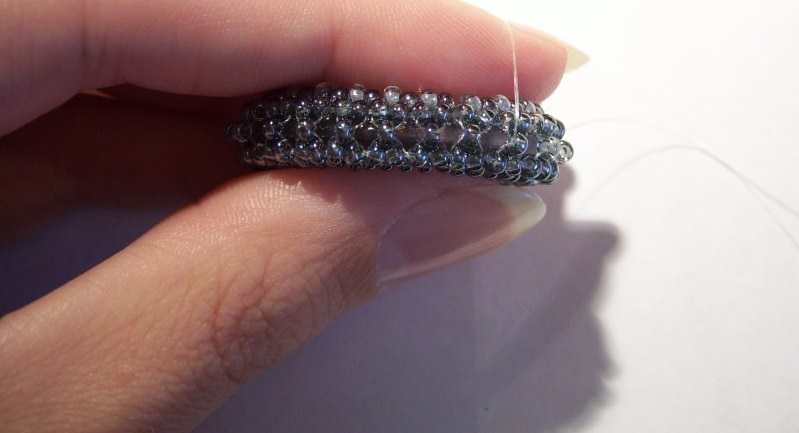
This is not the end of the master class. You still need to make the second side of the beaded braid. With this technique, braiding is two-sided. To do this, using the remaining free end of the monofilament, it is necessary to weave the beads of the second color, as well as on the upper edge of the braid. When all the beads are in place, the edge is tightly tightened on the same principle as the upper one. As a result, the stone should sit very tightly in its beaded frame, do not crawl and not fly out. In this simple way, you can easily fly a cabochon of any shape and size. For inspiration and development of braiding designs, you can always refer to the photo. The braiding of cabochons will allow you to create your own unique collection of ornaments.
Photo masterclass of braiding cabochon beads
This method of braiding is simple enough and fast and requires additional tightening of the screed:


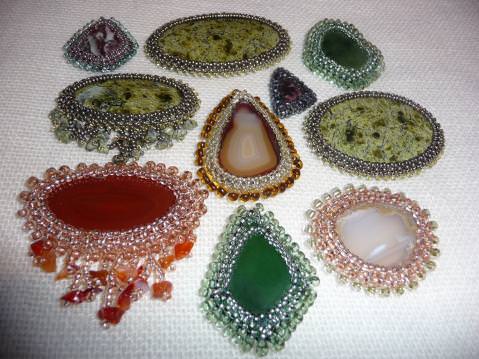
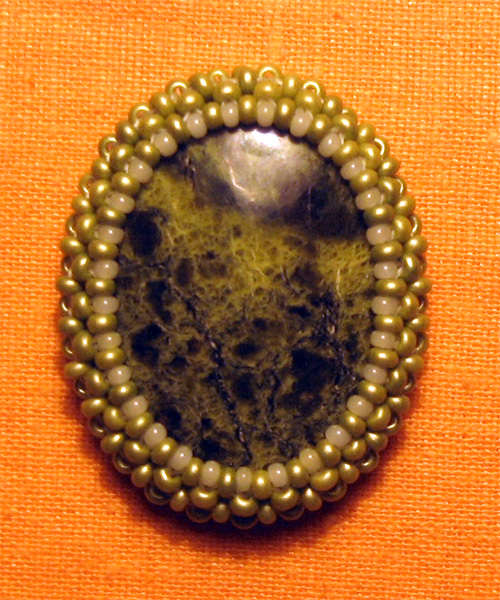
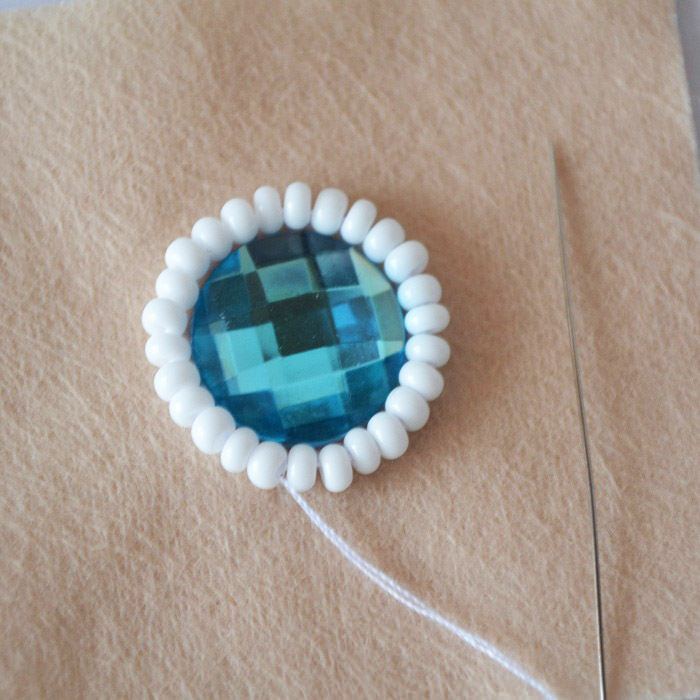
We trim the cabochon with beads
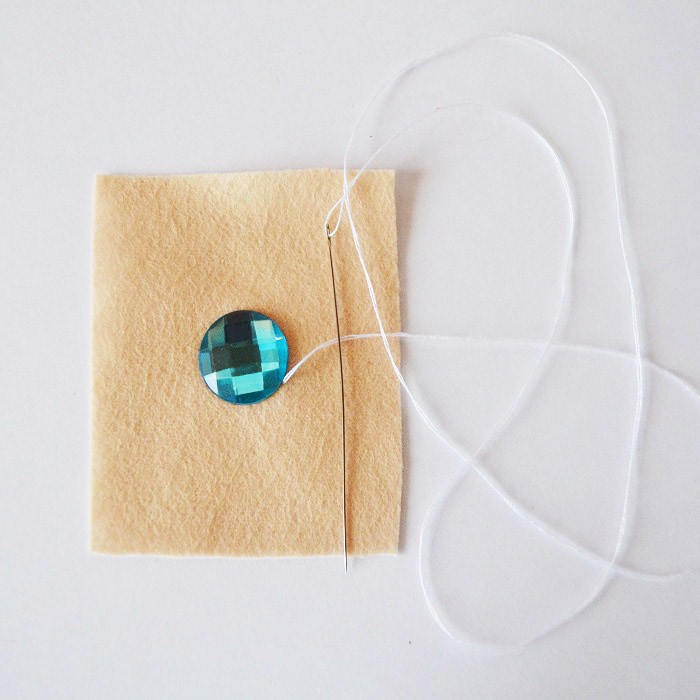
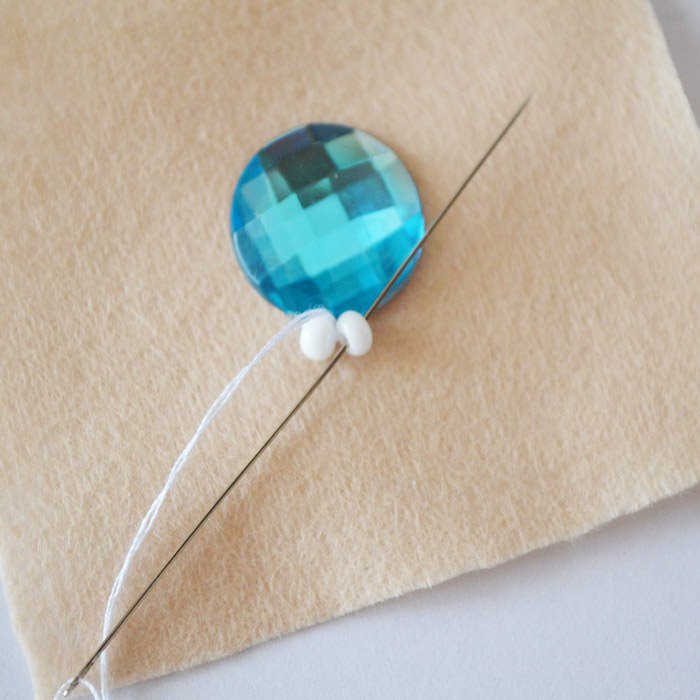
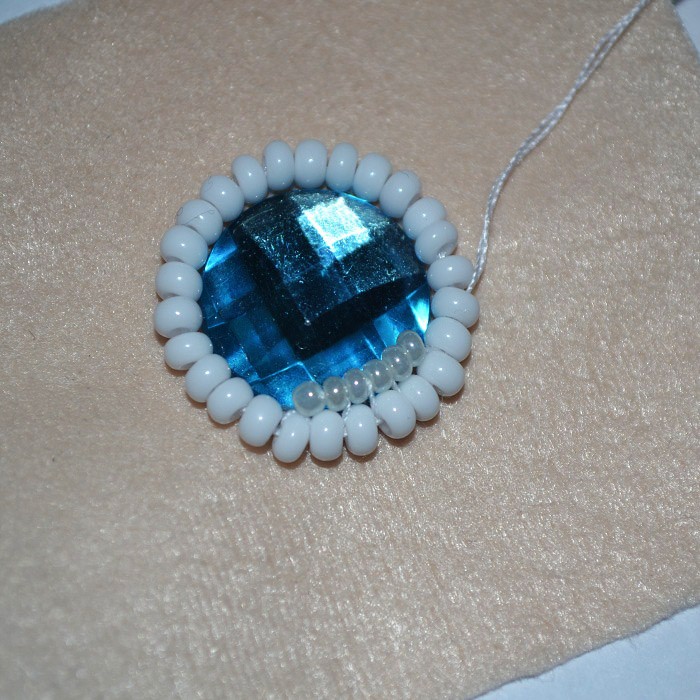
For a beautiful stone frame, especially forMaking brooches, it is good to sew it with beads. This master class will certainly help you learn this technique. You will need: cabochon, beads, felt, glue and monofilament.
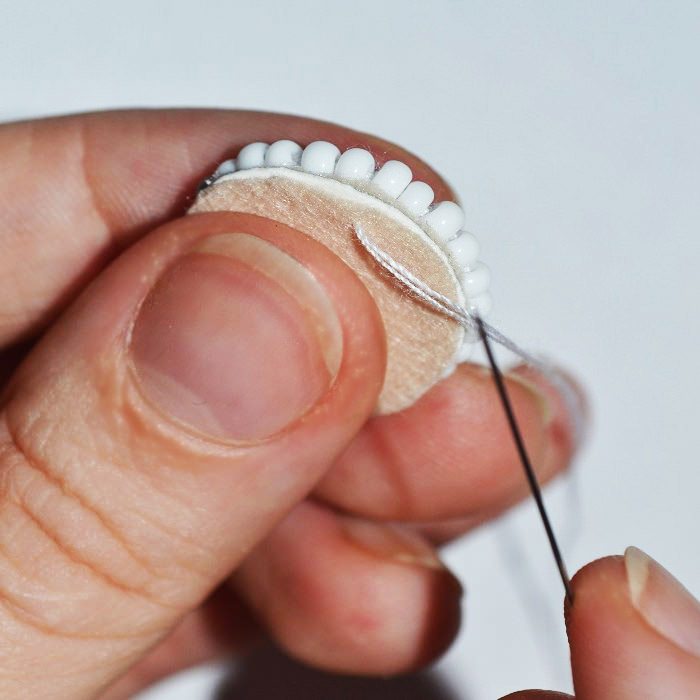
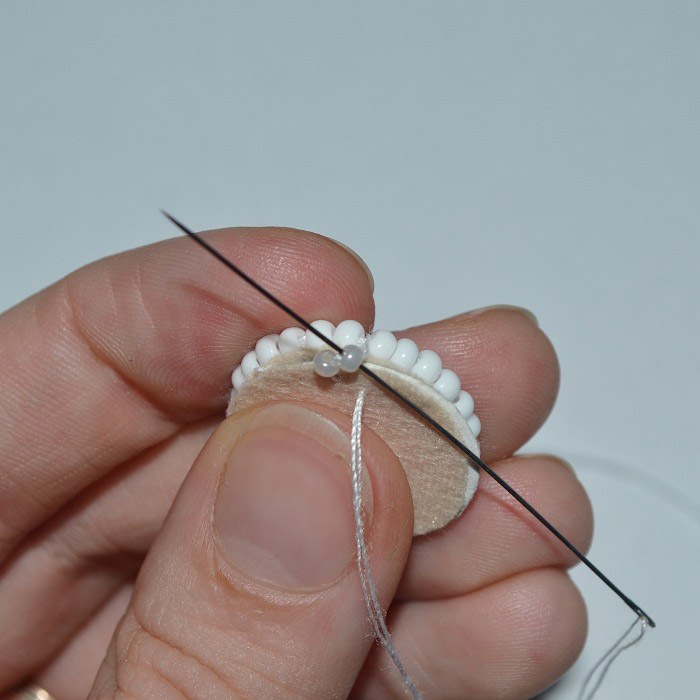
To begin with, you will need to be very carefulGlue the stone to a small piece of felt, but do not cut it. When the glue is dry, it is possible to start the lining. To do this, the needle with monofilament is removed from the underside at the edge of the cabochon. After stringing two beads and, having retreated to a distance sufficient to lay beads, again deduce the needle on the wrong side. Sending the needle again on the front side, it must be stuck so that it comes between the first two beads. Then stretch the thread through the right bead and again string two beads that will be fastened too. So you need to sew the entire circumference of your cabochon.
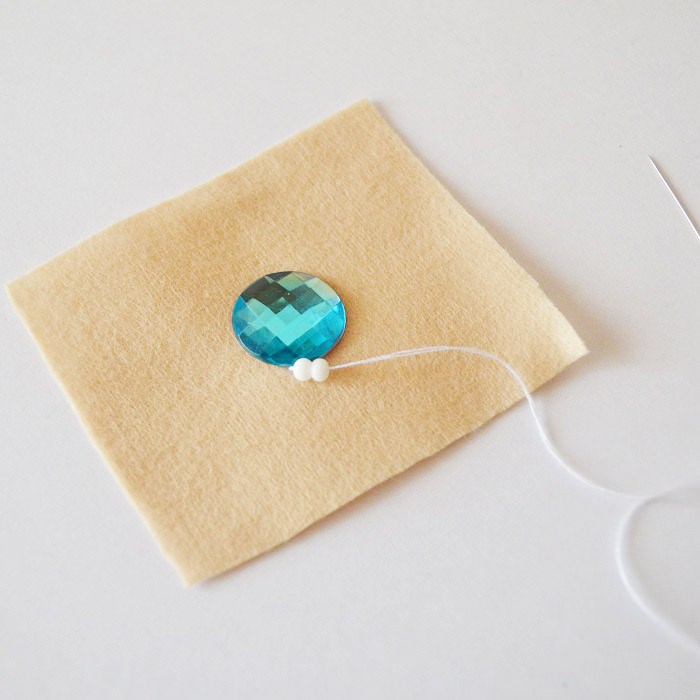
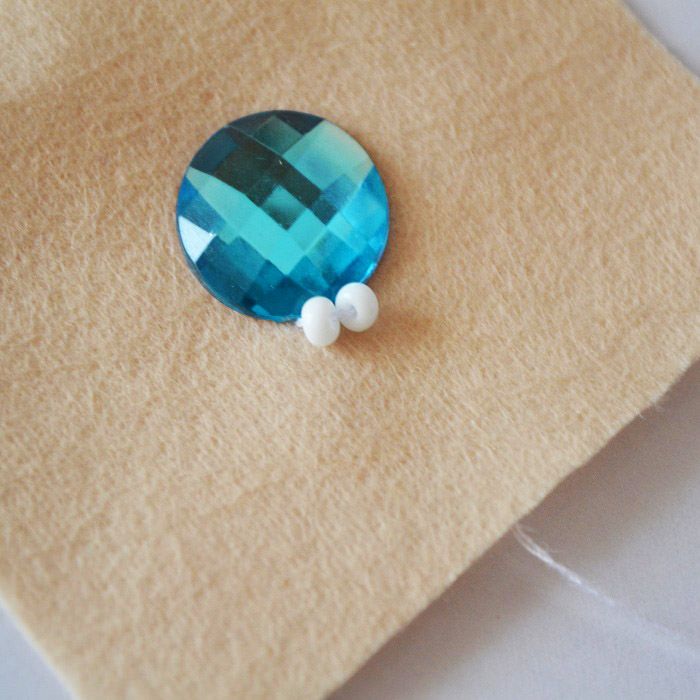
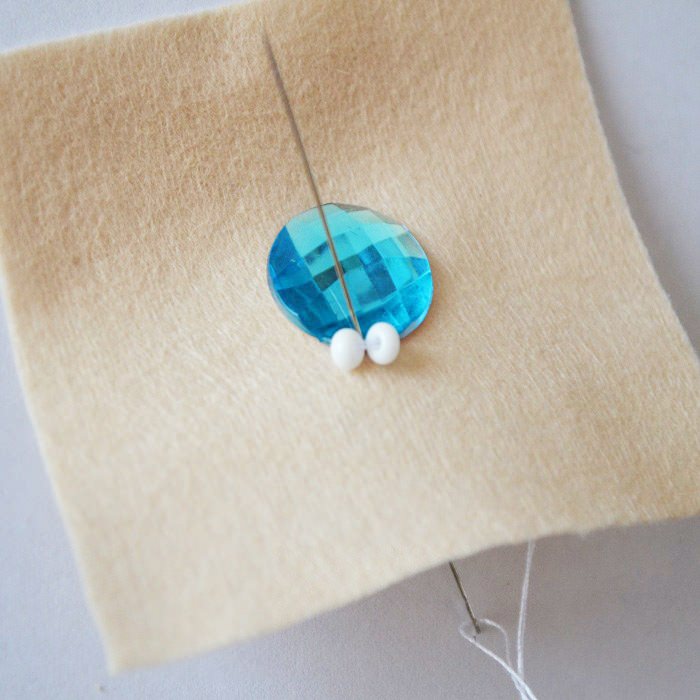


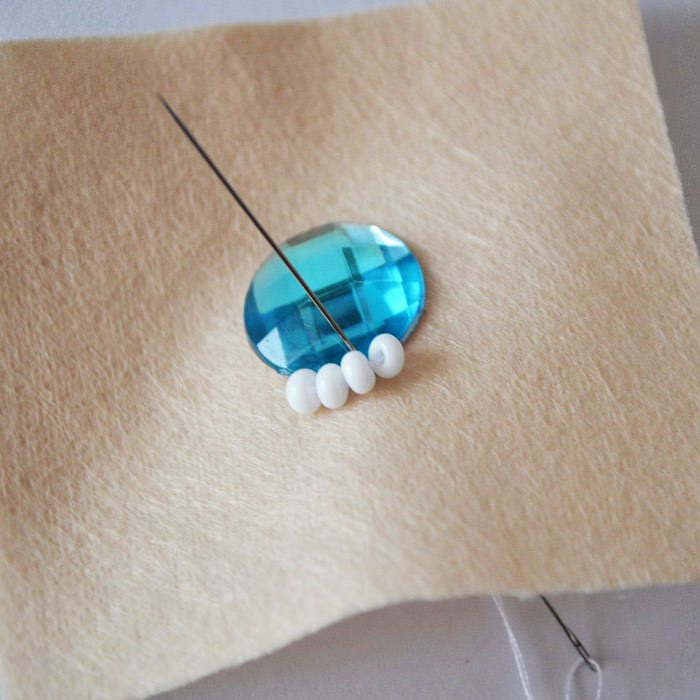

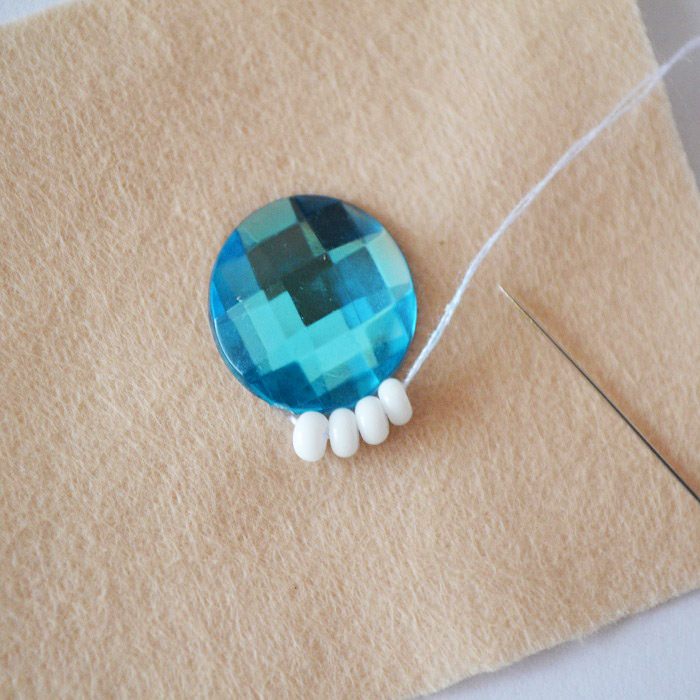
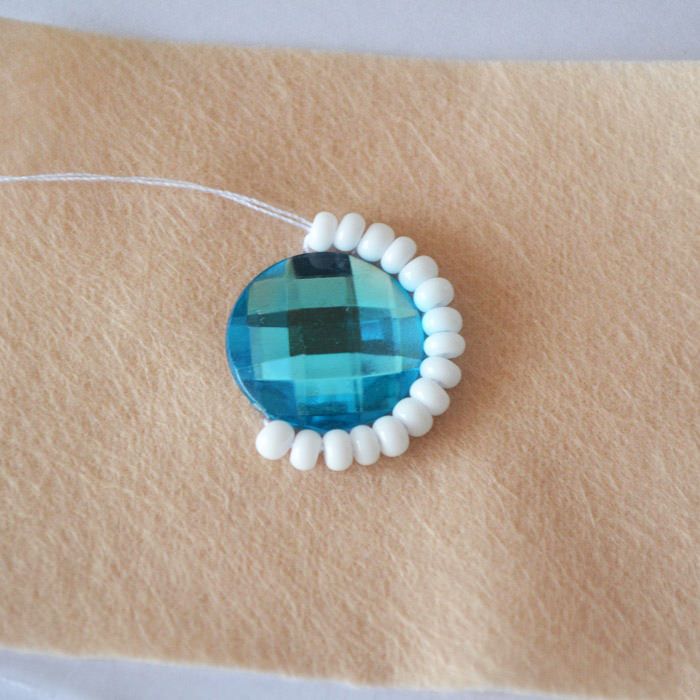
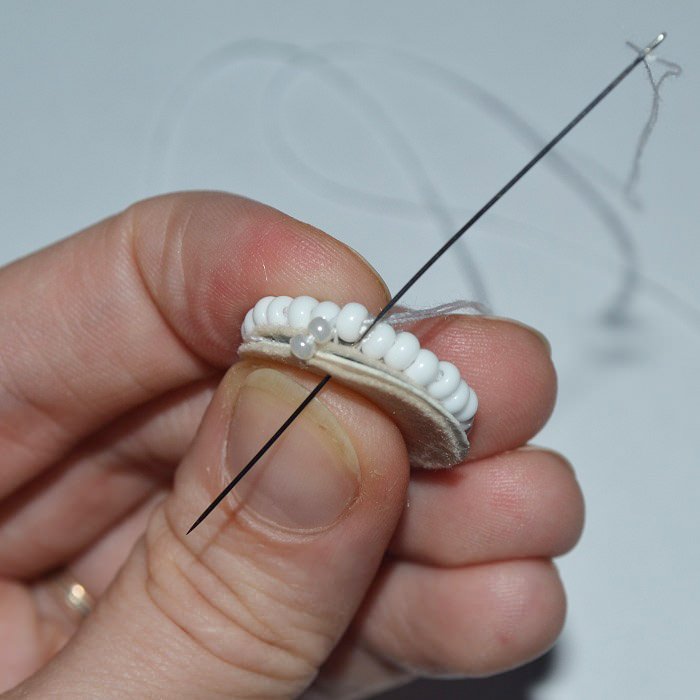
When the first row is finished, pull out againNeedle on the front side and start braiding with small beads. This is done almost as well as when sheathing, but small beads are fastened not to the fabric, but to the bottom row of beads. At the same time, the needle is passed through the previous bead every time, and then passes through 5 lower beads. So the second row is done. The number of rows can be larger.
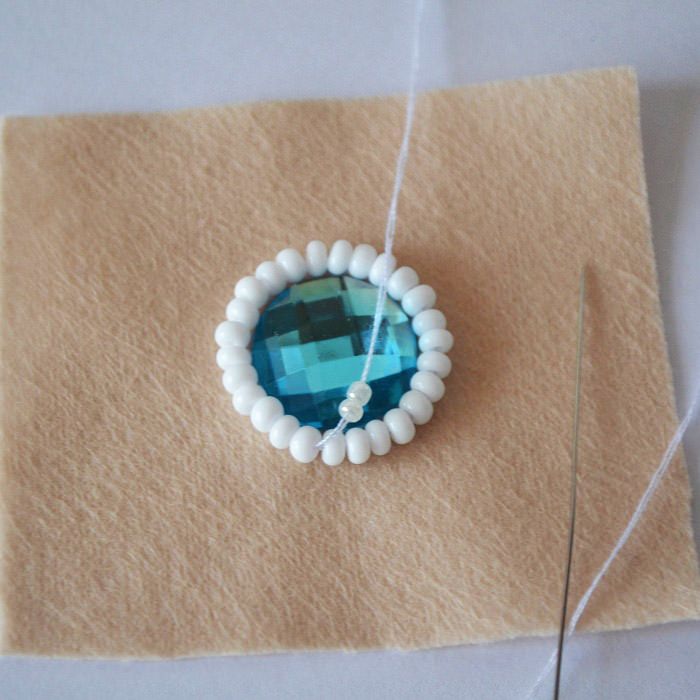


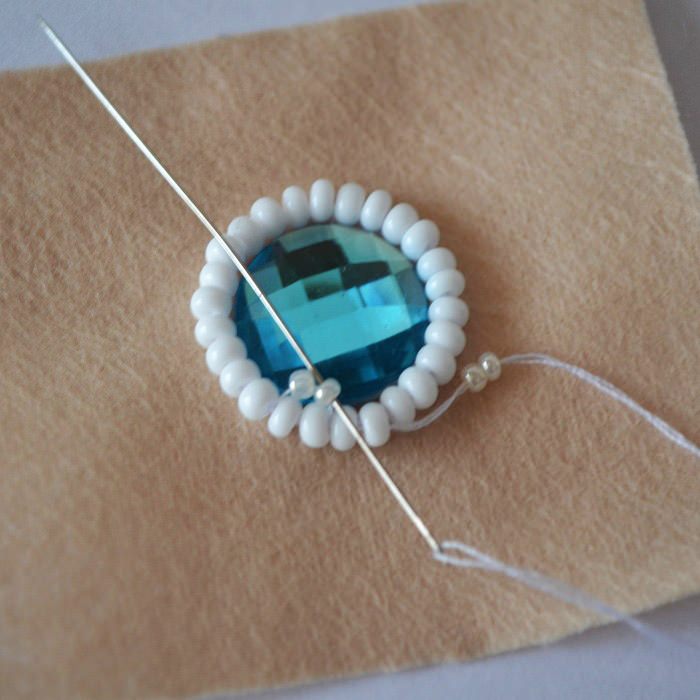

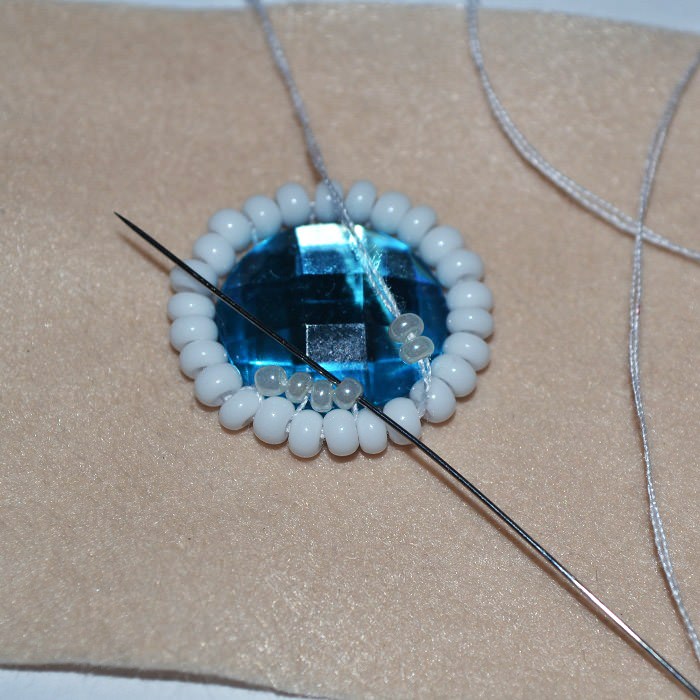


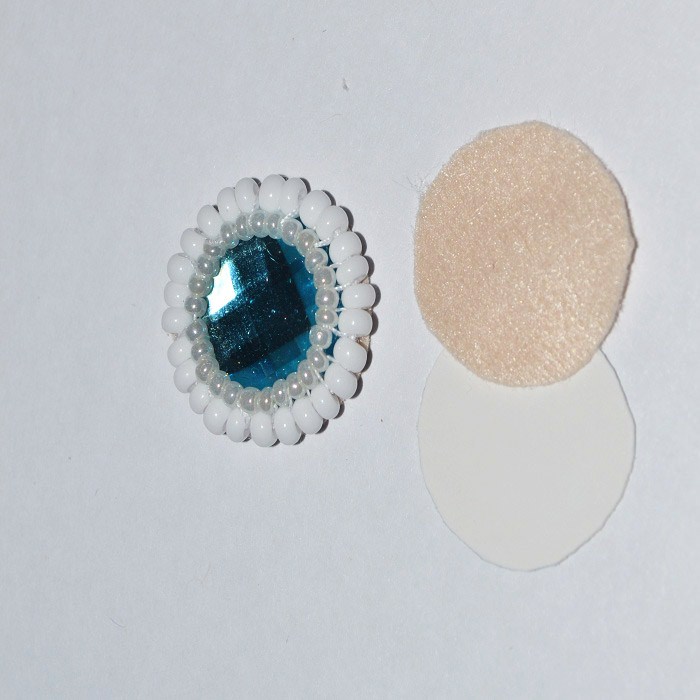

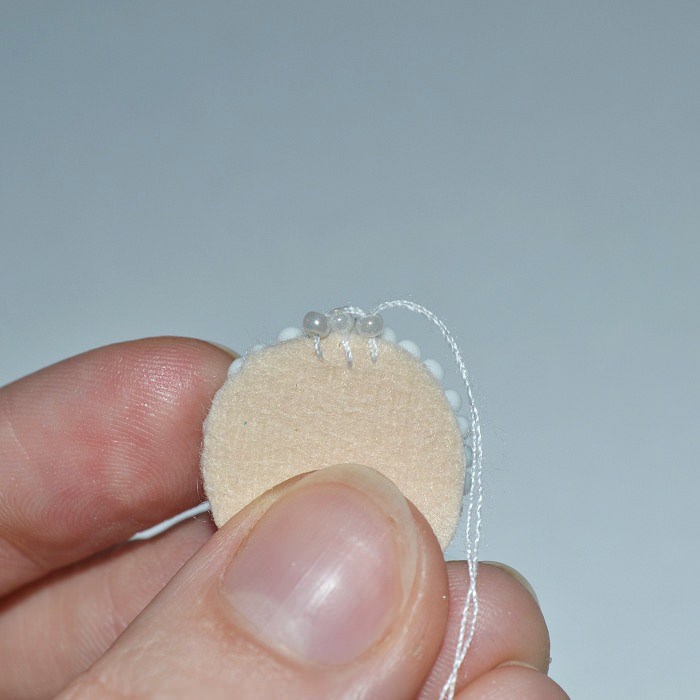


In this way, it is very good to coat a cabochon for a brooch or earrings. Or maybe you want to make a whole kit. To find the design of the future product, you should refer to the photo.
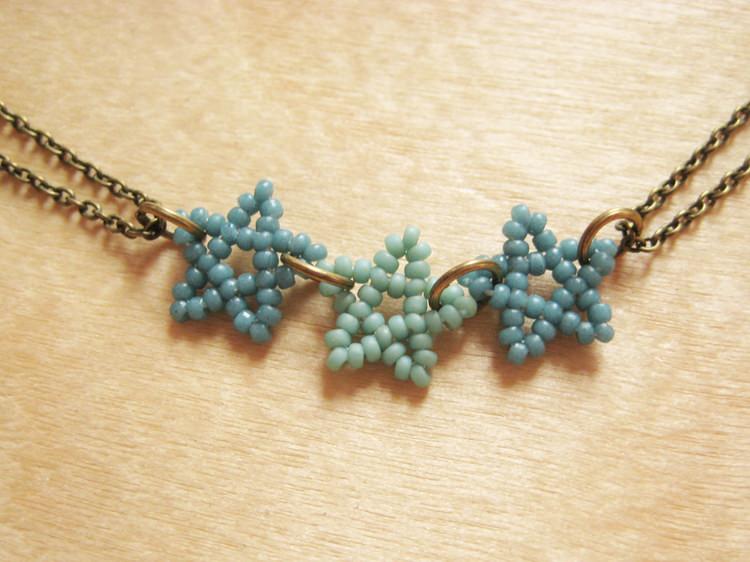
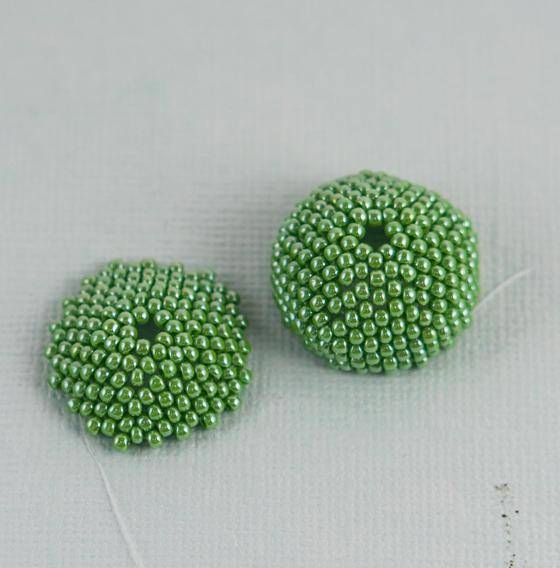
Beaded braided beads
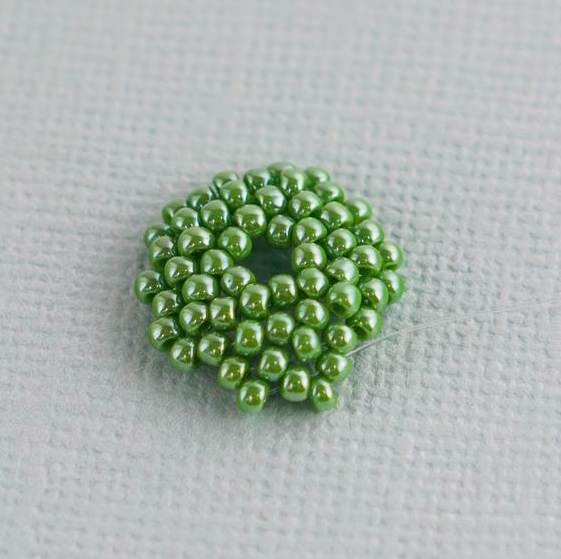
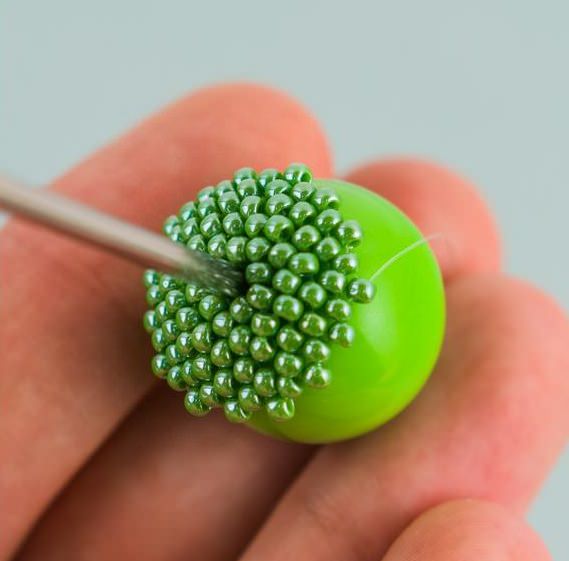
Beads are often needed for jewelry, and they should notGet out of the style of the product. Therefore, you need to use beads from beads, as well as ordinary ones, which can be braided with beads. It's not very difficult and very exciting. Our master class will teach you an interesting mosaic technique of braiding beads.
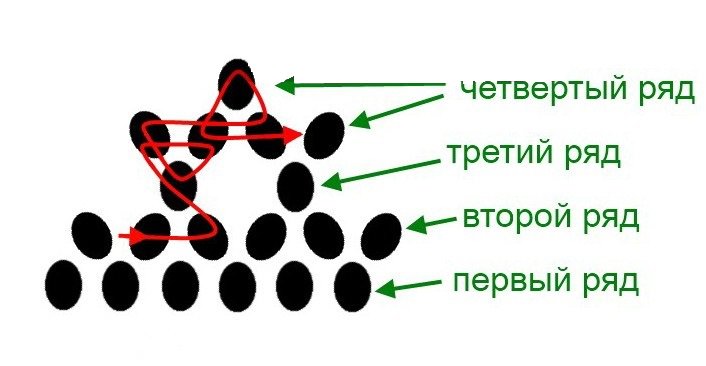
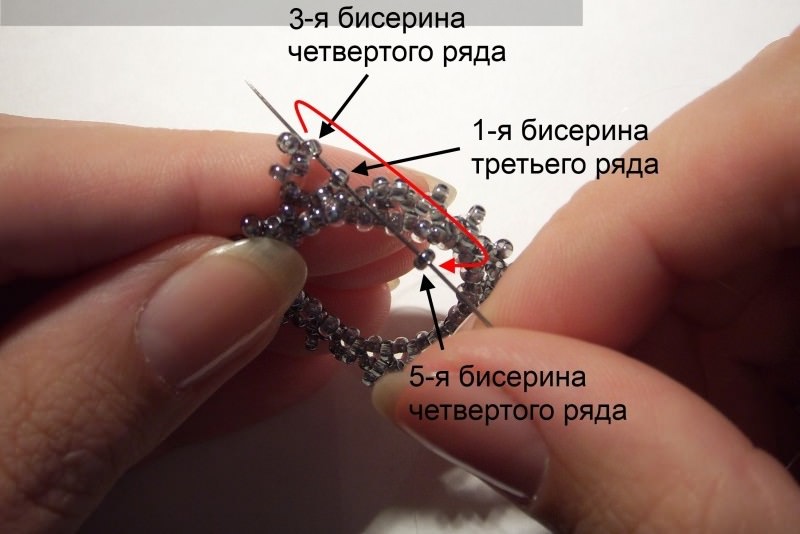
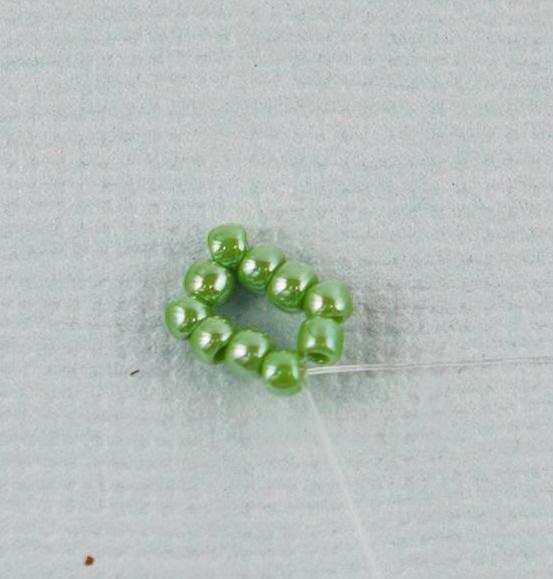
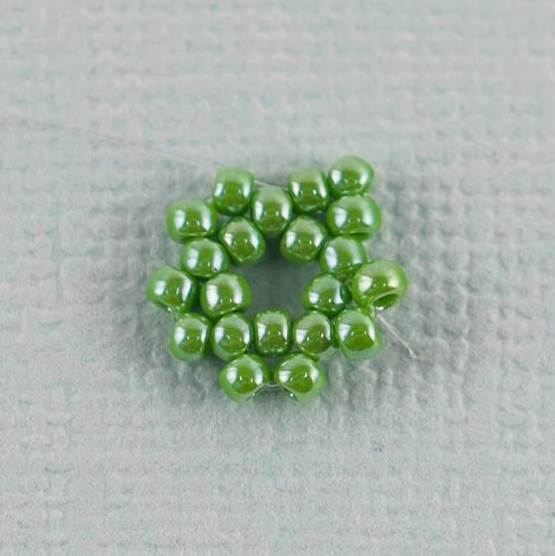
Bead braiding should be started with weaving the bottom. To do this, the thread is typed 9 beads, and the tenth closes them. We tie the ends of the thread. As a result, we get a ring.
Then, string two beads and stitch it inThe second bead from the needle of the previous chain. We weave so in a circle. In the middle of each of their two beads, stitching on the extra. We should have the appearance of an asterisk.

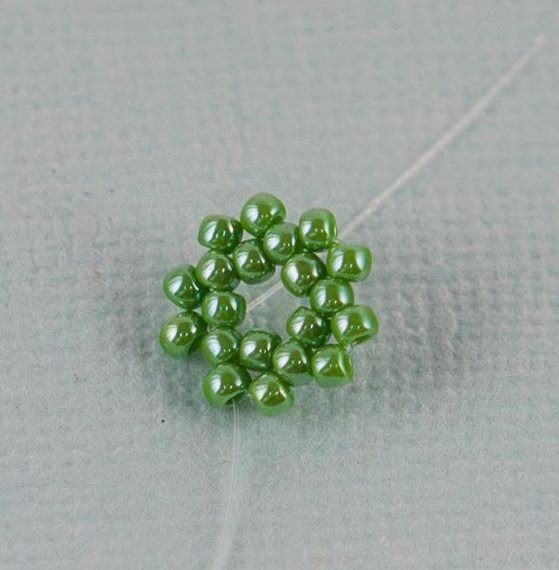


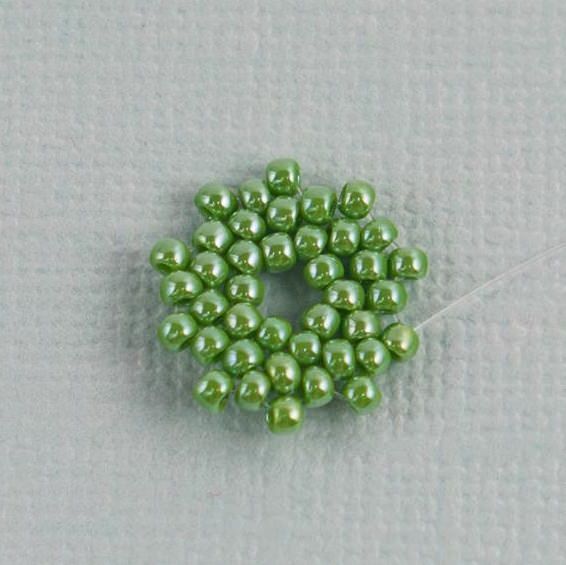
Next, repeat the previous steps and try on the resulting workpiece.
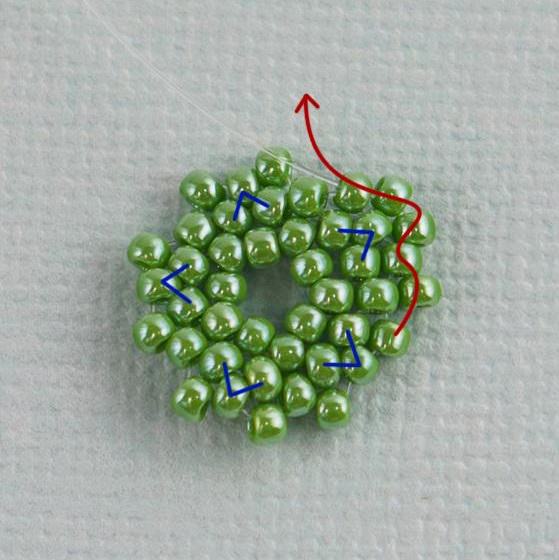
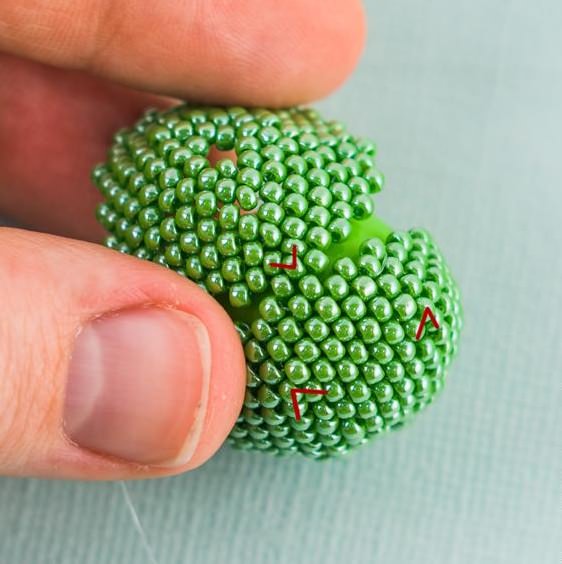
Five corners, marked with blue lines on the photo - will be expanders. Each subsequent such expanding element must be created above the previous one.
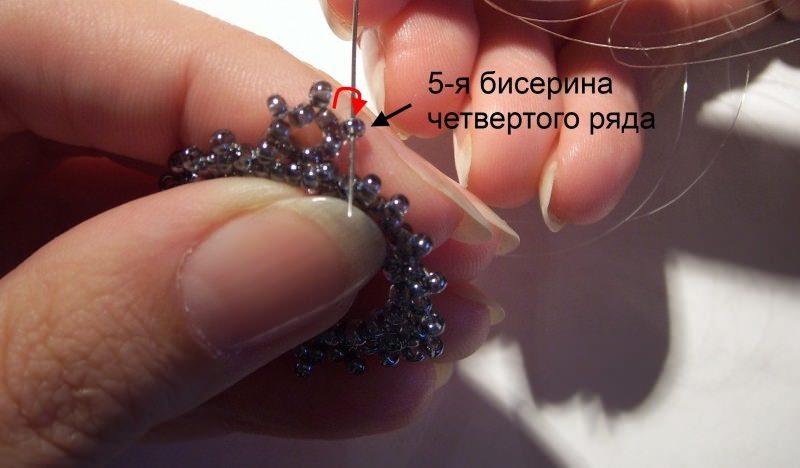
We continue to sew to weave further mosaicWeaving the next 2 rows. Again, try on our bead and, if necessary, continue the expansion, adding one more bead in the middle of the beads of the previous row and two beads over the corners. Next, we sew the series with a mosaic. The expansion process is now complete.
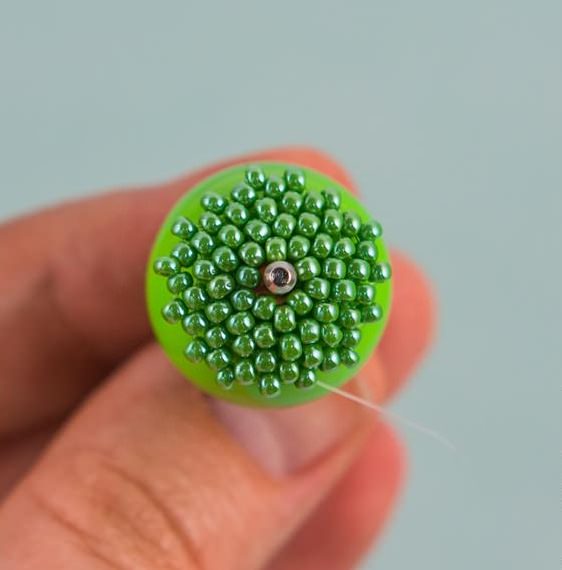


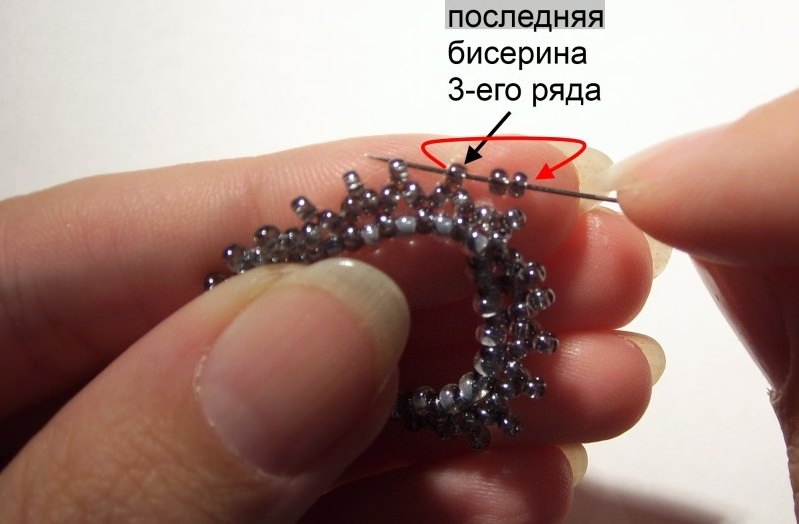
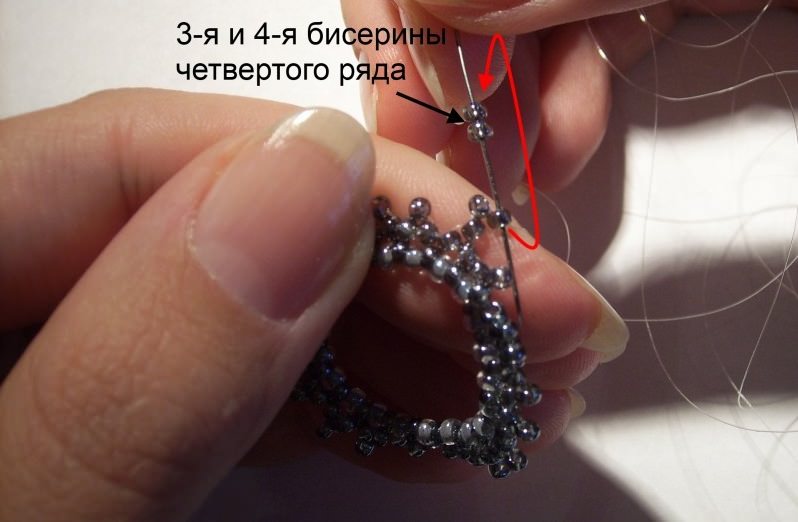
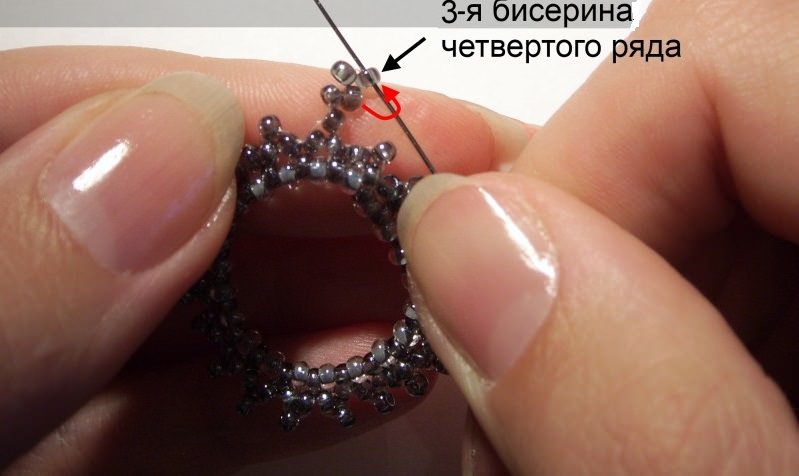
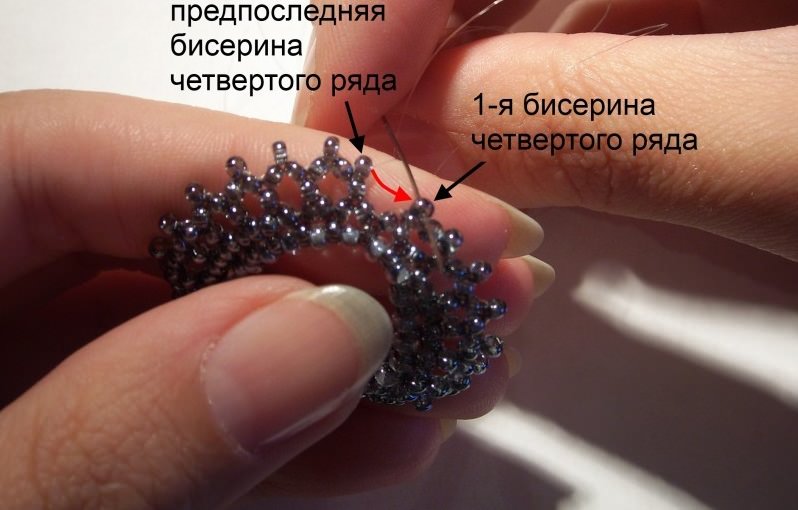
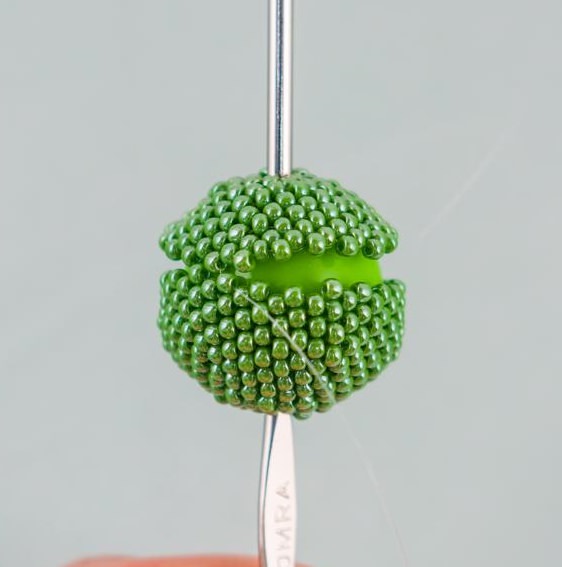
Now we extend the braiding without an extension to six rows. The final row must be passed twice.
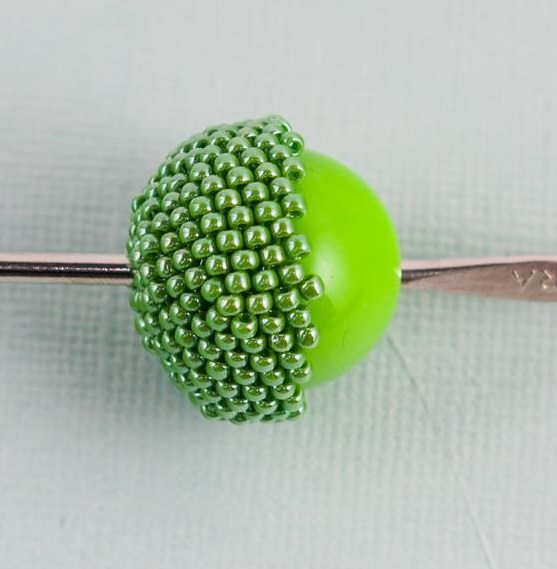
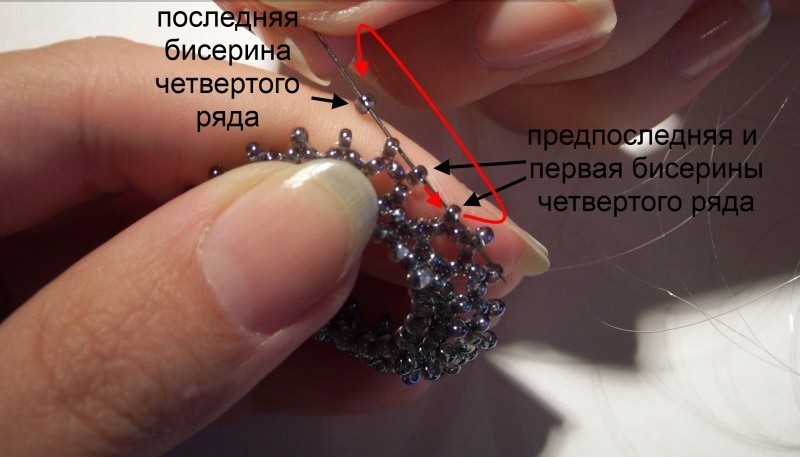
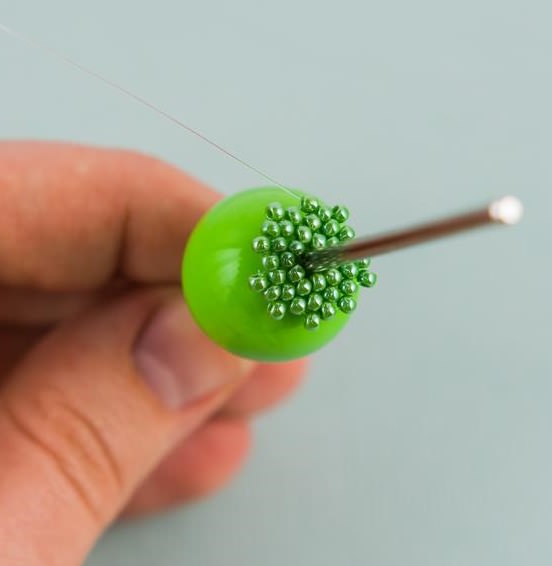
It remains to weave another half of the sameWay and sew the two halves in such a way that the expansion of the tip is caught between the bottom extensions. Tightly tighten the braid, so that there are no protruding corners. Such beads from beads will be ideal in ornaments.


In more detail this technique can be studied through photo or video materials.
We hope this master class will be of use to you, and you can easily braid a bead or cabochon.
Video: Learn how to braid cabochons and beads with beads