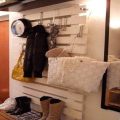
Wall hanger in the hallway with your own hands: how to make - 5 lessons
In the hallway can not do without a hanger. Of course, outerwear can be hung immediately in the closet, but it is longer and not so practical. The wall hanger is very convenient for narrow and small hallways, it is quite roomy and does not take up much space.  We offer you 5 workshops on making wall hangers with your own hands from improvised means: wood, leather, branches or pipes, as well as inspirational photo-ideas. But as ! The content of the article:
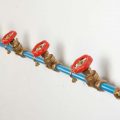
Perforated sheet
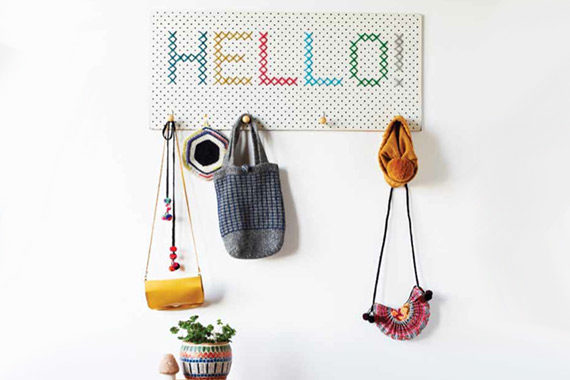
This hanger in all senses will display the phrase "and I also know how to embroider with a cross", will show your creativity and become a good decoration of the house. 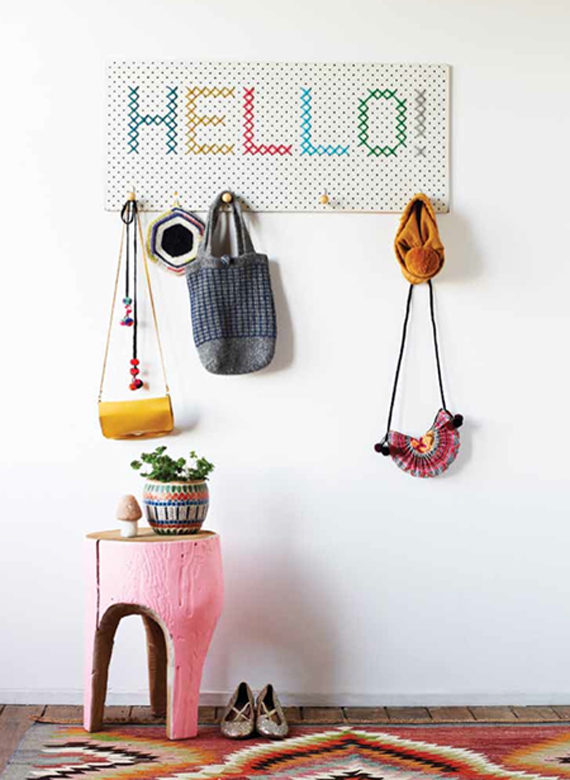 Materials In order to create it, you will need the following materials:
- perforated plastic or metal panel
- multi-colored floss threads (basically knitting threads are also suitable),
- scissors,
- hooks (in this case, 4 pieces with a ball at the end).
TIP: where to get such a perforated sheet? In any hardware store or furniture store, ask for a perforated sheet. And you will cut the desired size. The order of work: 
 Here you will find
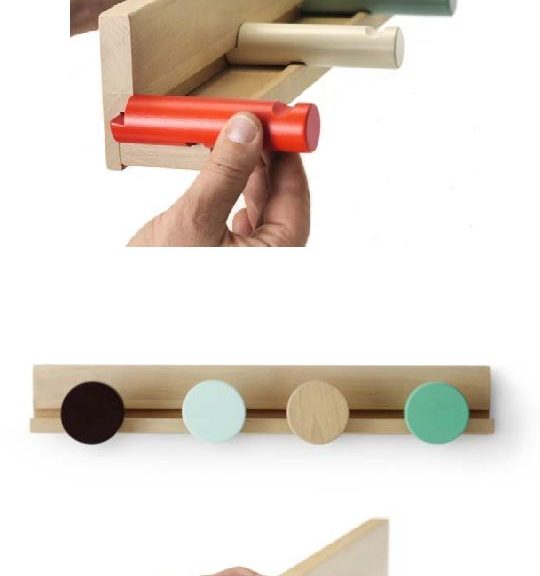
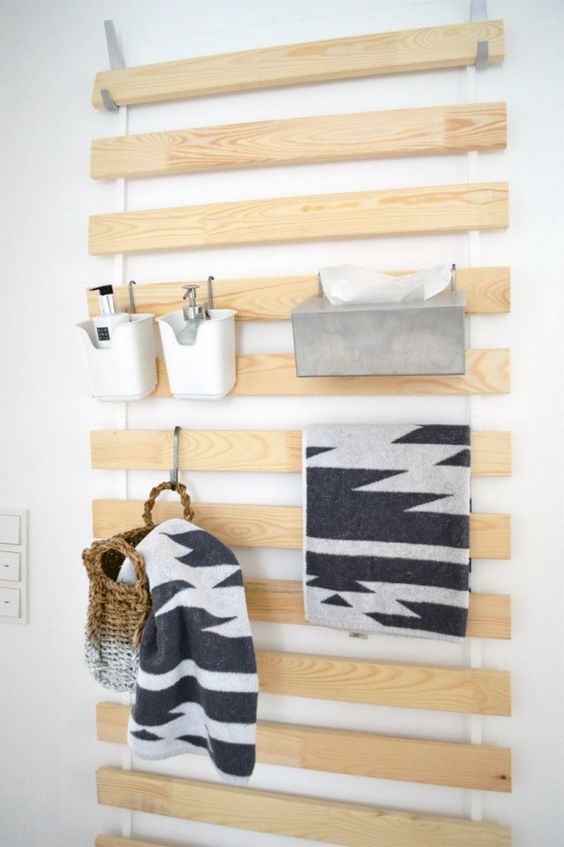
Wooden hanger
If you have a pallet lying around at the cottage, then this master class will help you find useful applications for it. If there is none, then the hanger can be made from the usual wooden board. 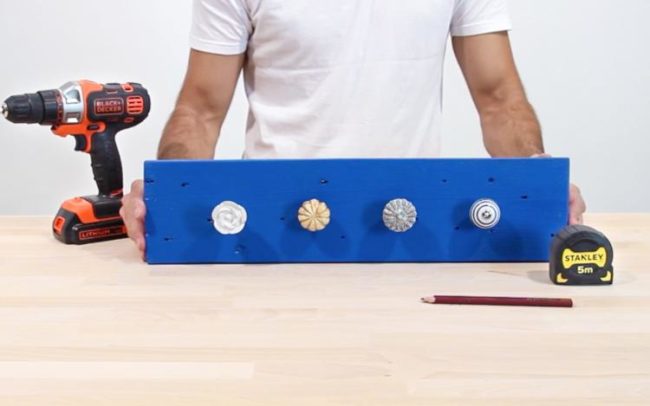 Necessary materials:
- Pallet or wooden board
- Hooks
- Paint and paint container
- Brush or roller
- Protective gloves
- Drill
- Fret saw
- Sander or sandpaper
- Measuring tape
- Pencil
- Wood Cleaning Cloth
Step by Step Instruction: Step 1: Wood Preparation 
Step 2: Plan where the hooks will be 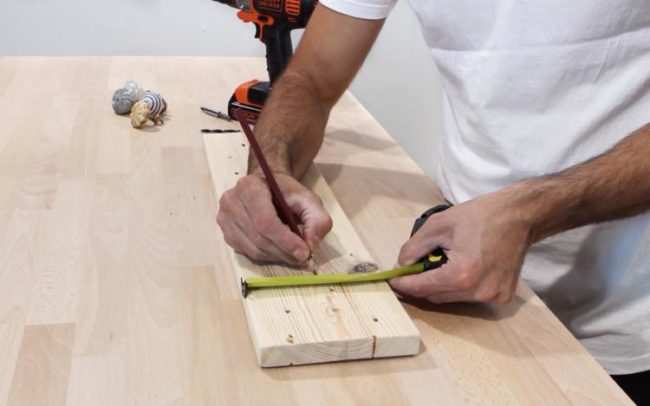 Using a measuring tape, mark the points wherewill fix the hooks. They can be located on the same line at regular intervals, or up and down in one, as you like. Step 3: Drill Hook Holes
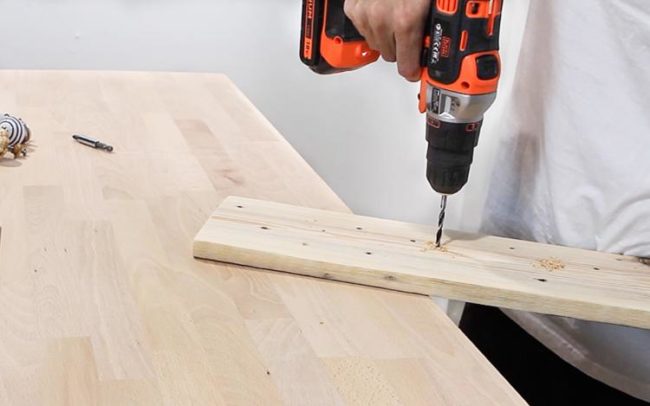
- Drill a hole for the hooks (pre-check that the width is the right size).
- After completion, clean the board from dust.
Step 4: Paint the boards 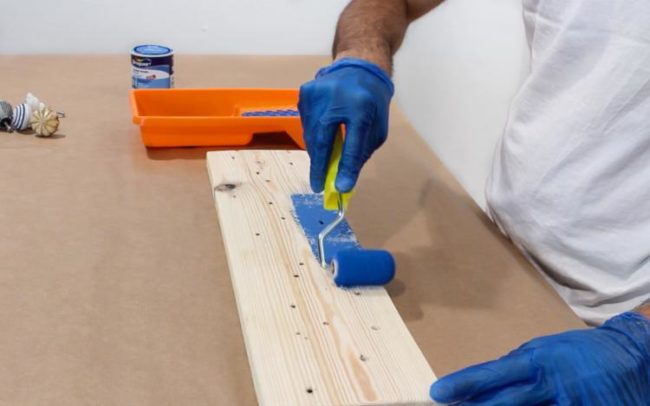
- Choose the color and type of paint, depending on your preferences and interior. It used a water-based acrylic paint in bright blue.
- Paint can be applied with a roller or brush, along and across the board, evenly filling all the space, the last ball should pass along.
If desired, you can use wood preservative before painting to ensure its long shelf life. Step 5: Insert Mounts 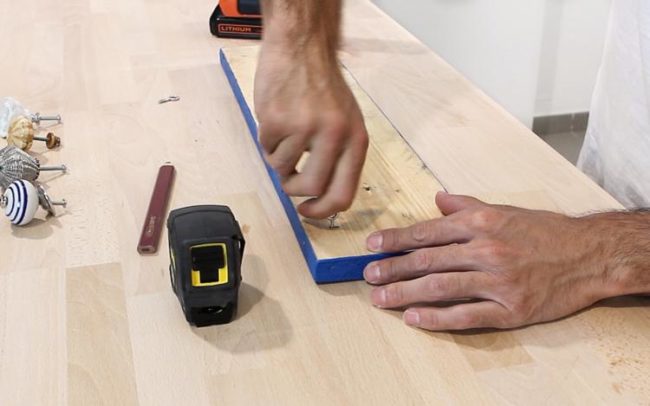
 Create your own design - choose the color, paint the patterns, choose the location of the hooks, as well as their color and size. All is ready!
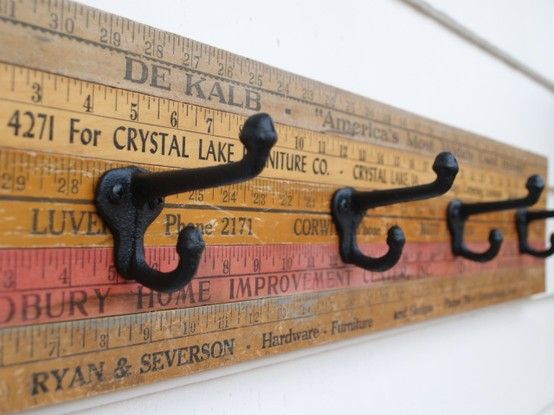
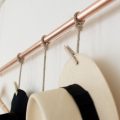
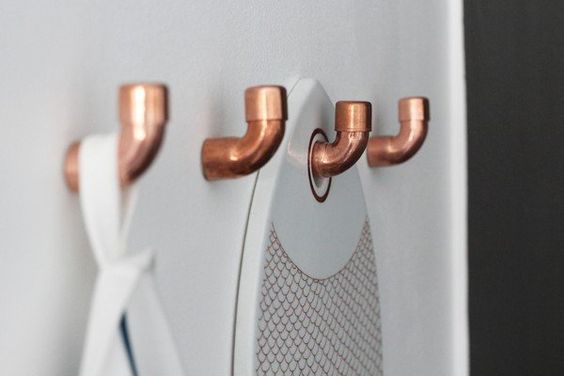
From copper pipe
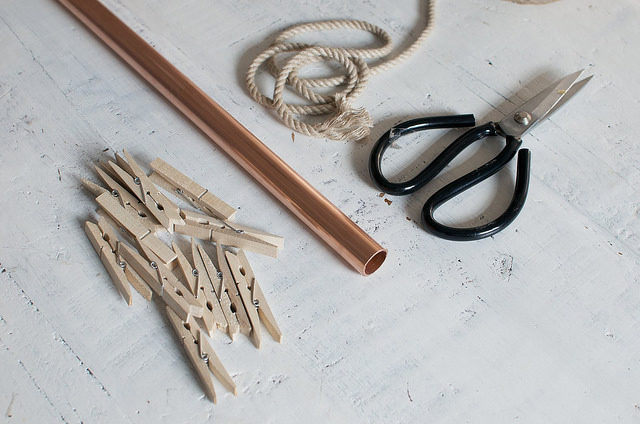
This hanger is especially suitable for lovers of hats. It is difficult for them to find a place where they were kept and did not hesitate; it takes too much space in the closet. This is also a great option for use with a direct purpose - for clothing, and for decorating the room. Of course, besides hats, a clothes hanger will fit here.  Necessary materials:
- Copper pipe
- Scissors
- Clothespins
- Rope
 Step-by-step instruction: Step 1: Prepare the base Cut the rope to a size that is sufficient for hanging the hanger. Pass the rope through the copper pipe.
  Step 2: Attach the ropes to hang the hats Cut a few more pieces of rope and tie them to the pipe, leaving enough space between them so that the hats do not interfere with each other afterwards.
 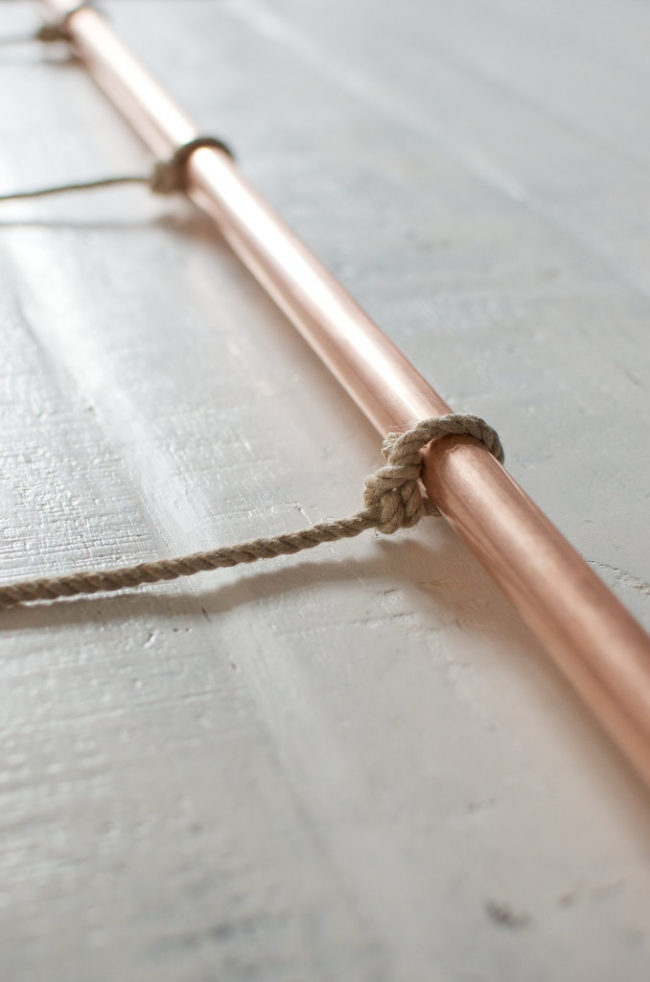 Step 3: Hang the hanger Attach the ends of the rope with a copper pipe to the wall or ceiling (for this there must be hooks or a pipe). Attach clothespins to rope hanging from a pipe; now you can hang hats on them. You can also hang a clothes hanger on the tube.
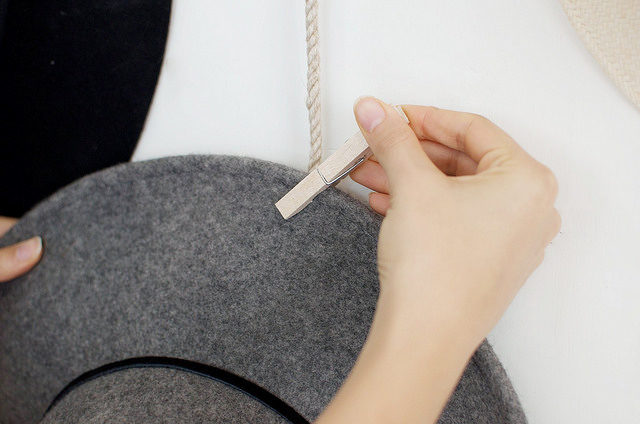
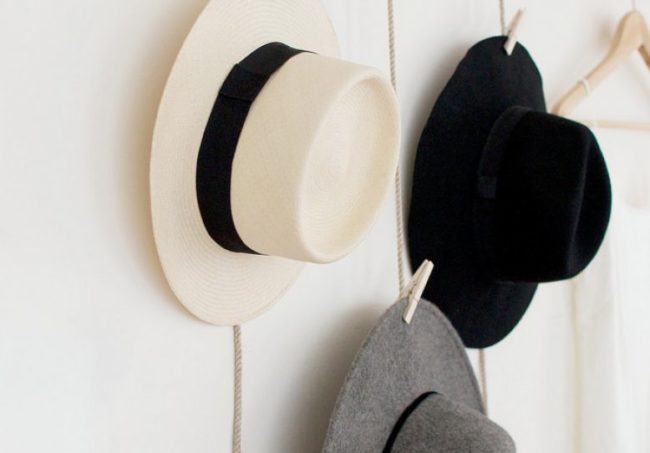 TIP: Choose the length of the pipe, depending on the amount of free space on the wall, hats and clothing.
  As you can see, it is done very quickly, even in half an hour you can catch it, but it looks very original.
Leather Belt Hanger
This wall hanger is suitable in the hallway, andin the kitchen and in the bathroom. It is similar in type to the hanger described in the previous master class, but its use is more universal. Beautifully complements the interior of your apartment, requiring at the same time to make quite a bit of effort and time.  Necessary materials:
- Leather belts (2 pieces of fairly soft leather)
- Two small pieces of leather (tougher)
- Wooden stick (from a tree branch)
- S-hooks
- Scissors
- Threads and needles (which are suitable for skin)
- Skin punch
Step by Step Instruction: Step 1: Harvesting Belts 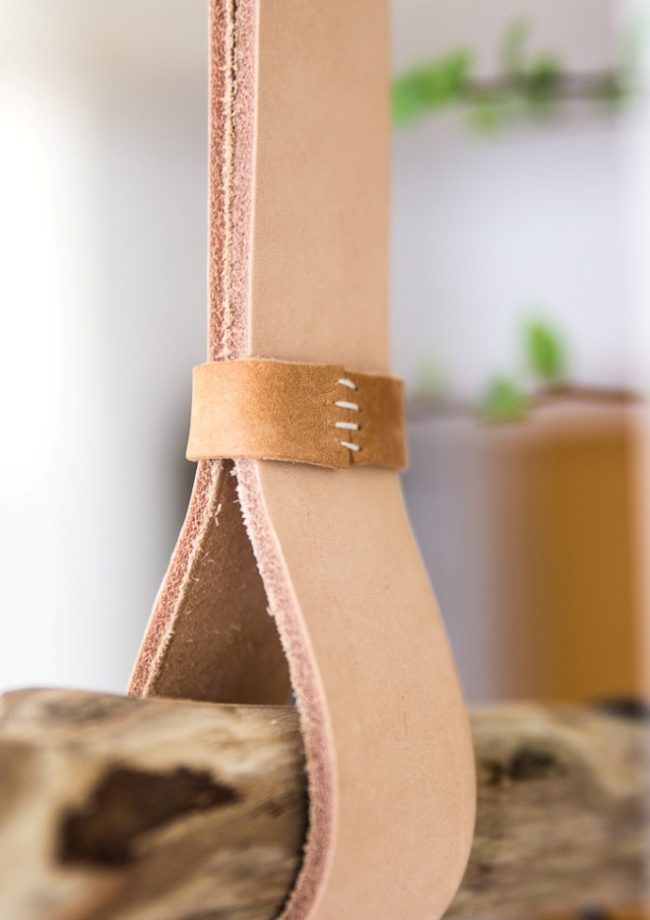
Step 2: Fasten the hanger 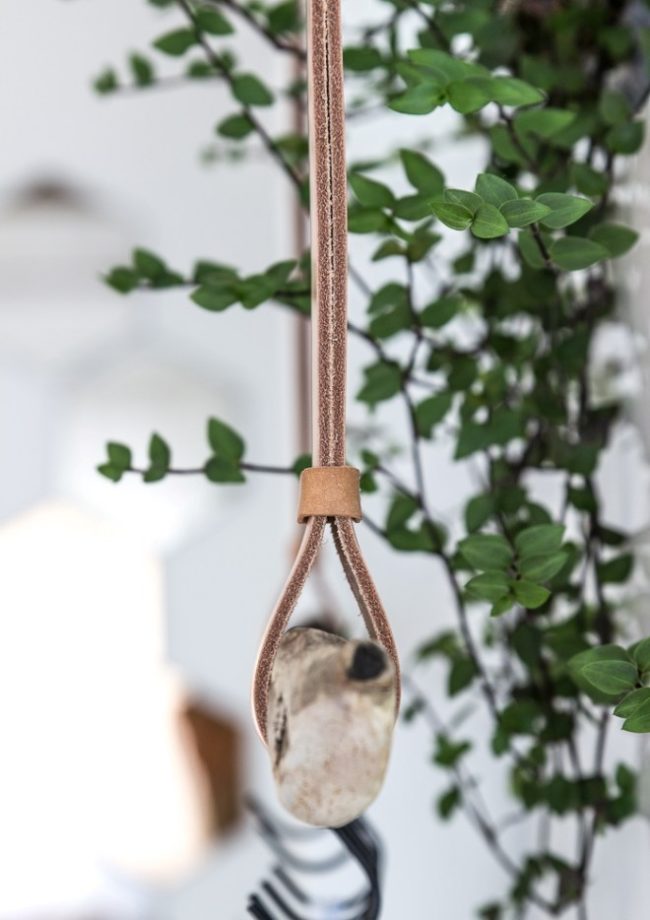 Use a punch for leather on top of the belts (in the center of the width) to make holes for which hang this construction on the wall or ceiling (on the previously attached hooks). Step 3: Hang the hooks
  Hang the right amount of S-shaped hooks on a wooden stick and the hanger is ready for use.
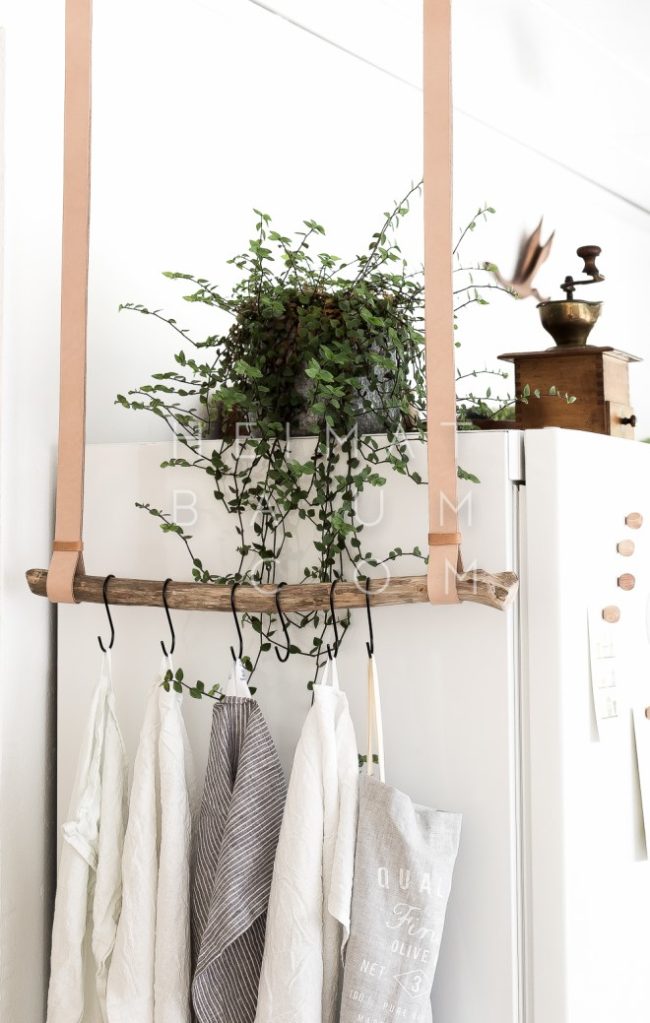
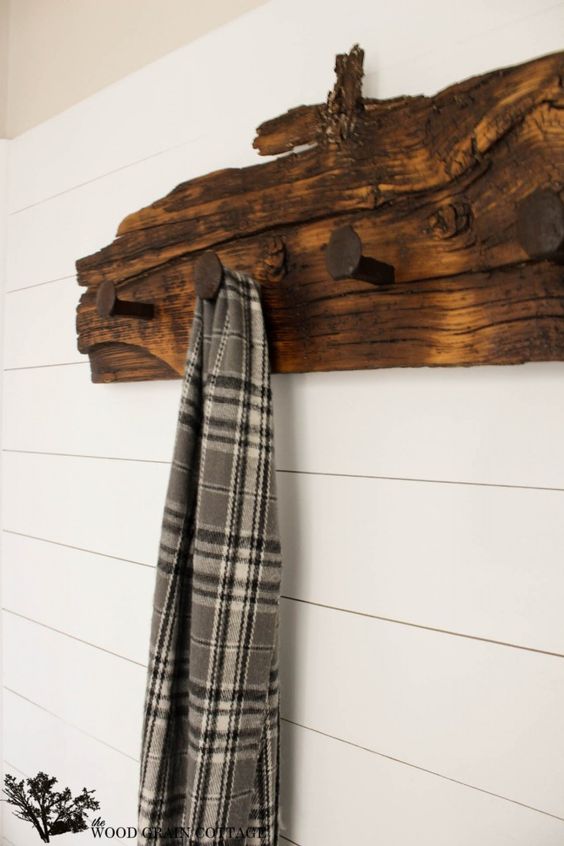
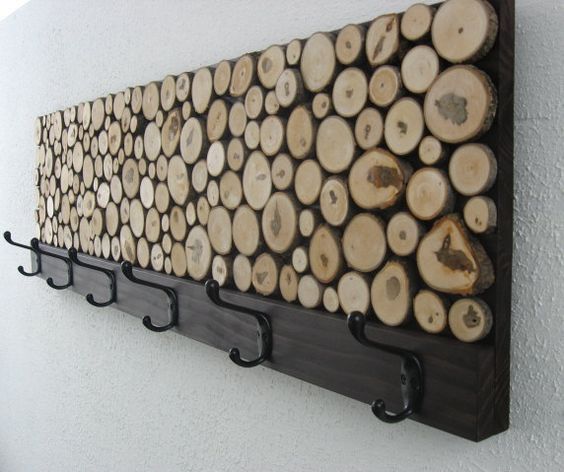
From branches and cuts
Branches and cuts excellent material for wallhangers. Firstly - it is very budget! And secondly, the tree will never go out of fashion and will perfectly complement the style of any apartment! From the branches you can make many crafts for the home - about this in the article.  How to make such

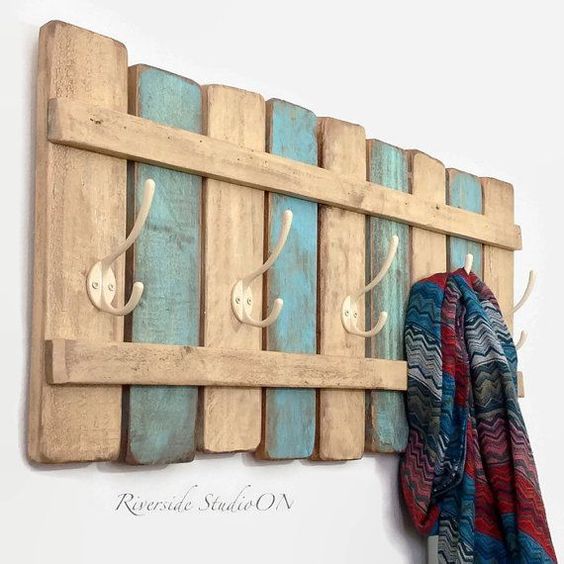
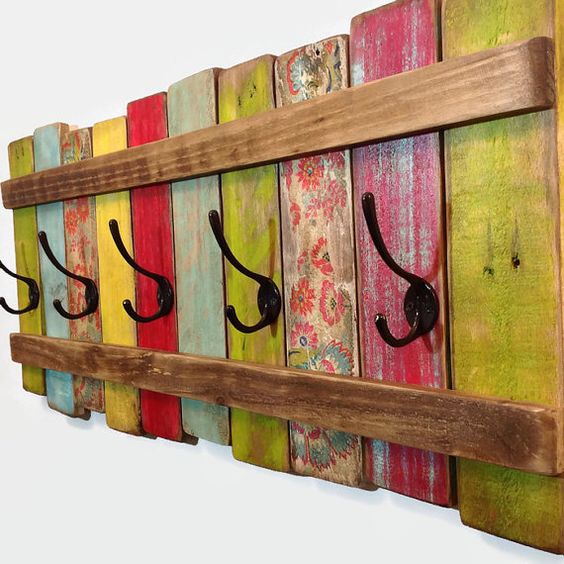
From pallet
If you are going to make a coat hanger andchoose a cheap and fast option, then a hanger from wooden boards or pallets is exactly what you need. If you think that it will look ordinary and non-original, look at the selection of photos below and make sure that you can create a truly unique thing with these materials that will decorate the interior of the apartment.  Pick up the paint (or simply treat the wood with an antiseptic, retaining the natural color), hooks, give the board the desired shape, think up your own way to decorate the boards.

 More complicated hangers can be made of wood. More precisely, the matter is not even in complexity, they are laborious, they need to be given more time.
The technology of making hangers from improvised means
Summing up all the master classes, I want to bring a single formula for the manufacture and creative over the hangers. Conditionally can be divided:
- Basis - there can be any object from a finished board to old objects.
- Hooks for hangers - do not have to buy, you can remove them from the hanger for clothes.
 The basis of improvised means Also formaking things you can use things that, at first glance, are not at all suitable for this: skis, oars, rulers, etc. how much fantasy. A wonderful way to find the use of things, stray in the closet.
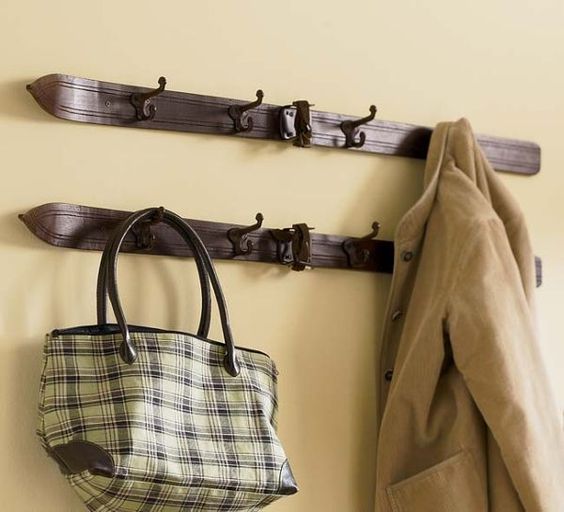

 Hooks for hangers Hooks are also not necessaryshould be standard (although their range of choice is quite wide). Start looking at things with the thought “where else can you be used?”. I am sure that having a little training myself, interesting ideas will start coming more and more often, and this applies not only to hangers, of course.
 Attach separate hooks on the wall, their design should look like an element of decor, even if they will not have any things.
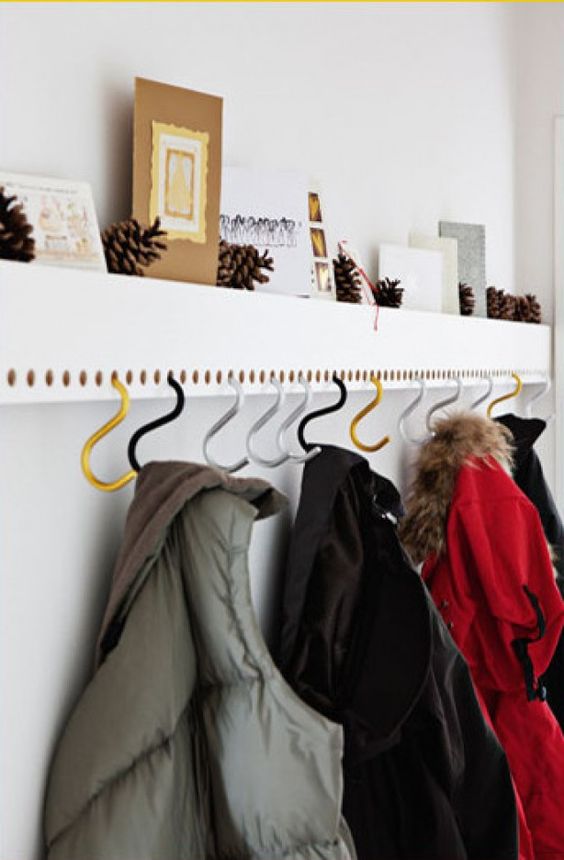

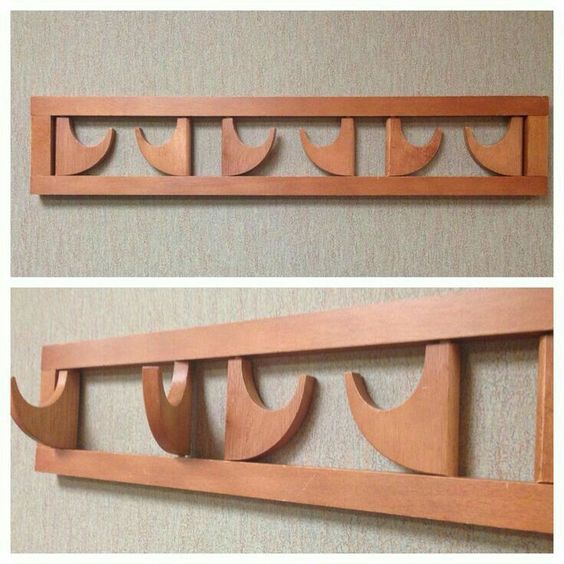
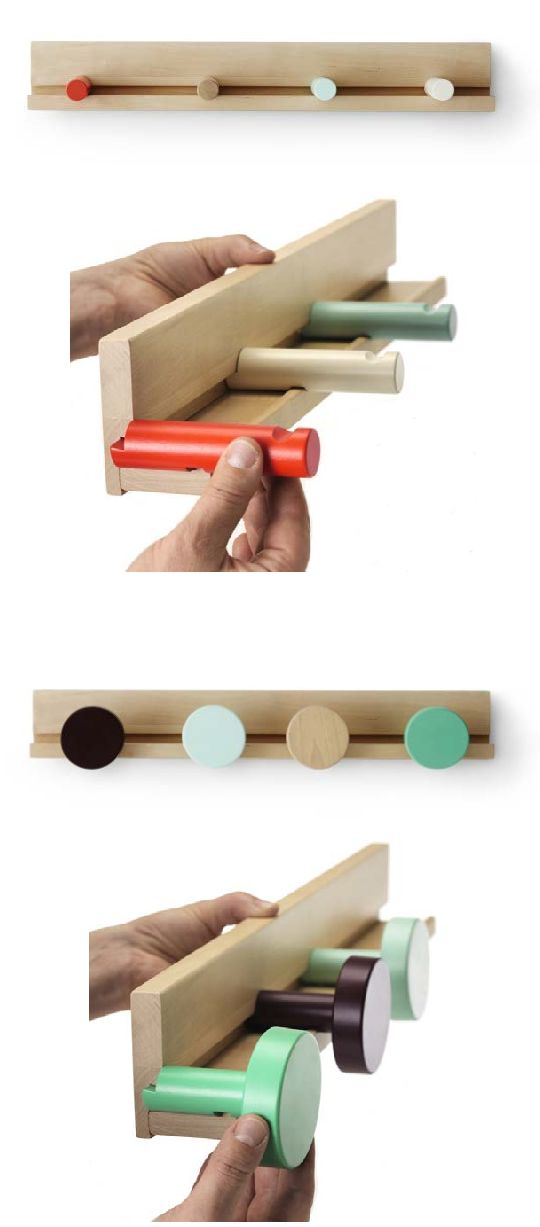
Wall Hanging Ideas
Designer more and more offer ideascreative and functional clothes hangers. Sometimes, their designs are quite elementary and not difficult for home execution. Metal, of course, more difficult to work, but if you want to create a hanger, it is not difficult. Make branches in the form of a tree or hang the hangers on the pipe - it will turn out solid and functional. 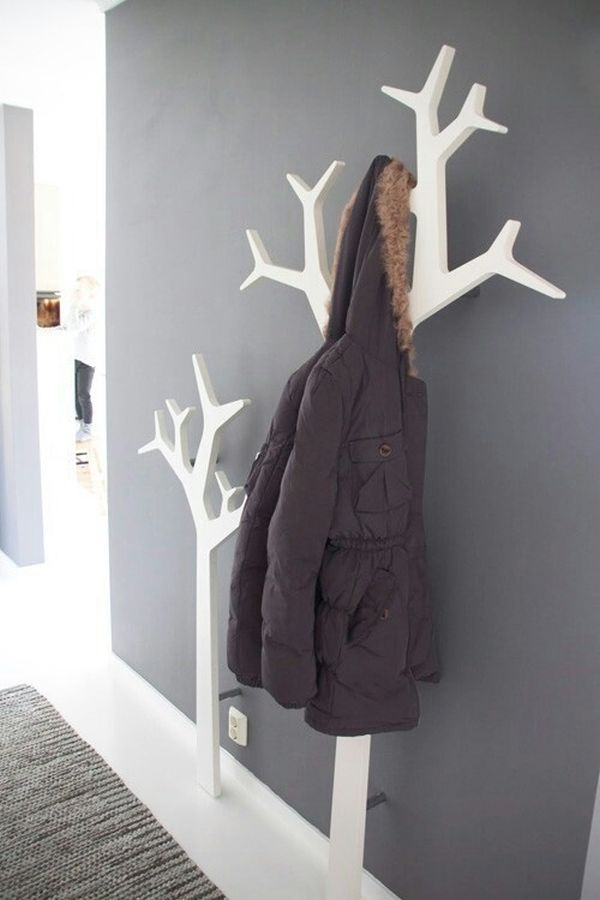


 All these photos are a piece of what you can create with your own hands. Take your favorite items, combine, and most importantly - get pleasure from it all!