
How to weave wisteria from beads, step-by-step photos and a description of the wickerwork of Japanese and Chinese wisteria in loop technique, tips on decorating crafts
Probably, it is difficult to meet a person whonever saw wisteria. Perhaps the name of someone and seem unfamiliar, but the magnificent waterfalls of the inflorescences, descending a few dozen centimeters, aroused delight and remained in memory, undoubtedly. Its name wisteria received from the Greek word "glycosis", translating as sweetness, thanks to a charming aroma. Amazing beauty grows in different parts of the world. It is a wood vine of the legume family. Grapes of flowers of some species can reach a length of 1.5 m. Liana is very popular in Japan, where it competes even with cherry blossoms. It is a symbol of tenderness, beauty and fragility. An amazing fact from botany - wisteria, living in Japan, twists tree trunks clockwise, and growing in China and Korea twists against the clock hands. In the United States, there are also shrubby species. The oldest wisteria is 111 years old, it covers an area of almost half a hectare of land and weighs about 250 tons. It is a miracle of nature located in the American city of Sierra Madre. During the flowering period, it is enveloped by a waterfall from more than one million lavender bunches. There is a very touching legend about wisteria. In one village lived a sweet and gentle beauty. She was so friendly and kind that all people loved her. Every morning the girl combed amazingly beautiful long hair and plaited them in braids. Jealous goddesses envied beautiful curls and sent a dragon who was supposed to destroy the beauty with her wonderful braids. He kidnapped her and went to the mountains. As the girl asked for mercy, the dragon, taught by evil goddesses, swallowed her. However, the evil did not go unpunished. The dragon's body suddenly became wooden, and when he wanted to exhale the flames, surprisingly beautiful bunches of flowers appeared, instead of fire, resembling the braids of a girl. Like most lianas, wisteria refers to invasive plants and it is tried not to be planted next to others. The perfect option is the wall of the house or the fence that it will fly over. Such a beautiful creation of nature could not but inspire needlewomen, and amazing crafts created by hand made of beads appear. It is this material, with its variety of colors and shades, that helps to reflect the grandeur of the waterfalls of the inflorescences. In this article we will spin wisteria from beads. In translation from Arabic, "bezer" or "busra" means "false pearl". And indeed some types of beads are like pearls, while the number of shapes, sizes and colors is much wider than that of ordinary pearls. We will mainly create wisteria in the weaving technique of weaving. This method is good in that even non-calibrated beads will work for him. And if for the mosaic or parallel weaving the beads chosen for the size are very important - otherwise the product simply warps, for the loop version any of them will do. Wisteria flowers come in a variety of shades from snow-white to pink, and dark purple. When you are weaving your craft, choose the color that you like best.
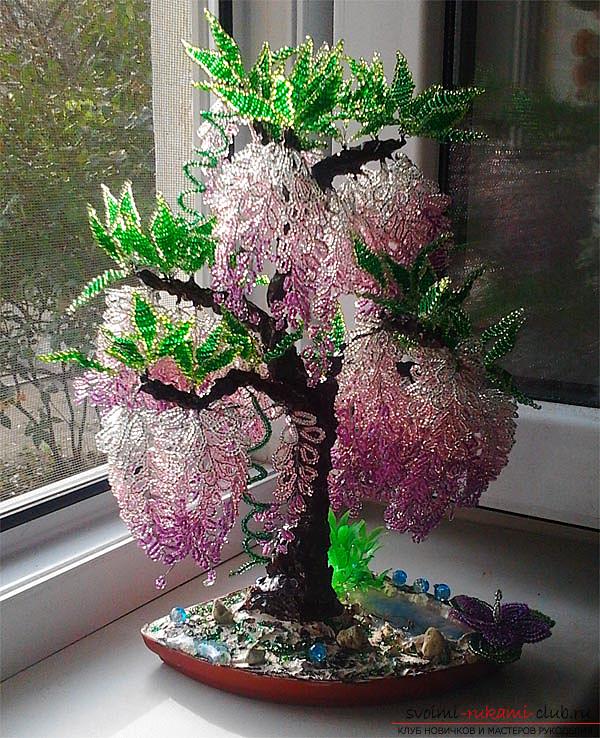
Lush wisteria of beads
 Materials and tools:
- Beads 10/0 (30 g white transparent, light pink, purple, 25 g light and dark green);
- Thin wire approximately 0.2-0.3 mm 4 coils;
- 8 pieces of thick wire 2 - 3 mm long 25 cm for branches and trunk;
- Medium-thick wire for attaching brushes and leaves;
- Tools for working with wire;
- Shallow capacity for the stand (you can use a stand from the pot for room colors of a suitable diameter);
- Alabaster;
- PVA glue;
- Paint (brown acrylic);
- Decorative elements (beads, pebbles, etc.);
- White blue gel candle (lake).
We will begin work on the creation of wisteria withcreating bunches. Throwing them in the loop technique, it is one of the simplest, so even novices in the beadwork will cope. Billets of bunches will be braided on lengths of thin wire about 90 cm long. Before starting to weave, it is necessary to prepare a workplace. Smooth surface should be well lit. It is desirable to cover it with light rough material so that the beads can be clearly seen, and they do not roll down a smooth surface, even if they fall. For convenience, sort the beads by colors into small containers. And proceed to the weave. First a plait brush. On a piece of wire, string 5 beads of purple. We move them to the middle of the segment and twist the wire into the loop. We make 3 turns. Now we will weave each end of the wire separately. The next loop we make of six purple beads. To do this, we recede from the first loop about 1.5 cm and make a second loop. Three turns again. Now the distance between the loops is about 0.7 cm. It should be approximately equal. In the third loop there will be 8 beads, in the fourth - 9. 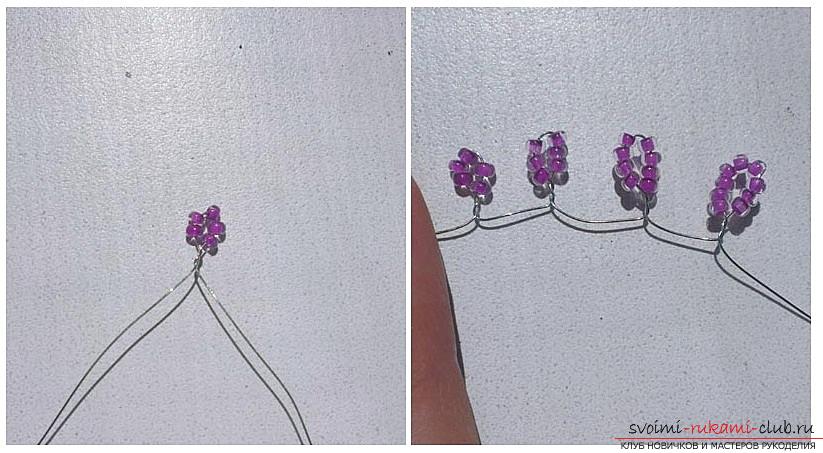 The next loop we will weave with the transitioncolors. The sequence of the set is as follows: 5th loop (3 violet colors of beads, 4 pink and 3 more violet), 6th loop (1 violet, 10 pink, 1 violet). 7th loop, we plait only of pink beads - 14 pieces. 8th (5 pink, 5 white and 5 pink), 9-bead with a shawl of 16 white beads.
  At the second end of the wire we make exactly the same loops. Now put our workpiece in half and start twisting, as shown in the photo.
 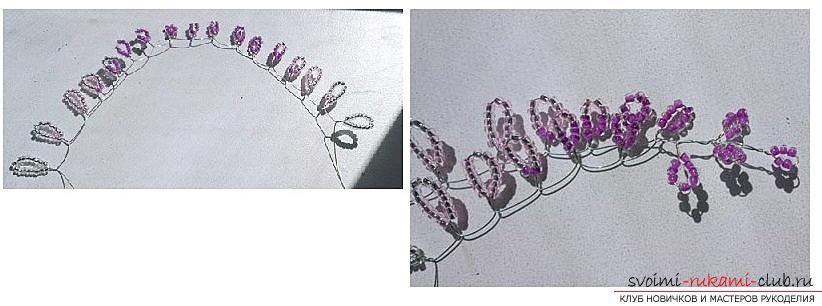 Now take and align the eyelets so that they look down. The more magnificent you want to get wisteria brush, the more such blanks you need. In this master class there are 60 of them.
 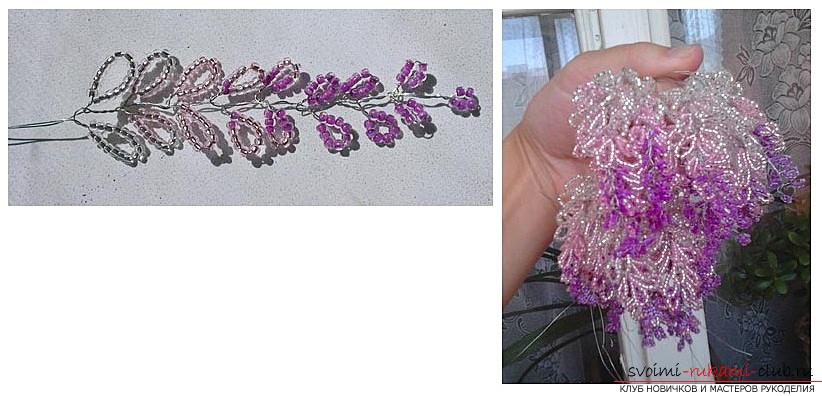 The second stage of the work is the plait of the leaves. We will perform them in the technique of parallel weaving. We need wire lengths of 25 cm in length. We pick up 1 light green bead, move it to the middle and cross the ends of the wire in it. Those. We take one wire tail and pass into a bead from the opposite side. In the next row we will have 2 light green beads. We cross the wire ends already in them. The third row will consist of two light green and one dark green, located in the middle. The fourth row is strung so: 1 light green beads, 2 dark green, 1 light green. By this principle, tat further until the dark green beads are not 6. The next rows of plaid, reducing 1 dark green bead.
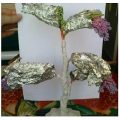
 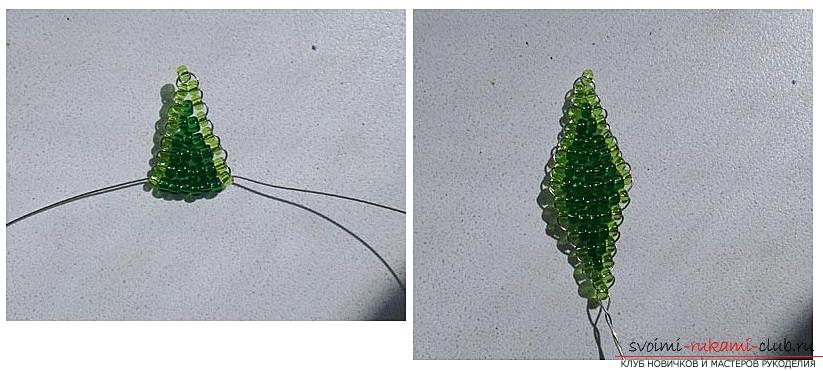 Leaf will need about 30 pcs. Let's start assembling wisteria. Take the cuts of the thickest wire and fasten the blanks of the brushes with beams of 10 - 15 pieces with the help of wire segments of medium thickness. We do so that the brushes are perpendicular to the branches down, and the leaves on the contrary are on top (see photo).
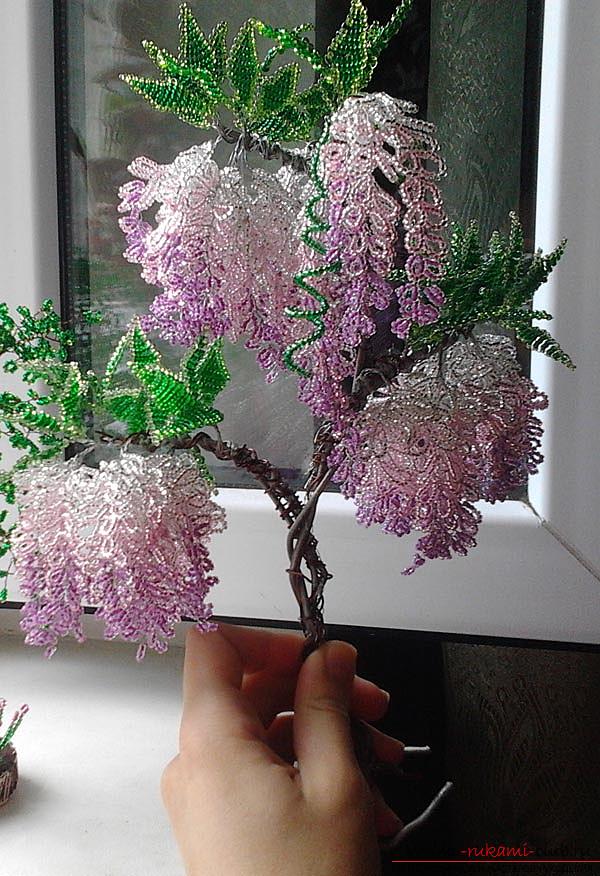
 Attach all the branches together in one piecethick wire. At its lower free end, fold a large enough loop. This is necessary for the stability and good fastening of the wisteria on the stand. Alabaster is diluted with water and glue PVA to the consistency of fatty sour cream. We put our wisteria down into the podstake and then fill it with a twig. Using a brush, spread a little mixture over the trunk. At the very base make the layer thicker. In order not to stain the beaded brushes, you can wrap them with foil.
 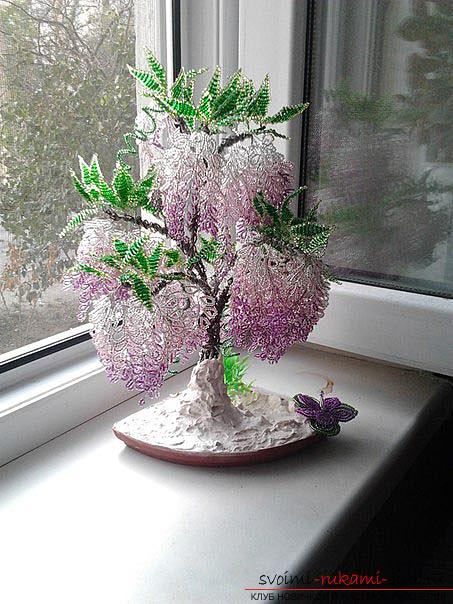 To decorate our crafts we wove frompurple and light green beads small flower, I use French arc technique. The number of beads in each arc can be clearly seen in the photo. But you can choose for your creation completely different elements of decor. Our flower we attached to a still moist alabaster.
 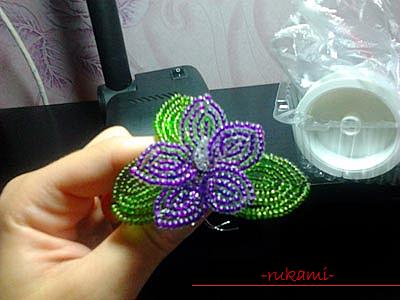 Now we make props for our wisteria,it is not tipped and left to dry completely. After all has frozen we plant a little more alabaster with glue and water and we cover branches. Again, leave until completely dry. Now comes the turn of paint. We cover it with stem and twigs. To decorate the podstavochki we will have a lake and a water lily. We have already fixed the flower, and for the lake it is necessary to melt the gel candle in a water bath and quickly pour it onto the stand. The rest of the surface of the stand is smeared with glue and attached to a variety of details of the decor to your liking: pebbles, beads, beads, etc.
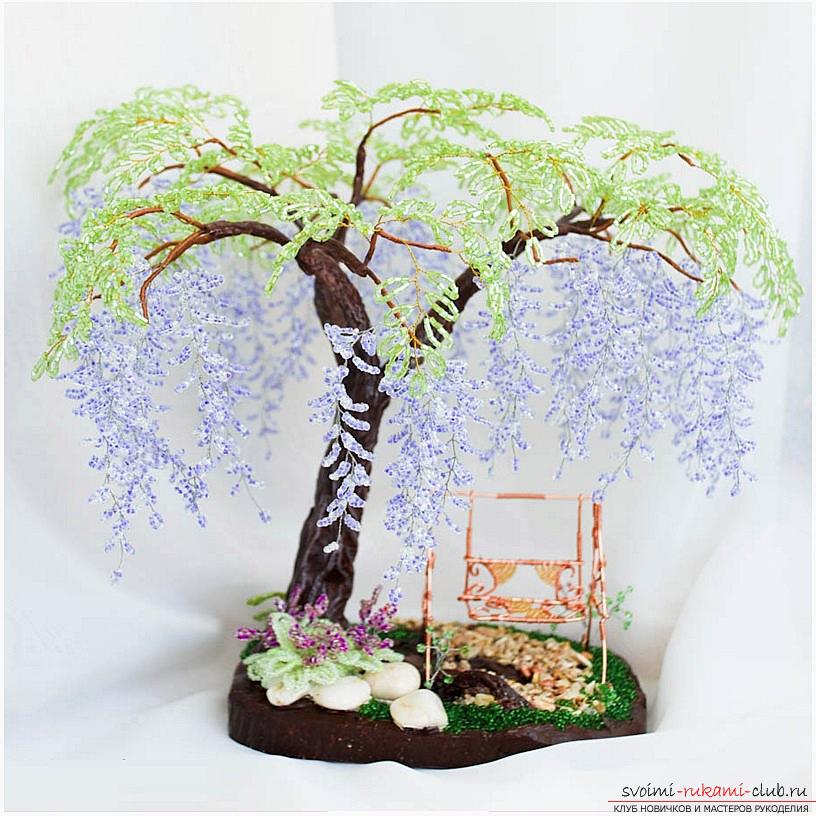
  When everything is dry, our wisteria is ready.
Next we'll weave the Chinese wisteria of a gentle blue hue.
 Materials and tools:
- 100 g of felling is light green;
- 100 grams of beads of transparent blue and transparent white colors;
- 3 coils of fine wire golden and silver;
- 1 m average wire thickness (of aluminum or copper) 1.5 mm;
- Thick wire for a barrel diameter of 2.5 cm;
- Threads for winding (colors brown or green);
- Elements for decoration (moss, pebbles, beads);
- Acrylic paint (color brown and white);
- Brush (hard);
- Alabaster or gypsum;
- Food film (polyethylene bag is suitable);
- Capacity for podstavochki;
- Tools for working with wire;
- PVA glue;
- Clear varnish in an aerosol container.
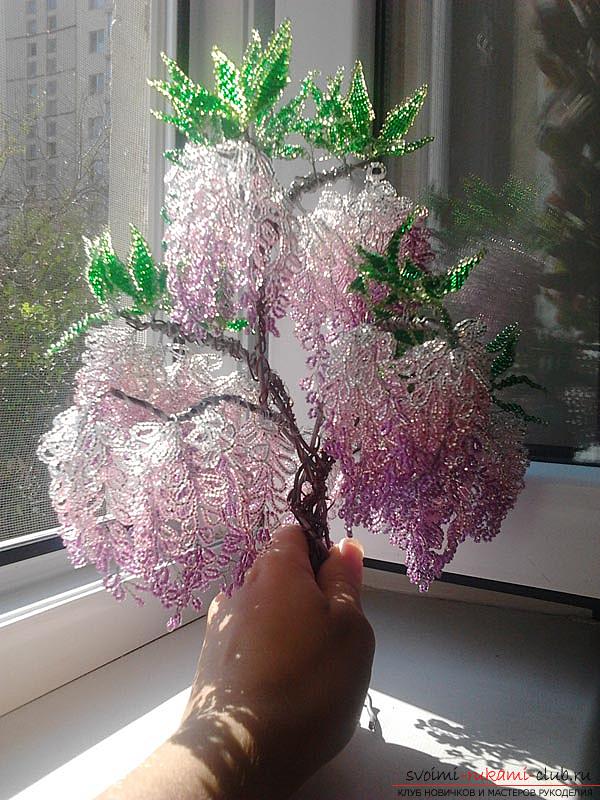
Cloth shaving from light green fellingby the way. It is possible to thread the whole felling on the spool without tearing off the wire at once. We remove the beads (felling) from the edge of the wire by 12-15 cm and begin to weave the loops. Number of cuttings in one loop - 12 pcs. The distance between the loops is about 1 cm, loops for one workpiece must be an odd number. In this master class - 9. From the last loop we move the low with the felling to 12 -15 cm and cut off the wire. Now we begin to twist our loop piece from the center loop in the same way as in the previous master class. After the last two loops, the ends of the wire are twisted another 4 cm. 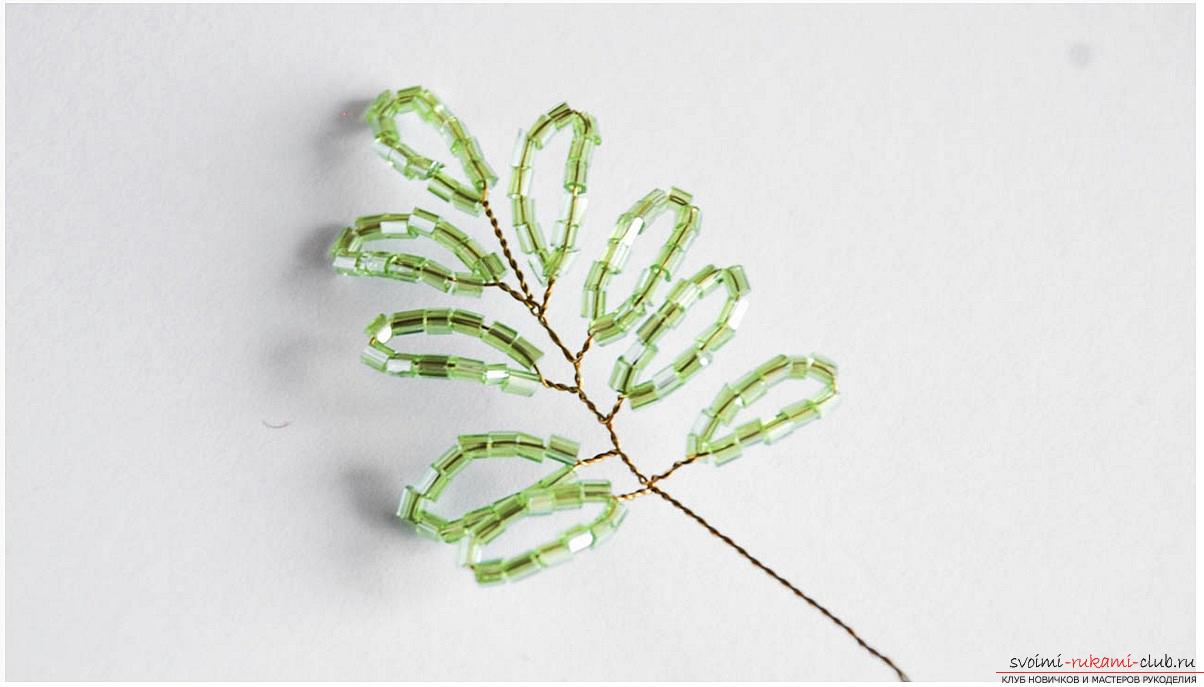 The number of loops in one workpiece can bemore or less, the main thing is that it is odd. Thus we use the whole green beads (chopping). The next step is to weave brushes. White and blue beads mix in one container. Both types should have the same effect, i.e. iridescent, matte or transparent. Similarly, we dial a mixture of two colors on the wire in the coil without detachment. We shall weave like green workpieces. The distance between the loops is also about 1 cm. Similarly, we retreat from the beginning of the wire approximately 12 cm and begin to weave as follows: 9 loops of 15 beads, 3 loops of 10, retreat 2 cm and shawl 1 loop of 7 beads, then again indent 2 cm and then 3 loops of 10, then 9 loops of 15 beads. Again, we move the beads down to 12-15 cm and cut off the wire. Central is a loop of 7 beads. We twist the workpiece in the same way as the green one. We use all the beads.
 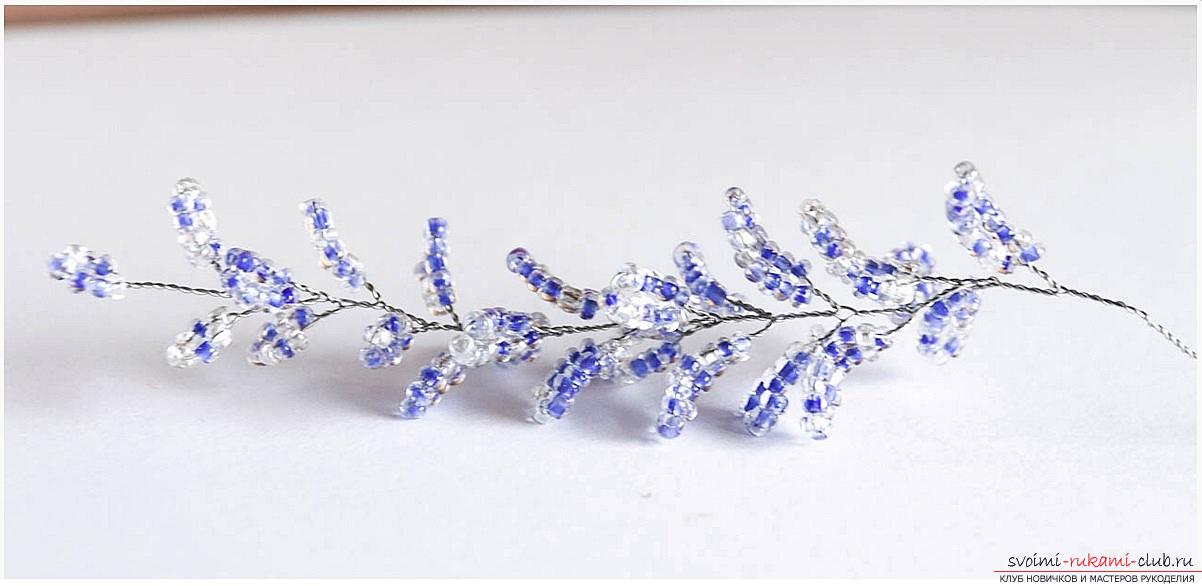 Now take the lengths of wire 1.5 mm and length 25 cm. We preform the workpieces with threads in the order shown in the photo. For one branch, you need from 3 to 5 blanks.
  Now we need a very thick wire of 2.5 mm. The length of 35 cm on them we attach our workpieces. It will be approximately 17 pairs (see photo).
 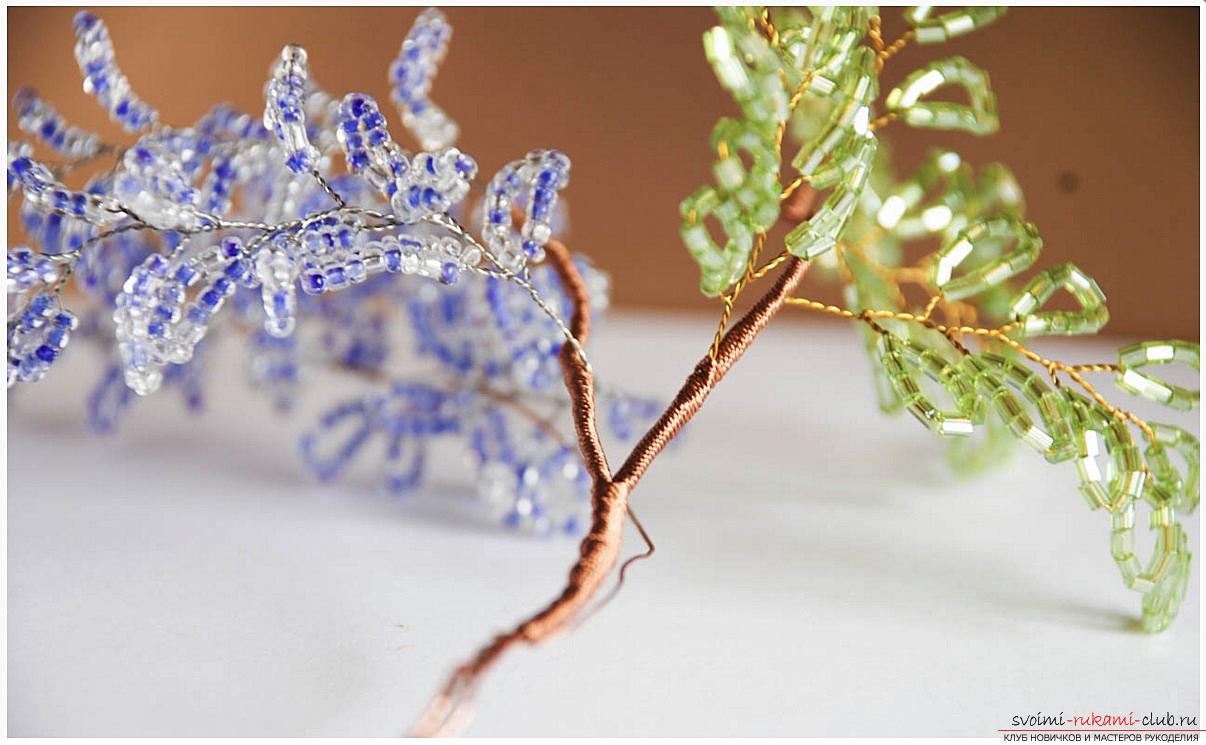 They need to be arranged so that the blue brusheswere below, and the green ones above. Twist the wire ends. So the trunk will have a characteristic and beautiful relief. You can arrange the branches as in the photo, or come up with your own version.
 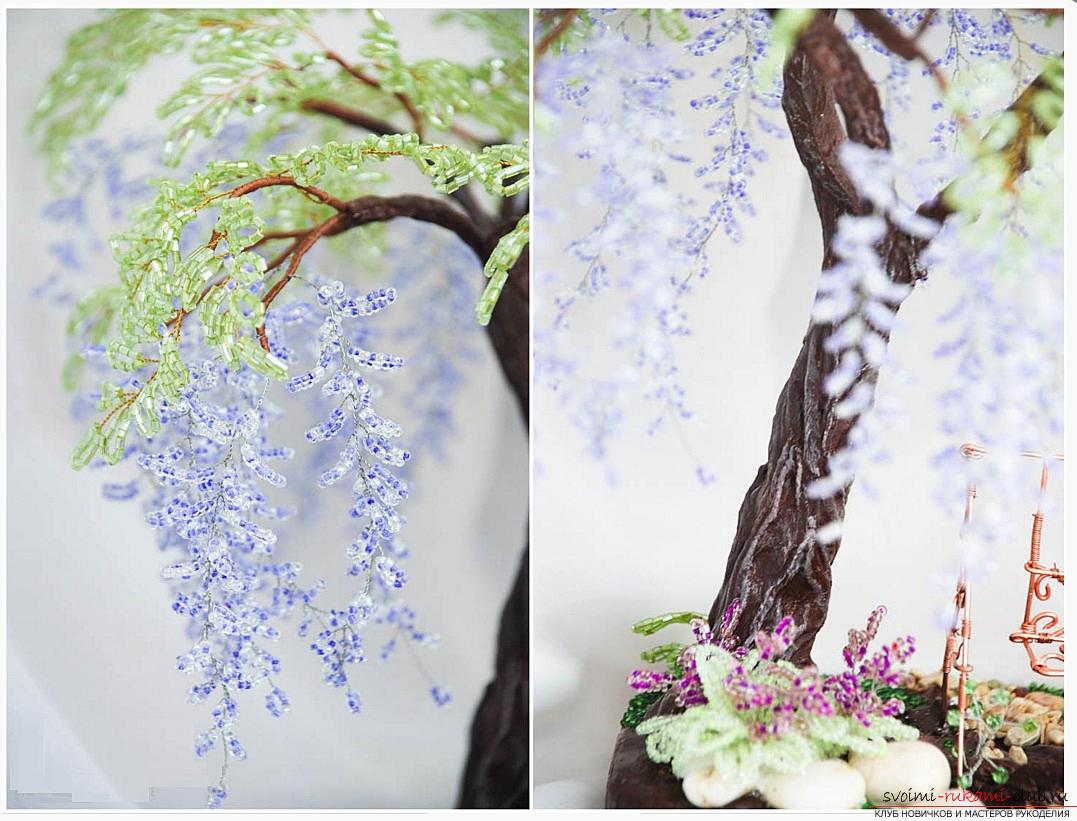 The end of the wire is collapsed by a ring forsustainability. We spread alabaster with water and glue to the consistency of thick sour cream. We lined our capacity with a film, put wisteria (from one side) and fill it with a mixture. The height of approximately 2 - 3 cm. Our work for some time will need a support to keep the desired position. When everything is dry, we remove the workpiece from the container. We raise a little alabaster with water and glue (like liquid sour cream) and smear the stem and twigs. At the bottom of the trunk we make a small thickening with an additional layer of alabaster. We wait for the final drying. Now it is necessary to paint the branches with a brown color, stem and podstavochku. When the paint dries, take a white paint and a rigid half-dry brush with horizontal movements paint the barrel. It remains only to lubricate the supply of glue and decorate with stones, beads, beads and other elements.
Comments
Related posts:
 How to weave multicolored iris from beads in French technique, description and step-by-step photos
 How to weave wisteria from beads, master class with detailed photos and description of the weaving
 How to create a gerbera flower from beads in the technique of parallel weaving, step by step photos and description
 Free master classes on creating wisteria from beads, tips and advice on making blossoming brushes and decorating the trunk. step-by-step photos.
 How to weave flowers of poppies, photo and description of weaving a bouquet of poppies