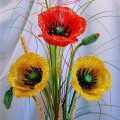
How to weave multicolored iris from beads in French technique, description and step-by-step photos
In this article we suggest weaving out beadsvery beautiful flower with a large color range - iris. Bright and beautiful irises people grow many hundreds of years. In one image over 4000 years old from the island of Crete, these flowers are depicted. It was grown by Egyptians, Arabians and Slavs. Her name is in honor of the Greek goddess Irida, who descended the bright rainbow to bring the will of the gods to mere mortals. There are many legends dedicated to the flower. One of them tells about those times when people were not on earth, but only spirits and divine beings lived. The sun every morning admired the earth, but one day this beautiful picture was clouded with clouds. Of these, rain fell, and when the clouds dispersed, a beautiful rainbow appeared on the earth. Spirits flew to look at this miracle. They sat down on the rainbow, laughed, joked and sang. They became more and more. The rainbow broke down and shattered into small pieces. Where they fell, beautiful flowers appeared. The Japanese "iris" and "military spirit" are written in the same hieroglyphics. Sharp long leaves of flowers resemble samurai swords. The Japanese believe that irises should awaken courage in young men, so for boys from iris flowers make magic talismans. Iris is called iris, cockerel, and pikulnik. Previously, among the peoples of Bulgaria and Serbia, it was called Perunik, in honor of the ancient Slavonic god of the storm of Perun. Let's weave iris from beads.  Since irises come in almost all shadesrainbow, you can choose the beads of the color you like. Create snow-white or purple flowers. In general, braid in those shades that will suit the interior or simply to your idea. It will take:
- Beads 11/0 (colors you choose on your own);
- A thin wire (0.4 and 0.5 mm). It is needed for petals and leaves;
- Strips of thick wire (4 mm). It is needed for stems;
- Threads or floras are green;
- Glue PVA (if you have chosen the thread for winding stems);
- Tools for working with wire.
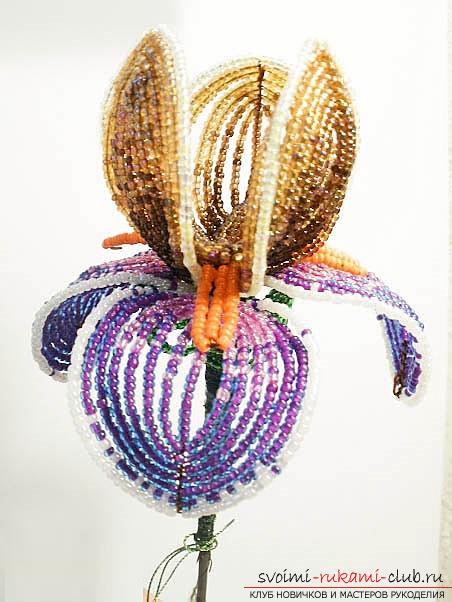
The weaving will be performed in the French arcaxial engineering. For one flower, the following lobes will be needed: (see picture). 3 pieces of large upper petal (standards), large lower petals (fouls), small for the core, thighs, sepals 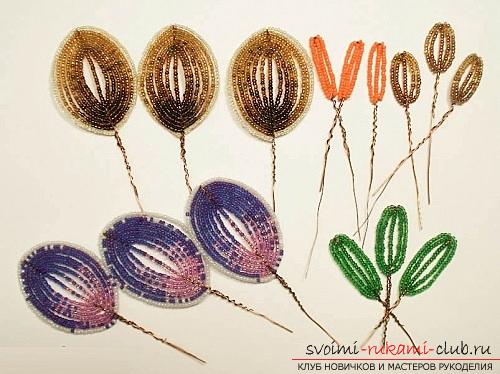 Let's start with small petals. Usually the color of these petals coincides with the shade of the large upper ones. Take a piece of wire length of about 1 m (this is the best piece of wire for work). At one end measure about 8 cm and make a long loop. We got an axis and a working wire. Now, on an axis 8 cm long, thread 2 cm beads. Now thread the beads thread. By the length of the low should be slightly larger than on the axis. Now we make a turn with a wire (see the picture). It turned out one arc. The working tail is fixed on top of the axis. We make one more low and fix the working wire at the bottom of the axis. For a small petal you need 2 pairs of arcs.
 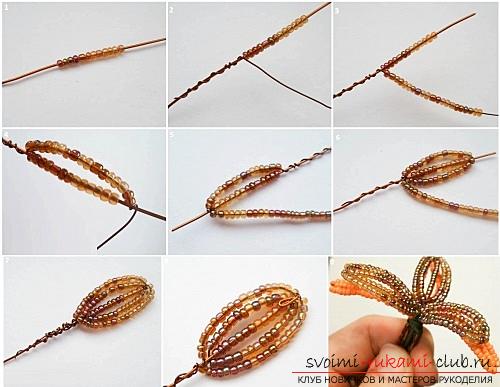 The beard will consist of one pair of arcs, and the lengthlow beads on the axis = 3 cm. For large petals, the axis = 3 cm, and 7 pairs of arches are needed. For sepals, the length of the axis with beads is 3 cm and 2 pairs of arcs. Now that all the necessary details are woven, we can collect the flower. First, attach to the length of the thick wire small petals, with the beards located under them. Now fasten the big upper petals (standards). They need to be located between the beards. Large lower petals (fouls) we attach between the upper ones, placing under the beards. To attach it is possible threads, then it is necessary to glaze the stem with a glue, or flor with a ribbon. After making a few more windings after the lower petals, you need to attach sepals.
  In order for the bouquet to be complete it is possible to weavea few buds. For each bud you need 2 petals with an axis length of 3 cm and five pairs of arcs. And two small additional sepals with an axis length of 3 cm and two pairs of arches. These additional leaves in these irises are located at the point of branching of the stems or the formation of buds. These additional leaves and buds need to be rolled into a spiral. To do this, you can use a thick pen or pencil. The number of additional leaves will depend only on how much you want to make flowers.
  Buds attach to short lengths of thickprocrastination. Next, at a distance of about 2 cm, we tie in 2 additional leaves. As an example of the location of buds and flowers, see the photo below.

