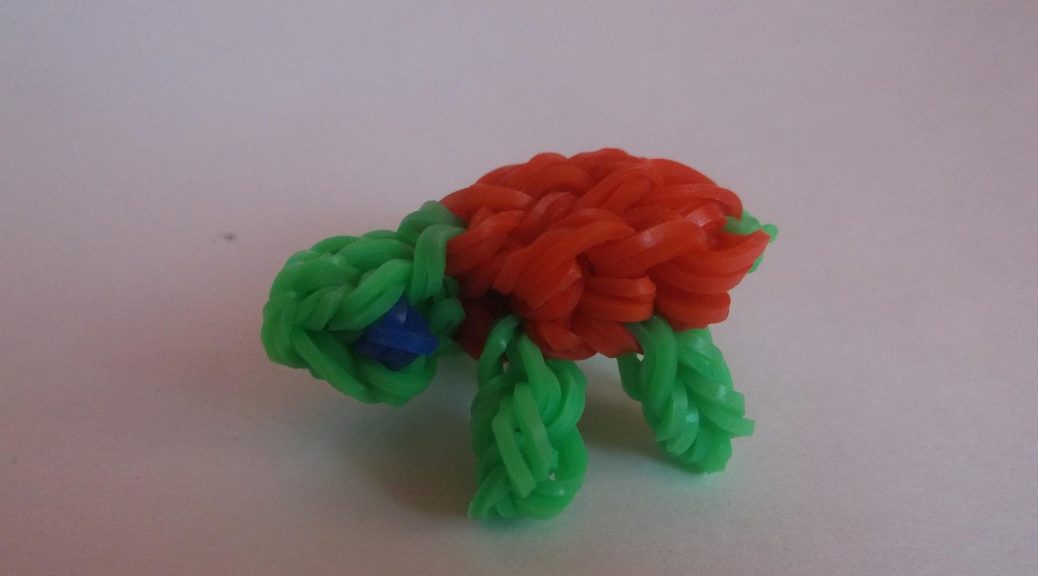
How to weave a small turtle from multicolored rubber bands? Step-by-step description of the stages of work and photos
Not everyone can afford to have a homea real turtle. They require proper care, which sometimes we do not have enough time. But we can tie a turtle, sew, knit or weave it out of gum! In this master class, we will weave a turtle made of rubber bands.
Materials and tools
- Rubbers of green, blue and red colors;
- Hook;
- 2 plugs:
- Scotch.
Stages of work
First we prepare the forks. Of course, such a turtle can be weaved on a special machine, but not all have it, so we will use the materials available. 2 the same forks are tied with adhesive tape to each other so that their teeth are directed in different directions. The tool is ready, you can start work. We will spin a red turtle, and the paws, head and tail will be green. You can take any color. We throw one green rubber band on 2 right prongs of the upper fork. We pull it back and throw it on the same teeth 3 more times. That is, on two prongs we have four loops. On the 2 left prongs of the same fork, too, wind one green-and-green rubber band four times. 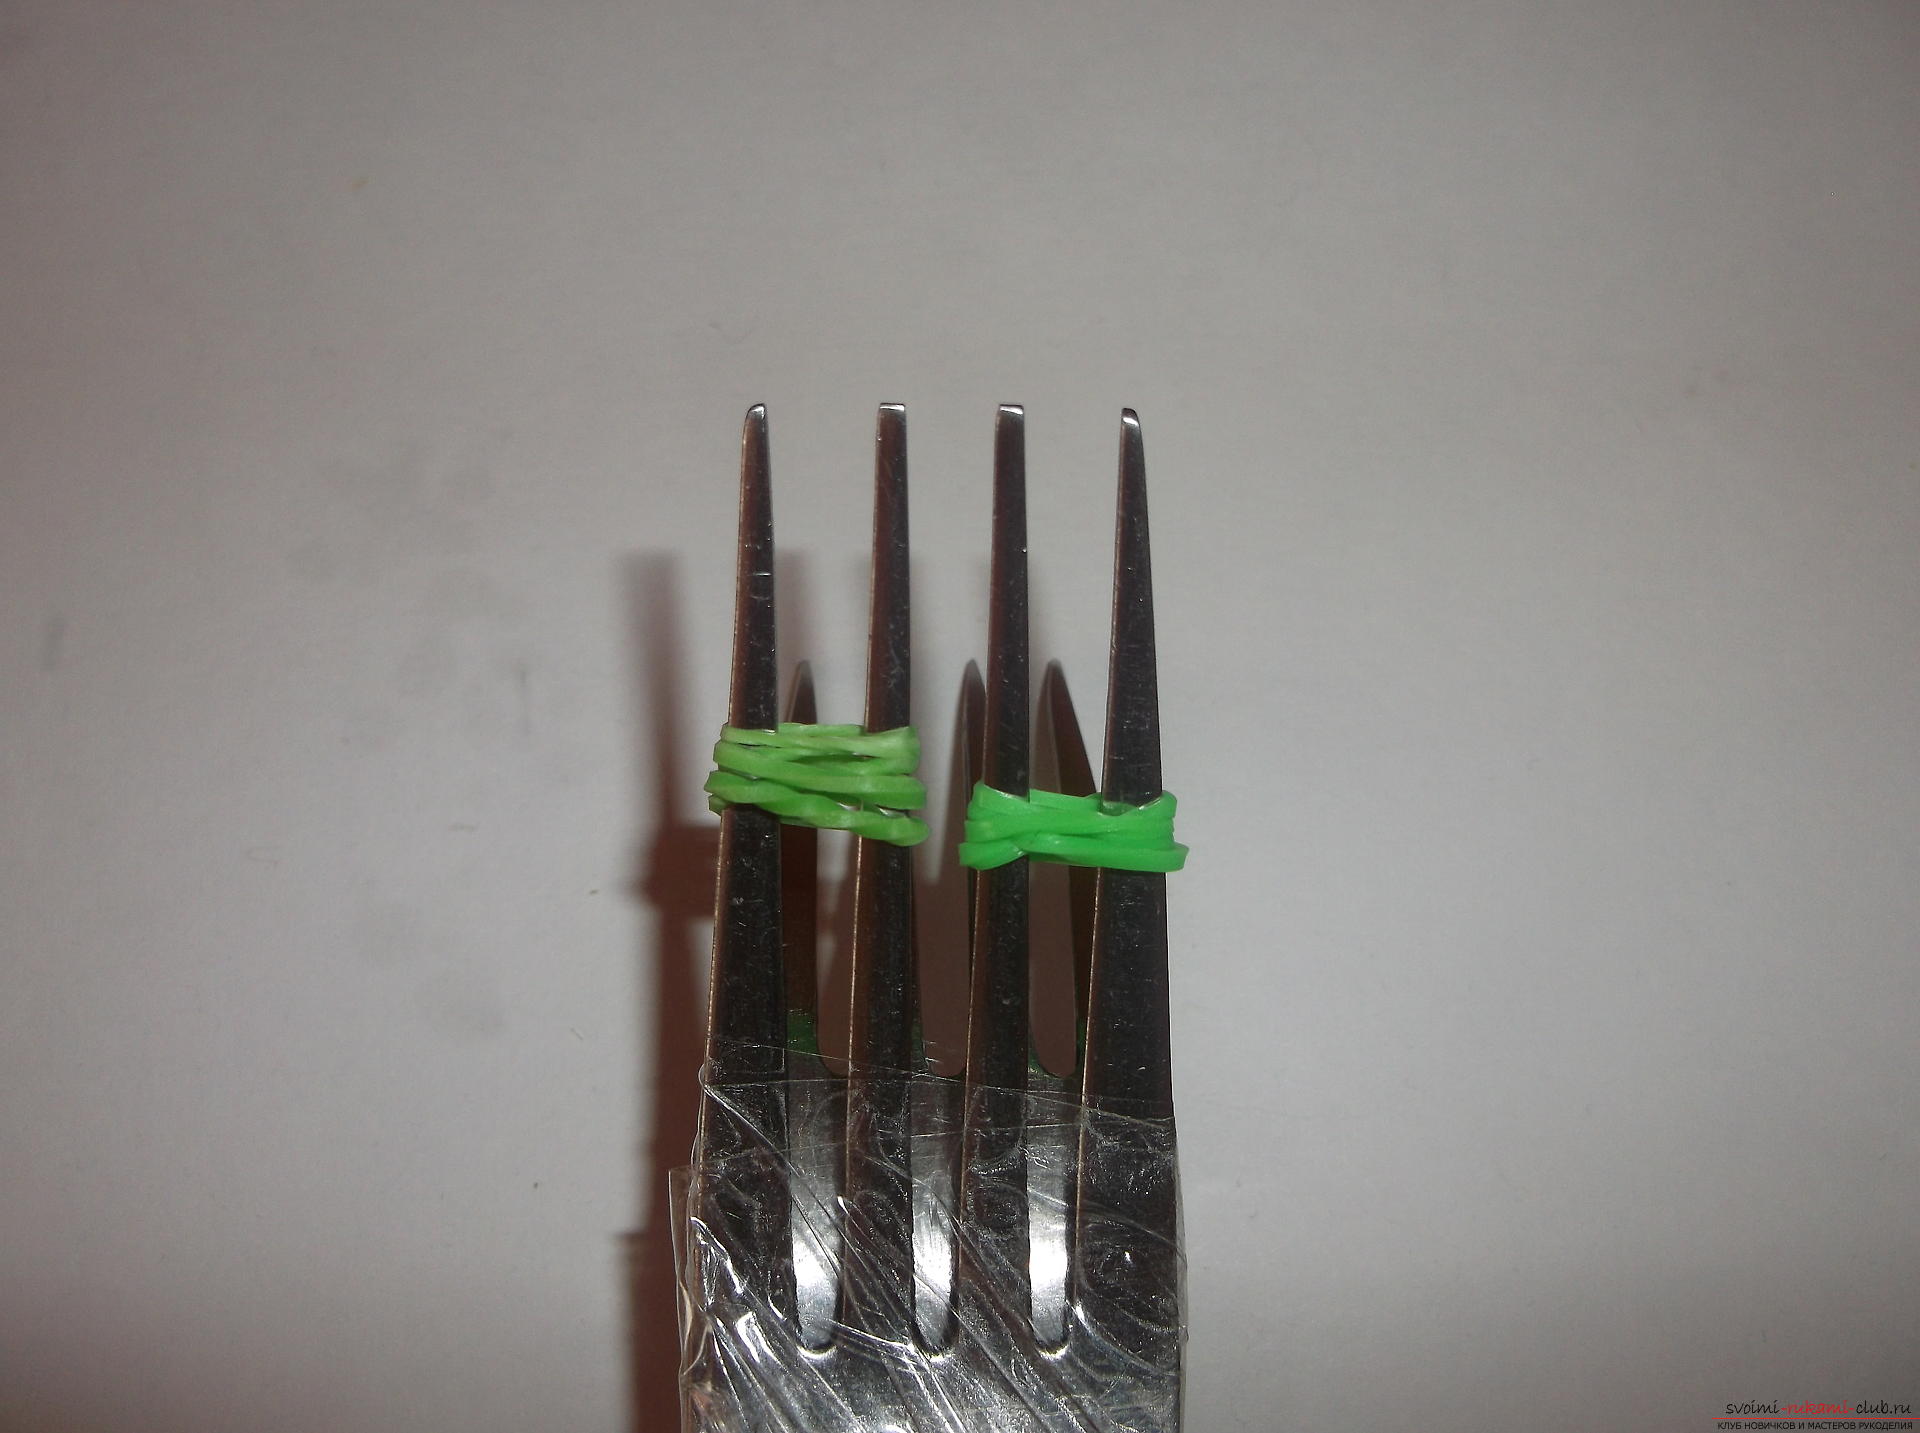 Next 3 rubbery greenish color on the 2 right prongs of both forks. And 3 rubbery greenish color is thrown on 2 left prongs of both forks.
 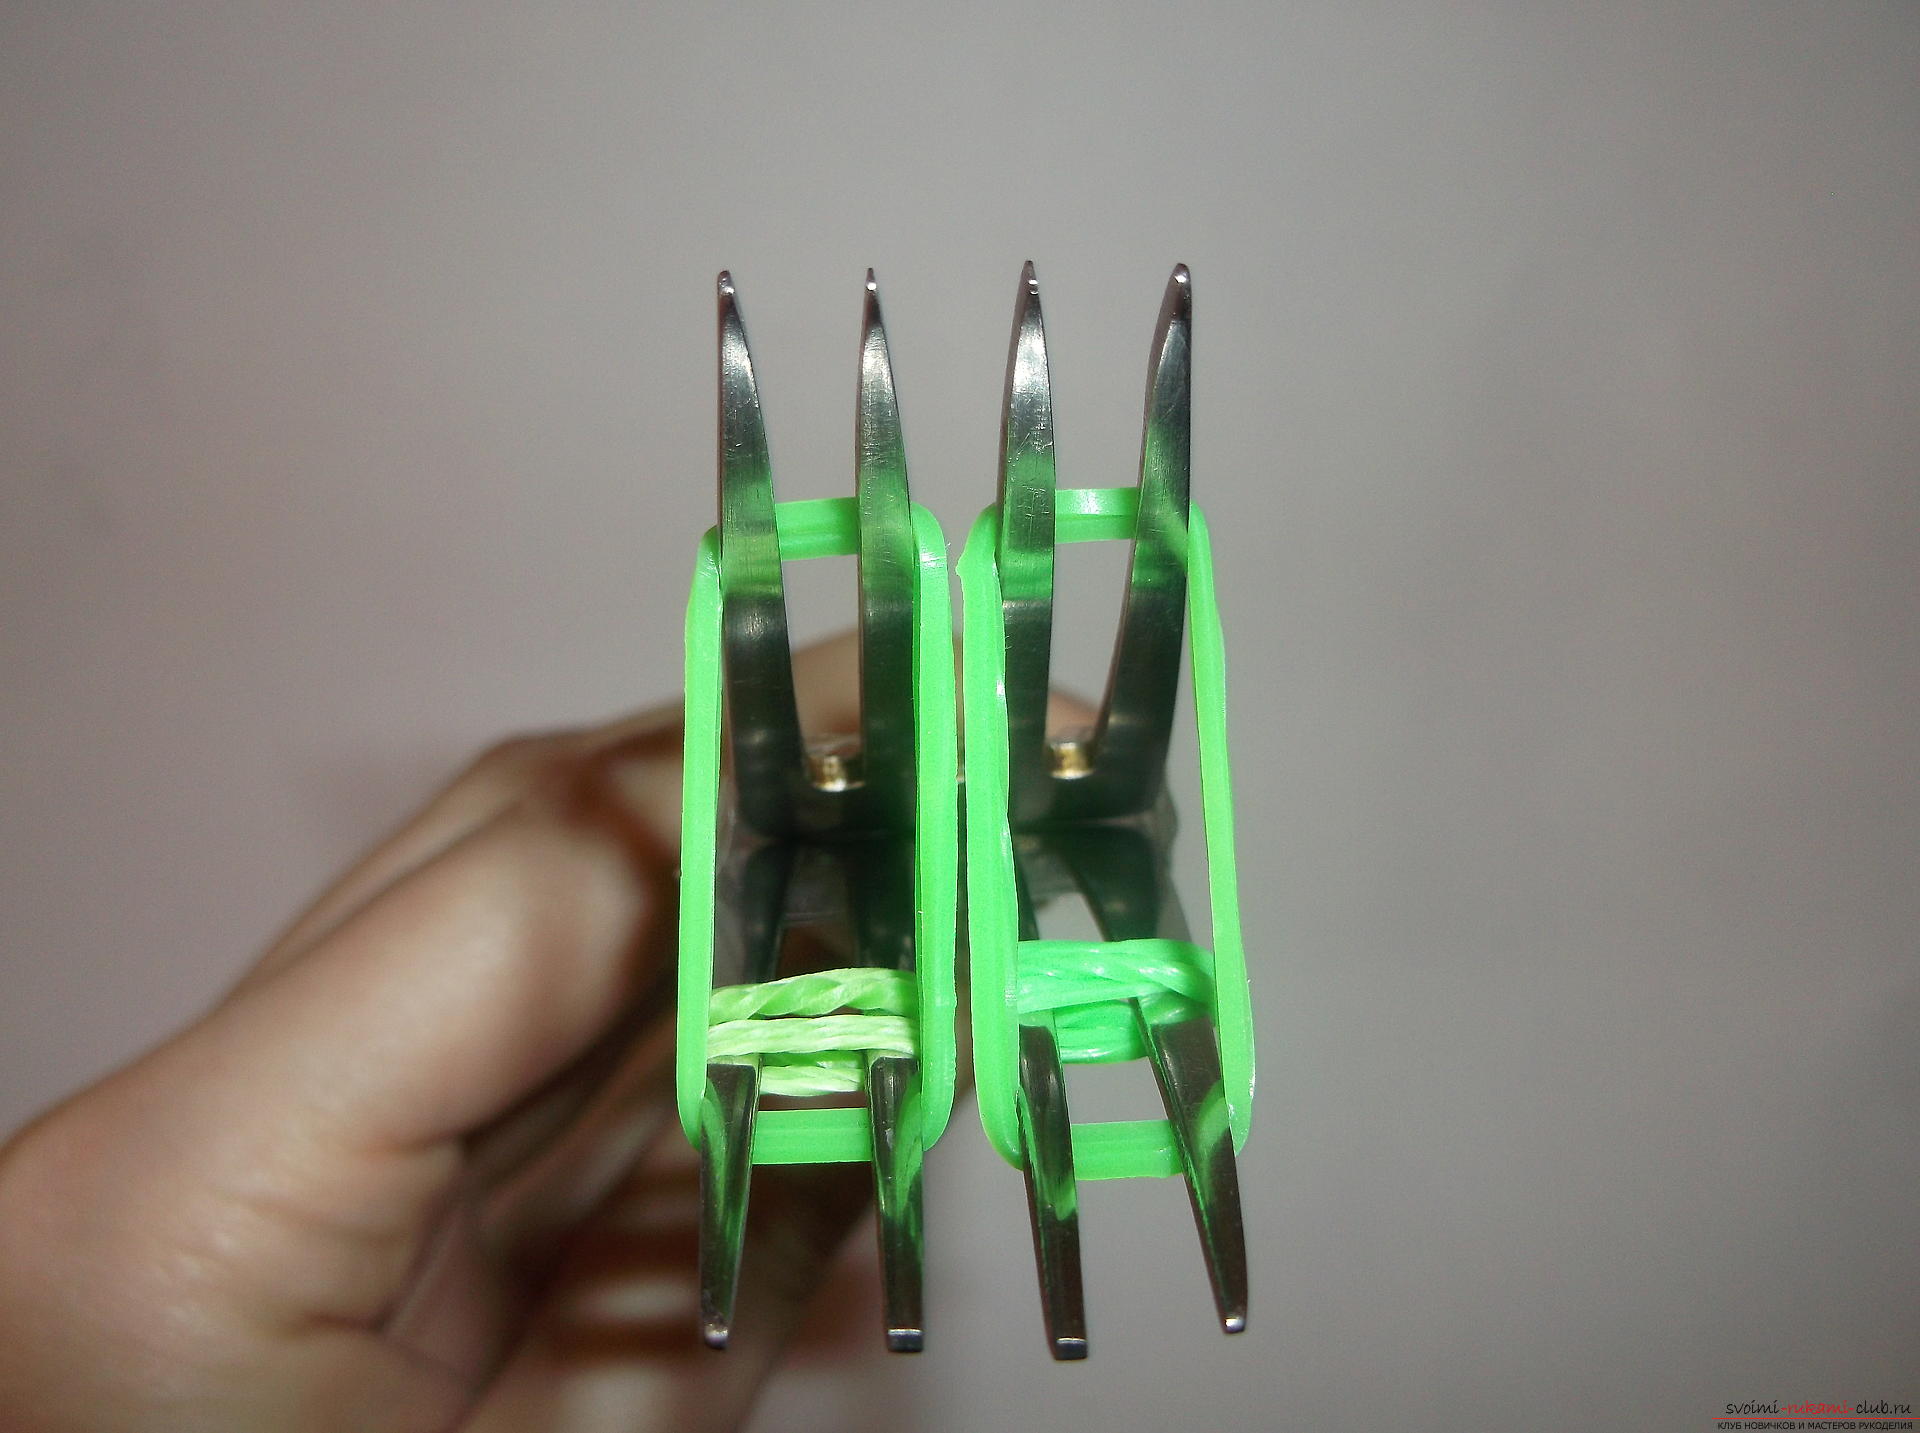 We remove the lower rubber bands, which were wound four times and from two right and two left teeth.
 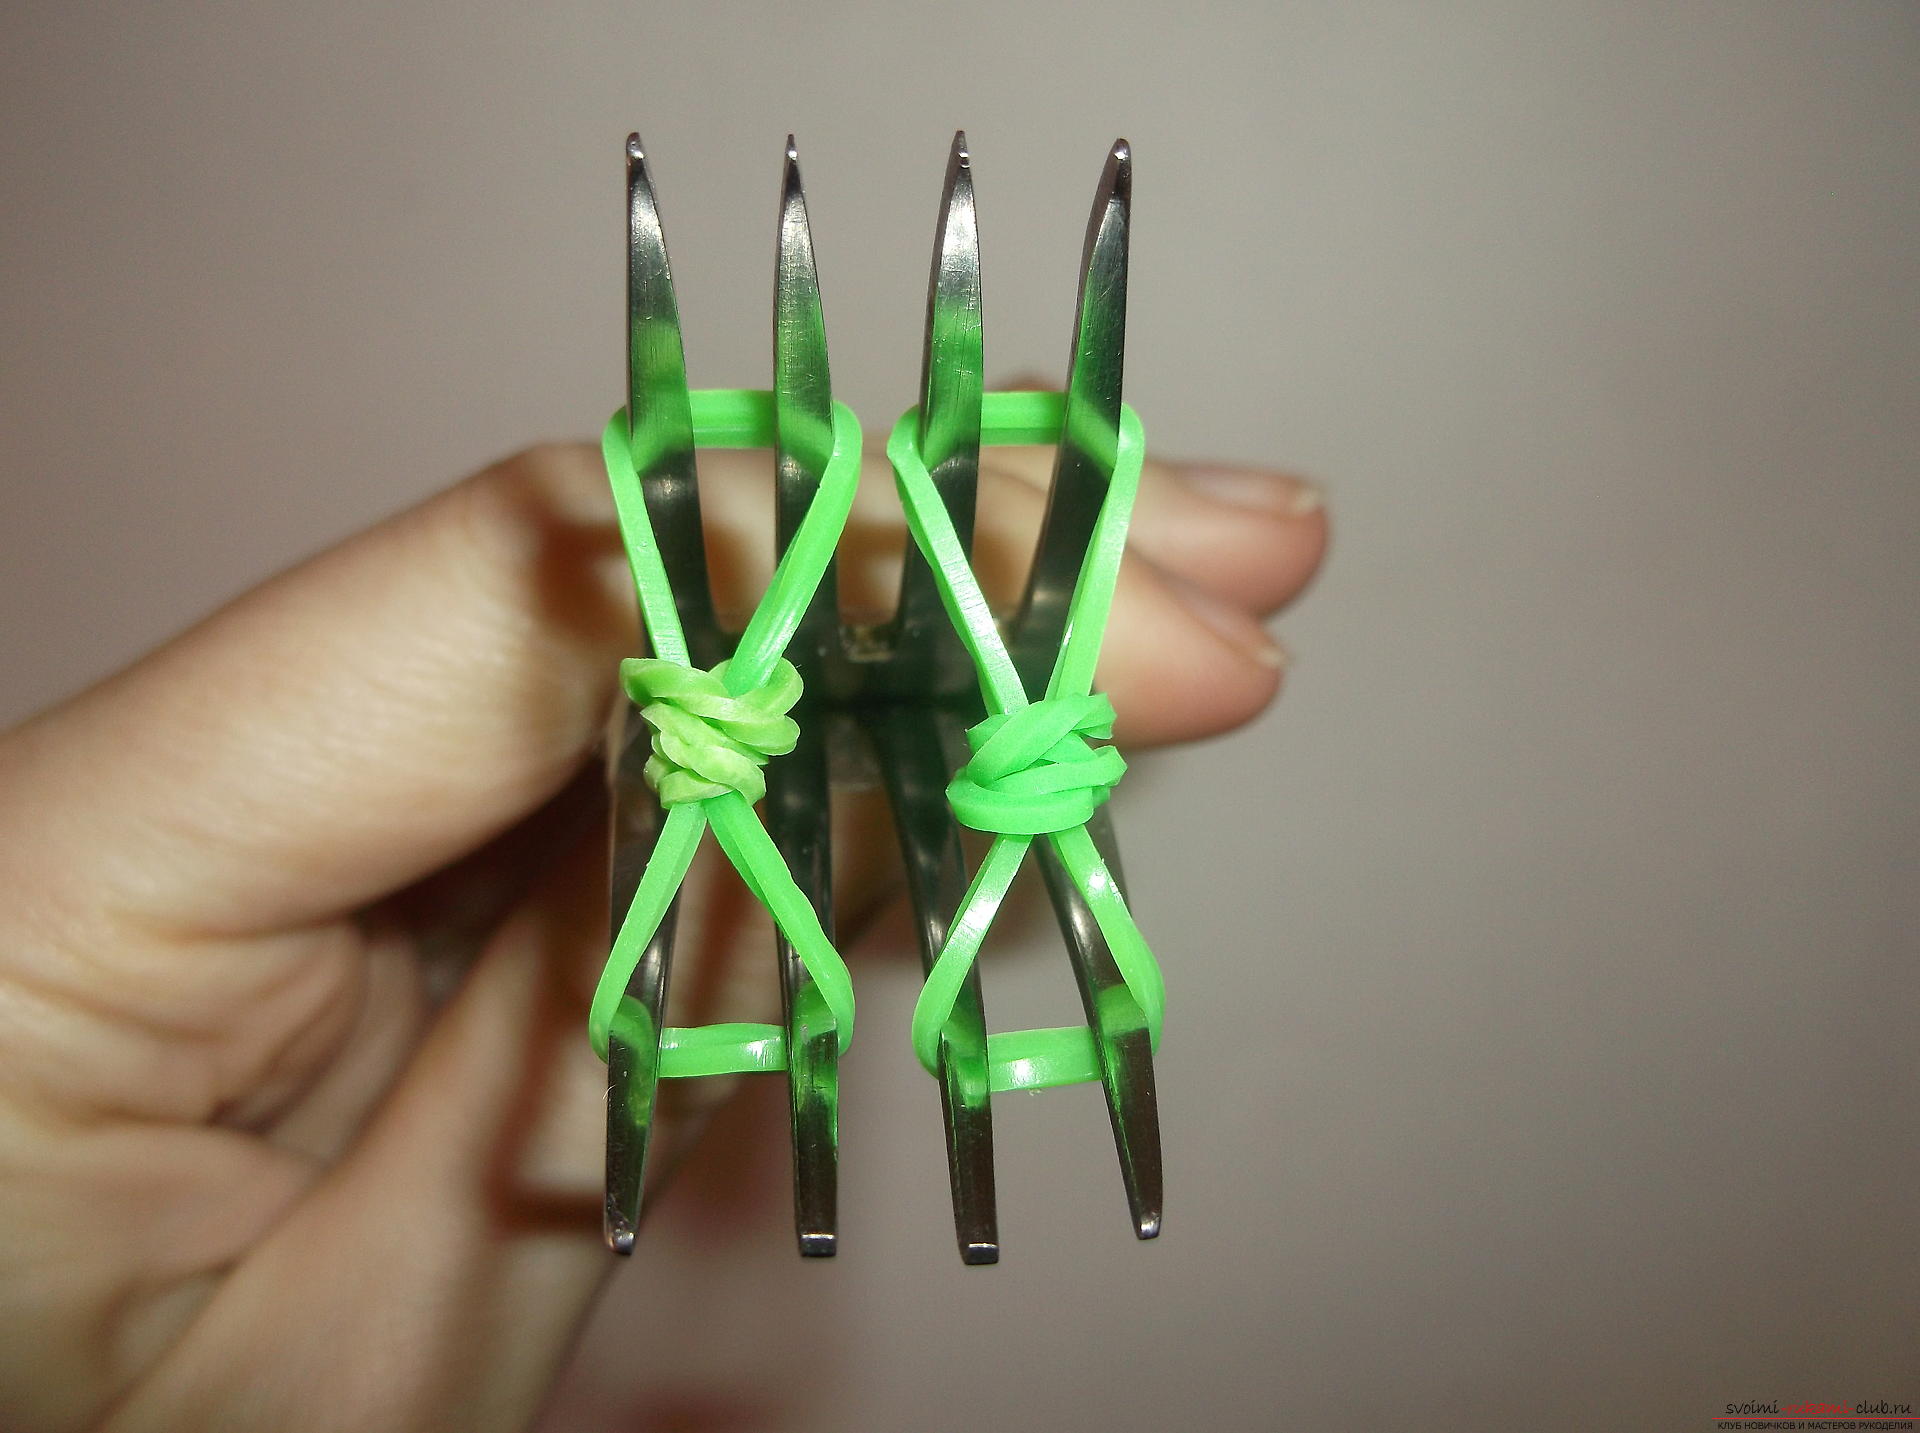 Next we will take 2 rubber bands. Similarly, we sprinkle 2 rubber bands on the 2 left prongs of the upper and lower forks, and on the 2 right prongs of both forks. Remove the 3 lower rubber bands from each pair of teeth on both forks.
 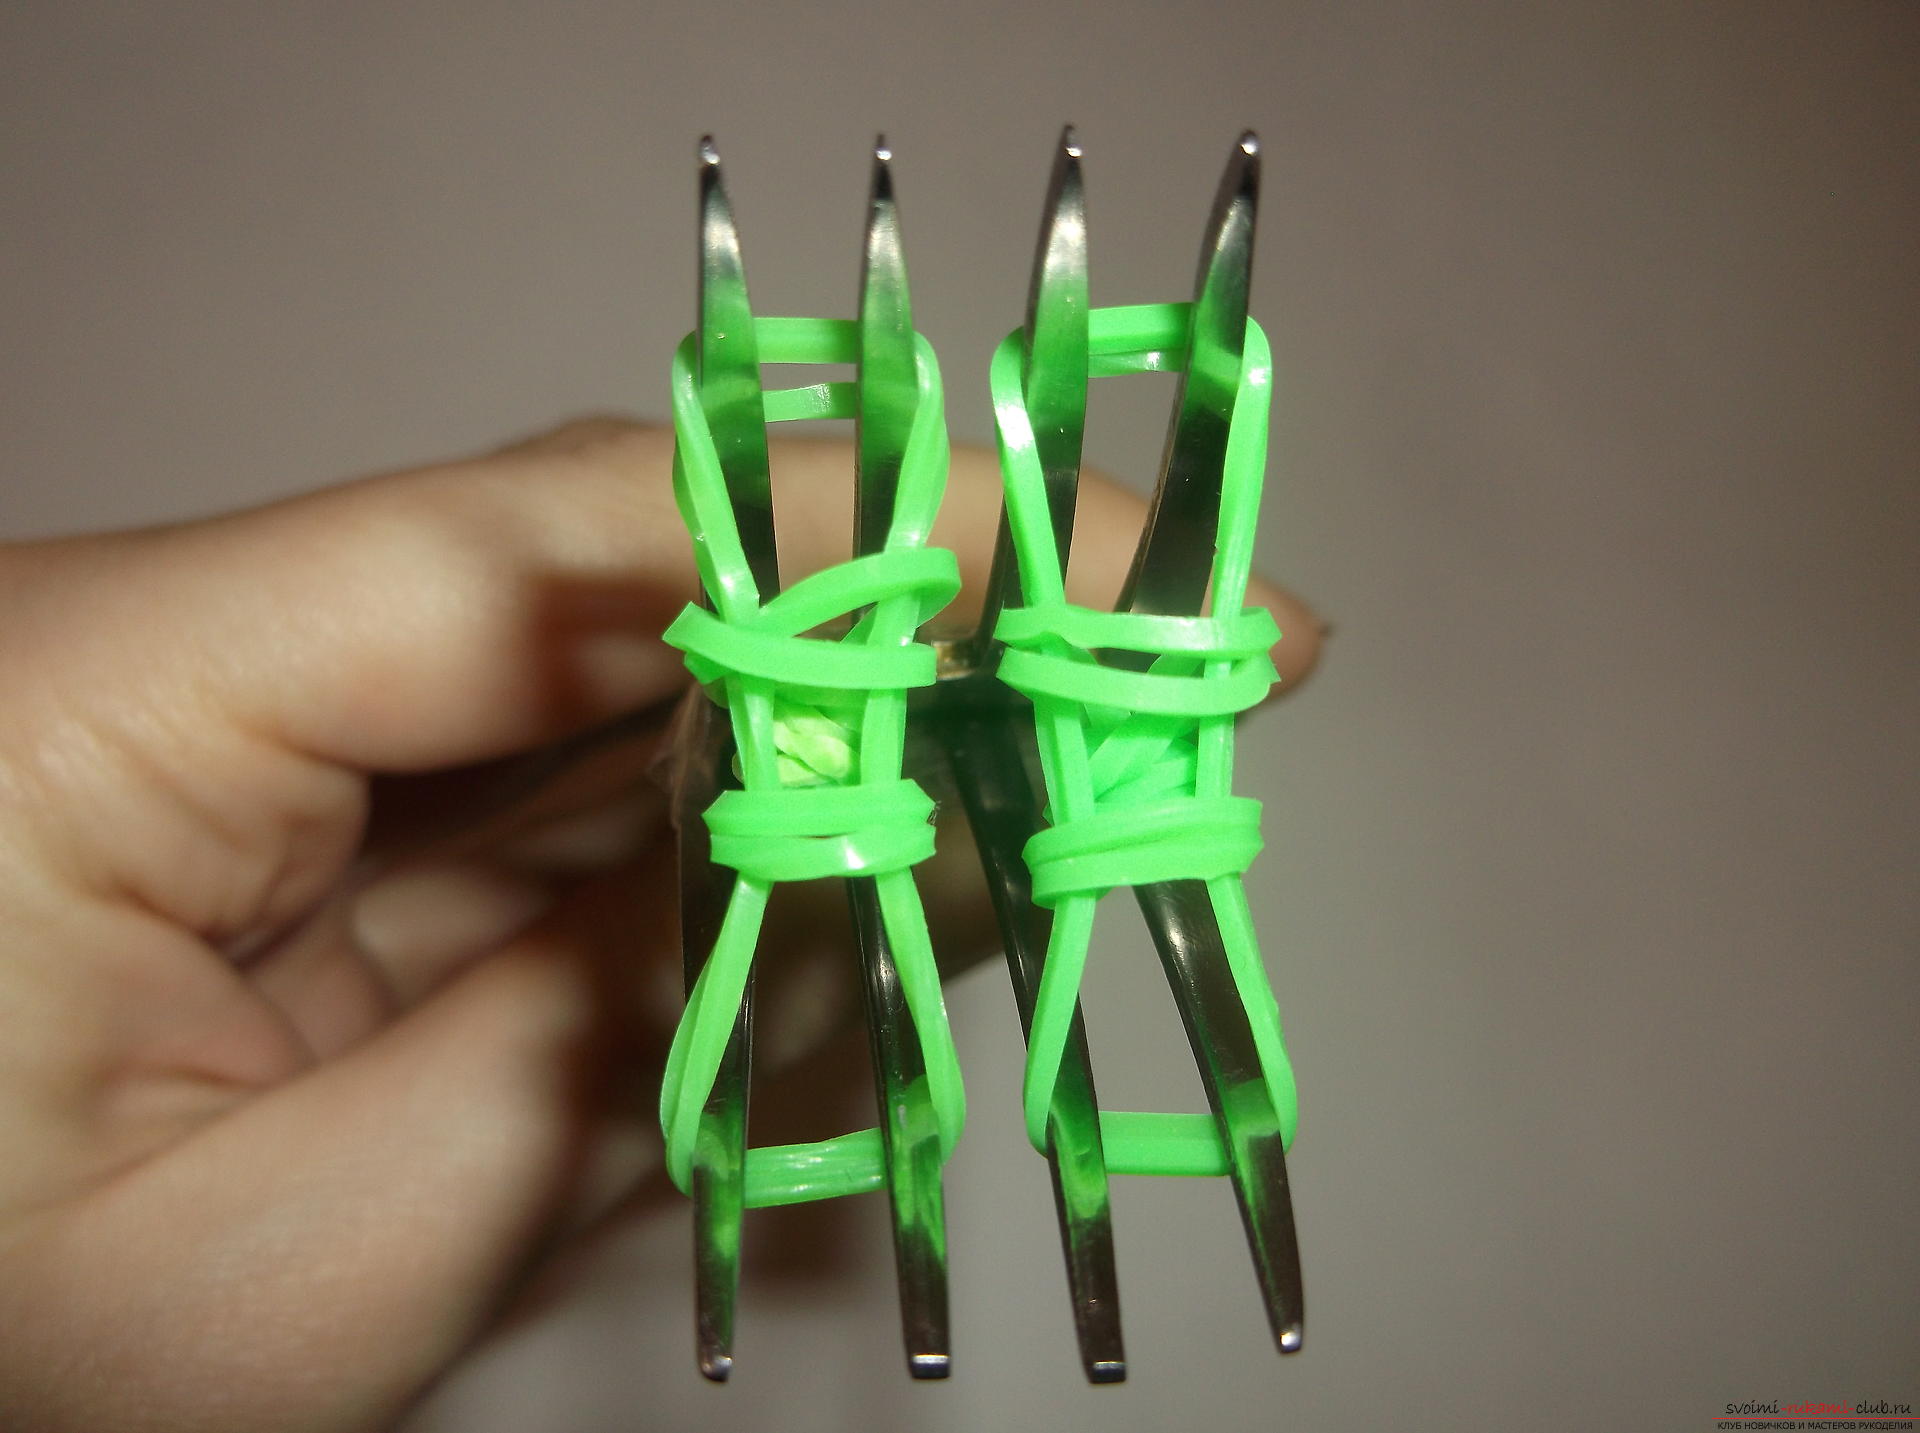 The remaining rubber bands from one fork will be thrown on one extreme tooth on the left and one extreme tooth on the right.
 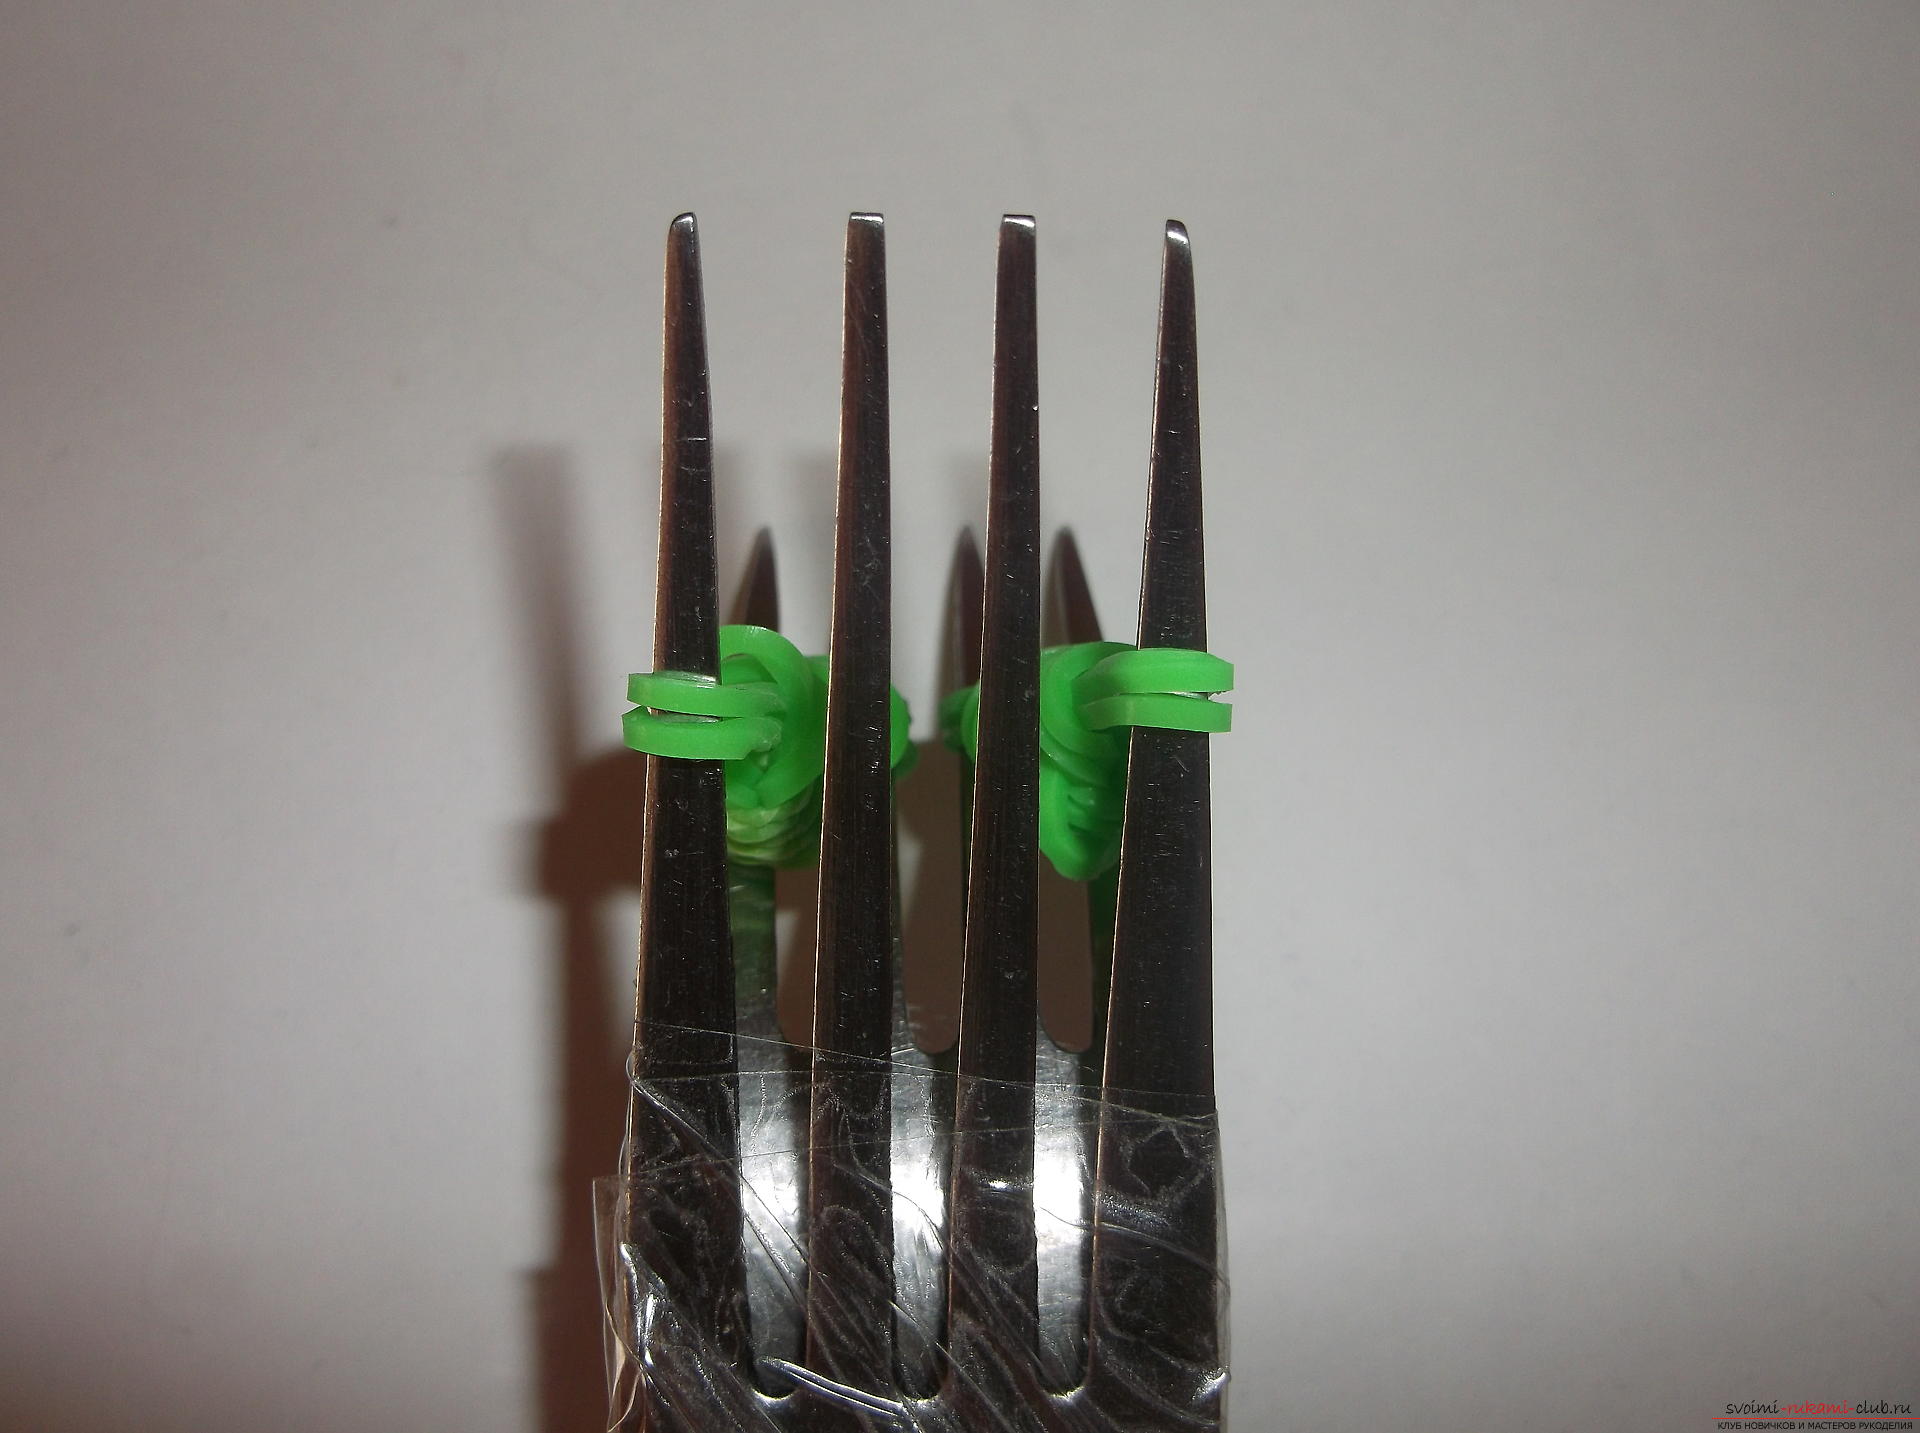 On the other fork there are 2each pair of extreme teeth. A pair of rubber bands from two left we transfer to one extreme left tooth of the lower fork, and a pair of rubber bands from two right teeth are transferred to one extreme tooth of the 2nd fork. That is, now on the top fork is 4 loops on each edge of the tooth, and on the lower fork rubber is not at all.
 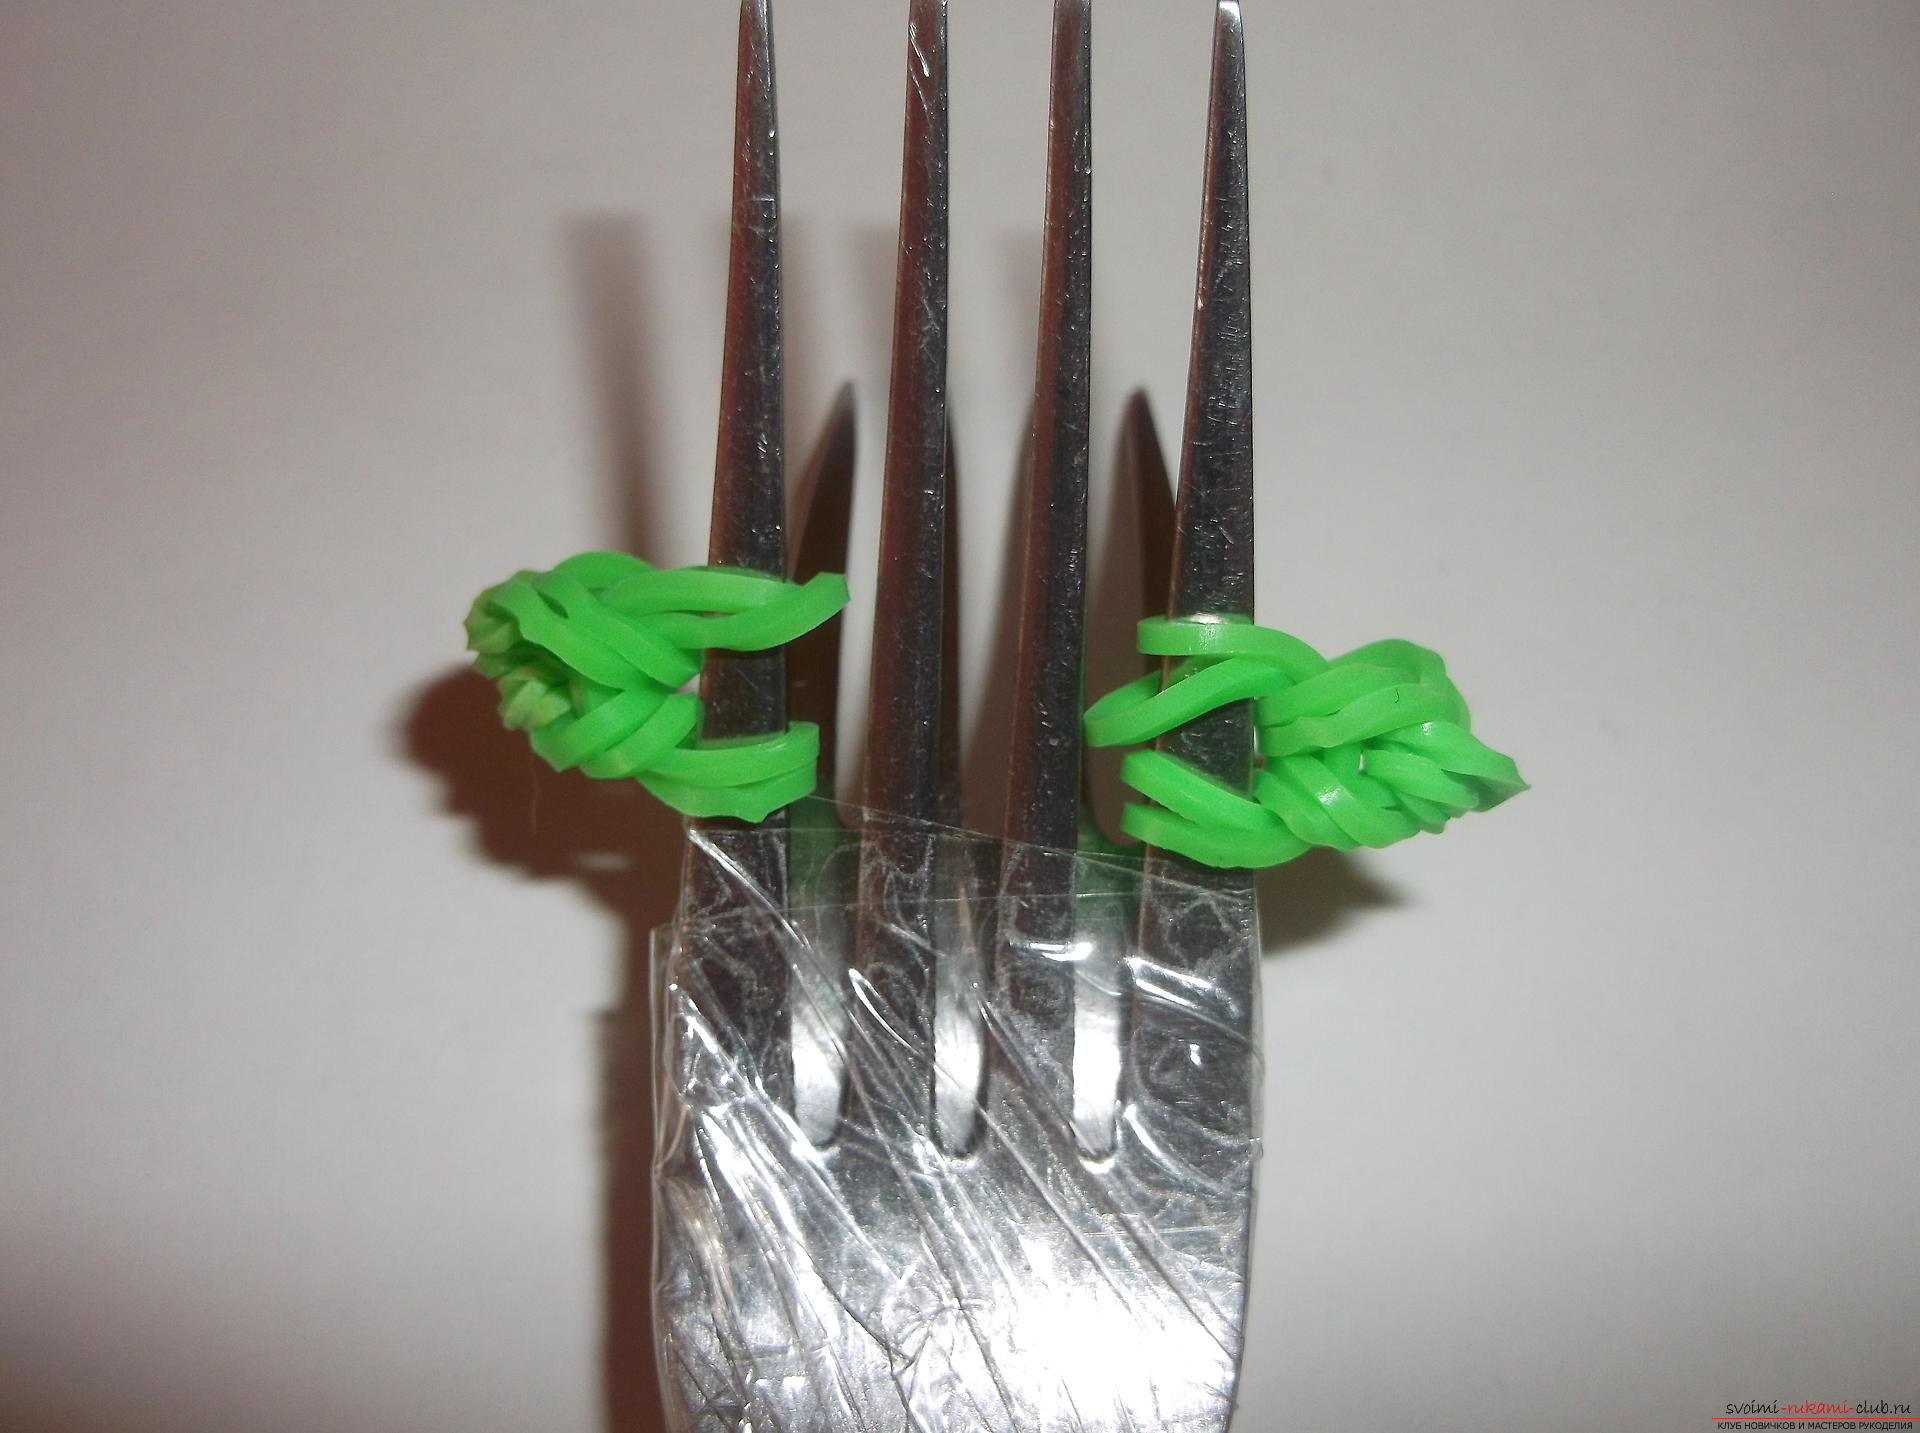 2 paws ready, pull them out to the sides tothey did not prevent us from weaving the turtle itself. Again, as in the very beginning, we wind on one of the right teeth one green rubber band four times. With the two left we do the same.
 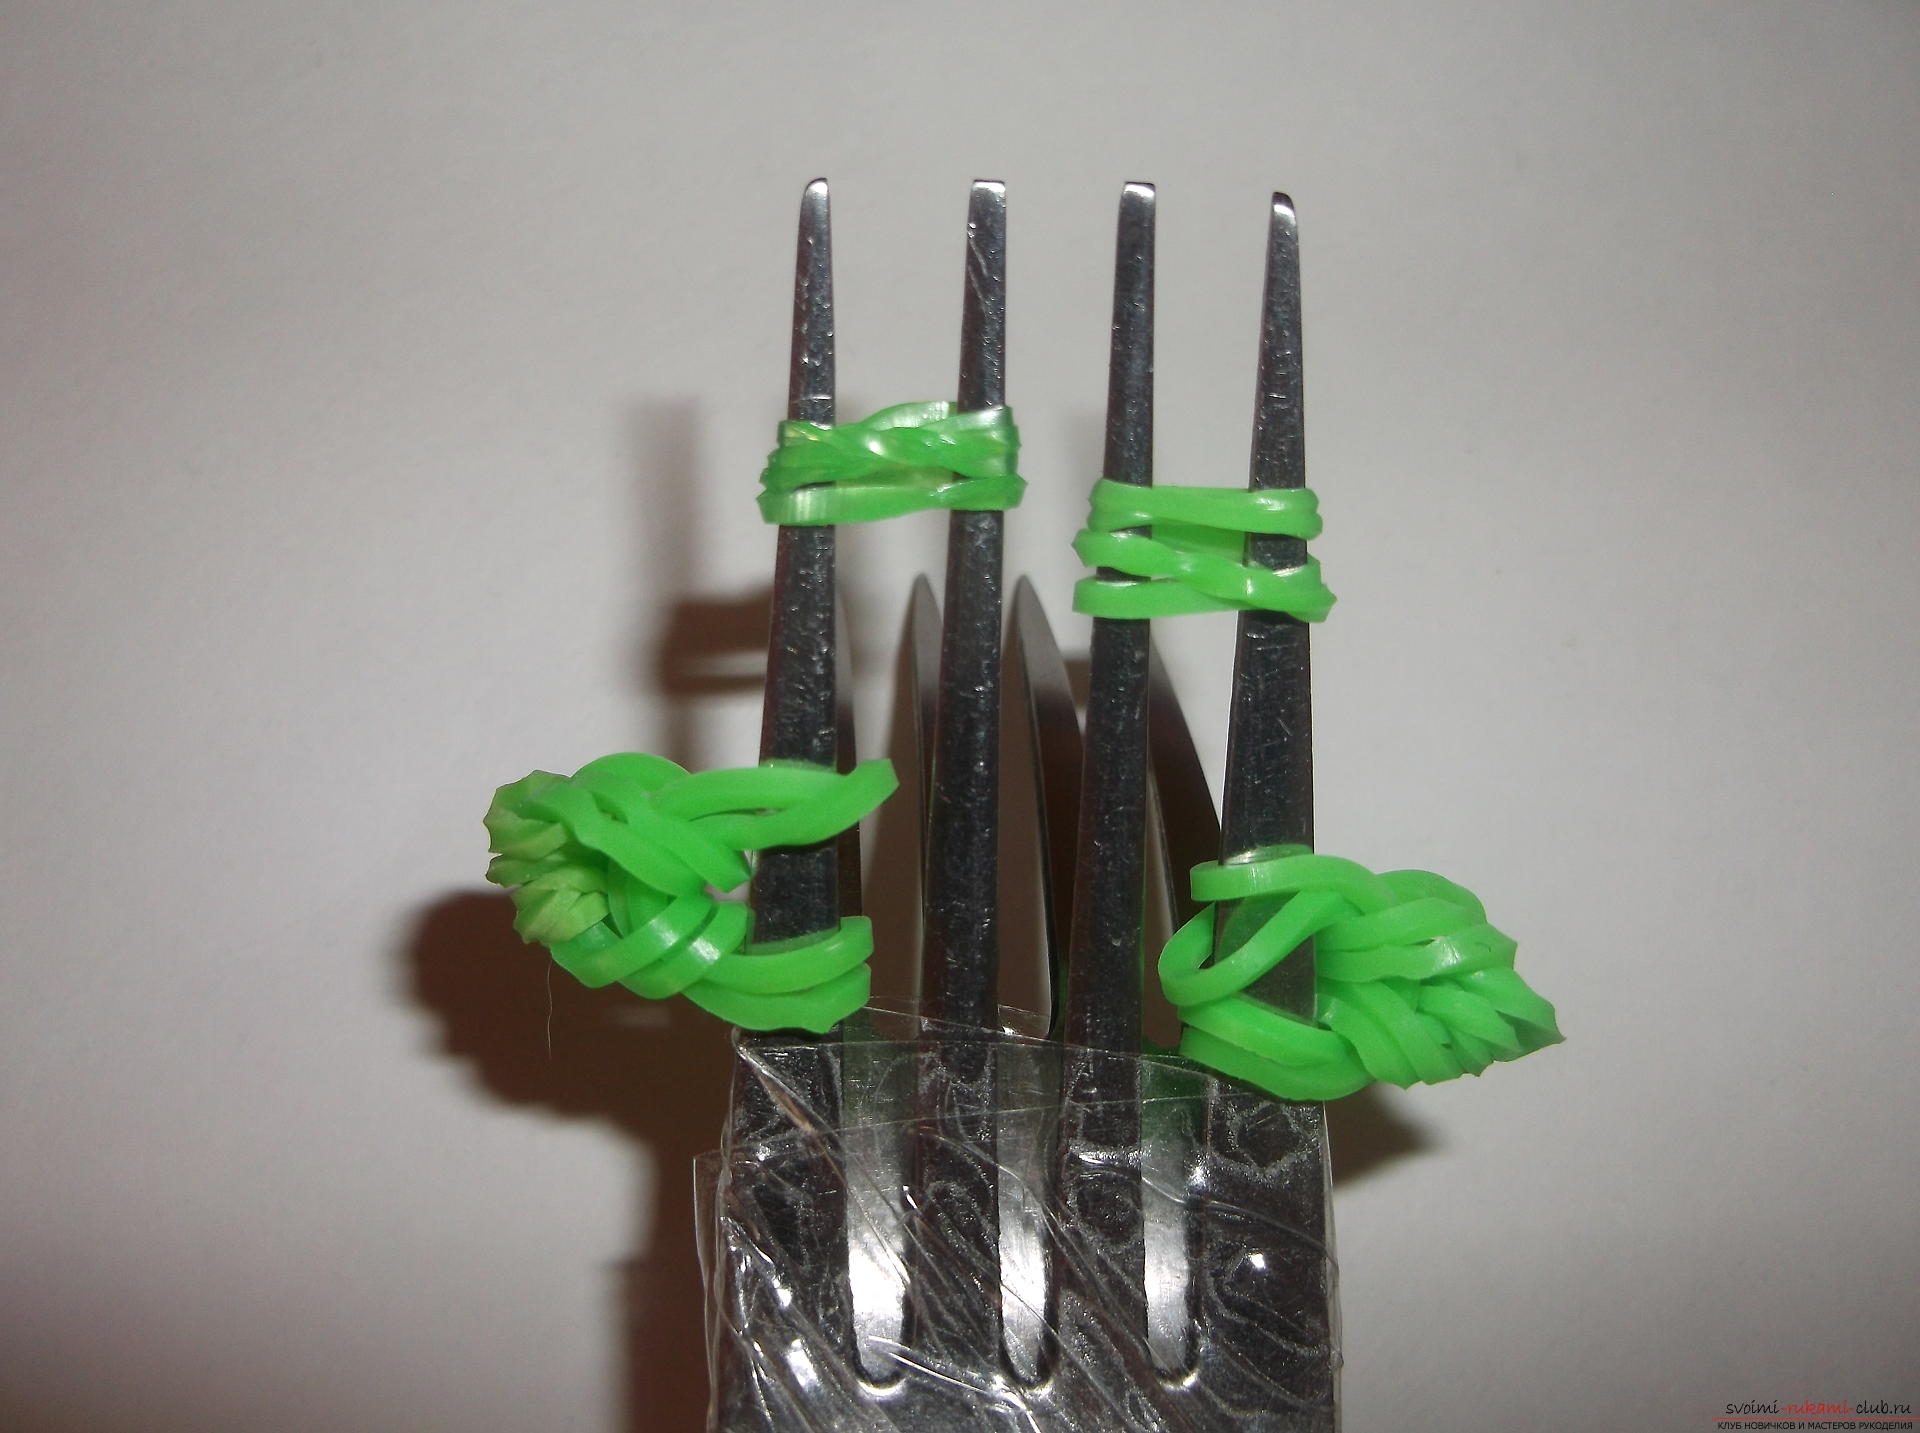 Draw a new layer. He is no different from the previous one. A pair of green rubber bands are tossed on the pairs of teeth of both forks.
 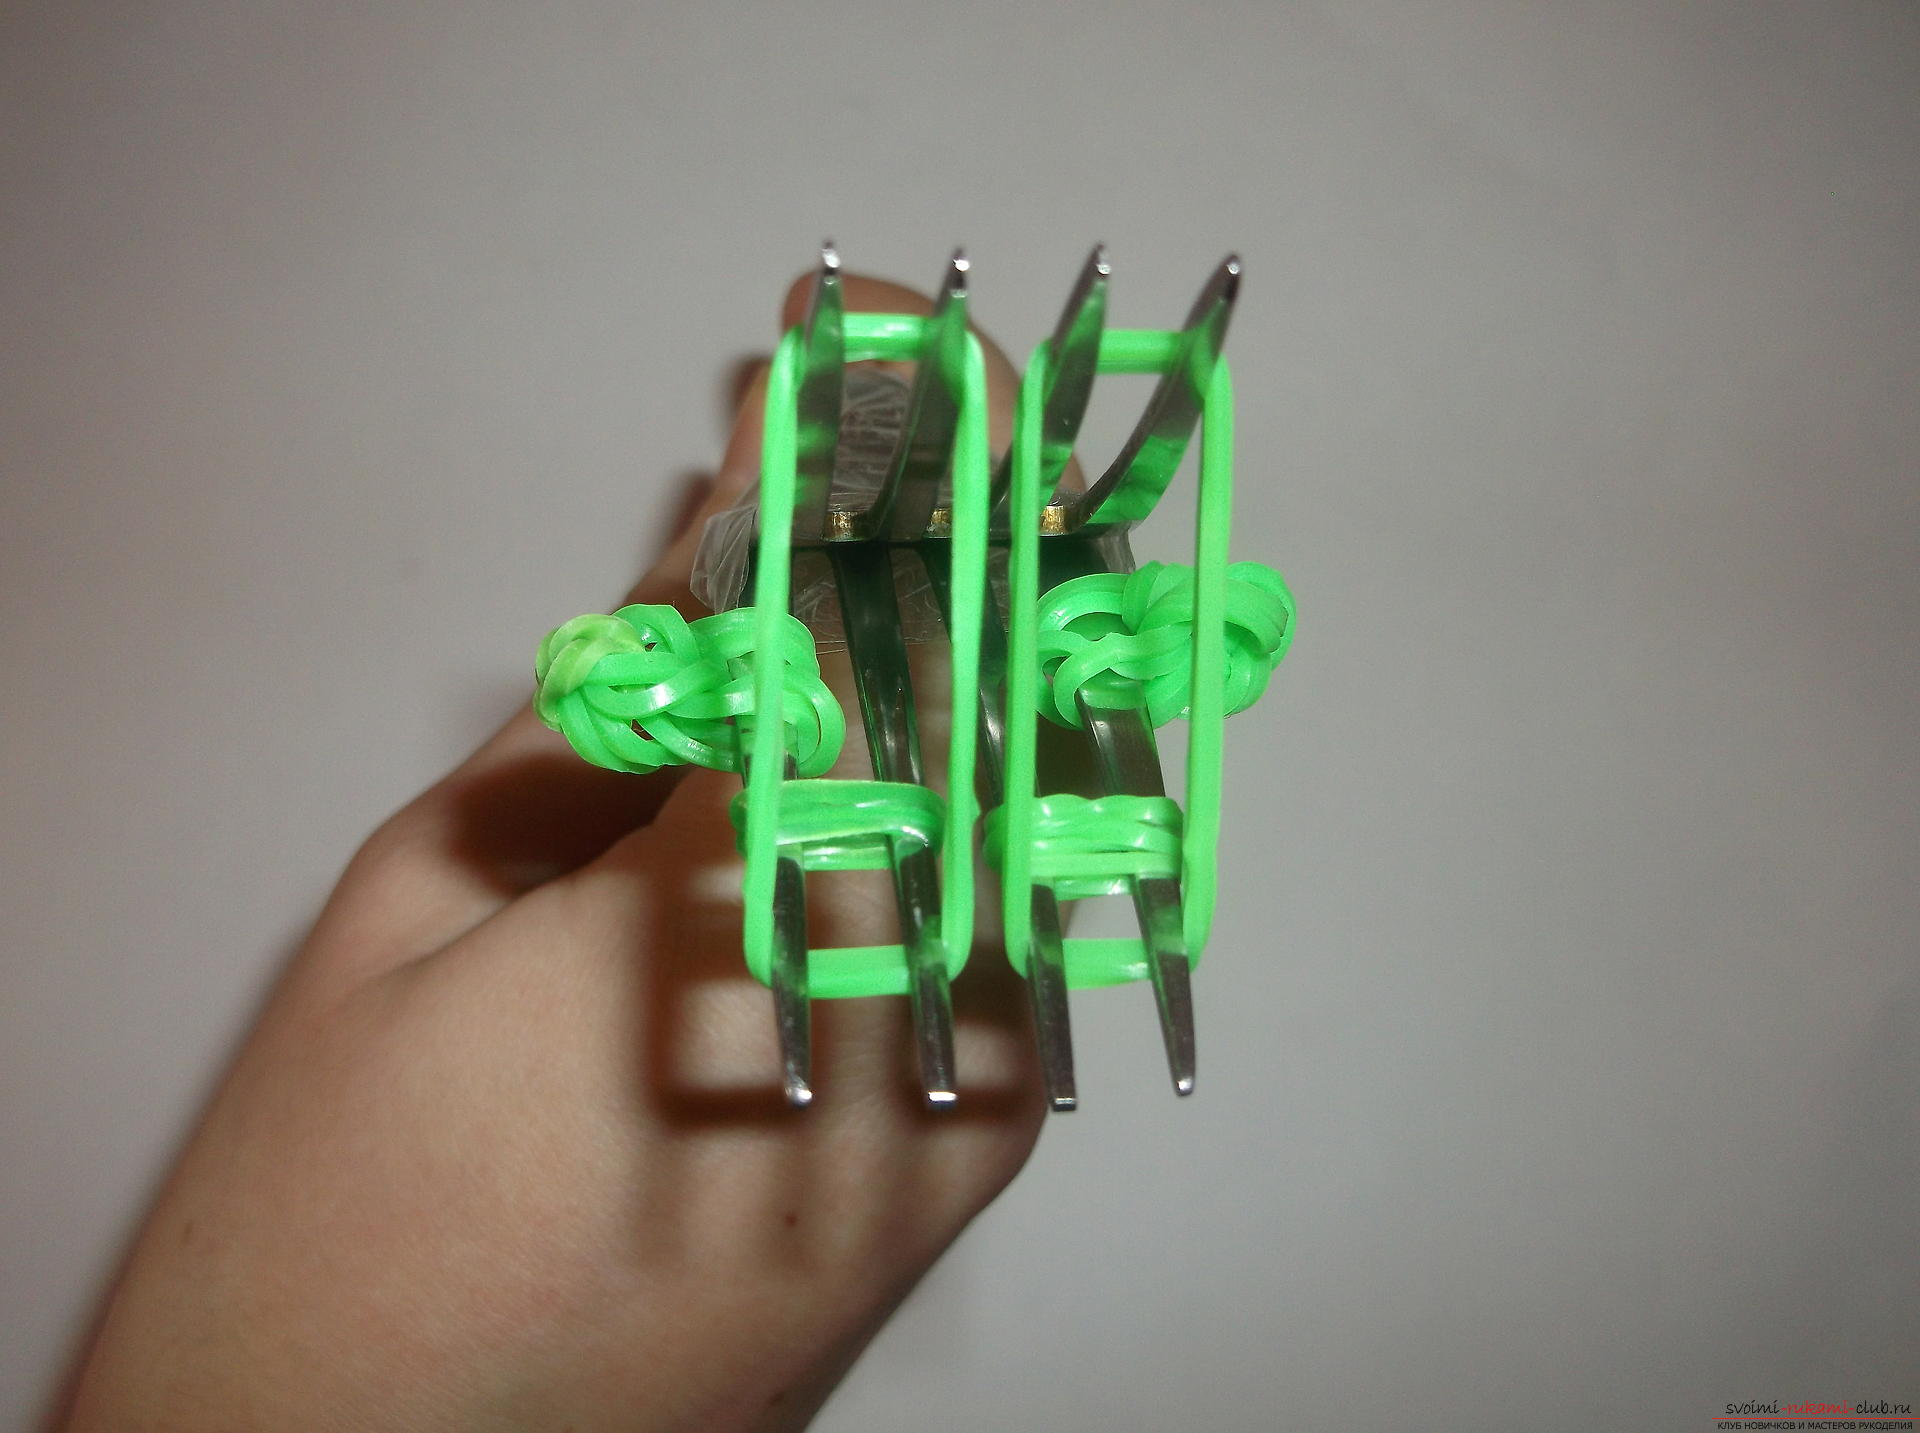 We take off the four lower loops. We wound them on the teeth 4 times. We again sprinkle 2 rubber bands on the pairs of teeth of the upper and lower forks. Remove the 2 lower rubber bands from both forks. Rubber from the lower fork is transferred to pairs of teeth of the upper.
 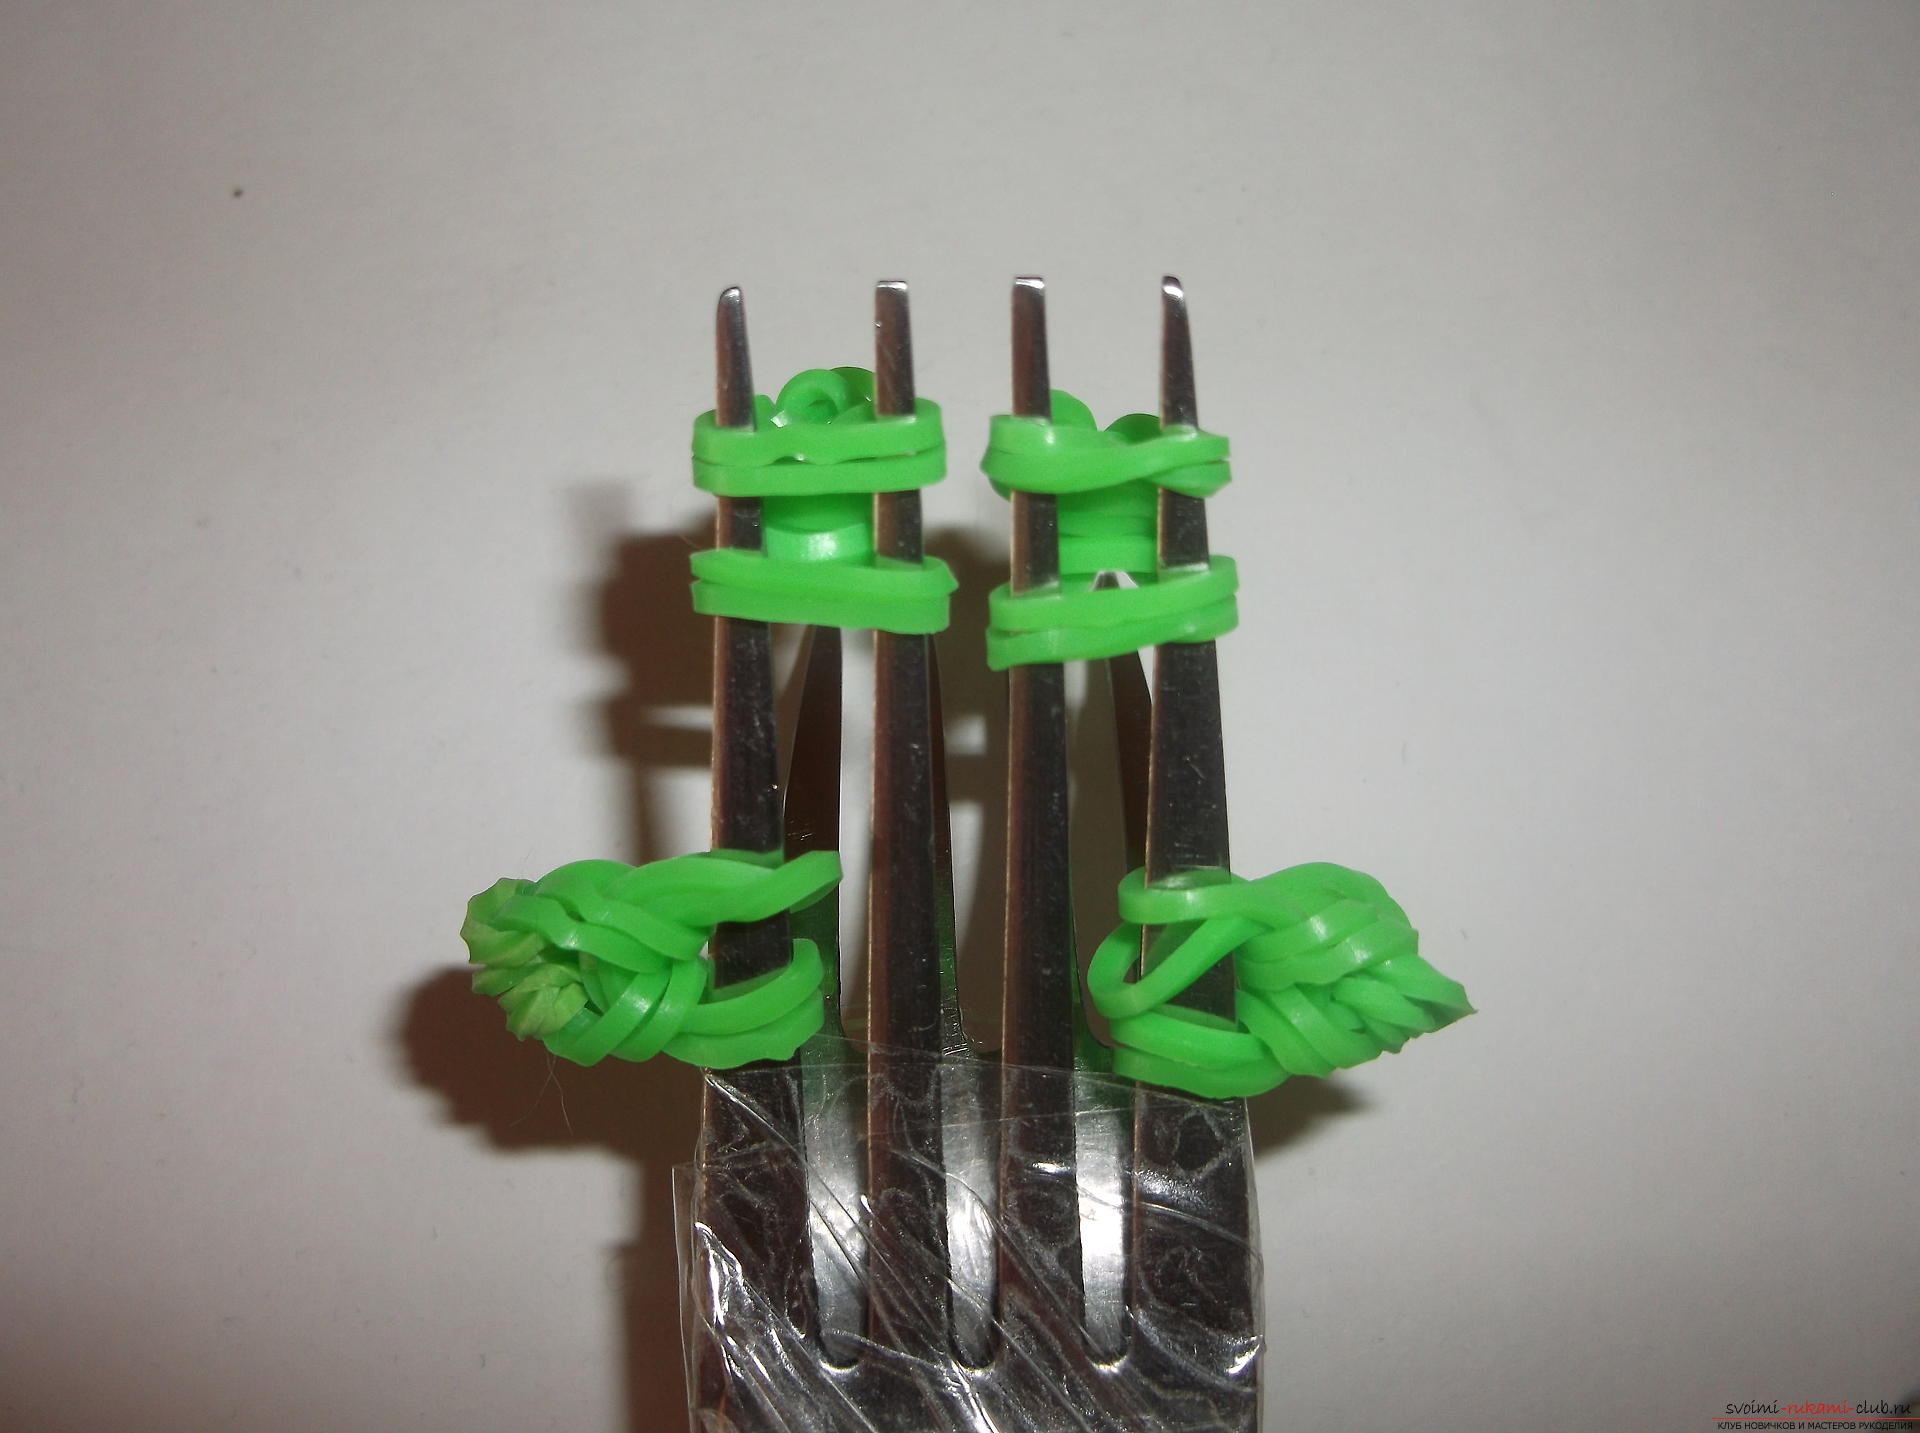 On the lower fork again there are no gum. On the upper four paws are already woven. Let's make a tail for a turtle. For this, we throw one green rubber band on the 2 middle teeth of the upper fork, twist the figure eight and throw the same rubber band onto the 2 middle teeth of the lower fork. Now we twist the same twisted elastic band behind the lower fork, again twist the figure-eight, throw on 2 middle teeth of the lower fork and stretch it to 2 middle teeth of the upper fork.
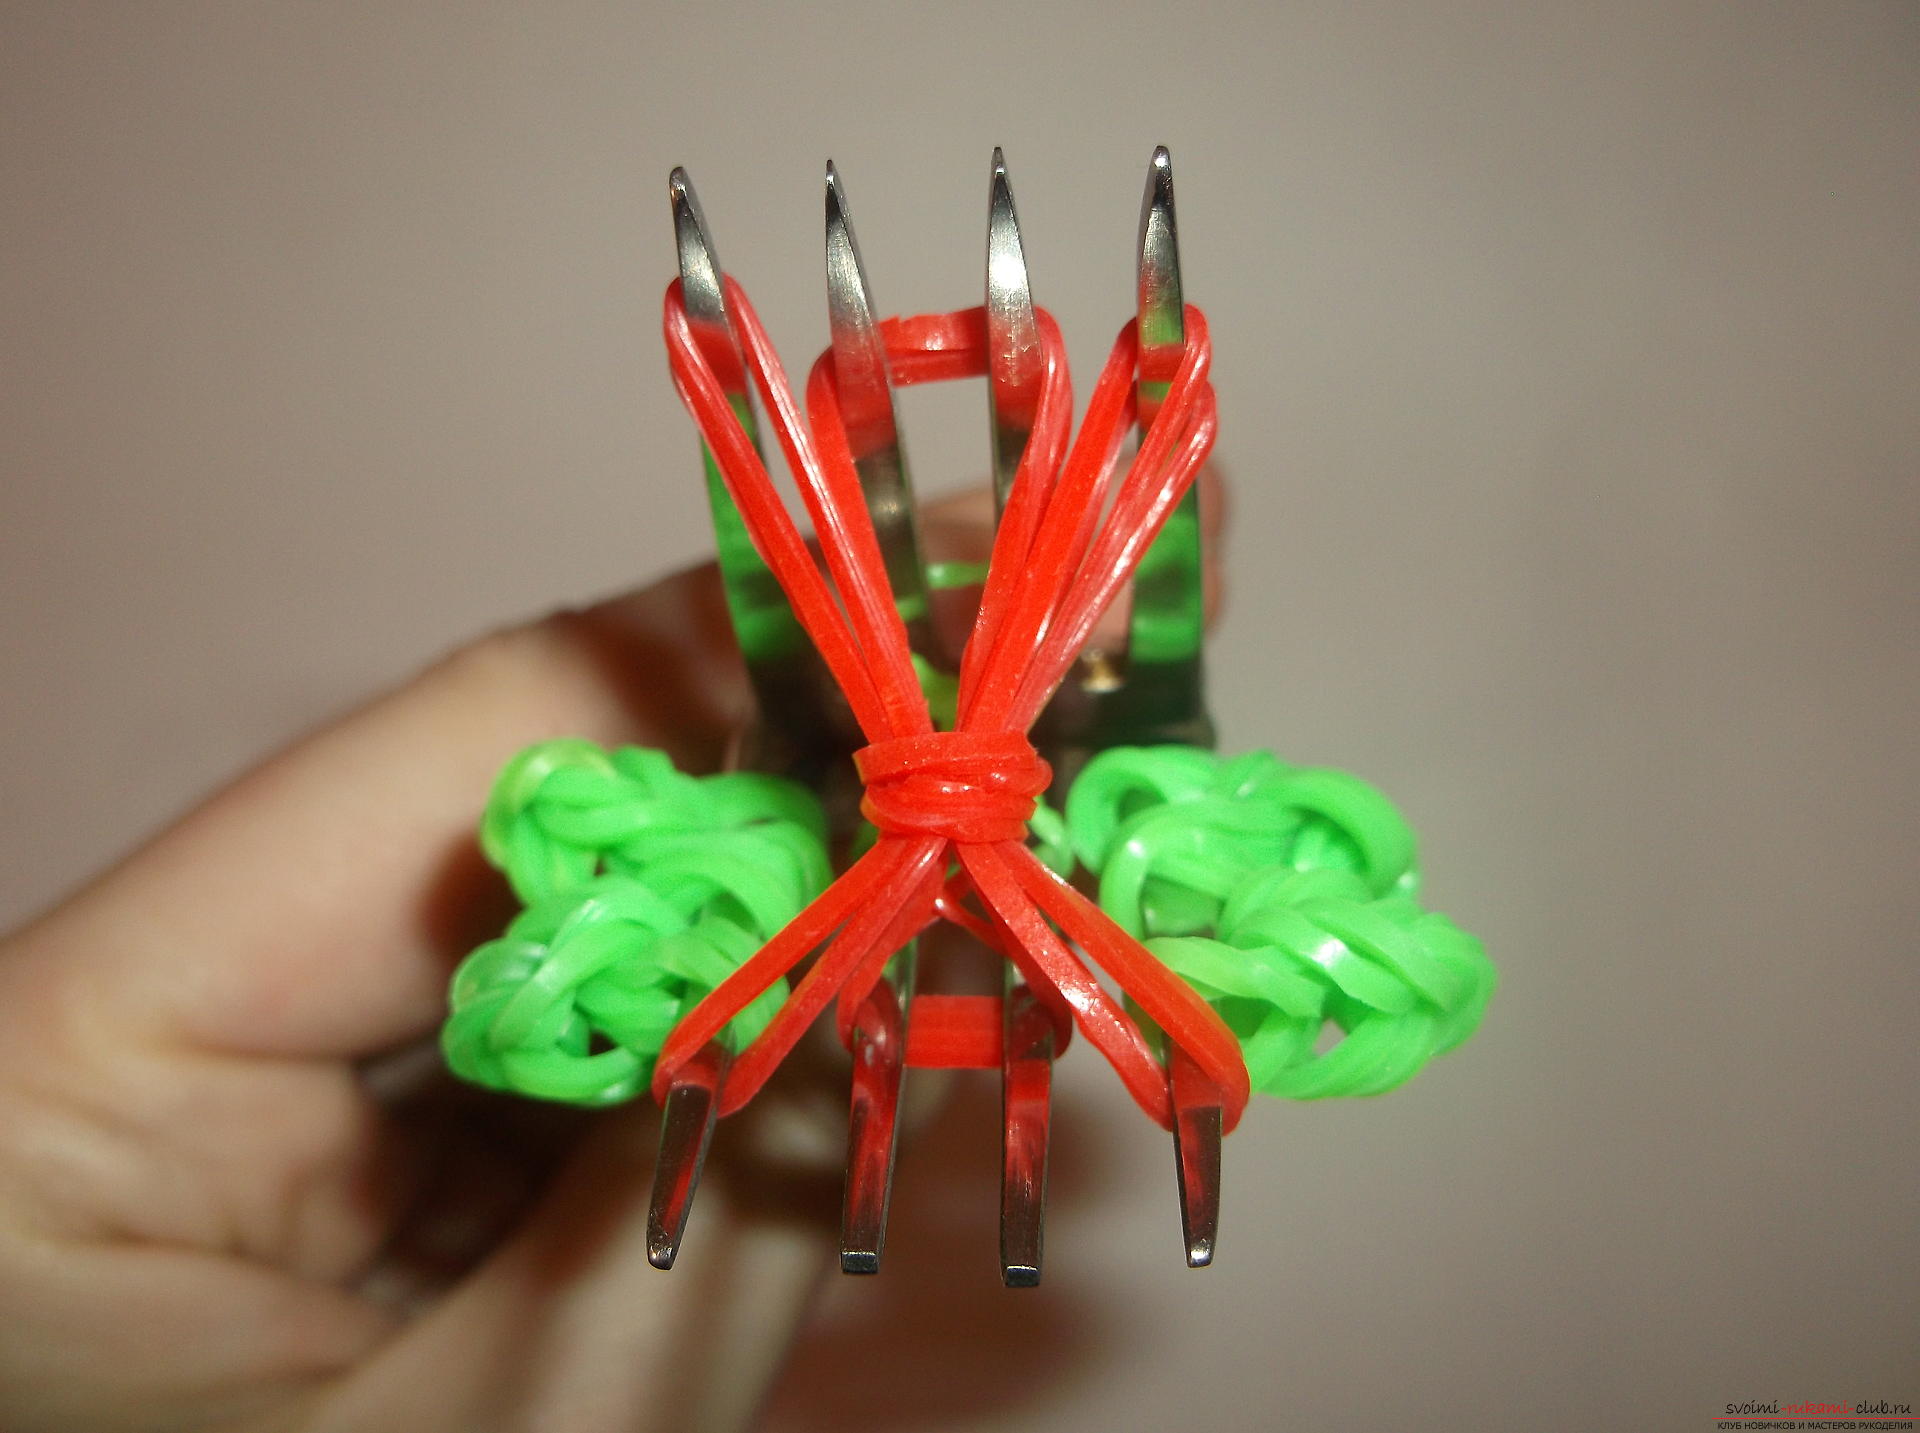
 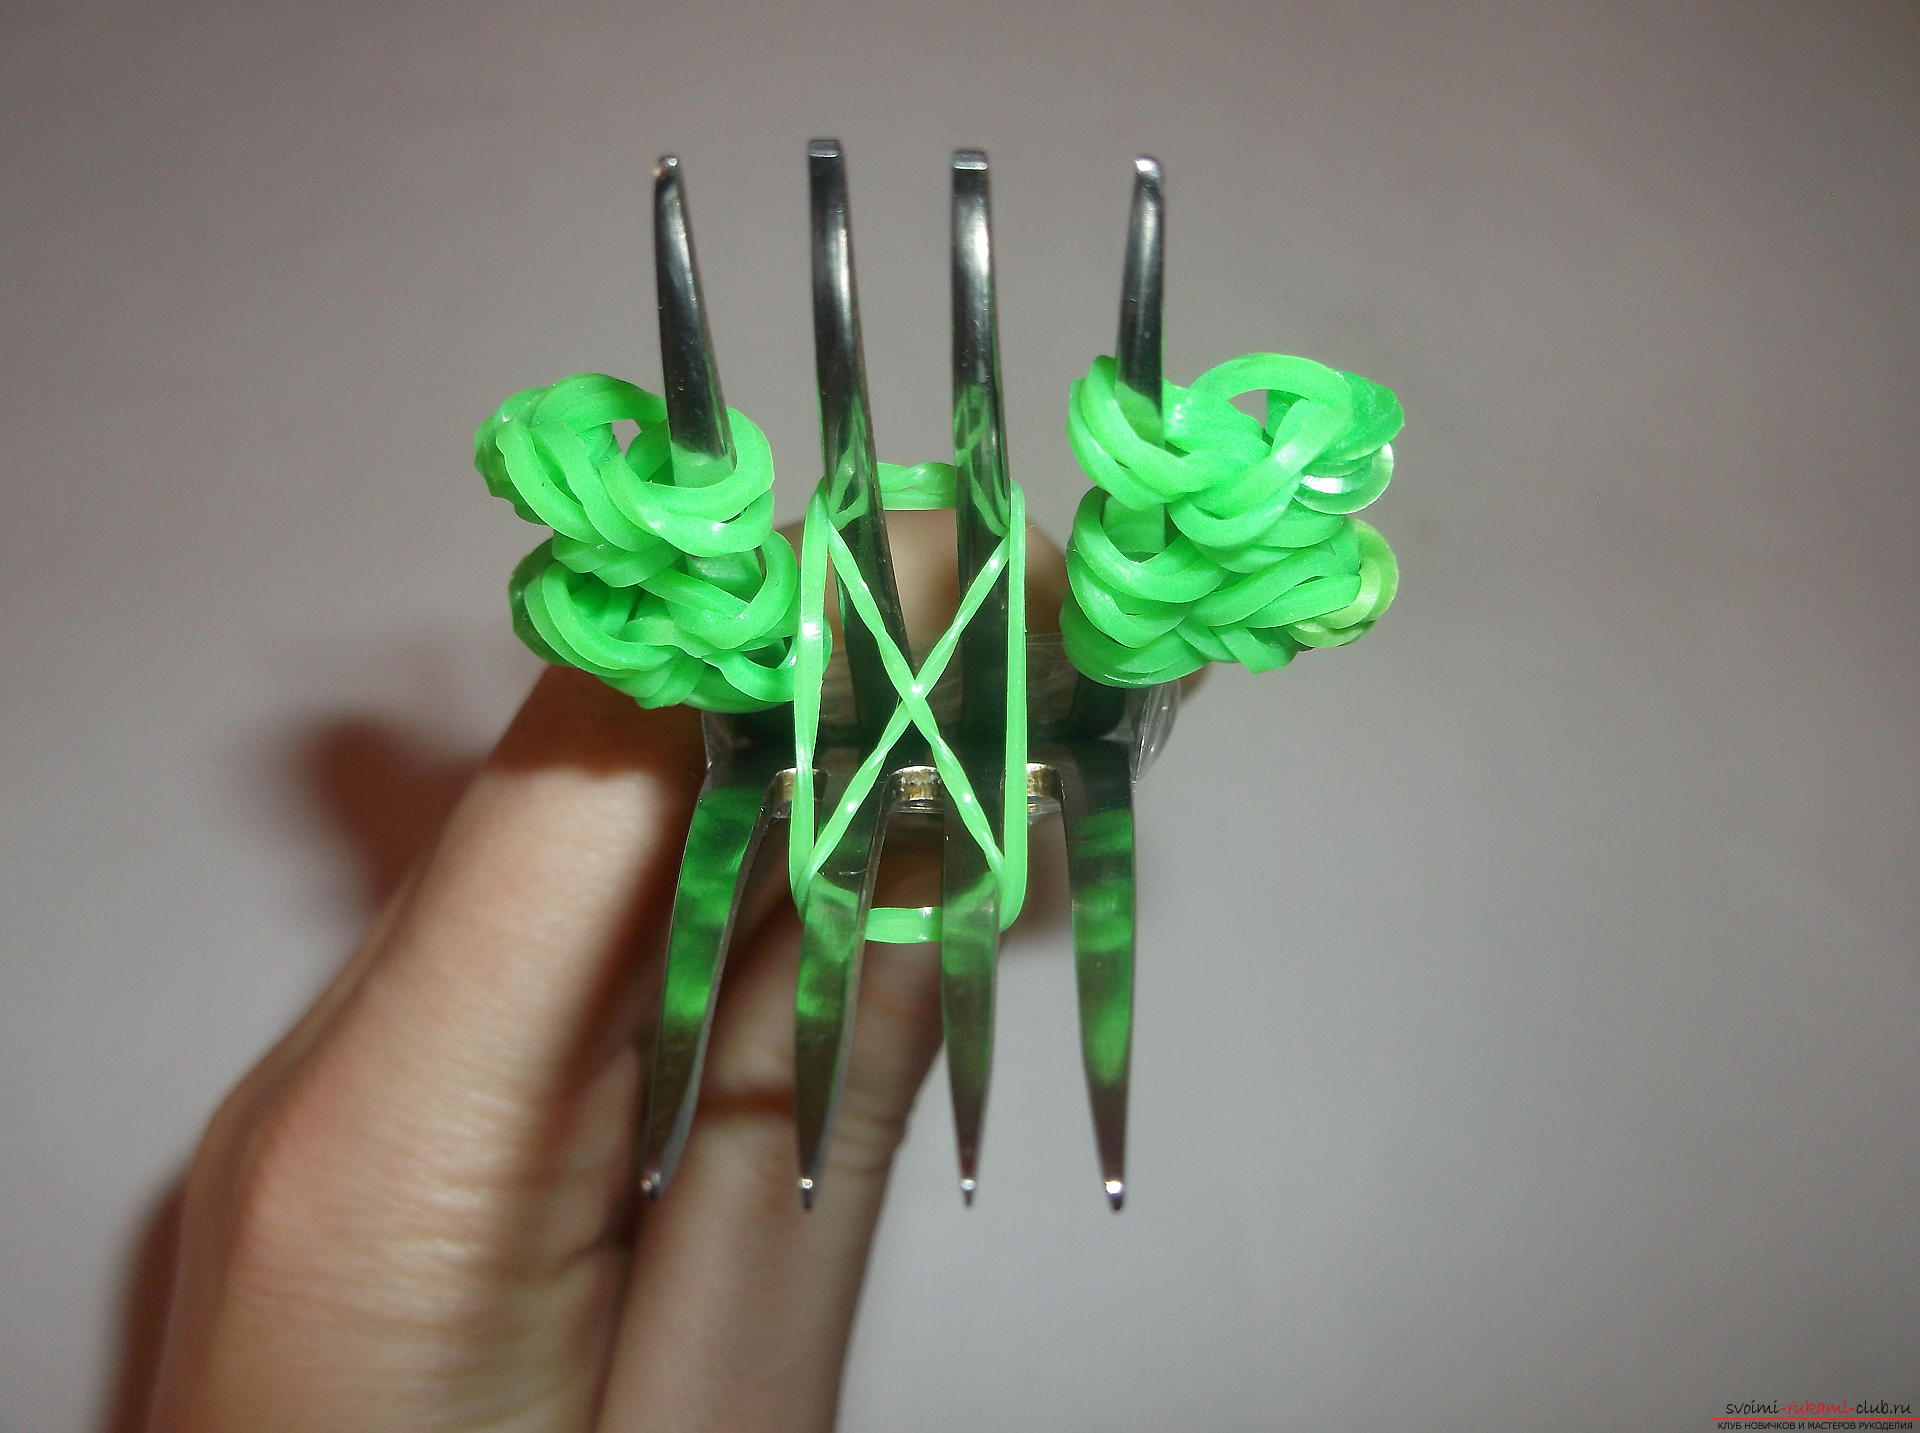 One lower elastic band is removed from a pair of middle teeth on both forks. Next we'll weave with red elastic bands. One red rubber band is wound on 2 middle teeth of the upper fork five times.
 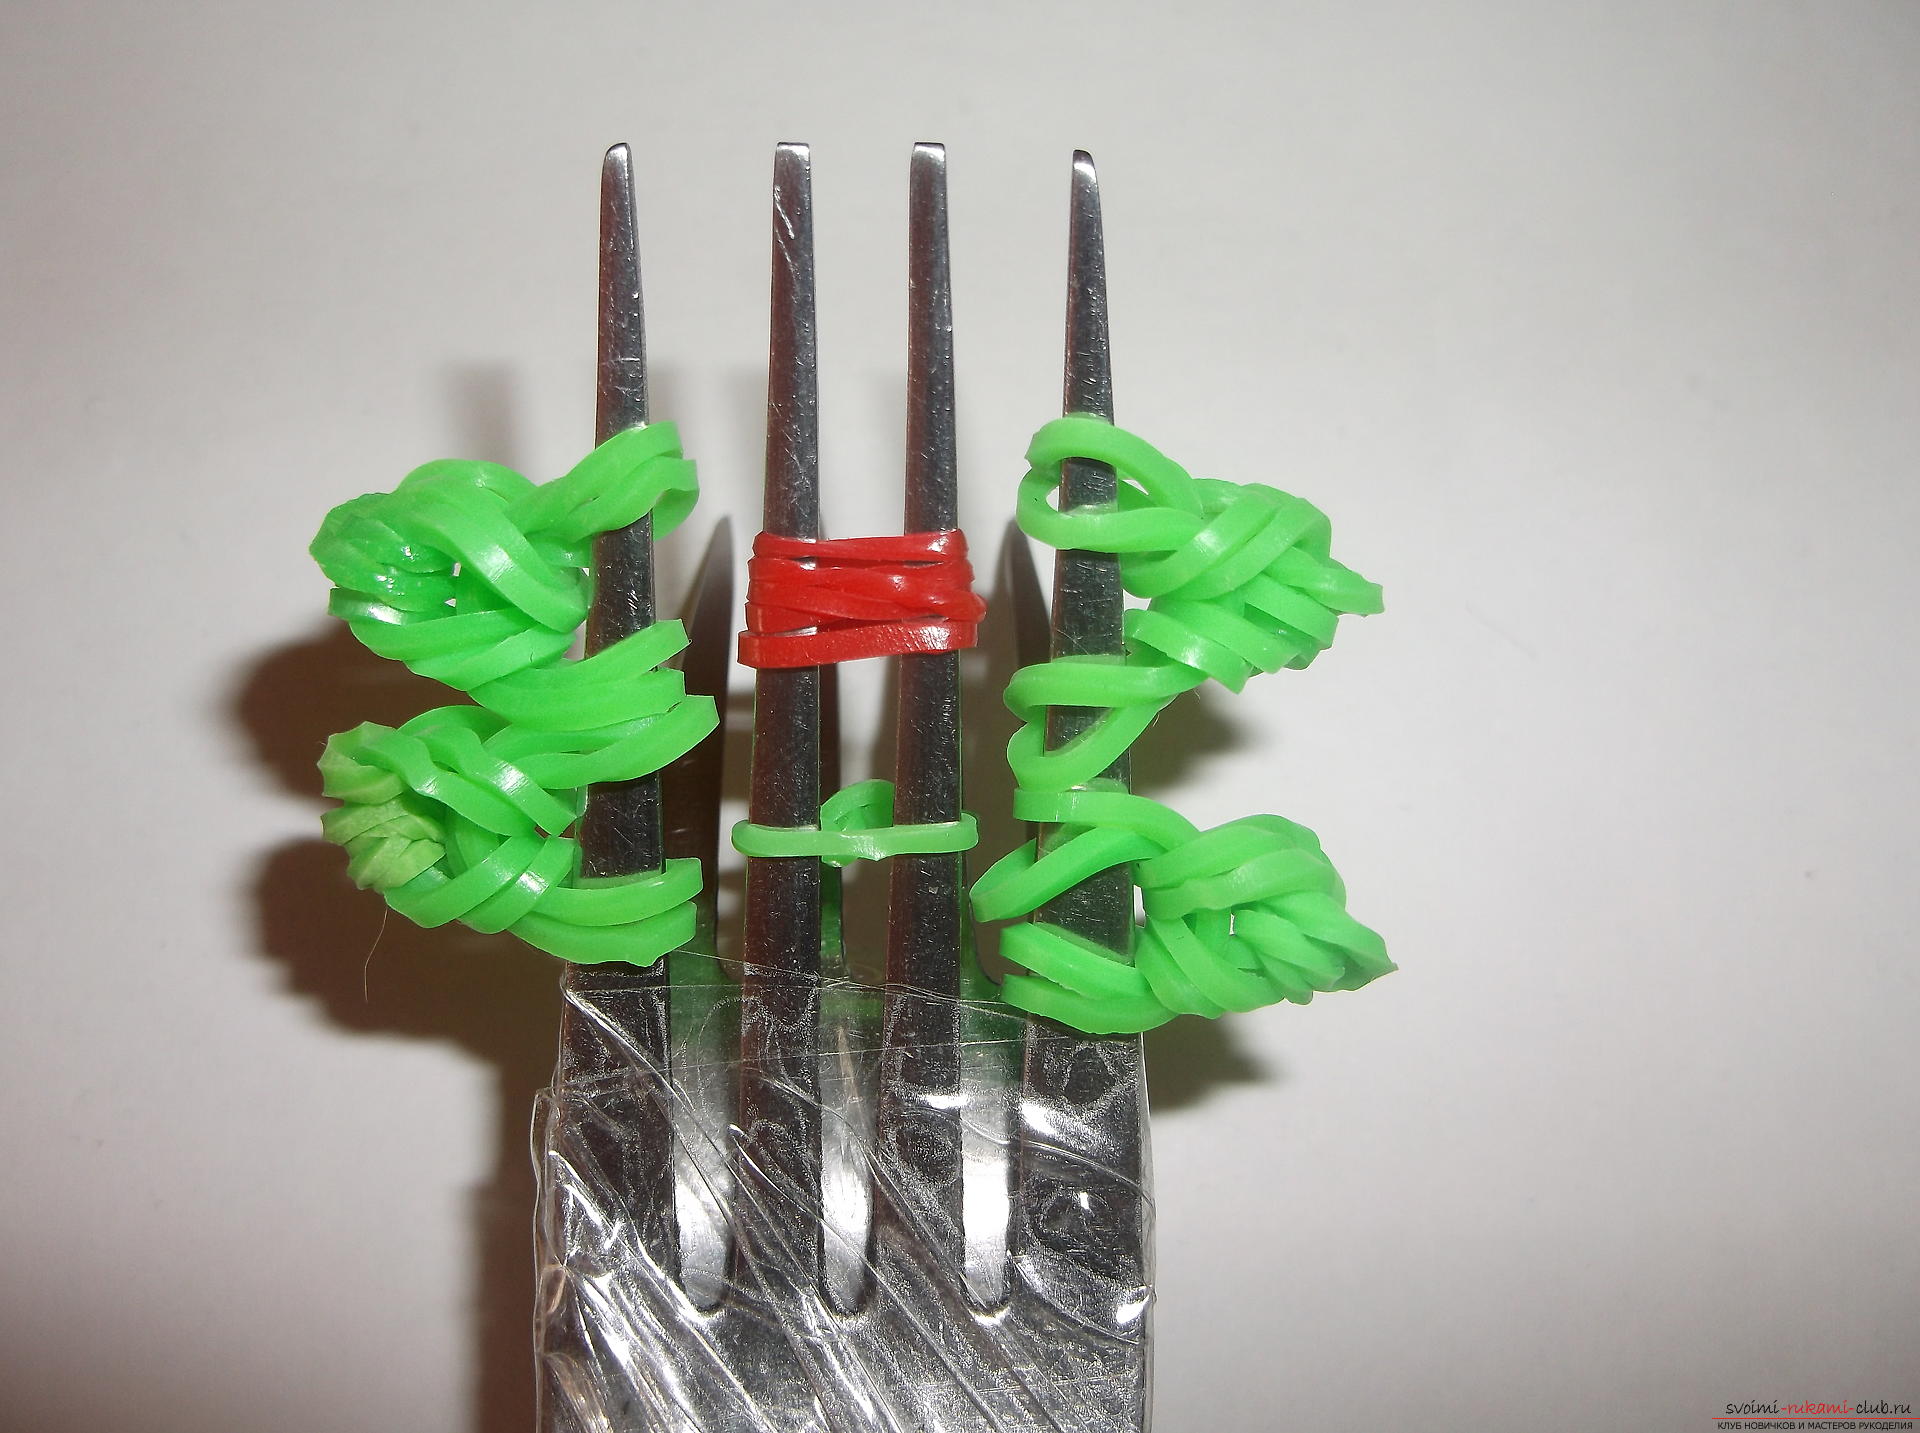 Then 2 red gum sprinkles on 2 mediumteeth of two forks. 2 rubber we put on 2 middle teeth of the upper fork and drag them to the rightmost tooth of the lower fork. And 2 more red rubber we throw again on 2 middle teeth of the top plug and we pull them already on the first left tooth of the lower plug.
 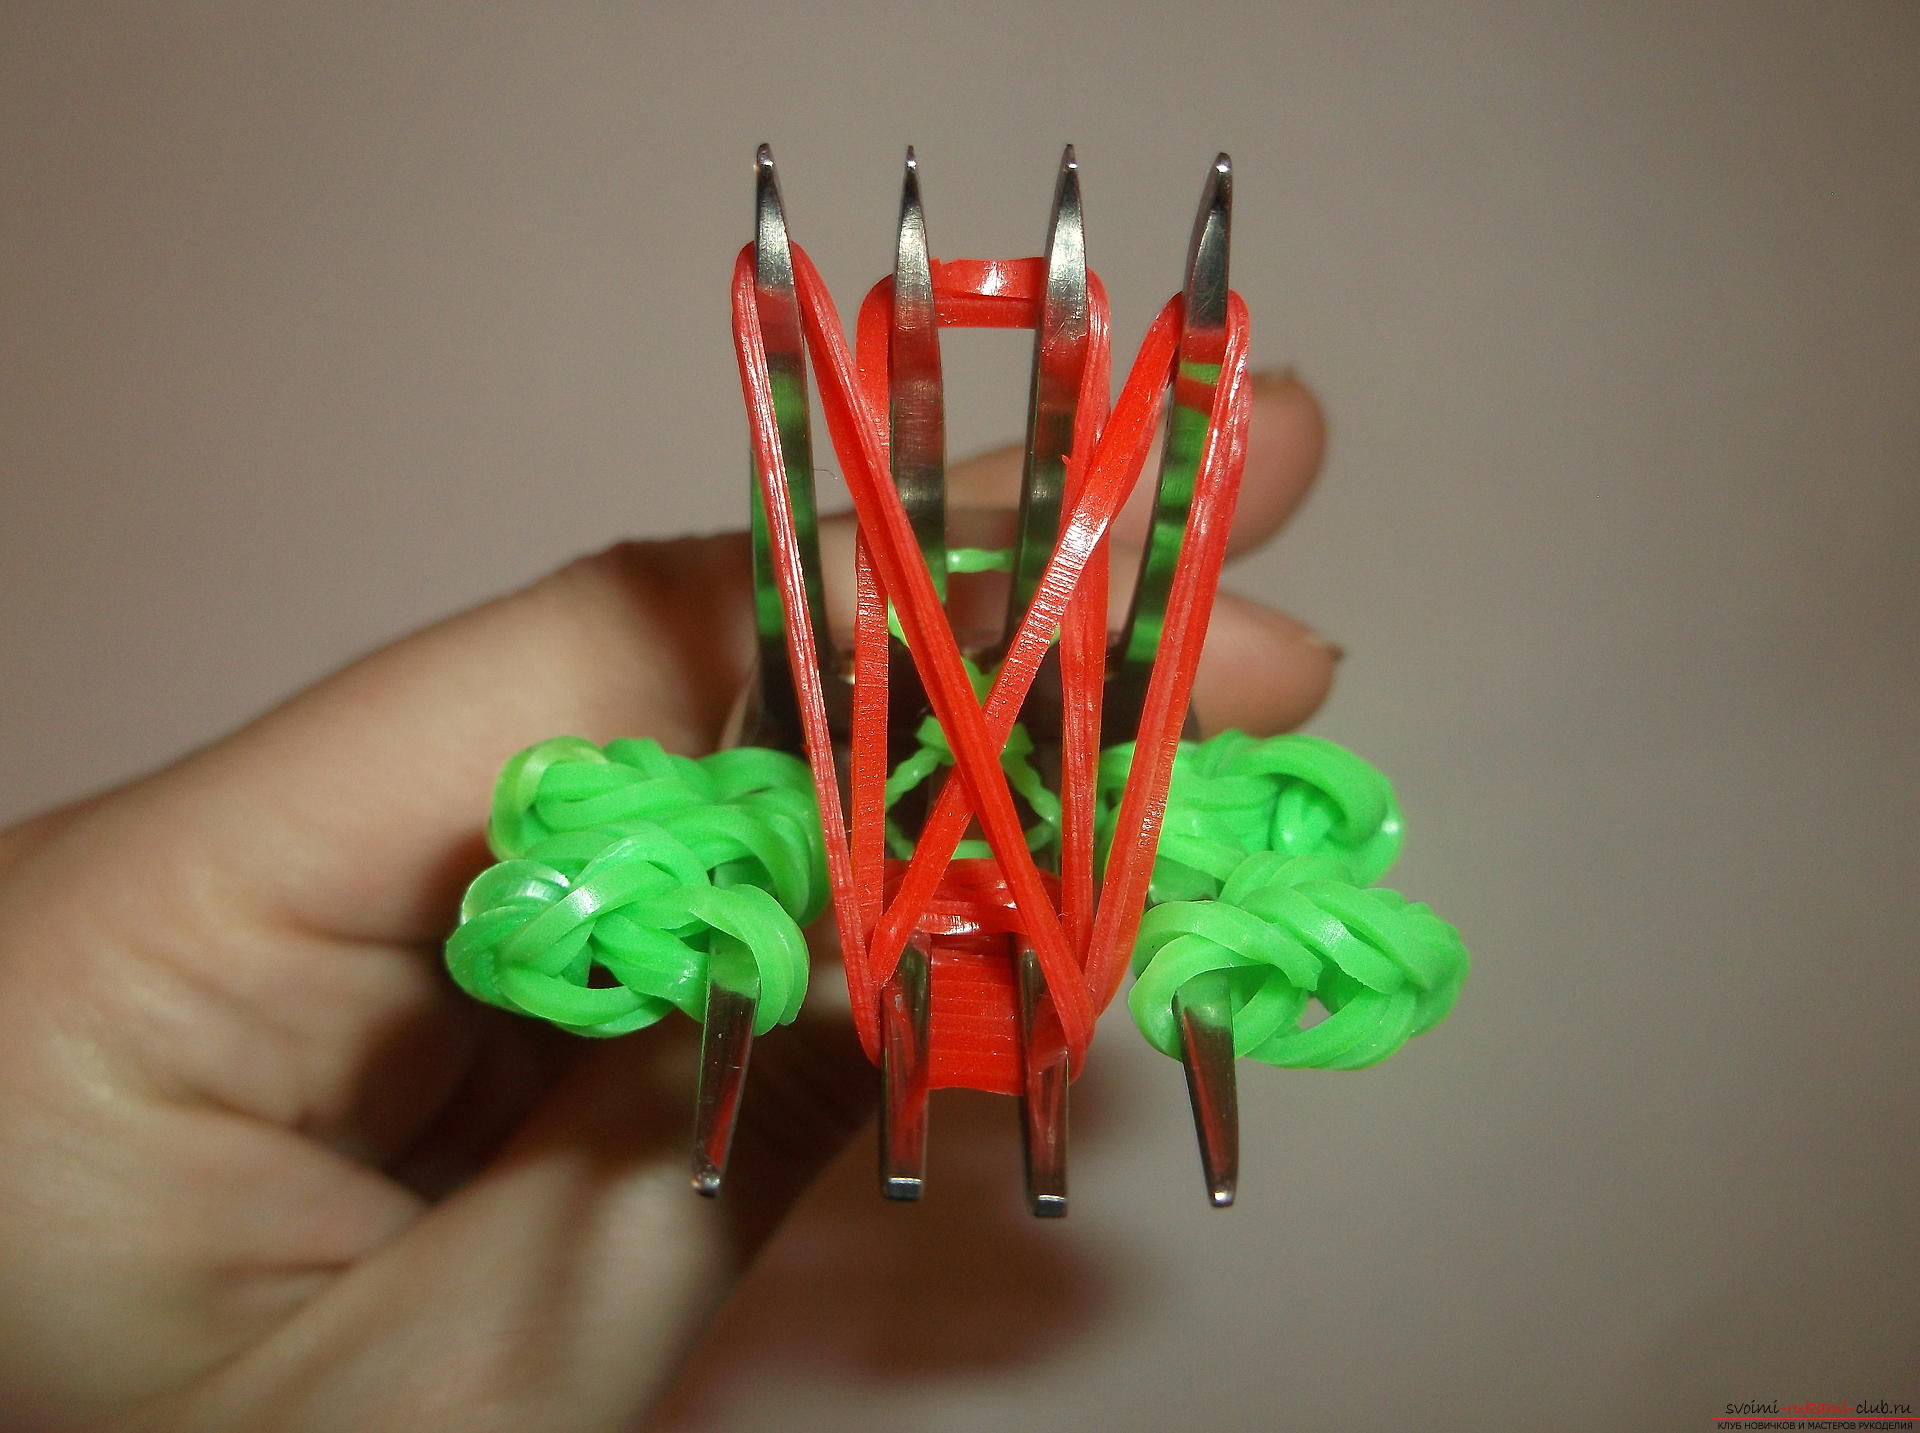 Now we remove five loops, which were woundonly 2 middle teeth of the upper fork. Further, the 2 upper loops are transferred to one left tooth of the upper fork and the next two upper loops are transferred to one right tooth of the same fork.
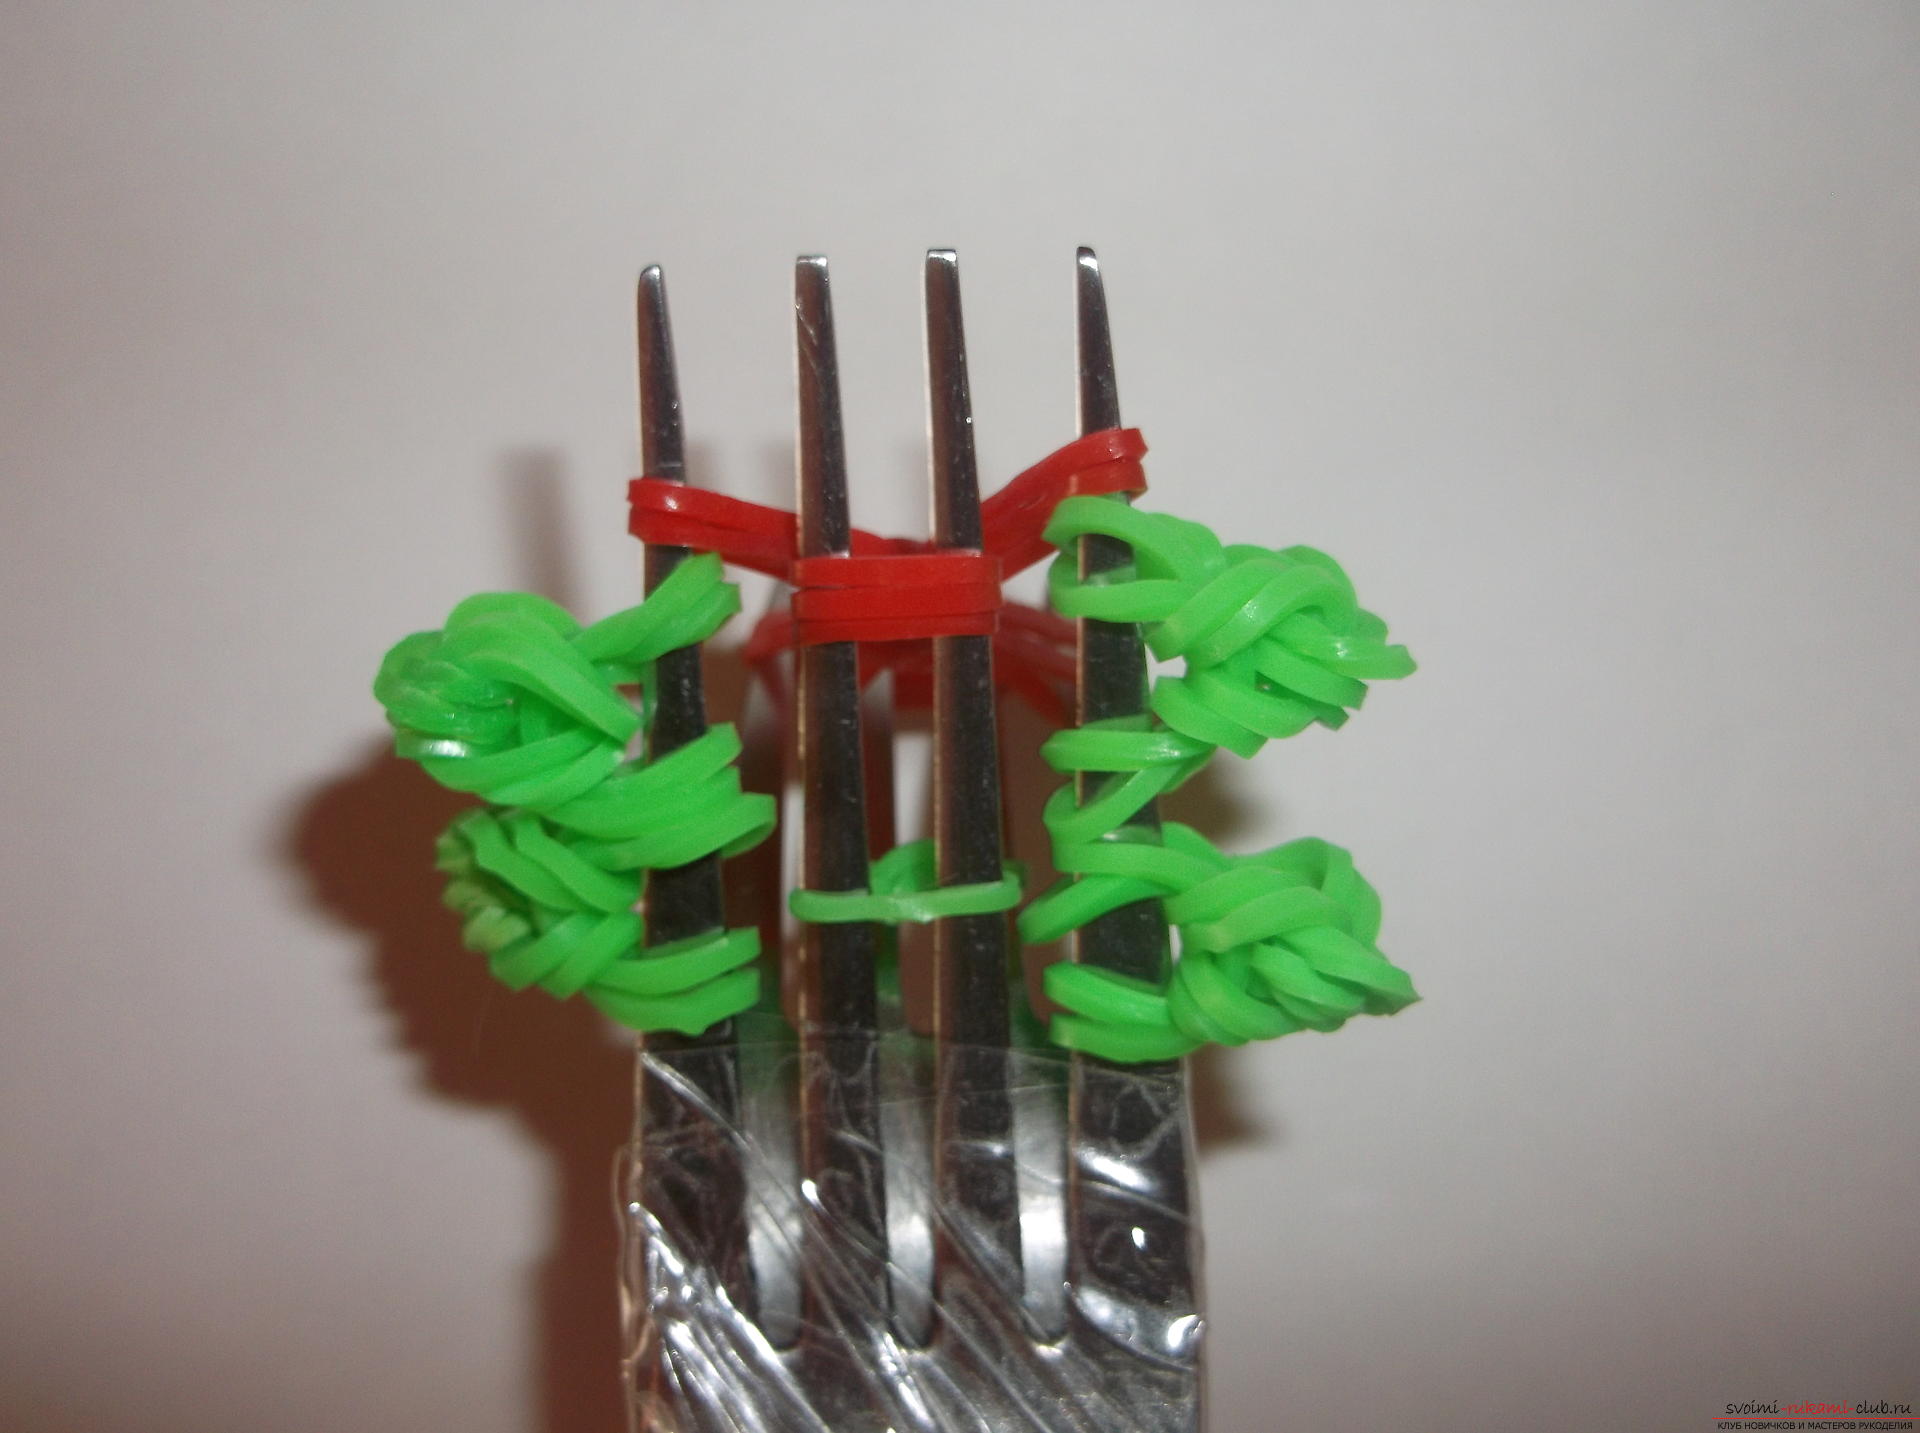
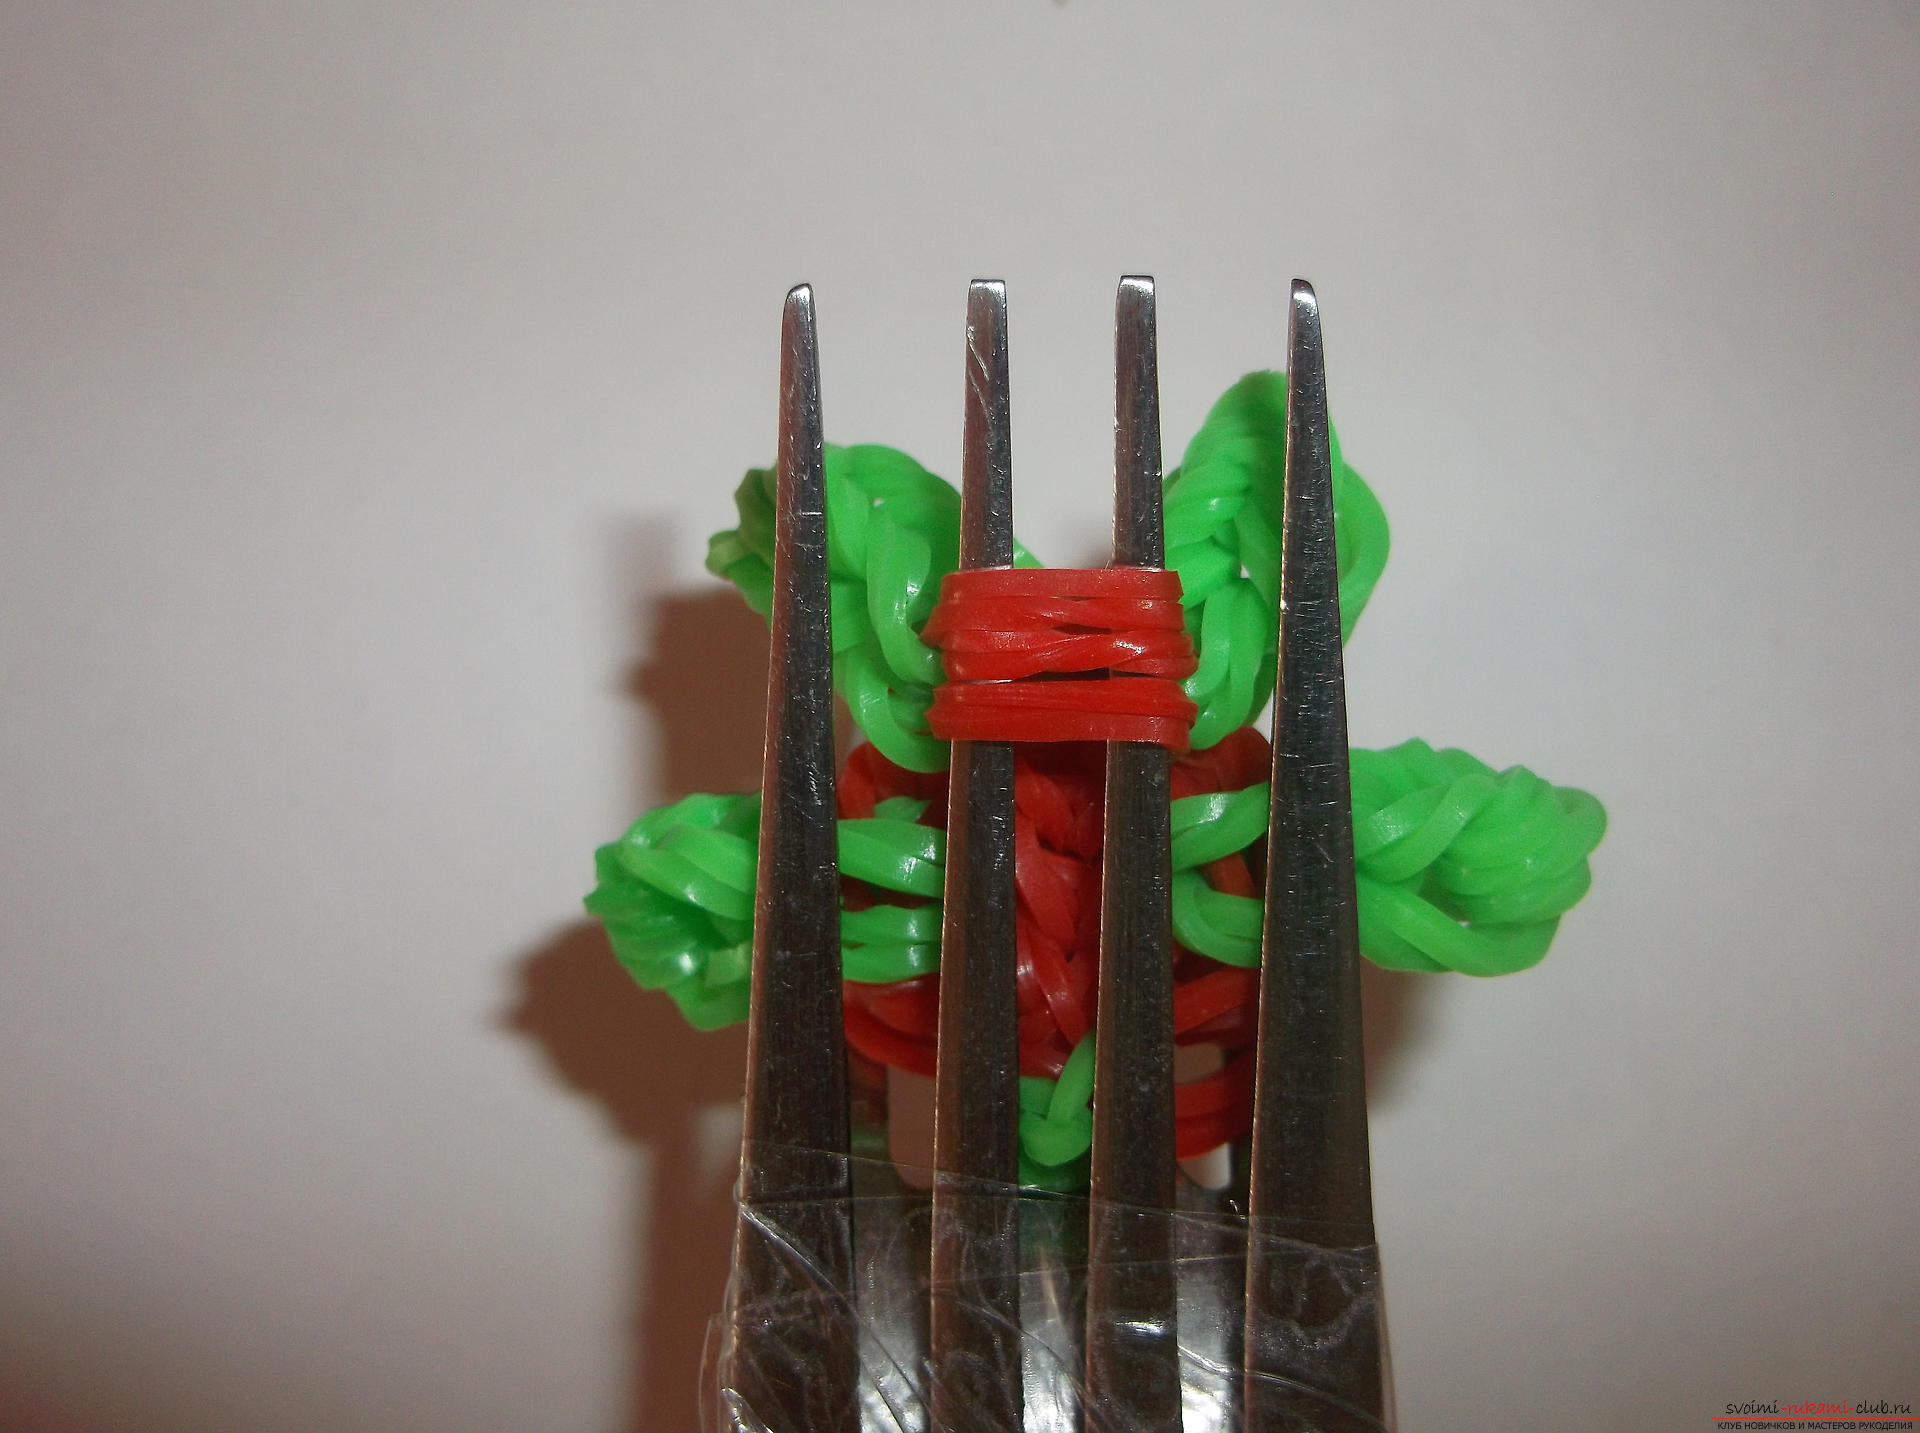
 Remove the lower elastic from both medium pairs oneach fork. It's green here. Now wind the red rubber band 2 times on 3 right prongs of the upper fork. And another rubber band is also wound 2 times only by 3 left teeth of the upper fork.
 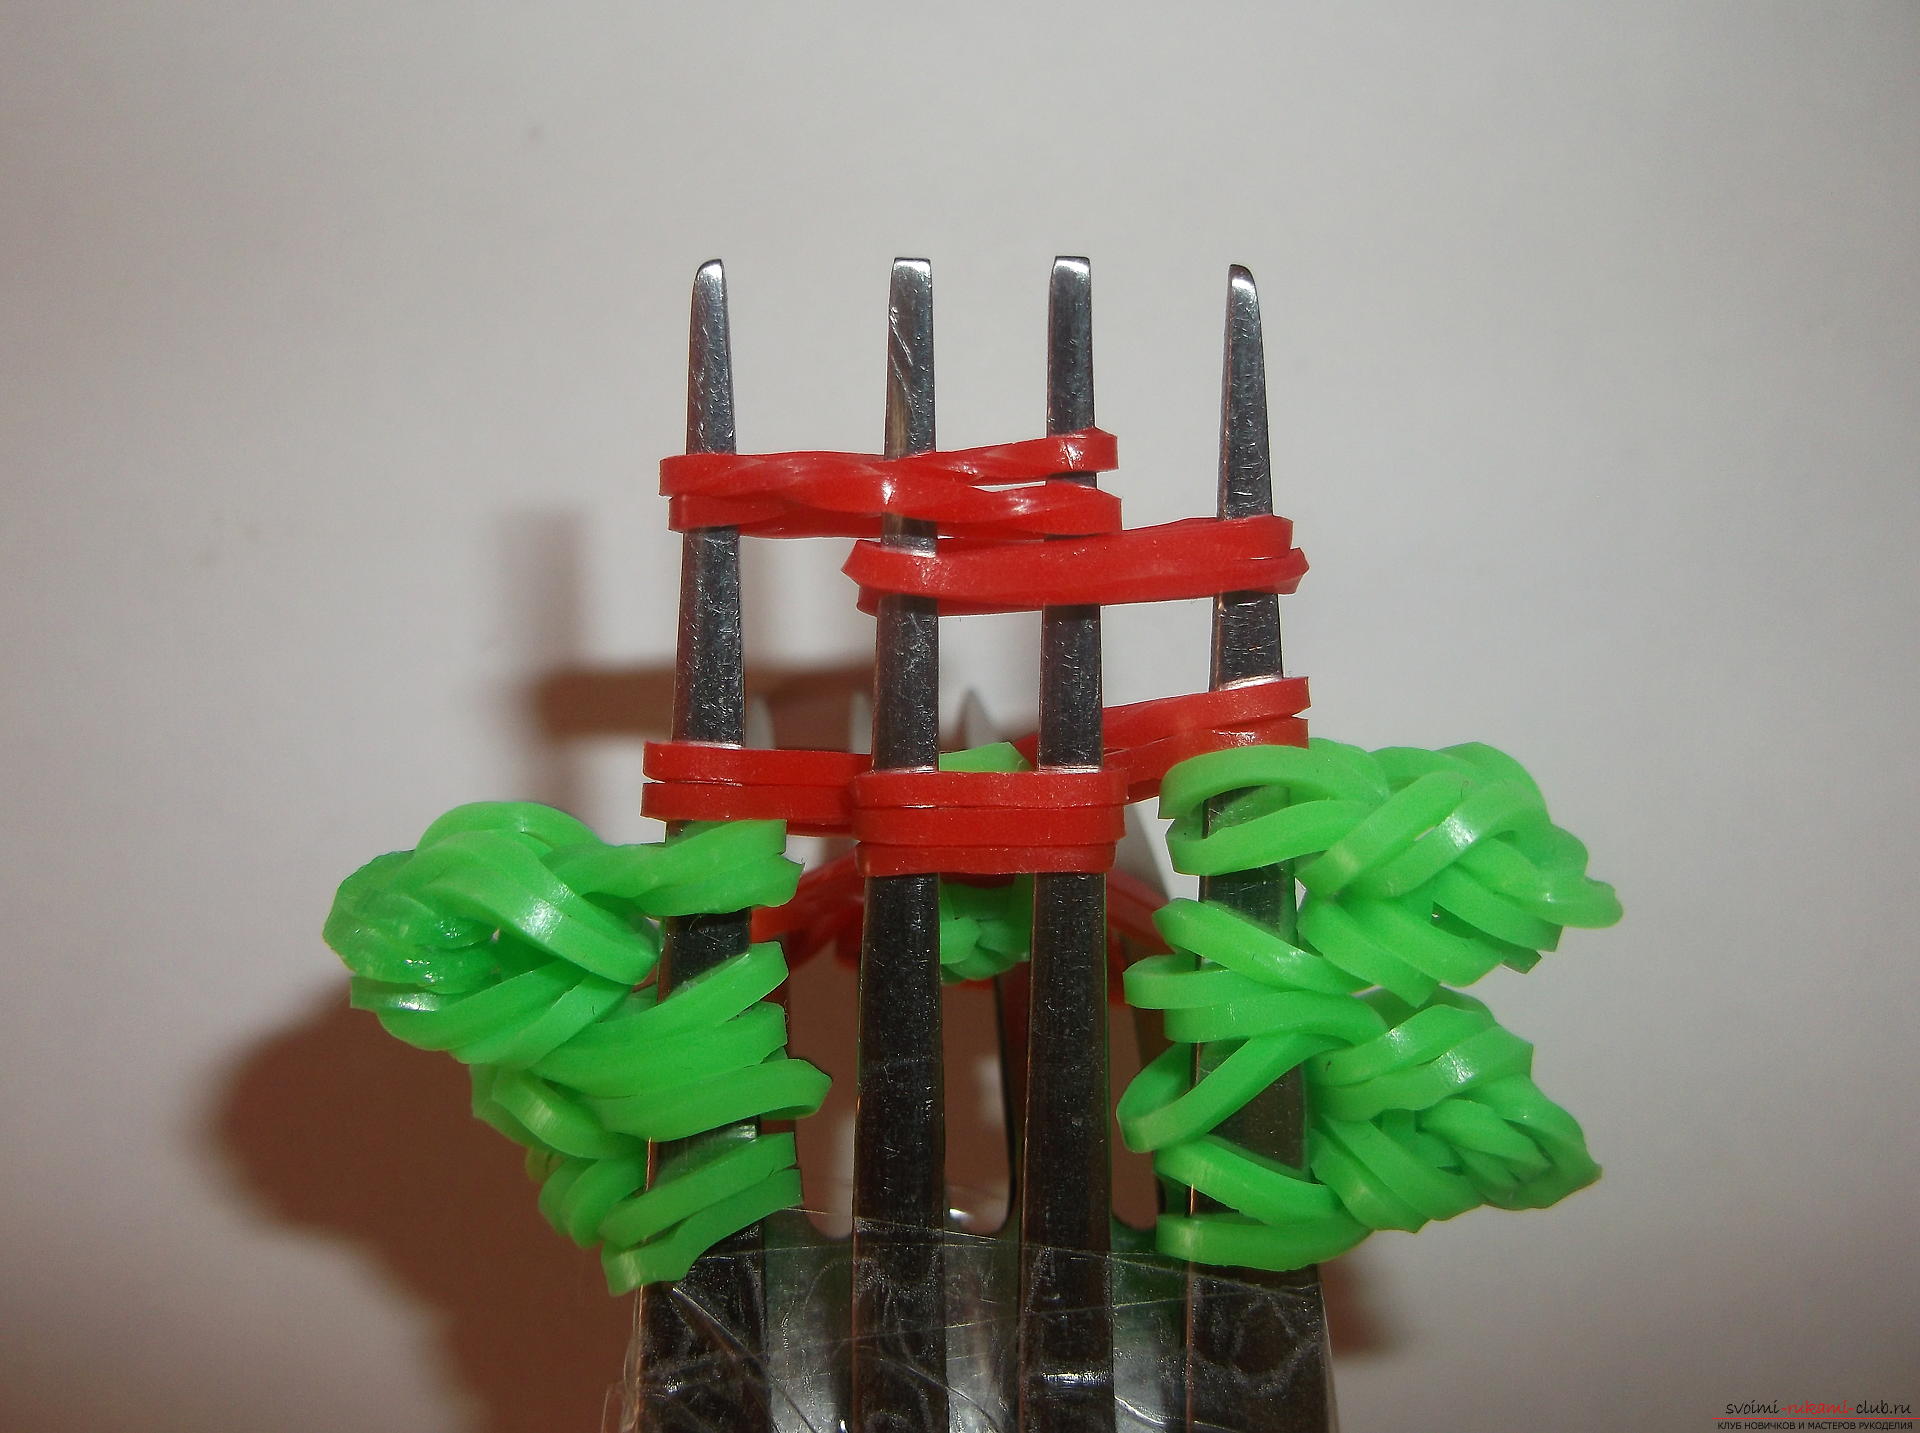 Next, we throw on 2 rubbery red color on the leftmost tooth of the upper and lower forks. 2 more on 2 middle teeth of both forks and 2 more on the rightmost tooth of both forks.
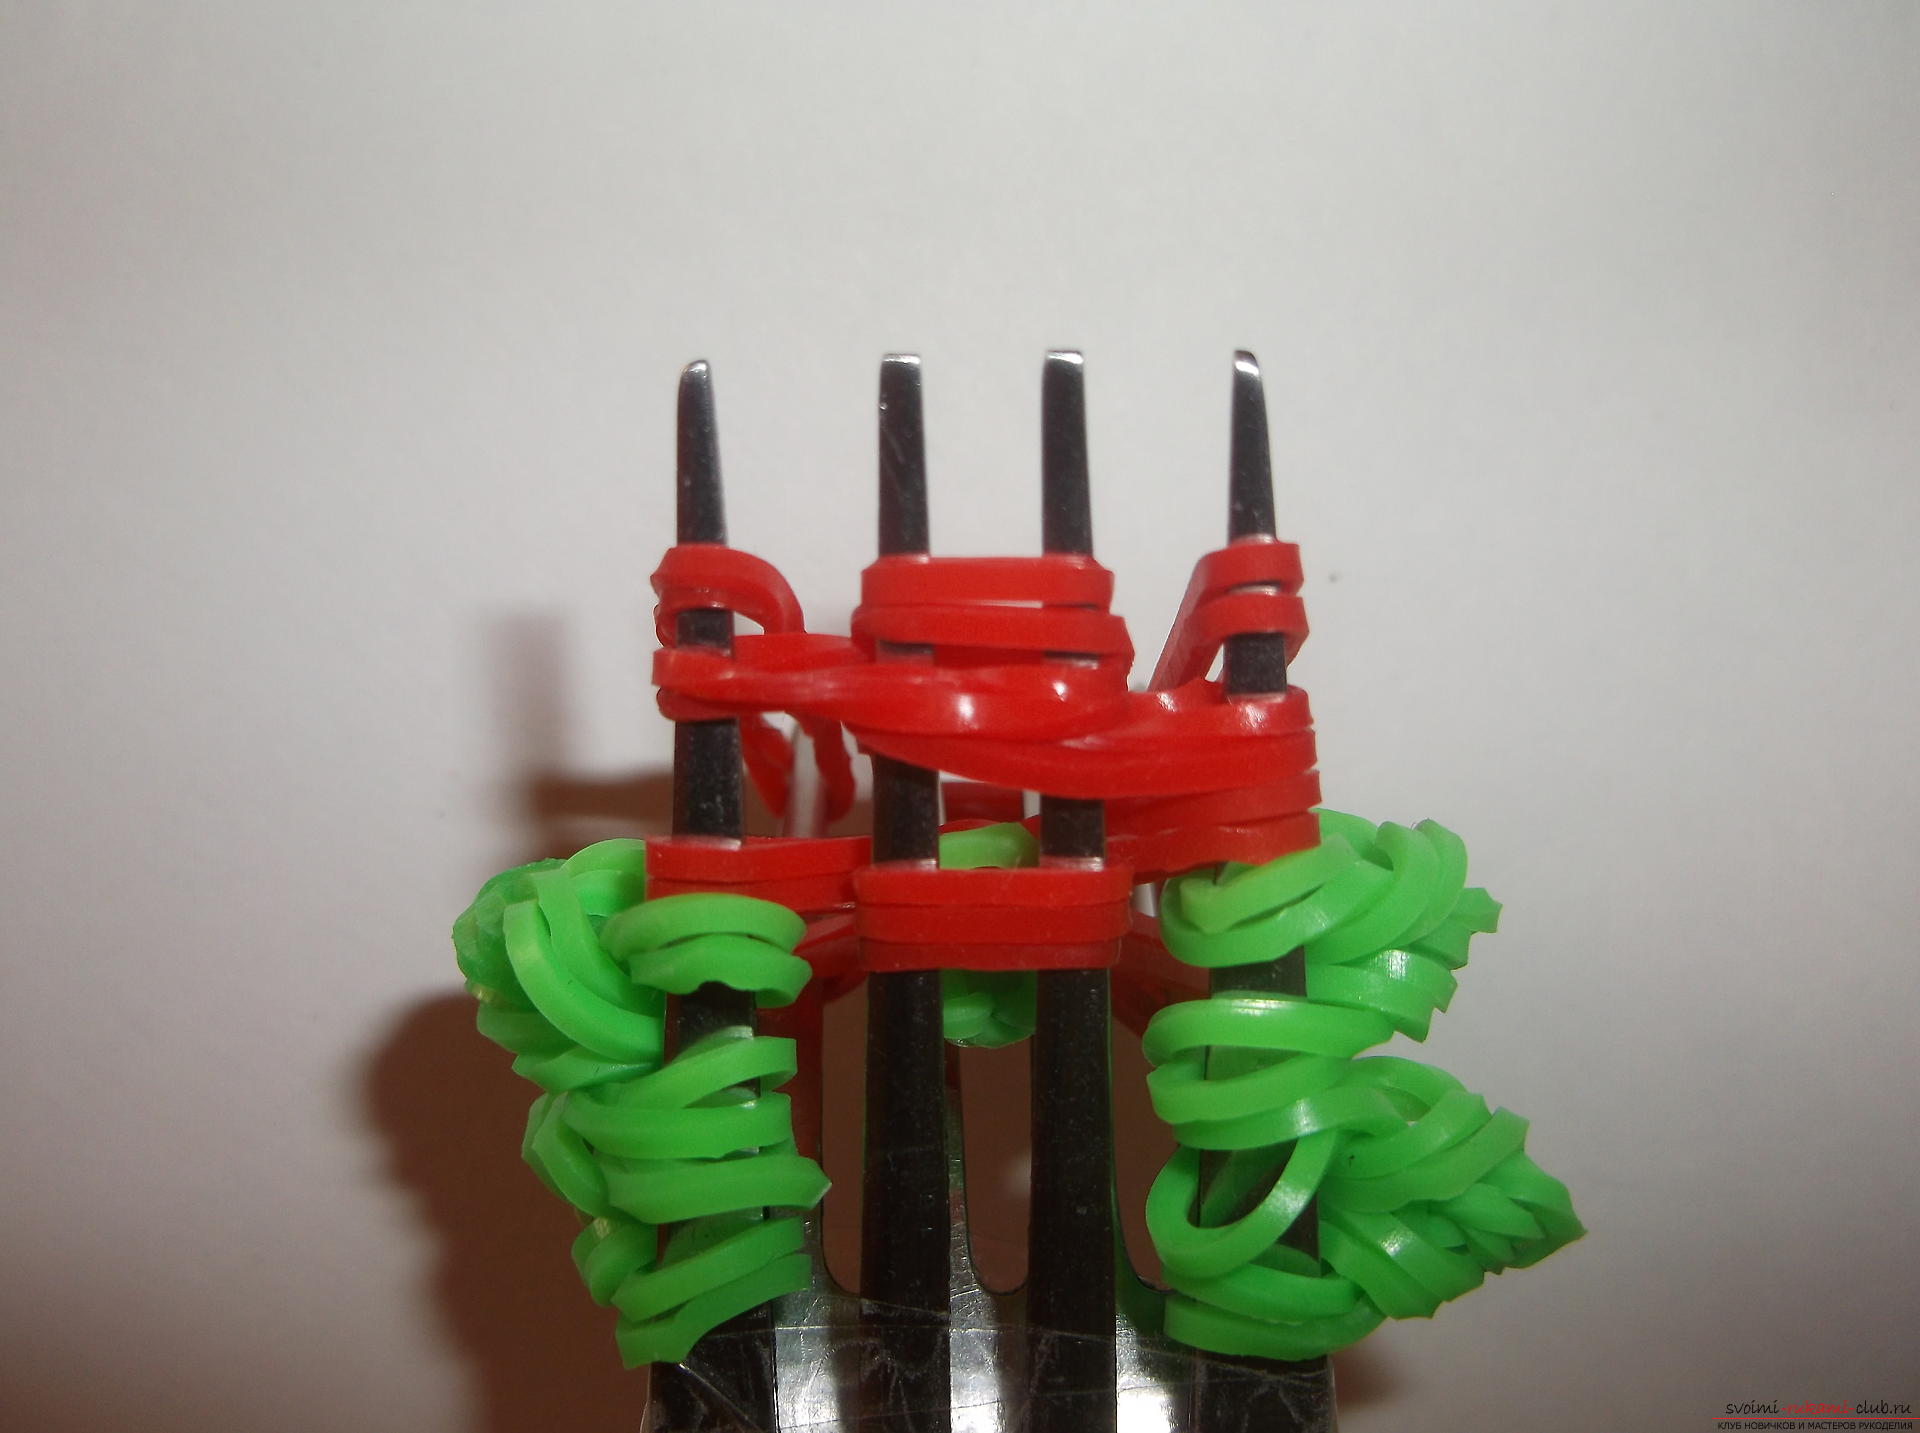
 Remove the rubber bands, which are put on 3 prongsleft and right. We also discard all the lower loops. We need to leave 2 red and 2 green loops, which form 2 legs. That is, one foot from the left and one from the right we throw into the center.
 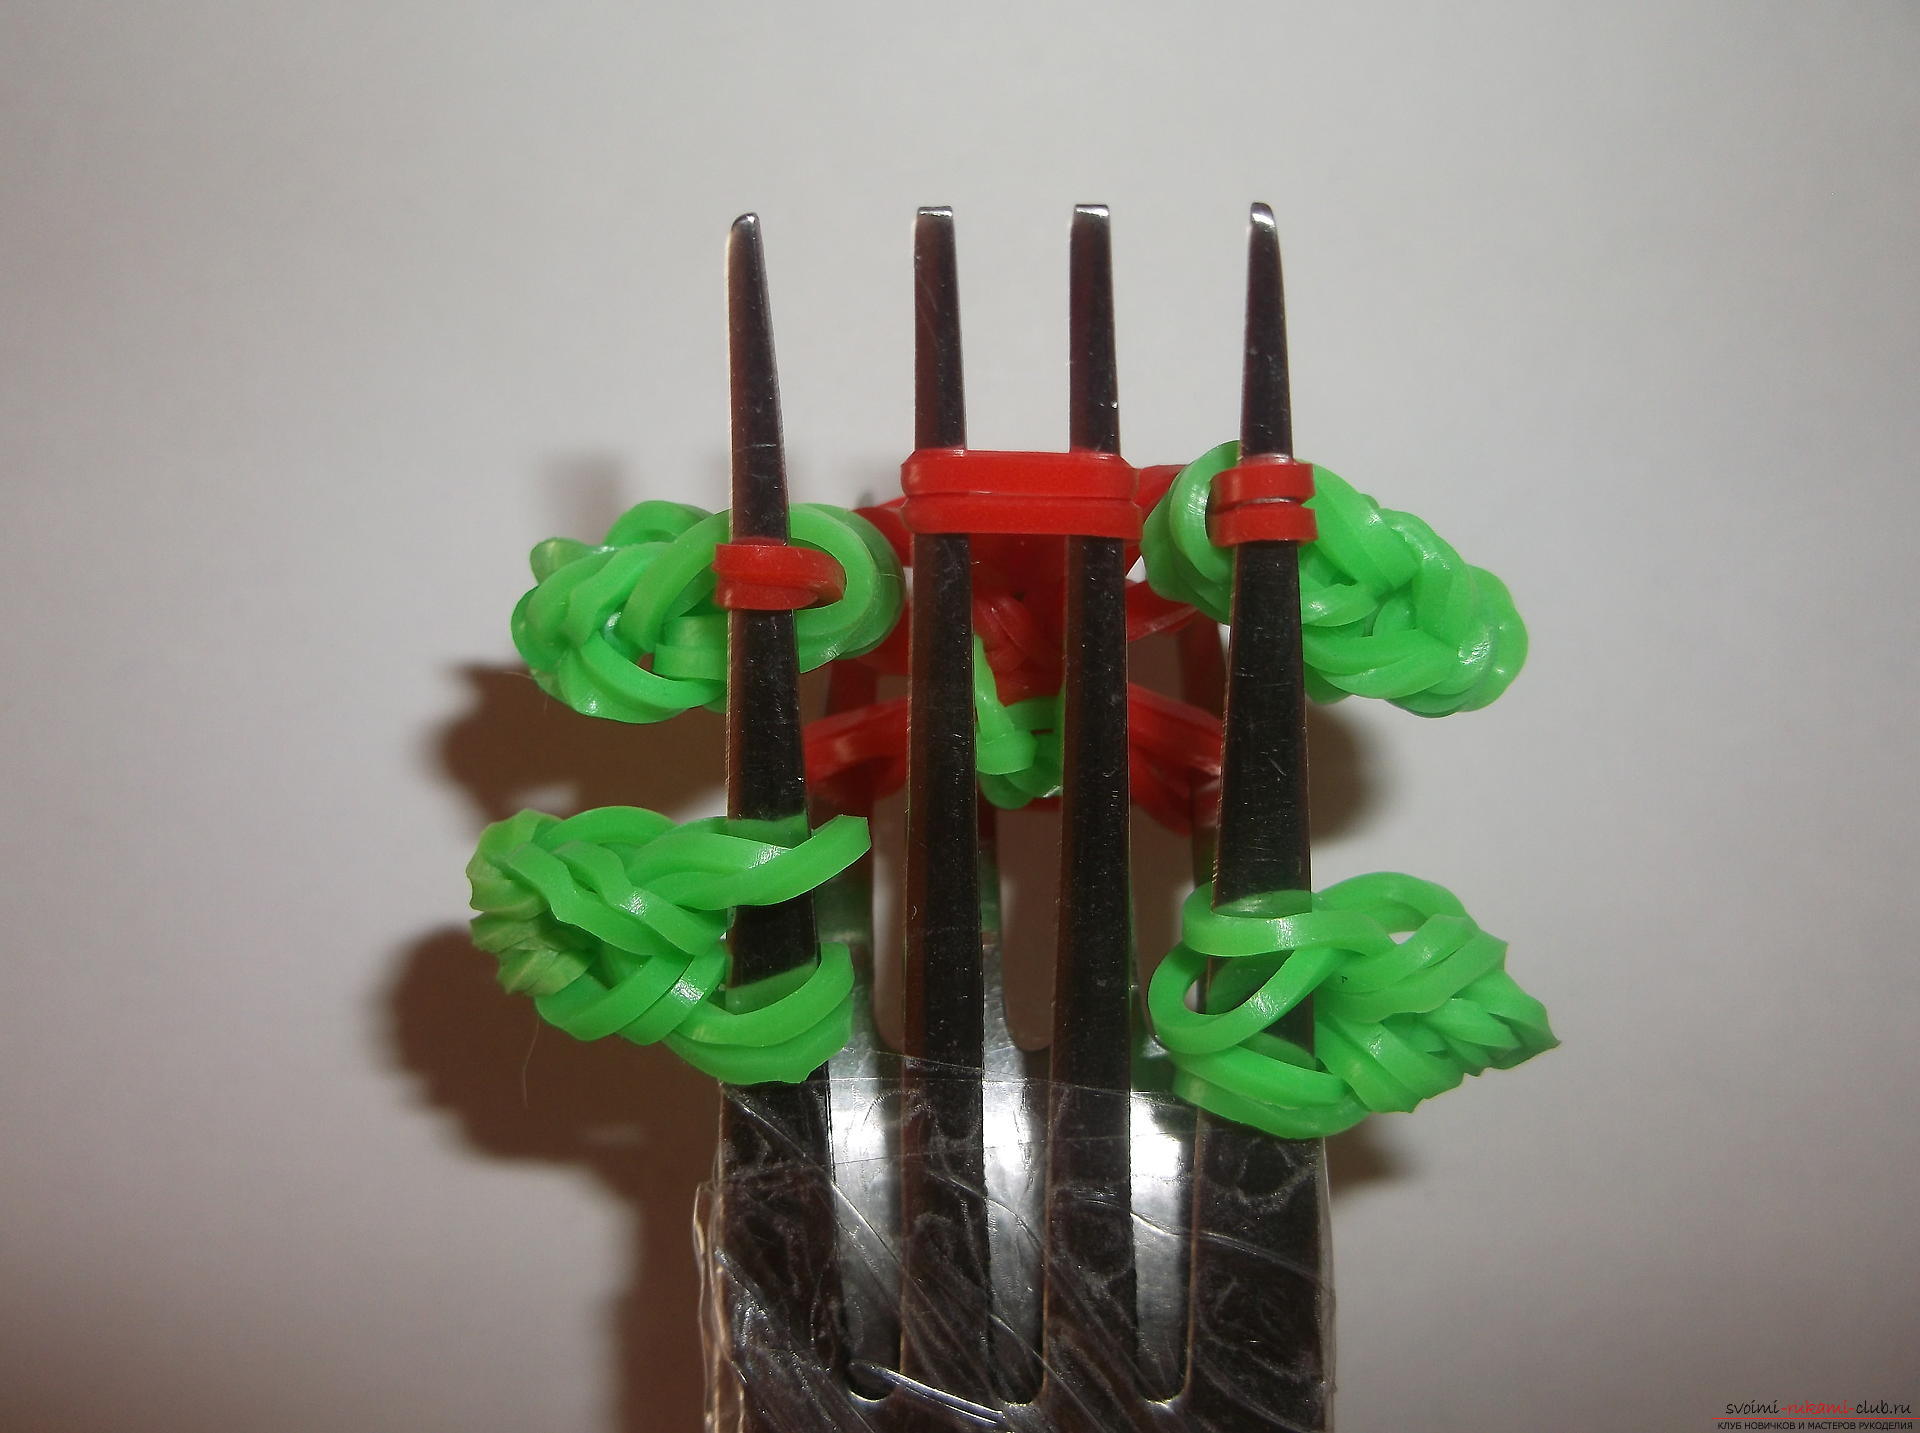 From the lower fork, we lower the lower layers.
 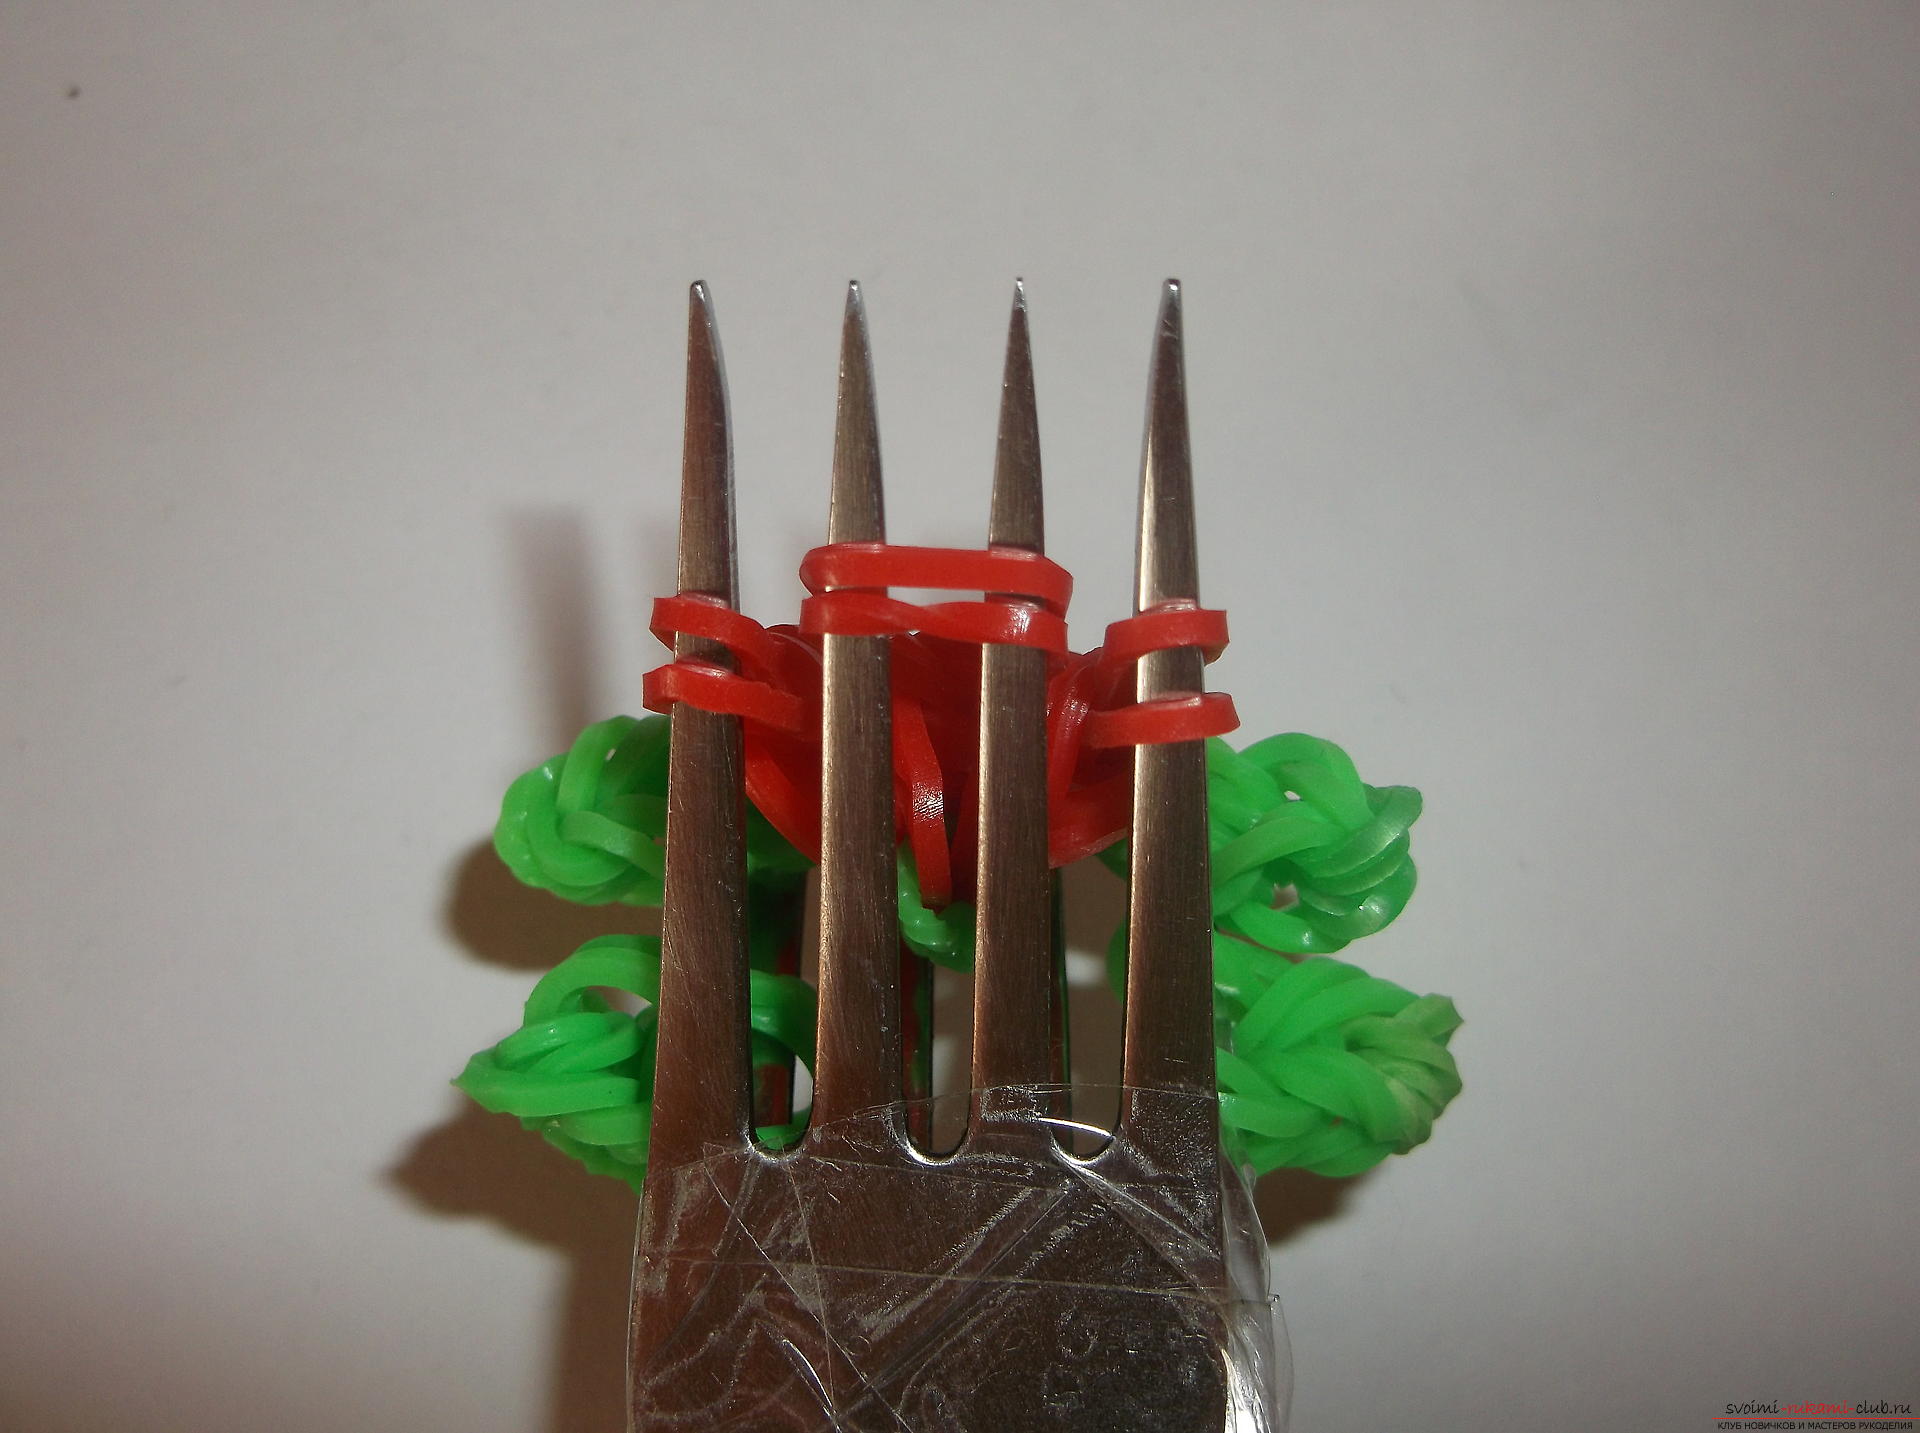 Then again, wrap one red rubber band2 times 3 teeth on the left and another 3 teeth on the right. Again, we throw on 2 rubber bands of red color on the pairs of both forks: on the extreme left, on the extreme right and on the pair of middle teeth of both forks. We throw off too, as before. First 2 rubber bands, which were wound 2 times on 3 prongs on both sides of the upper fork. And the bottom layer of red rubber bands, too. The paws are left in place. We do not touch them yet. From the lower fork, too, remove the lower layer. We repeat the series. Remove all the lower layers, including the feet. From the lower fork, too, remove the lower layer. We have 2 loops on the teeth. 2 at the extreme and 2 at the two averages. And also on the lower fork. All the rubber bands are transferred to 2 middle teeth. So do on both forks.
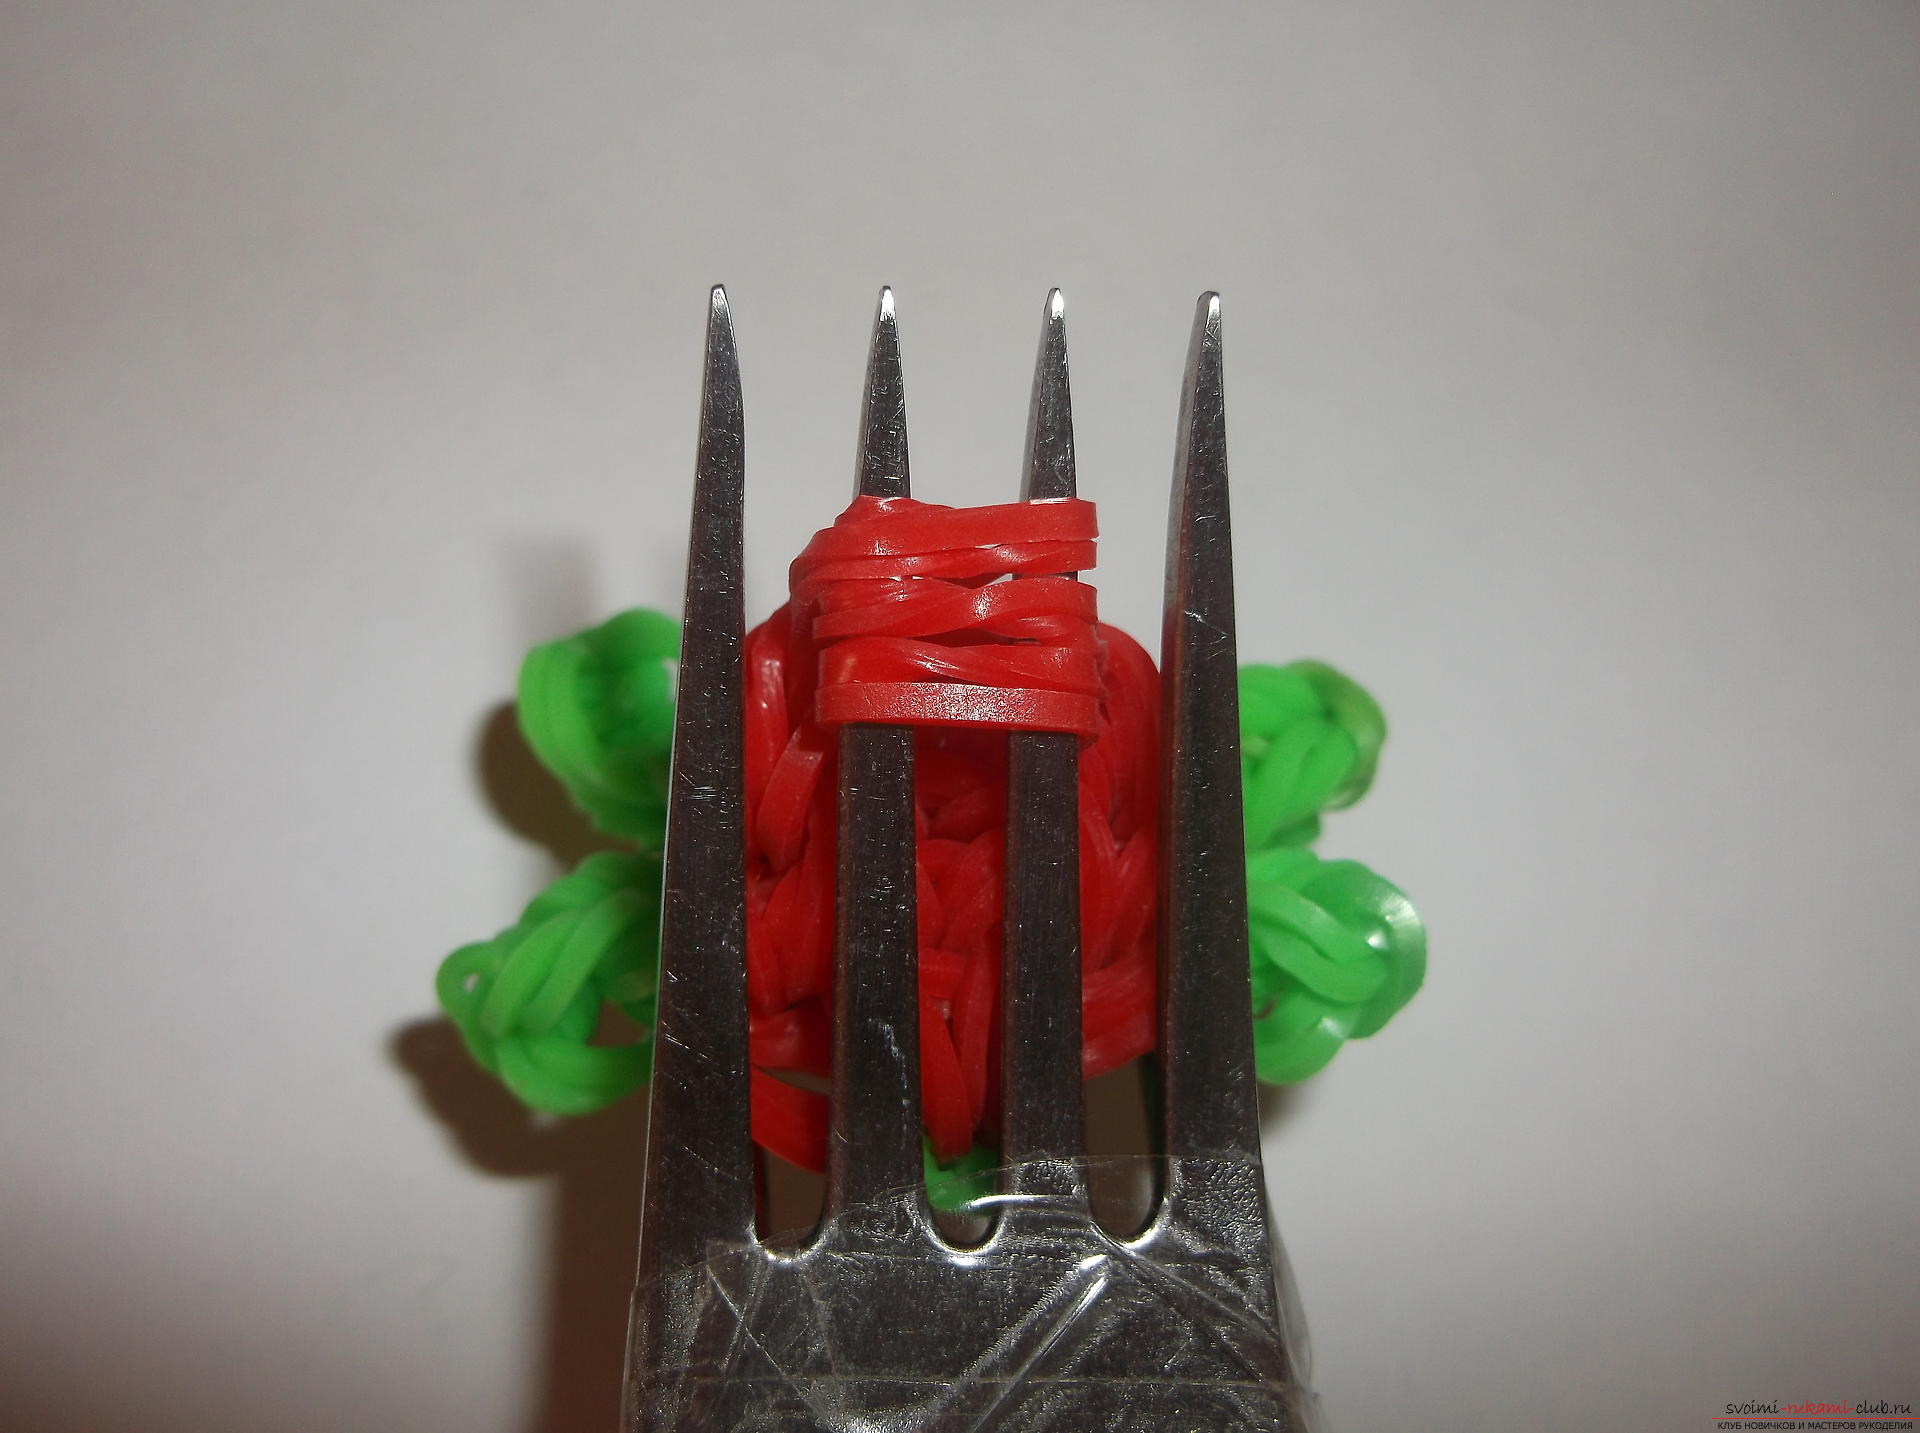
 We'll sew a neck for a turtle. We will weave it with green rubber bands. We throw on 2 middle teeth of both forks 2 green rubber. Remove all the red rubber bands from both forks.
 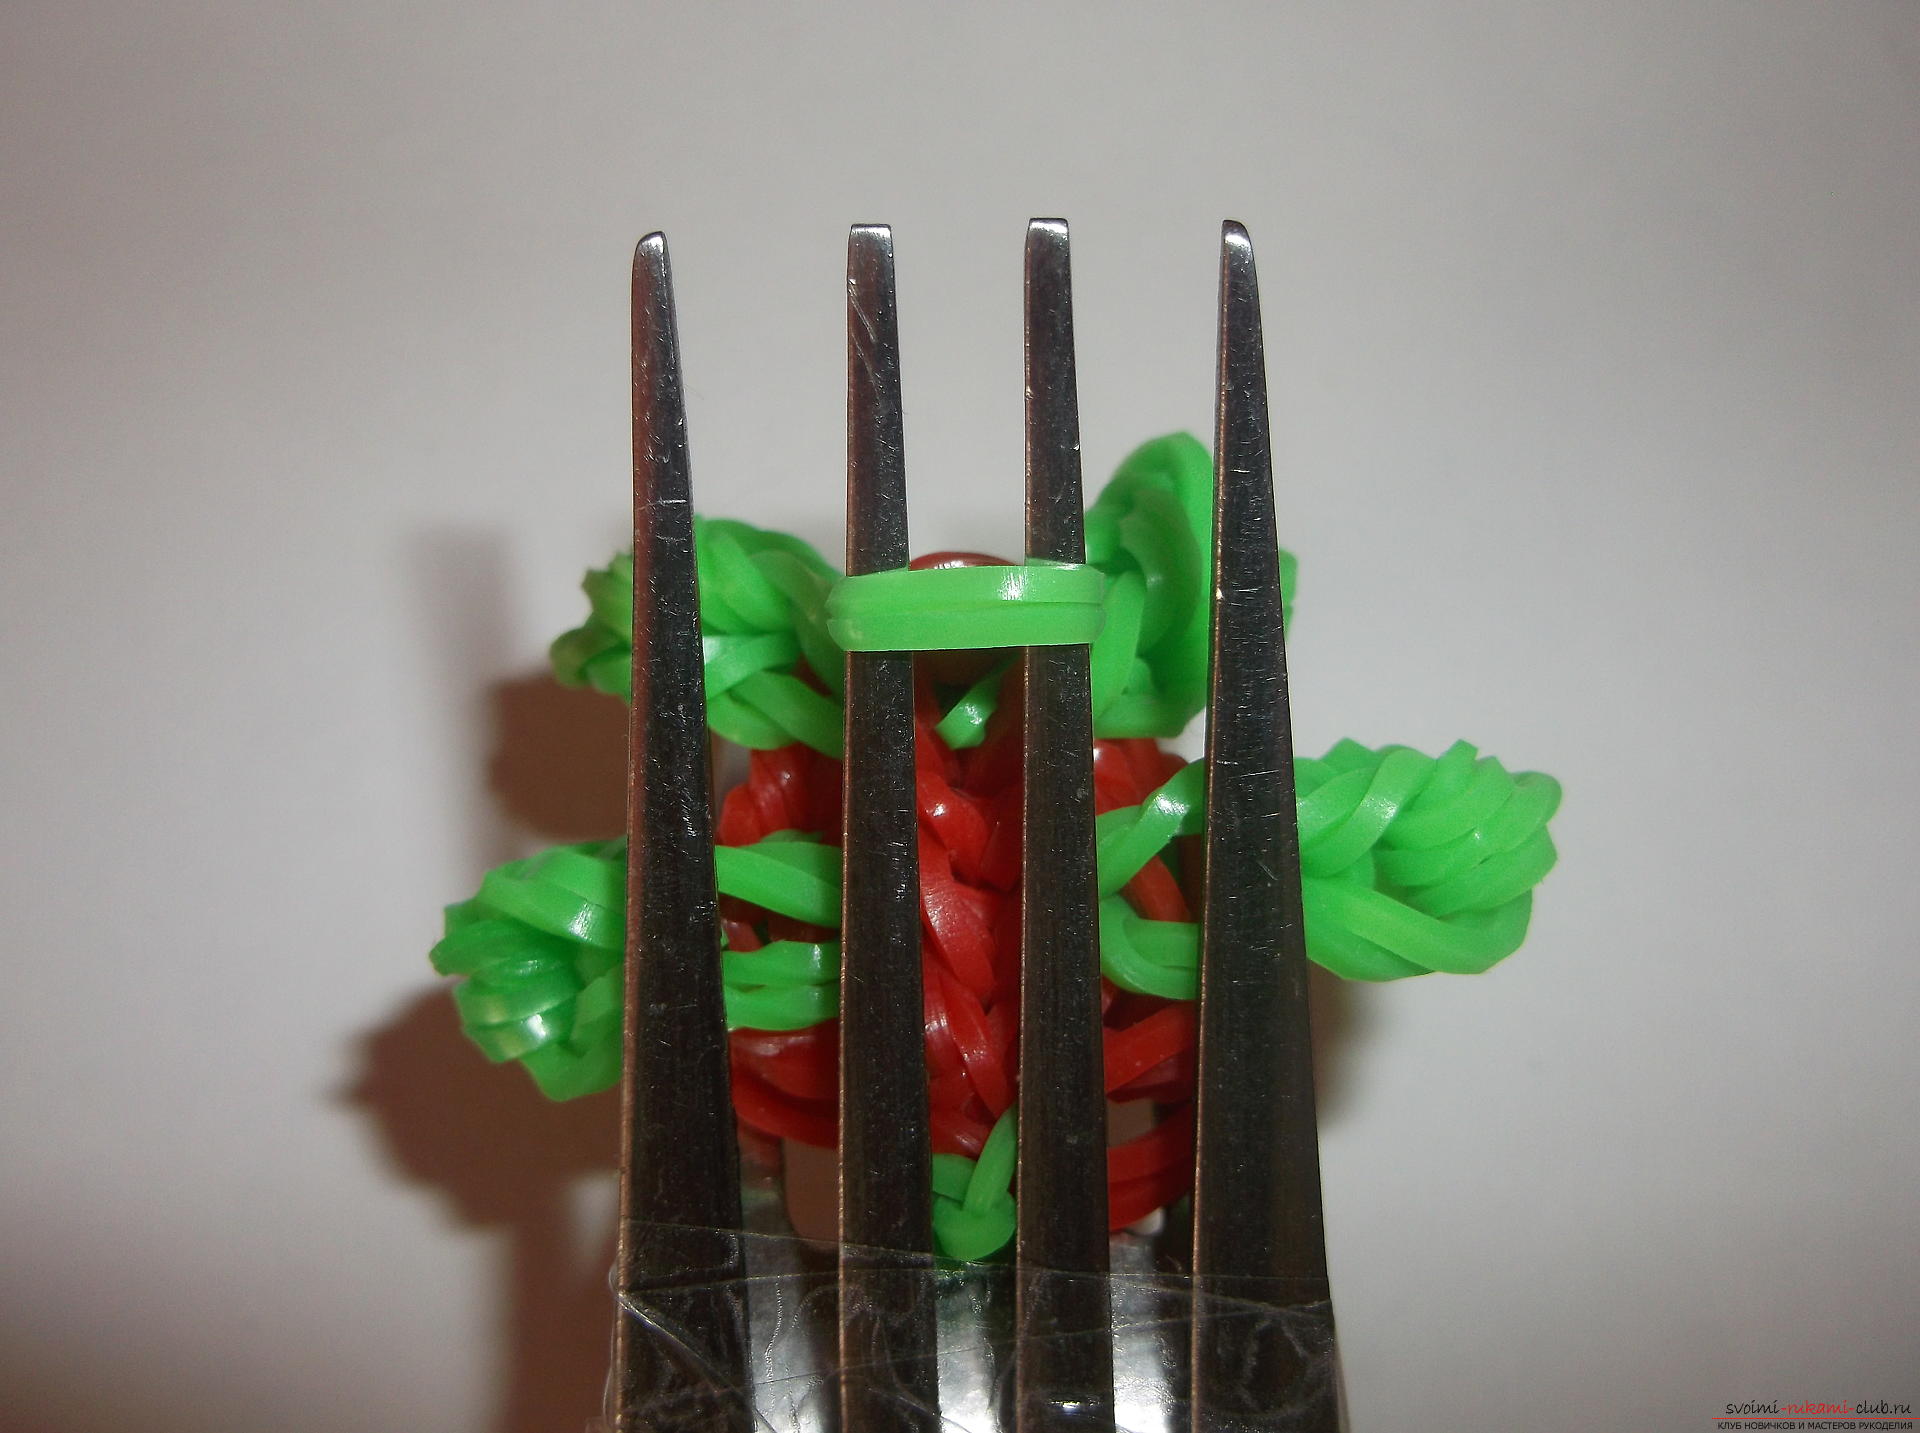 It remains to make a head. We throw 2 greenery rubber bands on the right middle tooth and 2 on the left middle prong of the upper fork.
 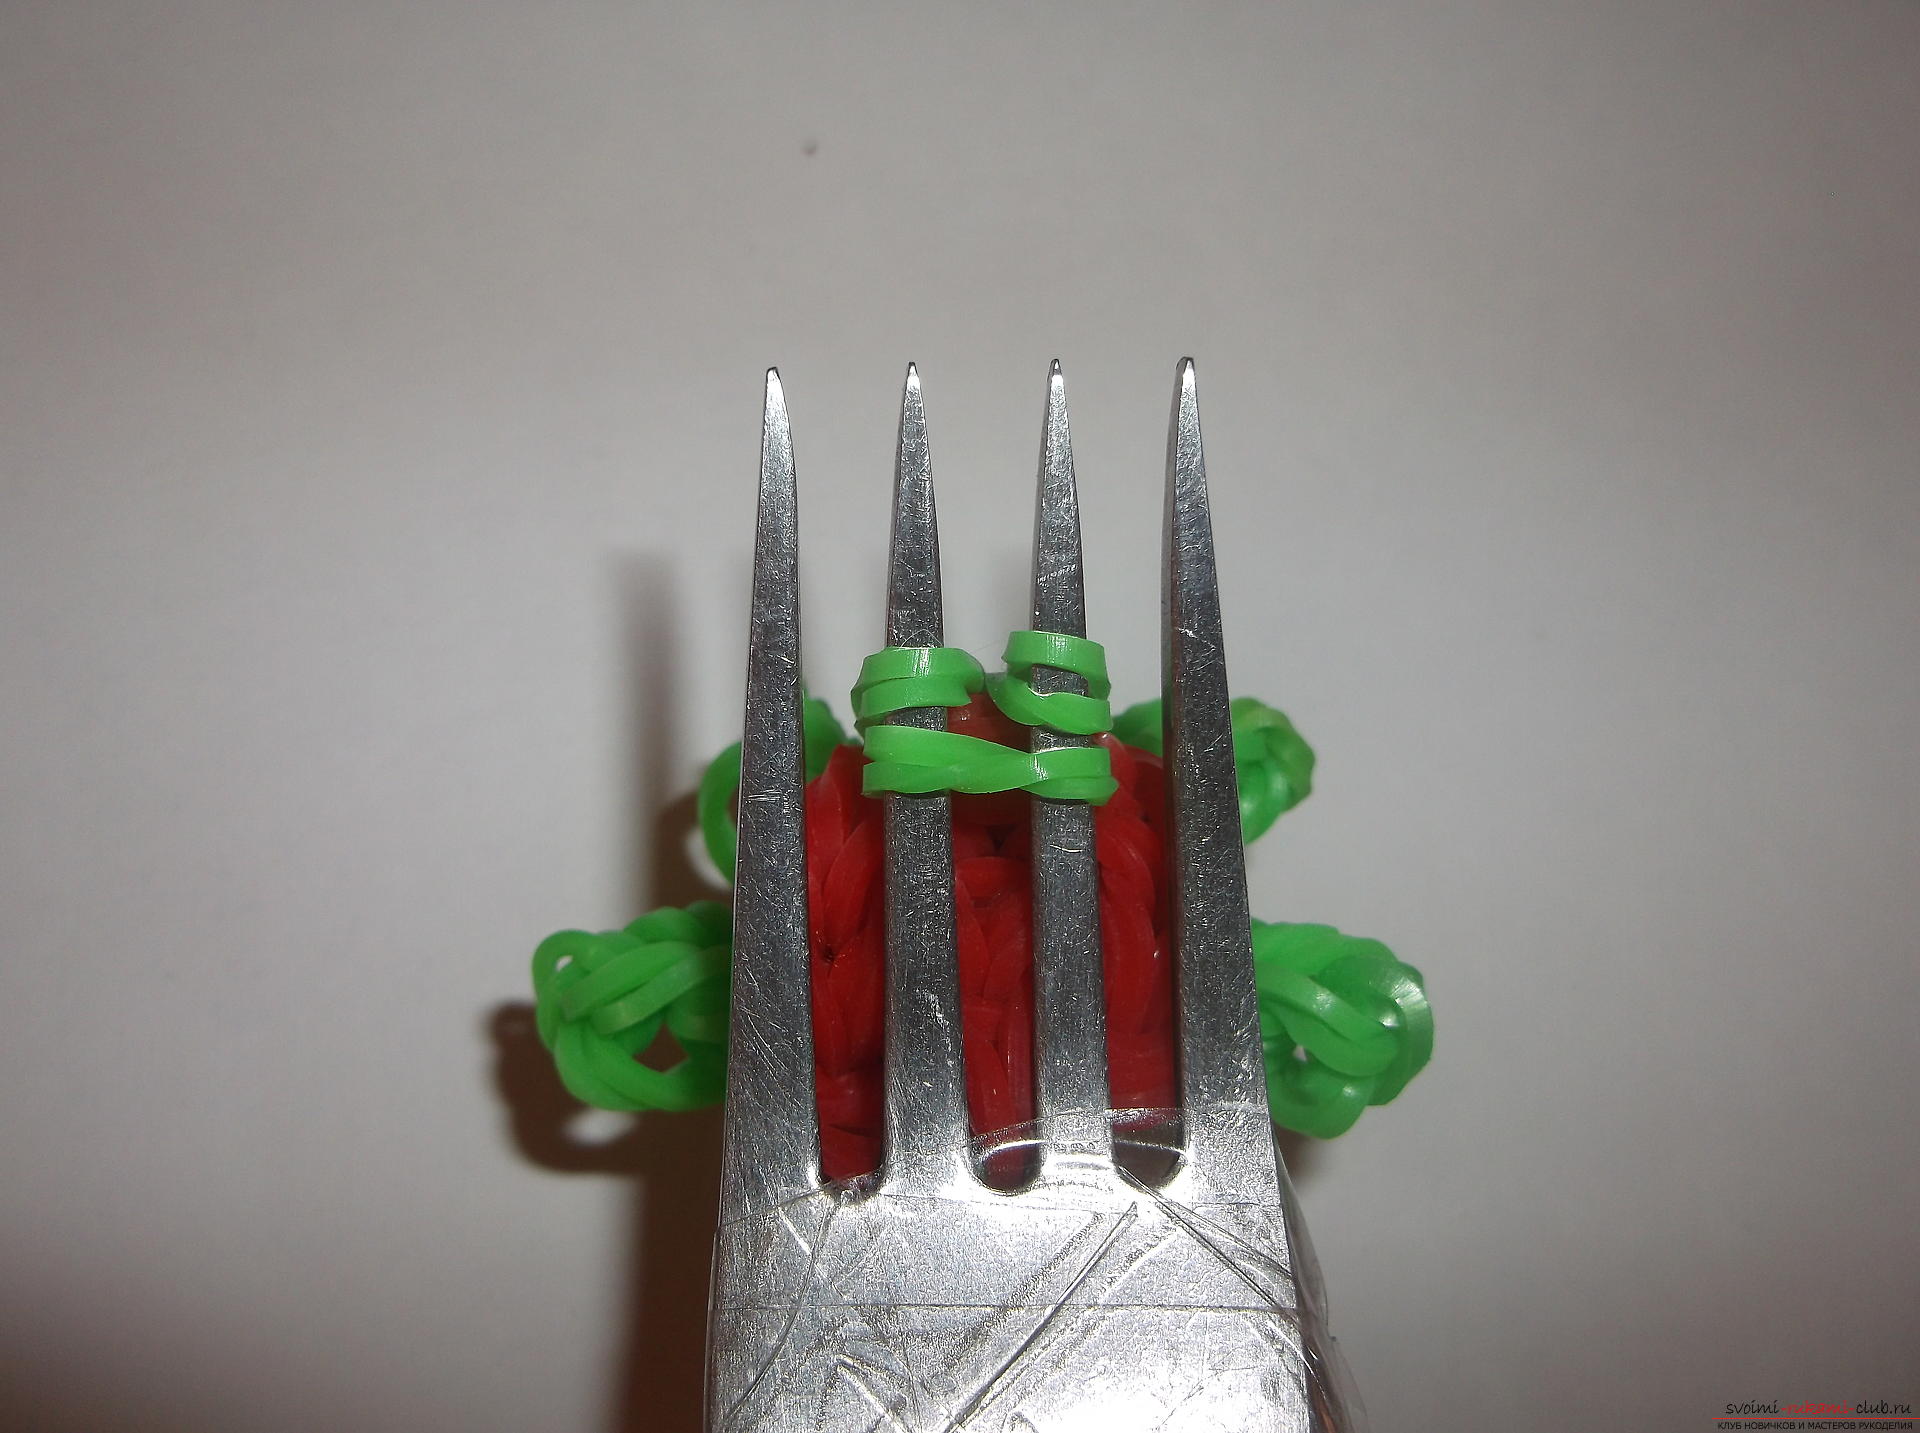 We remove two rubber bands from the bottom layer with each fork. Rubber bands stretch to 2 left and 2 right teeth of the upper fork. On the bottom we do the same.
  Now one green rubber bandwe wind 3 times all 4 teeth of the upper fork. Let's make eyes. One blue rubber band is wound 3 times on 2 right prongs of the upper fork and another blue rubber band for 2 left prongs of the upper fork. We throw 2 rubbery green color on 2 right prongs of the upper fork and pull them on the 2 right teeth of the lower fork. And 2 more rubbery greenish color we throw on 2 left prongs of the top plug and we pull them on 2 left teeth of the bottom plug.
 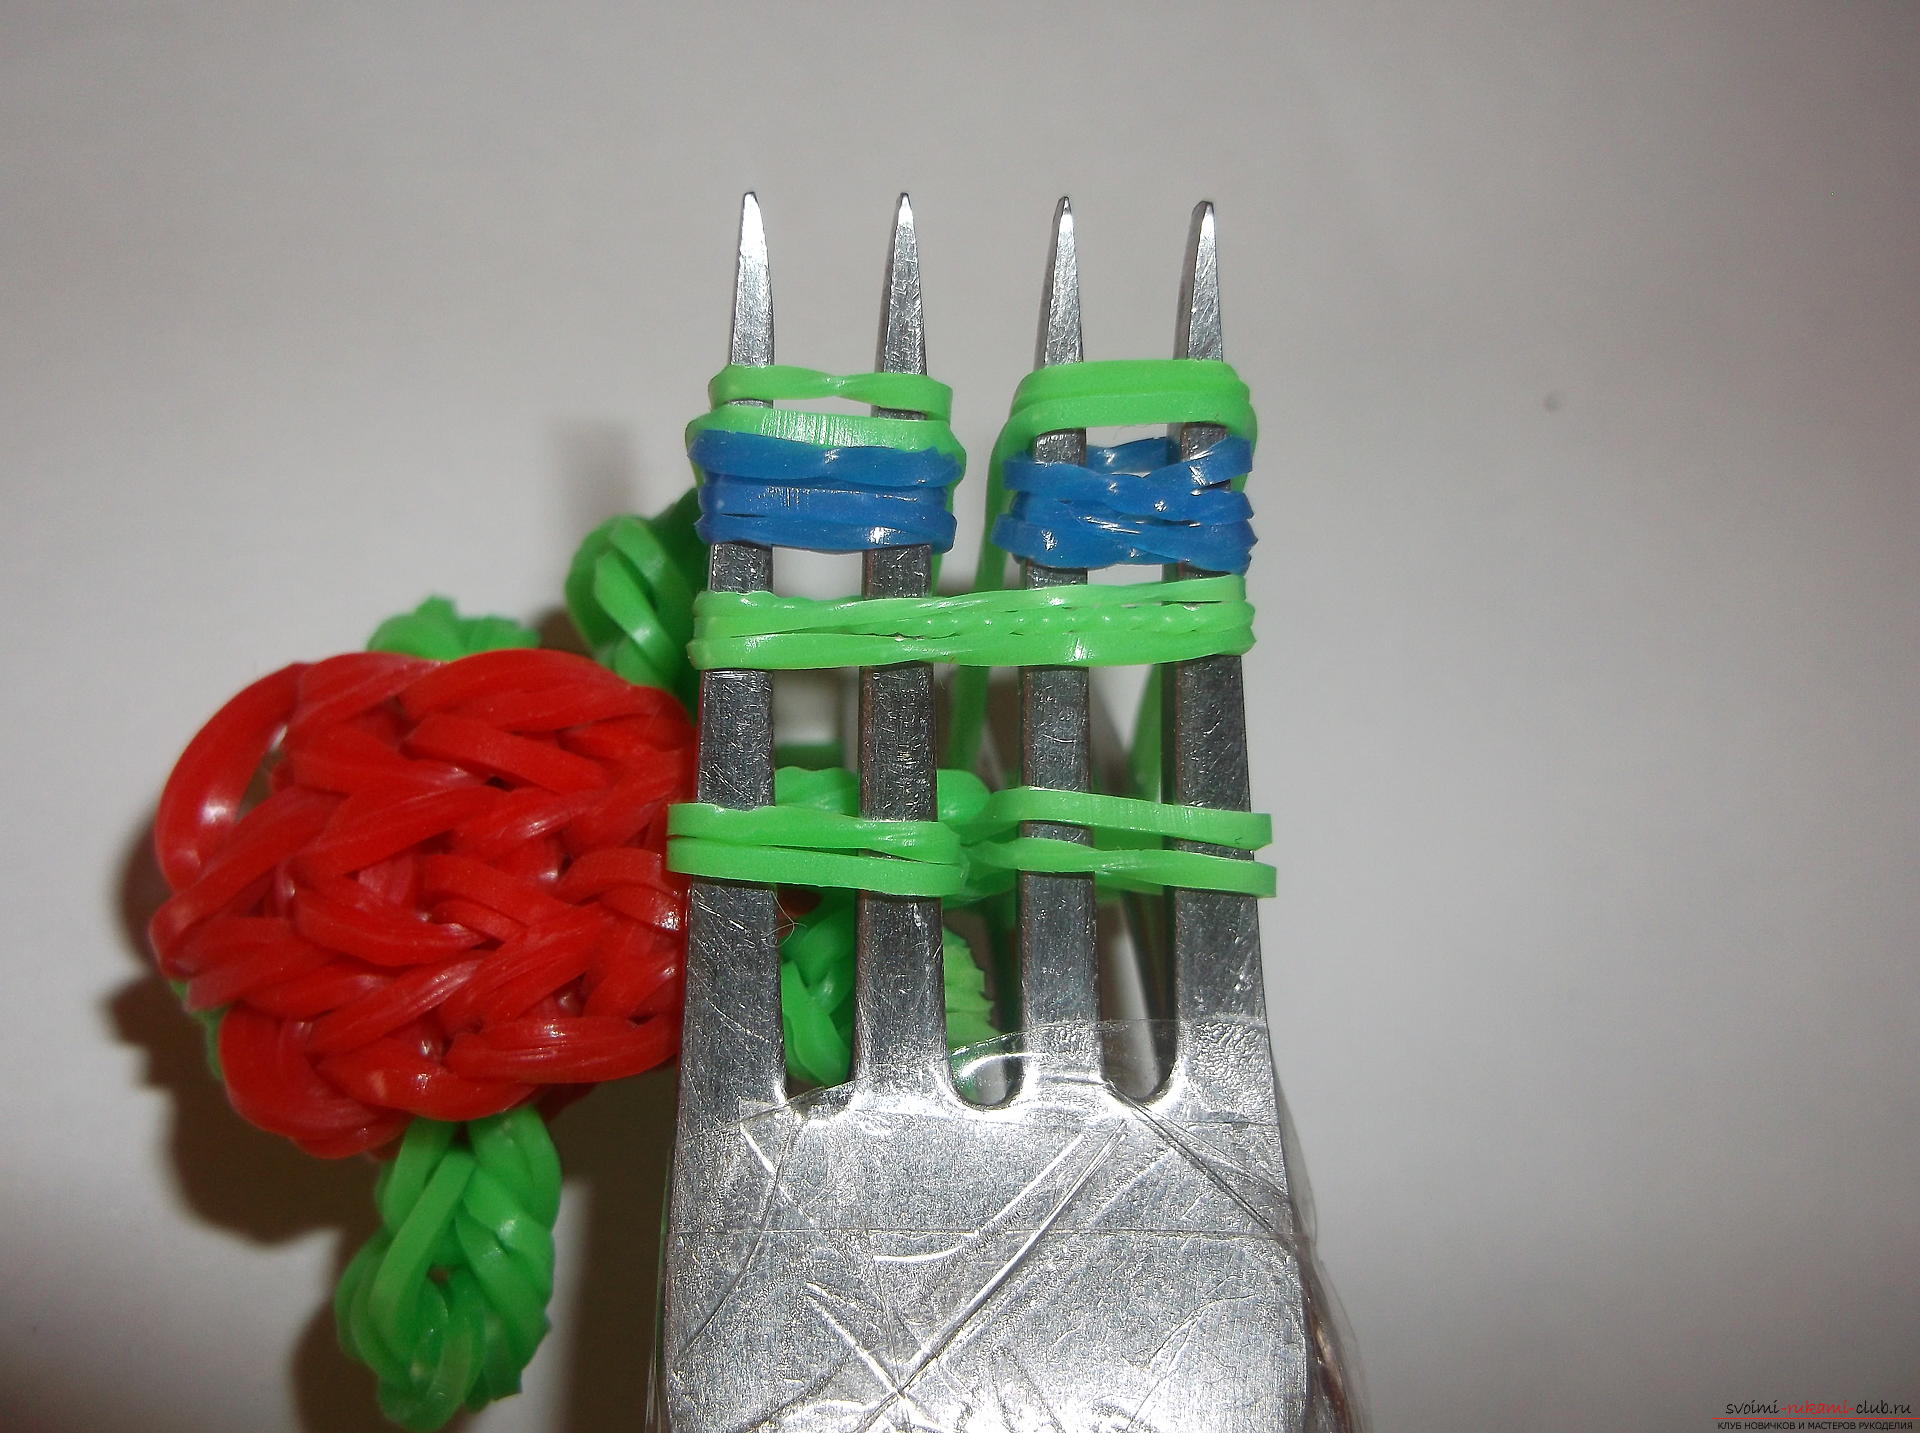 Remove the blue rubber and all the lower green, leaving only the top two. On the lower fork, too, remove the bottom layer.
 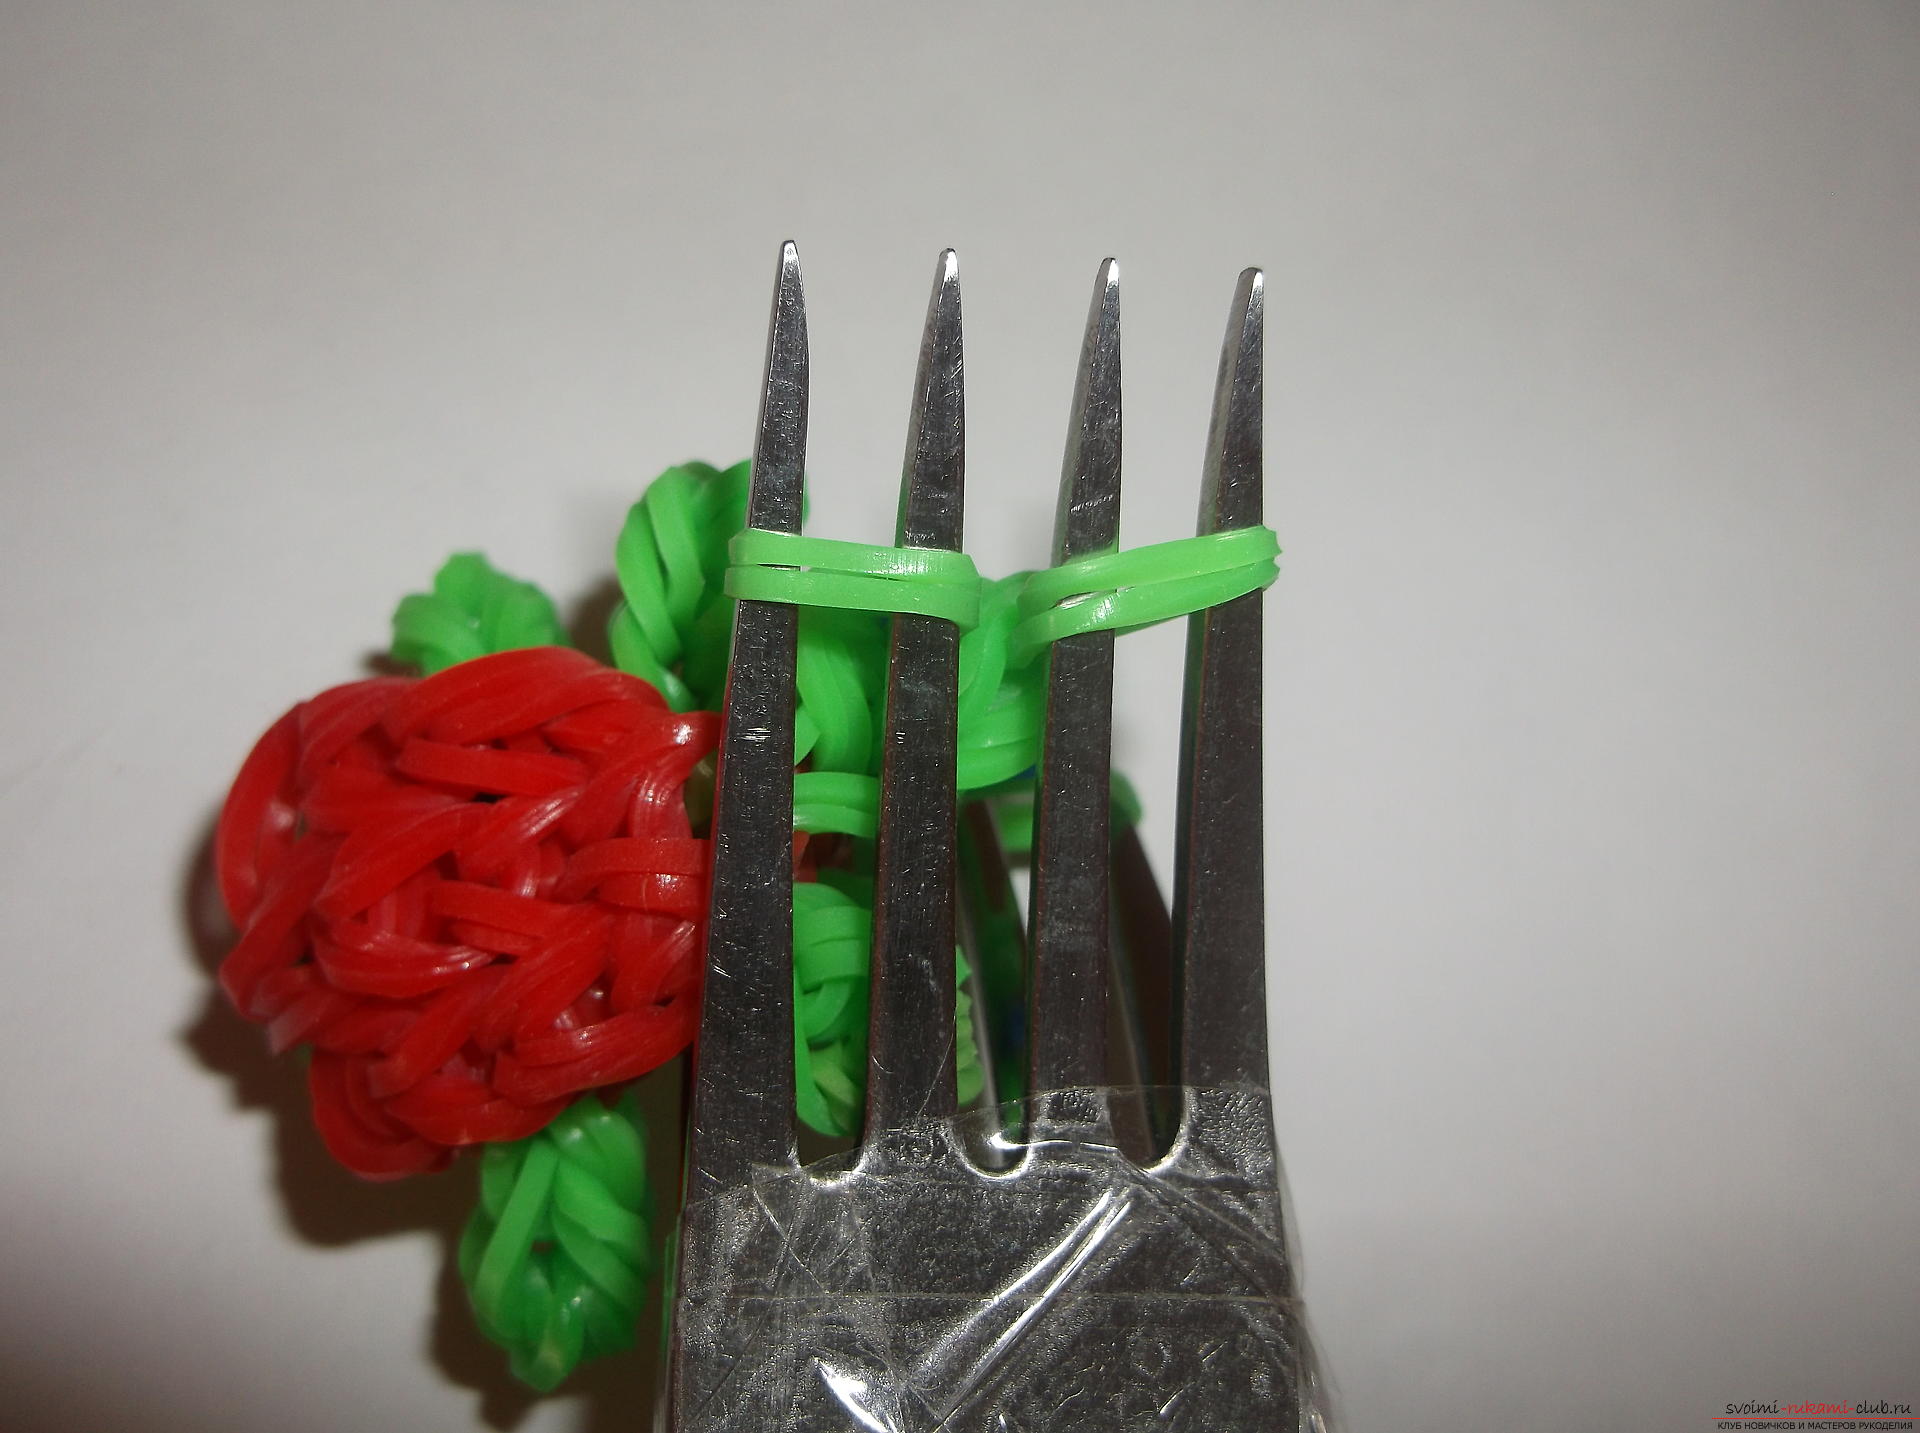 Now all the rubber bands on the upper fork are transferred to 2 middle teeth. On the lower fork, too, all the rubber bands are transferred to 2 medium teeth.
  Next, we throw 1 green rubber band on2 middle teeth of both forks. We remove all the lower rubber bands, leaving only one rubber band that has just been thrown. The same is with the lower fork. We carry the hinges from the forks to the hook. We remove the plug. We have 2 loops on the hook. We lead the first through the second. It turns out a bundle, carefully tighten. Hide the loop in the neck of the turtle. That's such a sweet turtle turns out! It can be used as a keychain or decorations for your desktop.
Comments
Related posts:
 How can we weave a small toy "Red-haired girl" out of multicolored rubber bands? Detailed description of the process of weaving, a list of necessary materials and step-by-step photos
 How to weave a flower from a rubber band in many ways
 How to weave the phone case from a rubber band: photo master-class
 Sew a stylish dress-case for a woman with her own hands, using a pattern, step-by-step description with photos.
 How to weave flowers of poppies, photo and description of weaving a bouquet of poppies